Create a PII Masking Template in AI+ Studio
Updated
Masking is the process of hiding or obfuscating sensitive information to protect it from unauthorized access. AI+ Studio allows you to create masking templates to define how sensitive data should be masked, ensuring compliance with security and privacy policies. This guide explains how to create a PII Masking Template in AI+ Studio.
Prerequisites
Ensure the required permissions are assigned before attempting to view, edit, create, or delete masking templates in AI+ Studio. The following table outlines the required permissions and their corresponding capabilities:
Permission | Yes | No |
View |
|
|
Edit |
|
|
Create |
|
|
Delete |
|
|
Access the Masking Template Record Manager
Follow these steps to create a masking template:

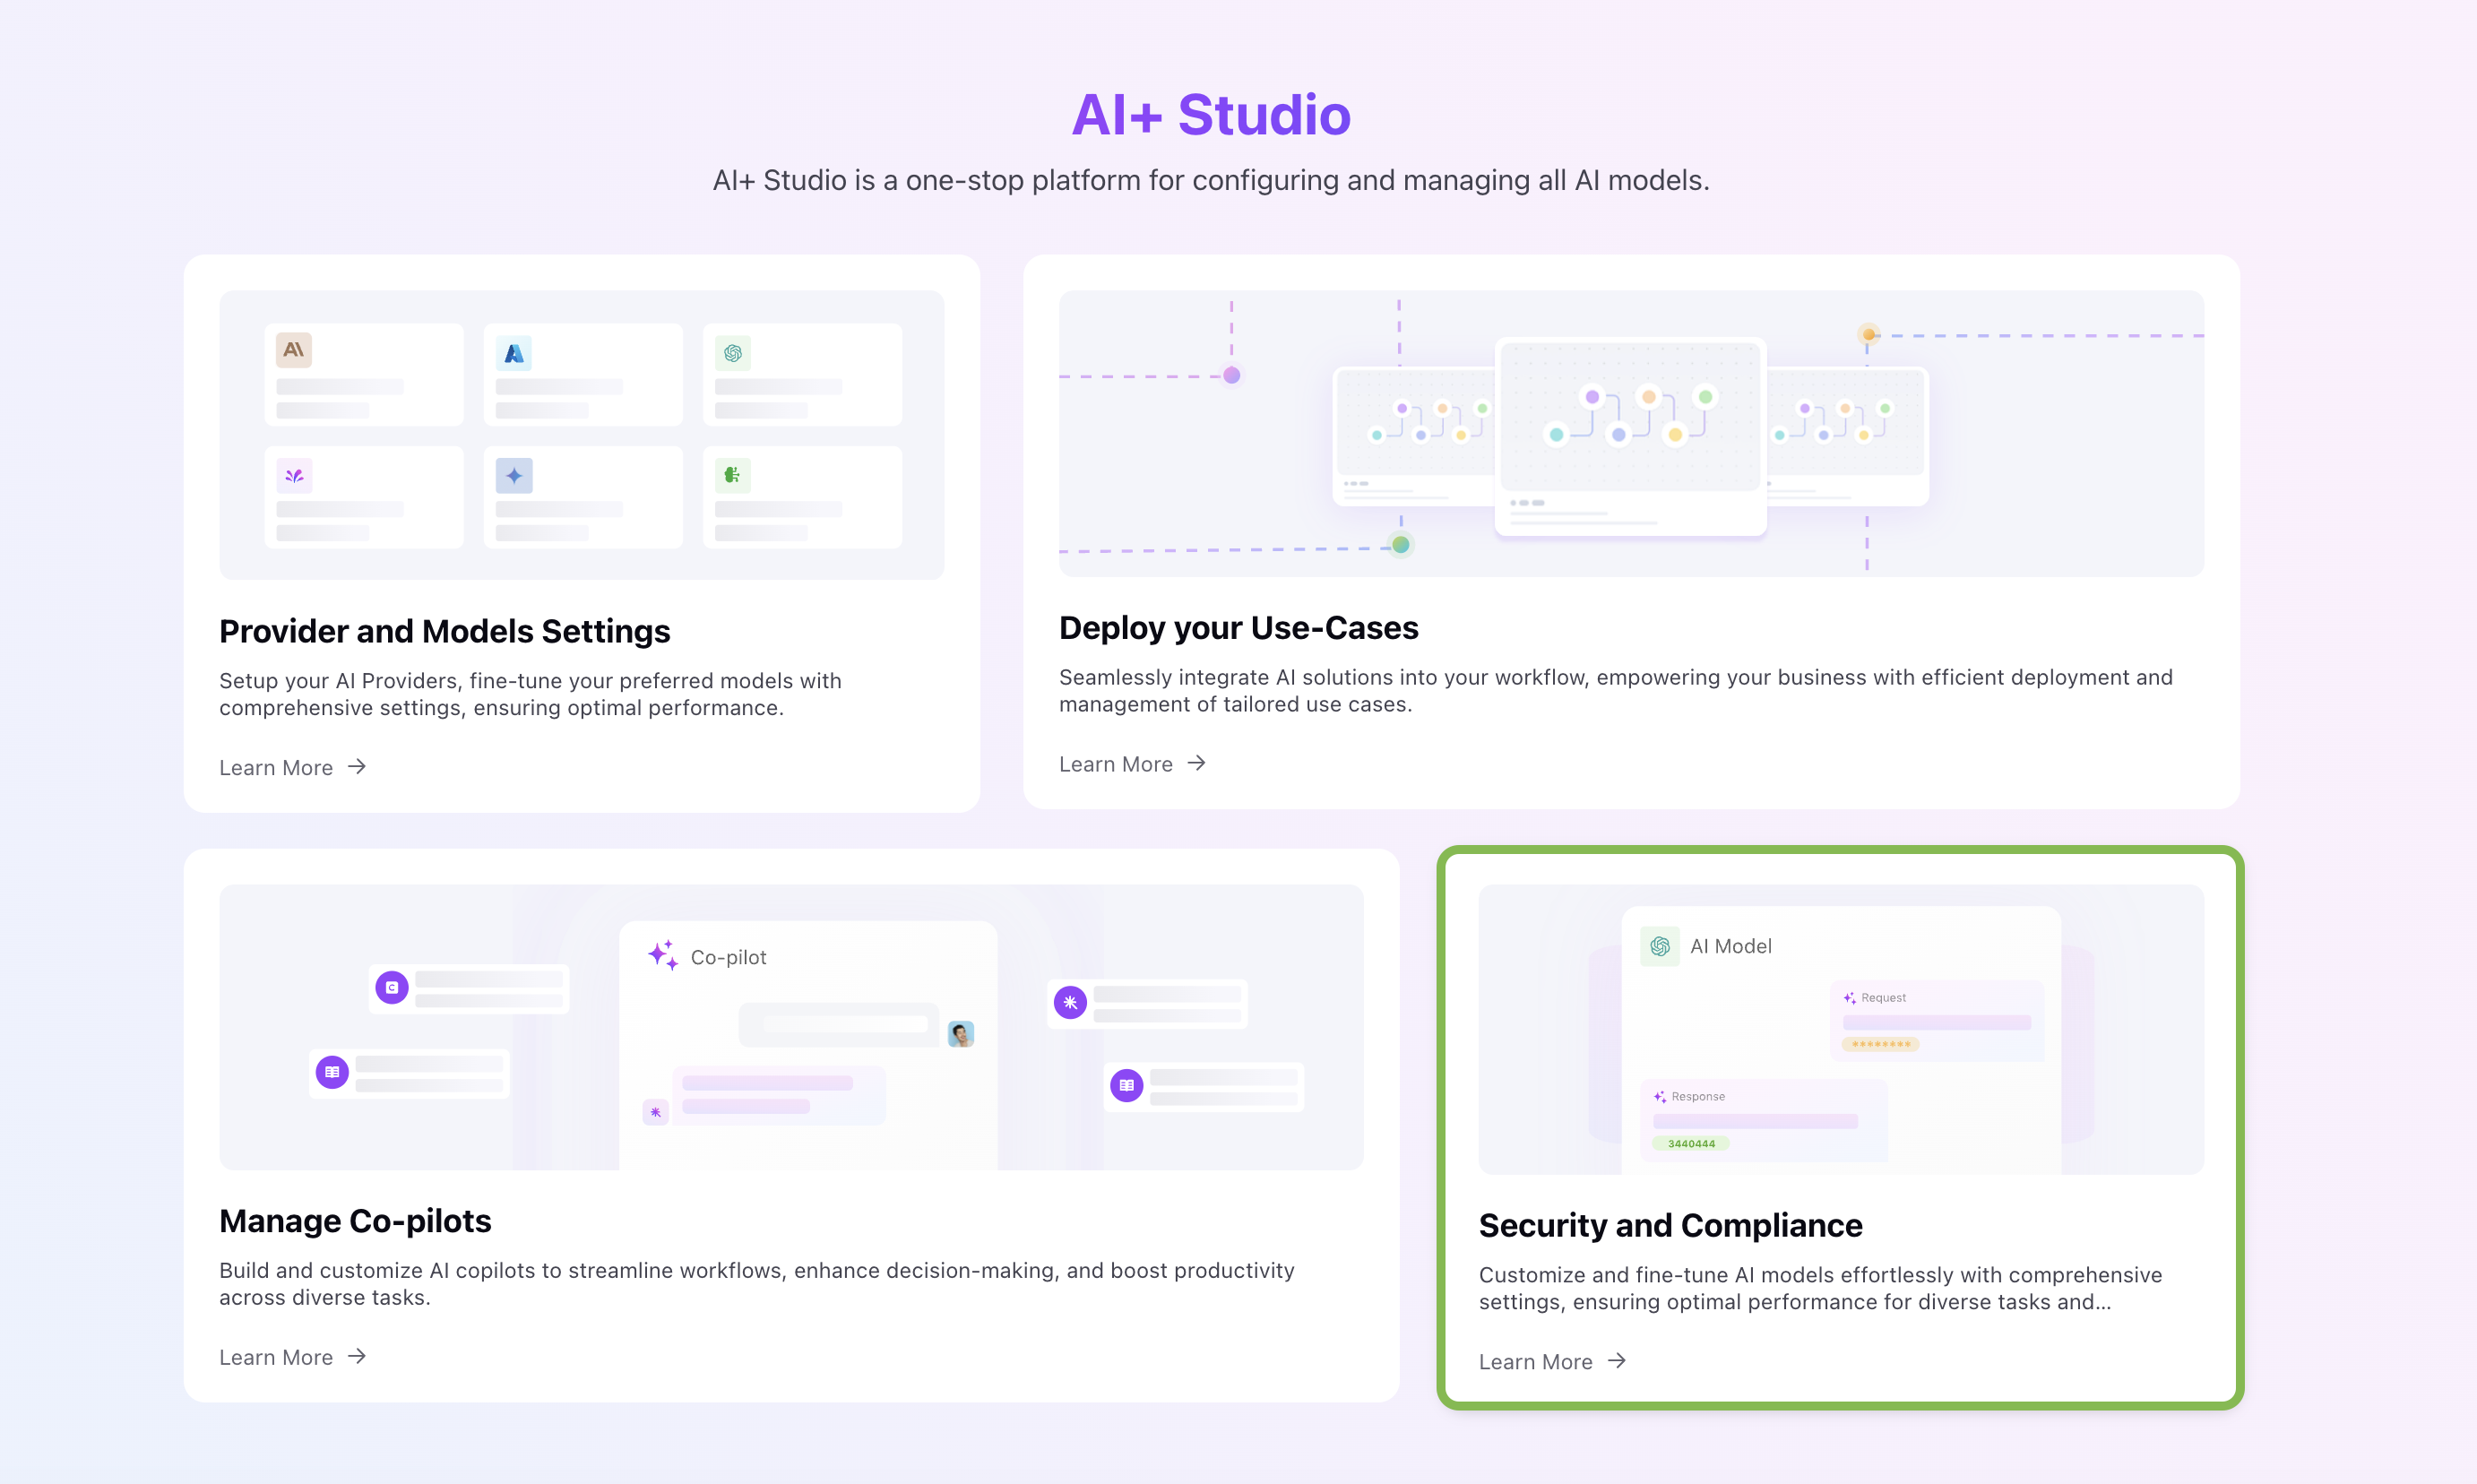
Open AI+ Studio: Navigate to AI+ Studio from the Sprinklr Launchpad.
Go to Security and Compliance: Click the Security and Compliance card to access the Masking Template Record Manager.
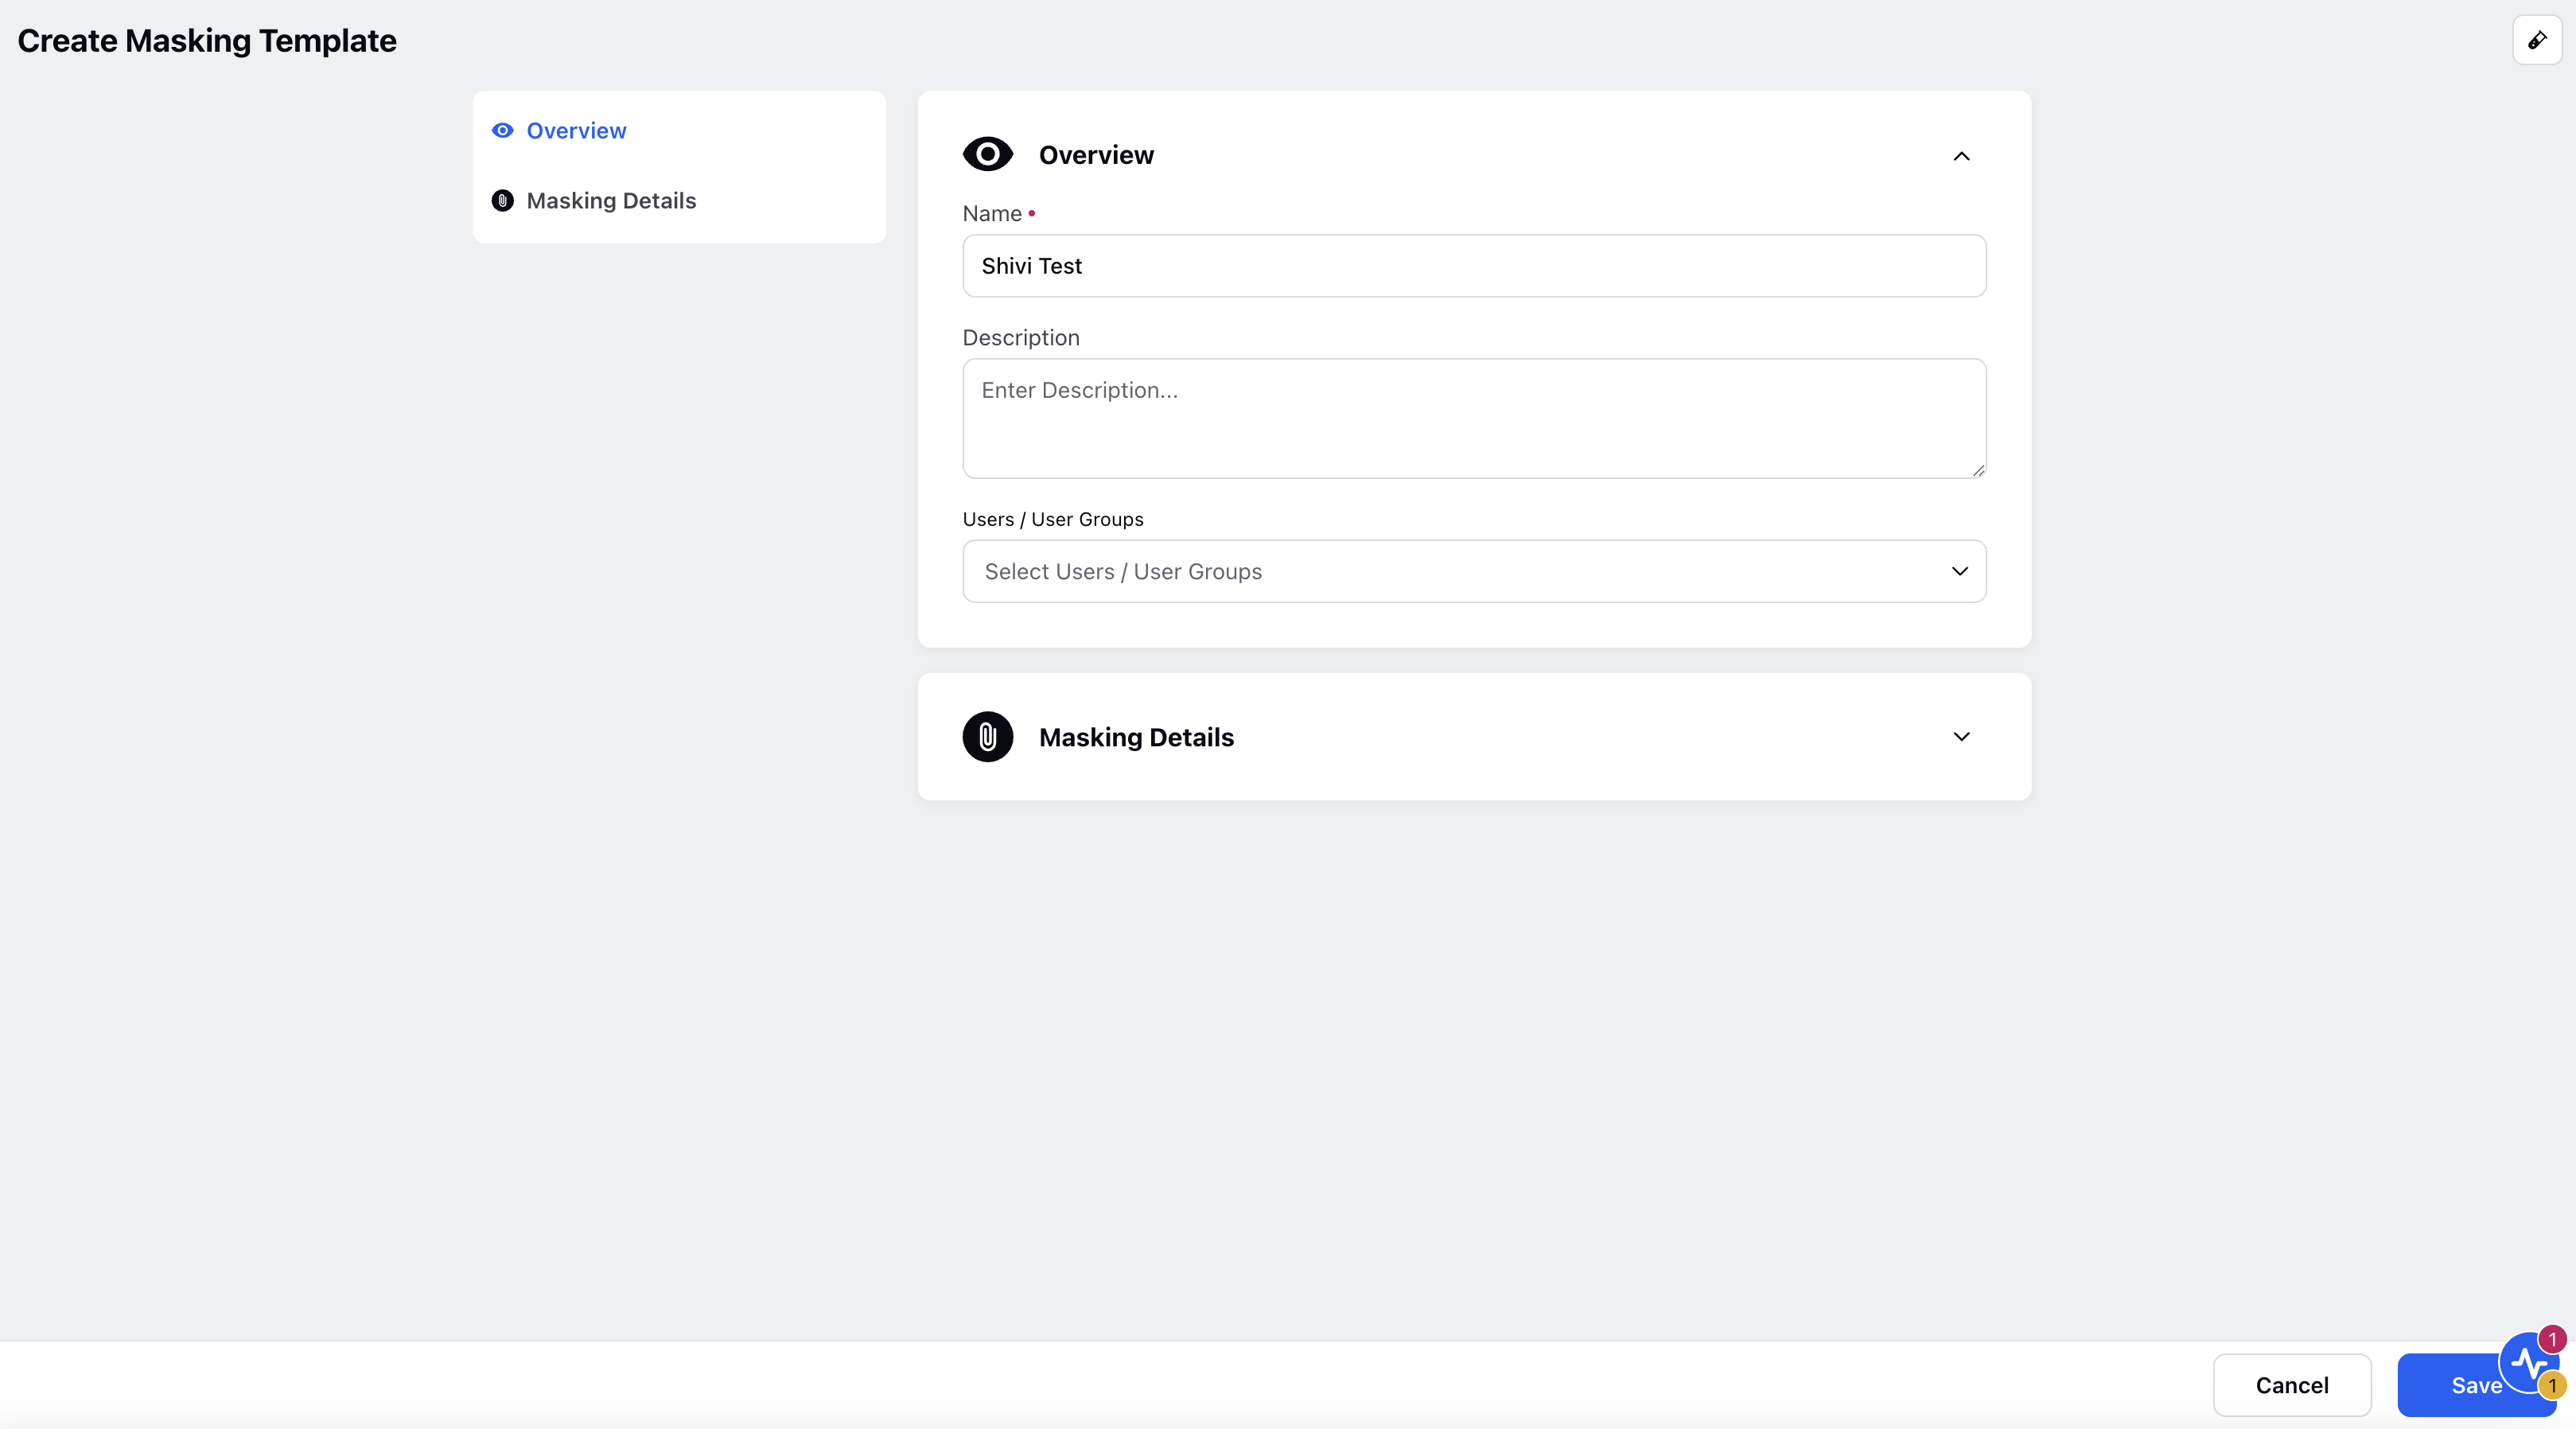
Add a New Masking Template: Click Add Masking Template in the top-right corner. The Create Masking Template screen appears.

Configure the Masking Template
Enter the required details in the Overview tab:
Name: Enter a unique name for the masking template.
Description: Provide a brief description of the template's purpose.
User/User Groups: Select the users or user groups who can access this masking template.

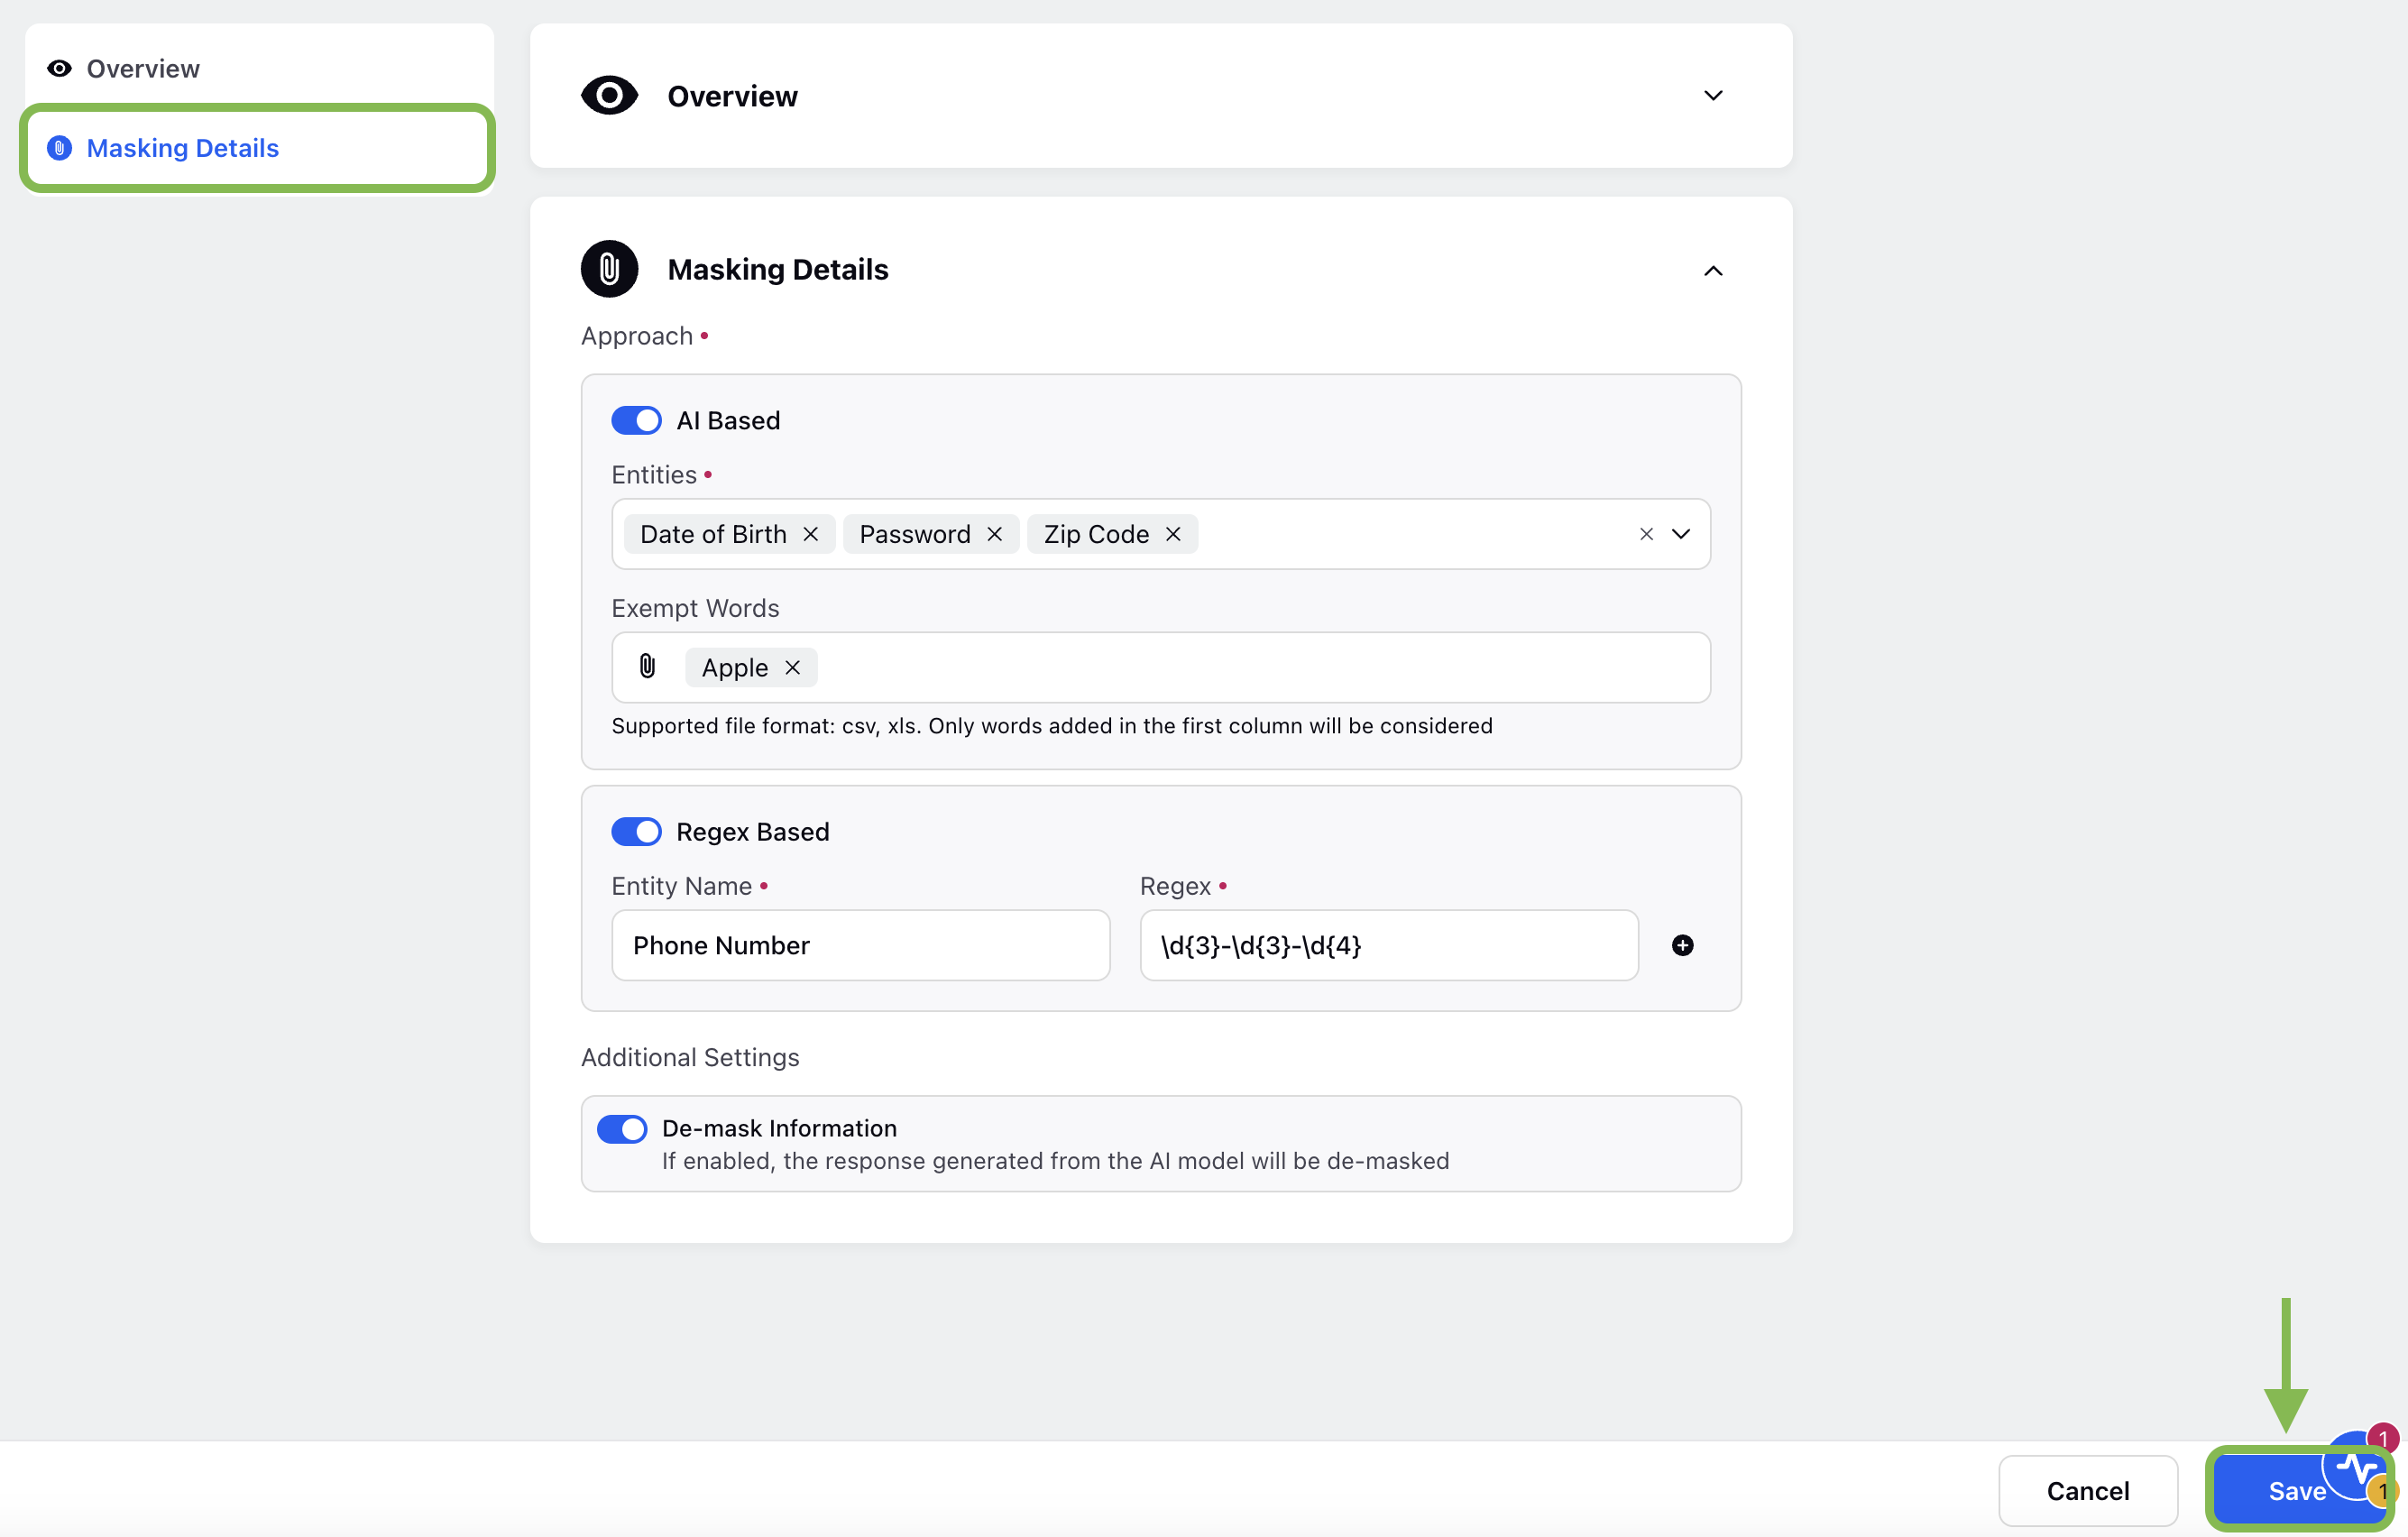
Next, switch to the Masking Details tab to define how sensitive data should be masked.
Choose a Masking Approach
AI+ Studio supports two masking methods: AI-Based Masking and Regex-Based Masking.
AI-Based Masking
AI-Based Masking uses artificial intelligence to automatically identify and mask predefined data entities. This eliminates the need for manual pattern definitions.
How AI-Based Masking Works
AI scans the text to detect predefined entities, such as names and addresses.
The system replaces detected entities with masked values.
Enter the following input field details to configure AI-Based Masking:
Entities: Select specific entities (such as names, addresses, emails, or other personally identifiable information) that need to be masked. Entities are predefined data types that AI+ Studio can recognize and mask. Examples include:
Personal Information: Names, phone numbers, email addresses.
Financial Data: Credit card numbers, bank account details.
Location Data: Addresses, GPS coordinates.
Exempt Words: Specify words that should not be masked, even if they match an entity type. Exempt words are terms that should not be masked, even if they match a recognized entity type.
Example: If "Apple" is a company name and a fruit, adding "Apple" to the exempt words list ensures it remains visible when referring to the company.
Upload a CSV or XLS file containing exempt words. Only the words listed in the first column of the file will be considered.

Regex-Based Masking
Regex-Based Masking allows users to define custom patterns using regular expressions (Regex) to mask specific data points. This method is commonly used when AI-based masking does not meet specific requirements.
How Regex-Based Masking Works
Users define a Regex pattern that identifies sensitive data.
The system applies the masking rules to any text matching the pattern.
Enter the following input field details to configure AI-Based Masking:
Entity Name: Enter a descriptive name for the entity being masked. The entity name is a label assigned to a regex-based rule to indicate the type of data being masked.
Example: If the regex pattern is designed to mask phone numbers, the entity name could be "Phone Number".
Regex: Define the Regex pattern that identifies the data to be masked.
Regular Expressions (Regex) Examples
Regular expressions are patterns used to search for and mask specific types of data.
Masking email addresses:
\b[A-Za-z0-9._%+-]+@[A-Za-z0-9.-]+\.[A-Z|a-z]{2,7}\b
Masking phone numbers:
\d{3}-\d{3}-\d{4}
Example Usage:
Original: Email: john.doe@example.com
Regex-Based Masking: Email: @.com
Note: In Sprinklr, all default deployments follow Regex-Based Masking.
Additional Settings
In Additional settings you can configure De-masking for your template.
De-Mask Information
De-masking allows authorized users to retrieve the original data when necessary. Enable or Disable this option by switching the toggle as per your requirement.
If enabled, the system securely stores the original data and allows authorized users to access it.
If disabled, the masked data remains permanently hidden.
After configuring your masking approach and additional settings, click Save to store your masking template.
You can now apply this template in the Prompt Node within AI+ Studio to automatically mask sensitive information.
By following this guide, you can create and configure a masking template in AI+ Studio using either AI-Based Masking or Regex-Based Masking. These options provide flexibility to protect sensitive data while ensuring compliance with privacy regulations.