Filters in the Production Dashboard
Updated
In the Production Dashboard, you can filter your view on the properties of the displayed entity as well as the properties of its associated entities. For example, in the production dashboard containing the messages, you will be able to filter the view based on the custom properties of the message and the custom properties of the associated entity like campaign and sub-campaign.
Applying a filter using the ‘Add Filter’ button
Navigate to the Production Dashboards.
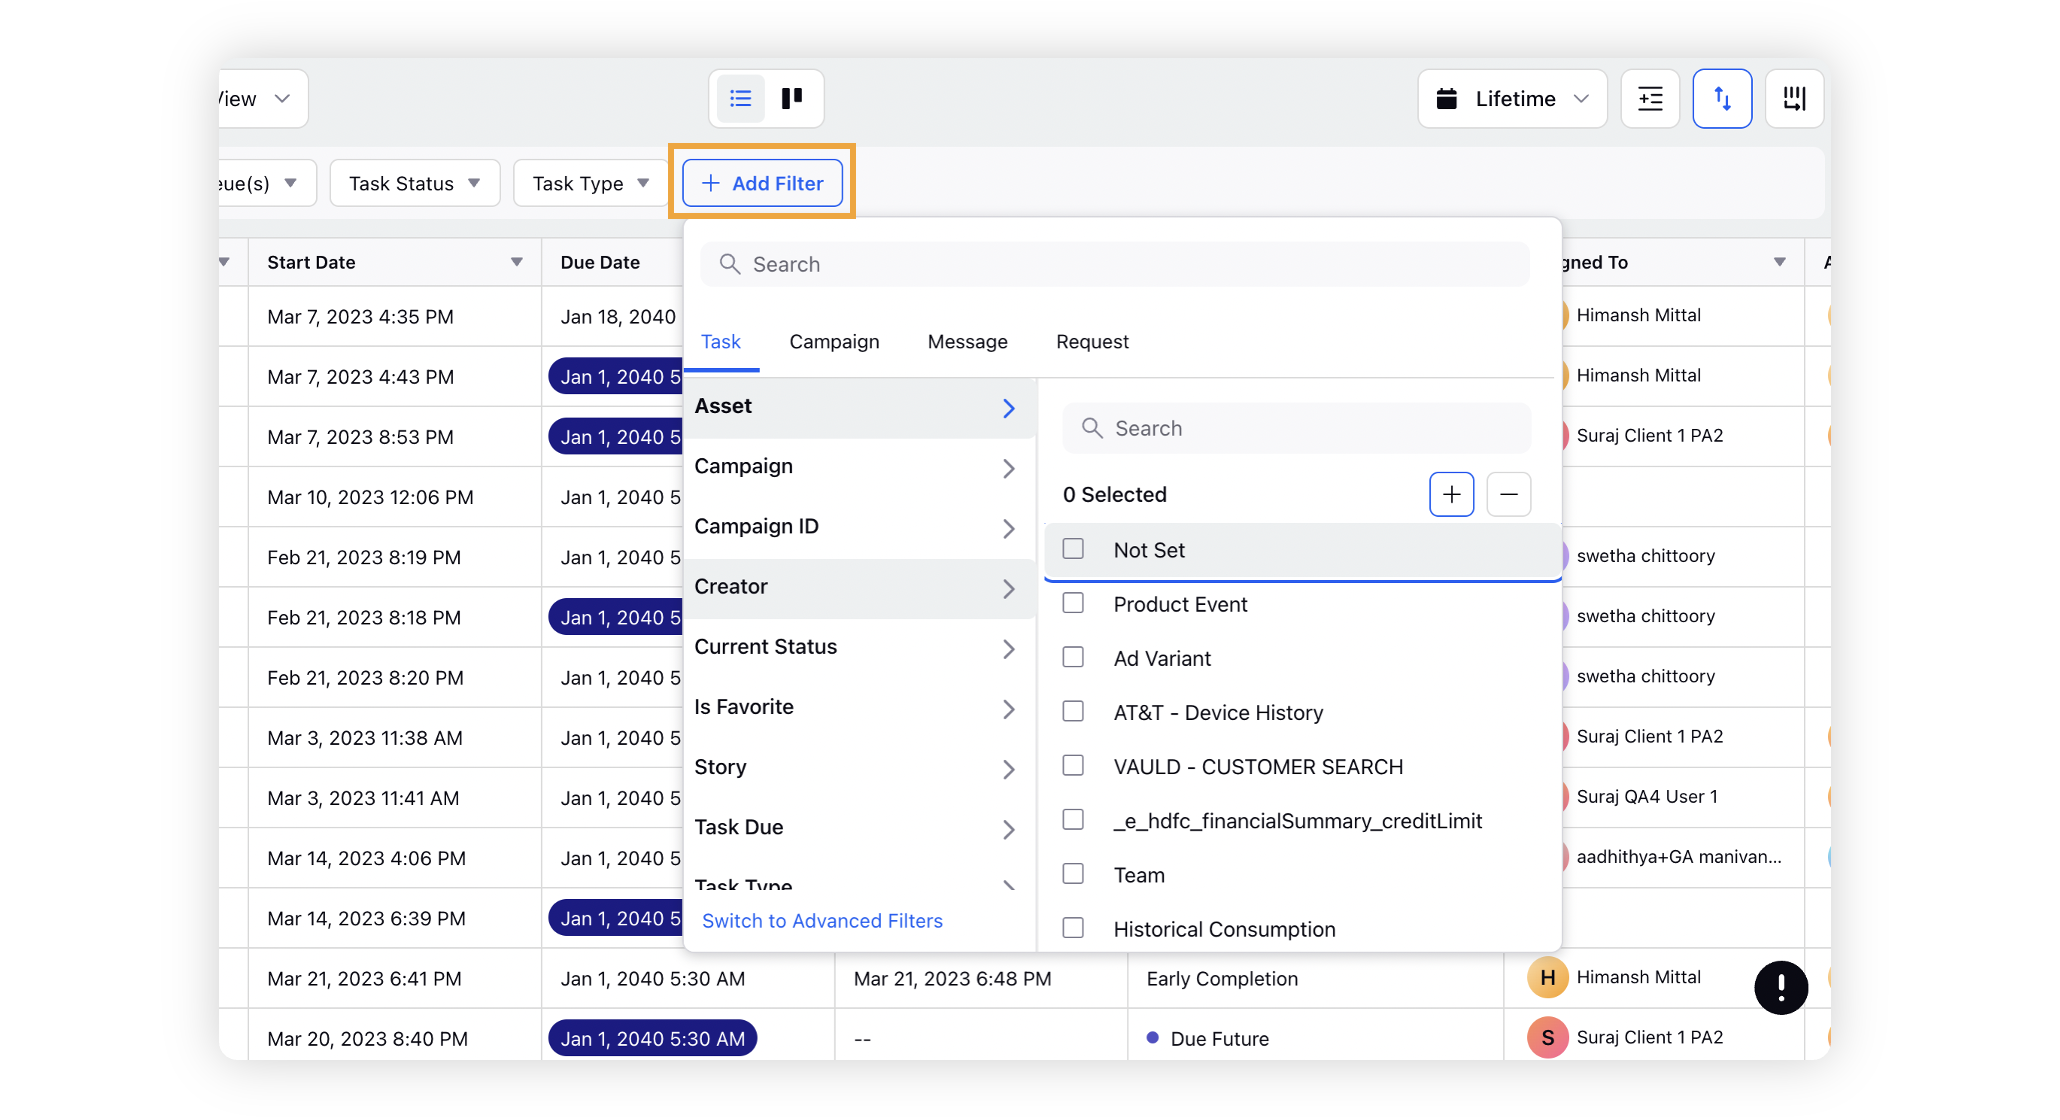
Click on the ‘Add Filter’ option on the dashboard you wish to apply filters.
Select the required property and its value to set the filter.
Applying a created quick filter
Navigate to the Production Dashboards.
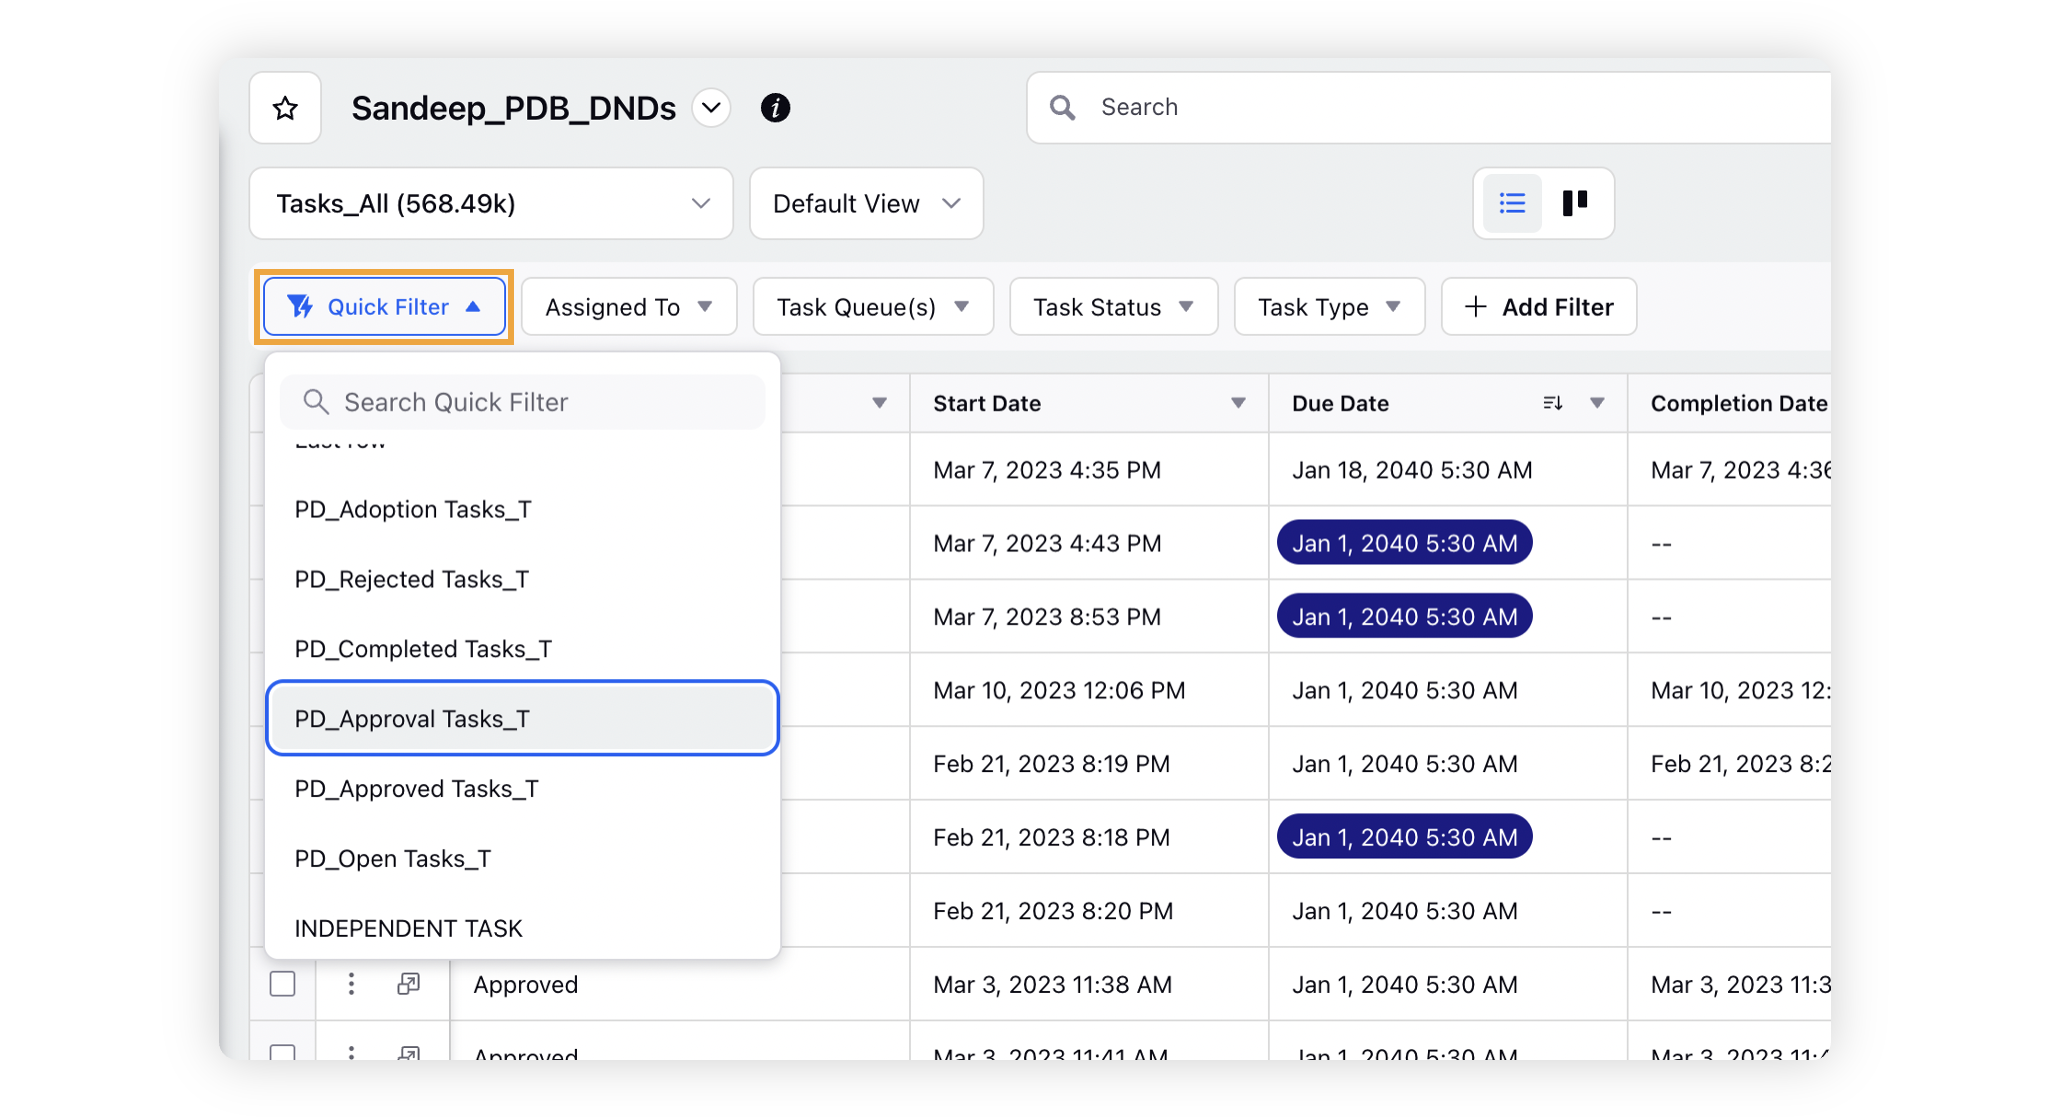
Click on the Quick Filter button in the top left of the screen of the dashboard you want to apply the filter on.
Select the desired Quick Filter from the dropdown menu.
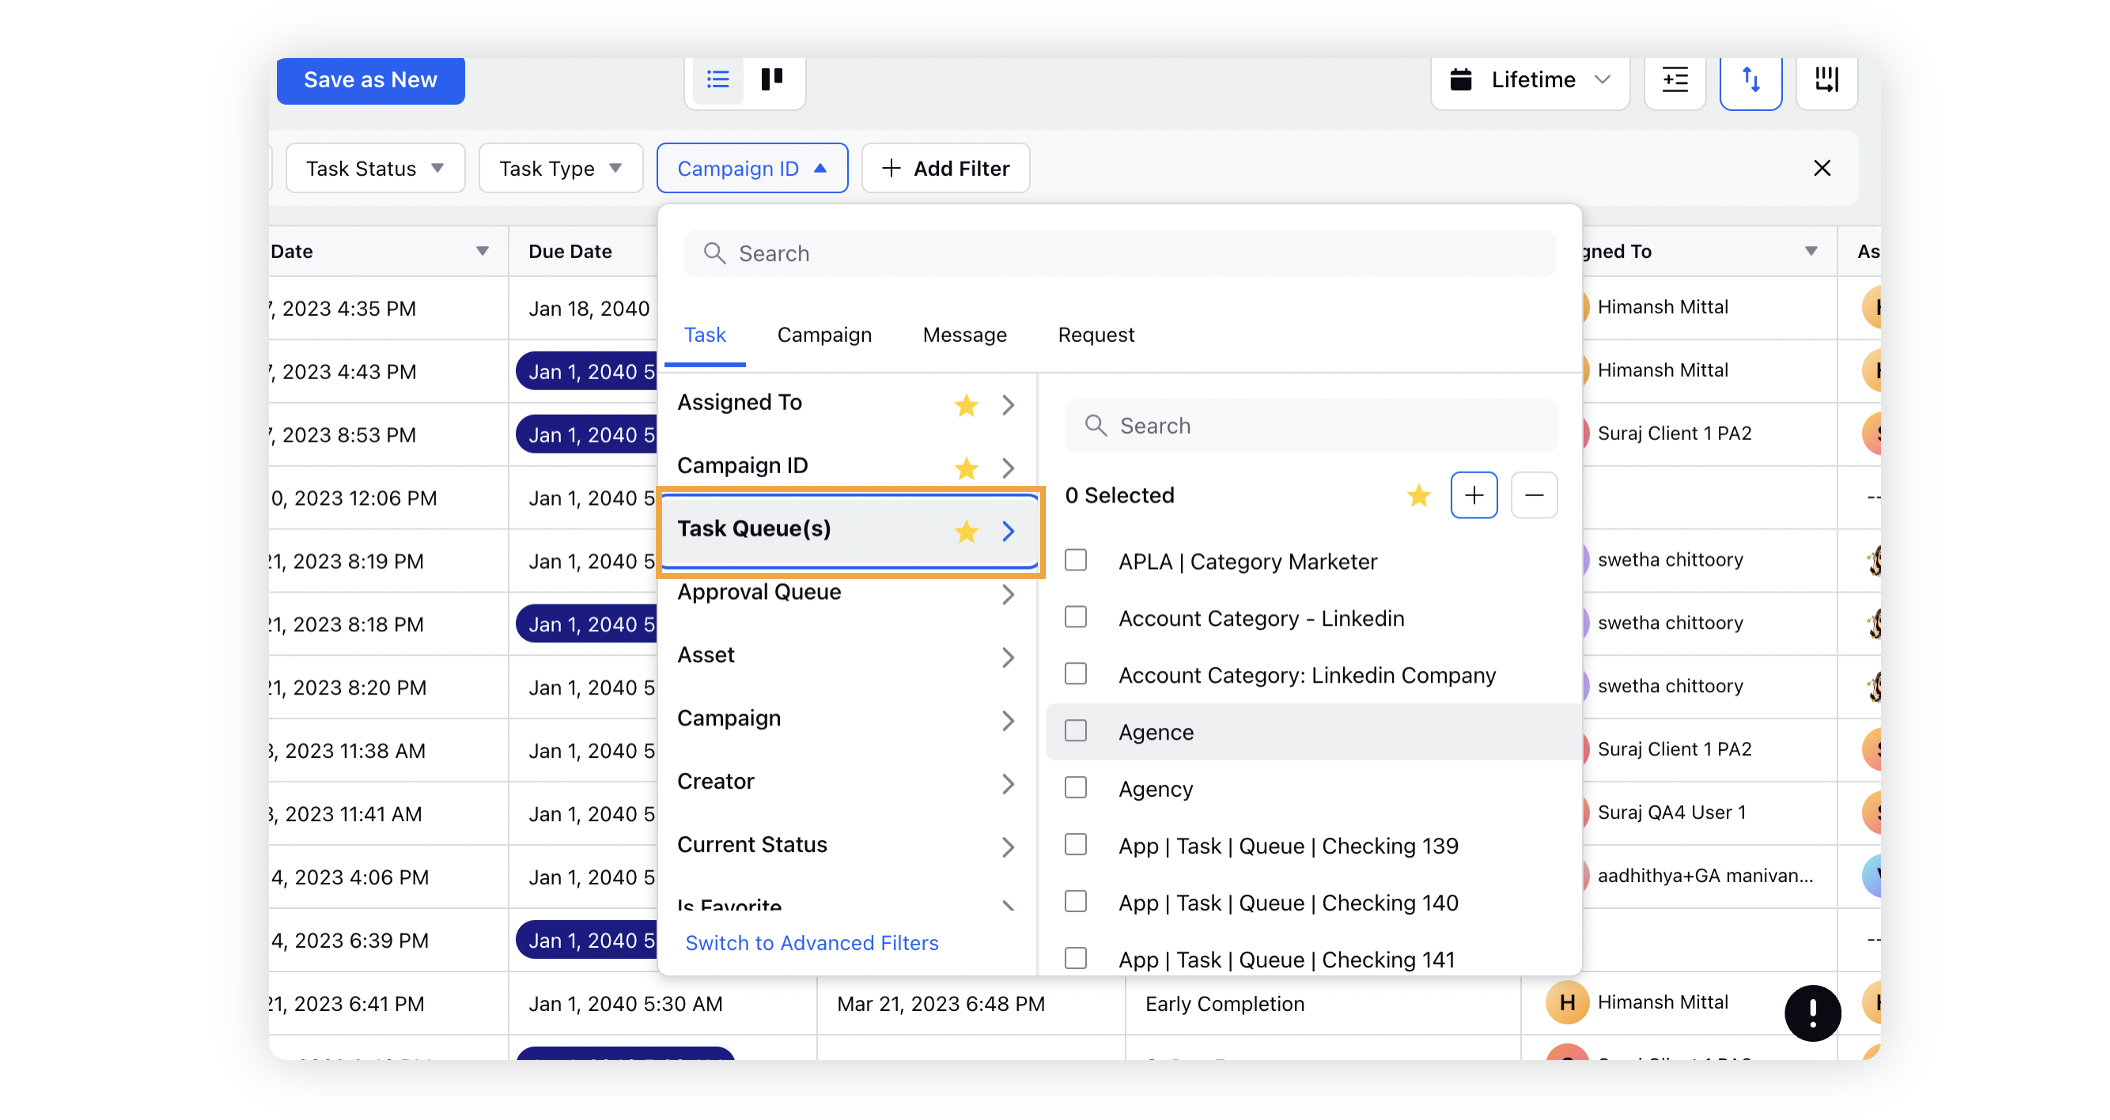
Mark your filters as favorite
You can mark your filter as favorite by hovering over the filter (refer the screenshot) so that they get displayed upfront in your dashboard thus saving time.