Add and Manage Columns in Project List View
Updated
In Project Management, you have the capability to create your own columns and control their visibility within the project list view.
Permissions: You should have either owner or admin permissions in Portfolio to add and manage the columns.
Add a New Column to Project List View
The project list view is equipped with seven default columns: Project Name, Status, Priority, Task Progress, Start Date, End Date, and Owner.

To add a column in the project list view, hover over the desired adjacent column. You'll notice three dots appear. Clicking on these dots will show options to add a column either to the right or left of the selected column.
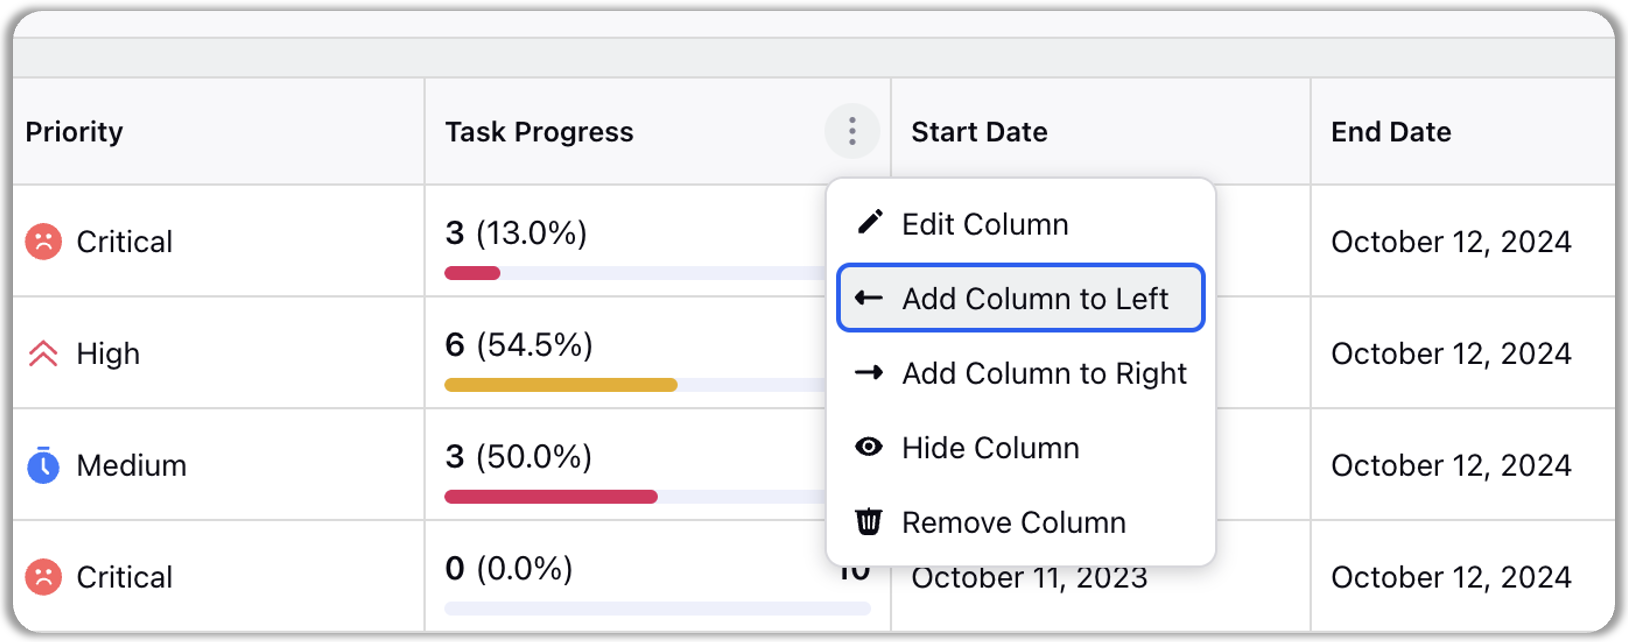
When you select "Add Column to Left" or "Add Column to Right," a pop-up will appear allowing you to create a project field for your list view. In this pop-up, you have the option to either select from existing columns or create an entirely new one.
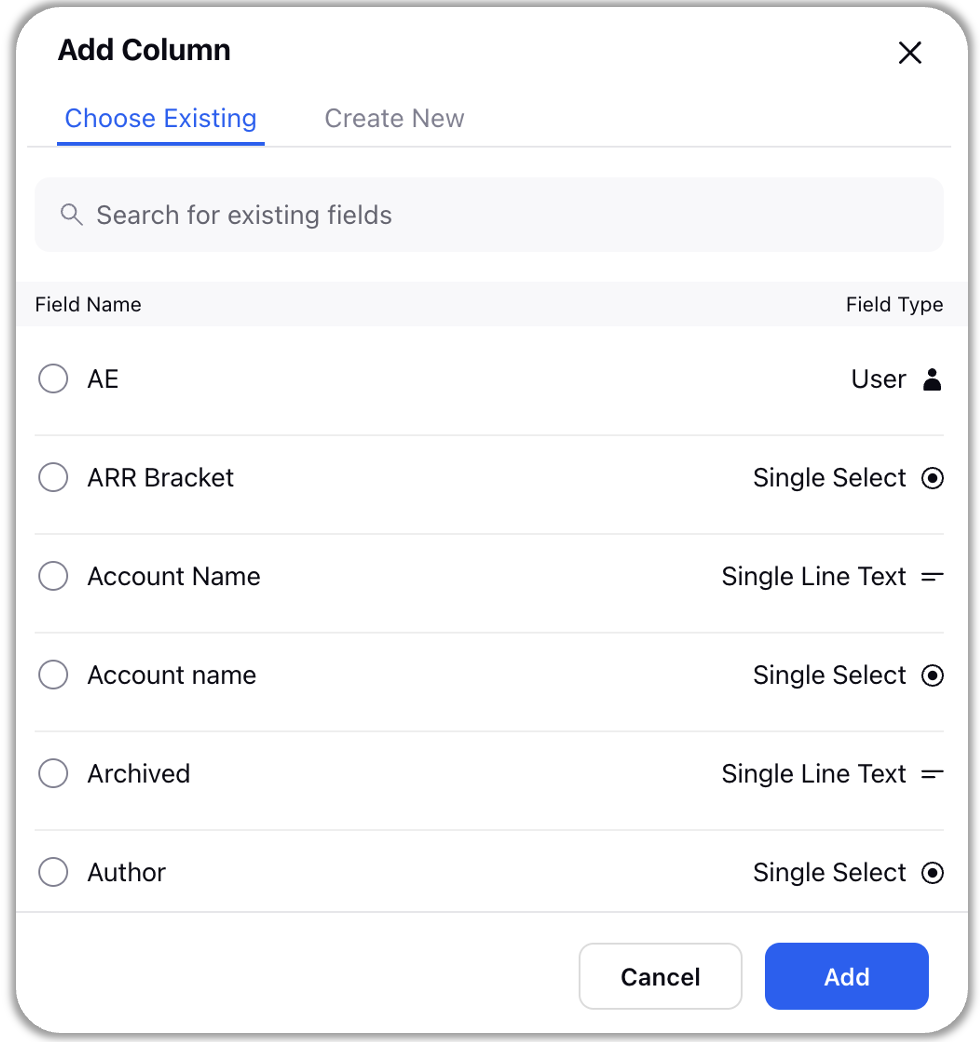
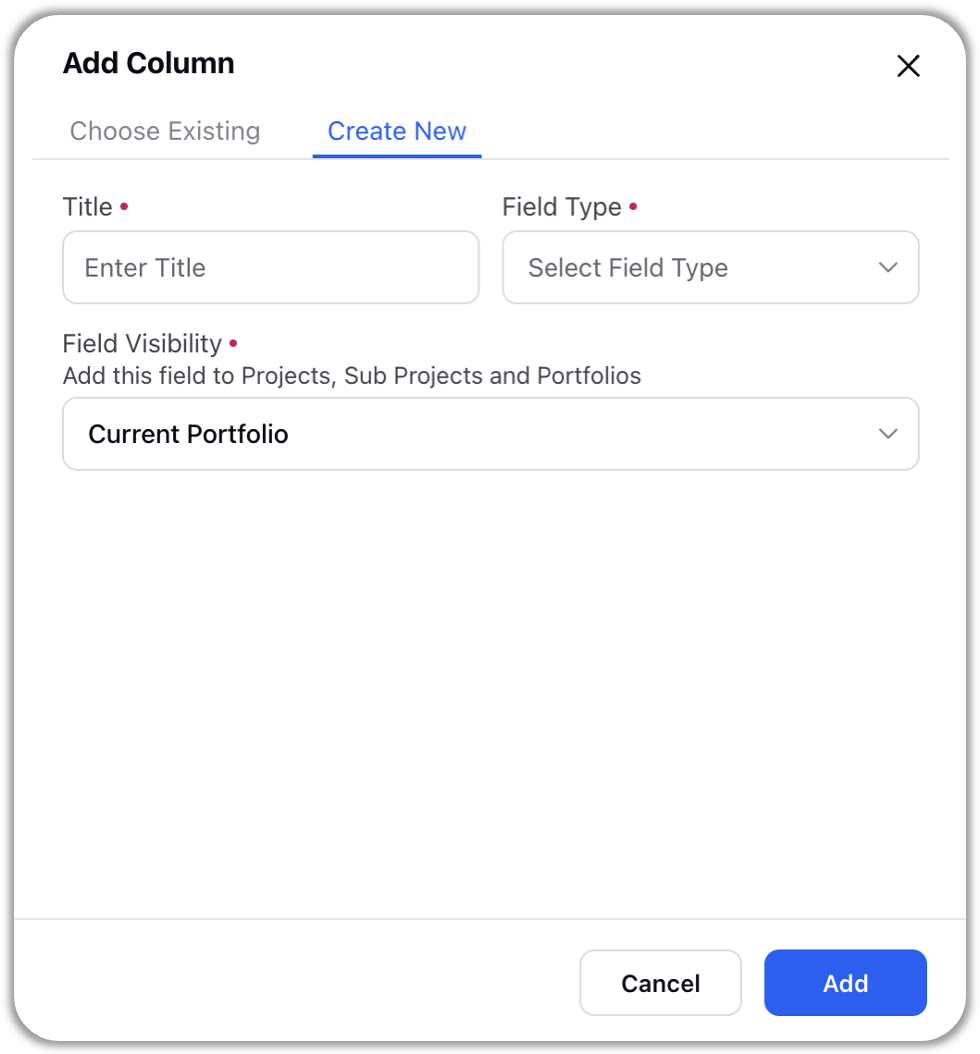
Please note that when you add an already existing column, the column will retain all its properties and it cannot be customized. When creating a new column for your project list view, there are three mandatory fields you need to fill. These fields are detailed below:
Title: This will be displayed at the top of your column in the project list view.
Field Type: This defines the type of data that can be entered into the column.
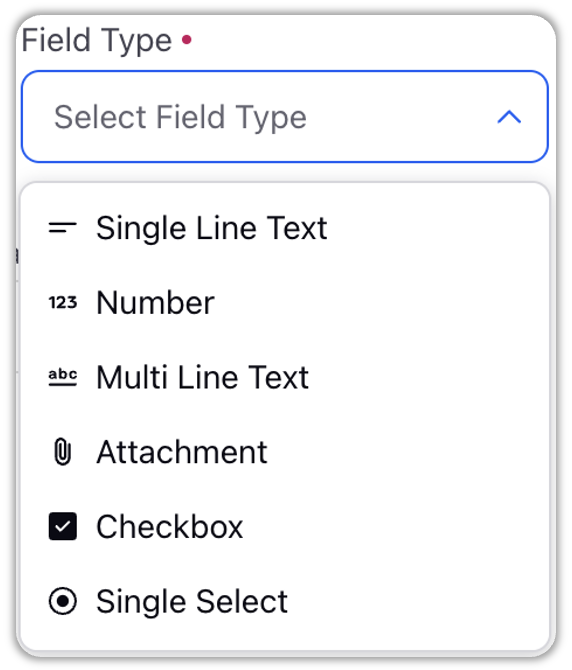
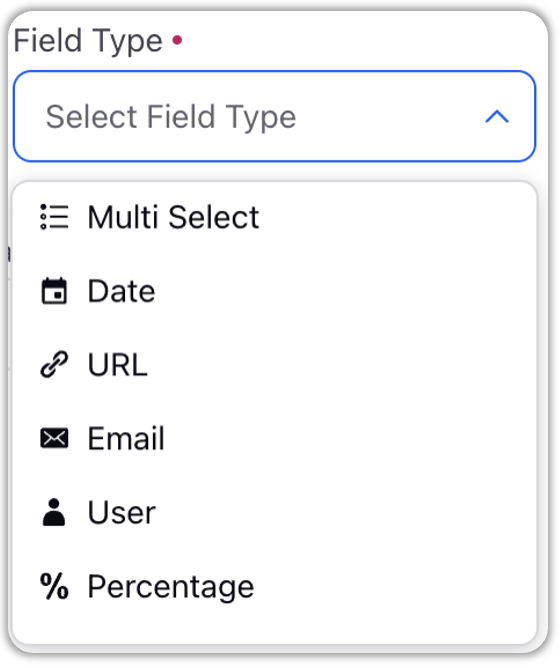

Each of these field type may need you to fill some additional information depending of what kind of data it is accepting. To know more about each of the field type shown above, refer to the article Type of Columns in Tasks and Projects
Field Visibility: Field visibility setting determines where your column (field) will be visible. It provides you with two options:
Current Portfolio: The column will be visible in the current portfolio
All Portfolios: The column will be available to add in all the portfolios
After selecting an existing column or creating a new one, click the "Add" button to see the column added in your project sheet.
Note: If there are some org wide best practice fields or tags which are mandatory to add to all projects, keep their visibility to “All Portfolios”, so that they can be leveraged in all portfolios without creating duplicate fields. On the other ahnd, if some field or tag has to be added just to the current portfolio, keep the visibility as “Current Portfolio” to keep your environment clutter free. |
Manage Columns in Project List View
You can perform the following actions on the project list view columns:
Edit column
To edit a column, hover over the column name and click on the three dots that appear.
When editing a column, its field type cannot be altered. However, you can modify the entities it contains (for single-picklist, multi-picklist) and adjust additional field details (such as including or excluding negative numbers in Number, Percentage, and Currency type columns). You can also rename the column.
Note: The columns for Project Name, Owner, Start Date, and End Date cannot be edited.
Rearrange column order
To rearrange the columns, click on "Manage Columns" to view all the columns currently displayed in the project list view.
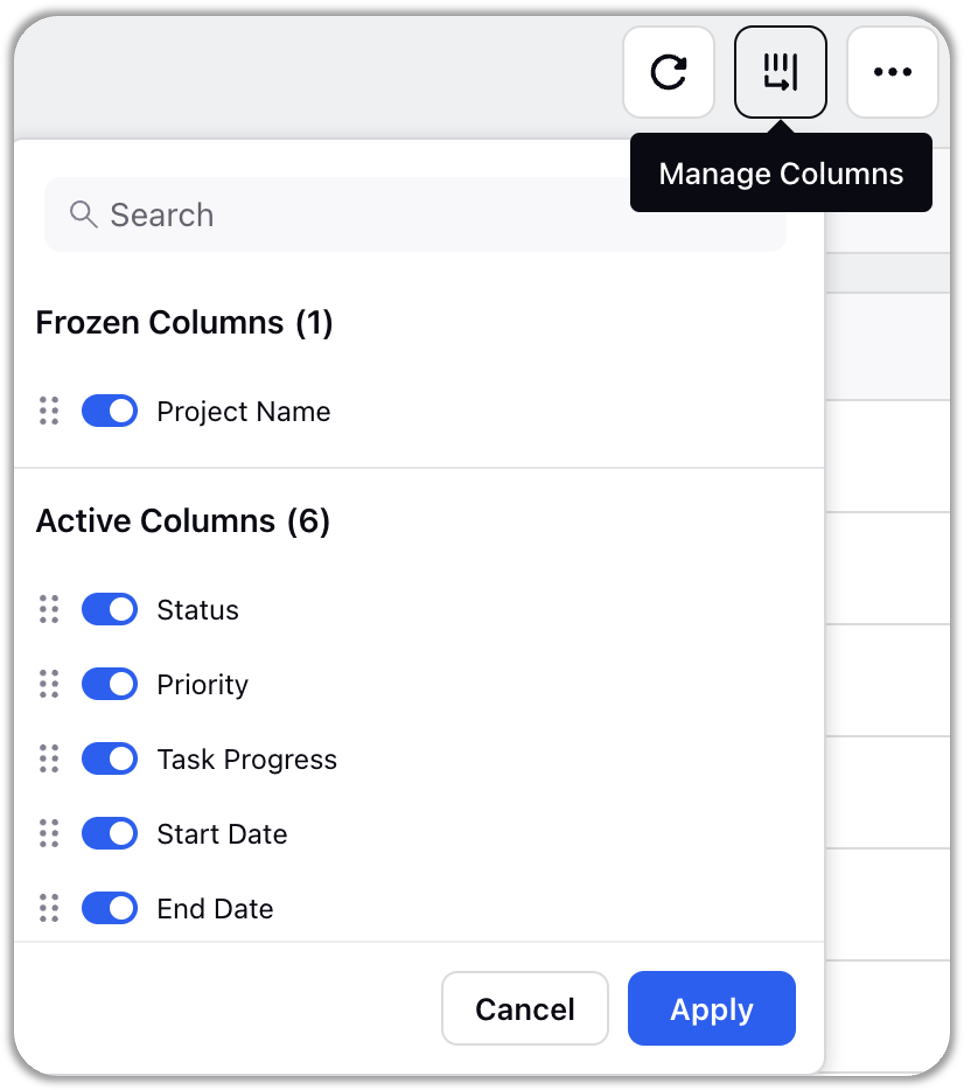
You can easily rearrange columns by dragging and dropping a column name to your desired position within the project list view.
Hide Column
You have the flexibility to select which columns appear in the project list view. To hide a column, simply hover over its name and click on the three dots that appear. Select the "Hide Column" option to remove that column from the view.
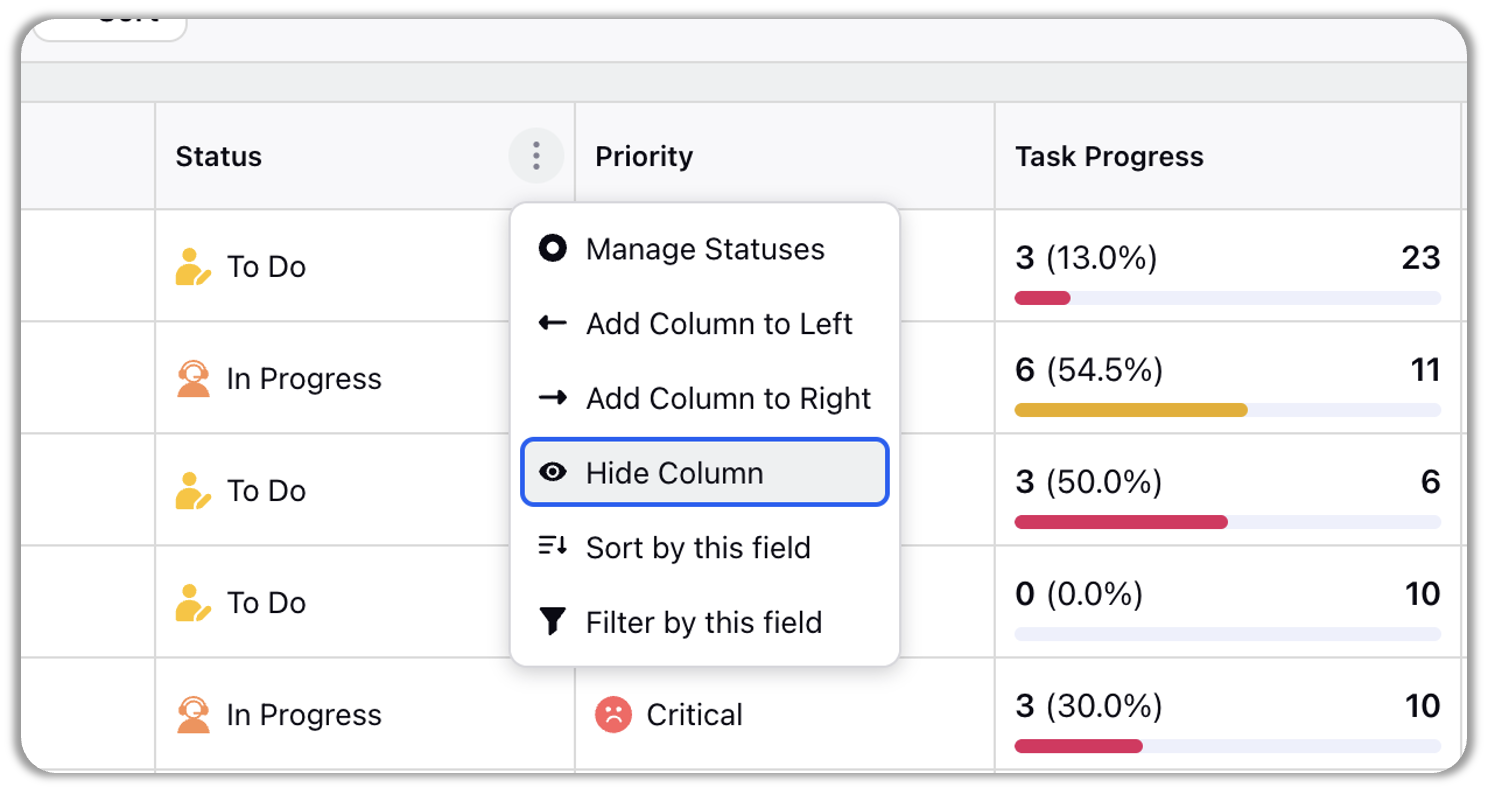
To restore a hidden column to the list view, navigate to the 'Manage Columns' option. You'll find all hidden columns under the 'Inactive Columns' section and all currently visible columns in the 'Active Columns' section. Simply use the toggle next to the column name to hide or unhide it from the sheet view.
Freeze Column
A frozen column maintains its position on the screen consistently. You can view and manage frozen columns by selecting the "Manage Columns" option. By default, the "Project Name" column is frozen. Its position is fixed, ensuring it remains as the first column in the project list view.
Remove Column
Once removed, a column cannot be broght back to the project list. To remove a column, hover over column's name and click on the three dots that appear. Select the "Remove Column" option to remove that column from the view. Note that standard columns like Project Name, Status, Priority, Start Date, End Date and Owner cannot be removed.