Create and Publish LinkedIn Polls from Sprinklr
Updated
Sprinklr empowers Social Media Managers/Publishing Supervisor to publish Linkedin Polls by integrating Linkedin Poll API to publish and fetch Linkedin Poll Posts. You can use Linkedin Polls posts in Quick publisher & Full screen publisher for Linkedin Profile and Linkedin Company pages.
To publish LinkedIn Polls
Click the New Tab icon
. Under the Sprinklr Social tab, click Quick Publish within Engage.
On the Create Post window, search and select the required LinkedIn Profile account(s) / LinkedIn Company account(s) from the Select Accounts field dropdown. You can also use Advanced Search to narrow your searches by a series of various filters.

Under Message Type, select Poll from the dropdown.
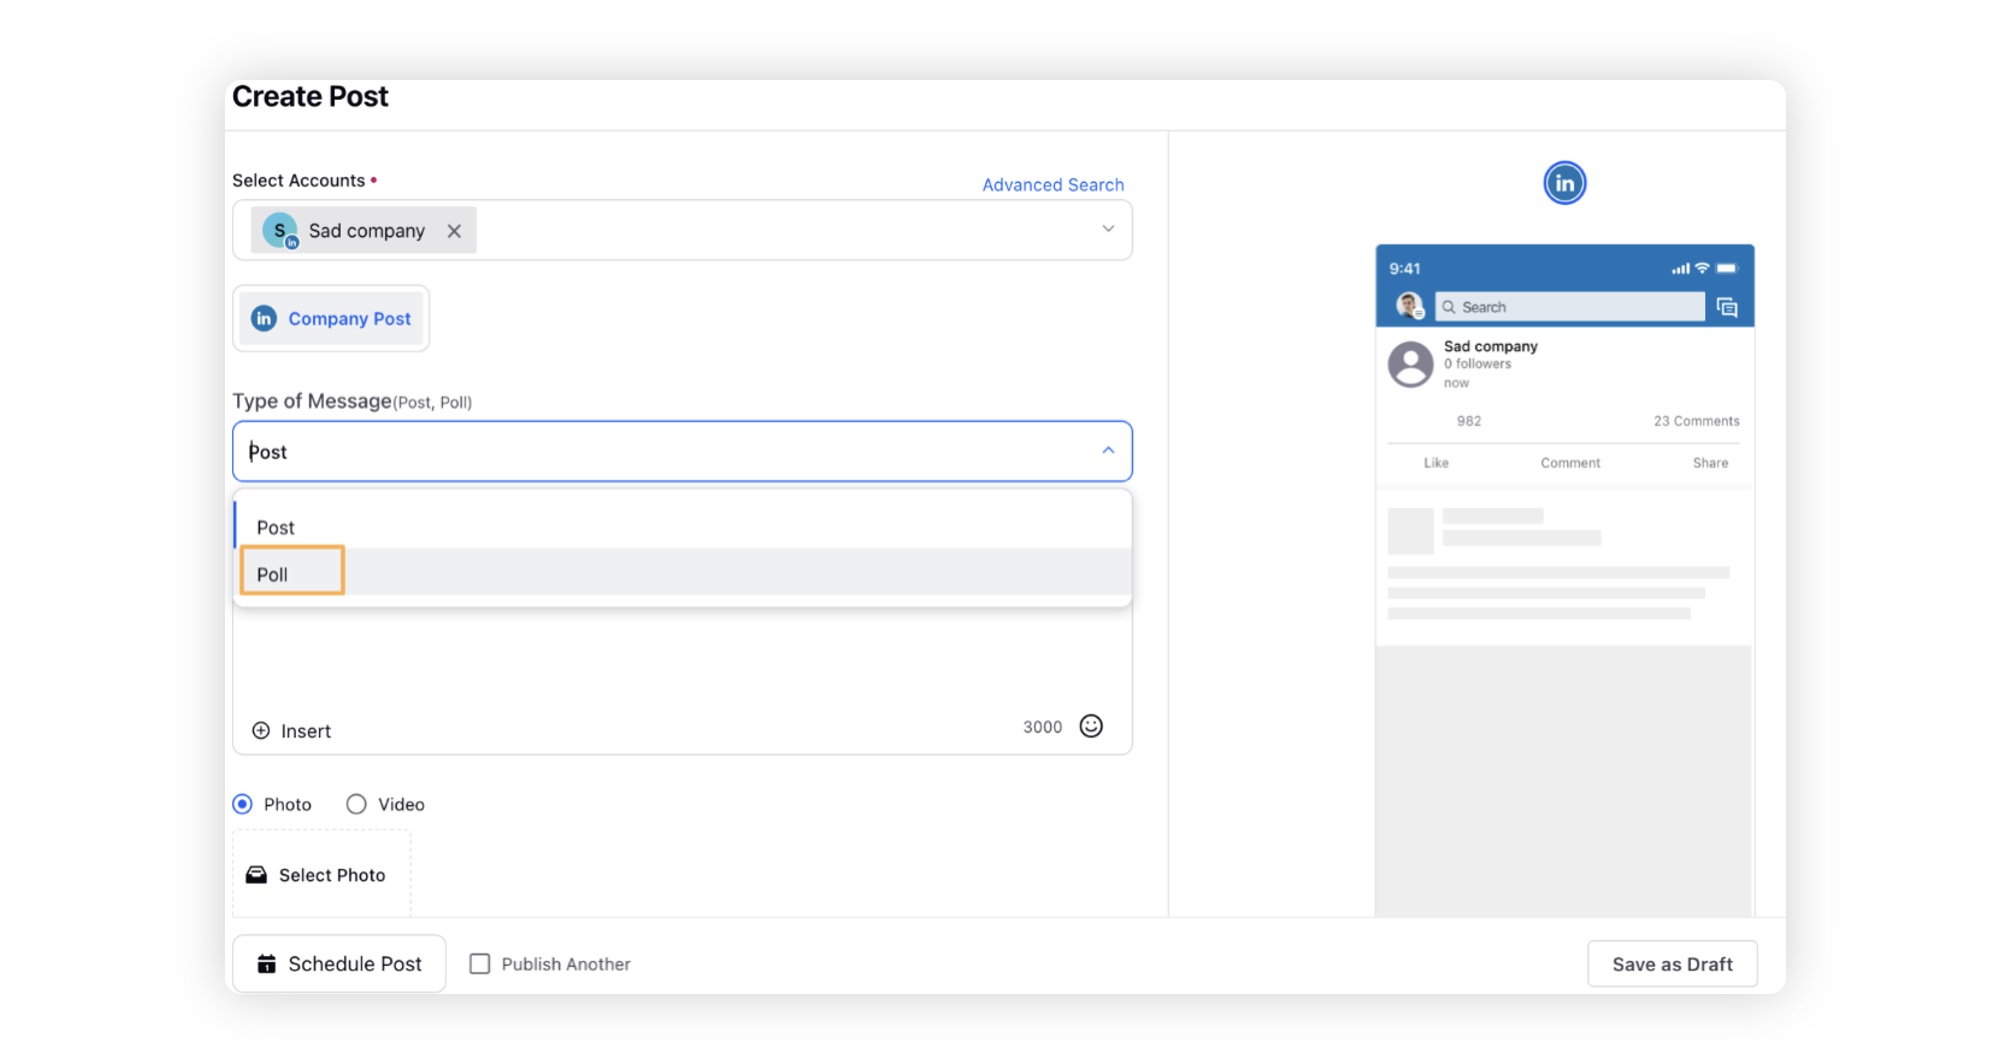
Enter the content for the post in the Message box.
 Note: This is a normal text/message that can be added to the Linkedin Post. This message has a maximum limit of 3000 characters.
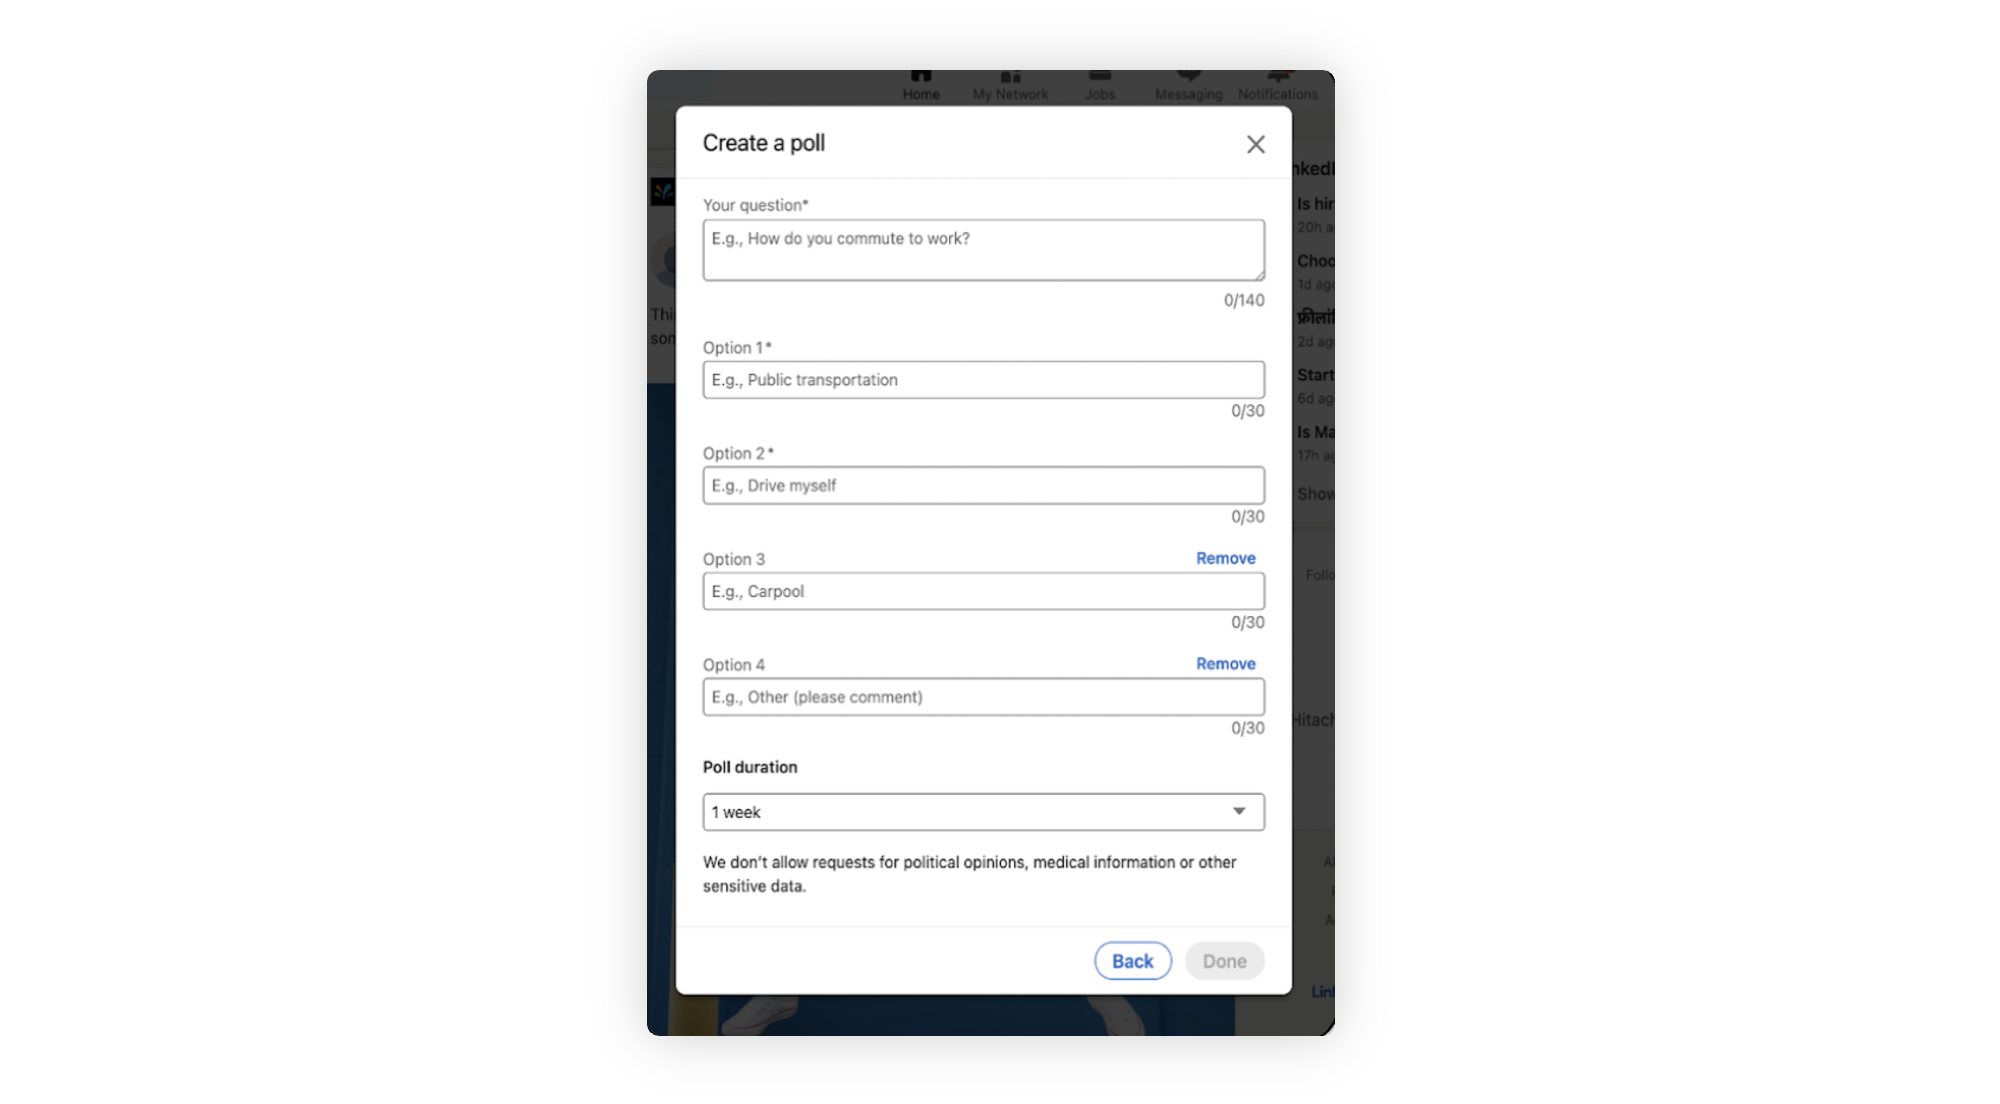
On the Create a poll window, enter your question in the Your question field.
Note: This question can have a maximum of 140 characters.You can enter upto 4 Options as answers. Click Remove to delete the extra Option field.
Note: By default you can add 2 options, which is the minimum compulsory requirement to create a poll on LinkedIn.Each Option can consist of a maximum of 30 characters.
You cannot add same options as a valid input.
Select Poll Duration from the given dropdown.
Optional Step: The preview of the post will render on the right pane. Also, you can click the Preview icon in the bottom left corner if you have minimized the Create Post window.
Click Post in the bottom right corner to publish the post on the selected LinkedIn account immediately. If you are not ready to publish and want to save your post as a draft, click Save as Draft.
You can also schedule your post for a future date and time by clicking the Schedule Post in the bottom left corner. Select the month, date, and time of publishing. Click Apply to save your changes.
Optional Step: To continue publishing the post, check the given Publish Another box at the bottom left corner.
To configure Polls in LinkedIn Engagement Column
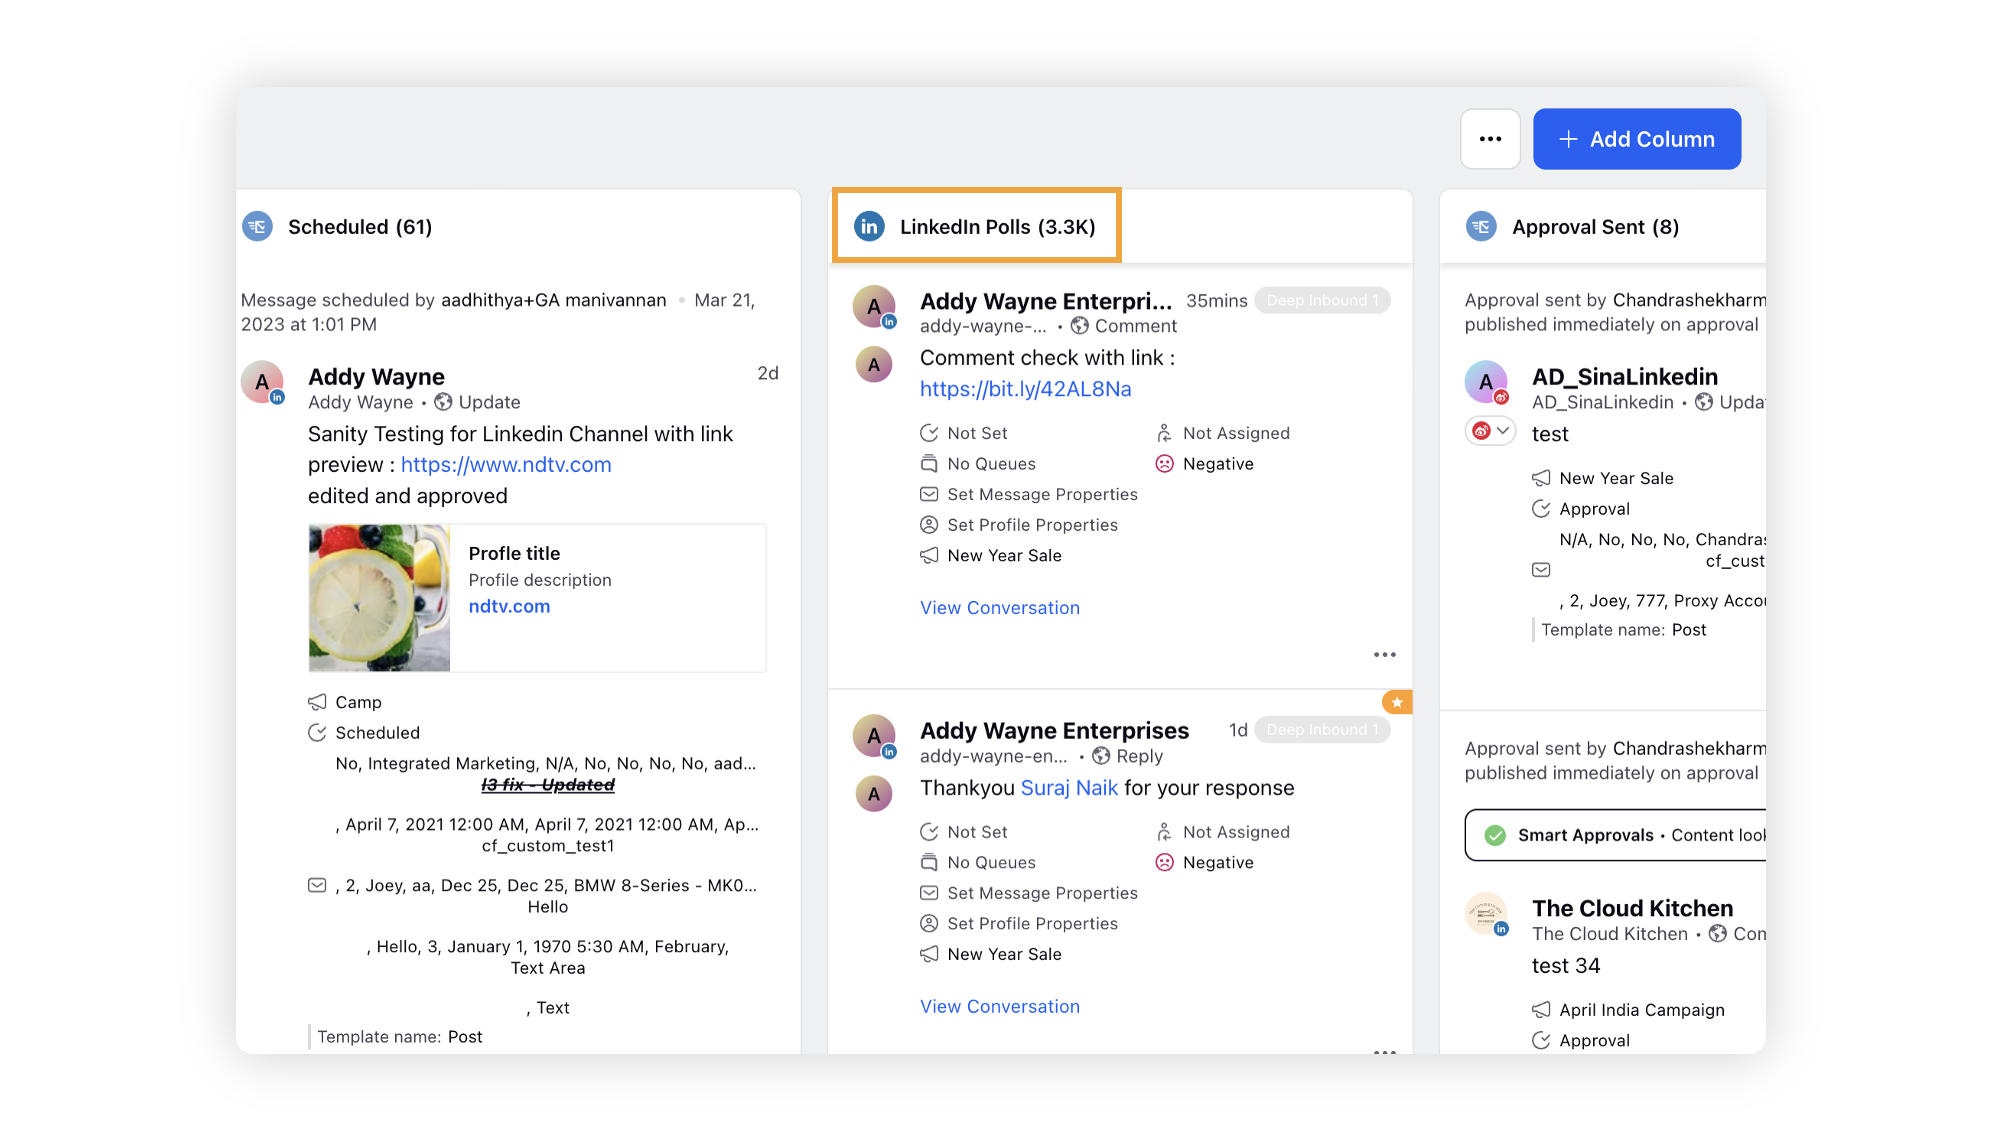
Wihtin the Engagement Dahsboards, you can create Inbound and Outbound columns to view LinkedIn Polls.
Create an inbound column for LinkedIn Polls
Click the New Tab icon
. Under the Sprinklr Social tab, click Engagement Dasbhoards within Engage.
From the Engagement Home window, select the desired dashboard.
In the top right corner of the Engagement Dashboard window, click Add Column.
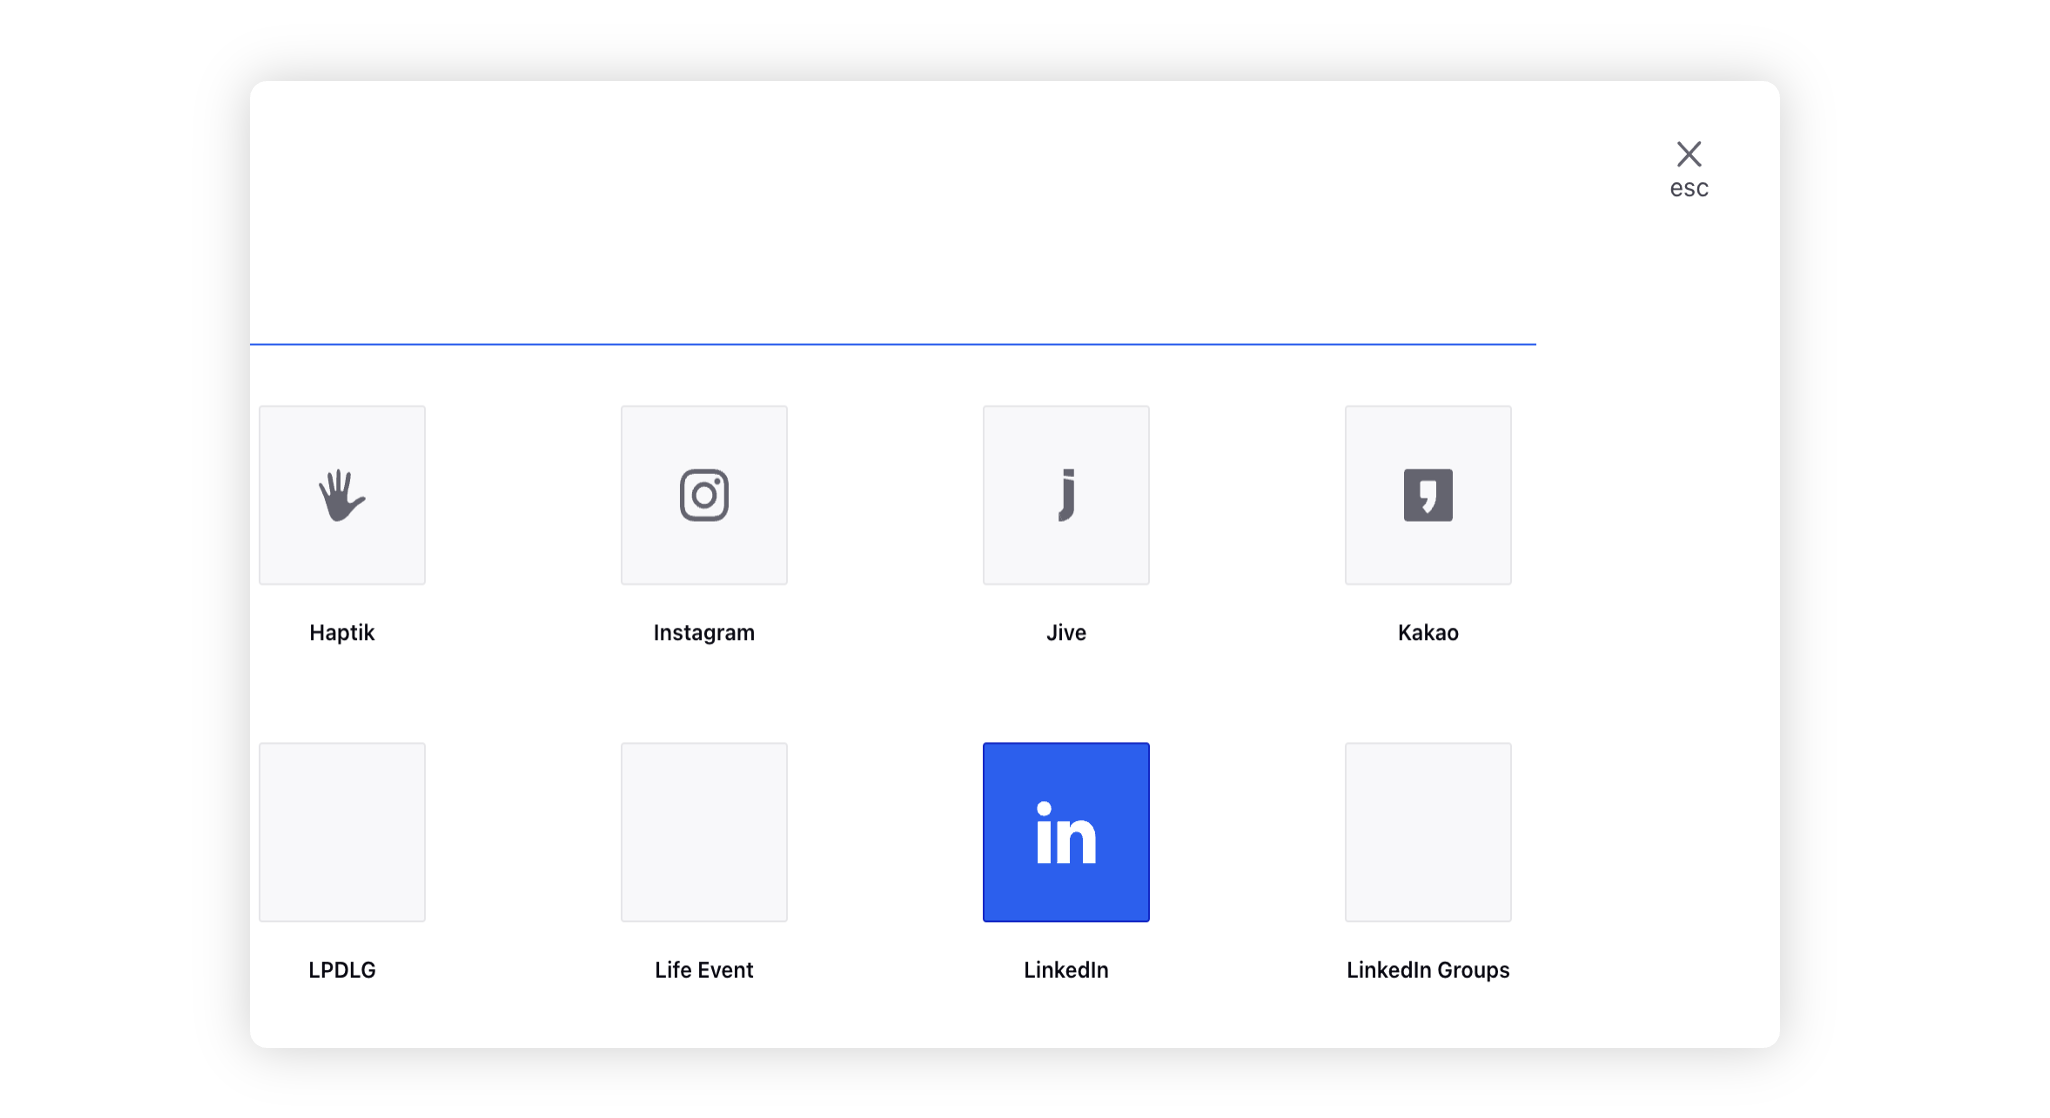
Select LinkedIn from the Add New Column window. You can also search for it in the search bar above.
On the Add New LinkedIn Column window, select Company Status Update and Profile Network Update as the type of column from the availabel options.
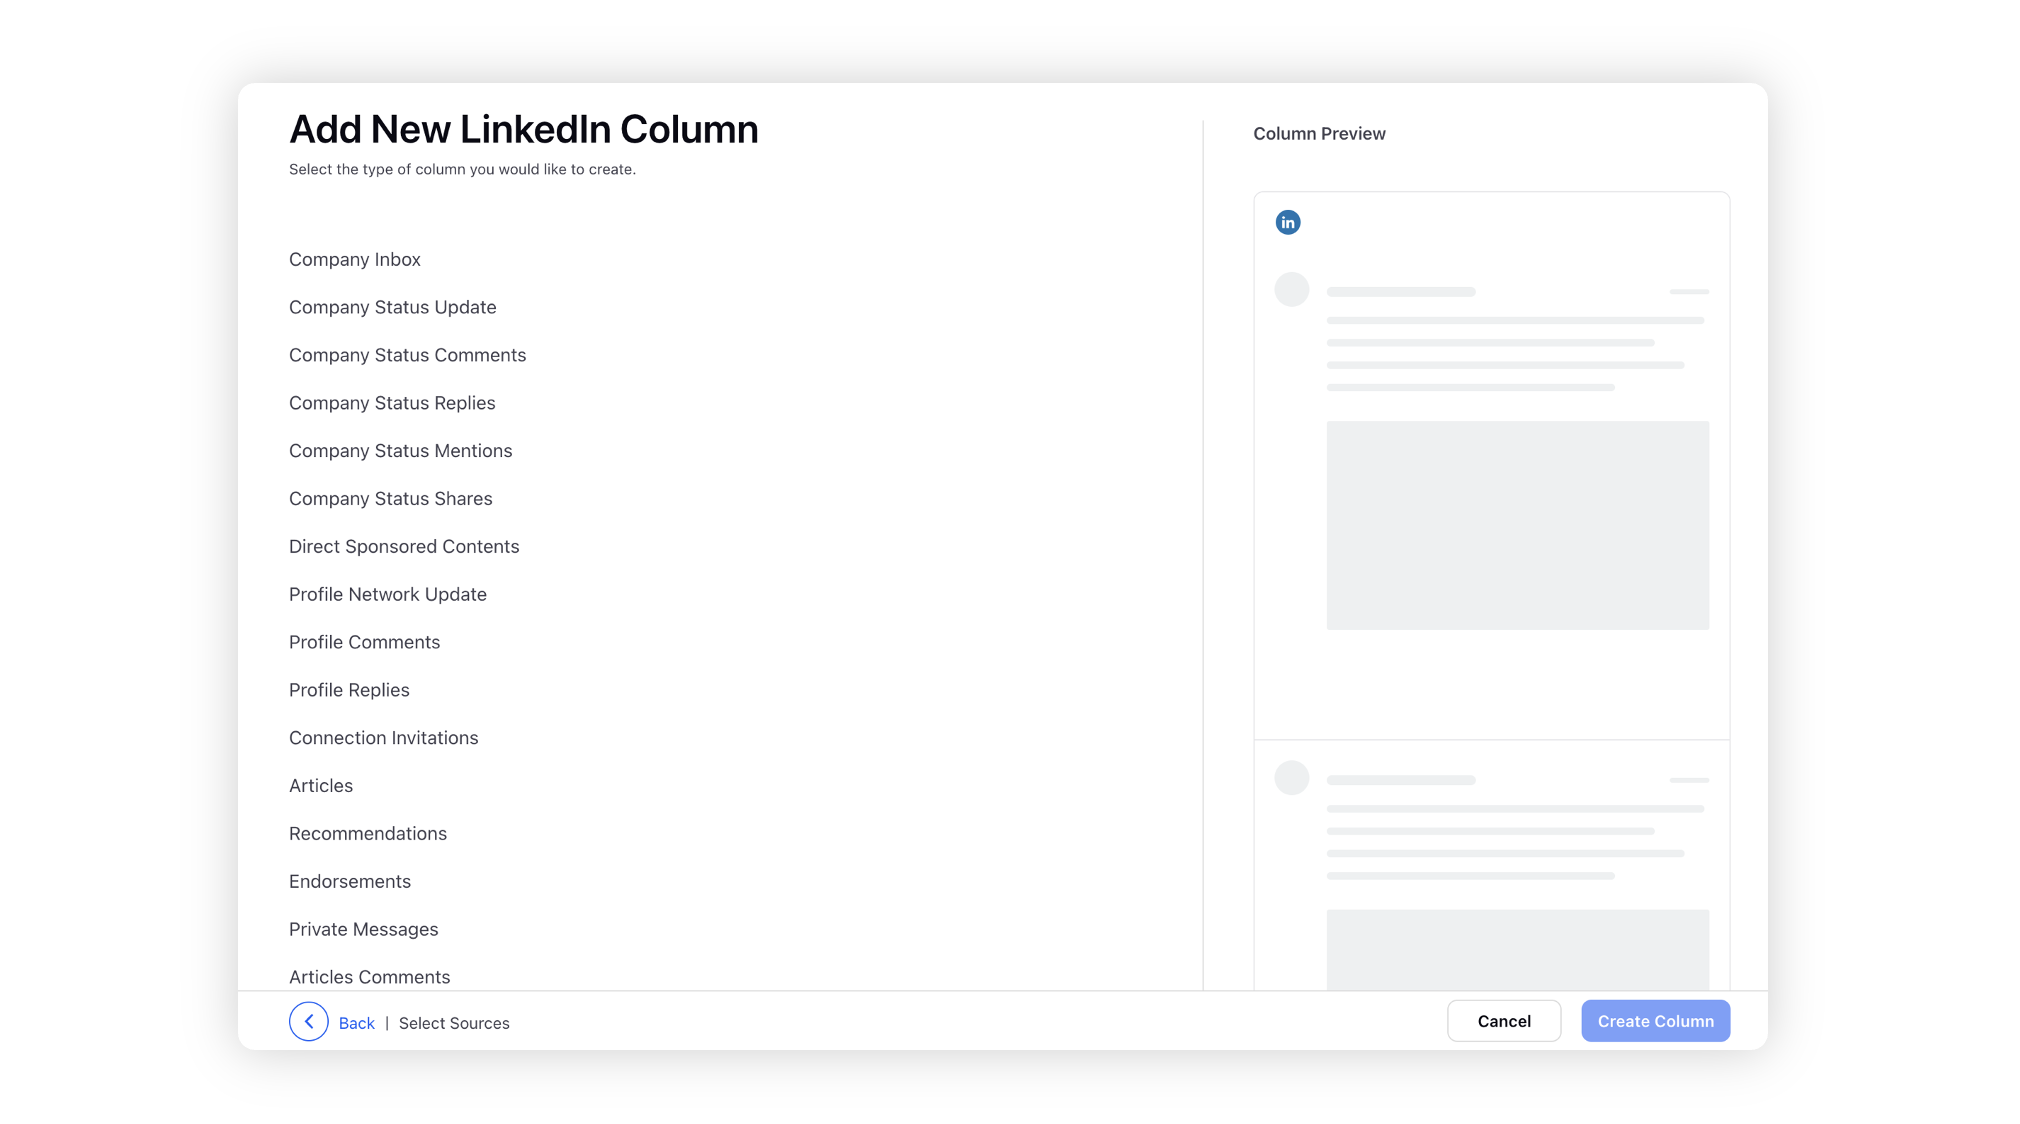
After selecting the type of column you want to create, enter the Basic Information for your column. Next, select Poll as the Media Type.
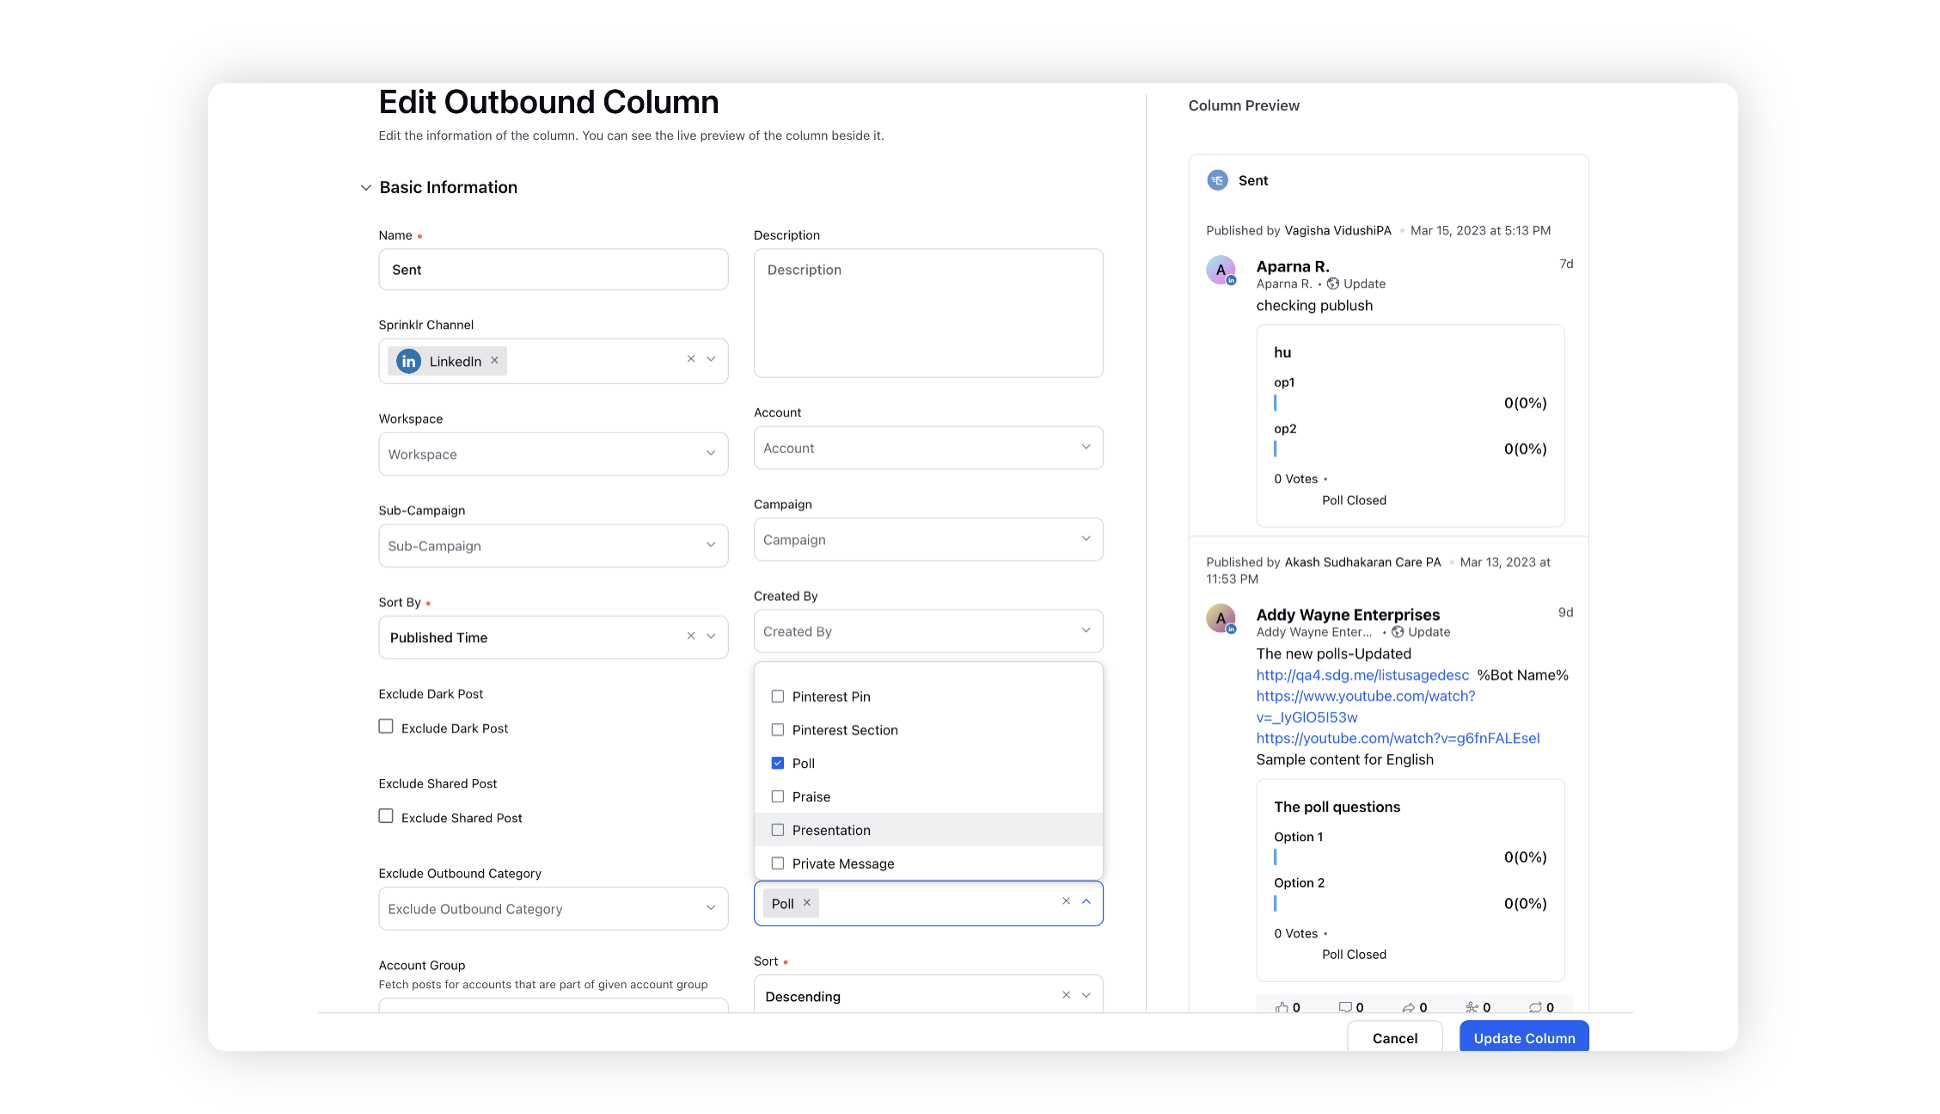
Note: The preview of your column will render on the right-hand pane.
Enter Workflow Properties as desired. Workflow properties refer to the properties applied in Sprinklr, either automatically or manually, that determine the message's workflow status, user assignment, priority, Spam designation, and sentiment.
Provide the Custom Properties as desired. Configuring additional properties in an Engagement Dashboard column, you can specify messages to include or exclude based on the properties that have been applied to the message.
After you have provided all the details for your column, click Create Column in the bottom right corner to create a new column. Upon creation, your column will be available in your current dashboard for you to engage with.
Create an outbound column for LinkedIn Polls
Click the New Tab icon
From the Engagement Home window, select the desired dashboard.
In the top right corner of the Engagement Dashboard window, click Add Column.
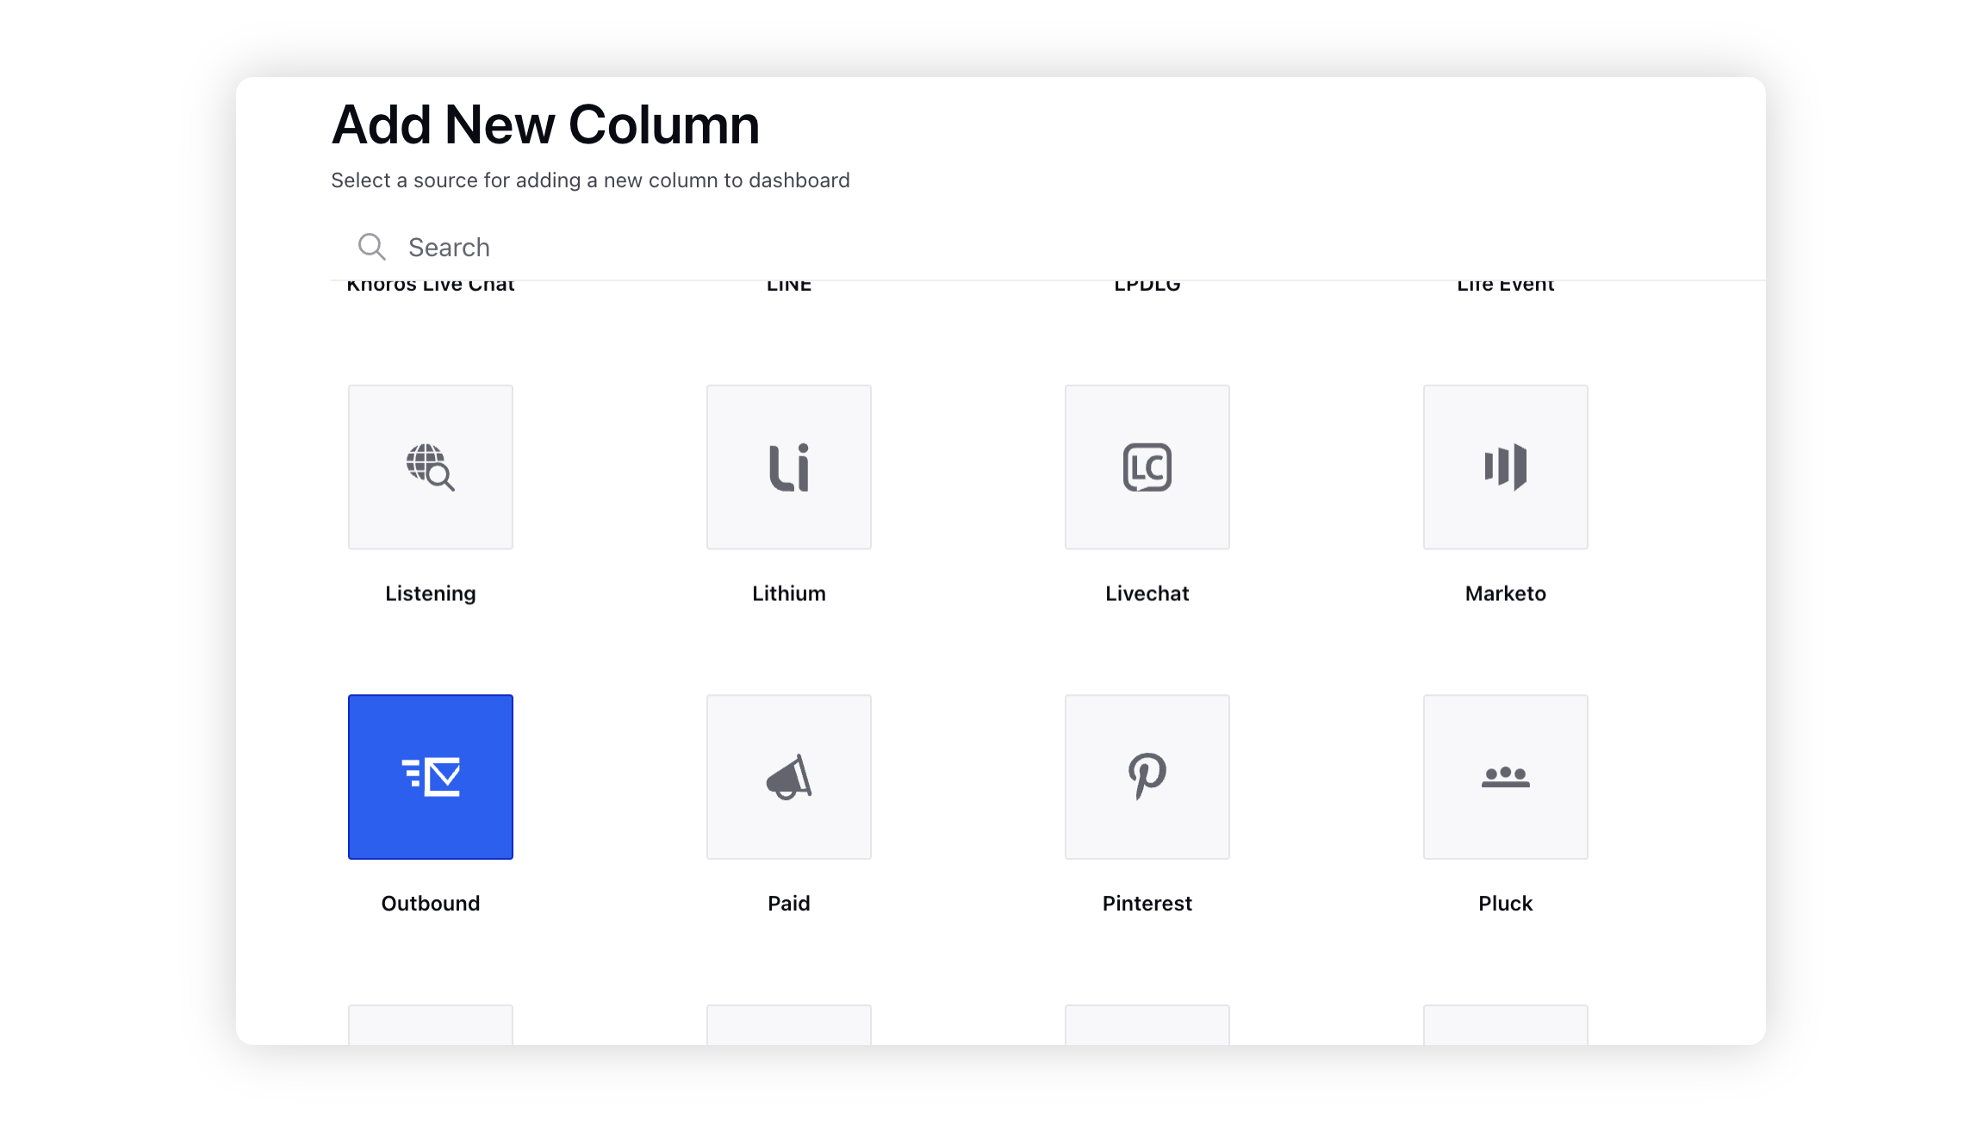
Select Outbound from the Add New Column window. You can also search for it in the search bar above.
On the Add New LinkedIn Column window, select Sent as the type of column from the availabel options.
After selecting the type of column you want to create, enter the Basic Information for your column. Next, select Poll as the Outbound Category.
Enter Workflow Properties as desired. Workflow properties refer to the properties applied in Sprinklr, either automatically or manually, that determine the message's workflow status, user assignment, priority, Spam designation, and sentiment.
Provide the Custom Properties as desired. Configuring additional properties in an Engagement Dashboard column, you can specify messages to include or exclude based on the properties that have been applied to the message.
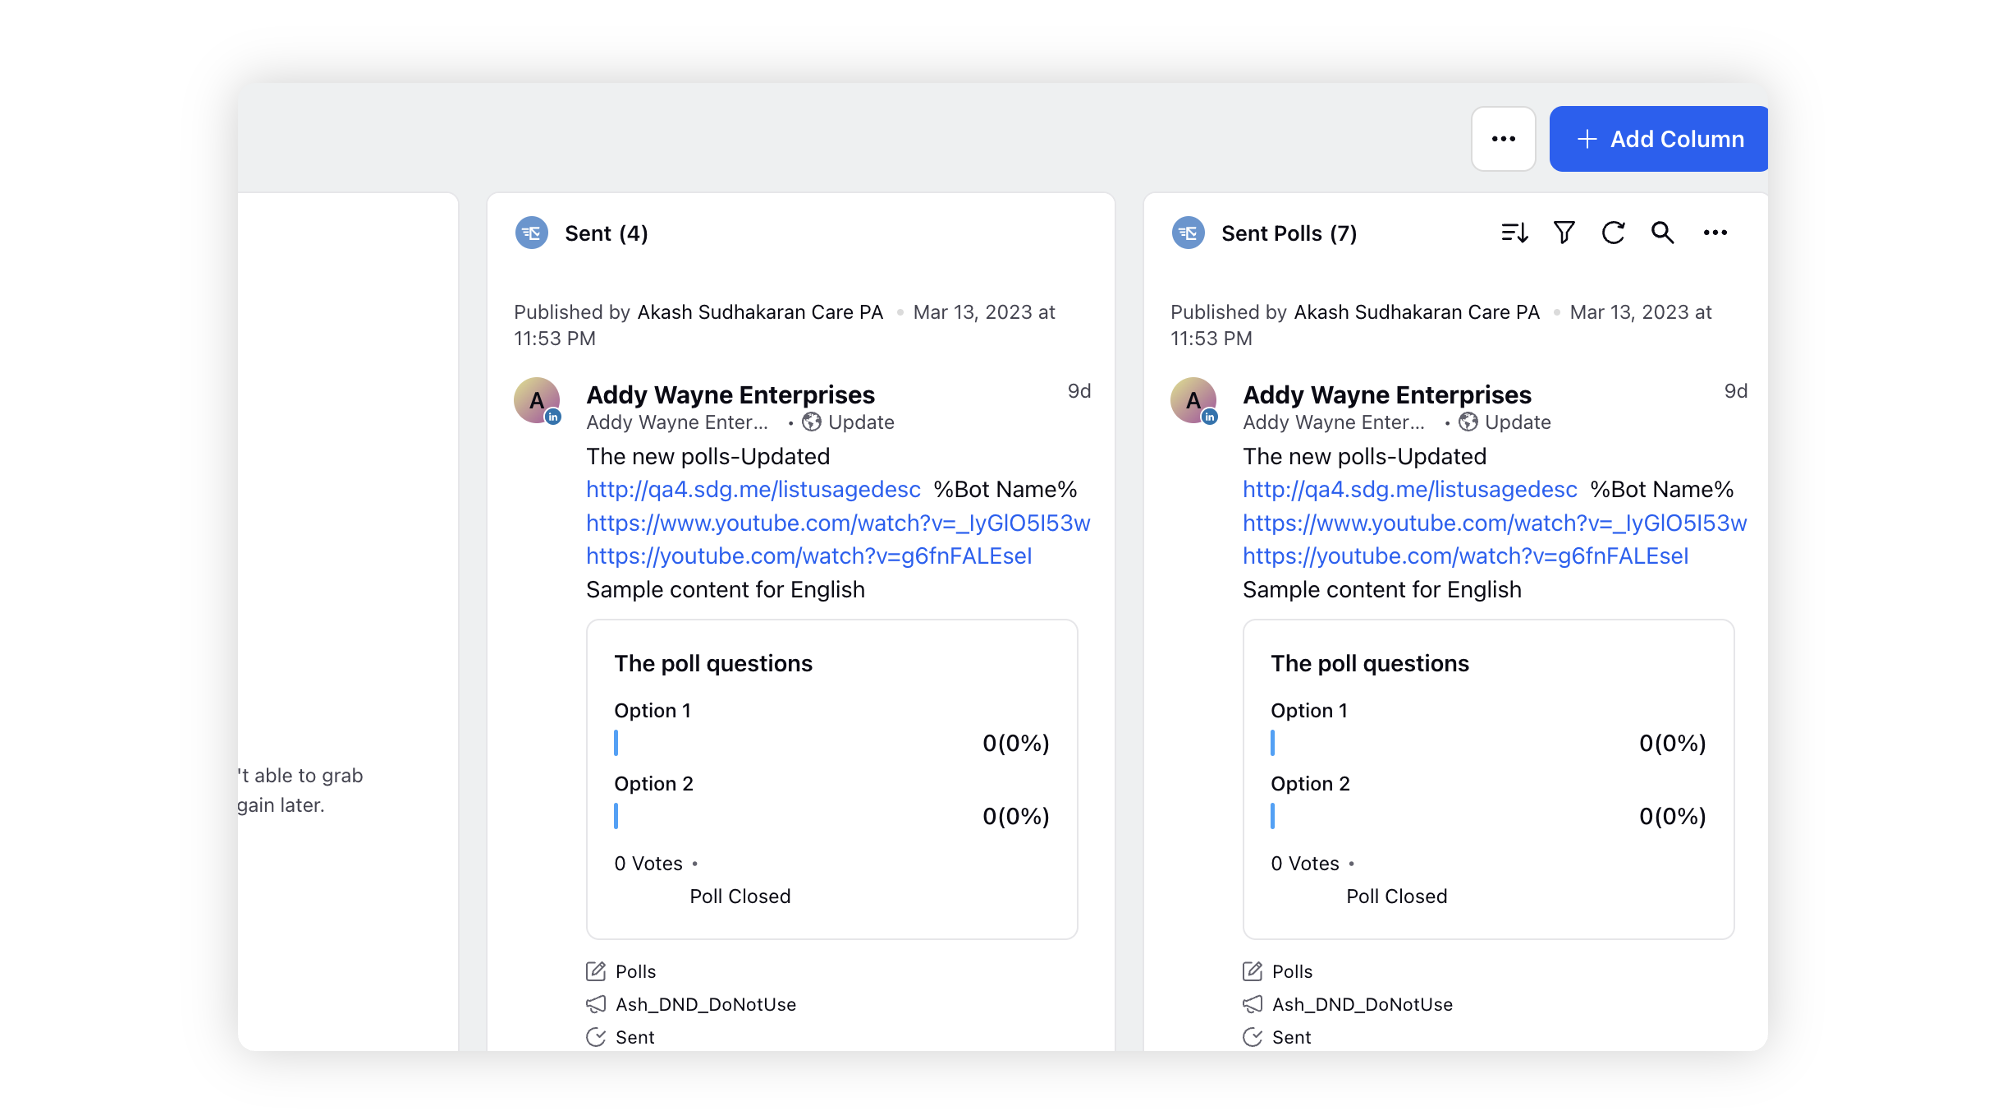
After you have provided all the details for your column, click Create Column in the bottom right corner to create a new column. Upon creation, your column will be available in your current dashboard for you to engage with.
To configure Polls as condition in Rule Engine
Click the New Tab icon
In the top-right corner of the Rule Engine window, click Create New Rule.
On the New Rule window, enter a Name and Description for your rule.
Select Customer / Workspace from the Rule Scope drop-down menu and Inbound from the Context drop-down menu.

If you want, modify the values for Activation Date and Rule Execution Batch. To proceed with the default values, click Next.
On the Rule Builder window, click the Addition icon
icon and select Add Condition to set up specific scenarios that must be met for subsequent actions to execute. You can also chain multiple conditions together to refine the scenarios.
Under Conditions Applies To "The properties of outbound message", select Poll as the Attachment type to create Autofill, Outbound, Pre-publishing, Post-publishing rules for Linkedin Poll Posts.
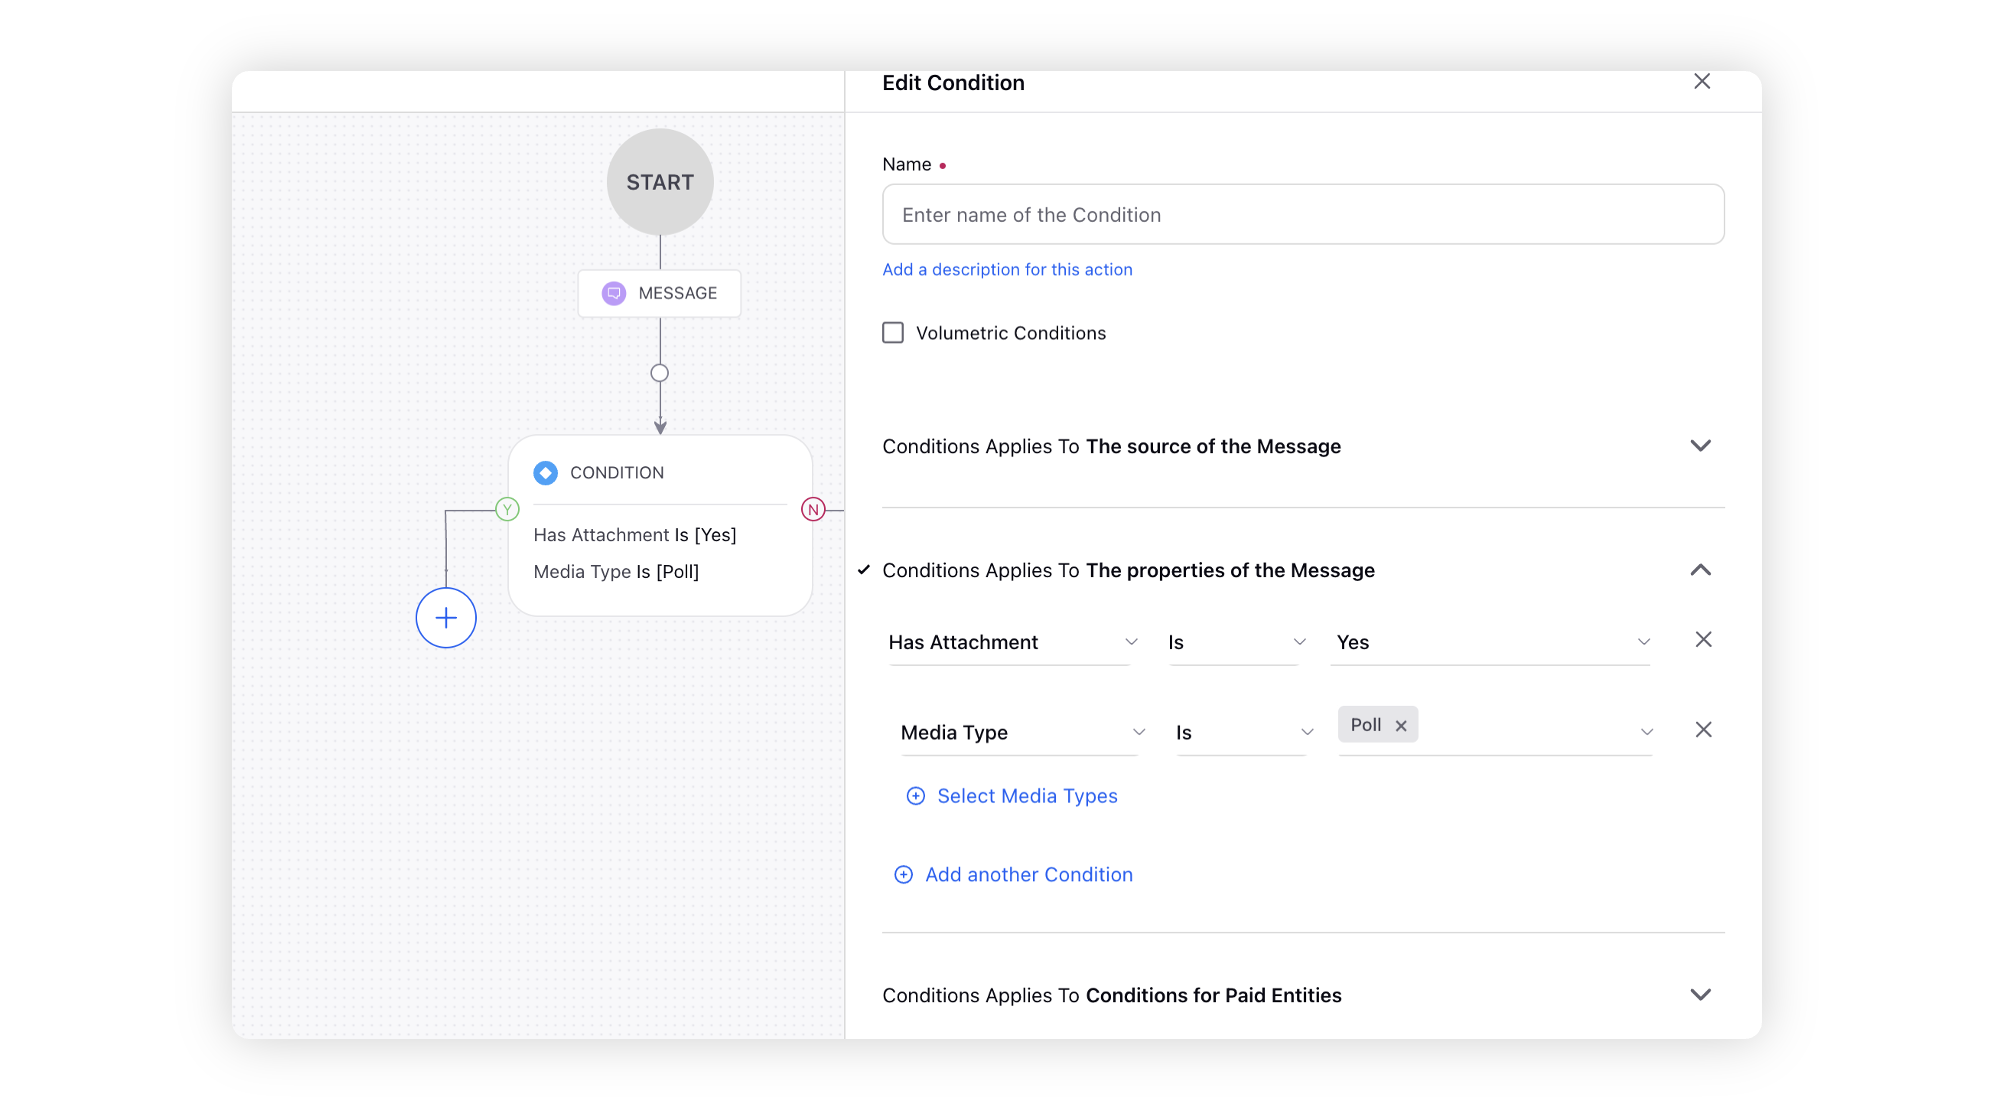
Under Conditions Applies To "The source of the Message", select Poll as Message subtype to create Inbound, Queue and Workflow update rules for Linkedin Poll Posts.
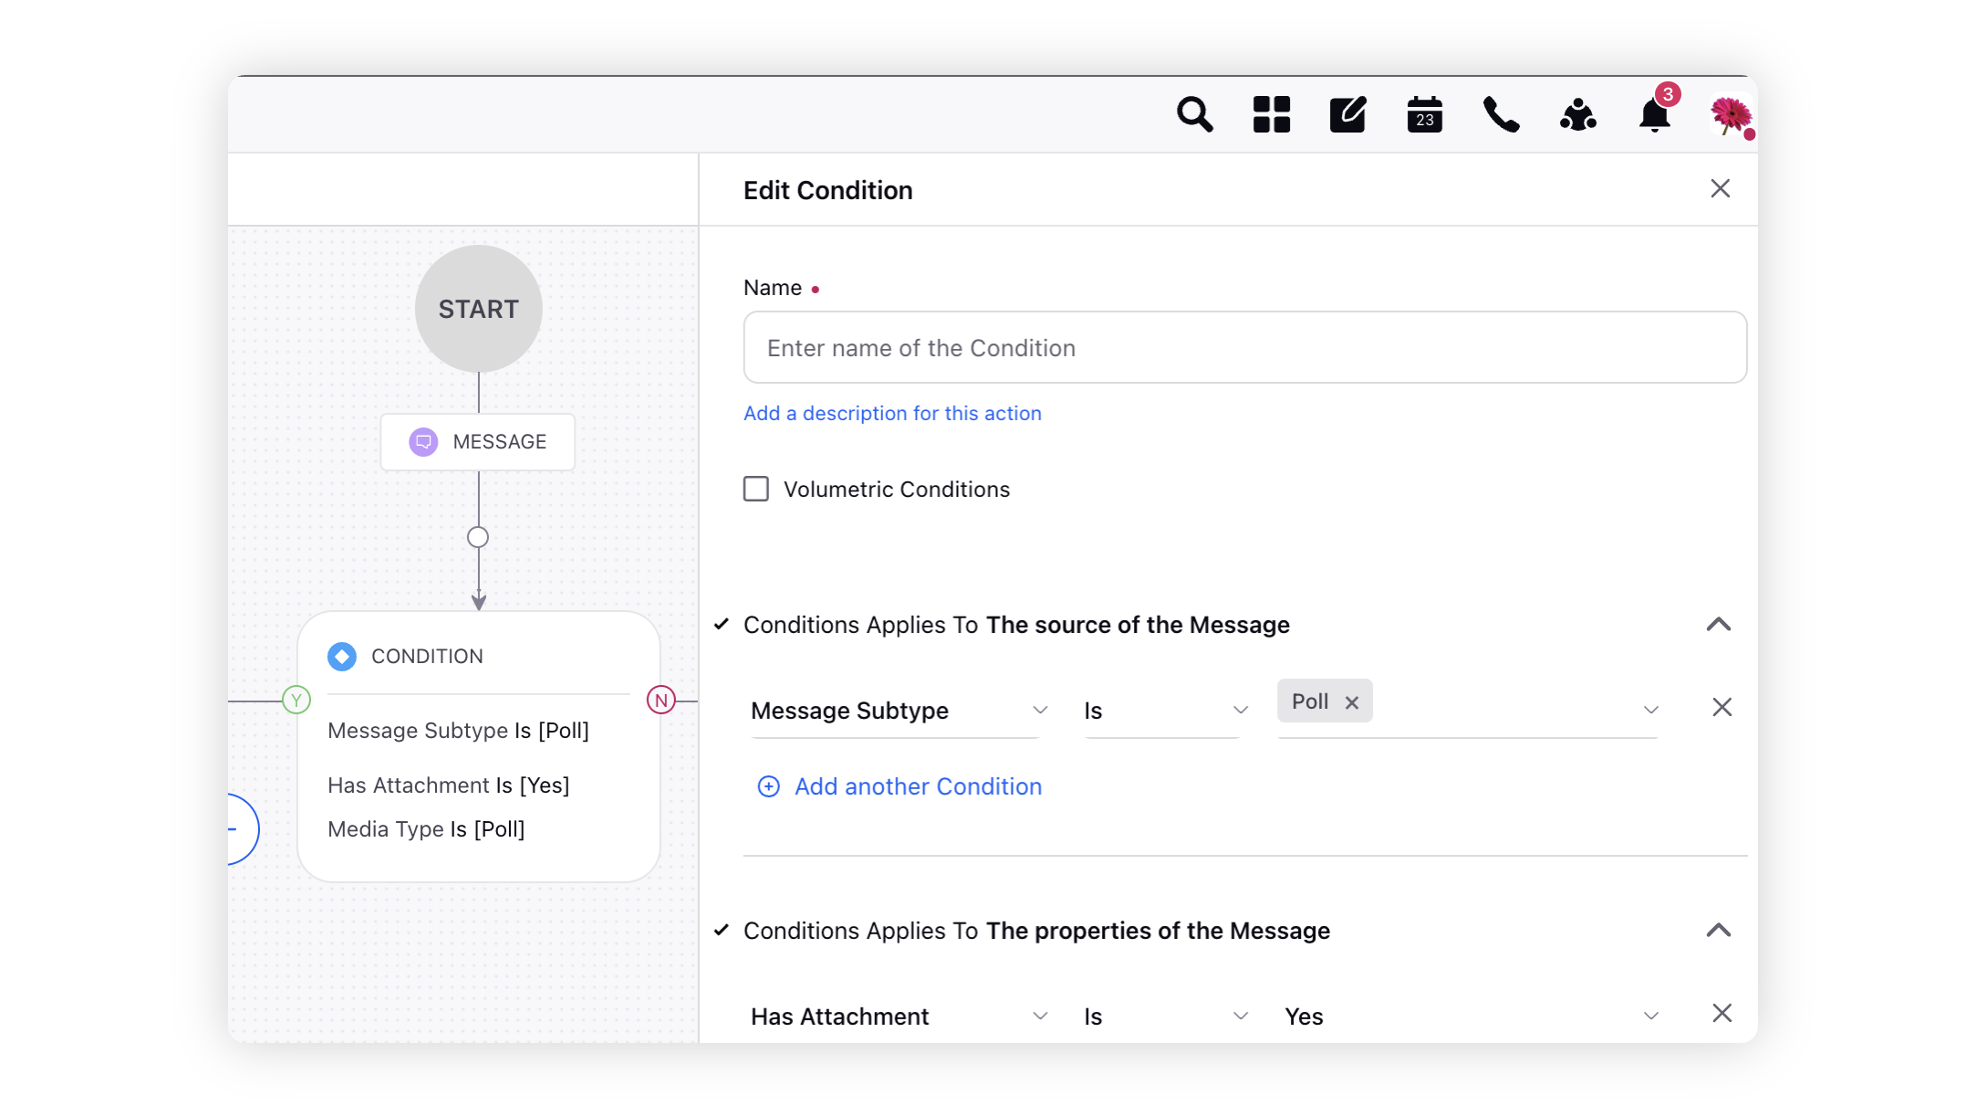
Click Add another Condition and select Account as a condition and select the desired account as its value.
To configure actions in a rule, click the Addition icon
icon and select Add Action on the Yes or No branch of a condition depending on when you want teh action to be executed.
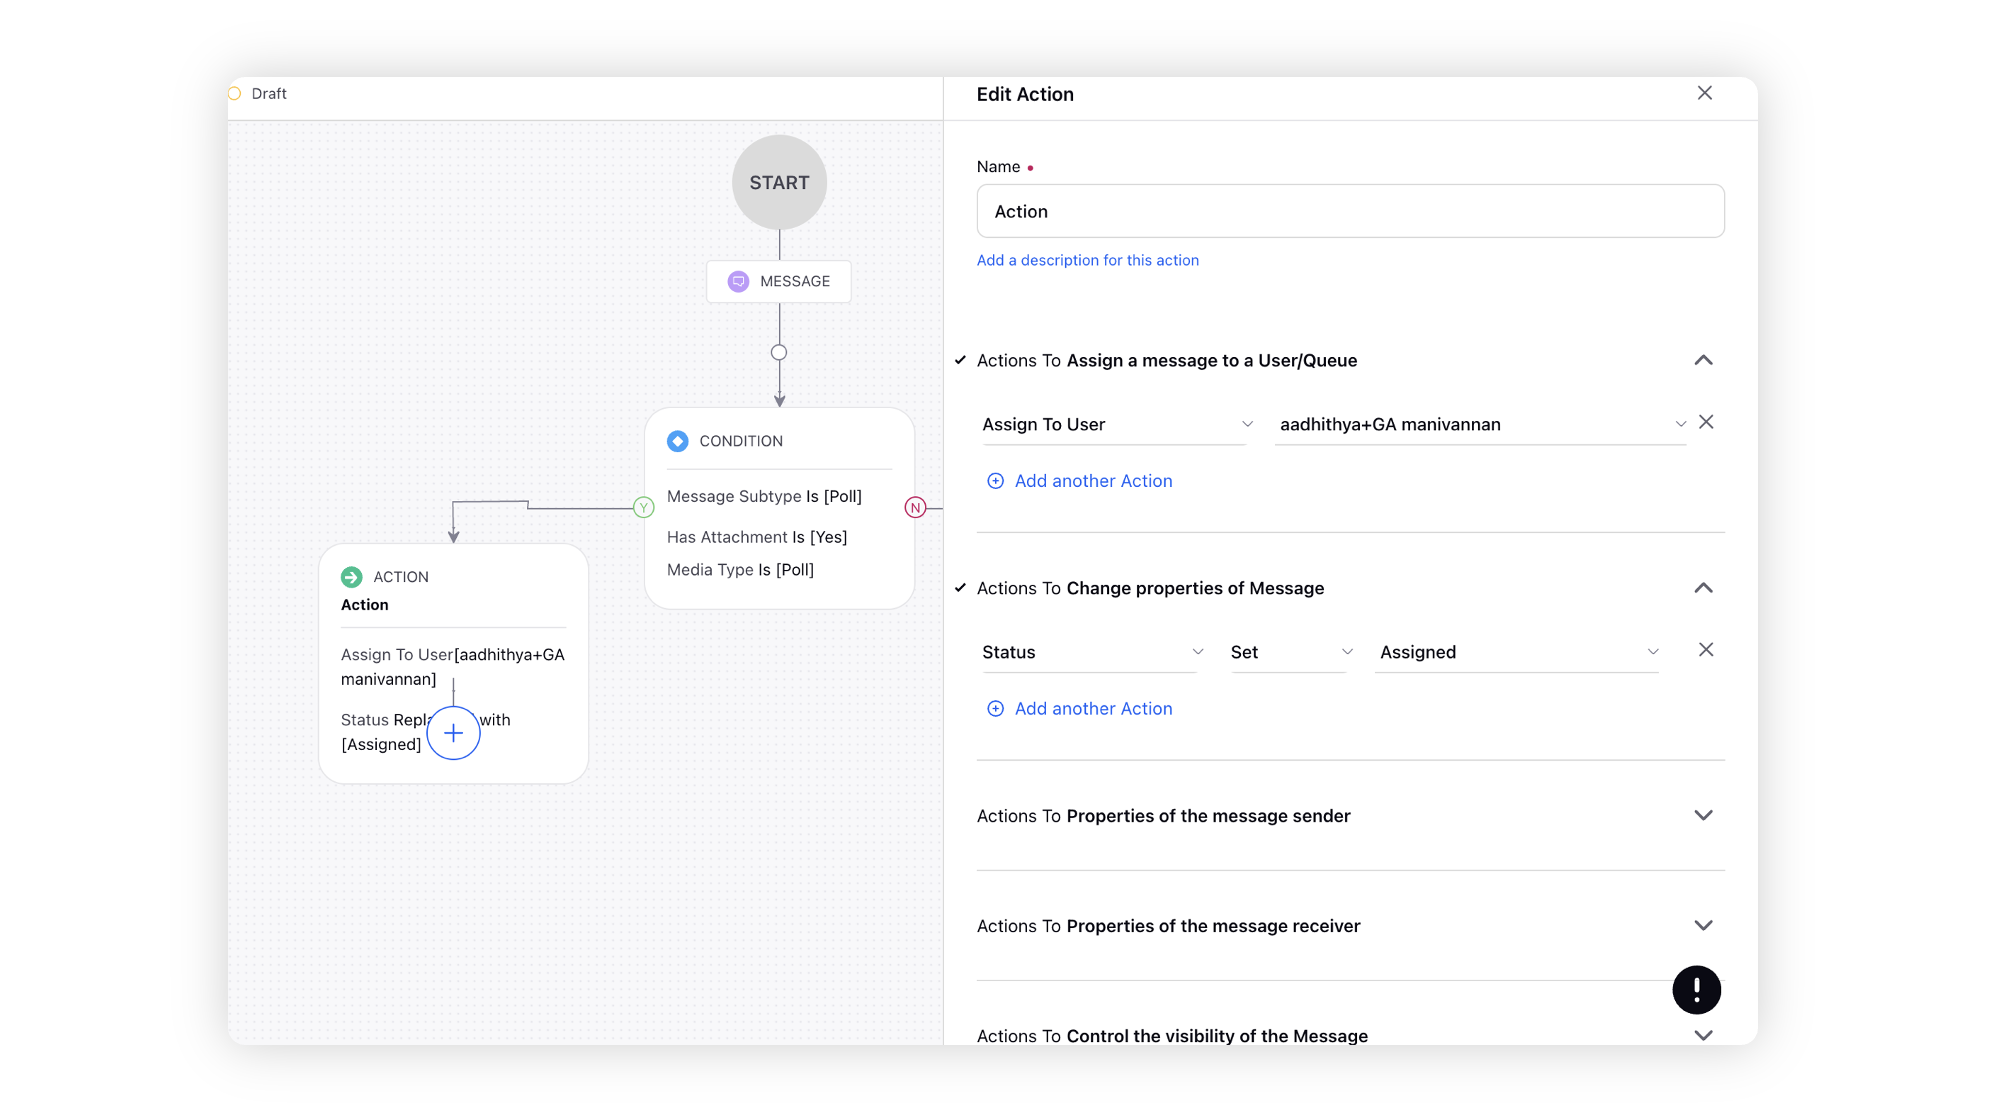
Click Save in the bottom right corner to finalize the creation of your new Rule, or Save as Draft to create a draft version of your Rule.
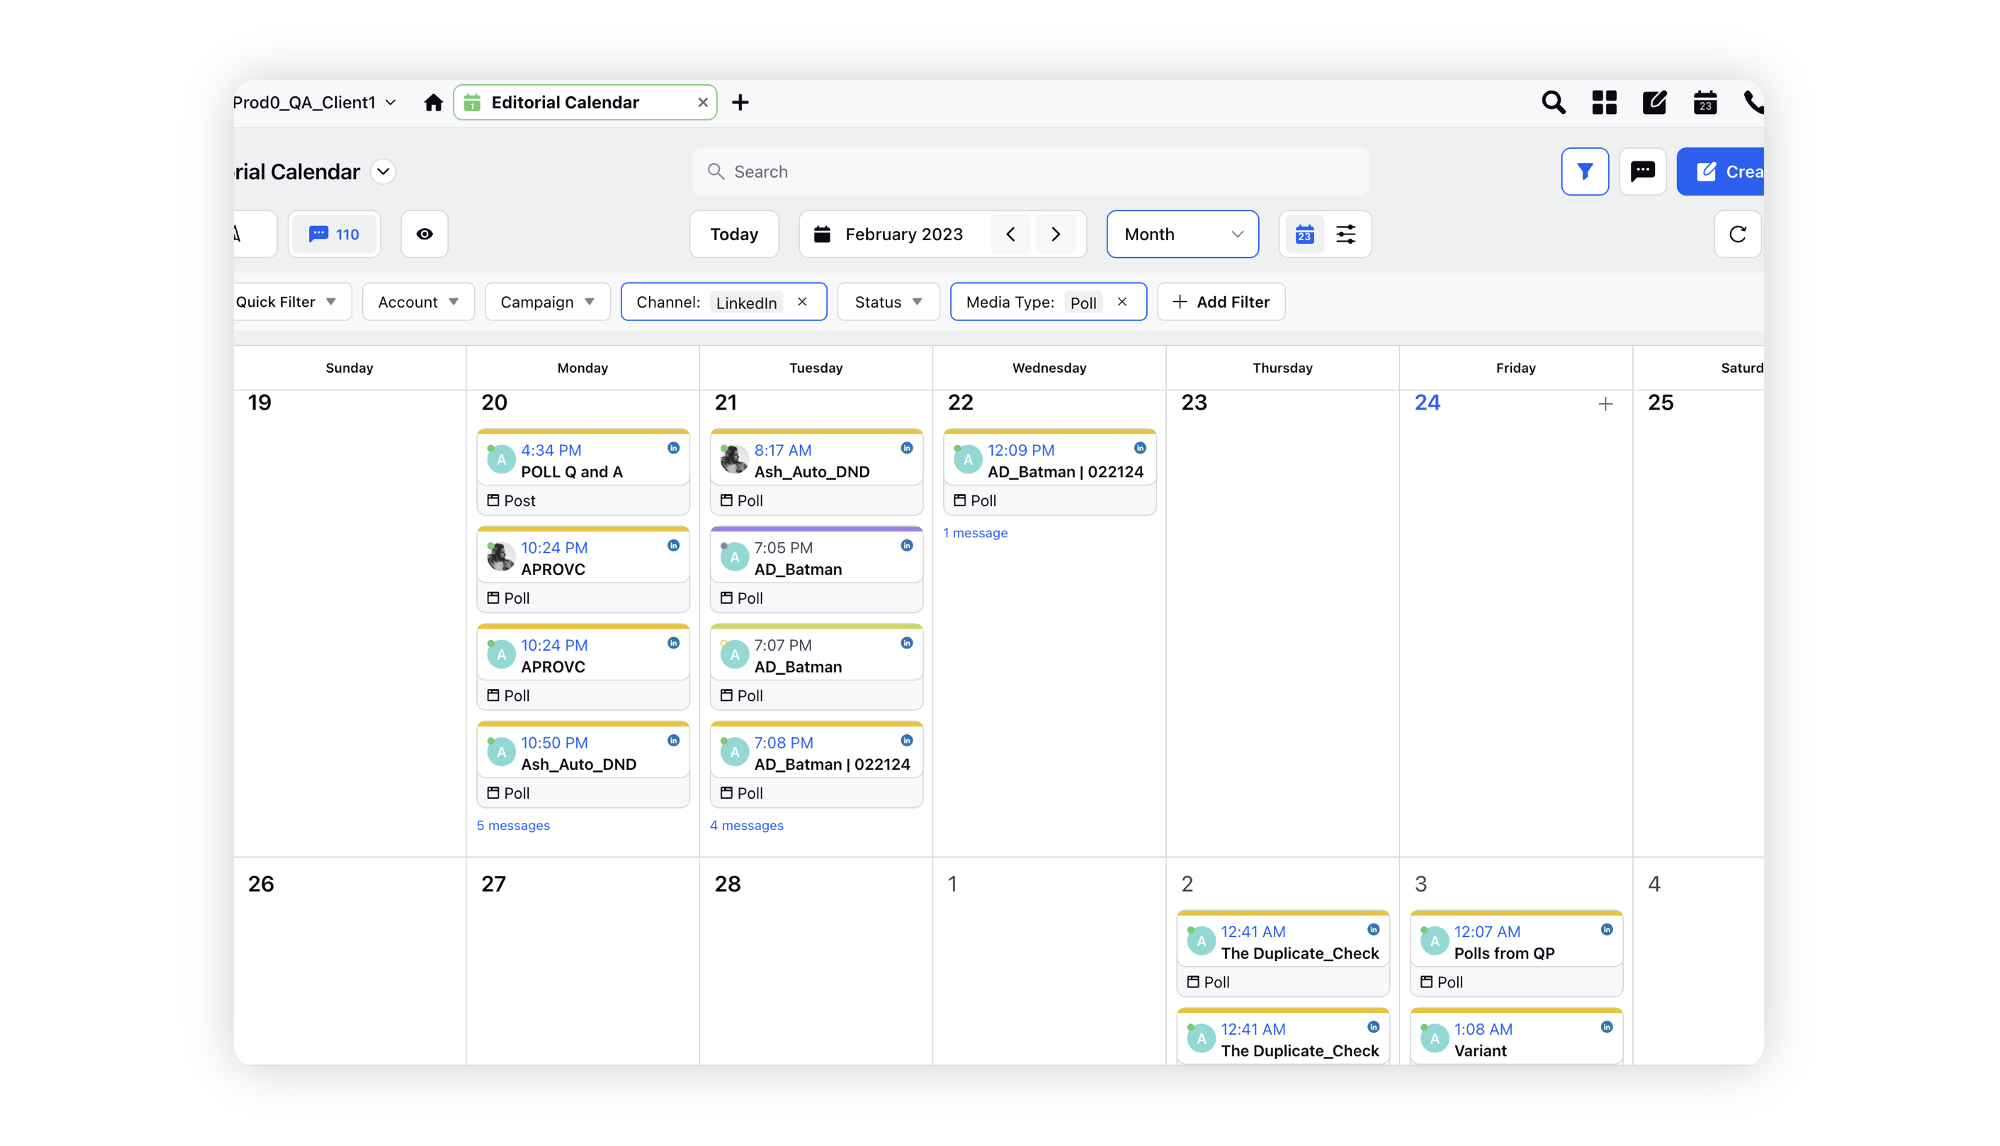
To view Linkedin Polls in Editorial Calendar
Click the New Tab icon
On the Editorial Calednar window, select LinkedIn as the Channel filter. Make sure you have messages configured in your view settings.
You can view your LinkedIn polls in your selected view type and perform additonal actions based on their status.
To create poll post asset in DAM
Click the New Tab icon
In the top right corner of the Asset Management window, click Create Asset and select Post from the dropdown.

On the Create New Asset winow, fill in the requires details. For more information, check this article on Post Asset.
Select LinkedIn from the Channels dropdown. Next, select Poll from the Type of Message dropdown.
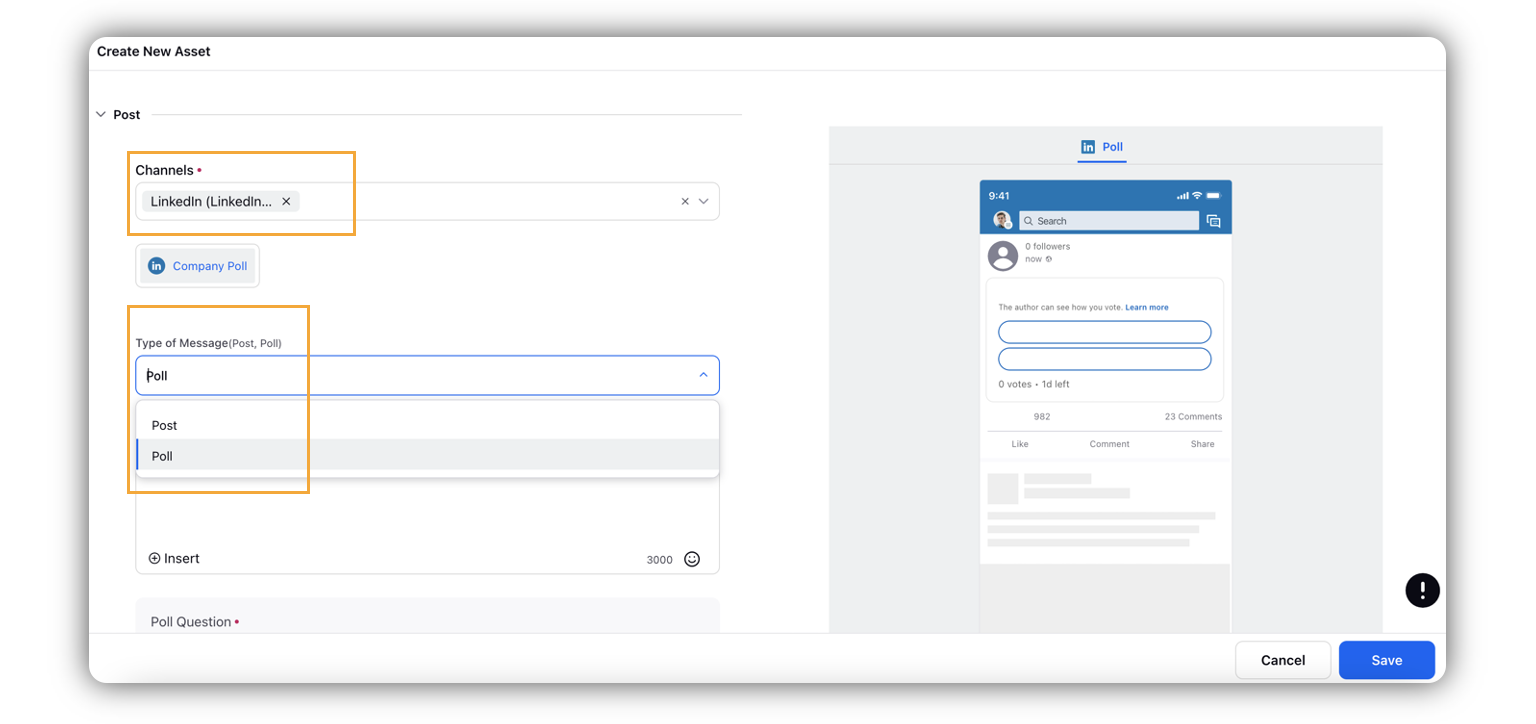
Click Save in the bottom right corner.