Create and Publish YouTube Shorts from Sprinklr
Updated
Sprinklr empowers Social Media Managers/Publishing Supervisor to publish Youtube Shorts and generate reporting for them. Publishing YouTube shorts is advantageous for brands in several ways. As a top video-sharing platform, it offers access to a vast audience. Shorts' short-form and shareable nature can improve brand visibility and engagement. Entertaining and well-produced shorts can foster brand awareness and loyalty.
To publish to YouTube Shorts
Click the New Tab icon
. Under the Sprinklr Social tab, click Quick Publish within Engage.
In the Create Post window, search and select the required YouTube Account in the Select Accounts field. You can also use Advanced Search to narrow your searches by a series of different filters.
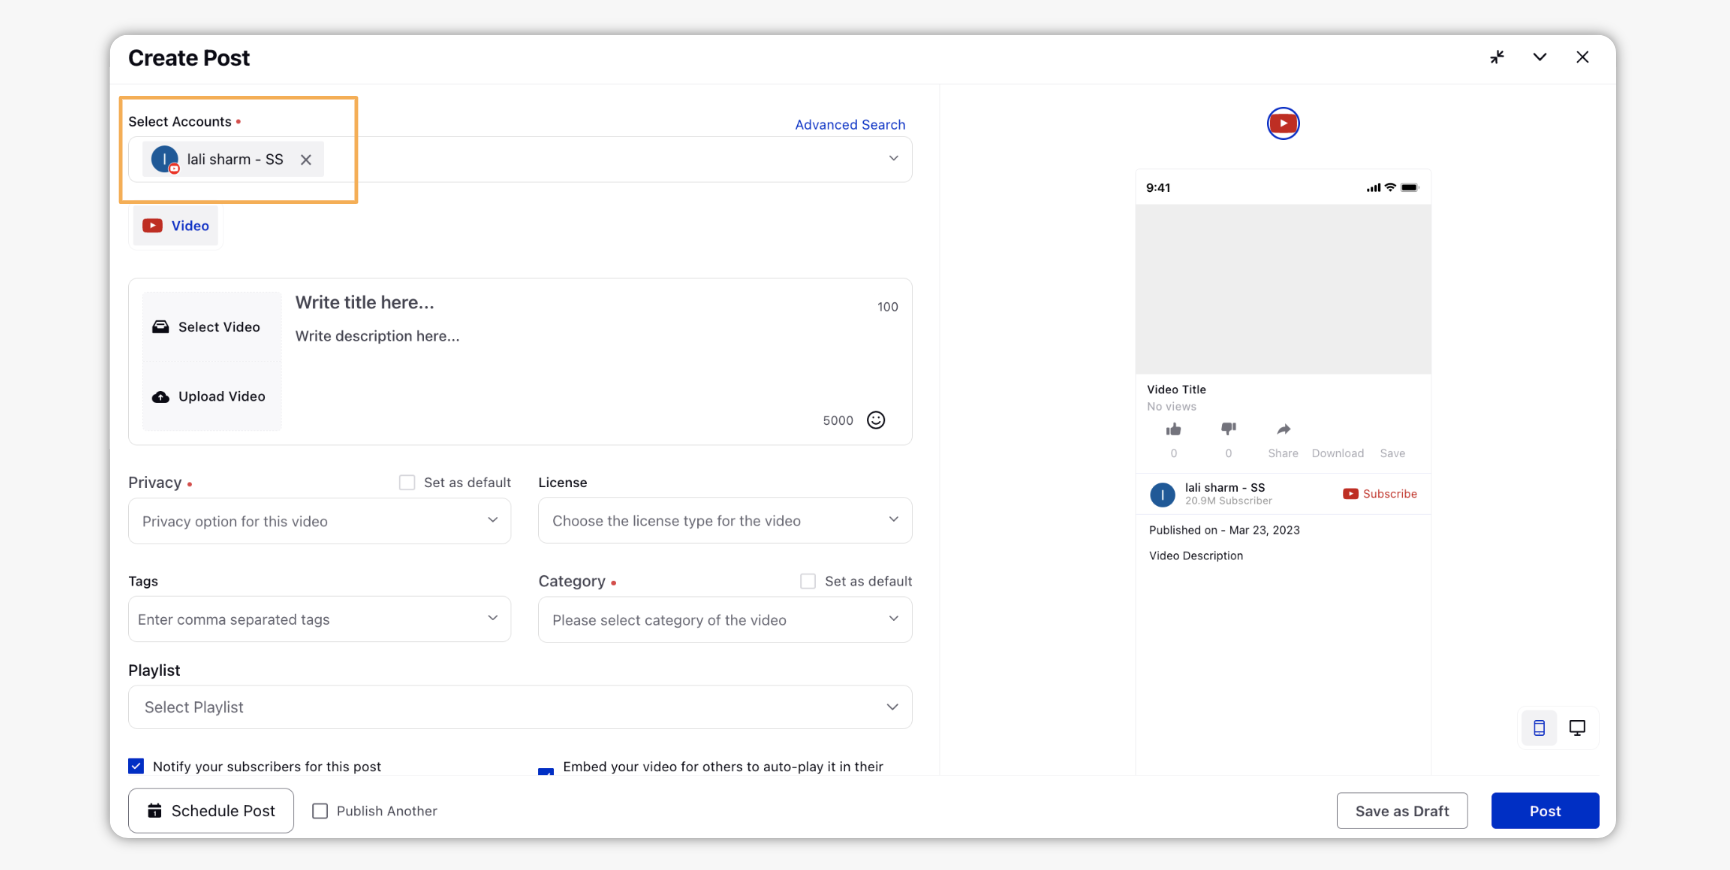
Choose the desired Select Video to choose the media from the Media Uploader (or Upload Video to select media to upload from your device).
If the video is of the Shorts configuration, it will automatically be detected as YouTube Shorts.
Youtube Shorts Media Guideline: Duration ≤ 60 secs, Aspect Ratio ≤ 1
Enter a Title and Description for your selected Shorts. Next, click the Emoji Picker icon from the Content box to open the emoji menu. Use the icons at the top to browse categories or search the emoji. Click your chosen emoji, and it'll be added to your description.
Select the Privacy for your Shorts Video from the drop-down list to control where it appears and who can watch it. You can also set your privacy settings as default by clicking Set as Default.
Select the video Category from the drop-down list. The categorization helps viewers find content, allows advertisers to refine their targeting and provides creators with common best practices. You can also set your category settings as default by clicking Set as Default.
Select a campaign from the Campaign drop-down menu to associate your post with. You can also set your campaign as default by clicking Set as Default.
The preview of the post will render on the right pane. Also, you can click the Preview icon
in the bottom left corner if you have minimized the Create Post window.
Click Post in the bottom right corner to publish the post on the selected YouTube account immediately. If you are not ready to publish and want to save your post as a draft, click Save as Draft.
You can also schedule your post for a future date and time by clicking the
Schedule Post in the bottom right corner. Select the month, date, and time of publishing. Click Apply to save your changes.
To continue publishing the post, check the given Publish Another box at the bottom.

To configure Shorts in Youtube Engagement Column
Click the New Tab icon
. Under Sprinklr Social, click Engagement Dashboards within Engage.
Click Add Column in the top right corner of the chosen Engagement Dashboard.
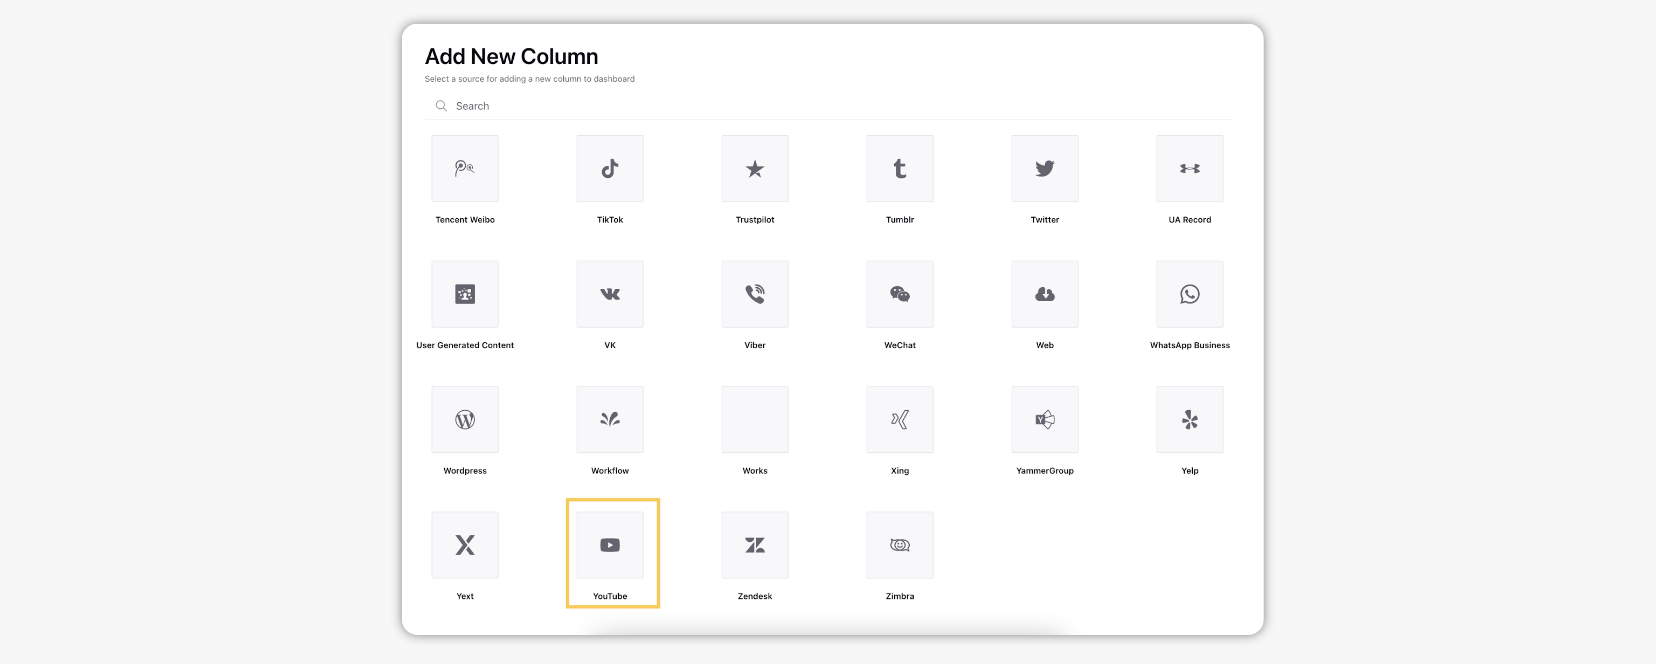
On the Add New Column window, search and select Youtube as a source for adding a new column.
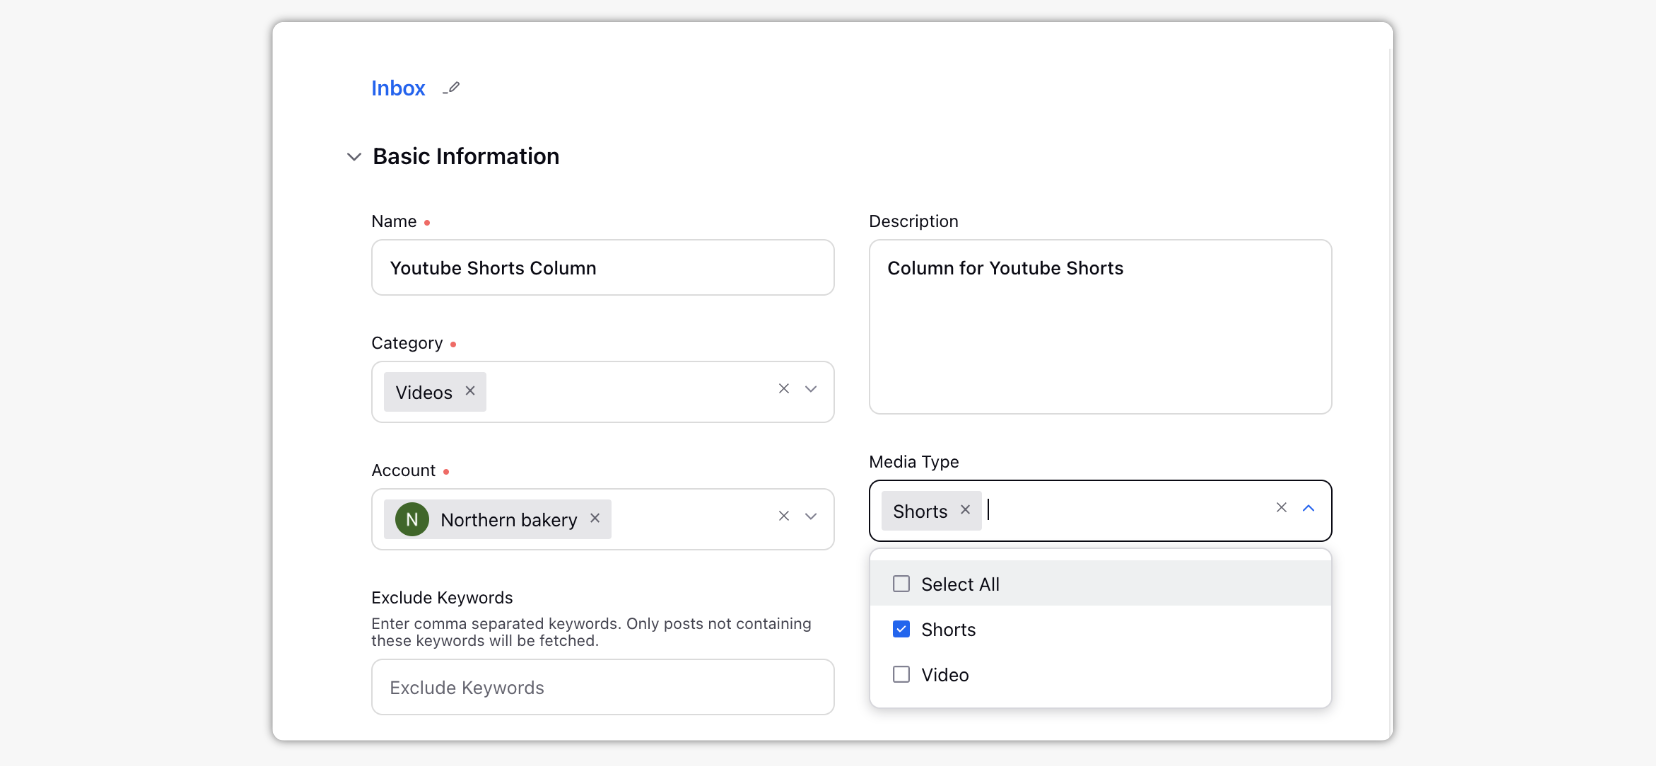
In the Add New YouTube Column window, select Inbox as Column Type.
Add the Name, Description, and add Accounts per your needs. Provide other Basic Information for your column. The preview of the column will render on the right side of the window.
Select Shorts as Media Type.
Enter Workflow Properties as desired. Workflow properties refer to the properties applied in Sprinklr, either automatically or manually, that determine the message's workflow status, user assignment, priority, Spam designation, and sentiment.
Provide Custom Properties as desired. Configuring additional properties, you can specify messages to include or exclude based on the properties that have been applied to the message.
To configure Youtube Shorts as condition in Rule Engine
Click the New Tab icon
In the top-right corner of the Rule Engine window, click Create New Rule.
On the New Rule window, enter a Name and Description for your rule.
Select Customer / Workspace from the Rule Scope drop-down menu and Inbound from the Context drop-down menu.
If you want, modify the values for Activation Date and Rule Execution Batch. To proceed with the default values, click Next.
In the Rule Builder window, click the Addition icon
icon and select Add Condition to set up specific scenarios that must be met for subsequent actions to execute. You can also chain multiple conditions together to refine the scenarios.
Under Conditions Applies To "The properties of outbound message", select Shorts as Message Subtype to create Autofill, Outbound, Pre-publishing, Post-publishing rules.
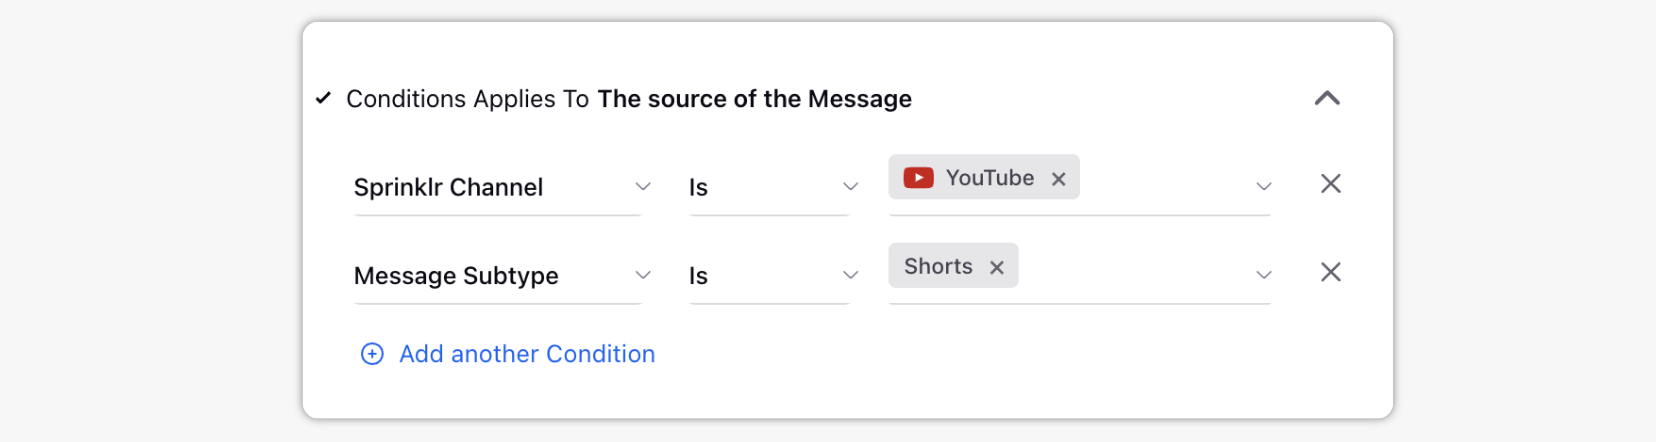
Click Add another Condition and select Account as a condition and select the desired account as its value.
To configure actions in a rule, click the Addition icon
Click Save in the bottom right corner to finalize the creation of your new Rule, or Save as Draft to create a draft version of your Rule.