Publish a post on YouTube
Updated
Sprinklr provides key publishing capabilities to enhance the content you publish on YouTube. This article covers the steps and guidelines on how to use these publishing capabilities to create best-performing content on YouTube.
Steps to Publish a Post on YouTube
Click the Publishing Options icon Space Quick Publish Icon in the top right of the navigation bar and select Create Post from the drop-down.
In the Create Post window, search and select the required YouTube Account in the Select Accounts field. You can also use Advanced Search to narrow your searches by a series of different filters.
Choose the desired Select Video to choose the media from the Media Uploader (or Upload Video to select media to upload from your device).
After adding the video, you can Add a Caption and Change Thumbnail for the video.
 Note: The capability to add or edit thumbnails is permission-controlled. You must have the Update Thumbnail permission.
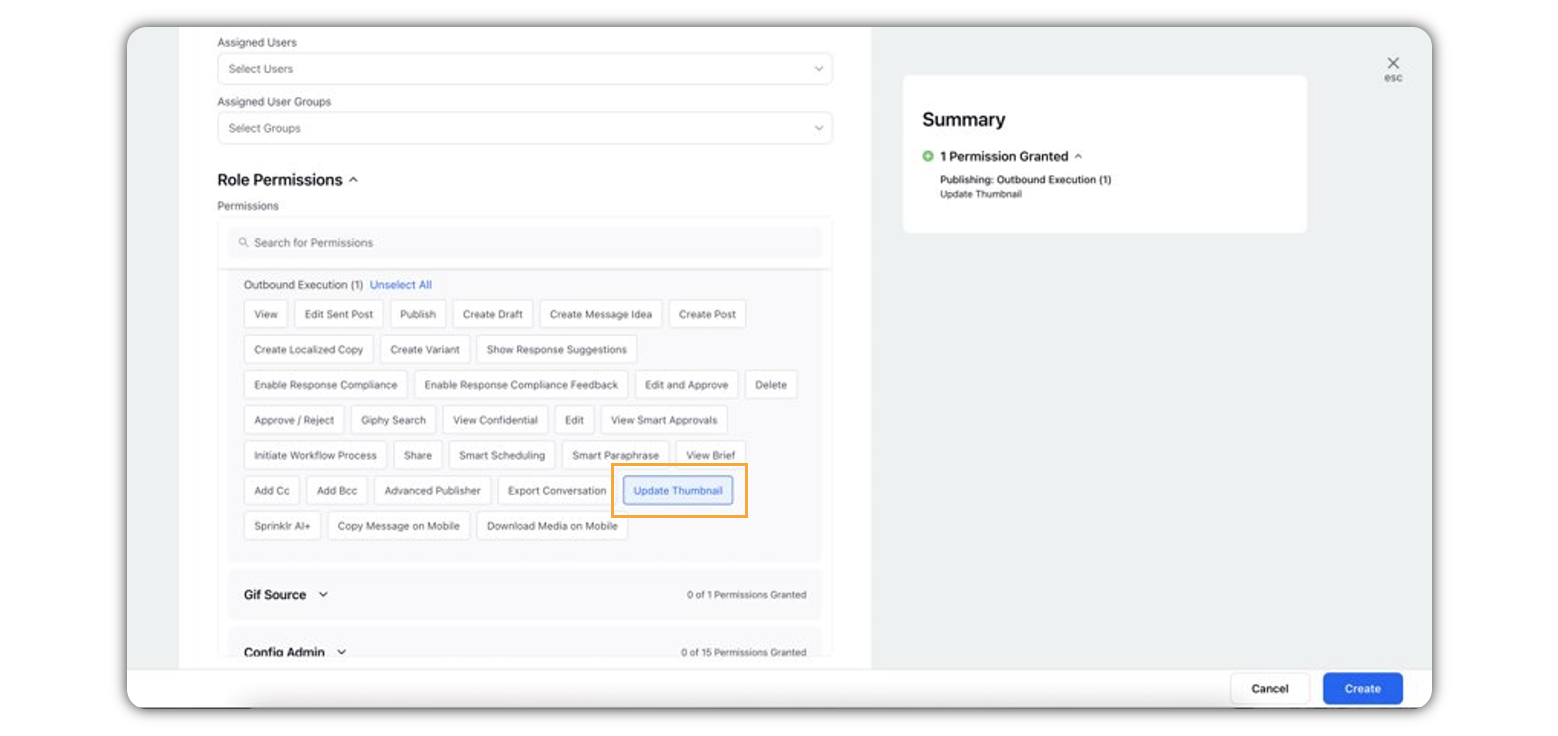
Enter a Video Title and Description for your selected video. Next, click the Emoji Picker icon from the Content box to open the emoji menu. Use the icons at the top to browse categories or search the emoji. Click your chosen emoji, and it'll be added to your description.
Select the Privacy for your video from the drop-down list to control where it appears and who can watch it. You can also set your privacy settings as default by clicking Set as Default.
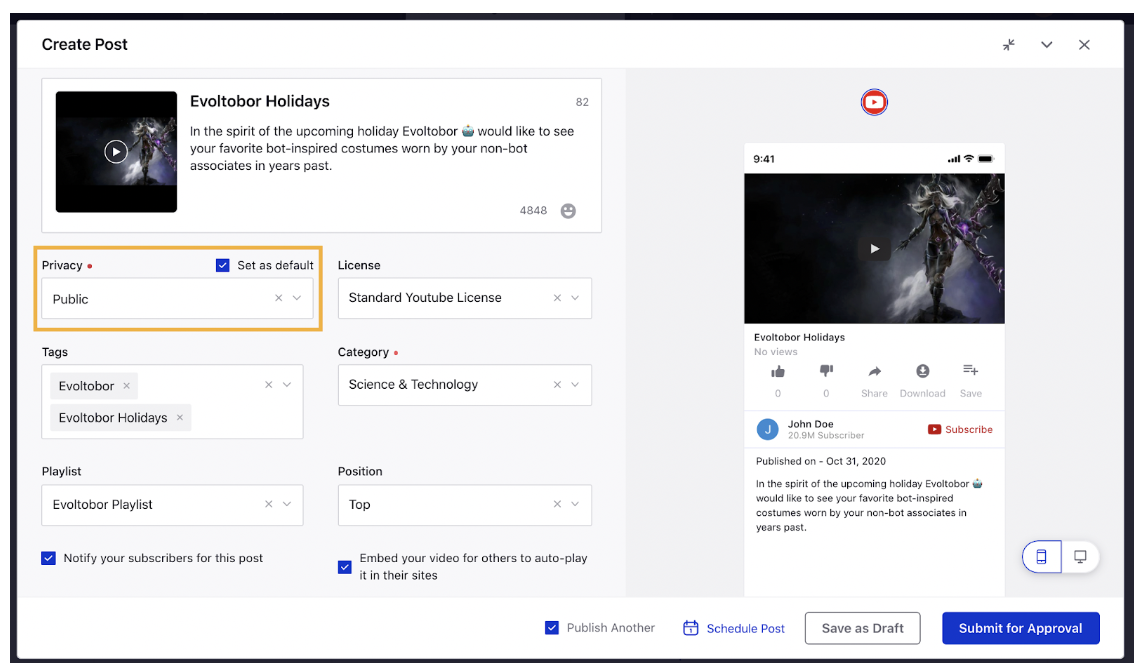
Choose the License type for the video from the drop-down menu.
Enter Tags for your YouTube video.
Select the video Category from the drop-down list. The categorization helps viewers find content, allows advertisers to refine their targeting and provides creators with common best practices. You can also set your category settings as default by clicking Set as Default.
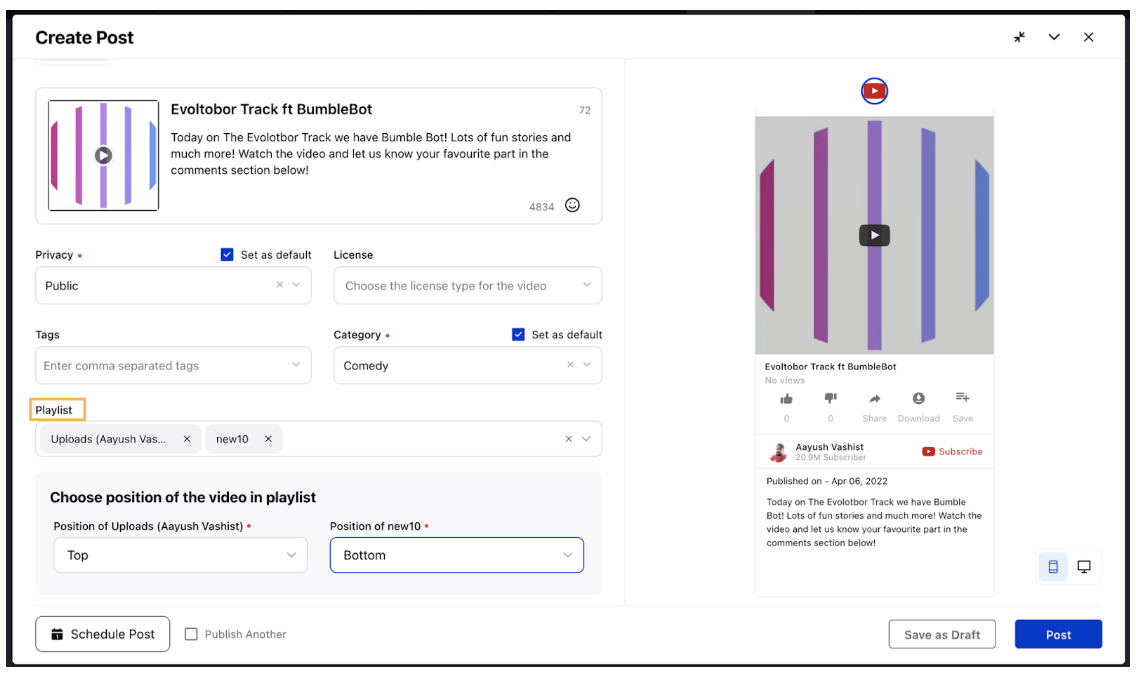
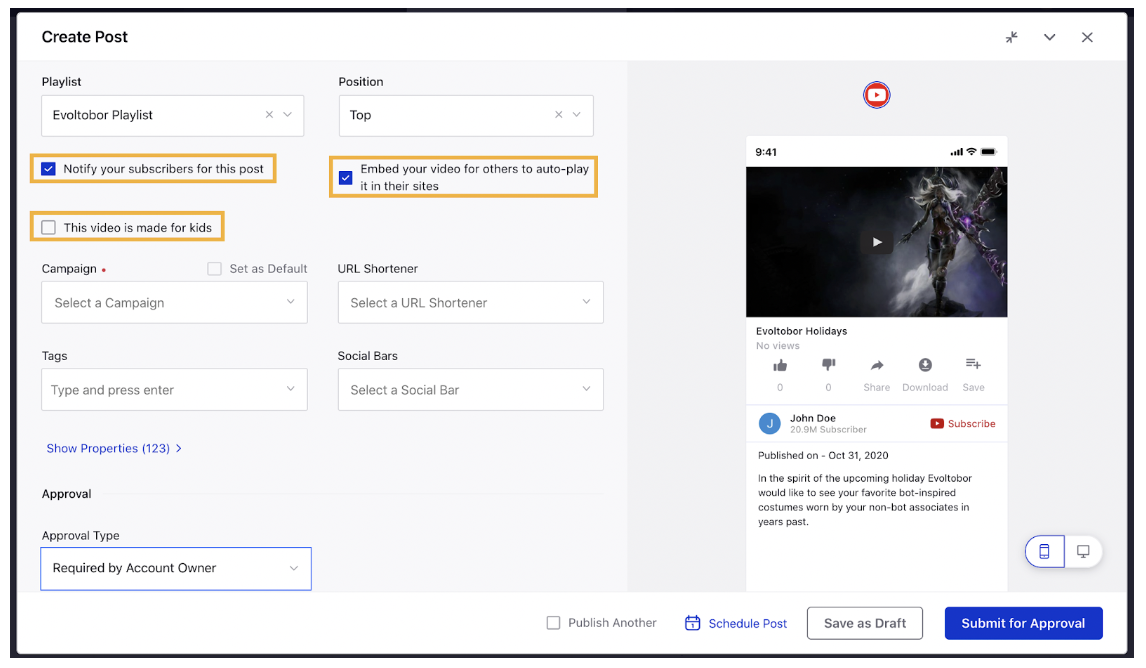
If required, select a Playlist from the available options. Note that you will be able to select multiple playlists at once for a single video.
 Note: If you'd like to publish YouTube videos to a specific playlist rather than publishing to a general YouTube account, Admins can add permissions to playlists in Account Settings. By permission, your YouTube playlists and individual playlists can be separated from their parent account, and users can choose to publish videos directly to the playlist.
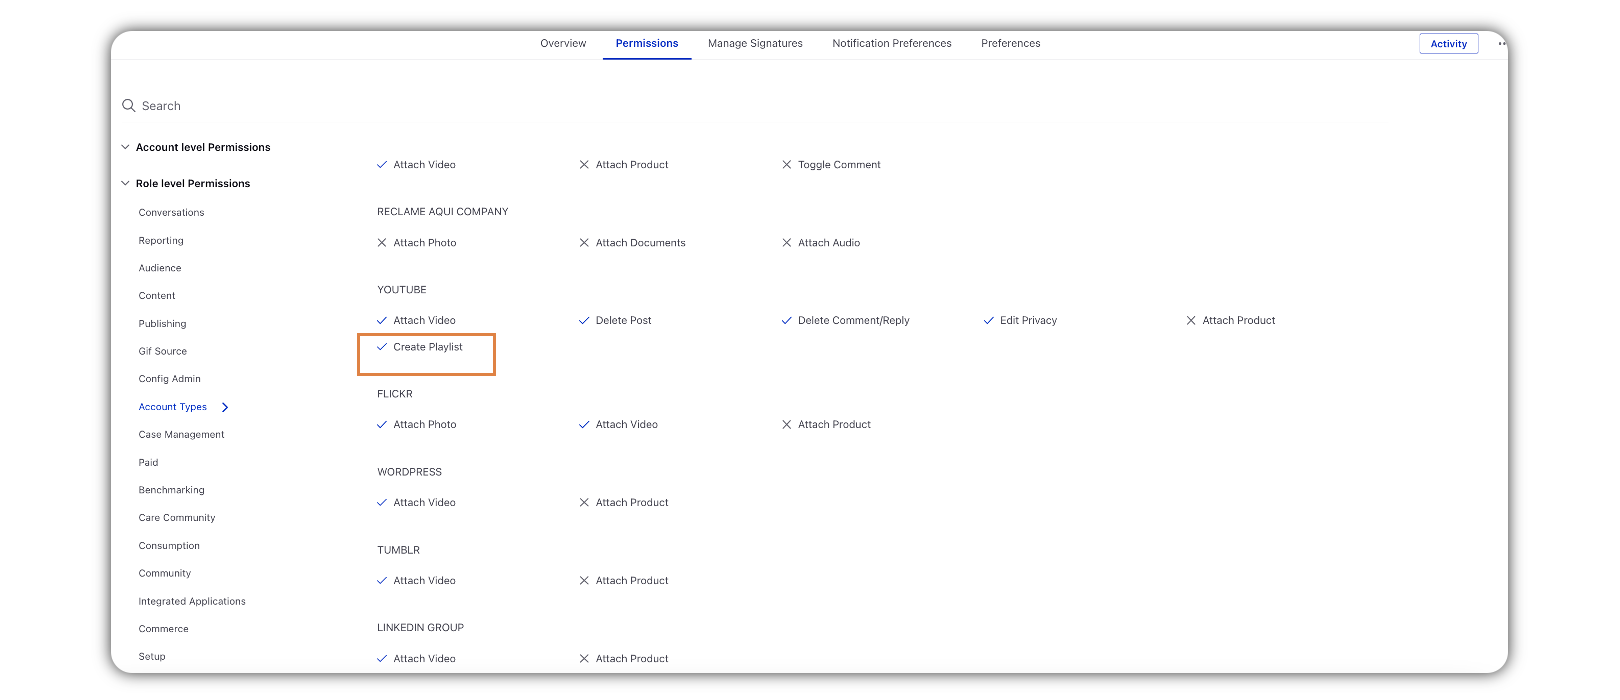
If you have selected the Playlist, then you are required to choose the Position where the video will be added to the playlist from the drop-down menu.
Note: You can only add a video in playlist if playlist Default video order is Manually sorted in YouTube. (Screenshot: Native environment)
Check the respective boxes to Notify your subscribers for this post or Embed your video for others to auto-play it in their sites or if your video is Made for kids.
Under First Comment, enter the comment(may include links, names, promotional content, etc.).

Select a campaign from the Campaign drop-down menu to associate your post with. You can also set your campaign as default by clicking Set as Default.
Select a sub-campaign from the Sub-Campaign drop-down menu to associate your post with.
You can select URL Shortener to shorten every link that you paste into your message. This helps you make the most of the character limit.
Select Tags and Social Bars from the drop-down menu respectively.
Apply desired Properties to the post.
Under Approval, set an Approval Type for your post. You can also add an Approval Note.
The preview of the post will render on the right pane. Also, you can click the Preview icon
in the bottom left corner if you have minimized the Create Post window.
Click Post in the bottom right corner to publish the post on the selected YouTube account immediately. If you are not ready to publish and want to save your post as a draft, click Save as Draft.
You can also schedule your post for a future date and time by clicking the
Schedule Post in the bottom right corner. Select the month, date, and time of publishing. Click Apply to save your changes.
To continue publishing the post, check the given Publish Another box at the bottom. we are here.