Create an X Video Post
Updated
Sprinklr gives you a smarter way to manage your presence on X. You can leverage your X account in the best possible way using Sprinklr's social publishing tool which provides you key publishing functionalities to enhance the content you publish to X. It allows you to easily schedule and publish content, target a specific audience, and engage with your followers on X.
Steps
Click the Publisher icon
in the top right corner of the top navigation bar and select Create Post. In the Create Post window, select your X Account where you want to publish. You can also use Advanced Search to narrow your searches by a series of different filters.
In the Create Post window, search and select the required X Account in the Select Accounts field. You can also use Advanced Search to narrow your searches by a series of various filters.
Note -
To maintain compliance with the X policies, the ability to select multiple X accounts at the same time in the Publisher is unavailable.
In addition, if you pick an account group with multiple X accounts, your post will not be published on X. You can only select one account for publishing at a time.
You can Pin your favorite and frequently used Account. You will not have to go through the hassle of adding the same account every time you publish a post. This will lead to quick publishing and increase efficiency.
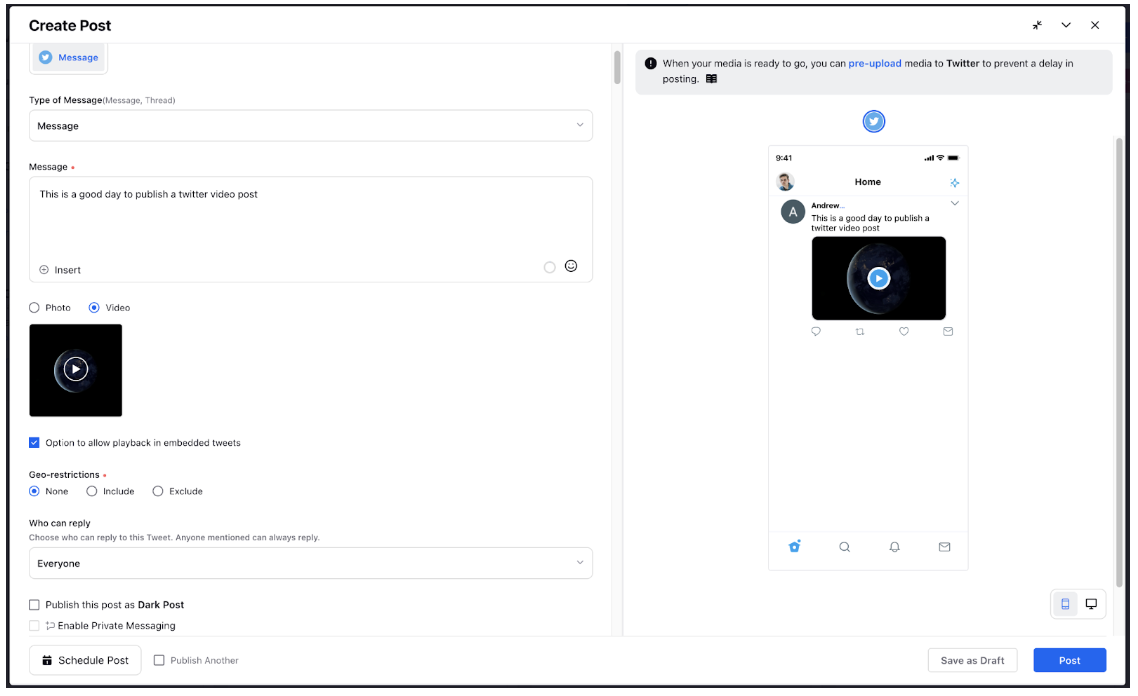
Click Video to add a video from the Media Uploader (or Upload Video to select media to upload from your device).
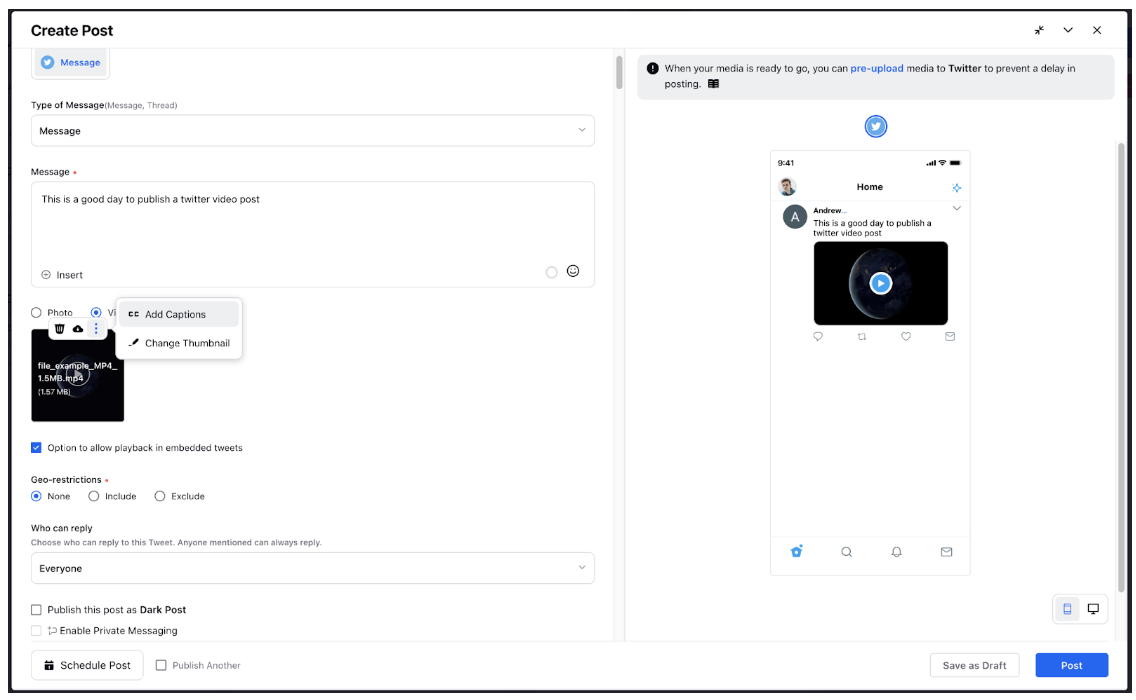
After adding the video, you can Add Caption and Change Thumbnail for the video.
Add Caption to the Video
After you've selected a video, click Add Caption at the bottom left corner of the video.
In the Add Video Captions pop-up window, click Add New Language and search your desired language from the drop-down menu.
You can upload the caption in the following format: SRT.
Maintain the character count of 109 characters for each group of the subtitles.
If the locale of the native account matches the language code with the subtitles, only then will the subtitles be visible to the user.
Next, click Add alongside the desired language to upload the subtitles for the video.
Click Save in the bottom right corner of the Add Video Captions pop-up window.
Change Thumbnail of the Video
 Note: The capability to add ot edit thumbnails is permission-controlled. You must have the Update Thumbnail permmission.
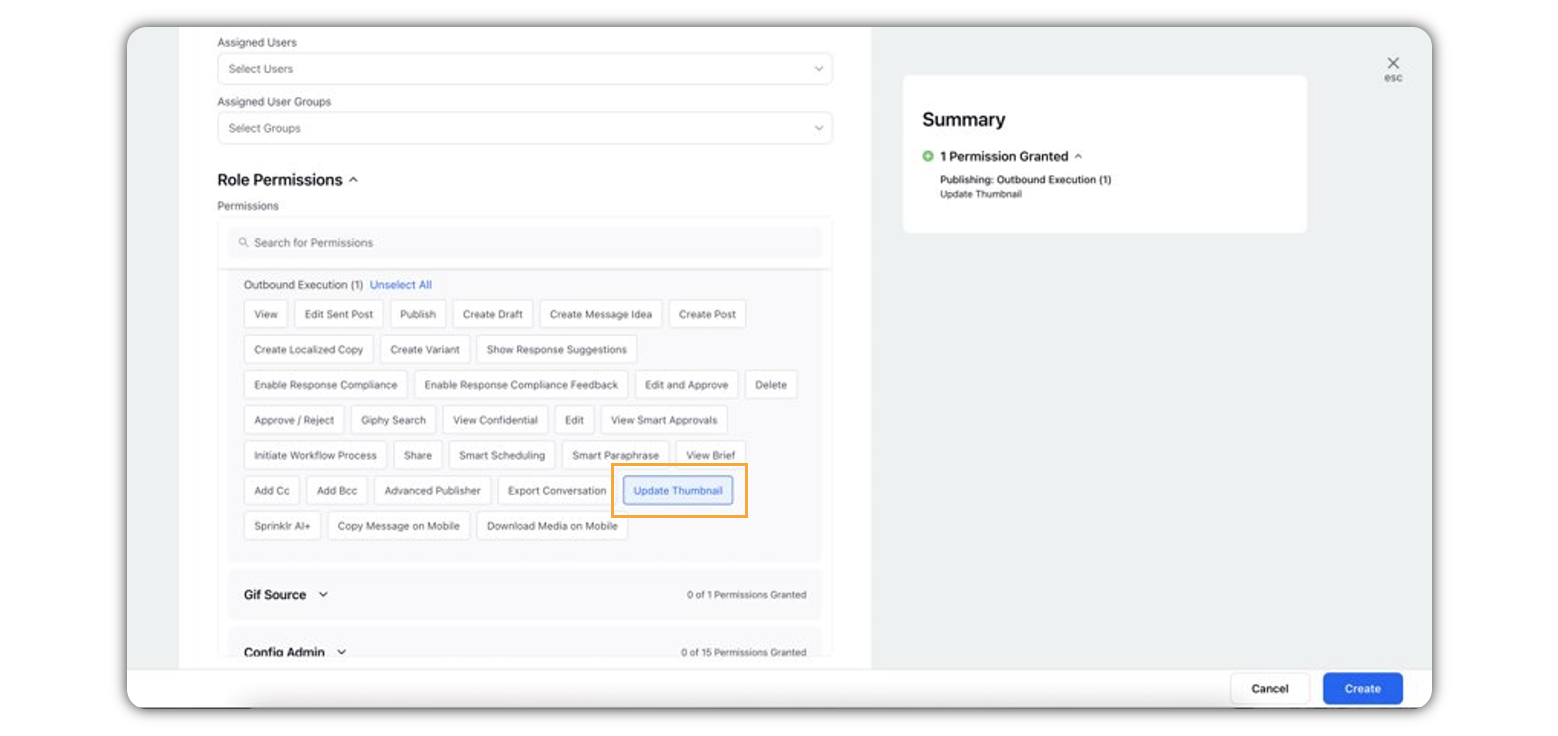
After you've selected a video, click Change Thumbnail at the bottom right corner of the video. Video thumbnails capability is available for the MP4 and MOV type media files.
In the Media Uploader window, you can also select a custom thumbnail while posting an X video.
While publishing a video to X, you can select from the pre-populated thumbnail images within the publisher, or you may use an image from the Digital Asset Manager, upload an image from your device, or use an image from the video to create a custom thumbnail image.
This capability includes both X Card and Non-Card based creative types.
Enter a Video Title and Description to your selected video. Next, click the Emoji Picker icon from the Content box to open the emoji menu. Use the icons at the top to browse categories, or search the emoji. Click your chosen emoji, and it'll be added to your description.
If you don't enter a Title and Description, the title and description of the video will be replaced with the name of the video.
Character Limits for Title and Description:
Title — 70 Characters
Description — 200 Characters
Check the box to enable the Option to allow playback in embedded tweets and Monetize this Video, respectively. For more information, check out Monetise Videos from Sprinklr . Embedded tweets allow for the videos to get embedded in the tweet when it is mentioned on a blog or article or any other site. An embedded tweet plays a video on the site itself. If you don't embed a tweet then clicking on the play will take the user to X and then play the video.
Under Geo-Restrictions, set the country restrictions by clicking None, Include and Exclude, respectively. Geo-restrictions help restrict the tweet based on geography. You can include/exclude a particular country and your tweet won't appear in that country. Based upon your set geo-restrictions, the video will be available in the specific countries.
You can choose Who can reply to this Tweet from the drop-down menu. For more information, see Choose who can reply to your Tweet.
You can also publish the post as a Dark Post and enable Private Messaging by checking the respective boxes.
When you check the Enable Private Messaging box, it adds a call to action button to your tweet which will allow anyone to click and open the message window within the native X account.
Whether anyone will be able to send Direct Message or not depends on the privacy permission of the account. To allow everyone to send you private messages, please enable the Allow message requests from everyone option from X Direct Message Settings.
If you add a media in the tweet, the CTA button won't appear.
Select a campaign from the Campaign drop-down menu to associate your post with. You can also set your campaign as default by clicking Set as Default. Select a sub-campaign from the Sub-Campaign drop-down menu to associate your post with.
Select Tags and Social Bars from the drop-down menu respectively and apply the respective custom properties to the post.
You can select URL Shortener to shorten every link that you paste in your message. This helps you make the most of the character limit.
Under Approval, set an Approval Type for your post. You can also add an Approval Note.
The preview of the post will render on the right pane. Also, you can click the Preview icon
in the bottom left corner if you have minimized the Create Post window.
Click Post in the bottom right corner to publish the post immediately. If you are not ready to publish and want to save your post as a draft, click Save as Draft.
You can also schedule your post for a future date and time by clicking the
Schedule Post in the bottom right corner. Select the month, date, and time of publishing. Click Apply to save your changes.
To continue publishing the post, check the given Publish Another box in the bottom.