Create and Manage Outbound Change Sets
Updated
The Outbound Change Set helps in sending configuration changes from one environment to another. For instance, you create/update the configurations in an environment, and now you want to push it to another connected environment to do it through an Outbound Change Set.
An Outbound Change Set consists of a list of objects across entities that a user wants to send from one environment to another connected environment. Sprinklr system automatically selects and adds the dependent objects to an outbound change set during creation.
As soon as the Outbound Change Set is successfully sent, you can find the same under the Inbound Change Set of the destination environment.
Details Captured in the Outbound Change Sets Tab
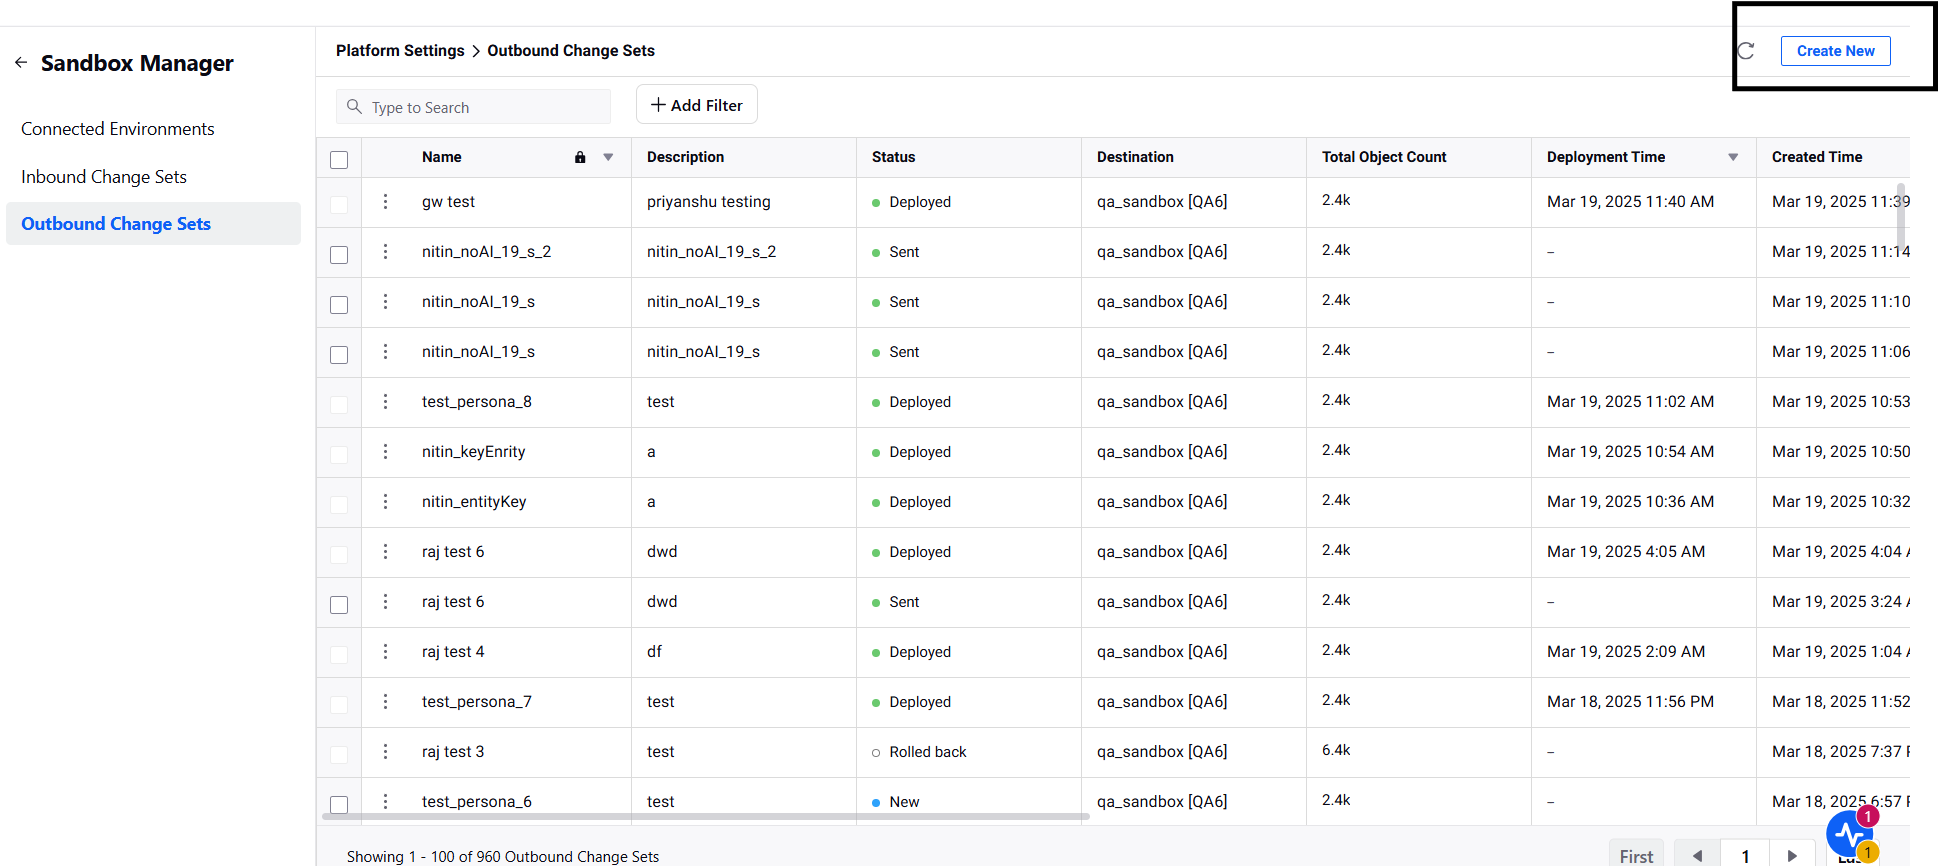
Columns | Description |
Name | The name of the Changeset |
Description | Description of the Changeset |
Status | Status of the changeset. |
Destination | Destination environment of the changeset. |
Total Object Count | The total number of objects in the changeset. |
Deployment Time | The time of deployment of the changeset in the destination environment. |
Created Time | The time of the creation of the changeset. |
Created By | Details of the user who created the changeset. |
Tags | View applied tags on the changeset. |
To Create an Outbound Change Set
Click the New Tab icon
. Under the Governance Console, click All Settings within Platform Setup.
On the Platform Settings window, click Sandbox Manager from the left pane and select Outbound Change Sets in the right pane.
On the Outbound Change Sets window, click Create New in the top right corner.

On the Outbound Change Sets window, fill in the required details.
Click Save in the bottom right corner.
Outbound Change Set — Field Descriptions
Term | Description |
Name | Enter a unique name for your outbound changeset. |
Description | Enter the description of the outbound changeset. |
Tags | Either create a new tag or add an existing tag from the drop-down menu. |
Update if exist | New object(s) get created and existing object(s) get updated. |
Skip if exists | Only new object(s) will be created. Any existing object(s) with same ID in the destination will be skipped during deployment. |
User selected updates only | Check the circle if Only new object(s) get created and user selected object(s) get updated. Any dependent entity, if it exists, gets skipped in the destination. |
Destination | Select the destination environment from the drop-down menu. |
Entities to Transfer | Select the desired entities to transfer from the drop-down menu. If you select Knowledge Base, you can deploy articles with content variables, content blocks, content templates, article tags, and language settings across production servers, ensuring a smooth workflow without the loss of functionality. |
Filters | Set the filter based on the properties of the entity. You can filter an entity based on the following filters:
|
Preview of Objects | Preview and select the entities which you wish to transfer. You will be able to view all the entities that match the filter properties. Select the desired entities to transfer from your current environment to the destination environment. |
Note: You can specify the Changeset Entity Action for each individual entity. For more information, refer to User Input for Individual Entity Actions.
To Manage Outbound Change Sets
Click the New Tab icon
. Under the Platform Modules, click All Settings.
On the Platform Settings window, click Sandbox Manager from the left pane and select Outbound Change Sets in the right pane.
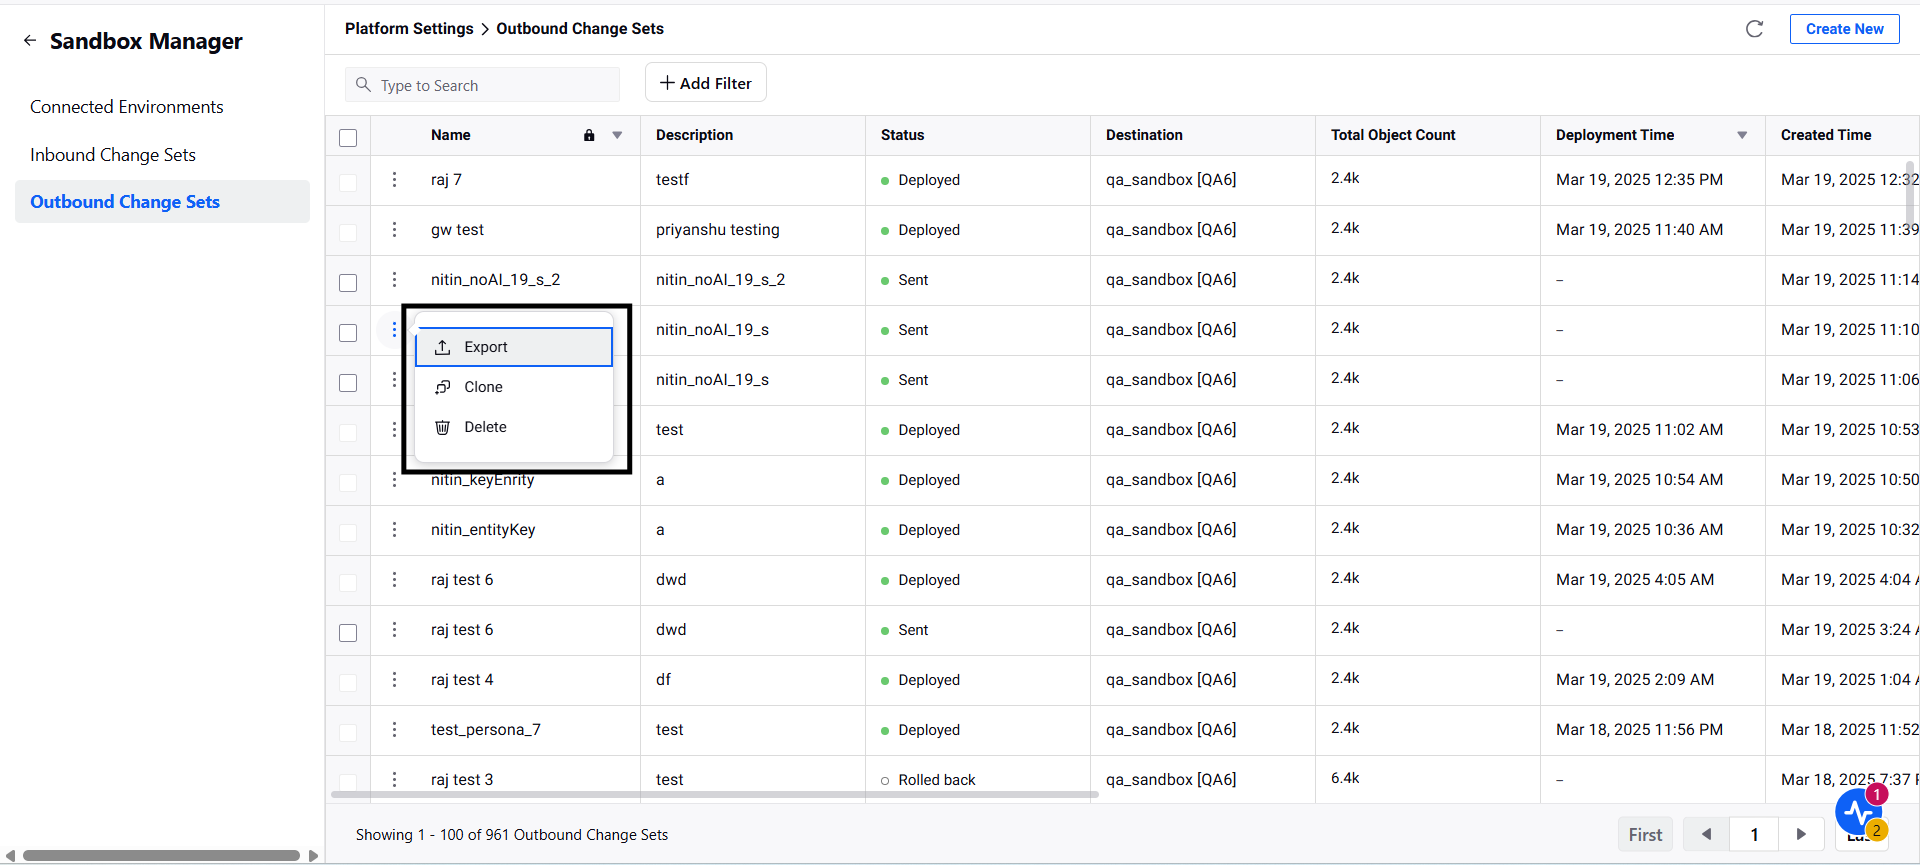
On the Outbound Change Sets window, hover over the three dots corresponding to the outbound change set
. The following options are available:
Delete — Select this option to delete a failed outbound change set.
Export — Select this option to export the details of the objects that are included in the outbound change set.
Clone — Select this option to clone the outbound change set.

You can search for and narrow down on the required Changeset using the Filter option. Filters are available for all the columns on the Outbound Change Sets page.
