Opt In Template for Recurring Notifications
Updated
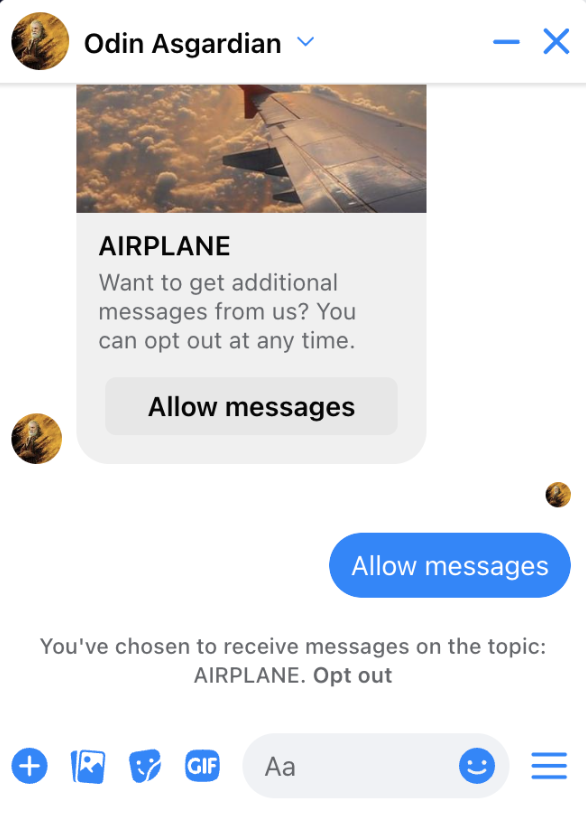
You can create Opt-In templates for requesting permission from individuals to send one marketing message per 24-hour period on Facebook Messenger. These recurring notifications enable you to communicate with users outside the standard messaging window, but only after they have given explicit permission to do so. These messages serve as a means to nurture relationships with individuals who have expressed interest in your business. It's important to note that people can opt out at any time, maintaining their control over communication preferences.
You can only send opt-in requests for marketing messages within the standard messaging window. Additionally, a user's decision to opt-in to marketing messages does not trigger the standard messaging window to open.

To Create an Opt In Template in Digital Asset Manager
Click the New Tab icon. Under the Sprinklr Social tab, click Assets within Engage.
In the top right corner of the Asset Management window, click Create Asset and select Omni Chat Templates from the dropdown.
On the Create New Asset window, enter a Name and optional Description for your asset under the Basic Details section.
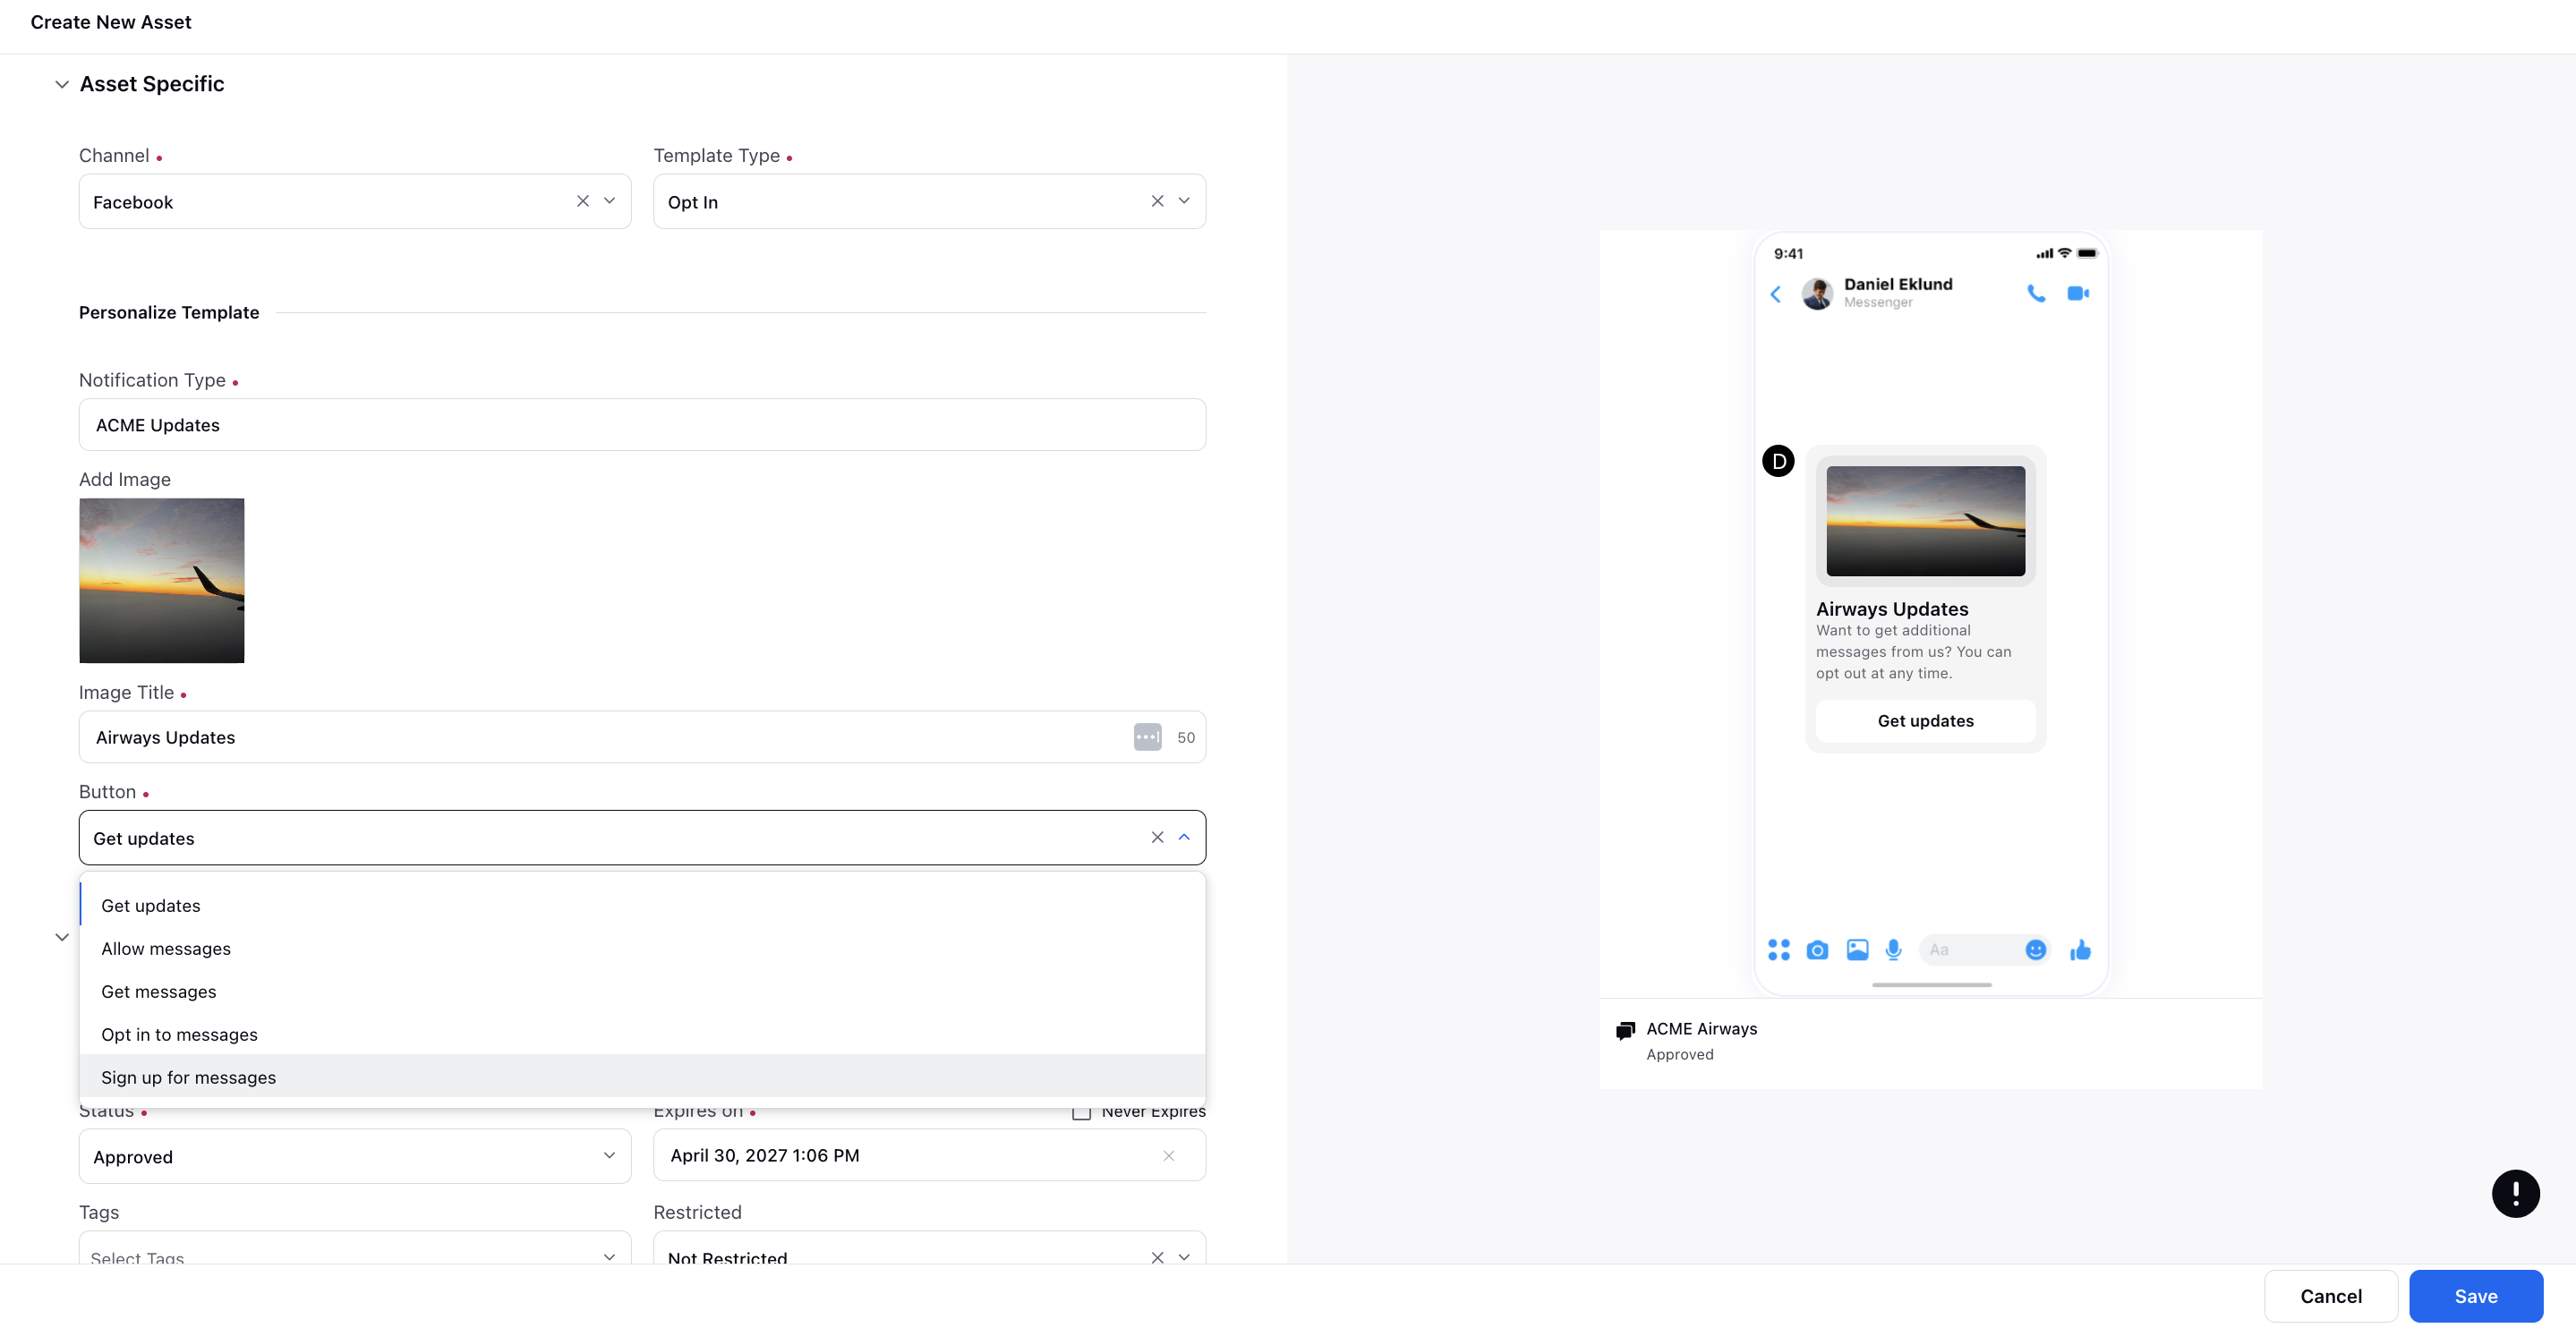
Under the Asset Specific section, select Facebook from the Channel dropdown and Opt In from the Template Type dropdown.
Under the Personalize Template section, add the desired Notification Type. This will be internally utilized to send templates via the Rule Engine.
Furthermore, add the desired Image, Image Title, and Button from the dropdown menu.

Add Asset Details and Properties per your needs.
Under Asset Sharing, select Workspace(s) and Users/Users Group(s) you want to share this asset with. You can also check the box alongside Visible in all workspaces to share the asset with all workspaces.
Click Save in the bottom right corner.
To Send an Opt In Template via Rule Engine
Create an Inbound rule.
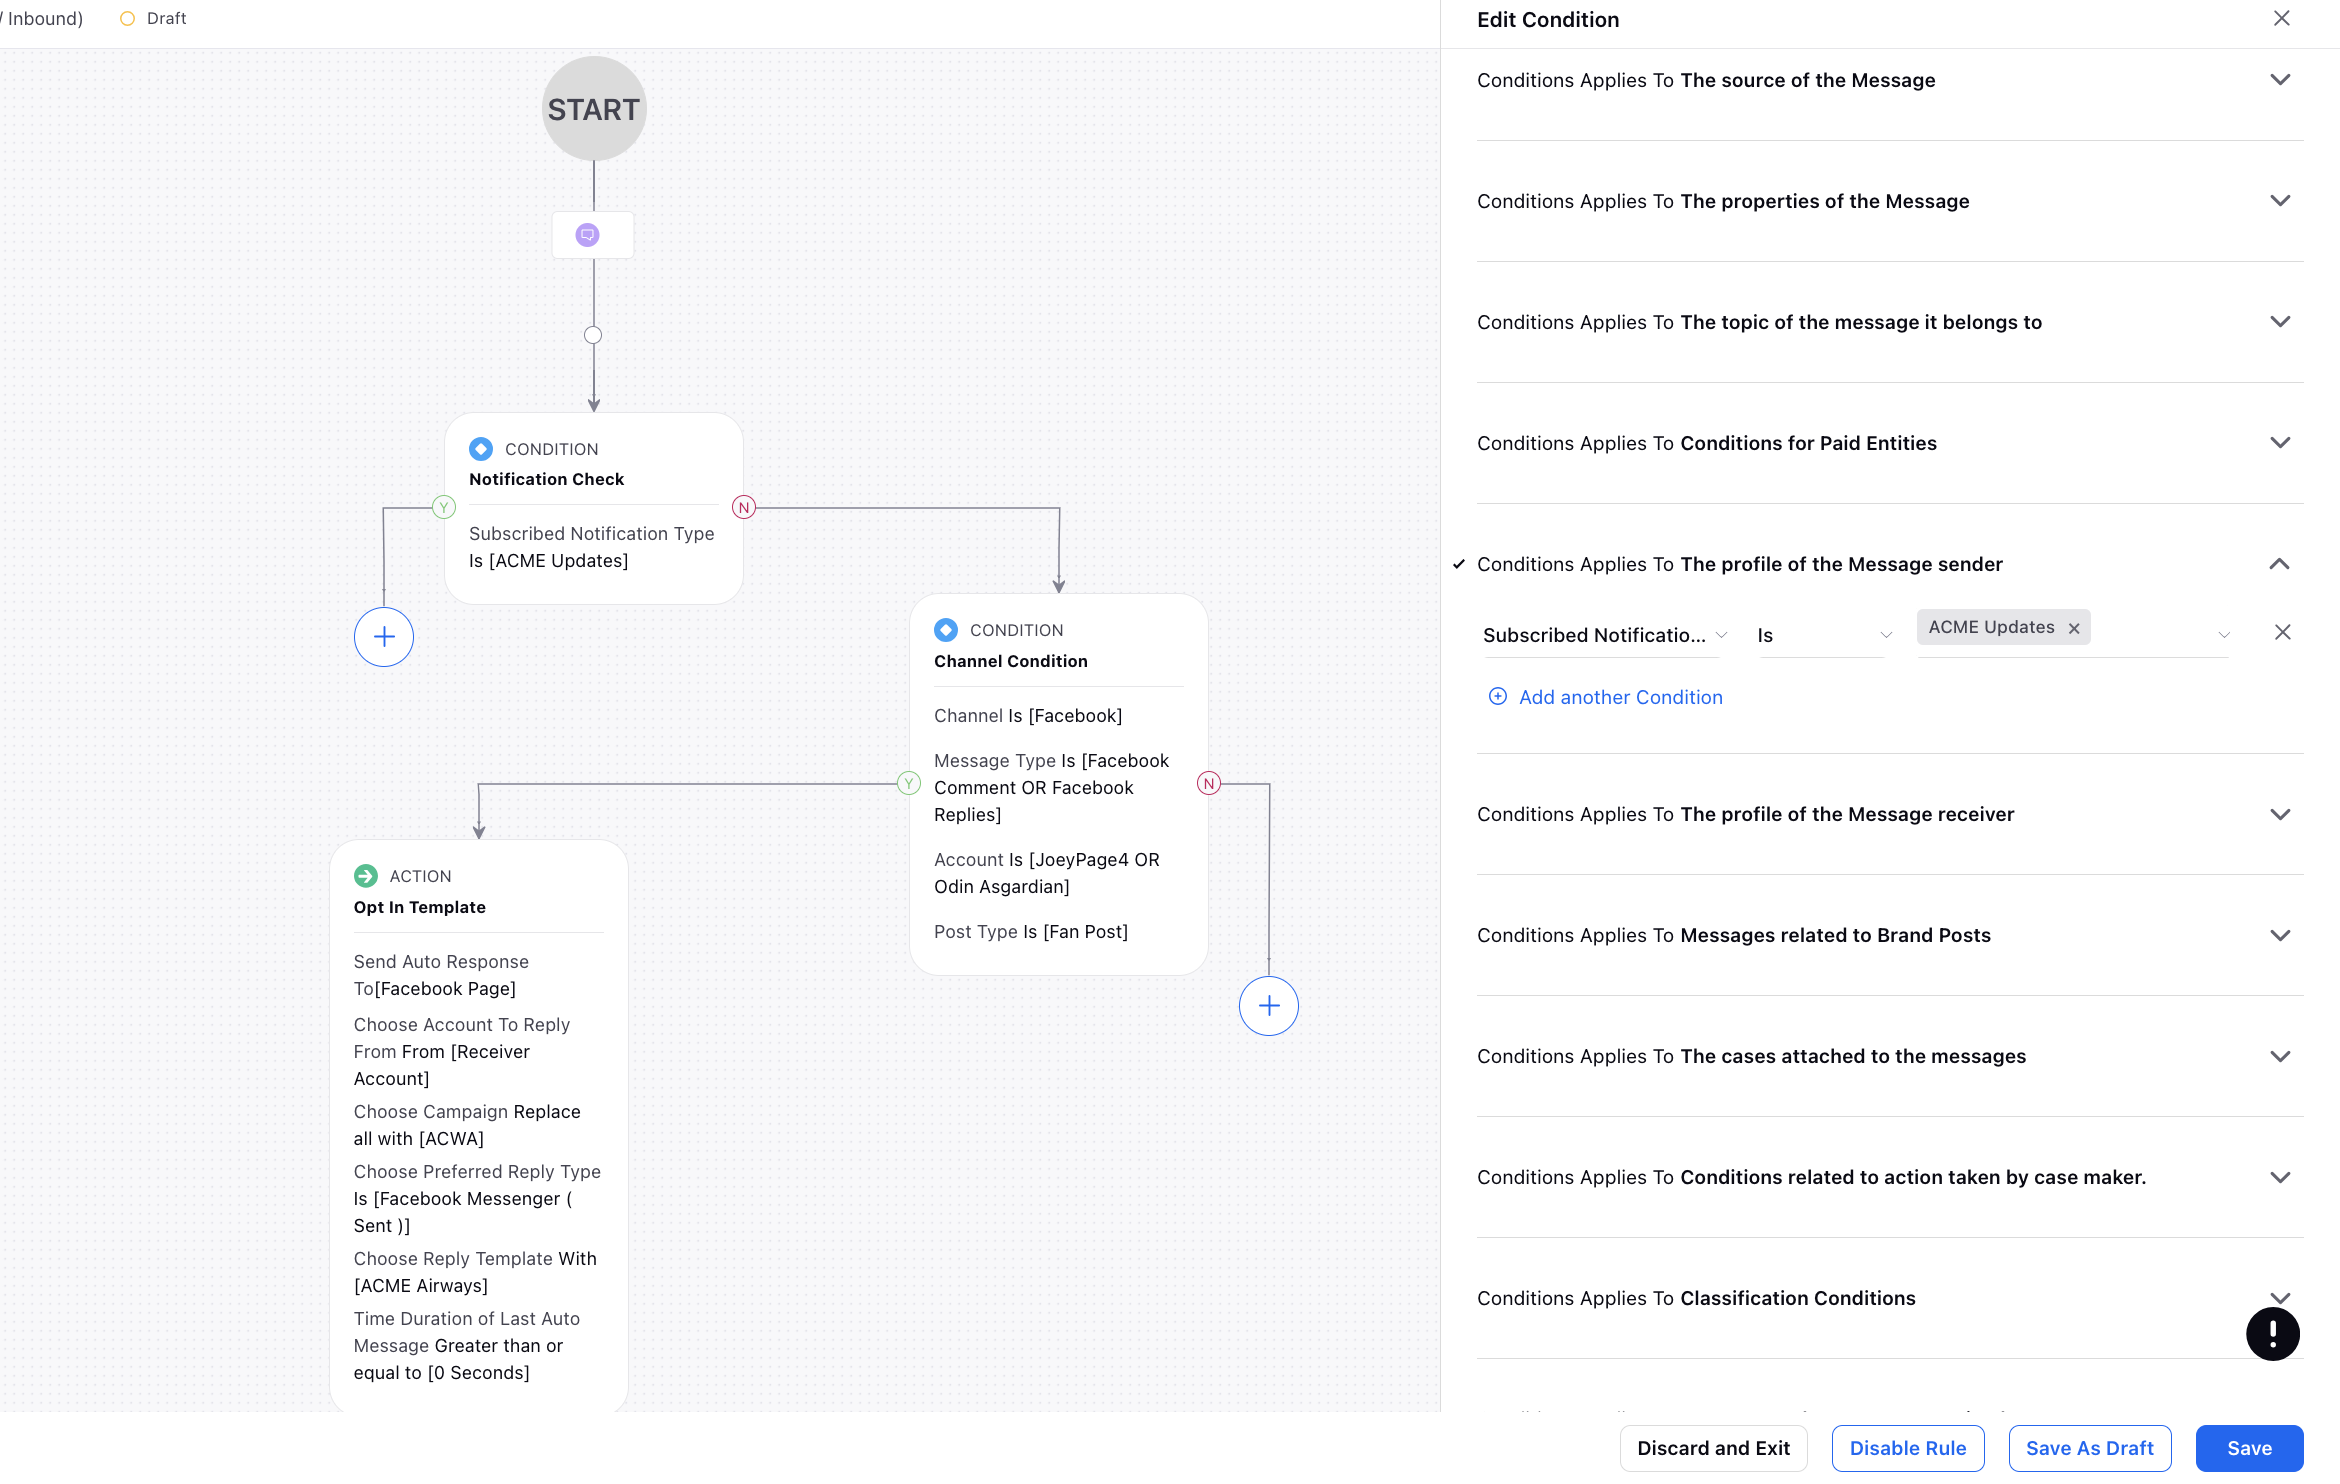
Under Conditions Applies To The profile of the Message sender, choose the Subscribed Notification Type condition as the desired opt-in template. This allows you to check if the template has already been sent or not. The Notification Type that you set while creating a template will appear in the dropdown menu.

Now, under the "No" branch of condition, add another set of conditions as desired. For example, you can select the desired message type or account.
Next, on the "Yes" branch, under Actions To Auto respond to a message, add the Send Auto Response To action as "Facebook Page."
Choose the Account To Reply From as "Receiver Account" or any desired account. This is the account from which the response will be sent.
Specify the Campaign to associate with this auto-response action and choose "Facebook Messenger (Sent)" as the Preferred Reply Type. This ensures that the response is sent via Facebook Messenger.
Choose the Reply Template as the Opt-In template that you previously created in the Digital Asset Manager (DAM).
Select the Time Duration of Last Auto Message as desired.

Click Save at the bottom.