Viewing Sentiment on Outbound Posts and Inbound Messages
Updated
Overview
The sentiment feature helps you understand how your brand is resonating with your audience, offering an opportunity to improve the overall user experience. It provides insights into public perception by showing how people feel about your brand. In cases where language may be ambiguous, such as slang or sarcasm, sentiment can be adjusted manually. A sentiment icon indicates whether a message is categorized as Positive, Neutral, or Negative.
Sprinklr's Sentiment AI Models are built to assess the emotional tone of individual messages, such as reviews, tweets, or news articles. These models analyze each text to determine whether the sentiment is Positive, Negative, or Neutral. This sentiment analysis provides businesses with valuable insights into how their brand is perceived and how audiences are engaging with it.
![]() Note: The AI features in Distributed platform are identical to those in the corresponding enterprise modules and share a similarly designed user interface.
Note: The AI features in Distributed platform are identical to those in the corresponding enterprise modules and share a similarly designed user interface.
Steps to Grab Sentiment of Outbound Posts
Navigate to Reporting on the main menu and select Reporting Insights.
Click on
icon on the top left corner and select your Dashboard from the list.
Click on Add Widget.
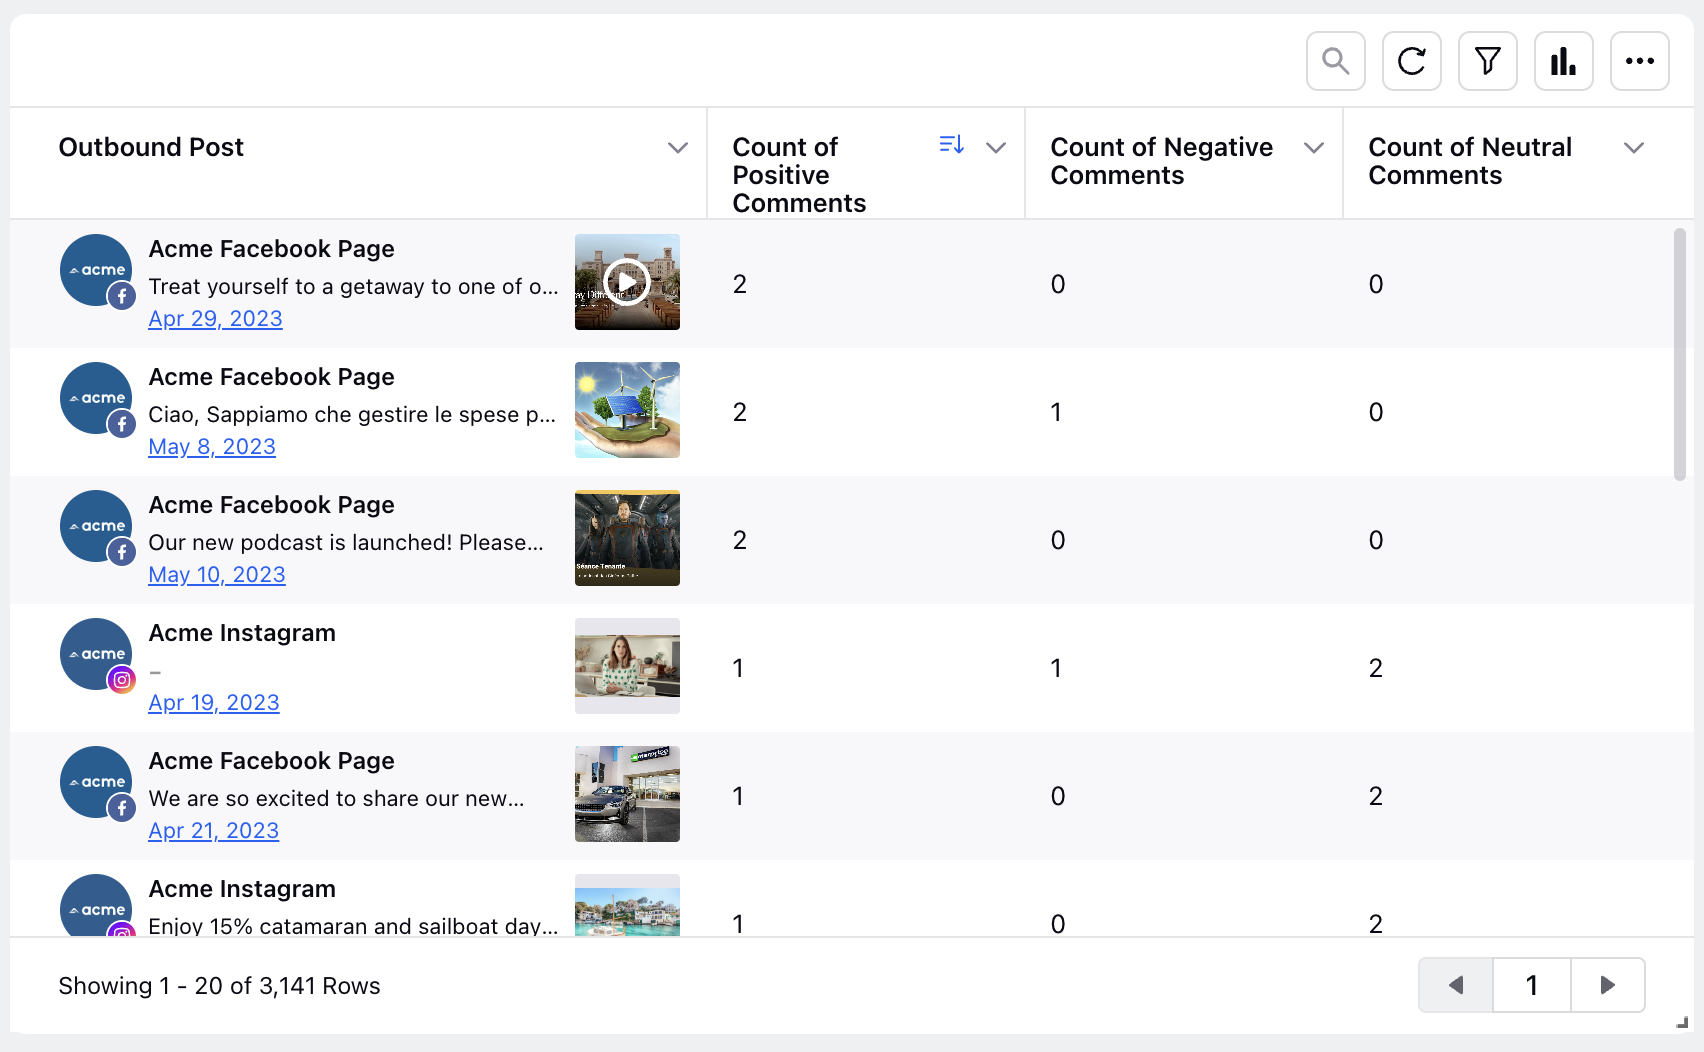
Select Social Analytics as the widget type, and Outbound Post as the Category/Value.
Select and add Count of Positive Comments, Count of Negative Comments, Count of Neutral Comments as a Metric.
Add any additional Metrics or Dimensions to the widget and click Save.
Sentiment of Outbound posts will now be shown in the Dashboard.
 Note: You should always be aware of obstacles created by language elements like sarcasm that could affect sentiment analysis.
Steps to Display Sentiment on Inbound Messages
Navigate to Reporting on the main menu and select Reporting Insights.
Click on
icon from the top left corner and select your Dashboard from the list.
Click on Add Widget.
Select Inbound Analytics as the widget type
Select and add Sentiment, Volume of Fan Messages Replied, %Volume of Fan Messages Replied Within SLA, Volume of Public Fan Messages Replied as a Metric.
Add any additional Metrics or Dimensions to the widget and click Save.
Sentiment of Inbound Messages will now be shown in the dashboard.