Set Priority to your Requests
Updated
Create a request rule to automatically categorize your requests based on the type of request. This way you can ensure that all the high priority requests are never deprioritised. You can also group requests based on priority or filter them as necessary in production dashboards. Once the rule is enabled, all the requests satisfying the condition will have the selected action initiated on it.
Example Use case shown below: The rule categorizes the requests into high, medium and low priority based on the types of campaign request - Rapid Response, Executive Sponsorship, Regular & Adhoc.
Prerequisite
Creating the Custom Field
Create the Request Priority custom field ( All settings → Custom Fields ), with asset set as Request per the context. This will be a Picklist field.
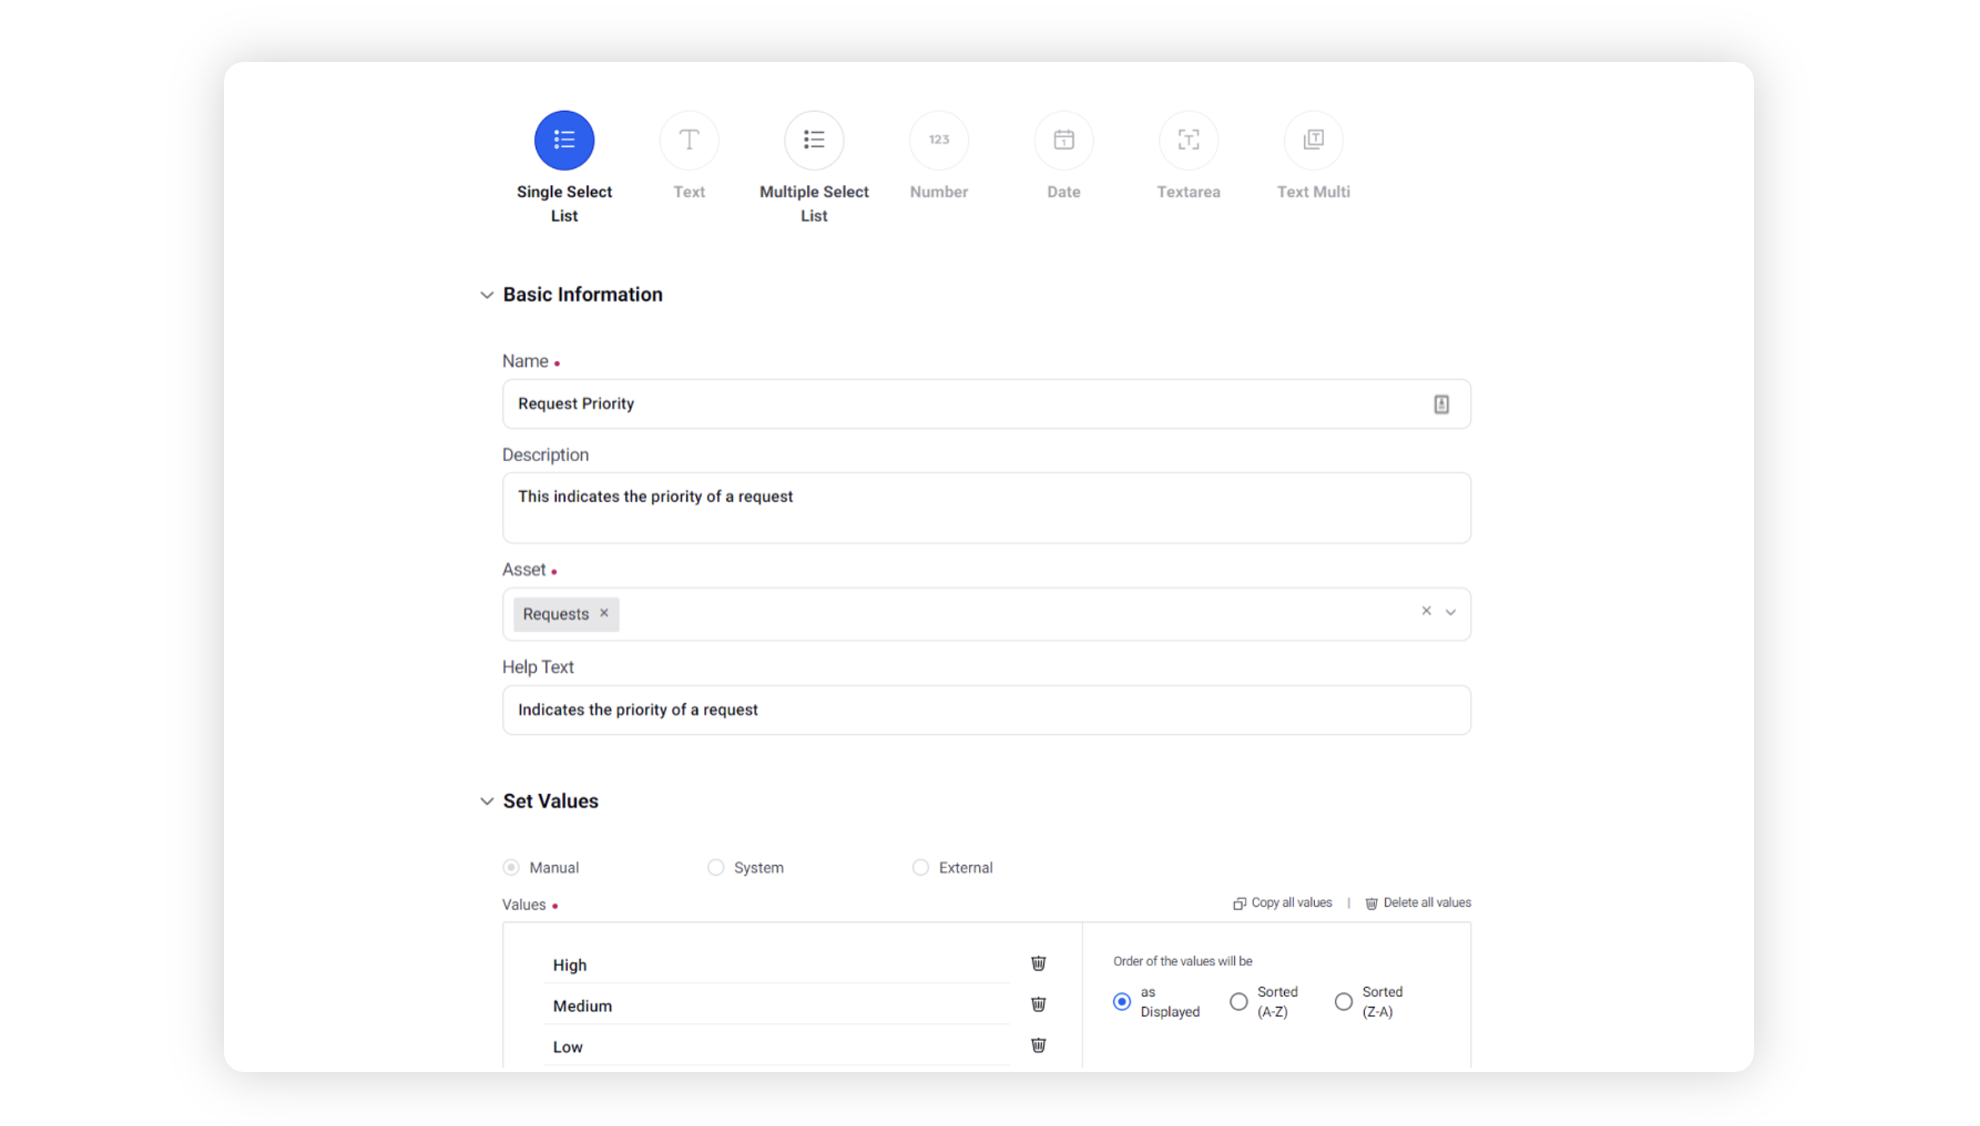
Under the Set Values section, you can define the priority values. Some standard values you can include are - High, Medium & Low.
Define any other aspects of your custom field and click Save. This should enable you to use the custom field in the respective workflows.
Creating the Request Form
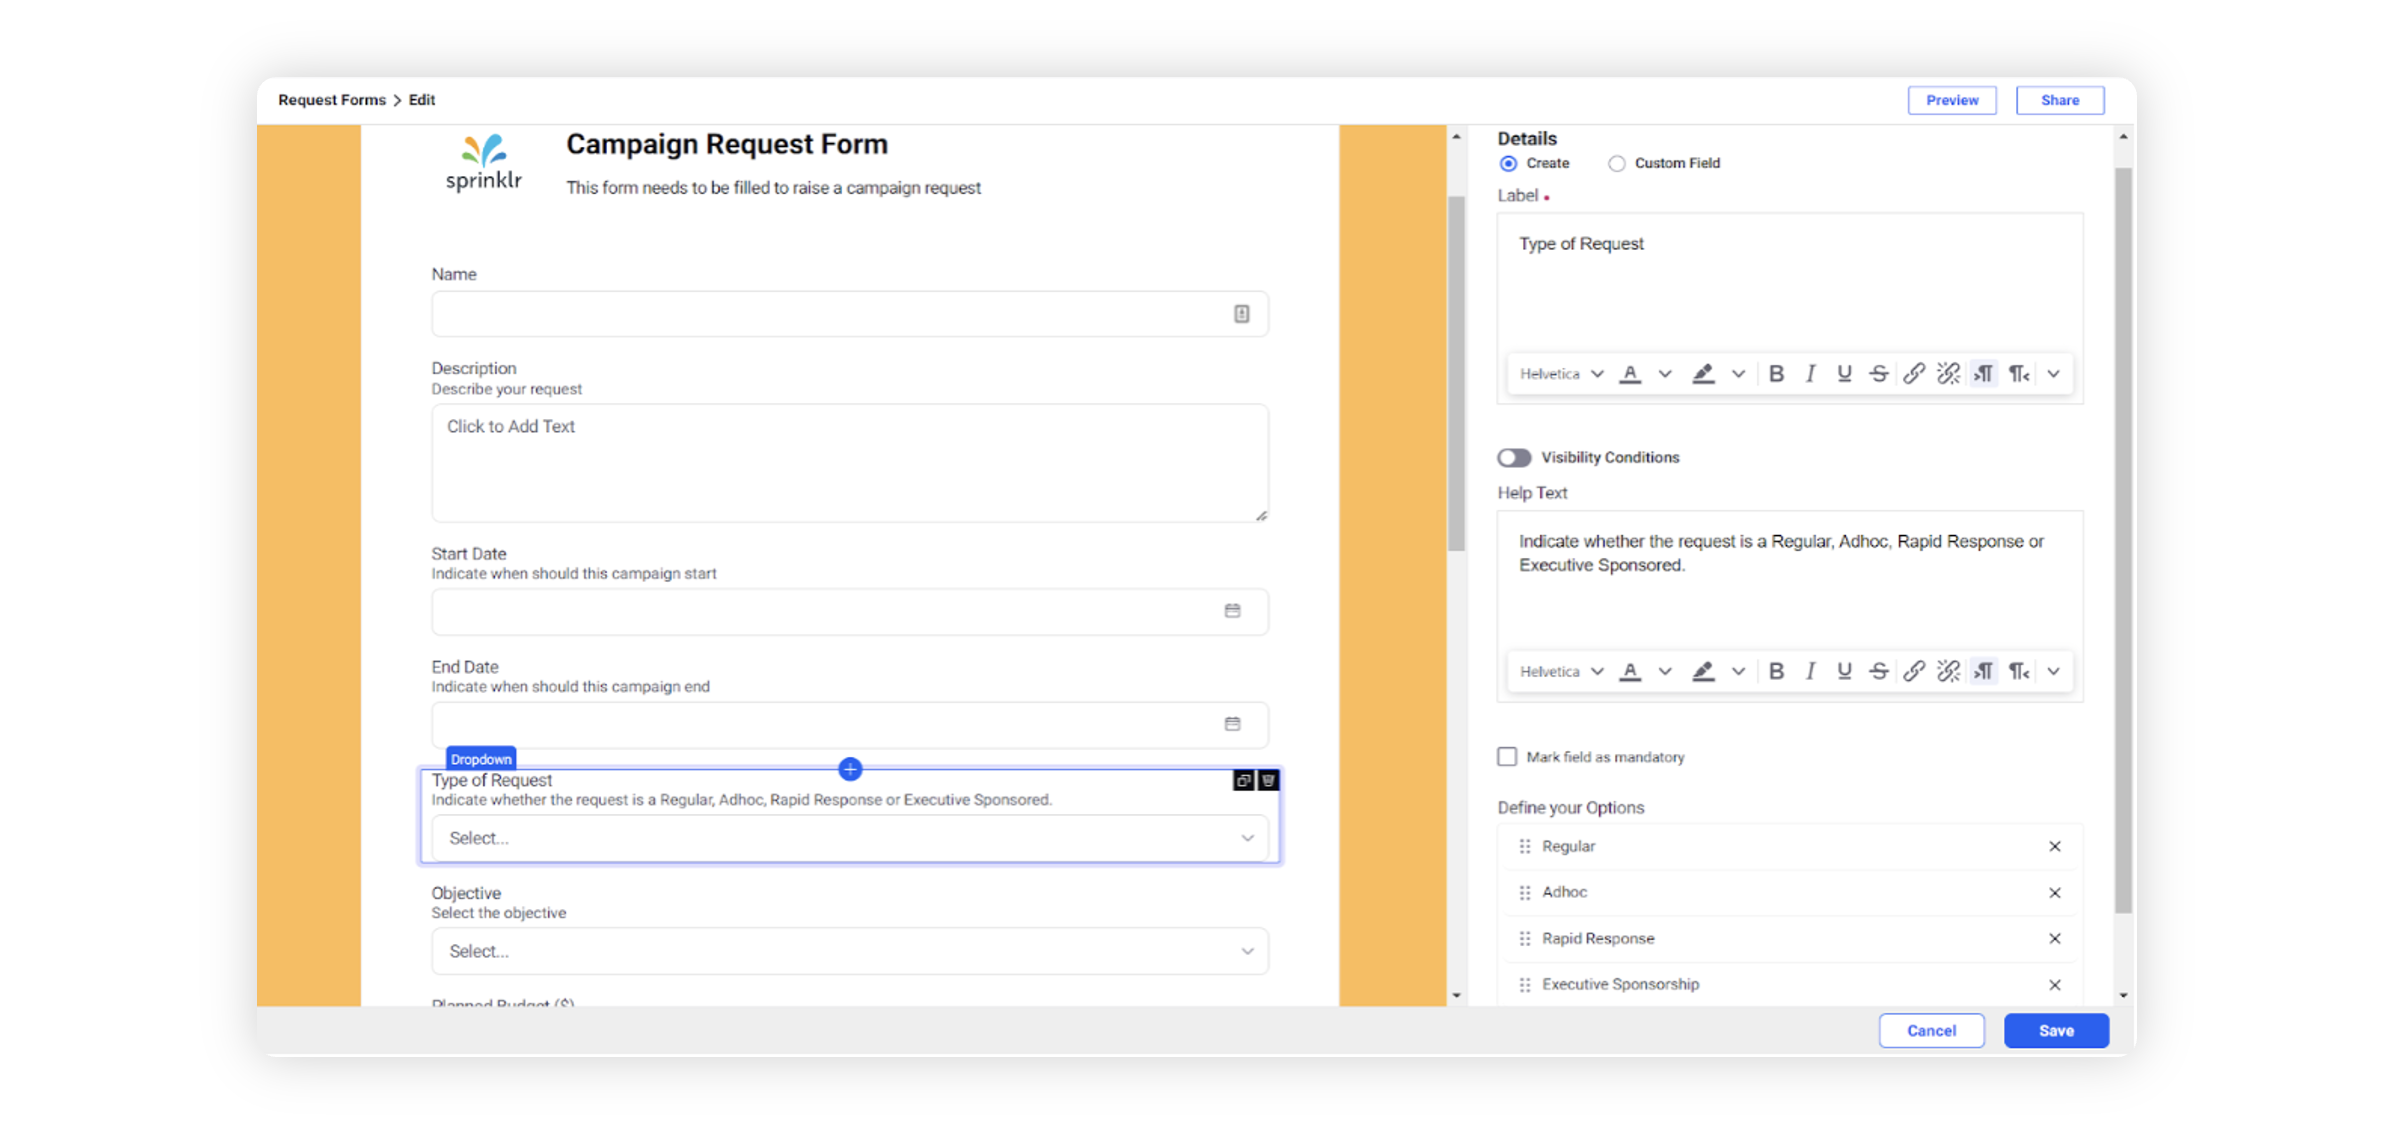
While defining your request form, make sure to add a “request Type” field to indicate the type of request. Then we can define a logic in the rule to map values between the type of request to the priority of request. The types of requests defined here are Regular, Ad Hoc, Rapid response & Executive Sponsorship.
How to set up
Click the New Tab icon. Under Governance, click Manage Rules within Platform Setup.
In the top right corner of the Rule Engine window, click Create New Rule. For more information, see Create a Rule.
On the New Rule window, fill in the required details. Make sure you select Request from the Context dropdown.
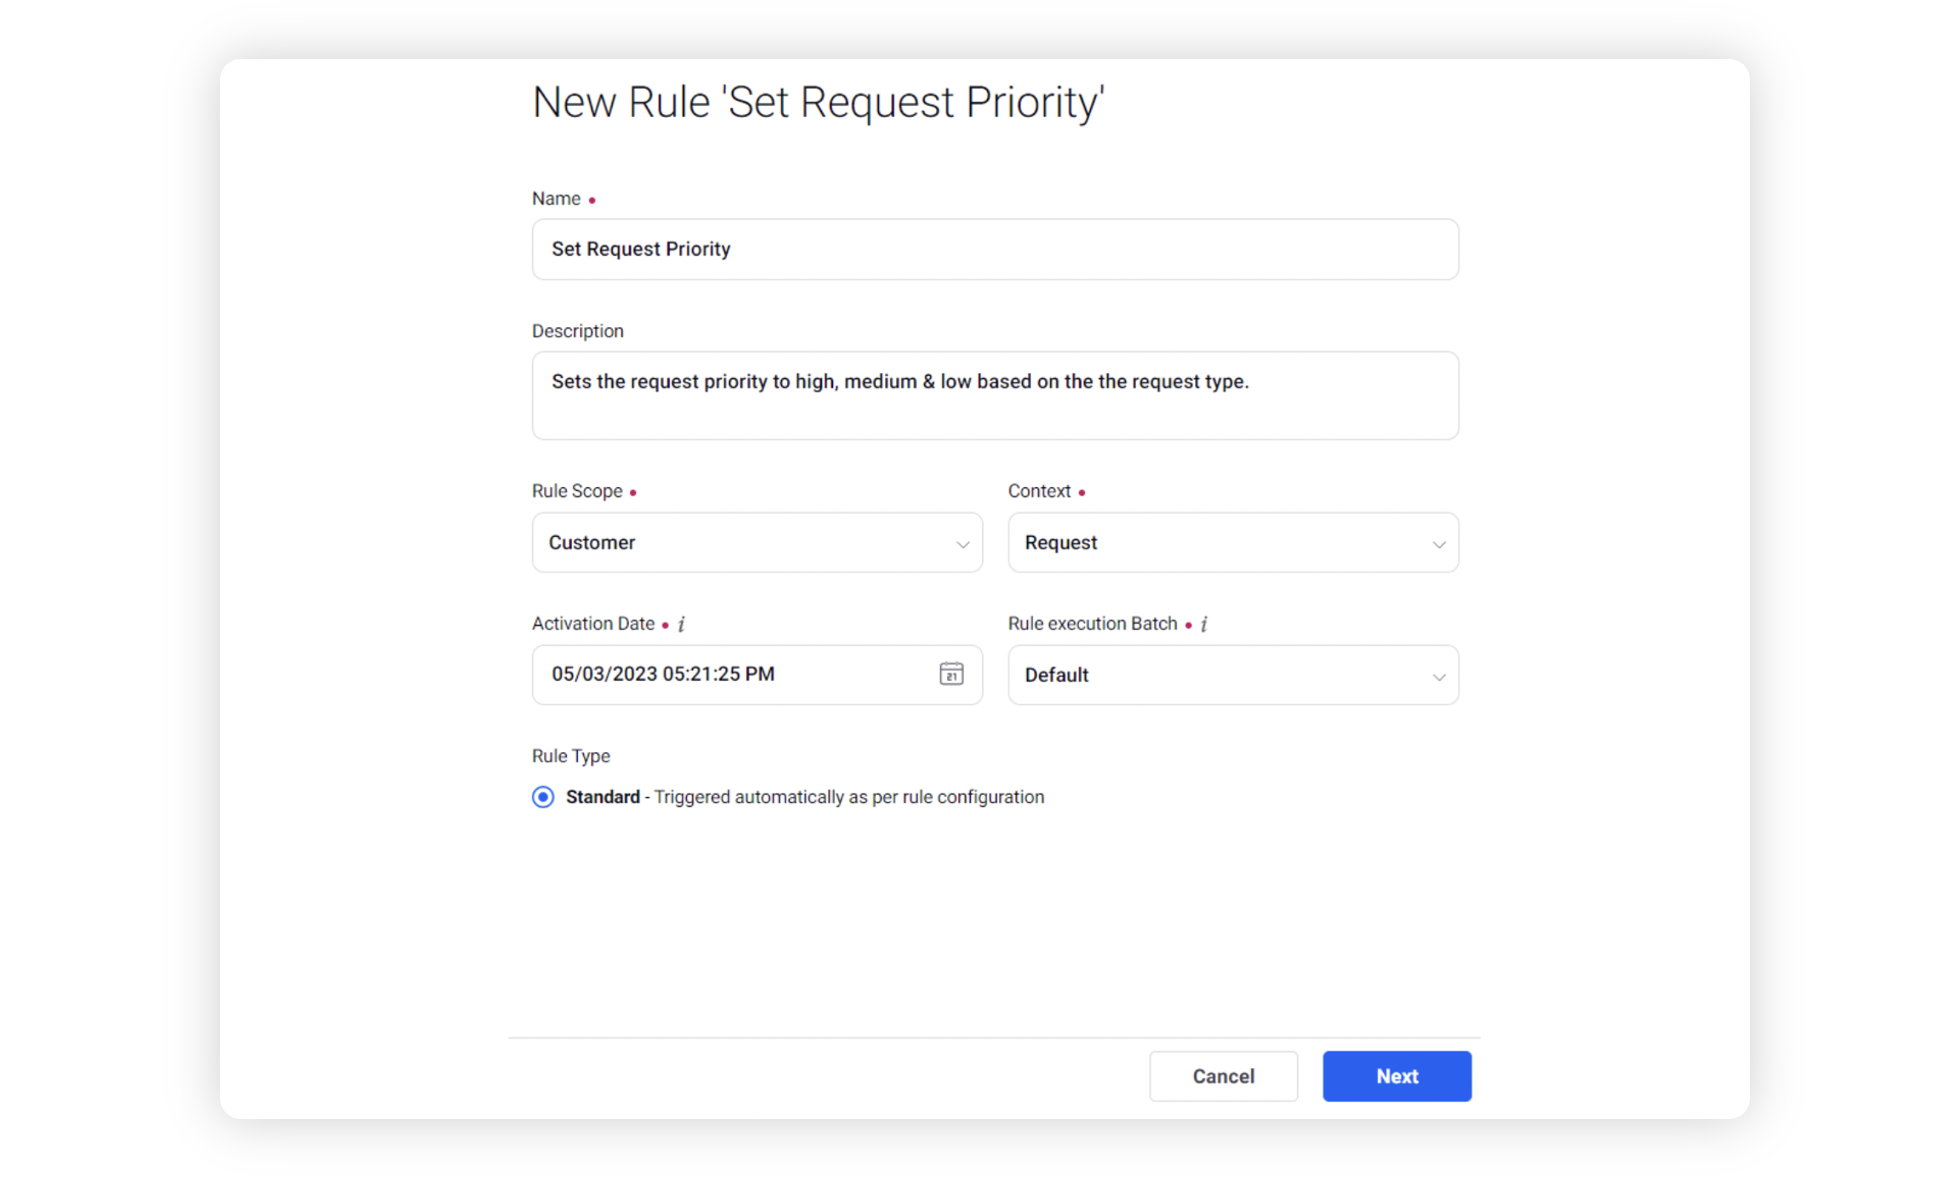
Modify the values for Activation Date, Rule Execution Batch, Rule Type, and Custom Fields. To proceed with the default values, click Next in the bottom right corner.
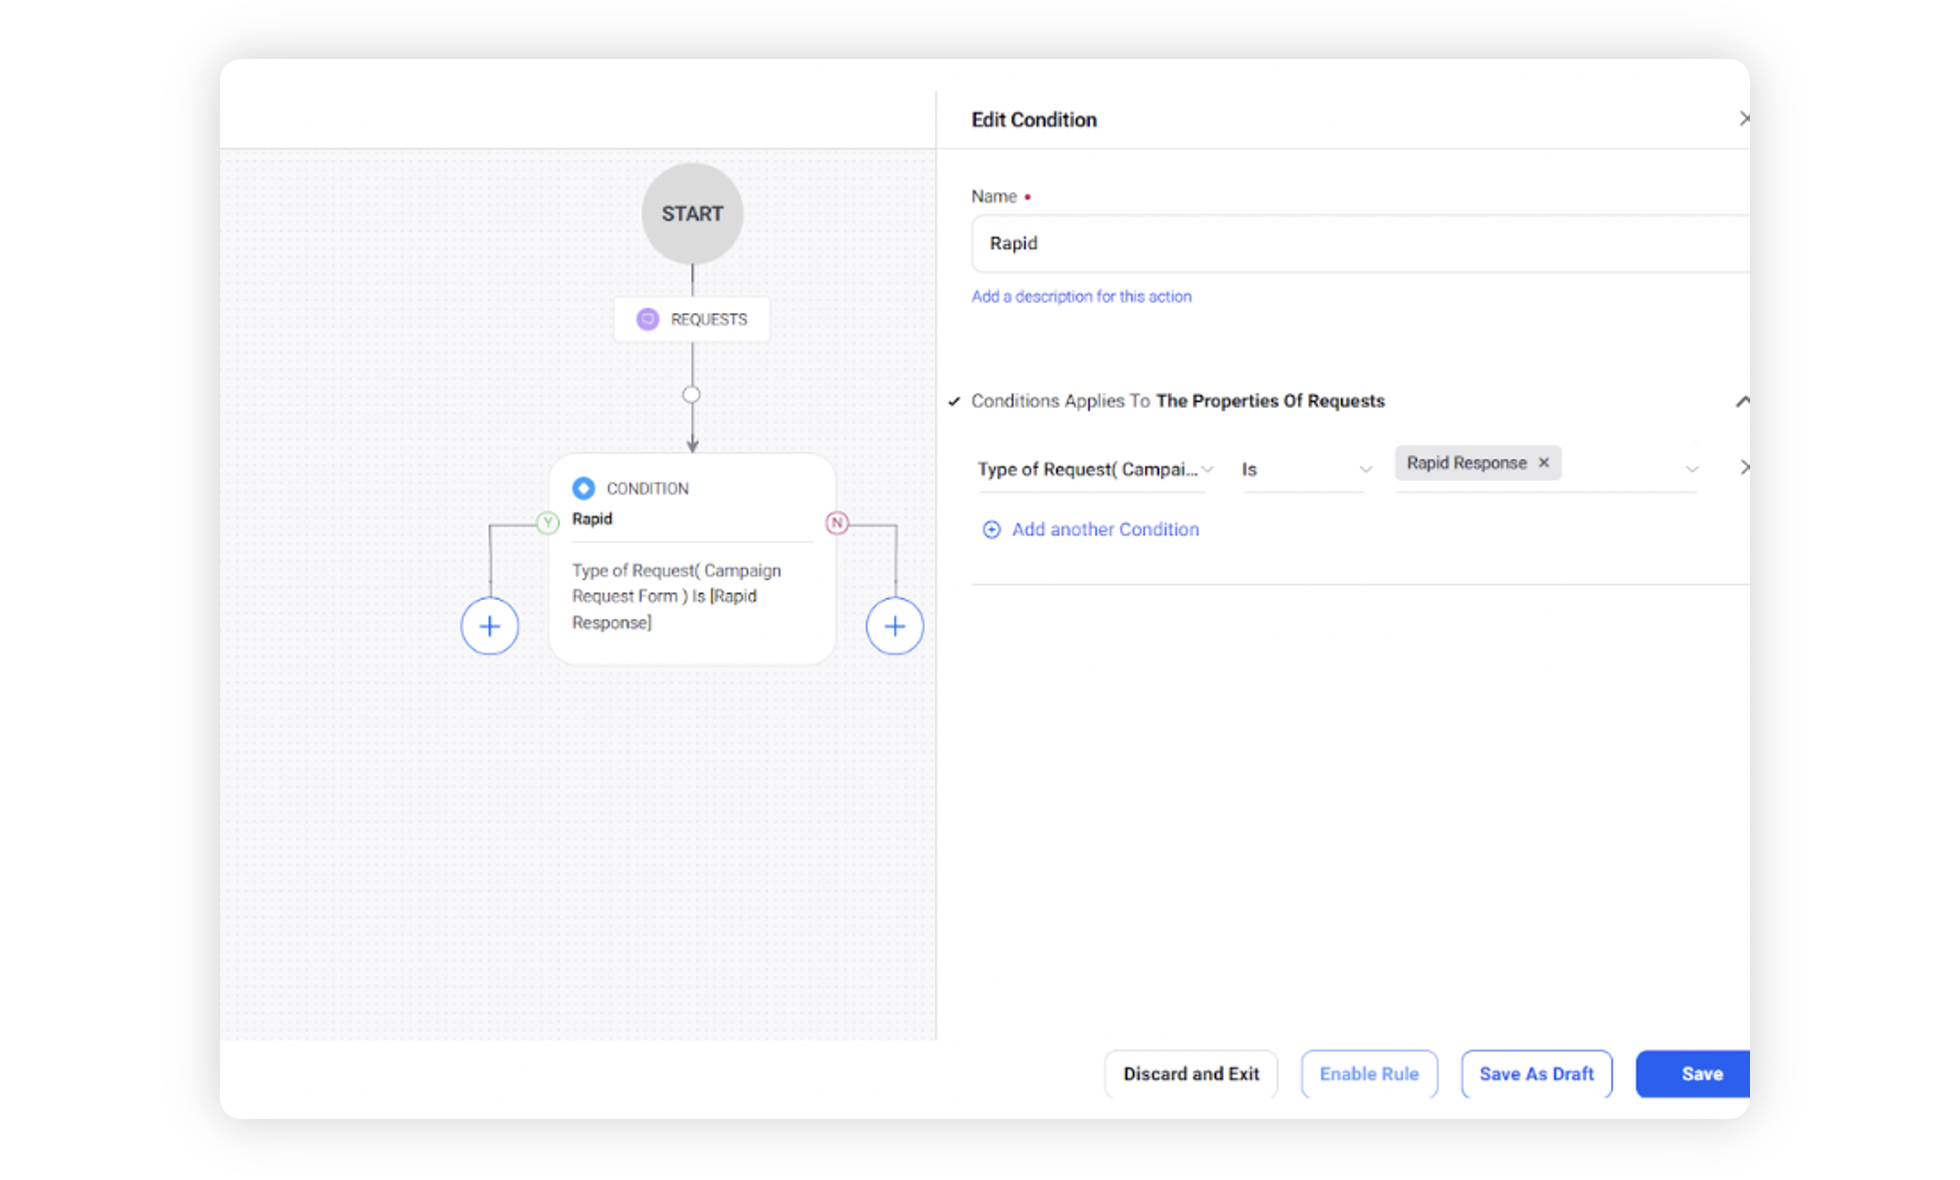
On the Rule Builder window, select Add Condition to set up specific scenarios that must be met for subsequent actions to execute. You can also chain multiple conditions together to refine the scenarios.
In this example, we are using the condition as Type of Request = Rapid Response, under the section “Conditions Applies to the Properties of Requests”. Type of Request is a field defined as a part of the request form. In case it is not defined as a part of the request form, then users will not be able to select this field as a part of the rule.
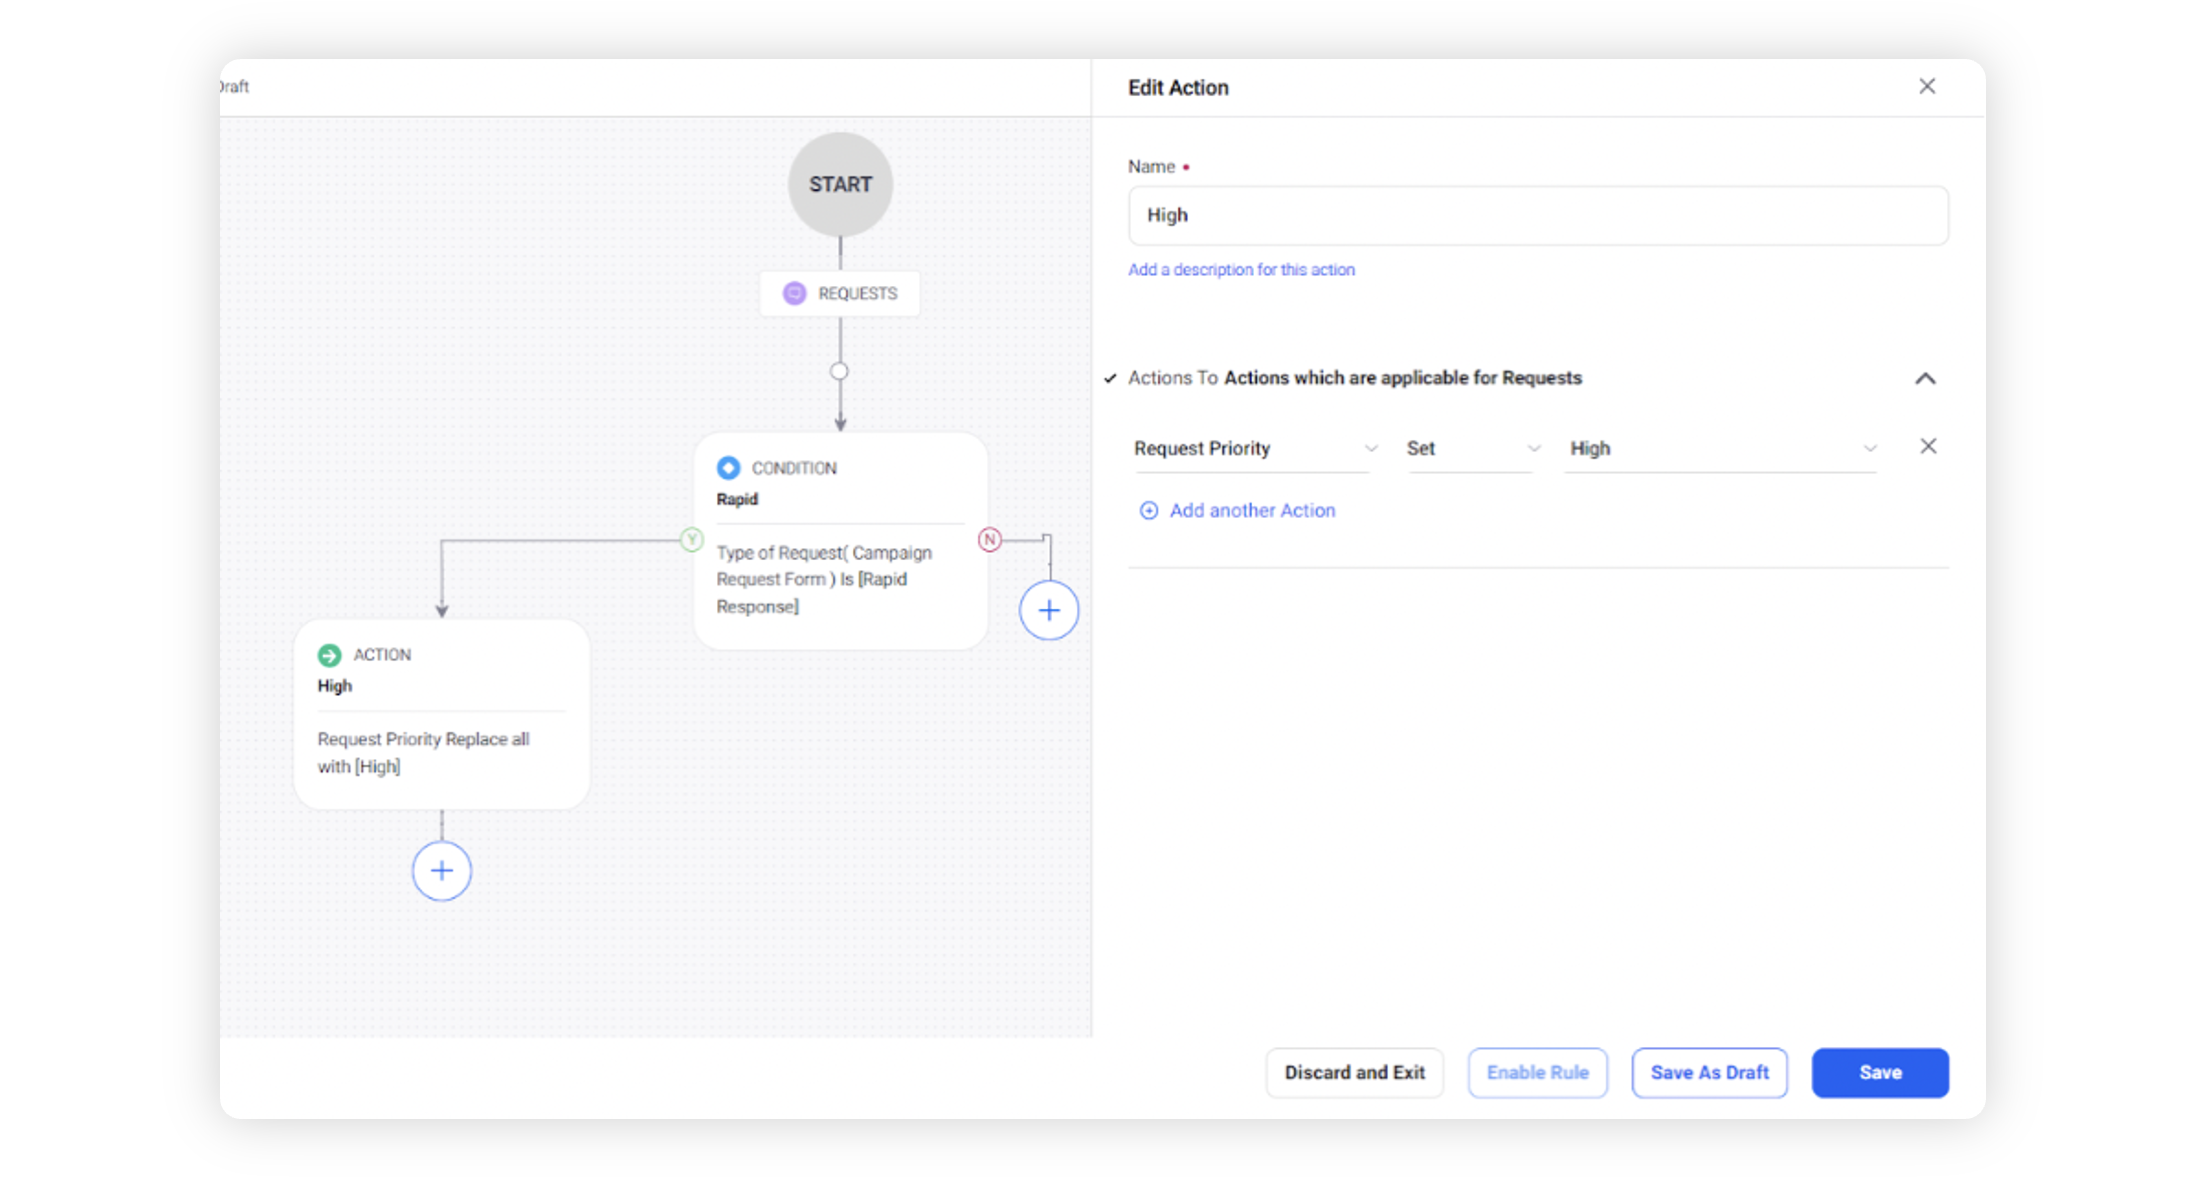
To configure actions in a rule, select Add Action on the Yes or a No branch of the condition depending on when you want the action to be executed.
Define your Request priority in the action. Set Request Priority as High, under “Actions which are applicable for Requests” as the Action that you wish to perform when the condition becomes true.
Chain multiple conditions and actions together to map values between the type of request to the priority of request.
Click Save in the bottom right corner to finalize the creation of your new rule, or Save as Draft to create a draft version of your rule.