Manage Roles
Updated
In Sprinklr, Permissions define the actions that a user can perform. A Role is a collection of permissions that an administrator assigns to a user or user groups. In Sprinklr there are three types of Roles: Workspace Roles, Global Roles with Local Scope, and Global Roles with Global Scope.
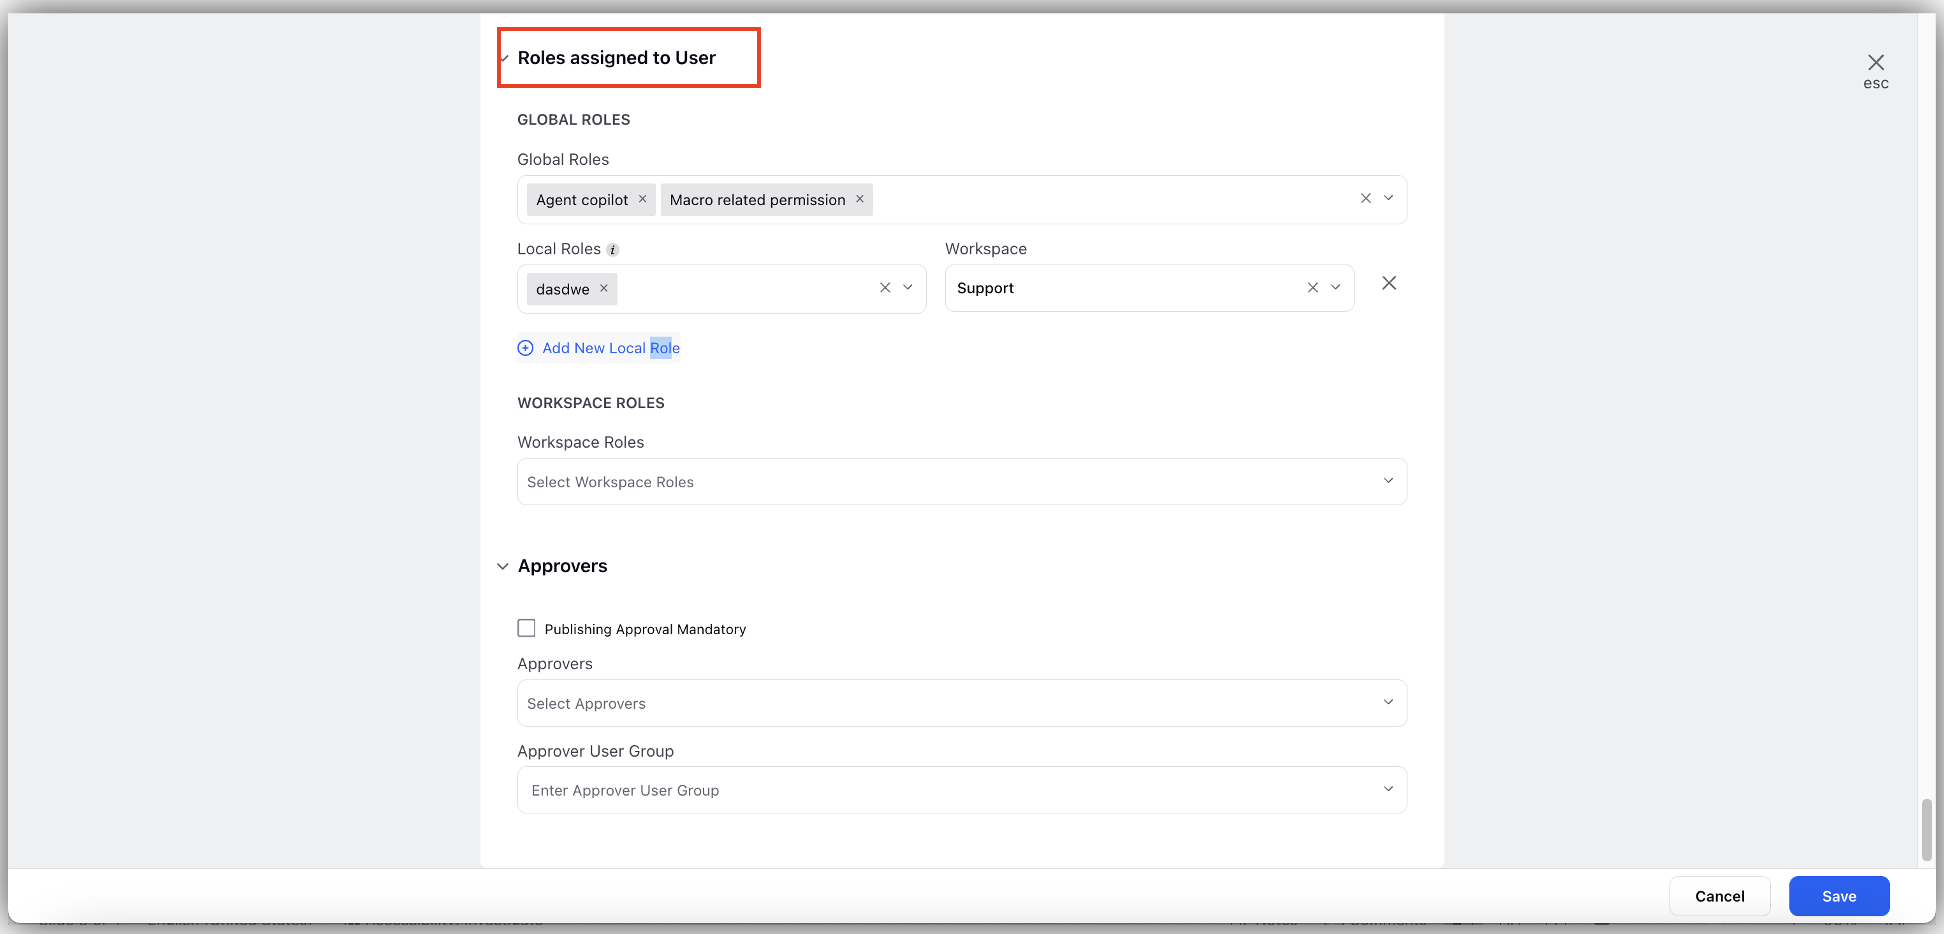
Workspace Roles: This role is only available in one specfic workplace. When these roles are assigned to a user/user group, they take the highest precedence. All the other types of assigned roles will become obsolete if workspace roles are assigned.
Global Roles with Local Scope: This role is applicable to a set of workplaces. This takes precedence after the Workspace Roles. So, if Global Roles (local scope) is assigned to a user, all the Global Roles with Global Scope if assigned will become obsolete.
Global Roles with Global Scope: This role is available in all workspaces. This takes the least precedence out of all the Roles. If Global Roles are assigned to User/User Groups, it's applicable across all the workspaces.
 Note: Multiple roles of the same type can be assigned to a user individually or inherited from user group(s) the user is added to. When multiple roles are assigned to a user, the user is granted with all permissions from all roles.
In this page, you explore Roles management page where you learn how to view permissions & details, edit, and delete Roles.
![]() Admin Set-up:
Admin Set-up:
Adding Users and defining Roles and Permissions is an admin feature. Users must have permission to perform these governing actions in an environment.
Adding Workspace Roles
Workspace Roles are created within a Workspace, and applies to users within a Workspace. Workspace Roles can be used in situations where you want to provide only a limited set of permissions to a specific user, as Workspace Roles will override Global (Customer) Roles.
On the Launchpad, under Platform Modules > Settings, click All Settings.

On the left navigation pane, under General, select User Management. The User Management page appears.

Select Workspace Roles from the left navigation pane.

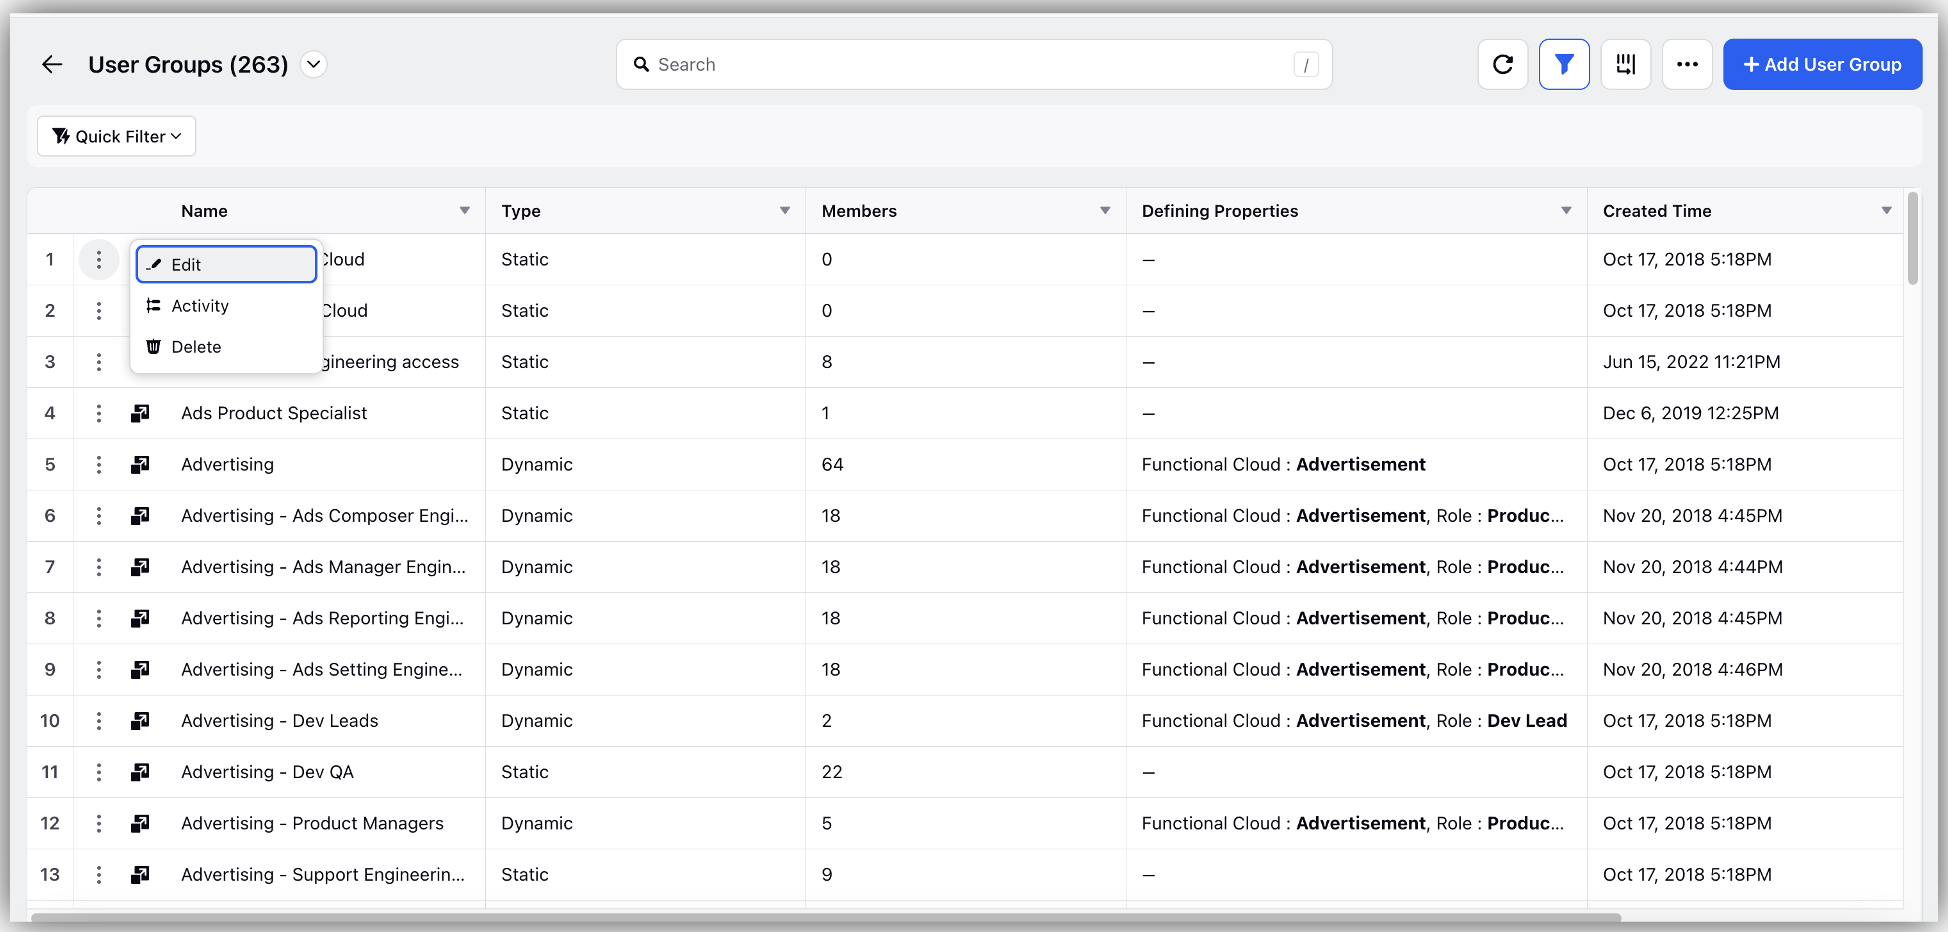
On the Workspace Roles window, hover over to the Options icon alongside the Role for which you want to view the details, and click Details.

You can toggle between the Role's details and permissions by clicking on the Overview tab and Permissions tab.

Alternatively, hover over the Role's Options icon and select the View Permissions option.


Edit a Role
Hover over the Role's Options icon
and select the Edit option.

Upon updating Role details, click Save to save your changes.
Delete a Role
Hover over the Role's Options icon
and select the Delete option.

Adding a Global Role
Global Roles are roles that apply across multiple Workspaces.
To add a Global Role, select Global Roles that appear on the User Management page. Then, click Add Role.

Click on three dots next to the Role Name to Edit, Clone, View Permissions, check Activity, or Delete a role.
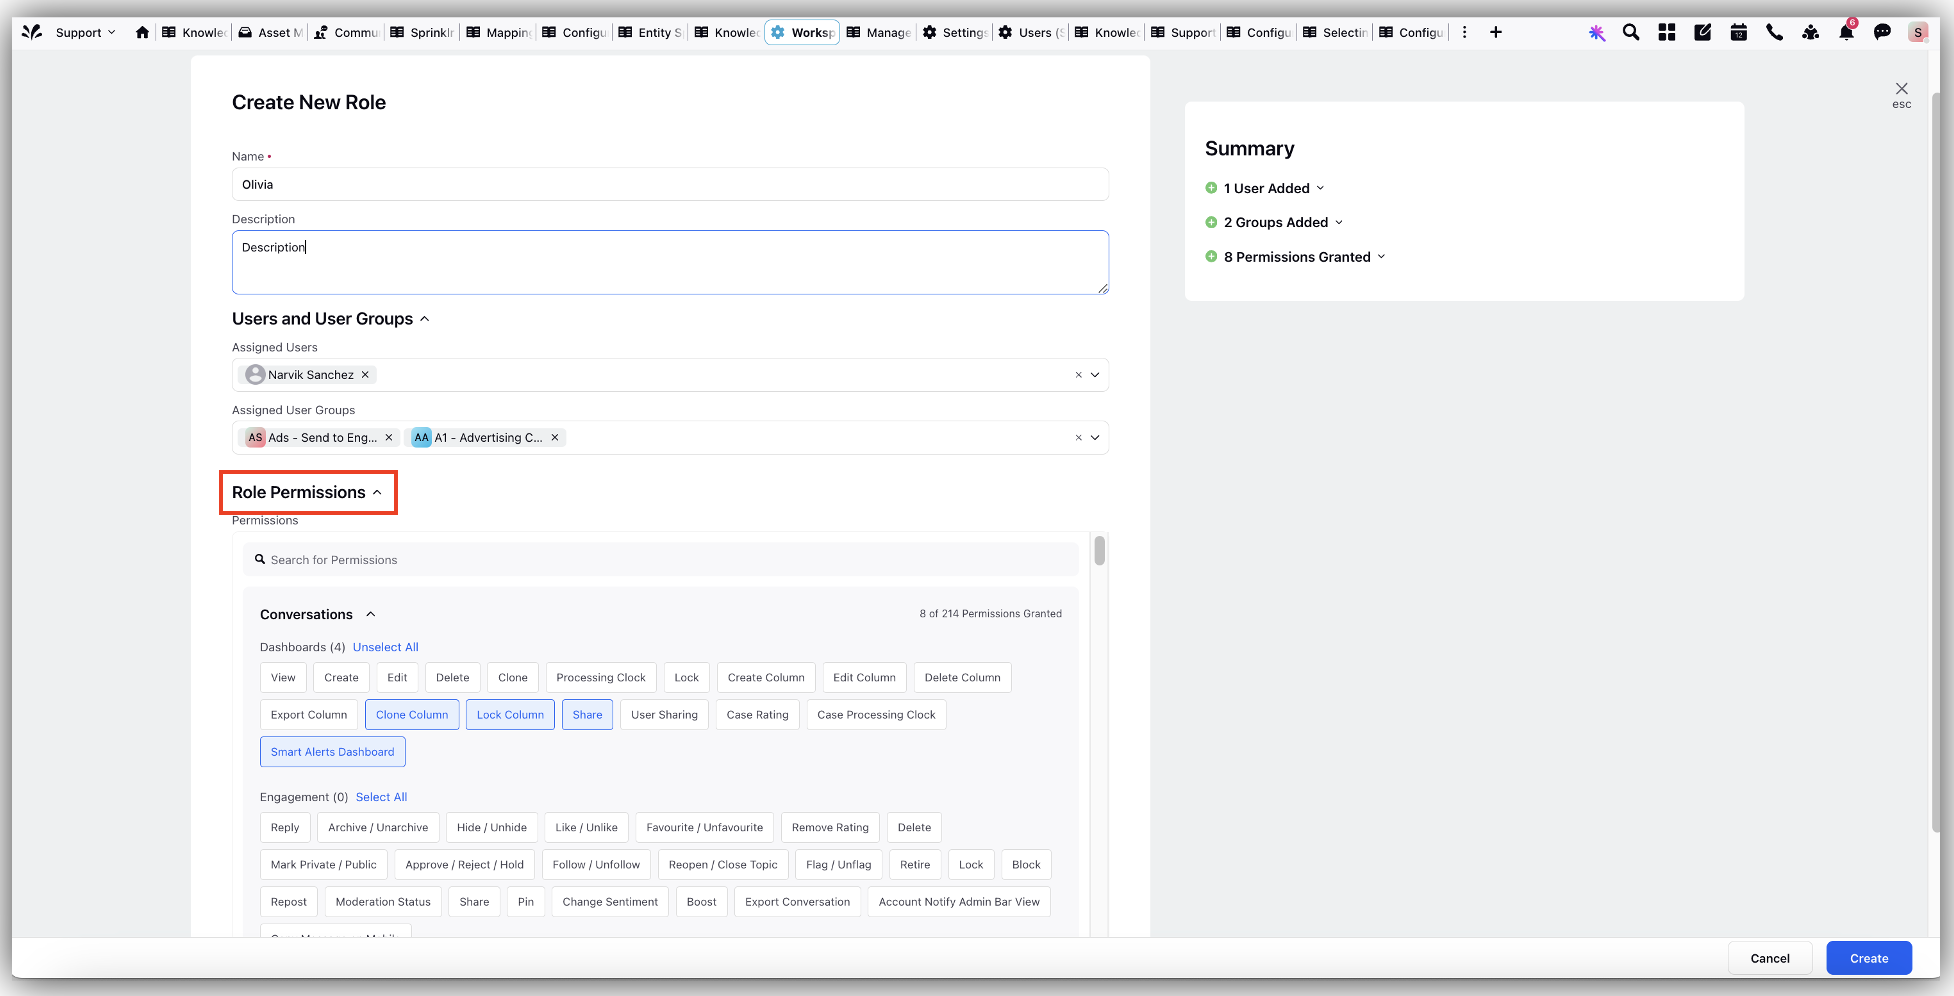
Click on + Create Role to create a new User Role.

In the Create New Role page, add various fields and click Create.

Here is a description of the various fields in the Create New Role window.
Fields
Description
Name
Enter a unique name to identify the Role.
Description
A description of what this Role will do.
Scope
Select either Global or Local as a scope for the role you are creating:
Global: Global roles (Customer level) are those roles which if assigned to a user/user group are applicable for all its workspaces.
Local: This offers a flexibility to use a set of Global Roles at a Workspace level. In this case, when you set a Global Role as Local, and when you are assigning it to a user, you will be required to choose the Workspace it applies to.
Users and User Groups
Assigned Users: Select user(s) who will be provisioned with the role and its associated permissions.
Assigned User Groups: Select the user group(s) who will be provisioned with the role and its associated permissions.
Role Permissions
Select individual permissions for the role you are adding. You can either search for specific permission(s) by its name in the search bar or scroll down to select permissions from the given options.
Assigning Permissions to a Role
There are three ways you can assign permissions to Users/User Groups:
1. Assigning Permissions via a Role: While creating a role, when you add a user under Assigned Users, or a User Group under Assigned User Groups, then all users selected within these two fields get the permissions that are associated with that role.
2. Assigning Permissions while Editing a Role: When a new user is added to the User Group, all permissions associated with the Role, that applies to all members of the User Group, will apply to the new user. You can add a user by hovering on the three dots next to a User Group and clicking Edit.
3. Permissions Get Assigned During User Creation: While adding a New User, you can assign roles under Roles assigned to User section in the New User window. This way the permissions associated with that role gets allocated to the new user.