Scheduled Publishing/Unpublishing of Articles
Updated
Scheduled publishing/unpublishing of articles is a critical feature in any CMS platform because it allows authors and organizations to plan, manage, and optimize their content creation and publishing workflows.
Common Use Cases
Content planning: Scheduled publishing/unpublishing allows content creators to plan and prepare content ahead of time, which is essential for efficient content management. With this feature, authors can set a specific date and time for when they want their content to be published or unpublished, making it easier to manage a content calendar and ensure a consistent publishing schedule.
Time zone management: When publishing content globally, it's important to consider time zones. With scheduled publishing/unpublishing, authors can choose the exact time and date to publish or unpublish content according to the time zone of their target audience.
Workflow optimization: In organizations where multiple people contribute to content creation, scheduled publishing/unpublishing can help optimize the content creation workflow. It allows authors to schedule their work to go live or be taken down when it's convenient for their team or organization.
Managing content updates: Scheduled publishing/unpublishing can also help manage content updates. If an article requires changes or updates, the author can schedule it to be unpublished, make the necessary changes, and then schedule it to be republished at a later time.
You can schedule publishing and unpublishing of an article in a Ready to Publish or Approved state at the specified date, time & timezone.
Note: Scheduling will be canceled when performing the following actions, accompanied by a warning message:
Manually marking as private
Manually marking as public
Moving the article to another folder
To Schedule Articles
1. On the Article Manager window, hover over the Options icon alongside the desired article and select Set Schedule. You can also select multiple articles in bulk to perform this action.
2. On the Set Schedule pop-up window, select the Timezone, Publish Date & Time and Unpublish Date & Time.

3. Once set, you can edit or delete the publishing and expiry schedule.

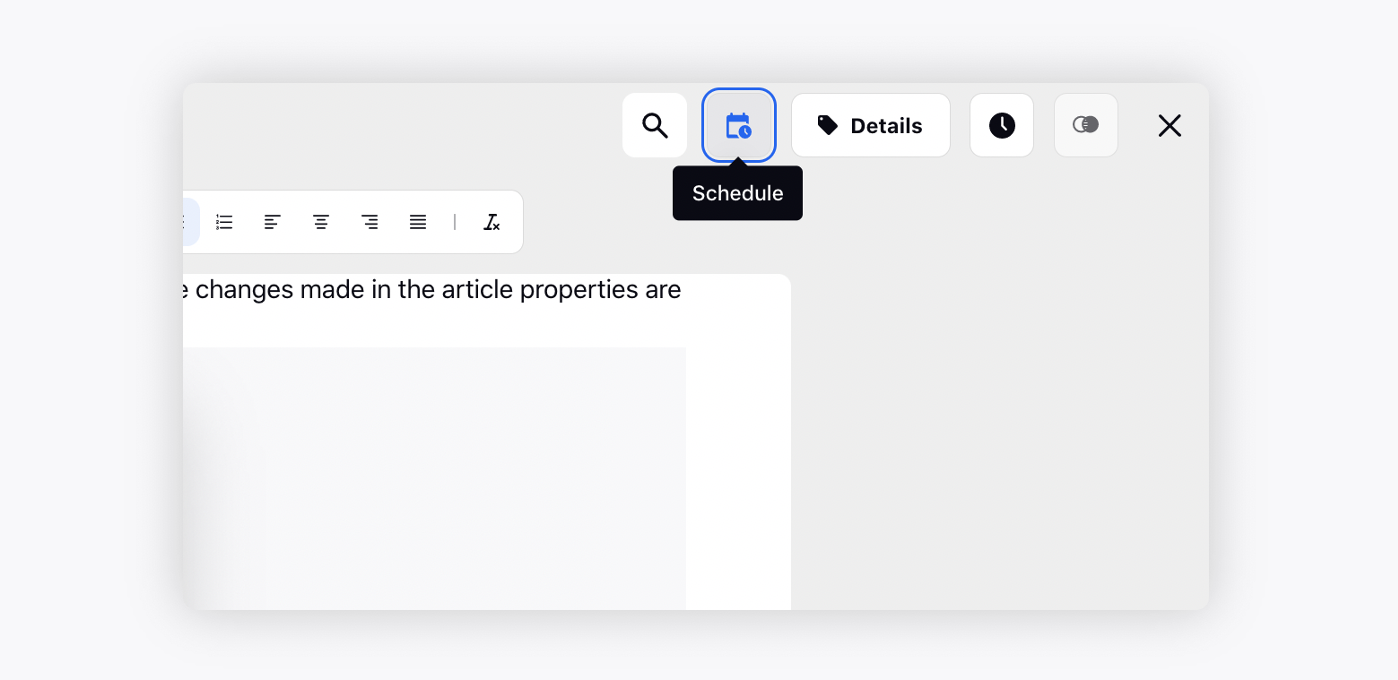
4. You can also schedule an article when opened in a view or edit mode. Select the Schedule icon from the top of the builder.
5. Additionally, you can schedule an article when marking the article as Ready To Publish.

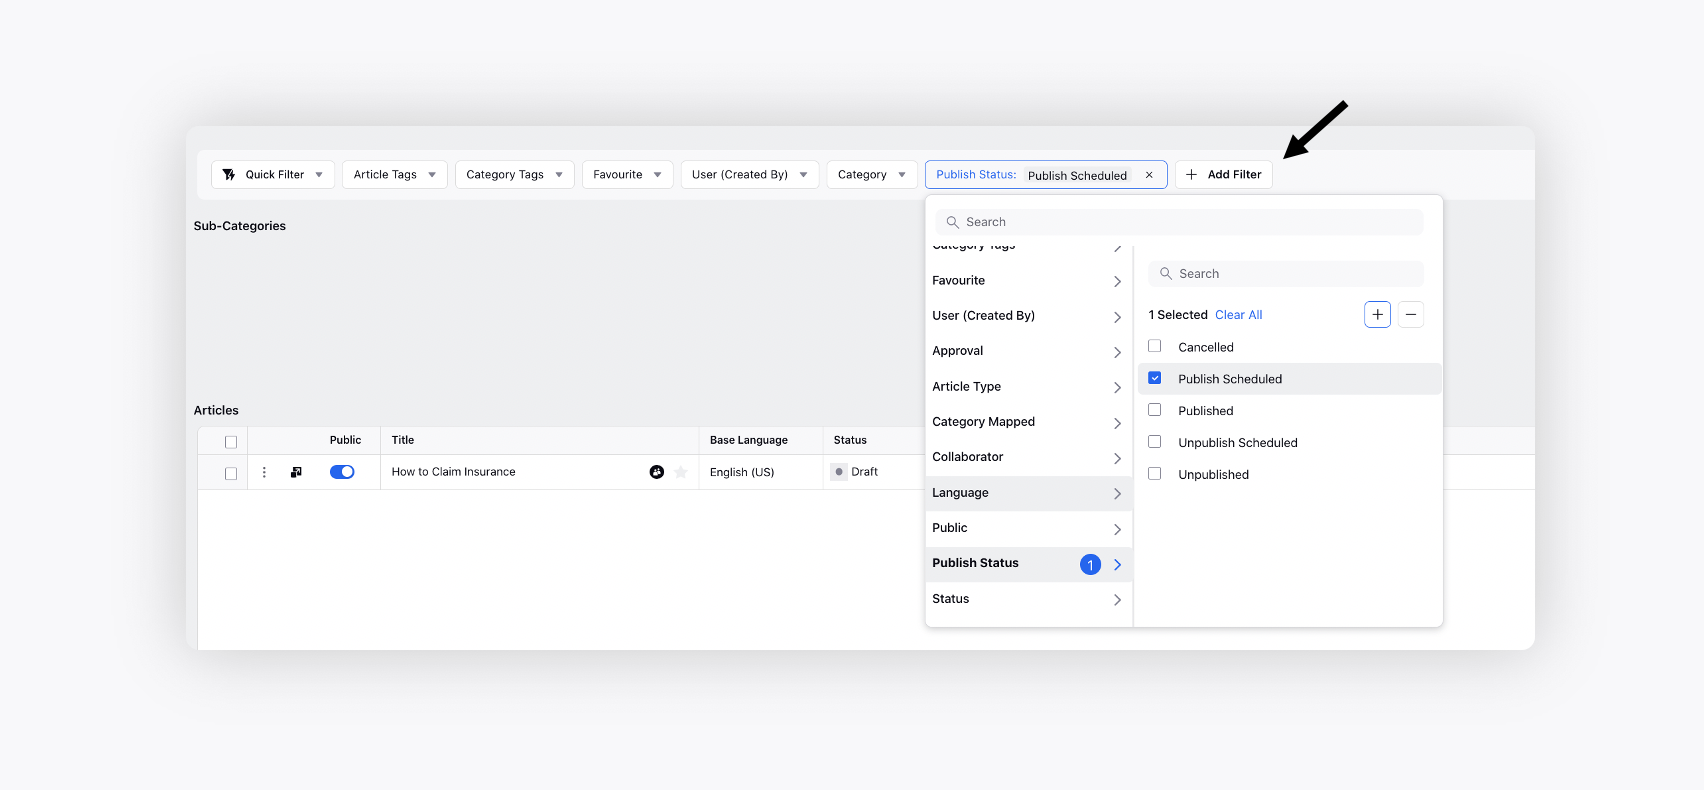
6. Apply the Publish Status filter and view articles based on scheduled status.