Drip Campaign (Customer Journey) in Distributed
Updated
With the help of drip campaigns, you can send a series of pre-scheduled and automated messages to a targeted audience over a specified time. With the drip campaign capability, a user can:
Encourage recipients to take specific action
Provide relevant information and build trust
Remind about upcoming events
Customize offers for different segments of the audience
Re-engage inactive customers
Request feedback and conduct surveys after sales
Deliver timely responses to inquiries
Drip Campaign Industry Coverage

Steps to Create a Drip Campaign (Admin)
Click the New Tab icon
. Under Sprinklr Marketing, click Journey Facilitator within Publish.
In the top right corner of the Journey Facilitator window, click Create Journey.
In the Create Journey window, enter the required details.
Journey Name: Enter the name of the journey.
Description: Add a description for the journey.
Add to Campaign: Choose a relevant campaign that you already have in Sprinklr.
Conversion: Select a conversion type.
Start Journey From & Run Journey Until: Select dates from the date pickers to determine the duration of the journey.

Select Segment Based or Profile List Based or Trigger Based.
Under Share Settings, select the journey visibility with the relevant users or user groups.
 Note: Users will be notified when they are selected under Users or User Groups.
Under Message Delivery Settings, add a rate limit to be used to send out the messages.
Click Save in the bottom right corner.
For the next steps, see Create and Deploy Journeys.
Steps to Stop a Customer Journey
You can now stop a particular customer journey for all the contacts involved.
Log in to the Distributed environment.
Click the More Options icon
 in the Menu bar to the left and click Journey Facilitator.
Click the Options icon adjascent to the journey that you want to stop, and click Stop Journey.
 If you select Stop Journey, this would stop the journey for all the contacts, for which this journey has been applied.
Steps to View Contacts Involved in a Customer Journey (Journey Reporting)
You can now view the list of individual contacts involved in a particular customer journey.
Log in to the Distributed environment.
Click the More Options icon
in the Menu bar to the left and click Journey Facilitator.Click the Options icon adjascent to the journey for which you want to view involved contacts, and click View Journey Reporting.

You will now be able to view the journey details in 2 categories - Active Journey Executions (only for Distributed users) as well as All Journey Executions, both of which will show contact names, journey trigger time and e-mail addresses.

Steps to Add and Remove a Contact in a Customer Journey in Distributed
Admins can make the distributed users and contacts parts of any email-based customer journey that they create on the Space environment. Admin can create and share journeys with Distributed users who can include their email contacts in the journey. The Distributed users can add or remove any single user at any point during the customer journey.
Log in to the Distributed environment.
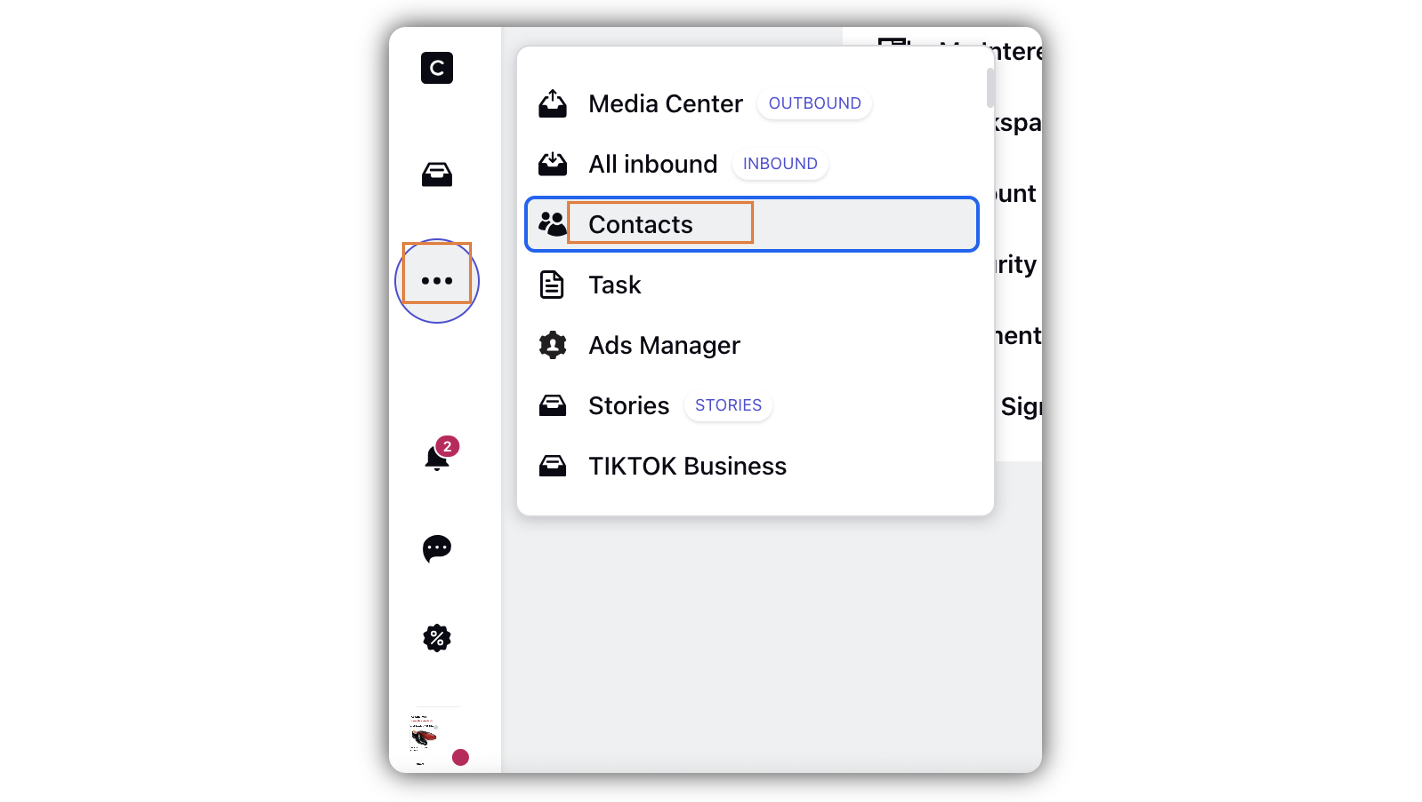
Click the More Options icon
in the Menu bar to the left and click Contacts.
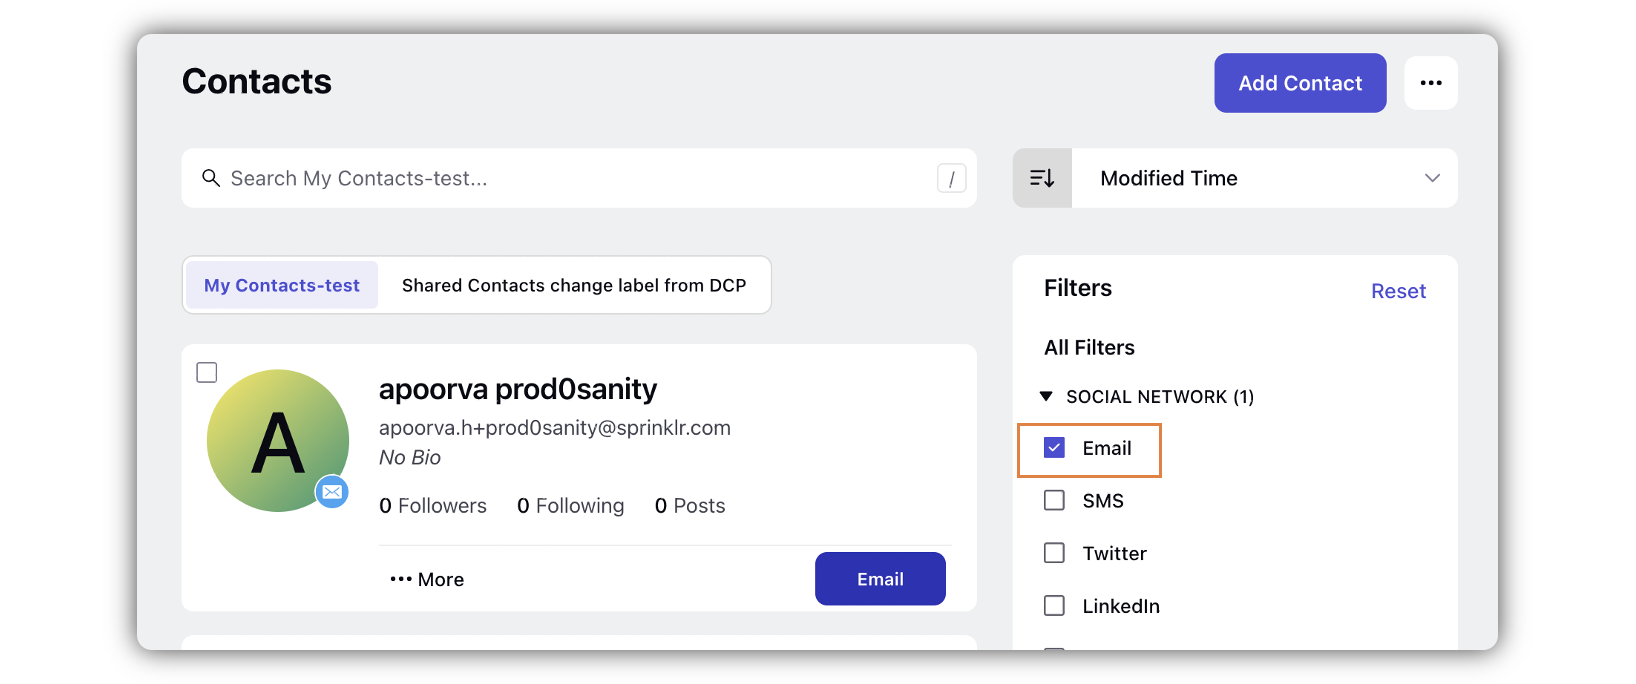
Select the checkbox for Email under All Filters.
Click the More options icon for the email contact for which you want to apply journey, and select Apply Journey or Stop Journey, based on your requirement.
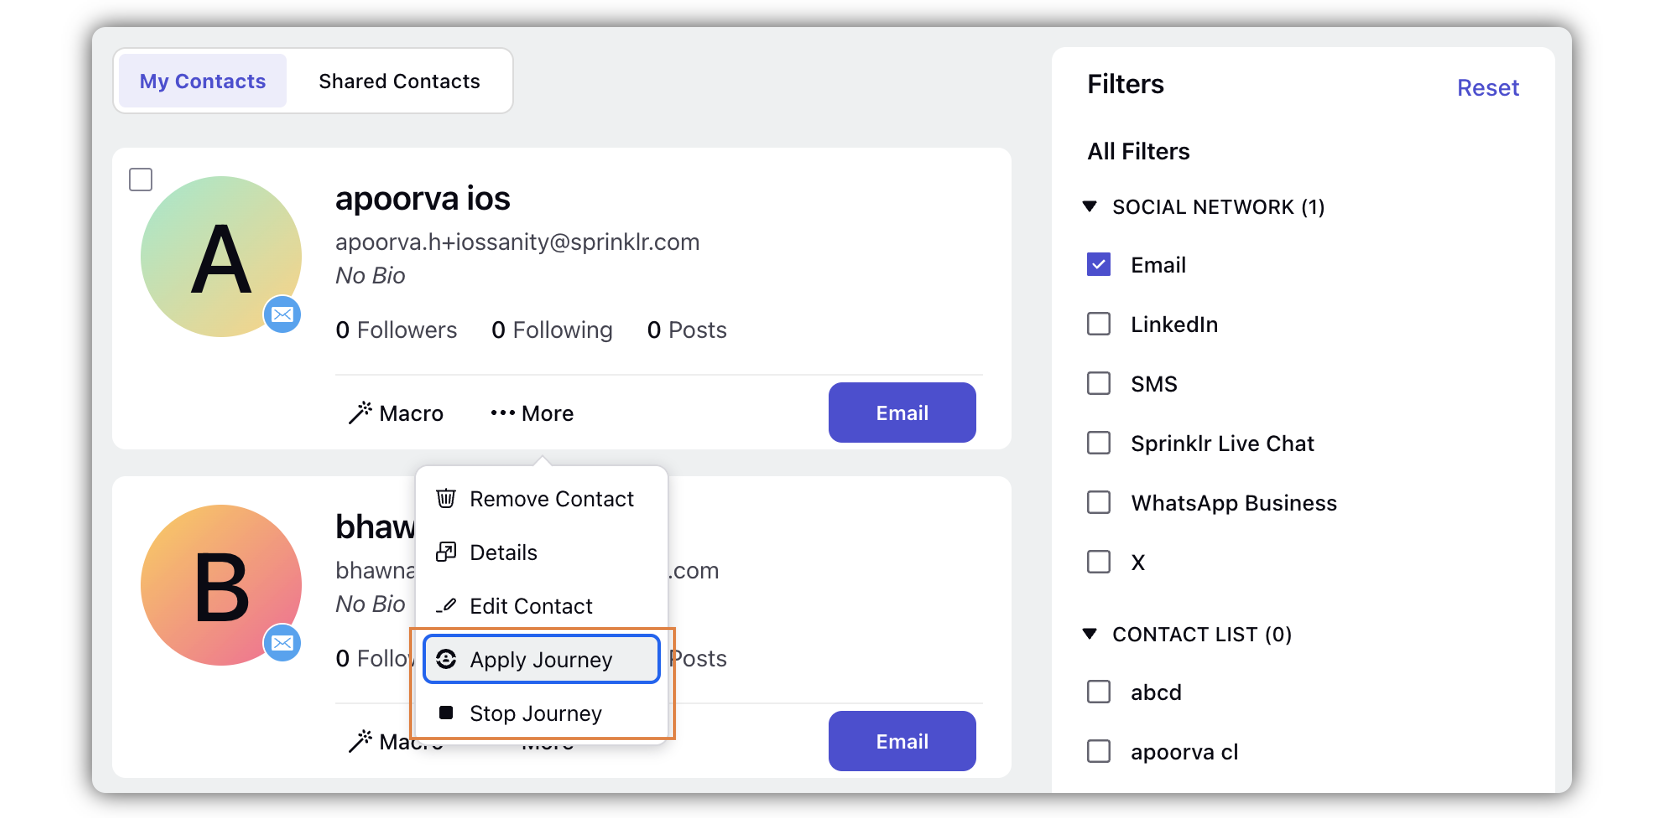
In the Apply Journey(s) / Stop Journey(s) pop up window, search and select the journey you want to apply. Click Done or Stop accordingly in the bottom right corner.
Note: While applying a journey on a contact, you will be able to view the description of the journey below the journey name. This will help you understand what the journey is about, before applying it on a specific contact.


Override Account in Drip Campaign
Distributed users can determine the accounts(Email and Email Marketing) for which drip campaign will run. The user will be able to select one or some of the accounts or account groups pre-selected by the admin while configuring the drip campaign or the customer journey on Journey Facilitator.
Steps to Override Accounts in Drip Campaign(Admin)
While creating the journey, select the Trigger-Based option.
Under Share Settings, select the workspaces and Distributed users in the given fields.
Under Message Delivery Settings, enable the Enable Account Trigger Override toggle.

Under Account, select the account(s) and under Account Group, select account group(s) available for the distributed user.
Click Save in the bottom right corner.
For the next steps, see Create and Deploy Journeys.
Steps to Override Accounts in Drip Campaign(Distributed User)
Log in to the Distributed environment.
Click the More Options icon
in the Menu bar to the left and click Contacts. Select the checkbox for Email under All Filters.
Click the More options icon for the email contact for which you want to apply journey, and select Apply Journey or Stop Journey, based on your requirement.
In the Apply Journey(s) / Stop Journey(s) pop up window, select the checkbox for the journey you want to apply. Click Apply or Stop accordingly in the bottom right corner. If you select Stop Journey, the journey will stop for that particular contact.
Select the Journey and Account from which the Journey must be deployed.

Click Apply in the bottom right corner.