Create X Conversation Cards
Updated
Conversational Ads include a call-to-action button with customizable hashtags that encourage consumer engagement. When a call to action button is tapped, the tweet composer opens on X with a pre-populated brand message accompanied by the creative and hashtag buttons. The consumer can then personalize the Tweet and share it with his or her followers. You can build these conversation cards in Sprinklr and use them in your X ads.
To Create X Conversation Cards
Click the New Tab icon. Under the Sprinklr Marketing (Ads) tab, click Creative Library within Plan.
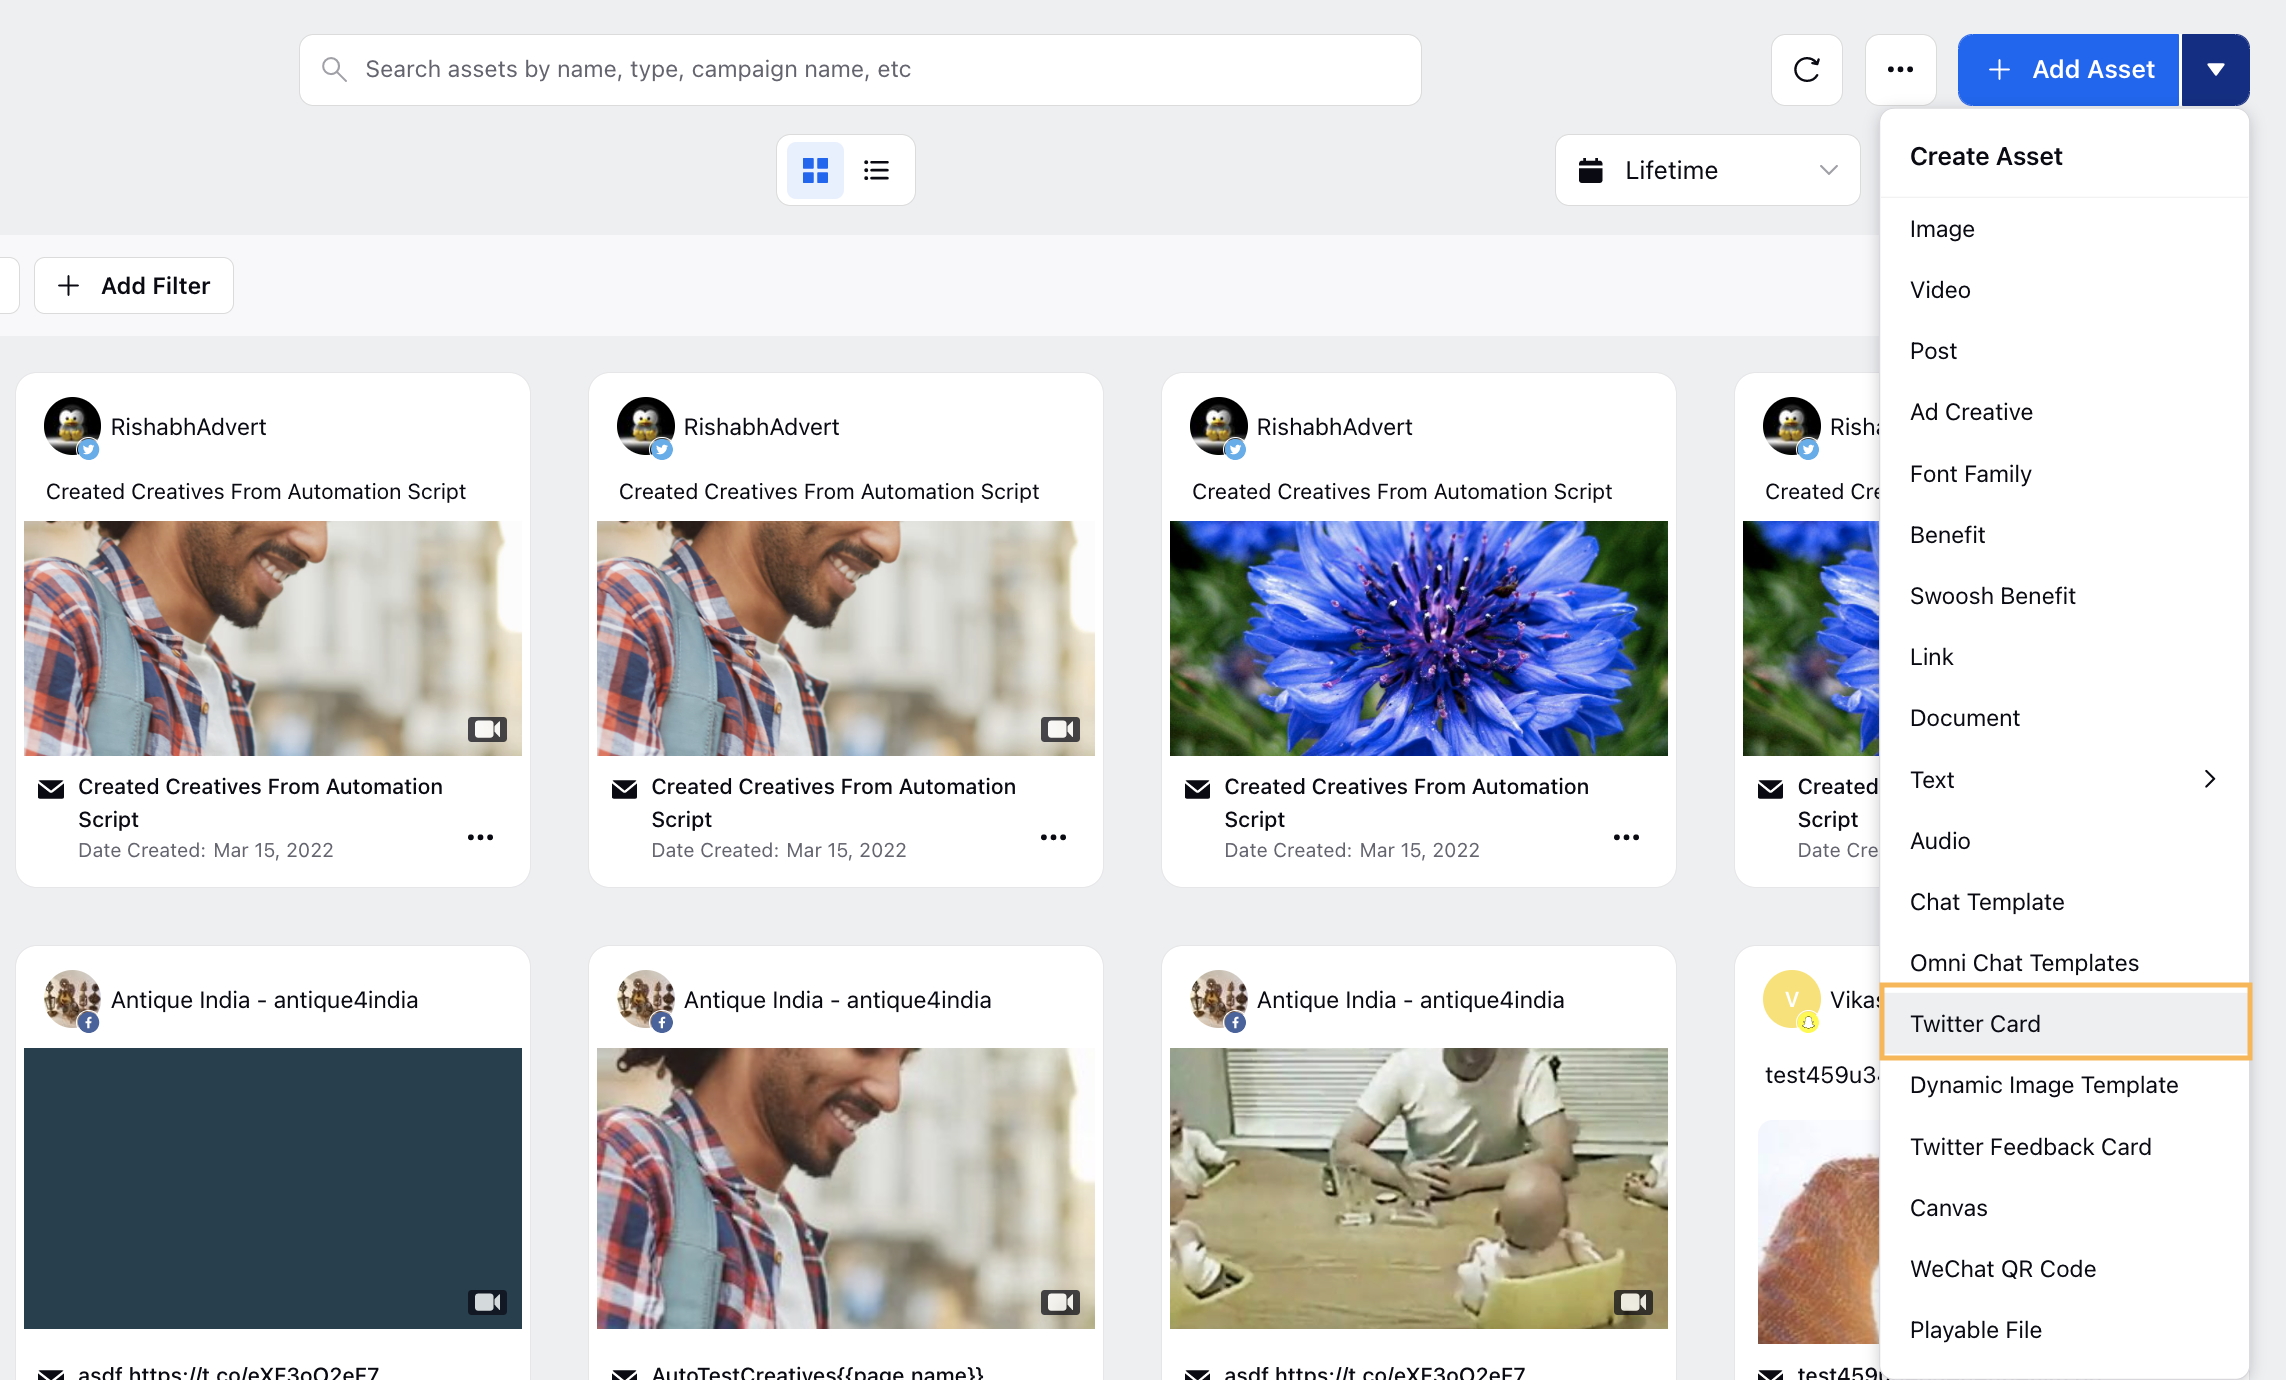
On the Digital Asset Manager (DAM) window, click the drop-down alongside Add Asset and select X Card.

On the Create New Asset window, select X Image Conversation Card or X Video Conversation Card from the Template drop-down menu.
Enter the details as per the requirement. For more information, see X Conversation Cards — Field Descriptions.
To Use X Conversation Cards in Ads
Click the New Tab icon. Under the Sprinklr Marketing (Ads) tab, click Ads Composer within Execute.
On the Create an Ad Campaign window, select your X ad account.
In the Campaign Details section, select the Objective for your campaign and enter other details. Click Next. To learn more, see Compose X Ads.
In the Creatives section, you can proceed with selecting an existing X conversation ad or click Create new creative.
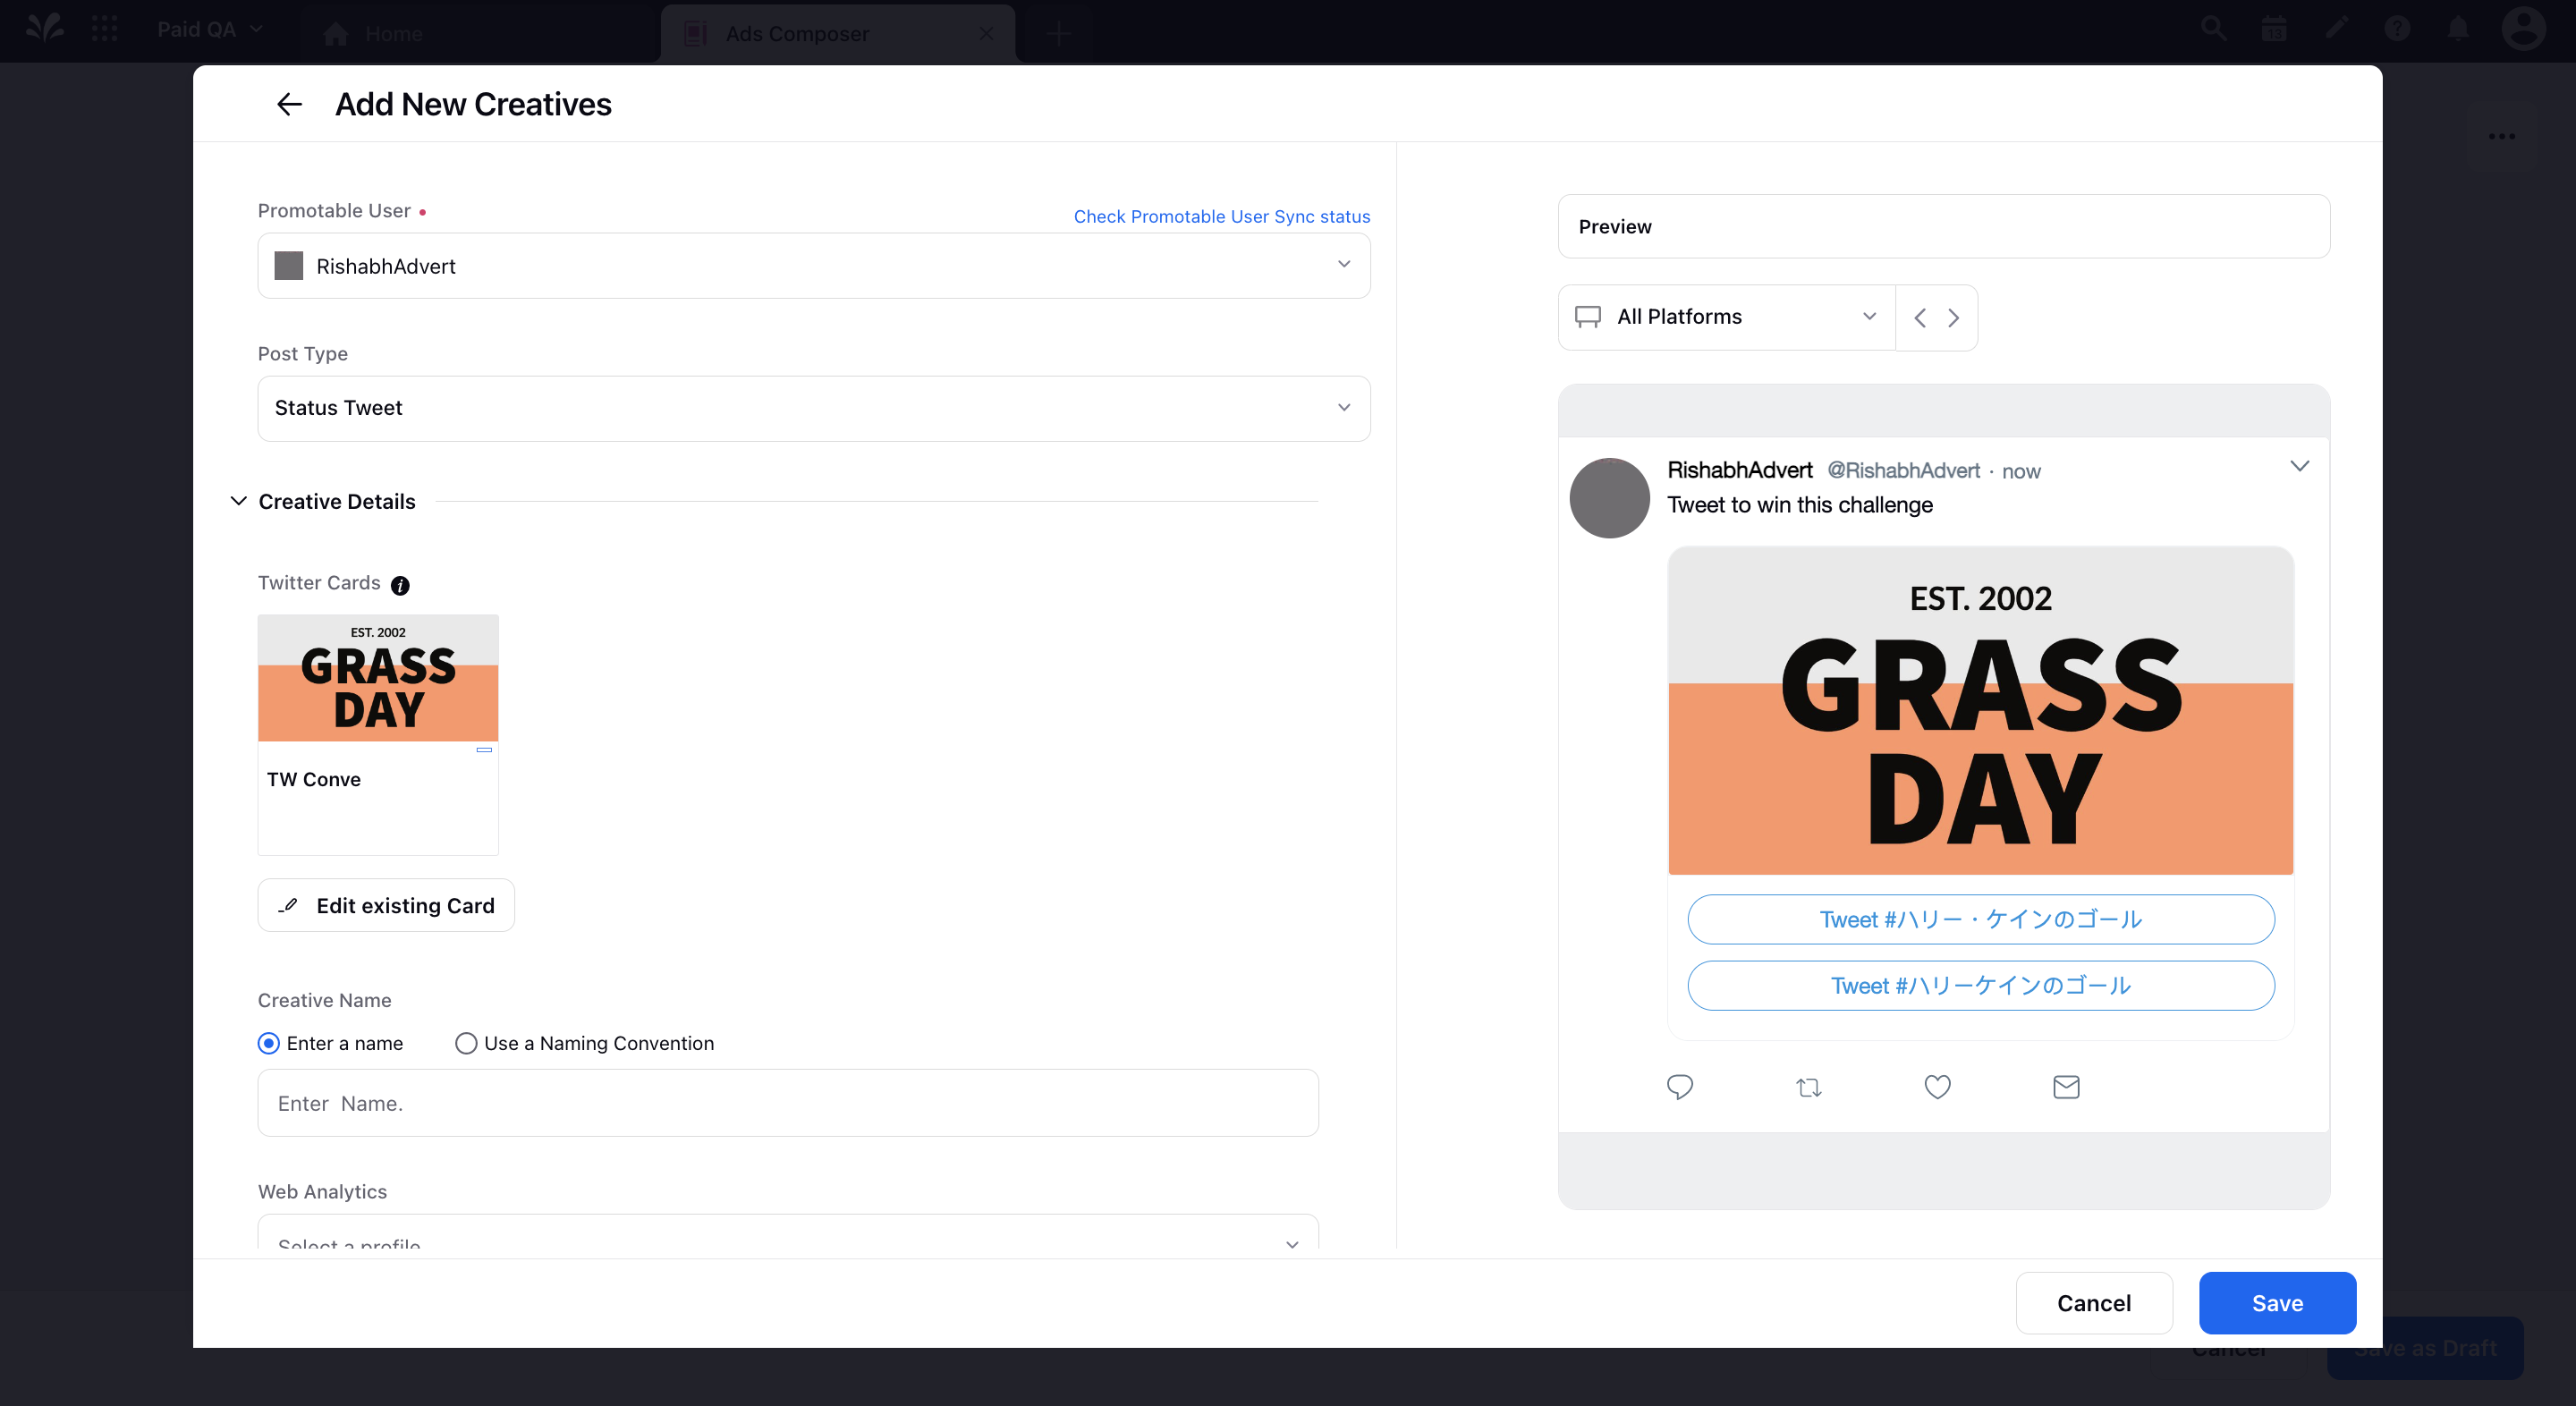
On the Add creatives to your campaign window, select Status Tweet as the Post Type.
Click Add card under the Creative Details section and select the desired conversation card to include in your Ad. Fill in the other details for your ad creative and click Save in the bottom-right corner.

Once you have built your creative, follow the prompted steps and fill in the other campaign details. For more information, see Compose X Ads.
In the Review section, hover over Publish in the bottom-right corner and select Publish to immediately publish your ad campaign on X.
X Conversation Cards — Field Descriptions
Term | Description |
X Card | |
Template | Select X Image/Video Conversation Card from the drop-down. |
Ad Account | Select the X Ad Account. |
Image (Applicable for Image Conversation Cards) | Select an Image. Allowed specifications: Minimum width of 800px, Maximum Size of 5MB, Width: Height with the aspect ratio 1.91:1. |
Video (Applicable for Video Conversation Cards) | Select a Video (Allowed aspect ratio 16:9). |
Title | Enter the title for the card, which appears below the image and above the CTAs. Maximum length allowed: 23 characters. |
Thanks Text (Applicable for Image Conversation Cards) | Enter the Thanks Text. Thanks text will be displayed after the CTA is clicked. Maximum length allowed: 23 characters. |
Thanks URL (Applicable for Video Conversation Cards) | Enter the URL. This URL will be displayed with the thank you text. |
First Hashtag (CTA) | Enter Call-To-Action (CTA) hashtag for the first option. Maximum length allowed: 20 characters including #. |
First Tweet | Enter the Tweet text that will be used when the first CTA is clicked (Maximum 256 characters allowed). |
Second Hashtag (CTA) | Enter Call-To-Action (CTA) hashtag for the second option. Maximum length allowed: 20 characters including #. Note that when adding a second Hashtag, the use of a title is not supported. |
Second Tweet | Enter the Tweet text that will be used when the second CTA is clicked (Maximum 256 characters allowed). |
Third Hashtag (CTA) | Enter Call-To-Action (CTA) hashtag for the third option. Maximum length allowed: 20 characters including #. |
Third Tweet | Enter the Tweet text that will be used when the third CTA is clicked (Maximum 256 characters allowed). |
Fourth Hashtag (CTA) | Enter Call-To-Action (CTA) hashtag for the fourth option. Maximum length allowed: 20 characters including #. |
Fourth Tweet | Enter the Tweet text that will be used when the fourth CTA is clicked (Maximum 256 characters allowed). |
Overview | |
Name | Enter the Card Name. (Maximum 80 characters allowed) |
Description | Enter the Description for your card. |
Delete all posts associated to this asset upon the expiry of this asset | Check the box to delete all the posts associated to the selected asset. |
Campaign(s) | Select campaign(s) from the drop-down. |
Status | Select the status of your card. |
Available From | Assign the date your card will be available from. |
Visible From | Assign the date your card will be visible from. |
Expires On | Assign the date of expiry of your card or check the box alongside Never Expires. |
Tags | Select the tag(s). |
Restricted | Mark your card as Restricted or Not Restricted. |
Brands | Select the Brand(s). |
Persona | Select Persona. |
Customer Journey Stage | Select the Customer Journey Stage. |
Automated Tags | Select Automated Tags. |
Information | Enter the Information for your card. |
Asset Sharing | |
Visible in all workspaces | Check the box to make your card visible in all workspaces. |
Workspace(s) | Select workspace(s). |
Users/Users Groups | Select Users or Users Groups. |