Know About ACW Nodes
Updated
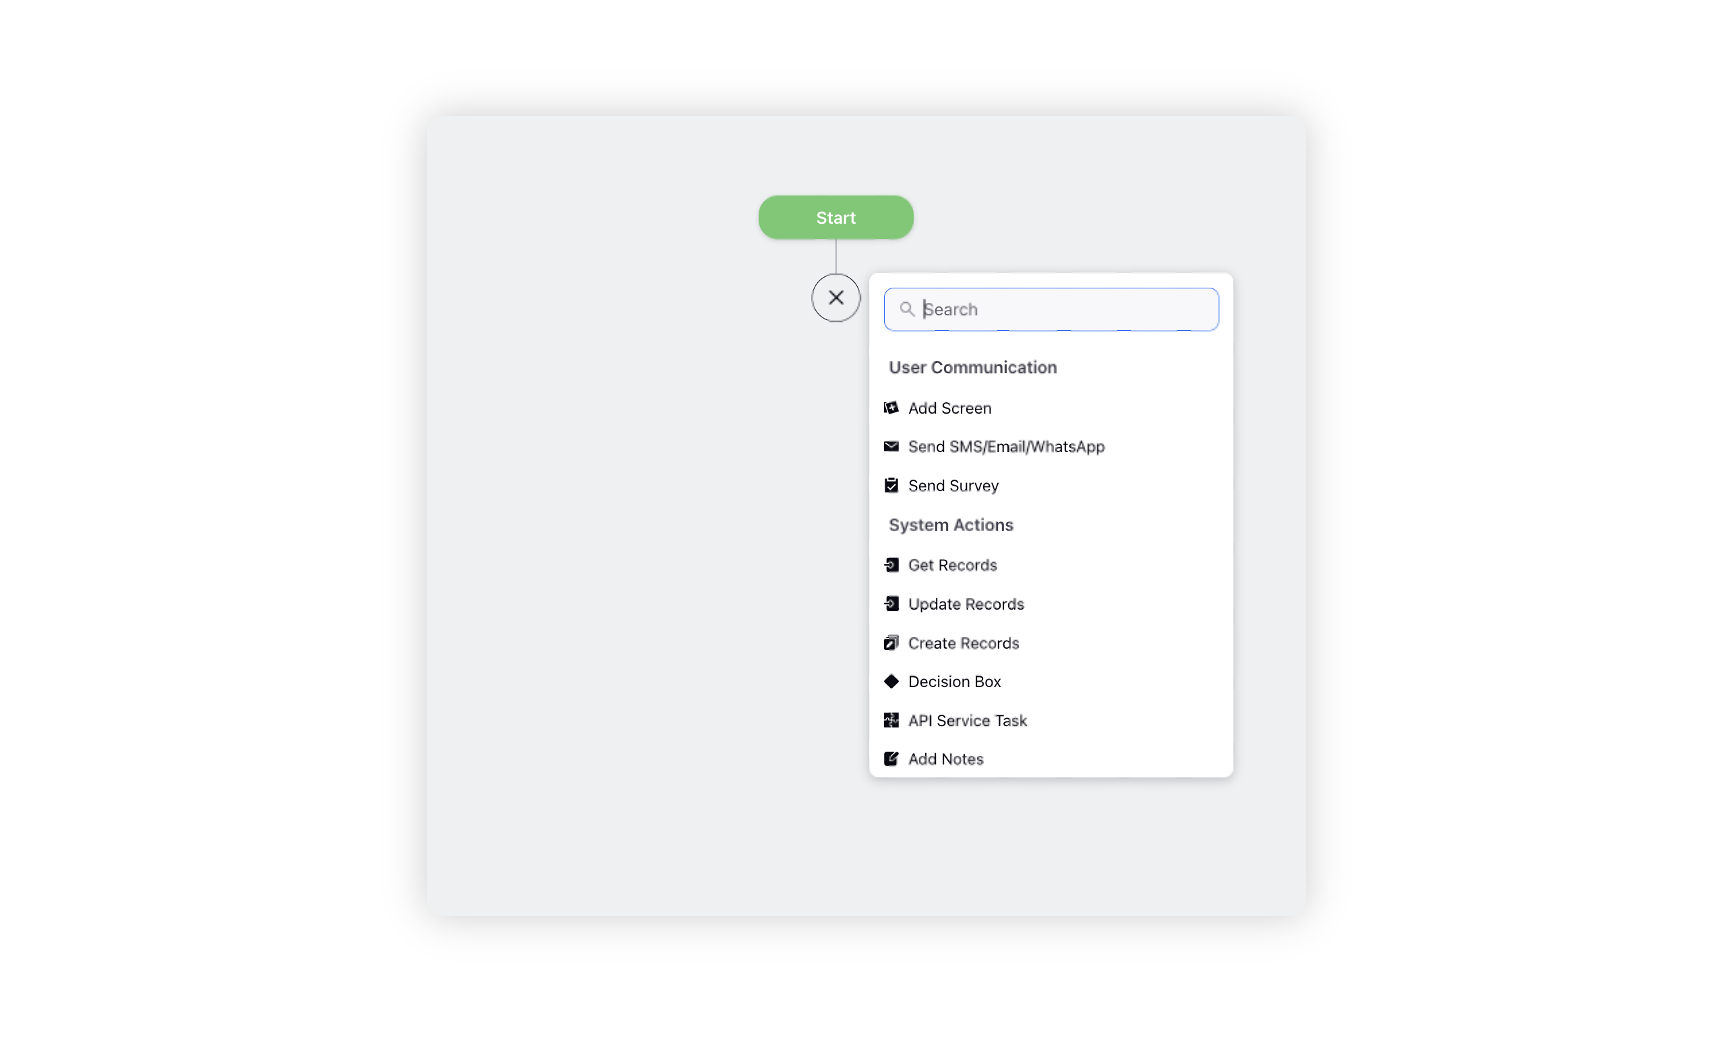
Teams can use the ACW nodes to configure workflow to take agent inputs, and case management actions. By clicking on the plus sign in the ACW builder, a desired node action can be selected. Details of each node action are listed below-
User Communication Nodes
These are the nodes which are used to take inputs from the agent, or to send instructions to the customer.
Add Screen
Screen helps in showing relevant information to the agents as well as taking inputs from the agents. You can show images, text, video, tables, GIFs, banners etc inside a screen. There are multiple input options like picklist, checkboxes, date time input, number input, text input, etc that can be added inside a screen For resolving variables inside description text, we need to use $ symbol and add the script in between curly brackets. Example - ${var} will resolve and solve the value of var on the screen.

The screen has 3 major screen components:
1. Navigation bar: Help us to navigate across different ACW screens. When the Navigation Bar toggle is turned on, we get 2 buttons by default: Back & Next, and an option to add more buttons. Further customization can be made using following functionalities:
“Button Group Position” and “Variant” can be selected to customize the appearance of buttons.
“Button Visibility conditions” can be set when we want to display a button only when those particular conditions are met.
2. There are three template actions possible:
Next screen action - This is used to move to the next screen or submit the ACW
Back screen action - This is used to move to the previous screen.
Close screen action - This is used to close the screen. It does not submit the ACW
3. Display components:
Description text: Description text is used to simply show a text output on a screen. The font, size, alignment of this text can be customized or links can be
added to text as per need. We can also include a resource by inserting relevant placeholders.Image/ Video Asset: Here we can add an image or video, which would appear on the ACW screen. To upload an image, please select the image icon. Here the user has 4 options: Add from DAM, Upload image, Add from URL & Dynamic image. To upload a Video, please select the video icon. Here the user has 2 options: Add from DAM & Upload video.

4. Input components: Contain various options to gather input for ACW.
Call disposition: It is used to add & configure the disposition plans which would be shown in ACW.
The call disposition contains 3 major components:
Mandatory disposition plan: This is a non mandatory field, where we can select only 1 disposition plan that has to be mandatorily filled by the agent.
Disposition plan label: This is a non mandatory field used to define the label for mandatory disposition plan.
Add Disposition Group: On clicking the Add disposition group we can define a set of disposition plans as a group. Following are feature components provided while defining disposition groups:
Group name: This is a mandatory field used to define names for the disposition plan group.
Allow multiple dispositions: If the toggle is turned on, then the agent can fill multiple disposition plans for a particular disposition plan group.
Eligible disposition plans: This is a mandatory field used to select all the disposition plans for a particular disposition category.
Disposition plan label

1. Date & time input
This is used to take in the date and time (if required) from the end user (agent or customer). The use cases include - scheduling an appointment, delivery date, mentioning the date on which issue occurred while lodging a complaint, purchase date etc. It is optional to enable time selection along with date input. There are a variety of date time formats available to select from. Also, we can choose the client's business hours for validating the selected date and time. The options outside the selected business hours will be disabled for users to choose. Furthermore, if the user attempts to input a time outside the defined business hours manually, an error message will be displayed. We can also restrict the date and time using the “Enable date and time conditions”, in which the date selection can be limited before, after or within a particular range.
2. Email input
This is an extension of text input with the additional feature of placeholder to indicate to the end user in which format the input is expected (ex - abc@xyz.com) and the option to make it read only.
Making an email input field read-only means that the field can be viewed by the user but cannot be modified or edited. This can be useful in a variety of contexts, such as when an agent is interacting with a customer during a call.
3. Number input
Number input can be a useful tool for agents during a call as it allows them to quickly and easily input and store numerical information related to the call.
4. Attach file
The file attachment feature allows the users to upload or attach files, such as documents, images, or videos, as part of a process or transaction. This feature allows users to provide additional information or data that may be required for the workflow, such as a resume for a job application, or an image of a product for customer support.
5. Password input
This is a feature for the customer facing GWs, and it takes in a password to verify the user’s identity. The password while inputting is masked and the eye icon can be used to see the password. The format can be either numeric or alphanumeric with the maximum and minimum length specified. This password can then be matched with the client’s APIs.
6. Phone
This is also an extension of number input with the exception of constraints. It does provide a placeholder to show the end user the expected format of phone number.
7. Picklist:
Picklist is a dropdown with various options where the user can select either single or multiple values.Controlling field is the parent input component on which the current picklist depends on If the value of the parent is changed, the current picklist will be reset.
Picklist can be configured in 3 ways:
Manually adding all the Options
Fetching the List through an API or through an Array List stored in a variable: Inorder to fetch the list through an API make sure that adapt api response, value and label are defined correctly as per API inputs and output.
By variable
8. Radio group
Radio buttons can be a useful tool for agents during a call as they allow the agent to quickly and easily select from a predefined set of options.
9. Slider
The slider element allows users to make selections or adjust settings within a continuous range of values. A slider is typically represented by a bar that can be moved left or right, to select a specific value within the range.
10. Text input and Text Area
Text input can be a useful tool for agents during a call as it allows them to quickly and easily input and store information related to the call. The only difference between text input and text area is that in text input, we can apply a check if the provided input is following a certain “PATTERN” or not.
11. Toggle
Toggle allows users to switch between two states. They are often used to enable or disable a certain feature or option within a workflow. It is basically a switch that can be flipped back and forth to change the state.
12. URL
This is an extension of the text input. It also has a pattern for validation of the url and a placeholder to show the end user the expected format of the url.
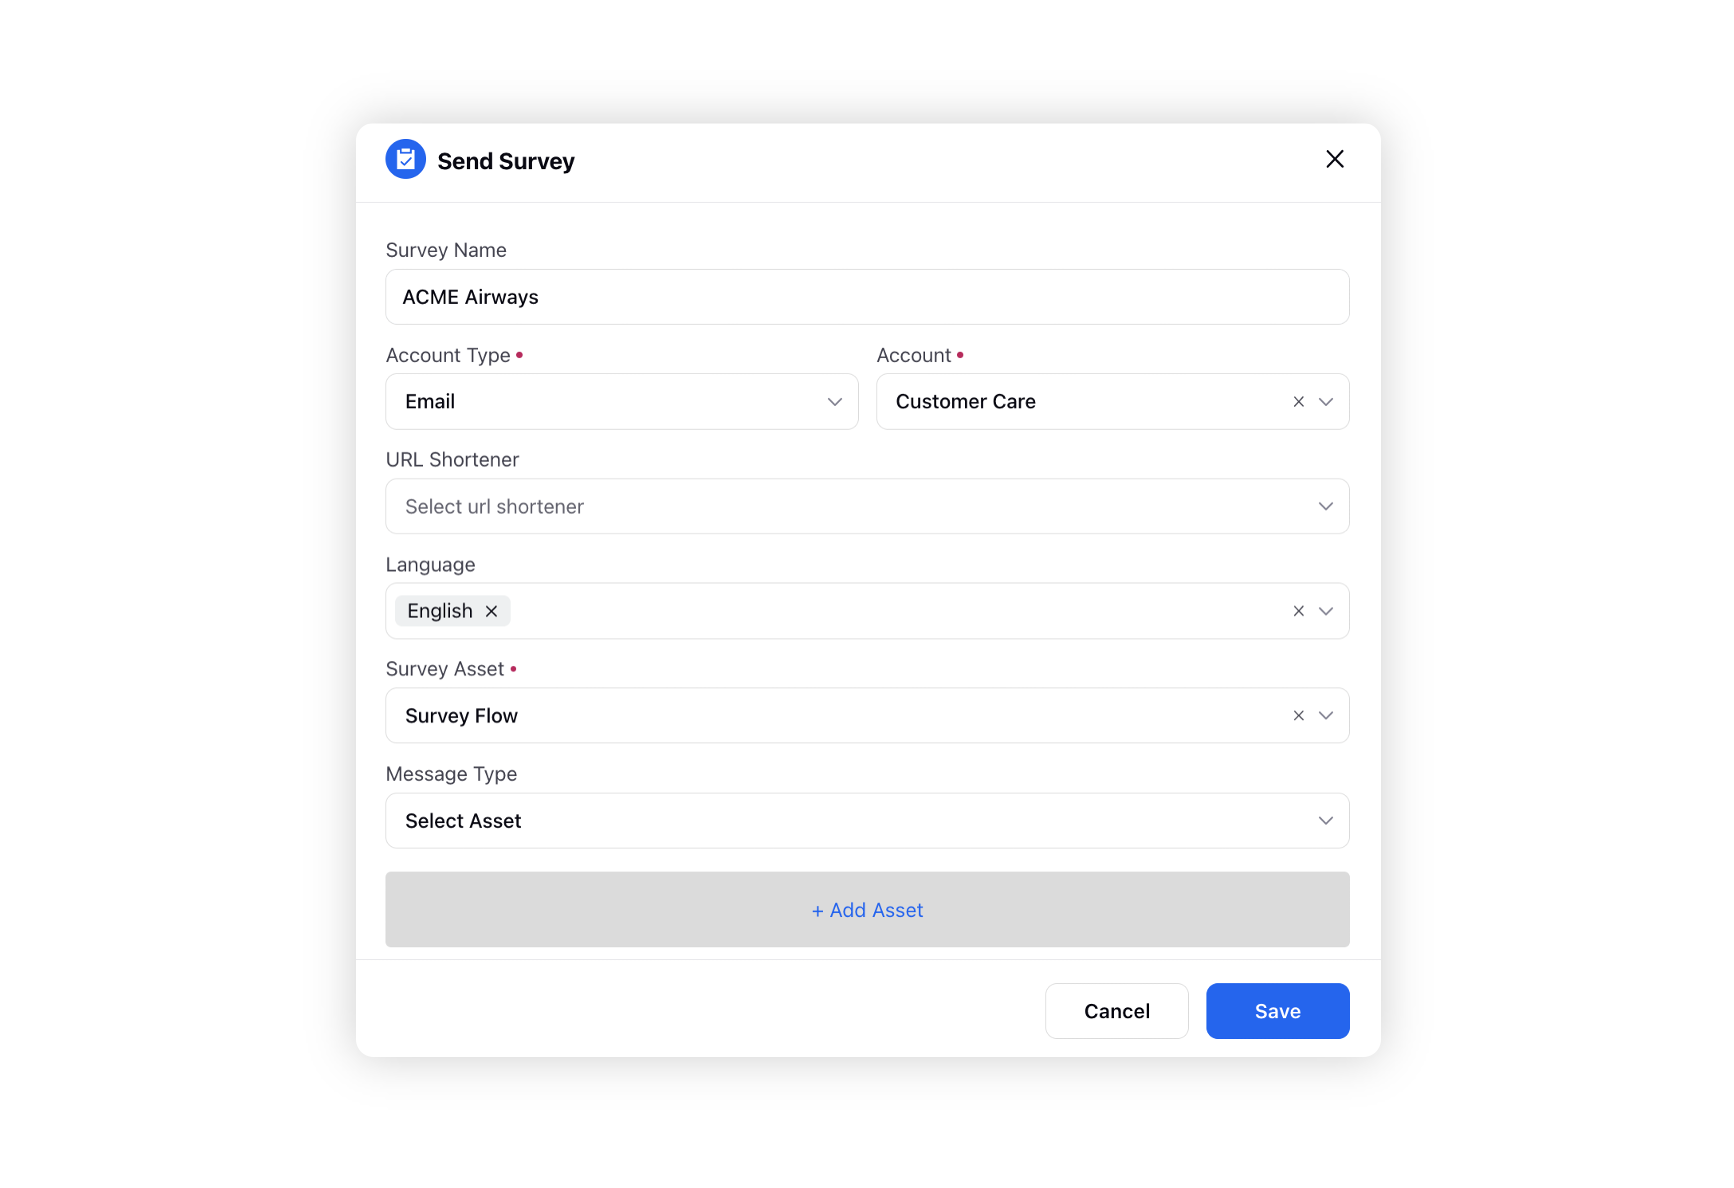
Send Survey
After-Call Work (ACW) can be leveraged to dispatch surveys to customers upon ACW submission. These surveys can be distributed through WhatsApp, SMS, or email, chosen from the Account Type dropdown menu. Upon selecting the account type, proceed to choose the specific account, URL shortener, preferred language, and attach the Survey Asset. You can also add a message to send with the survey.
Once an agent submits the ACW, the customer will receive a survey based on the configured settings.
System Action Nodes
Loop Node
In ACW the disposition screen returns a list of disposition plans filled by the agent. Loop node allows us to iterate over these disposition plans one at a time, access any particular fields on disposition plans and later we can perform any actions as per use case.
Components:
Collection Variable: This is the list/ array variable which API has returned. Iteration will be performed on each item of the list.
Loop Direction: This determines the direction in which the components of the list will be picked up. Example- If ‘First to last’ is selected, iteration will begin from the 1st element of the array.
Loop Variable name: Name to the variable to be used in subsequent nodes for performing actions.

Schedule Callback Node
This node helps users schedule a callback from the brand for a later time.


Note: In order to schedule the callback successfully, make sure following details are filled:
Callback number
Callback campaign: Without campaign, callbacks won’t be triggered by system
Time for callback
Assignee
Decision Box
A decision box is used when different paths are to be taken based on certain conditions. We can add conditions or condition groups to define the criteria required for taking a certain path in the ACW builder.

Components:
Path Name: Give individual names to each path
Condition: This is where you define the condition based on which the path will get executed. You can add more than 1 condition for the same path.
Condition Group: For some use cases, you need to group the conditions and then check for their validity. Clicking on this will open another condition box with an option to select between AND / OR.
Add Path: By default, the node shows only 2 paths including the default one. To add more paths, this option is used.
Default Path: A default path option is available at the very end of all paths so that this path can be followed in cases when none of the other conditions are met. Default path appears on the canvas if the path name is provided otherwise it stays disabled.
Delete Path: This button is used to delete any added path.
Assignment Node
This node is used to set the value for some variable in between the path of ACW flow.

Components:
Set variable to value mapping: Select the variable which needs to be changed and then set the filter and then in the third dialog box choose the value which you want to assign to that variable.
Get Records
This node is used when you want to load properties for any case, profile or custom entities present in the Sprinklr system into the ACW.
Components:
Entity Type: Select between case and profile i.e. the entity whose properties you want to load.
Variable Name: This variable will be used to call the properties from the resources.
Number of Records: Here you can specify the number of records to load
Filter: This is where you enter the conditions based on which the records are filtered and fetched. Imagine this as an excel sheet where you set filter to see only the required rows
Sort: Once these records are filtered, you can sort them based on the fields present.

Update Records
This node is used when you want to update any case, profile or custom entities present in the Sprinklr system from the ACW.
Components:
Entity Type: Select between case and profile i.e. the entity whose properties you want to load.
Variable Name: This variable will be used to call the properties from the resources.
Number of Records: Here you can specify the number of records to load
Filter: This is where you enter the conditions based on which the records are filtered and fetched. Imagine this as an excel sheet where you set filter to see only the required rows
Sort: Once these records are filtered, you can sort them based on the fields present.
Create Records
This node is used to create new records via ACW. We first need to select an entity i.e. case, profile or custom entity. Then select the fields and the value we want to enter in those fields.
Lastly we need to enter a variable name so that values from this record can be called and used later in this IVR.

Custom Field Action node
Custom Field Action Node is used to add, remove, merge or in general edit any custom fields.
What are custom fields?
Properties and tags that are enlisted in the Sprinklr Platform at several feature levels called Asset Classes are fully customizable. The Asset classes are Message, Profile, User, Client, Campaign, Case, Task etc. This allows you to organize and categorize content. Custom fields are used to create properties that are not provided by Sprinklr by default.
Set Fields: This is used to set any hardcoded value to an already created custom field. All you need is to select a field from the dropdown, choose the operator (set, unset,
merge etc.) and add the value to the field. This can be done for both case custom fields and profile custom fields.
Copy Fields: This is used when there is a need to set a user input taken during the IVR to a custom field. It can also be used to copy the value from one custom field to another.

API service task
APIs are mini programs that help to fetch data from third party servers or applications. It can be a CRM system that stores customer information, or secured bank servers that store user account details. This node helps to pull information using APIs based on certain inputs provided.
Components:
Choose API: API needs to be integrated with Sprinklr from the backend. Once added, they appear in this dropdown to choose from
Input Parameters and Values: API pulls out data based on certain inputs. Input Parameters takes the value that needs to be sent to the API. It can be a user input or case / profile property. Input Value is the value against which this input parameter is checked. If there is a match, required output is returned.
Outputs Parameters and Values: Output Values are the fields that we want as output from the API. Output Parameters is the name of the variable that we give to that particular output field.
Exception Variable: This is a required field which helps us identify if the API worked fine or gave an error. Exception variable will return true if the API fails.


Add Notes node
There are instances when a brand wants to add some notes which are visible only to the agent in the console.
Similar to other text fields, variables can be used here as well.

Break Loop
This loop is used to break out of the loop node if certain actions or conditions are met.
Add to suppression list node (to be used for outbound calls)
For dialer outbound calls, if we don't want to contact the customer but he is present in the number list we add him to the suppression list using this node and the call won't be triggered for that particular customer.
Send SMS/Email/WhatsApp
This action allows you to send SMS, email or reach out to a customer through WhatsApp.
While configuring this node, we need to specify the channel, the account from which we want to send out the message, mobile number or email id on which we wish to send the message and the message content which can be written separately or an existing asset can be inserted, subject to channel specific limitations.

Add or Remove from Queues node
This Node can be used to add or remove from specific Queues.

Flow Action Node
End Path
Adding this node ends the ACW flow. However, it should be noted that the Next Screen Action in buttons takes us to the next node of the ACW. Hence in a screen right before the End Path action, a button with the purpose to finish the journey should also be assigned ‘Next Screen Action’ so that it reaches the next node which is the End Node.