How to Migrate from JWT Credential to OAuth Server-to-Server Credential for Adobe
Updated
The Service Account (JWT) credentials have been deprecated in favor of the new OAuth Server-to-Server credentials.
You can read more about this: https://developer.adobe.com/developer-console/docs/guides/authentication/ServerToServerAuthentication/migration/
You can watch this video to understand step by step how the migration process can be done: https://www.youtube.com/watch?v=GzV4y2Btyts
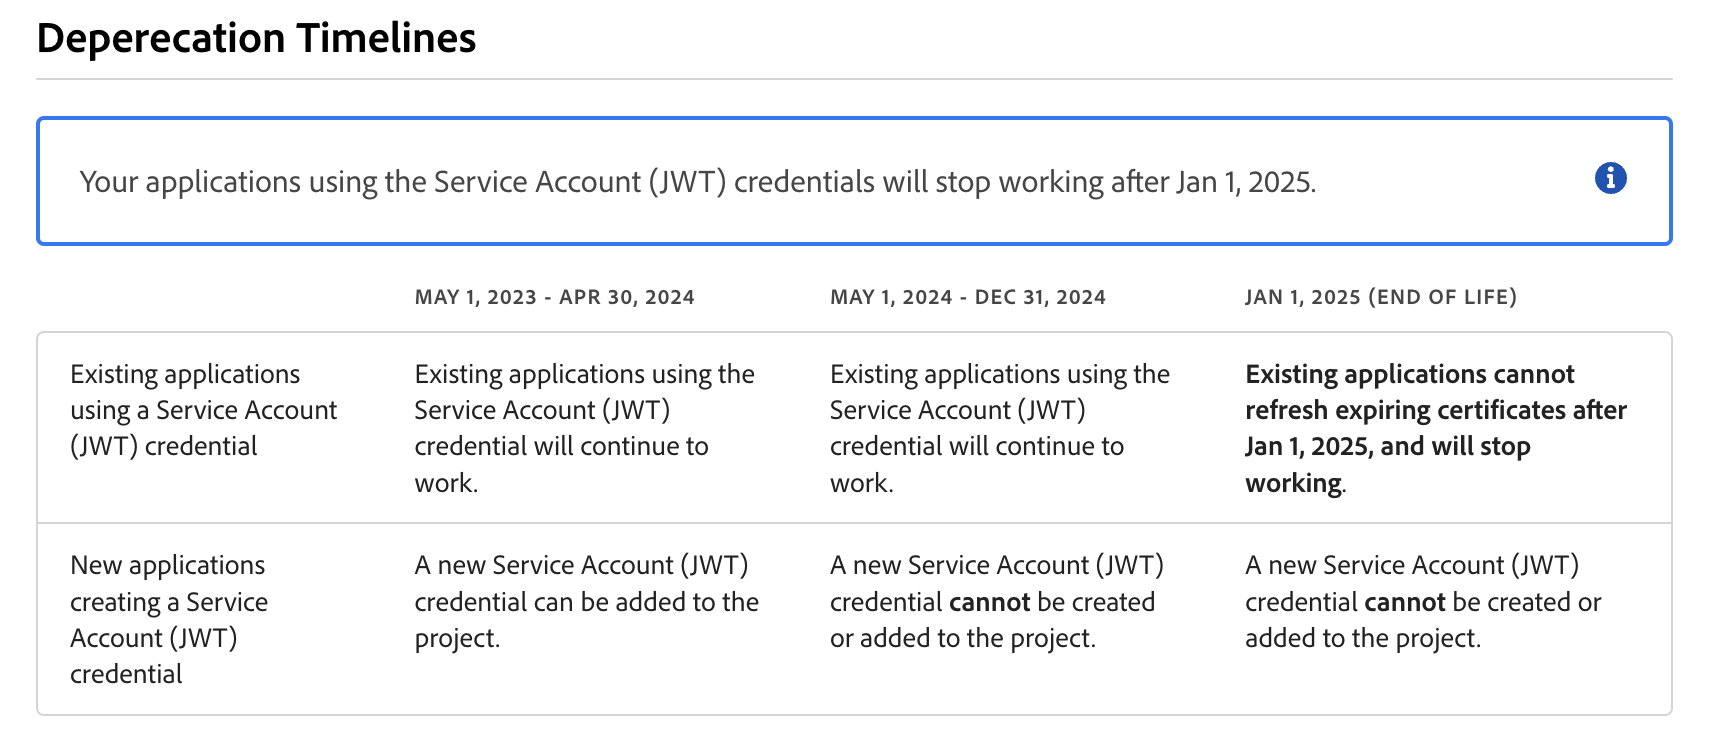
If a user is using Adobe Apps which are already installed, there is no need to migrate from the JWT credential to OAuth Server-to-server credential until 1st January 2025.
If a user is using Adobe Apps which are already installed, and wants to install a new adobe app, it is recommeneded to migrate all existing apps from the JWT credential to OAuth Server-to-server credential first and then directly add new apps via OAuth Server-to-server.
Step 1: Add the new credential to your project
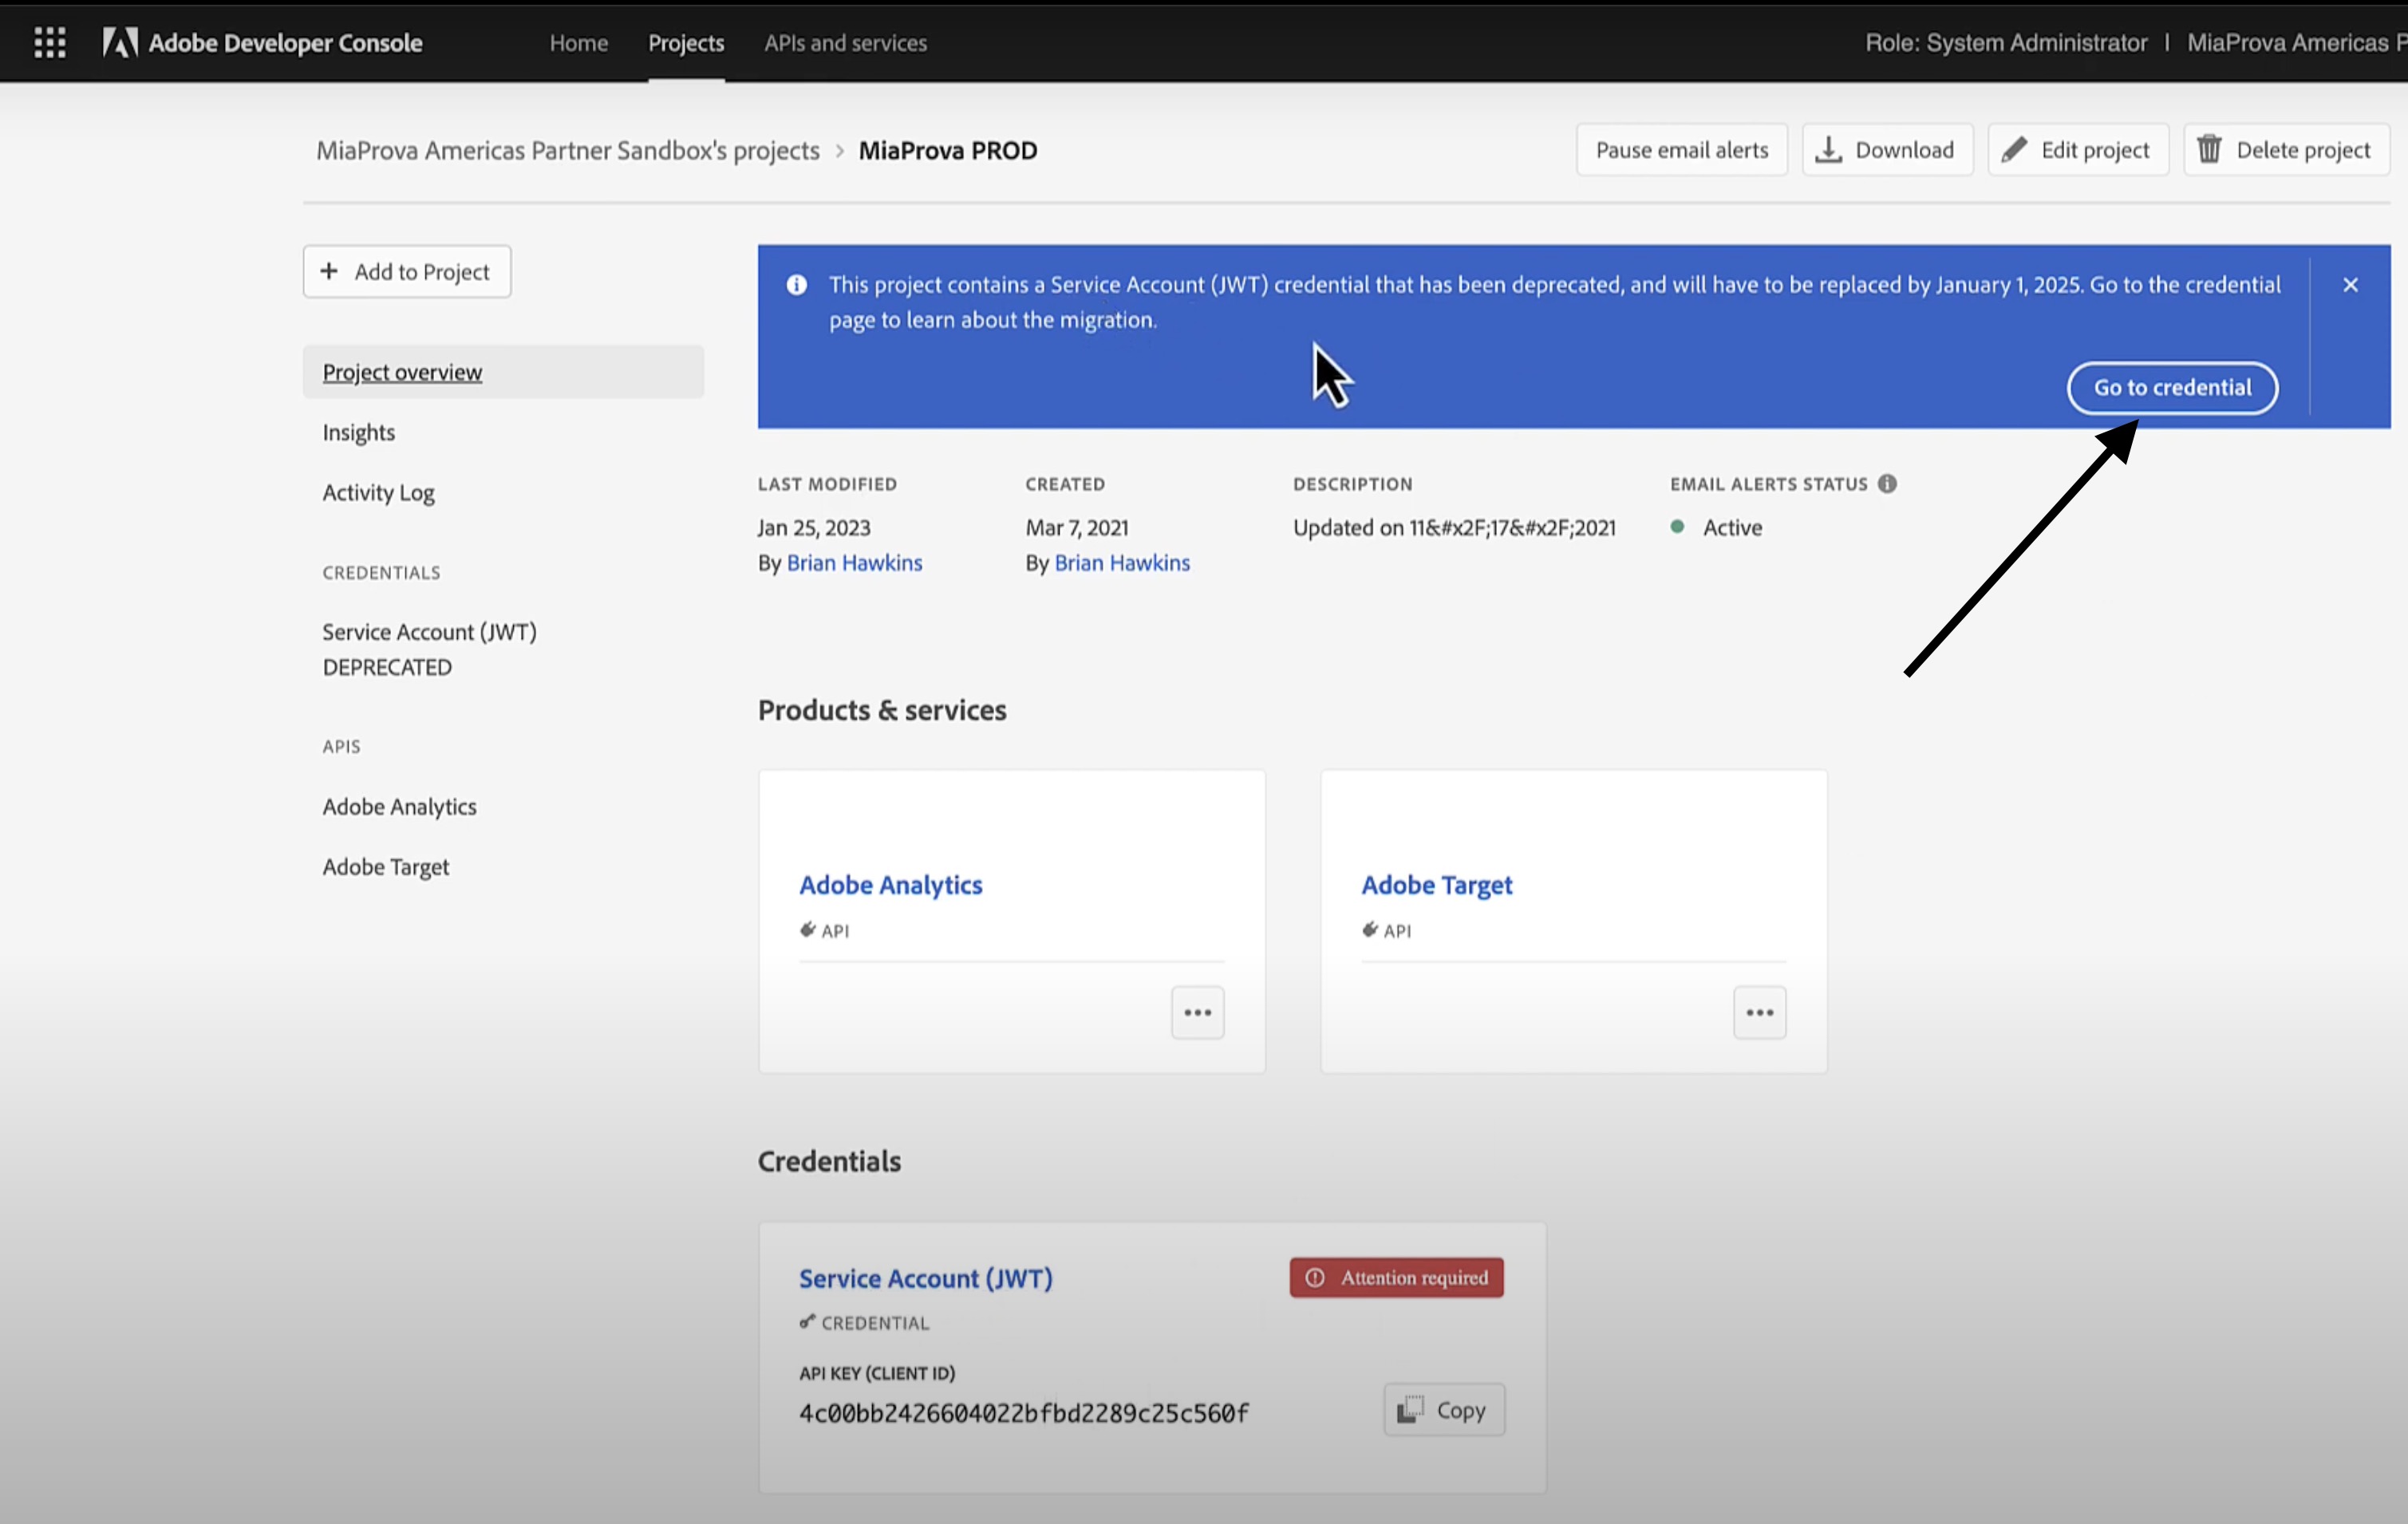
Log in to the Developer Console and open your project. Open the Service Account (JWT) credential tab from the left side nav and view the migration card or click on "Go to Credential" at the top.
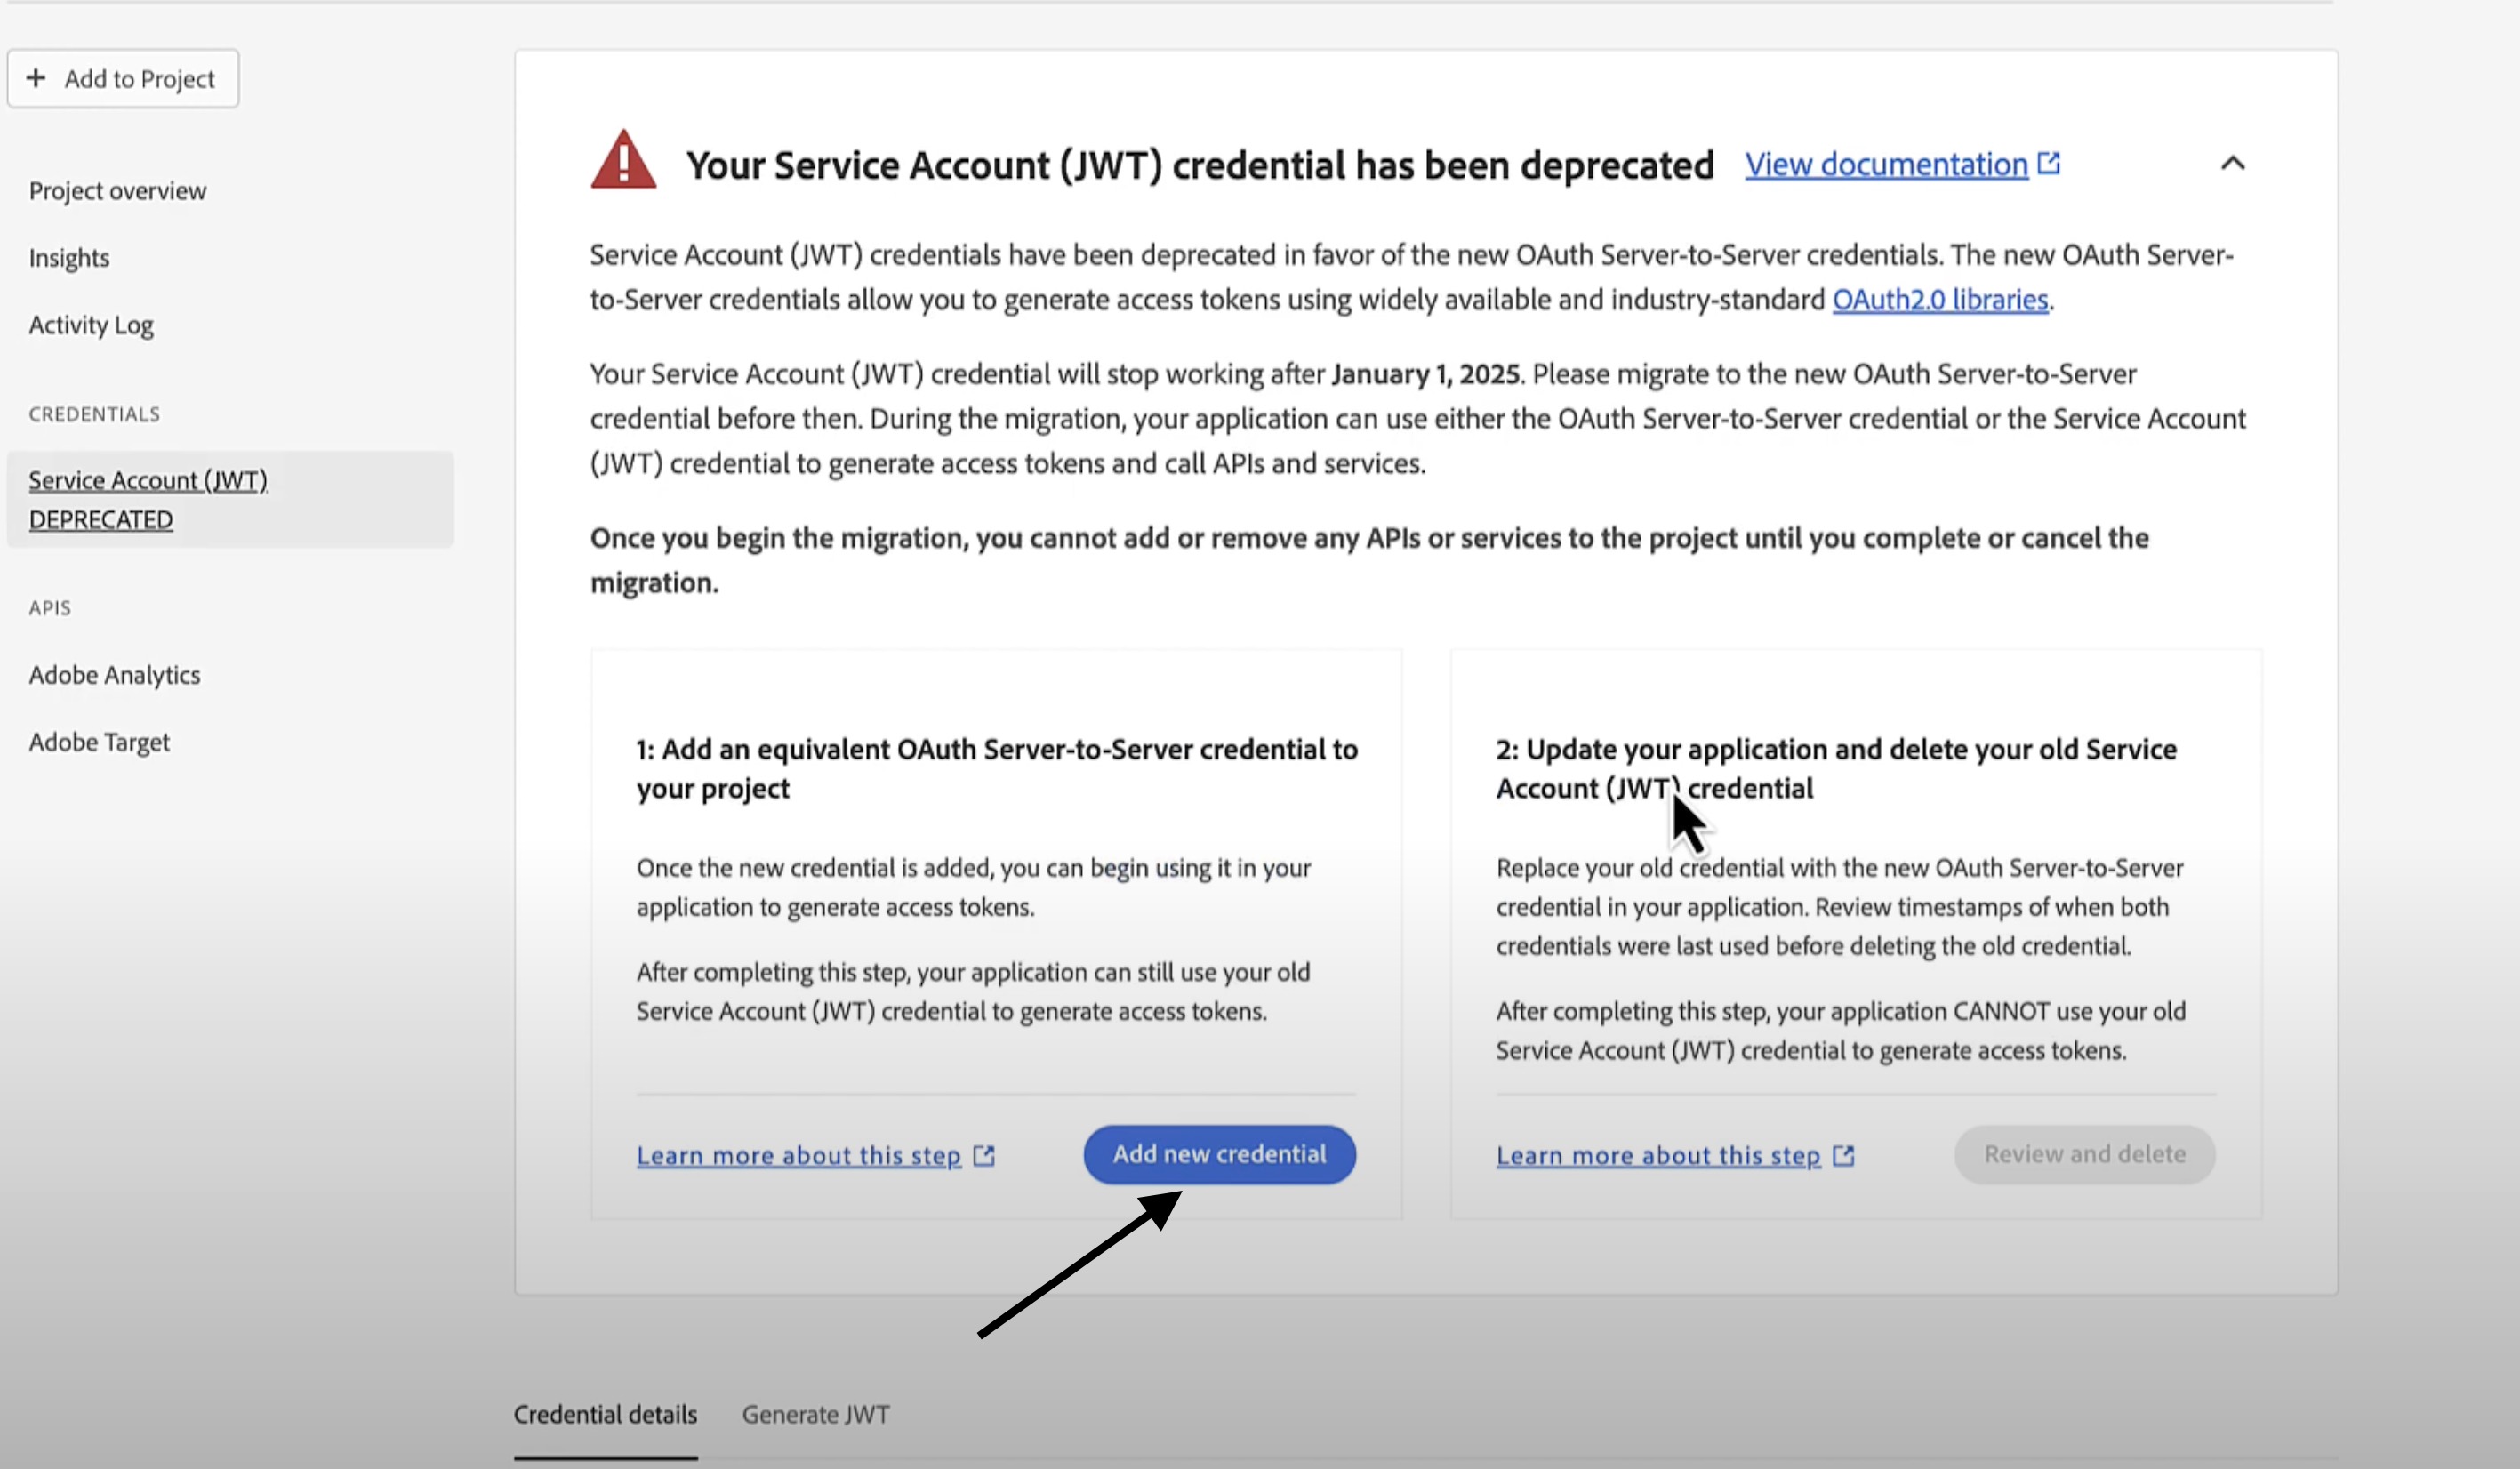
On the migration card, click the button to add an equivalent OAuth Server-to-Server credential. Adding an OAuth Server-to-Server credential to your project will start the migration.
Note: during the migration, you cannot add any API or service to your project. Some finer points about the added credential -
The new OAuth Server-to-Server credential has the same client id, technical account, connected APIs and services, scopes, and product profiles as the old Service Account (JWT) credential.
A token generated by the new credential will be identical to one generated by the old credential and have identical access.
The difference between the two credentials is in the token generation mechanism and the use of public certificates and private key pairs.
At this point, you can use either credential to generate access tokens. This ensures that your running application can continue generating access tokens using the Service Account (JWT).
Meanwhile, you can test the new credential by generating access tokens using the Developer Console UI or a cURL command. We also recommend reading our implementation guide that points to several standard OAuth 2.0 libraries to generate access tokens programmatically.
Step 2: Update your application and delete old credential
Update your application code to use the new credential to generate access tokens. (Click on "Review and Delete")
At this point, you can make code changes to your application and deploy it. Because both your credentials work and you can use either to generate access tokens, you can deploy your updated application to test, staging, and even production environments.
Once you have updated your application and deployed it to production, the next step is to review whether your application has stopped using the old credential completely. And if so, delete the old credential to complete the migration.
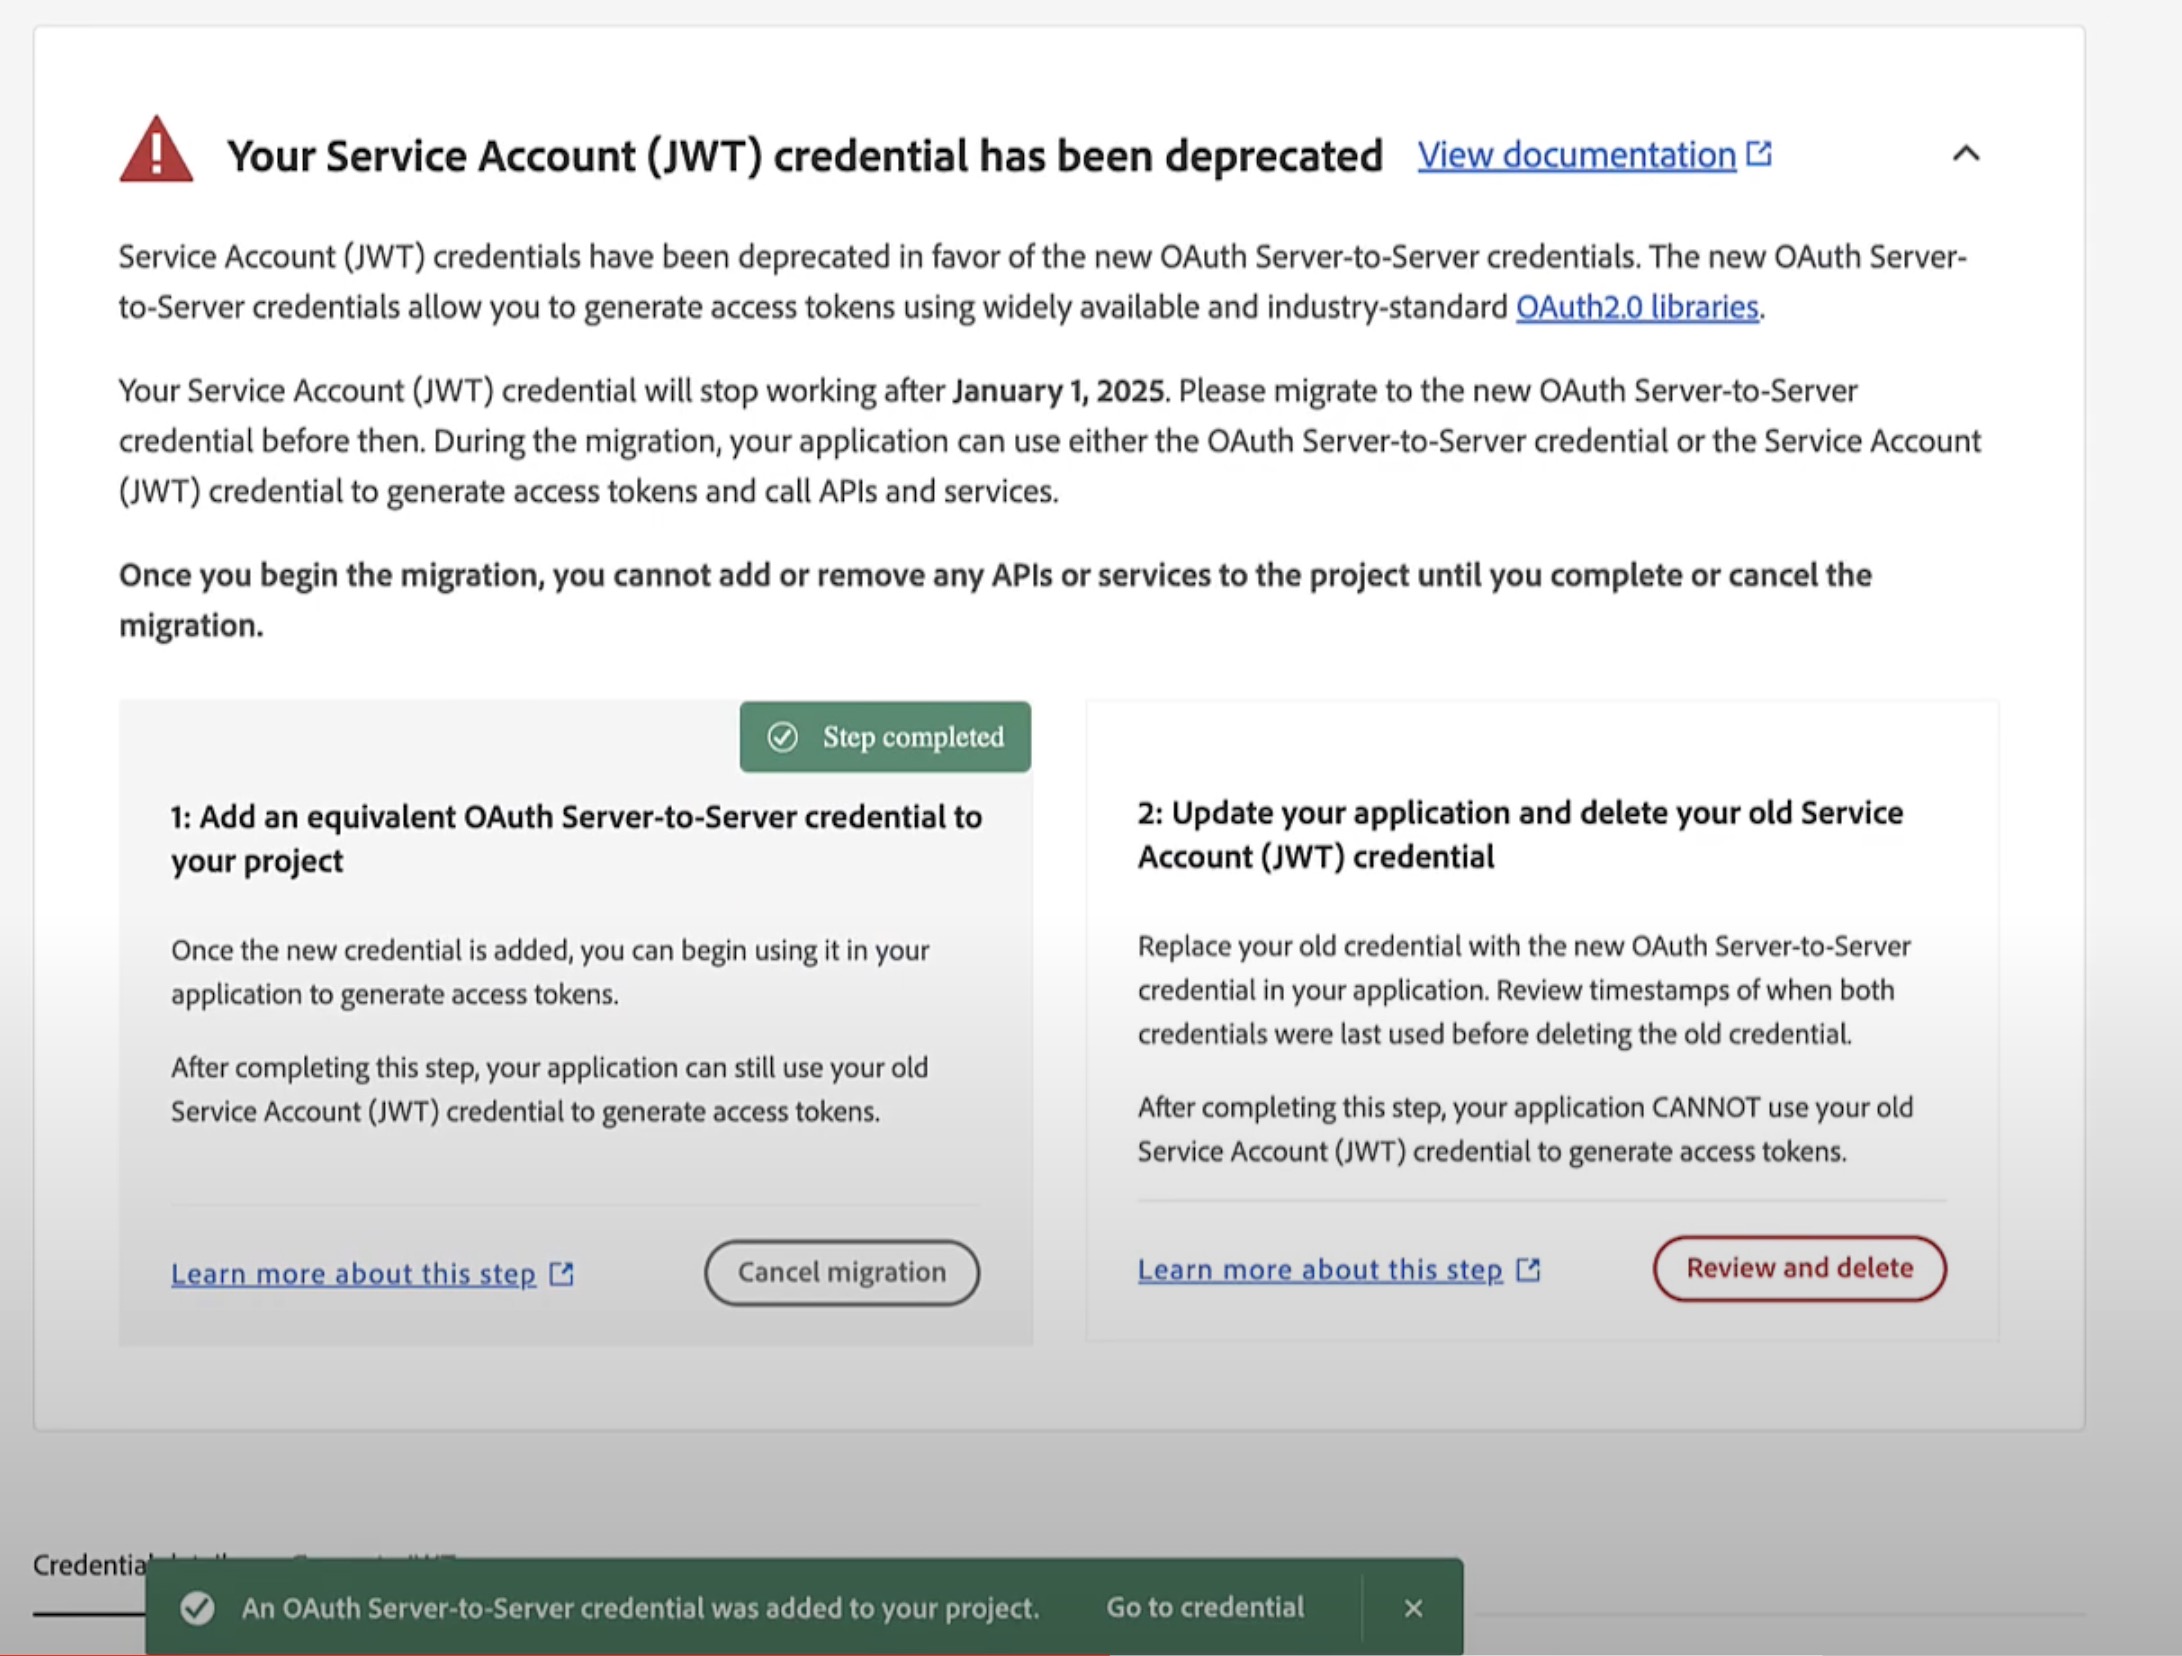
On the migration card, click the button to review timestamps and delete the old credential. This will launch a dialog that walks you through your application's timestamp and credential usage. Based on the status of the two checks (listed below), the UI displays will prompt you to the recommended action.
Did your application generate access tokens using the new credential more recently than the old credential?
Has it been at least 24 hours since the last time an access token was generated using your old credential?
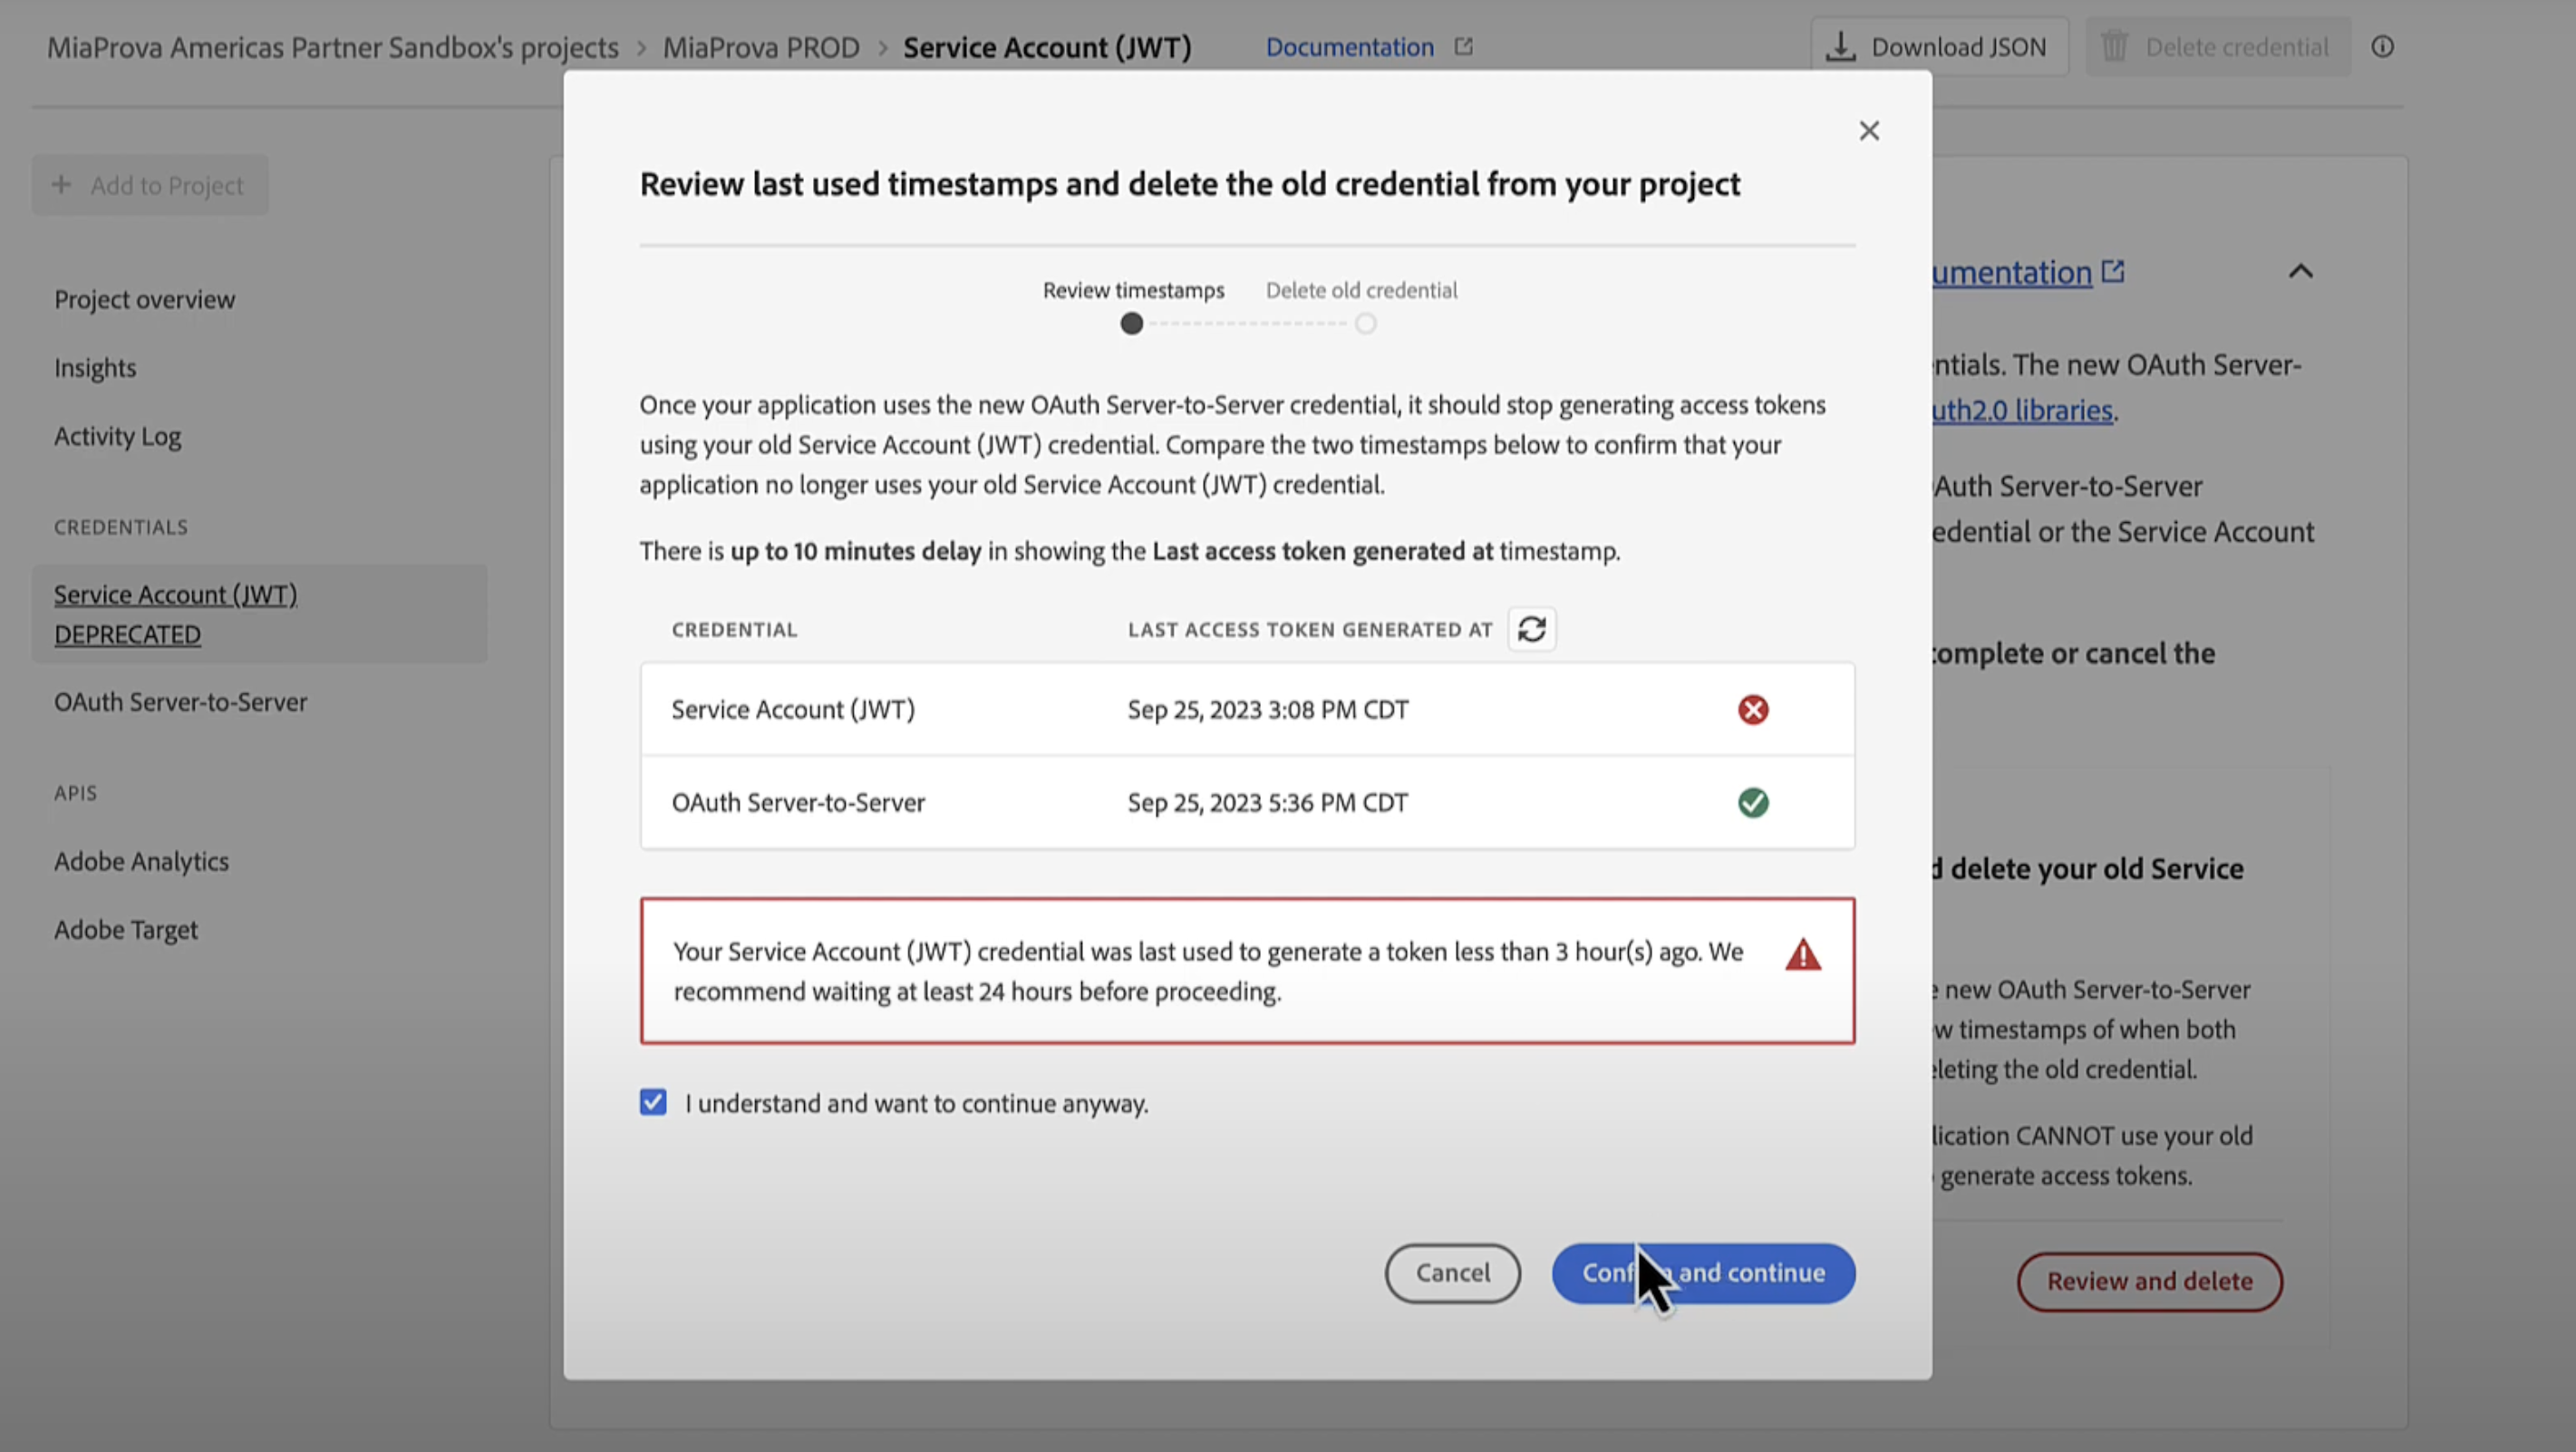
3. Once you are sure that you have replaced the old credential successfully, the dialog will take you to the last step of deleting the old credential. To confirm this step, you must type in the project name to confirm your intentions. Note: once completed, this step cannot be rolled back.
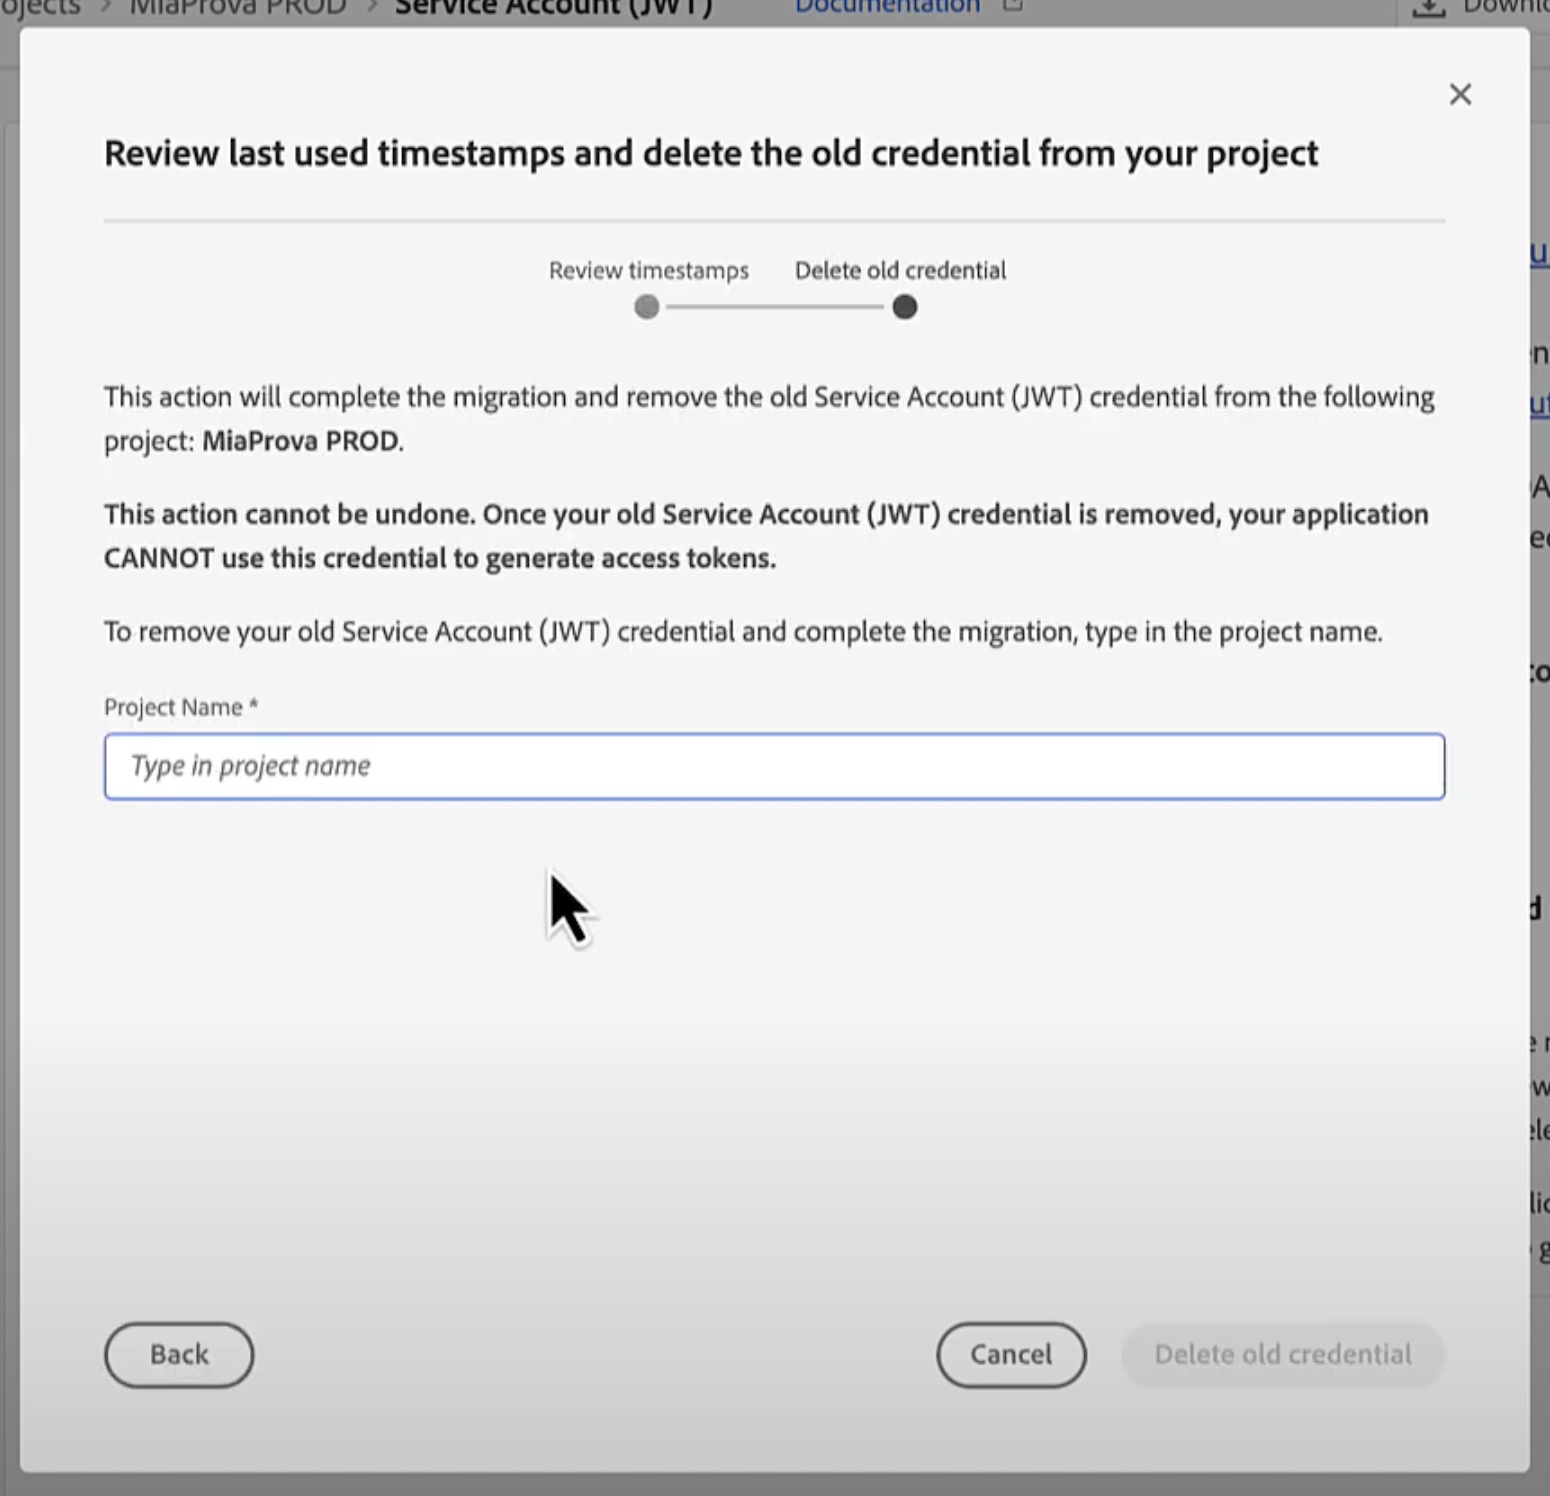
4. Finally click on Delete Credential and you have succesfully deleted the old JWT Authentication