Sending Emails from Sprinklr's Domain
Updated
You have the option to opt for an email account provided by Sprinklr, powered by Amazon Simple Email Service(SES), eliminating the need to create your own email accounts with external providers like Gmail or MS Exchange. This makes it easier for you to manage your emails within Sprinklr's platform, without needing to maintain your own email servers.
Enablement note: To learn more about getting this capability enabled in your environment, please work with your Success Manager. |
Sending Emails from Sprinklr's Domain
With Sprinklr's domain email accounts, you have the flexibility to select a custom username, allowing you to personalize your email address according to your preferences. This feature is particularly useful in scenarios where a brand prefers not to integrate their existing email account with Sprinklr. Instead, Sprinklr can create a dedicated email address for receiving and publishing emails on behalf of the brand.
For example, you could create an email account like "help@acme.sprinklrsupport.com," where "help" is the chosen username and "acme.sprinklrsupport.com" is the domain of the email account, where "acme" can also be customized to reflect your brand's identity.
Other examples of email accounts that can be added include:
customersupport@brand.sprinklrsupport.com
enquiries@help.sprinklrsupport.com
return@customer.sprinklrsupport.com
Click the New Tab icon. Under Platform Modules, click Social Accounts within Listen.
On the Accounts window, click Add Account in the top right corner. Choose Email from the options.
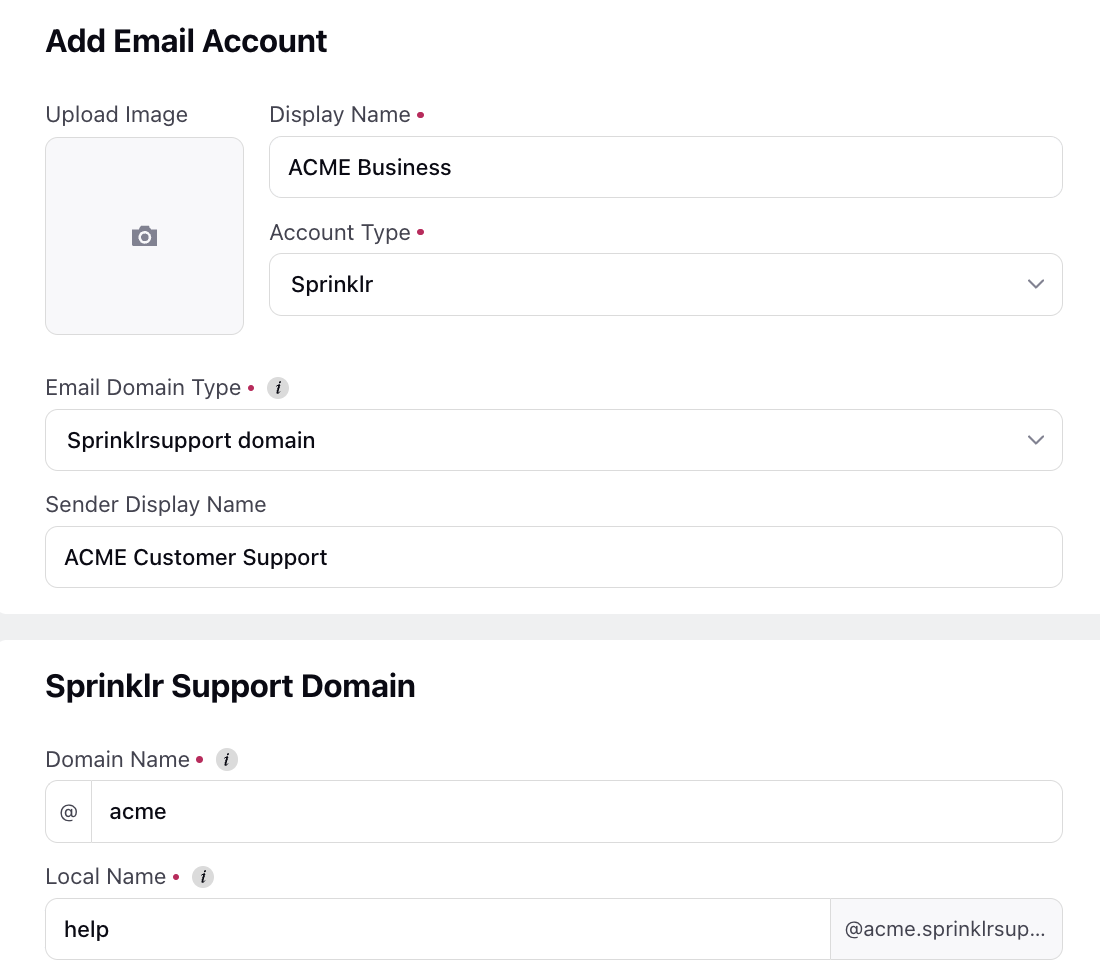
On the Add Email Account window, provide a Display Name that will be displayed within Sprinklr.
Select Account Type as Sprinklr.
Select the Email Domain Type as Sprinklrsupport domain.

Specify a Sender Display Name of your choice. This is the name visible to the recipients of the emails.
Enter the Domain Name. It refers to the subdomain of "sprinklrsupport.com," which can be customized according to your preferences.
Enter the Local Name. It represents the username for your email account, such as "help," "customersupport," "enquiries," or "return."
Click Save to add the email account. Once the domain is verified, the email ID will be added to the existing rule set, and the account will be ready for receiving and publishing emails.
Sending Emails from Brand's Domain using Auto-Forwarding
If you prefer not to use the "sprinklrsupport" domain for customer interactions, you have the option to change the sender email address to your own domain. For instance, if the email account added to the platform is "help@brand.sprinklrsupport.com," you can send emails from "help@brand.com" instead.
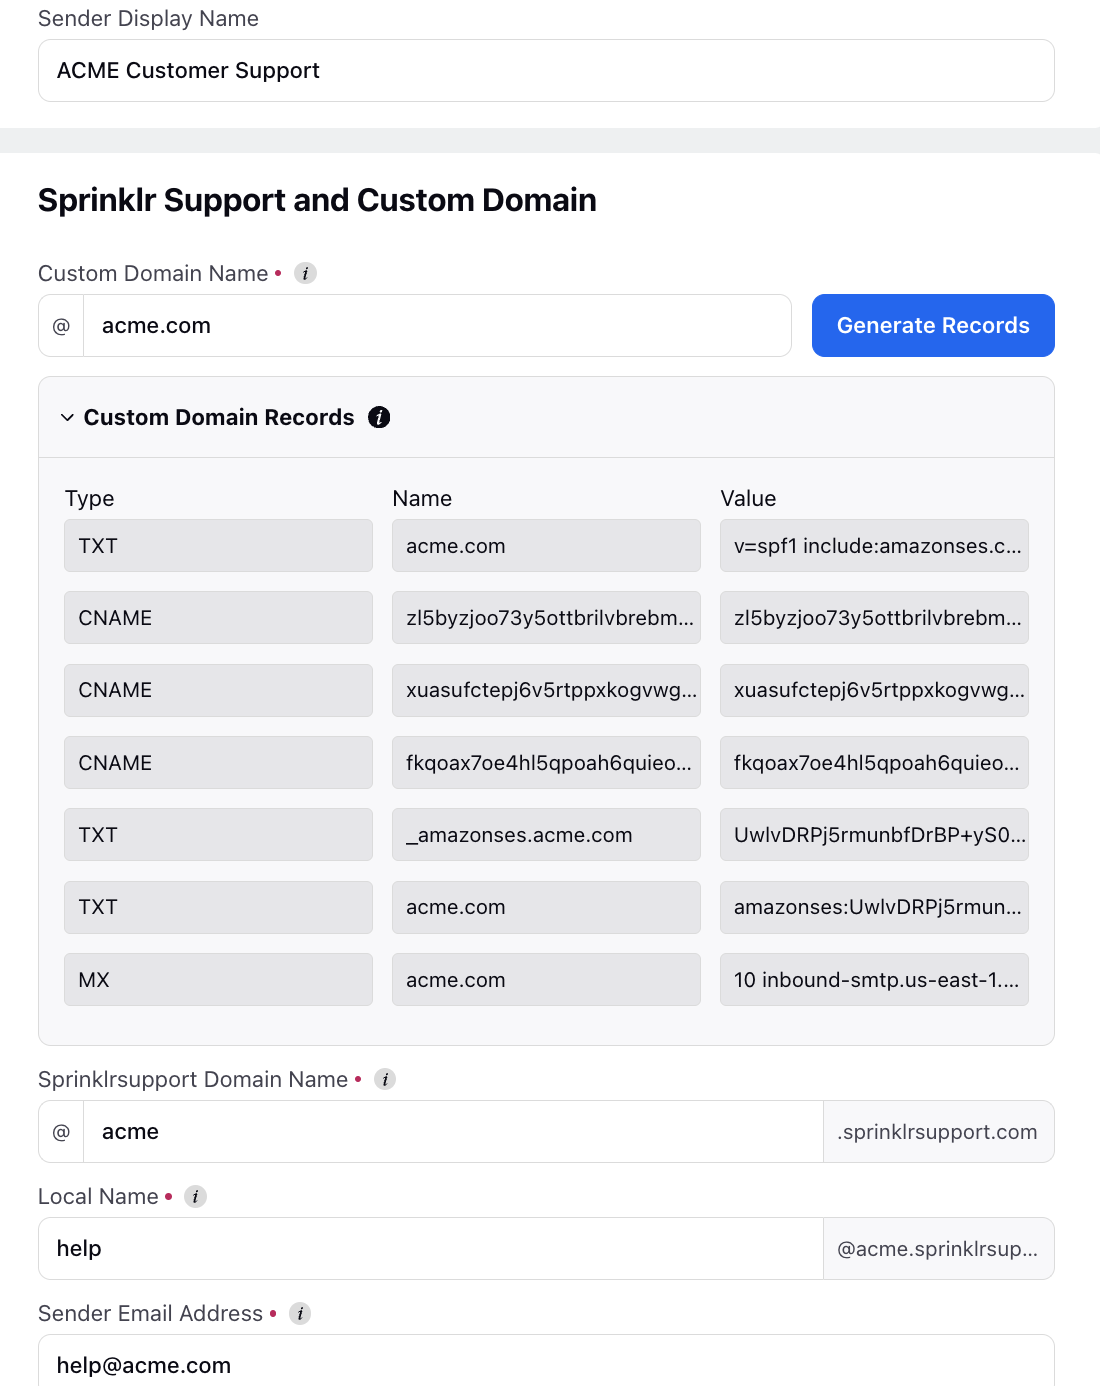
Select the Email Domain Type as Sprinklrsupport + Custom domain with autoforwarding.

Specify a Sender Display Name of your choice. This is the name visible to the recipients of the emails.
Enter the Custom Domain Name, which is your brand's domain (e.g., "brand.com"). Click Generate Records to obtain TXT and DKIM records for the brand's domain.
Once the TXT and DKIM records are fetched, the brand is required to integrate these records into their DNS settings. Incorporating these records enables Sprinklr to dispatch emails under the "brand.com" domain. This allows brands to leverage Sprinklr's email-sending capabilities without needing to incorporate their own email address into the system.
Enter the Sprinklrsupport Domain Name. It refers to the subdomain of "sprinklrsupport.com," which can be customized according to your preferences.
Enter the Local Name. It represents the username for your email account, such as "help," "customersupport," "enquiries," or "return."
Lastly enter the Sender Email Address from which you want your users to receive emails.
Click Save at the bottom.
Once the aforementioned steps are completed, Sprinklr will be capable of sending emails from "help@brand.com." Consequently, end customers will address their replies to "help@brand.com," despite the email account registered in Sprinklr being "help@brand.sprinklrsupport.com." To ensure this functionality, it's necessary to setup an autoforward rule within the native mailbox to forward all incoming emails from "help@brand.com" to "help@brand.sprinklrsupport.com."
Sending Emails from Brand's Domain
In situations where the brand does not have a native mailbox and prefers not to use the sprinklrsupport domain when communicating with customers, they have the option to configure a mailbox for their custom domain directly within Sprinklr.
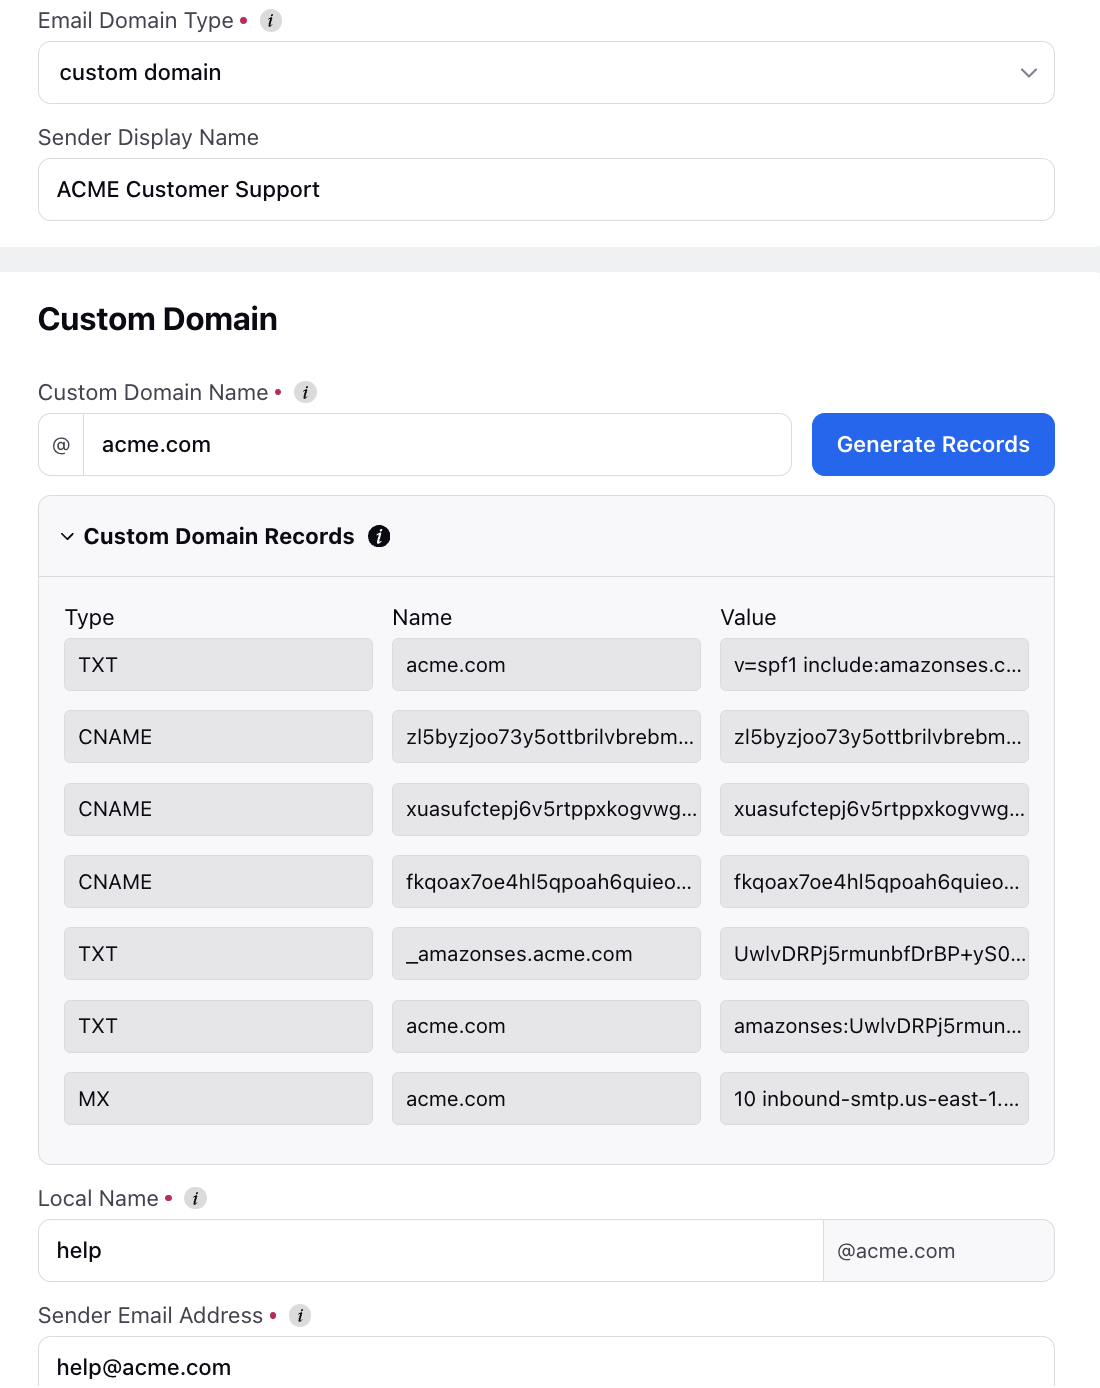
Select the Email Domain Type as custom domain.

Specify a Sender Display Name of your choice. This is the name visible to the recipients of the emails.
Enter the Custom Domain Name, which is your brand's domain (e.g., "brand.com"). Click Generate Records to obtain TXT, MX, and DKIM records for the brand's domain.
Once the TXT and DKIM records are fetched, the brand is required to integrate these records into their DNS settings. Incorporating these records enables Sprinklr to dispatch emails under the "brand.com" domain.
Enter the Local Name. It represents the username for your email account, such as "help," "customersupport," "enquiries," or "return."
Lastly enter the Sender Email Address from which you want your users to receive emails.
Click Save at the bottom.