How to Install & Setup the Google Analtics Ads Integration
No tags available
Updated
3 months ago
, by [Redesign] Sprinklr Help Center
Google Analytics setup is a straight forward process and it can be done by anyone who has admin access to the Google Analytics account (Google Analytics credentials are required).
Please follow the below steps and prepare all the metrics, goals and identify the unique identifiers to have a seamless experience during the configuration.
Before you Begin:-
Ensure user adding the Google Analytics in Sprinklr Marketplace have Admin permissions in Google Analytics.
Understand the Metrics which you want to track in Sprinklr.
Understand the Goals and the correpsonding conversion level for them which you want to track in Sprinklr.
Identify the Unique Identifier in your URLs which will help you to map the data to the best possible granular level.
Click the New Tab icon. Under Governance Console, click New Marketplace within Integrate.
On the Market Place window, scroll down to the Analytics section and click Install for Google Analytics. You can also search Google Analytics from the Search bar in the top-right corner.
On the Install Google Analytics pop-up window, enter a Name and Description.
Under Google Analytics User, click Add an application user to configure the application further.
On the Choose an account window, select an Account and click Allow. Once connected, you can control which Sprinklr users are able to use the Google Analytics connection.
Note:
If you want to add an additional Google Analytics account, click the Addition icon under Google Analytics User and select the desired account.
If you do not have the appropriate permissions to add a Google Analytics account and proceed to give Sprinklr permission for fetching the data, you will be prompted with an error message to get the desired permissions and then add the account.
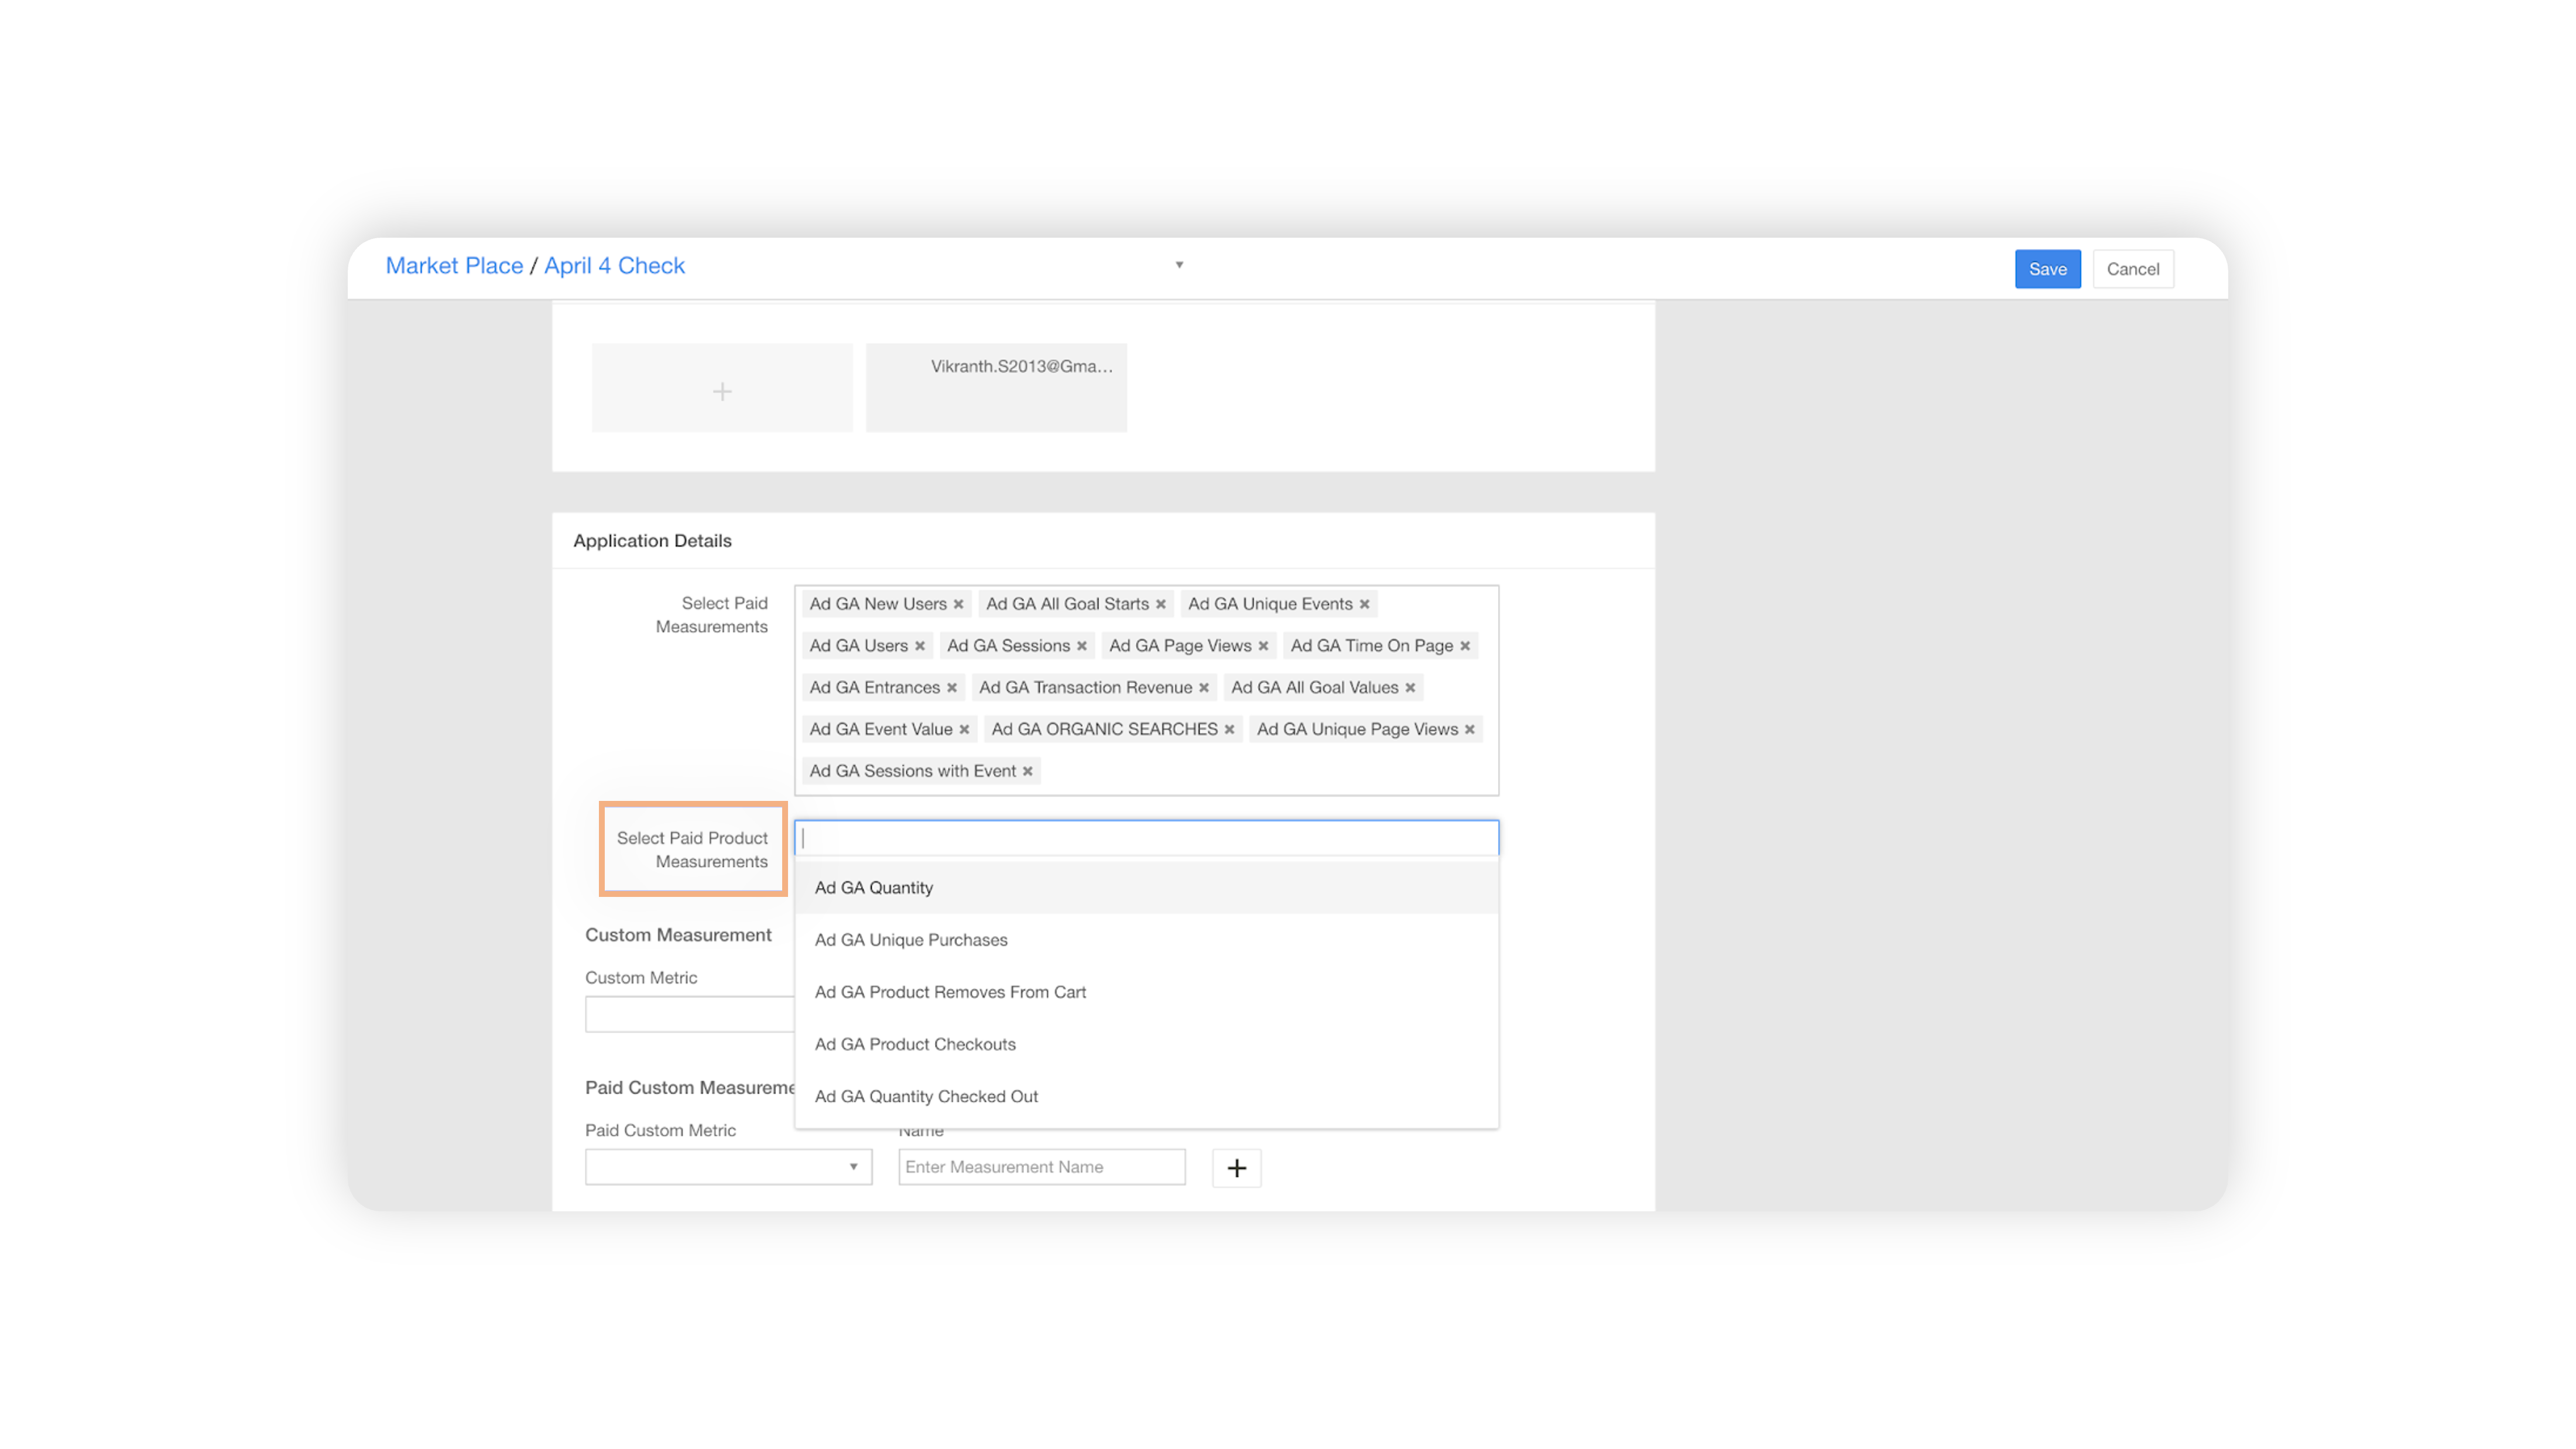
Under the Application Details section, add the property/views from the Google Analytics profiles drop-down menu.
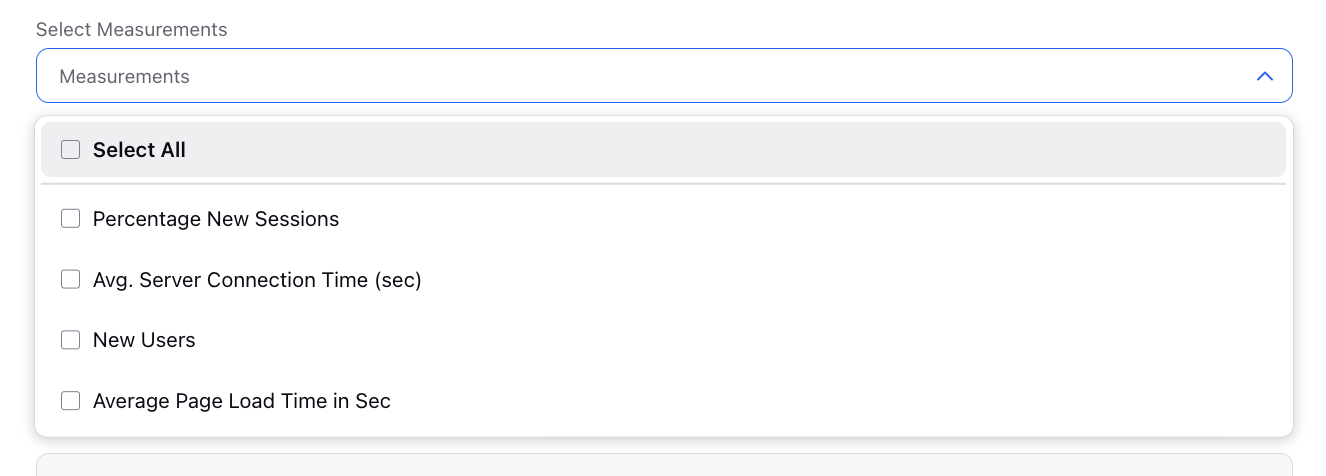
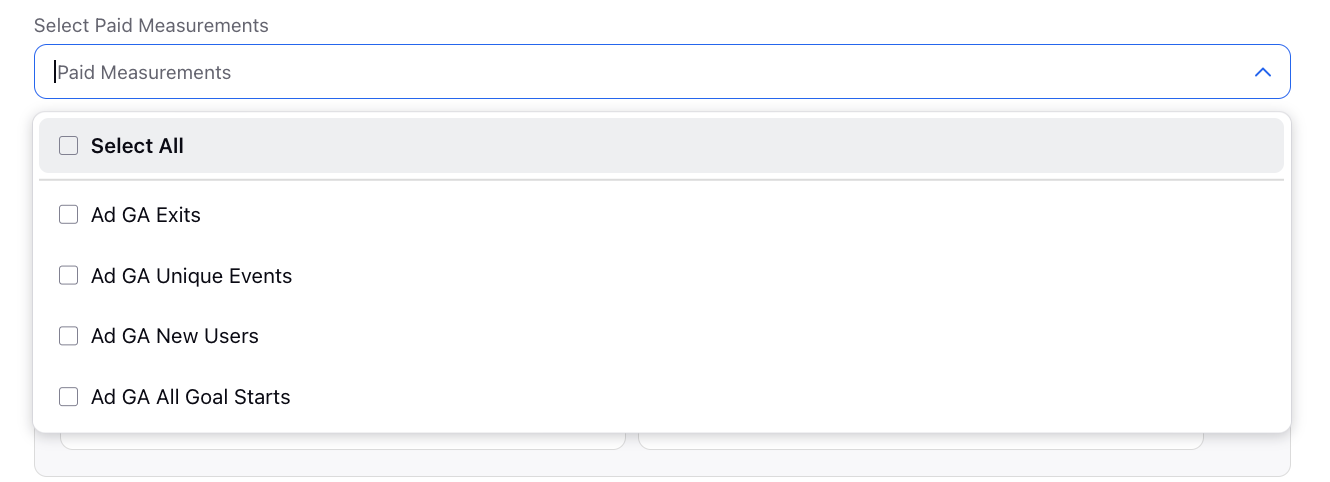
Select the metrics you want to measure from the Select Measurements and Select Paid Measurements drop-down menus.
Note:
If you have selected incompatible metrics and dimensions in your Google Analytics configuration, you will receive an error message that the dimensions and metrics which you have added are not compatible with each other, upon saving the configuration.
Click here to check the metrics and dimensions compatibility.
In order to report on e-commerce Product metrics and dimensions, select the metrics from the Select Paid Product Measurements field.
Enablement note:
To learn more about enabling Google Analytics Ecommerce Reporting in your environment, please work with your Success Manager.
Note:-
Product metrics and dimensions will not be mapped to specific Ad/Ad Set/Paid Initiatives and will be independent of the Ad Unique Identifier selection.
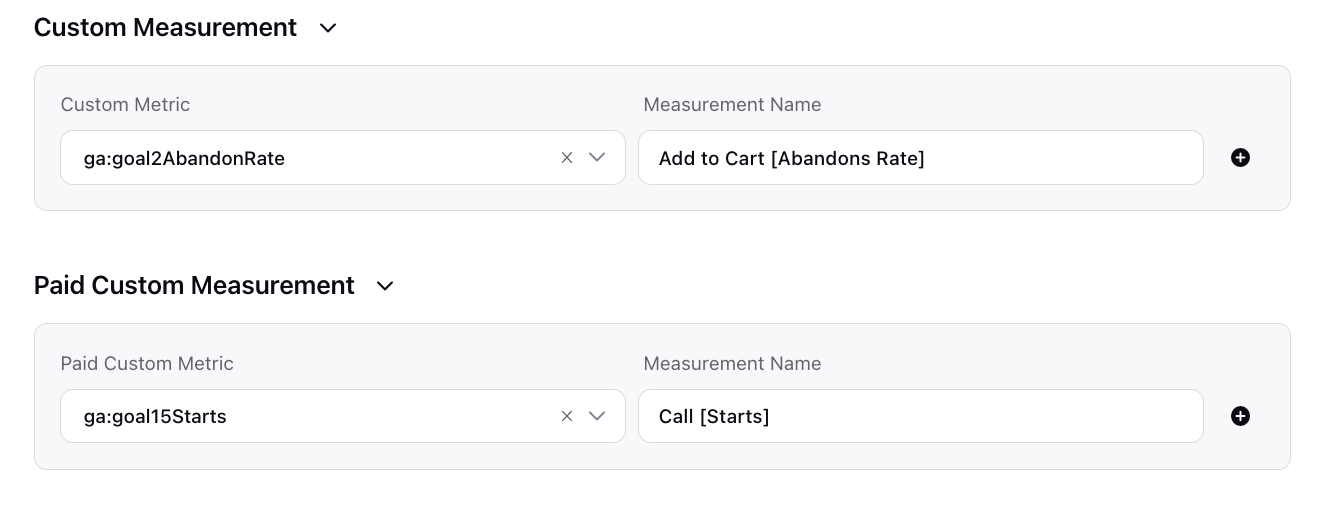
Select the Goal (Custom Measurement/ Paid Measurement) which you want to be present in Sprinklr similiar to the goal which you added in the Google Analytics along with the level at which you want to track in funnel.
Add the Name of the Goal (Custom Measurement/ Paid Measurement) which you want to show up in the Ads Reporting.
Choose the unique UTM (or Custom) Parameter to attribute Google Analytics data.
For example, to attribute Google Analytics data to an Ad Variant, each Ad Variant must have a unique value in the designated UTM parameter. In the Select Dimensions Having Ad Variant Identifier section, select ga:adContent (or the dimension having the unique ad identifier) as the Dimension for the corresponding Profile in order to map the unique value back to an Ad Variant; identified by its Ad Variant ID.
Note -
Sprinklr will fetch data in any scenario and will try to map it to the ad entity level at which we are able to find the unique ad identifier that you have defined in the configuration. If you haven't defined any unique identifier, data will reflect in Sprinklr but won’t be associated with any Ad.
In order to select the Post/Ad Variant Identifier, the UTM parameter must first be added as a Custom Dimension to the configuration.