Creating a Stats Import Template
Updated
SUMMARY
This article covers how to create a stats import template which is the first step to import any external data and use it in ads reporting or optimization. Templates are required in order to map the headers of the file with Sprinklr dimension name the header corresponds to. This is to ensure data is mapped correctly.
Create a Stats Import Template
Click the New Tab icon. Under the Sprinklr Marketing - Advertising tab, click Tools and Settings within Plan.
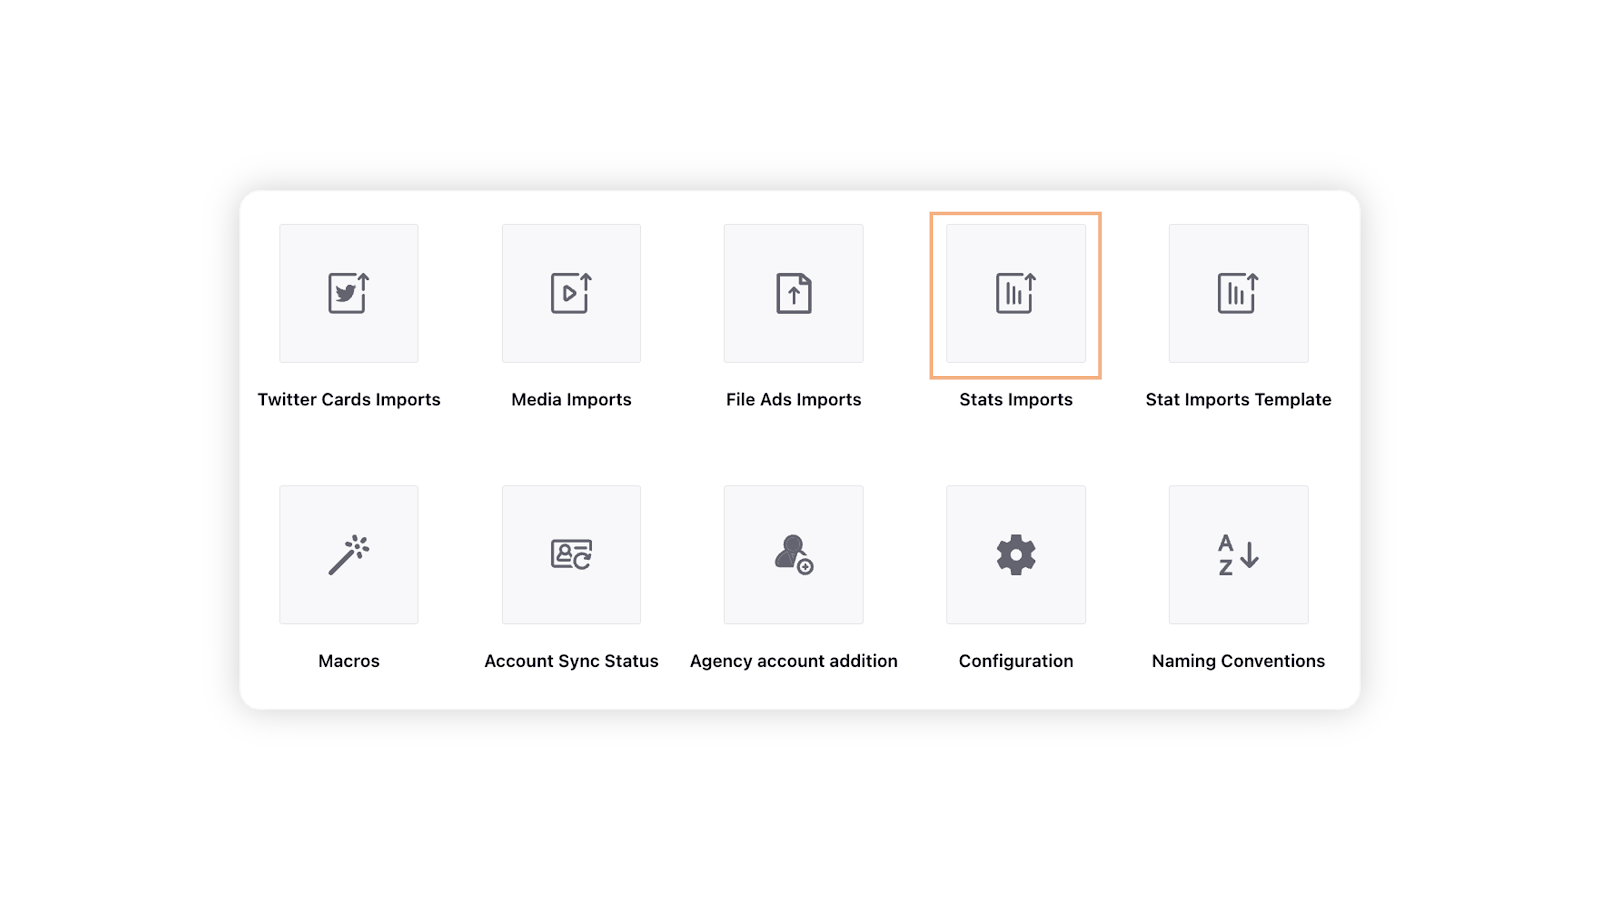
On the Ads Settings window, select Stat Imports Template within Imports/Exports Settings.
In the top right corner of the Stat Imports Template window, click Add Stat Imports Template to upload a template. You will need to create this customized template.
On the Create New Tracking Template window, enter a Name for your template. This is important because the name of the template will be part of the dimensions and metrics created.
Click Upload to choose the file to upload from your system.

Note:
|
Once you upload the file, you need to tell Sprinklr which values are expected for each column
Check the box alongside Cohort Data and select the range of days for which you want to analyze the cohort data from the Select Range of Days drop-down menu. For more information, see Cohort Data.
Note: By default, 1 Day, 7 Days, 30 Days, and 365 Days standard attribution windows will be selected. |
Select which columns correspond to Date, Ad Name, etc. and which columns correspond to your stats in the template. The dummy data is used to check these fields and is not uploaded. You can also add campaign name and adset name as headers.
Select D for each dimension (Date, Ad ID, etc.) and M for each metric (conversions, leads, revenue, etc.).

Note:
|
Select an Additional Unique Identifier from the drop-down menu. Additional unique identifiers will allow you to import data segmented with more granularity. For example, you can import a file with the Ad ID and Date present on multiple rows broken out by gender.
Select the timezone for importing your data from the Timezone for Importing Data drop-down menu.
If you have currency information ($, €, £, etc.) in your columns (cost per lead, revenue, etc.), you can skip the Select Currency option. However, we advise you to select the proper currency in order to map all the currency data correctly.
Refer to the table below for the different behaviors.

Note:
|
Currency in Tracking Template | Currency in Import File | Behavior |
No | Yes | Data will be mapped to the file currency. |
Yes | Yes | Data will be mapped to the currency selected in the tracking template. |
Yes | No | Data will be mapped to the currency selected in the tracking template. |
No | No | Data will only be stored as a value. The currency conversion will not work on these values as the base currency will be unknown. |
To set up Cohort data in Stat Imports
Check Import Stats in Sprinklr Marketing (Ads) for template setup and importing data.
In the template setup, check the cohort data checkbox and select the time period for which you need the cohort ranges for.
For cohort data, you need to have two sets of date fields available in the file:
Attribution date - the date on which data was attributed and
Revenue date - the date on which the conversion happened.
1, 7, 30 and 365 Range of days will be selected by default but can be customised by adding or removing the period. For example if you look at 14days attribution then you can add a 14 days cohort period.
The attribution and revenue date in file can be simply progressive dates. Sprinklr will look at both time periods and attribute data in cohort periods selected
For example: if attribution date of an ad variant in 1st Nov 2021 and revenue date is 8th Nov 2021 then Sprinklr will attribute the data to 7days cohort period
You can upload a data file either manually or via FTP/SFTP and cohort the data by predefined time periods from the Stats Import Template. Select from a range of attribution days for which you want to view the reporting data. By default, 1 Day, 7 Days, 30 Days, and 365 Days standard attribution metrics will be selected.
In your cohort timeframe, Day 0 refers to the install/attribution day in which the user installed your app and so on. Set the Attribution Date and Revenue Date as your template headers to import the stats based on that timeframe.

Support for Email Alerts for Stats Import Skipped Rows
The "Email Alerts for Stats Import Skipped Rows" function is designed to keep users fully informed during the statistics import process. When the system detects skipped rows, it automatically generates an email alert. This alert is sent not only to the user who is conducting the stats import but also to any additional users specified in the stats import settings. The email provides a comprehensive breakdown of the number of rows skipped and detailed reasons for each, ensuring all relevant parties are well-informed and can take necessary actions to rectify any issues with the data import.
