User Mapping in CRM Integration
Updated
User mapping is a critical process in integrating Sprinklr with CRM systems. It ensures that users can access the Sprinklr Care Console iFrame within CRM. This process ensures that each user in CRM is associated with a corresponding user in Sprinklr, facilitating data governance, compliance, and streamlined communication between the two systems.
This guide will walk you through the step-by-step process of user mapping, including importing, updating, deleting, and exporting user mappings.
Understanding User Mapping
User mapping is essentially a 1-to-1 association between a CRM user and a Sprinklr user, primarily to manage iFrame access. This ensures that all features within the iFrame, controlled by permissions, are consistent with the associated Sprinklr user.
Key Benefits
Data Governance: Ensures that user actions are tracked and audited across both systems.
Compliance: Maintains consistency in user roles and permissions.
Streamlined Operations: Simplifies user management by keeping a synchronized record of users.
Prerequisites
Before beginning the user mapping process, ensure you have the following prerequisites in place:
1.CRM Connector Configuration
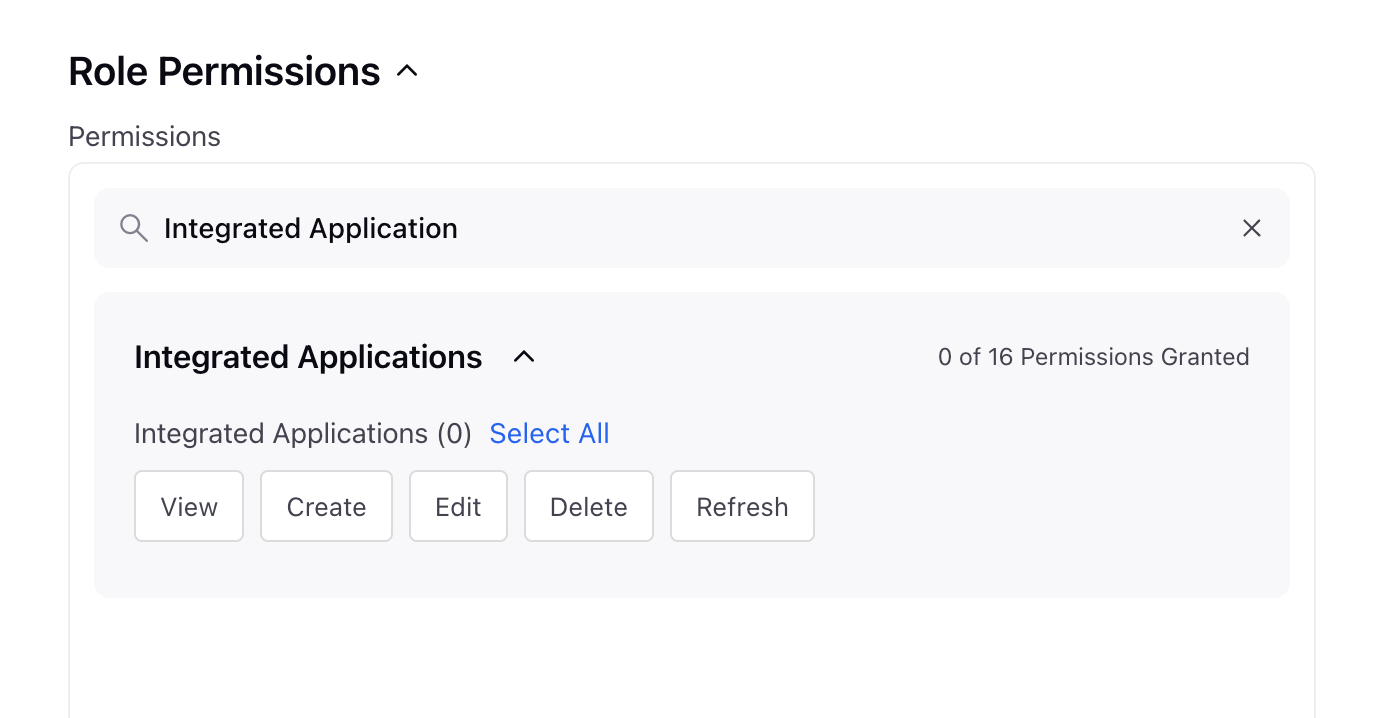
The CRM Connector must be configured in the Sprinklr Marketplace.
![]() Note: Access to CRM Connector configuration may be permission controlled. Ensure you have the necessary permissions to proceed.
Note: Access to CRM Connector configuration may be permission controlled. Ensure you have the necessary permissions to proceed.
2. Valid Sprinklr User Account
To map users, you will need a valid Sprinklr User account access. A Sprinklr user can be mapped using User ID or Email.
3. CRM User ID
CRM User ID is required to map with a Sprinklr User ID. As an example, refer to this guide to learn about how to obtain Salesforce CRM User ID.
![]() Note: User Mapping can be performed in two ways:
Note: User Mapping can be performed in two ways:
1. Sprinklr Marketplace UI: We will be covering UI based User Mapping in this document.
2. API Based: To learn more about how to do User Mapping through APIs, refer to this document.
Create User Mapping
Creating a user mapping is essential to link your Sprinklr users with their corresponding CRM User IDs. This ensures that data flows seamlessly between systems, enabling efficient user management.
Create a Single User Mapping
When you need to map individual users, you can create a single user mapping. This allows you to manually link a specific Sprinklr user to their respective CRM user ID.
Follow the steps below to create a single user mapping:
Step 1: Access the Sprinklr Marketplace
Navigate to the Sprinklr ‘Marketplace’ tab within your Sprinklr launchpad.
Click on ‘Installed Apps’ to view all the installed connectors.
Step 2: Locate the CRM Connector App
Scroll through the list of installed apps to find the CRM connector app.
Hover over the CRM connector to reveal additional options.
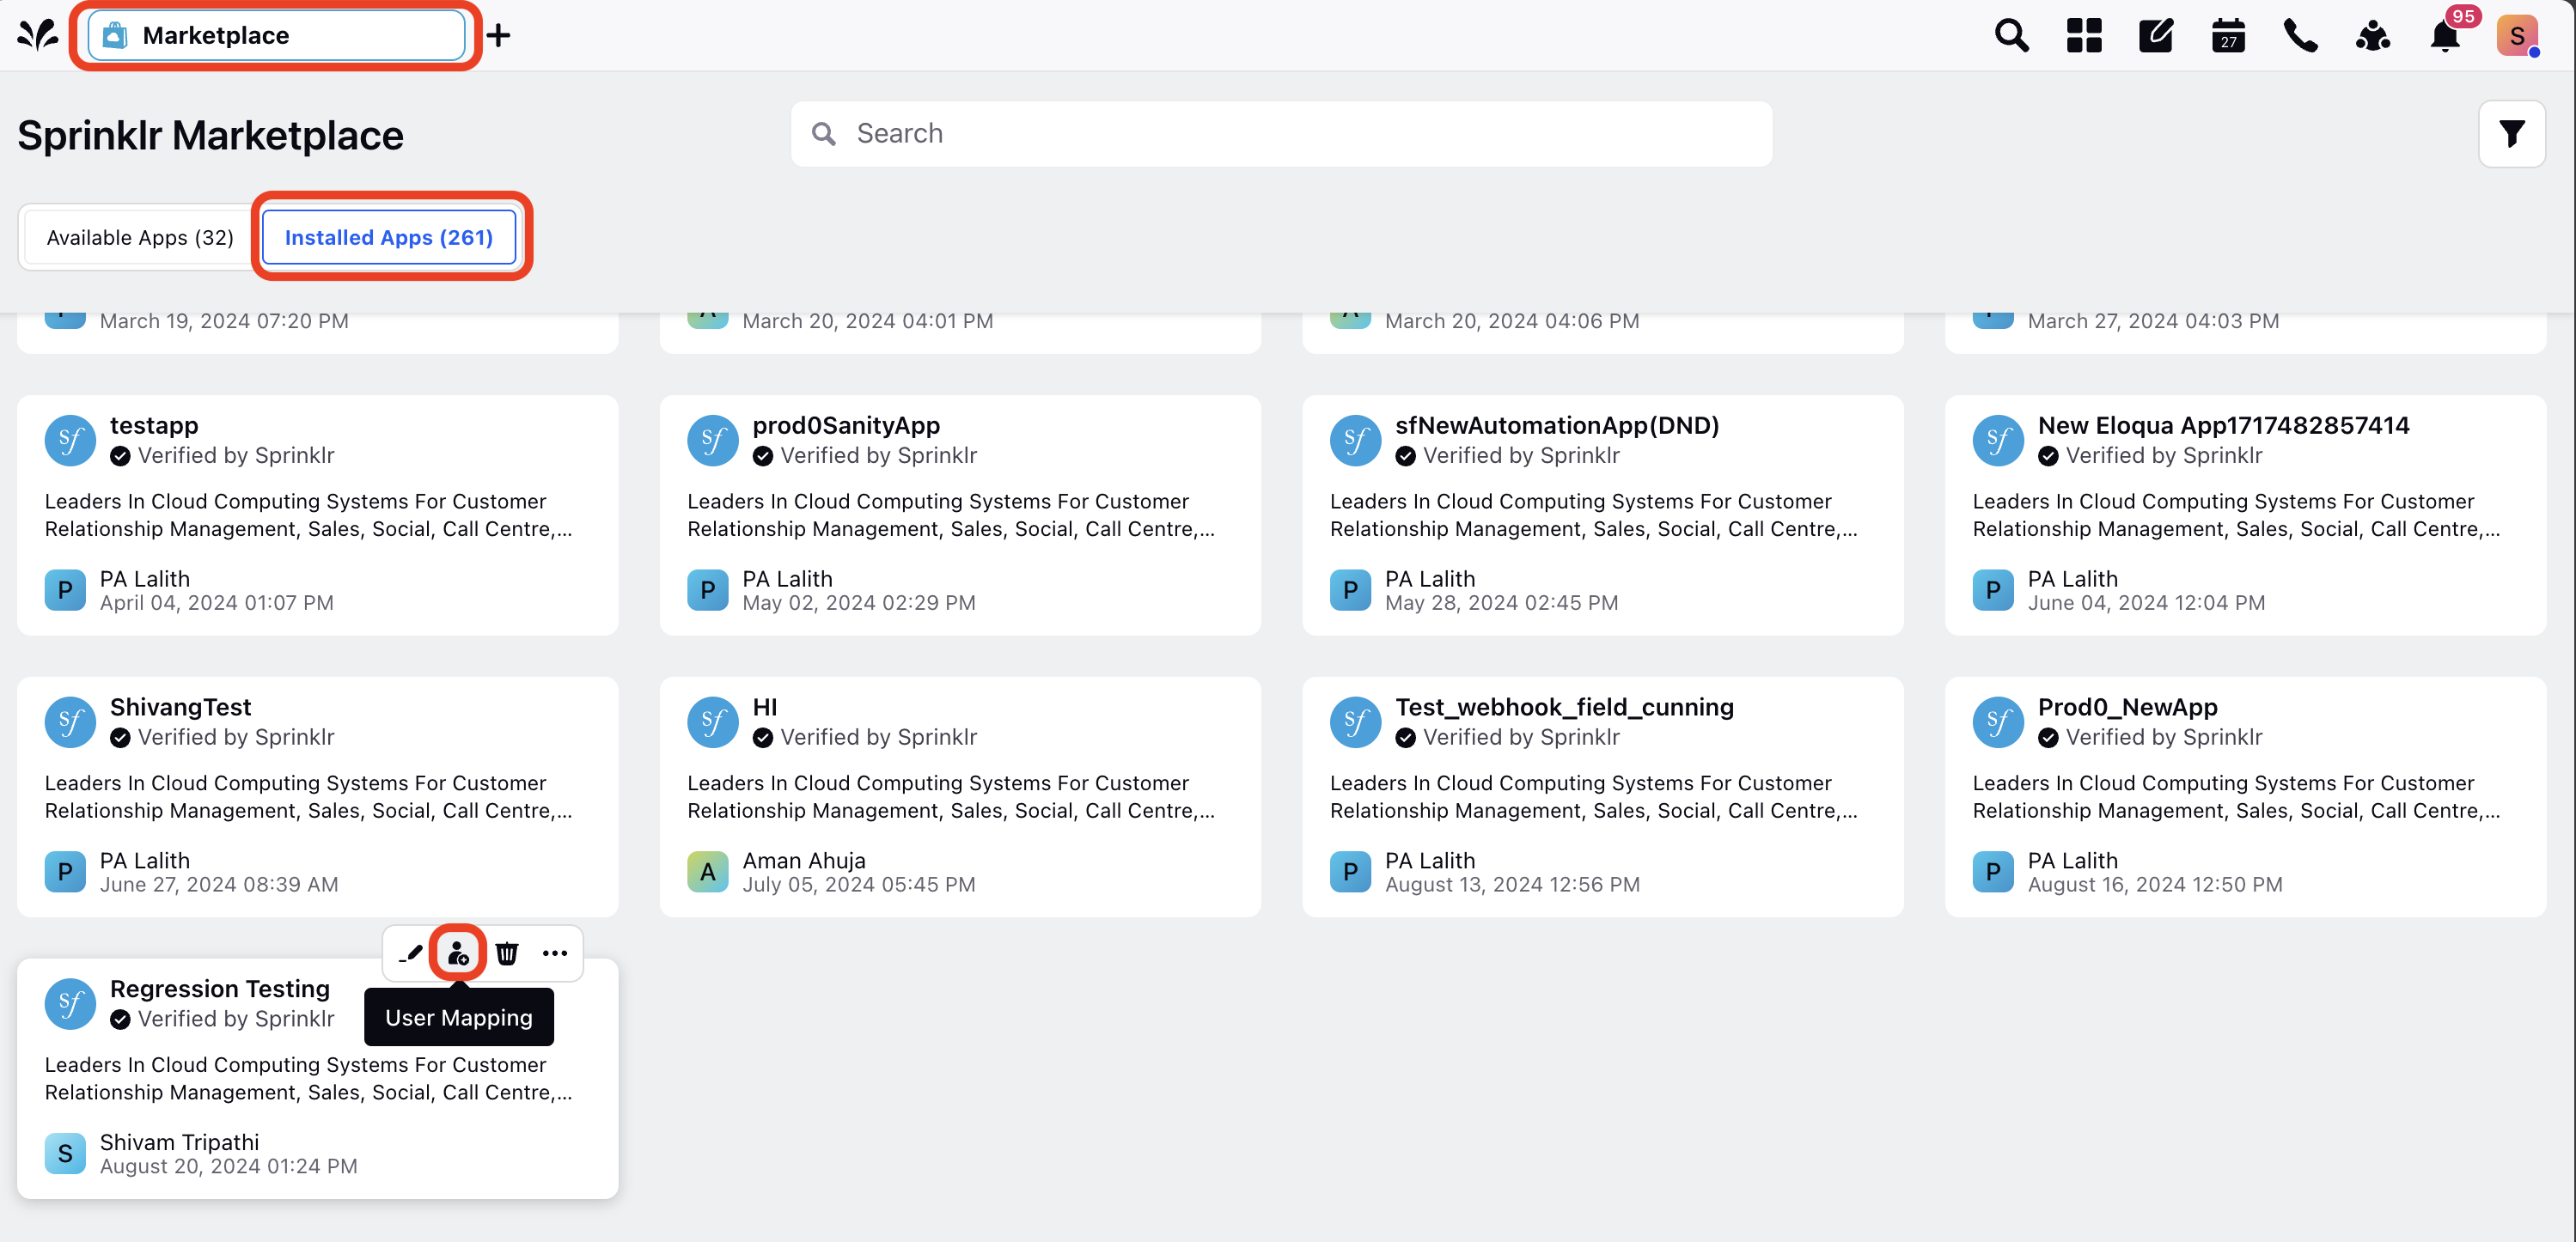
Step 3: Initiate User Mapping
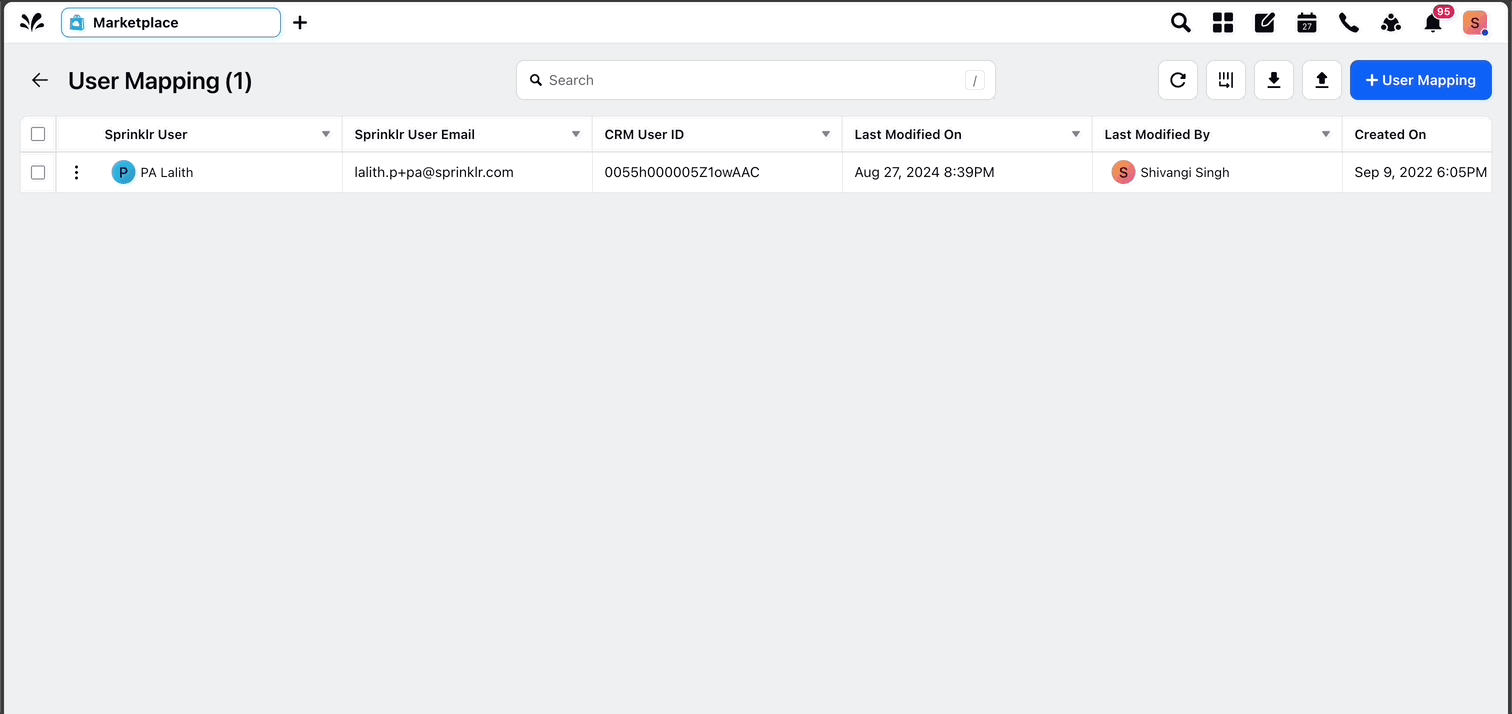
Click on the ‘User Mapping’ button. This action will display a list of Sprinklr users that are currently mapped to CRM users.
Step 4: Add New User Mapping
To add a new user mapping, click the ‘User Mapping’ button.
In the dropdown, select the Sprinklr User for the user you want to map. This dropdown will show a list of available Sprinklr users.
Enter the corresponding CRM User ID to complete the mapping.
Step 5: Save the User Mapping
Once you have entered the necessary details, click ‘Save’.
You have successfully created a user mapping.
Bulk Import of User Mapping
For onboarding or managing multiple users at once, performing a bulk import of user mappings is the most efficient method. This process allows you to upload a file with multiple user mappings in one go.
Follow the steps below to do a bulk import of user mappings:
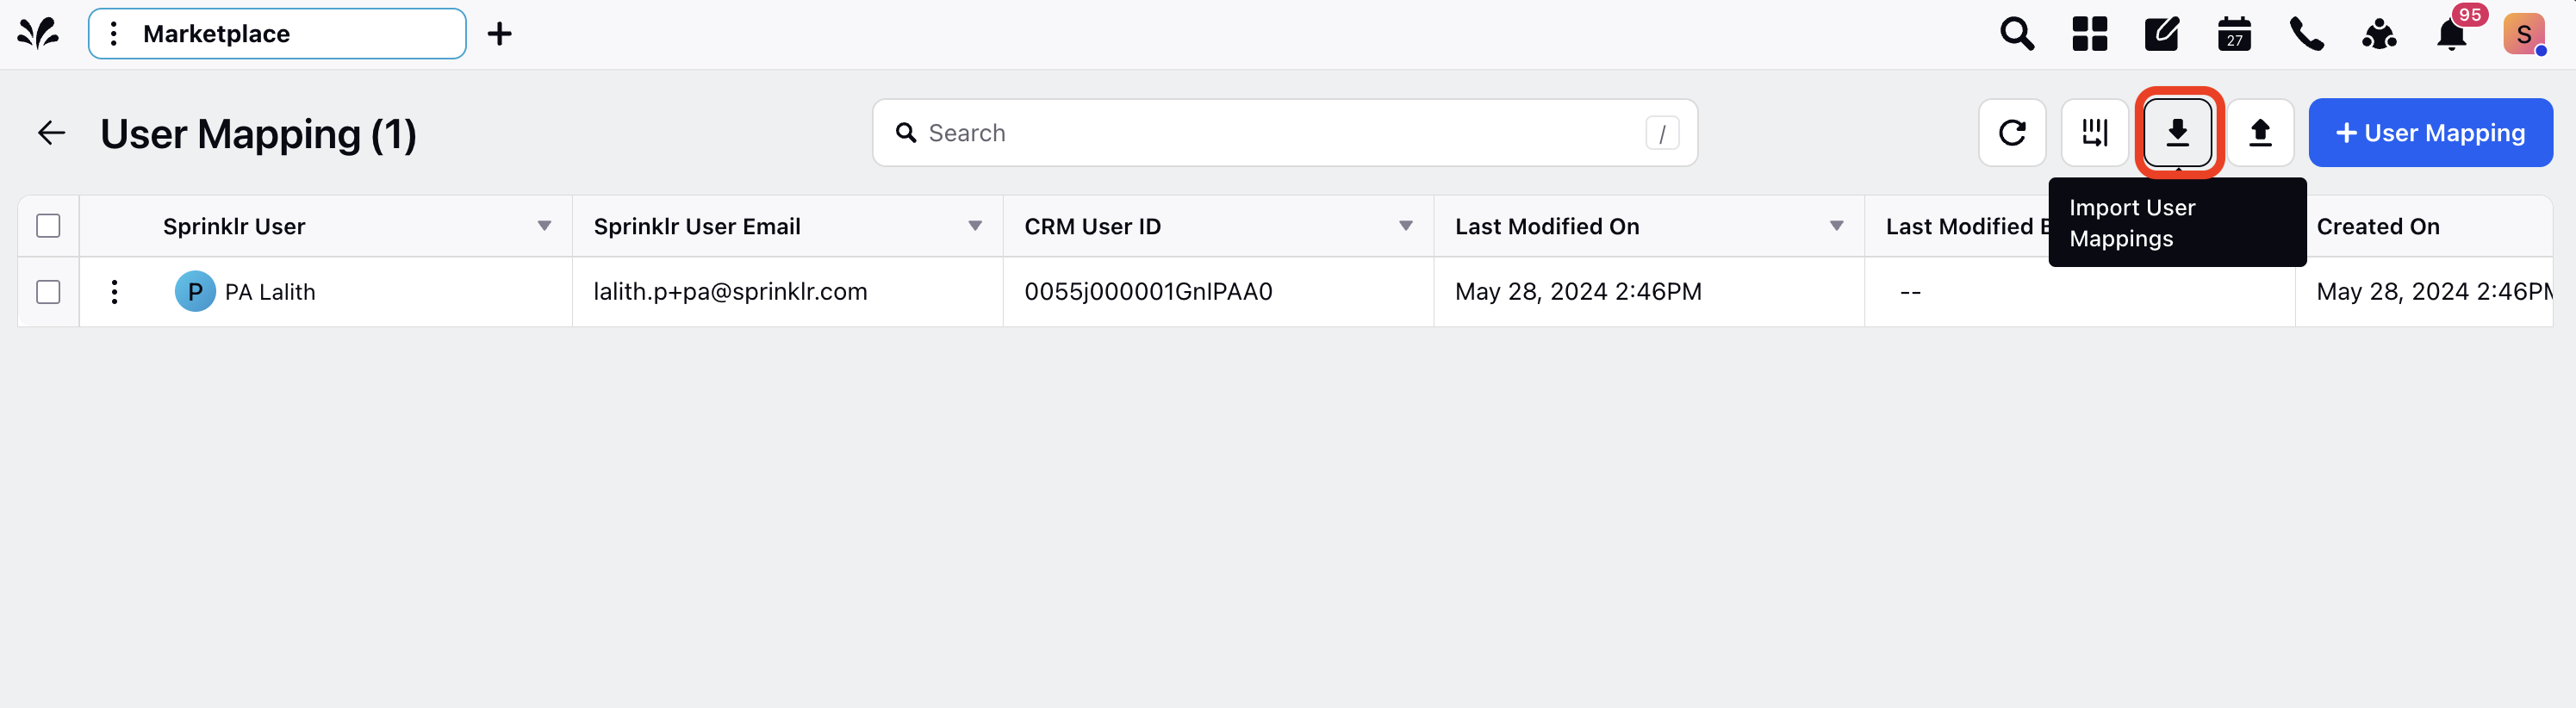
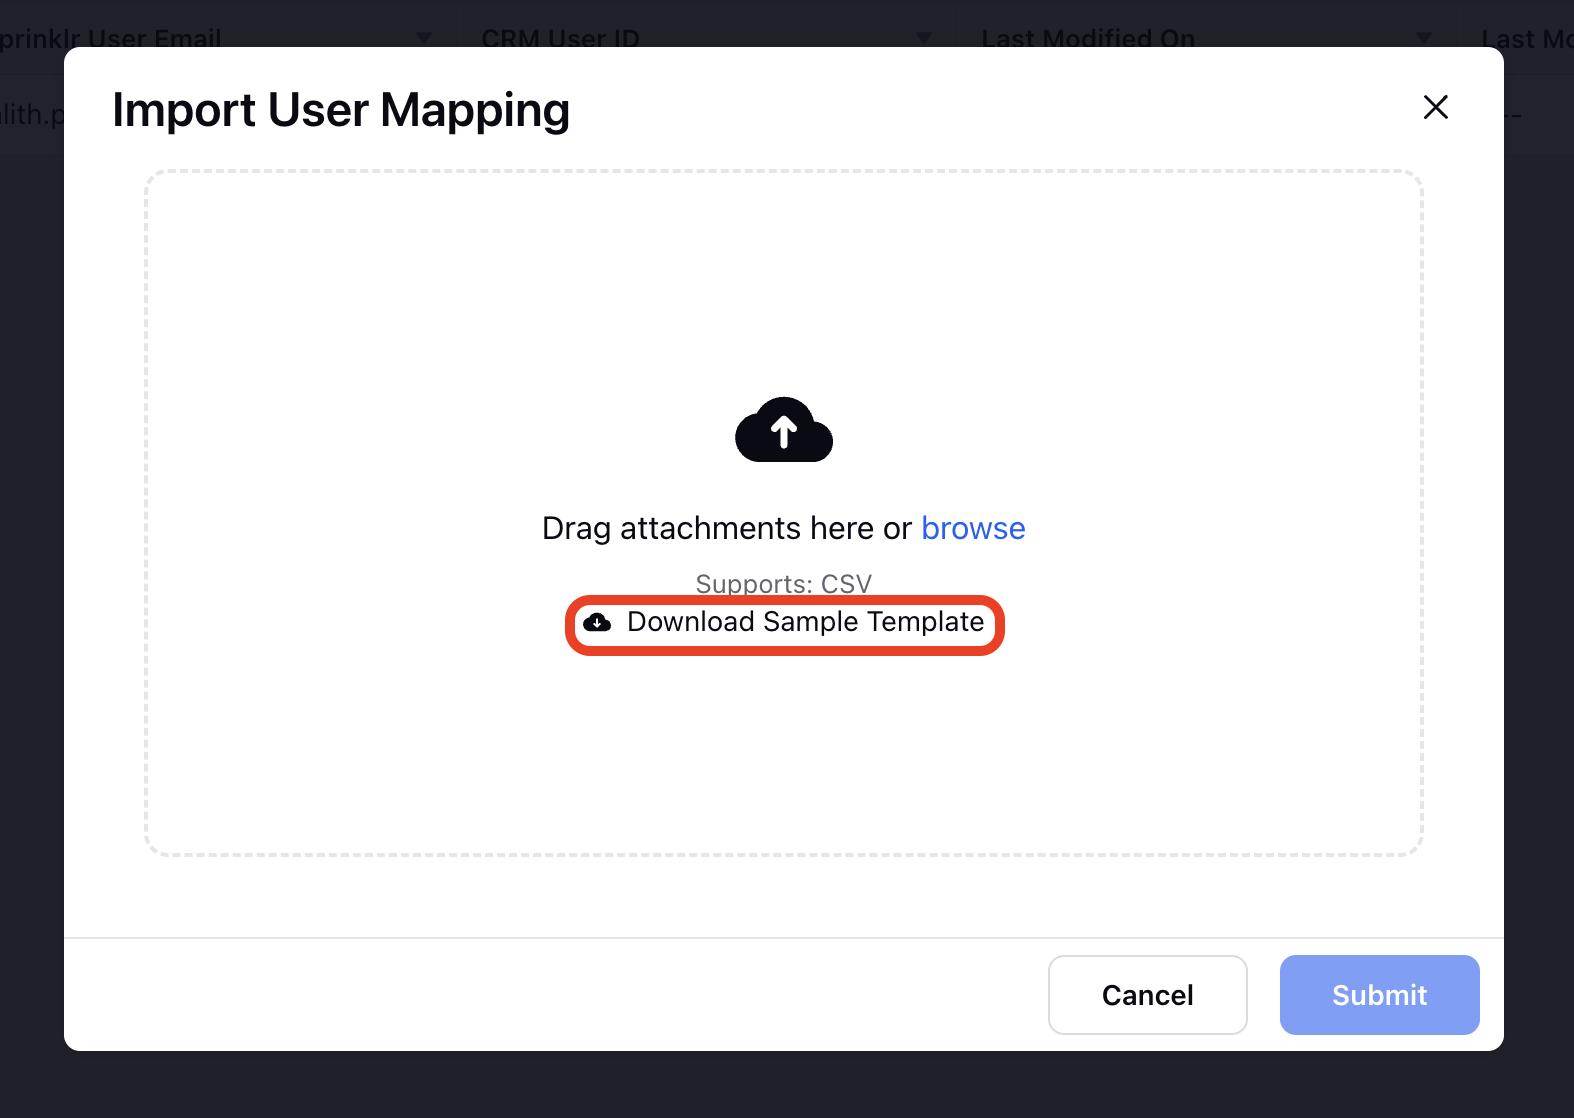
Step 1: Access Bulk Import
Within the User Mapping section, click the Import button located in the toolbar. This action will open the Import User Mappings window.
Step 2: Download the Template
In the Import User Mapping window, click on Download Sample Template to get a CSV file template. This template will guide you on the format required for bulk imports.
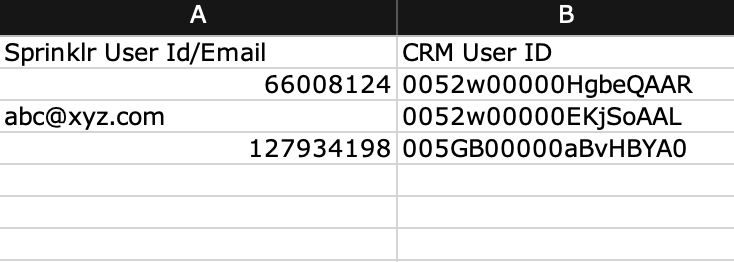
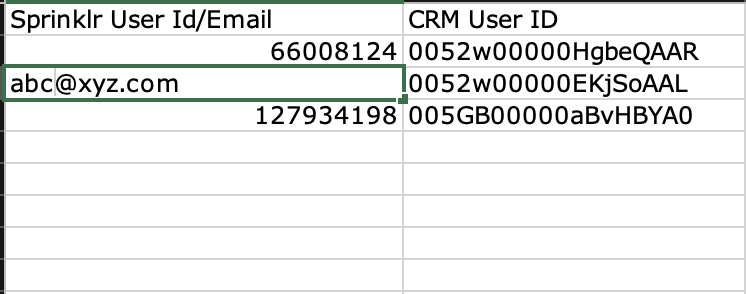
Step 3: Prepare the CSV File
Open the downloaded template and populate it with the necessary information:
Sprinklr User ID/Email: Enter the ID or email associated with the Sprinklr account.
CRM User ID: Enter the corresponding CRM User ID.
Step 4: Upload the CSV File
Once your CSV file is prepared, go back to the Import User Mapping window.
Upload your file by either dragging it into the window or using the Browse option.
Step 5: Submit the Bulk Import
After the file is uploaded, click Submit.
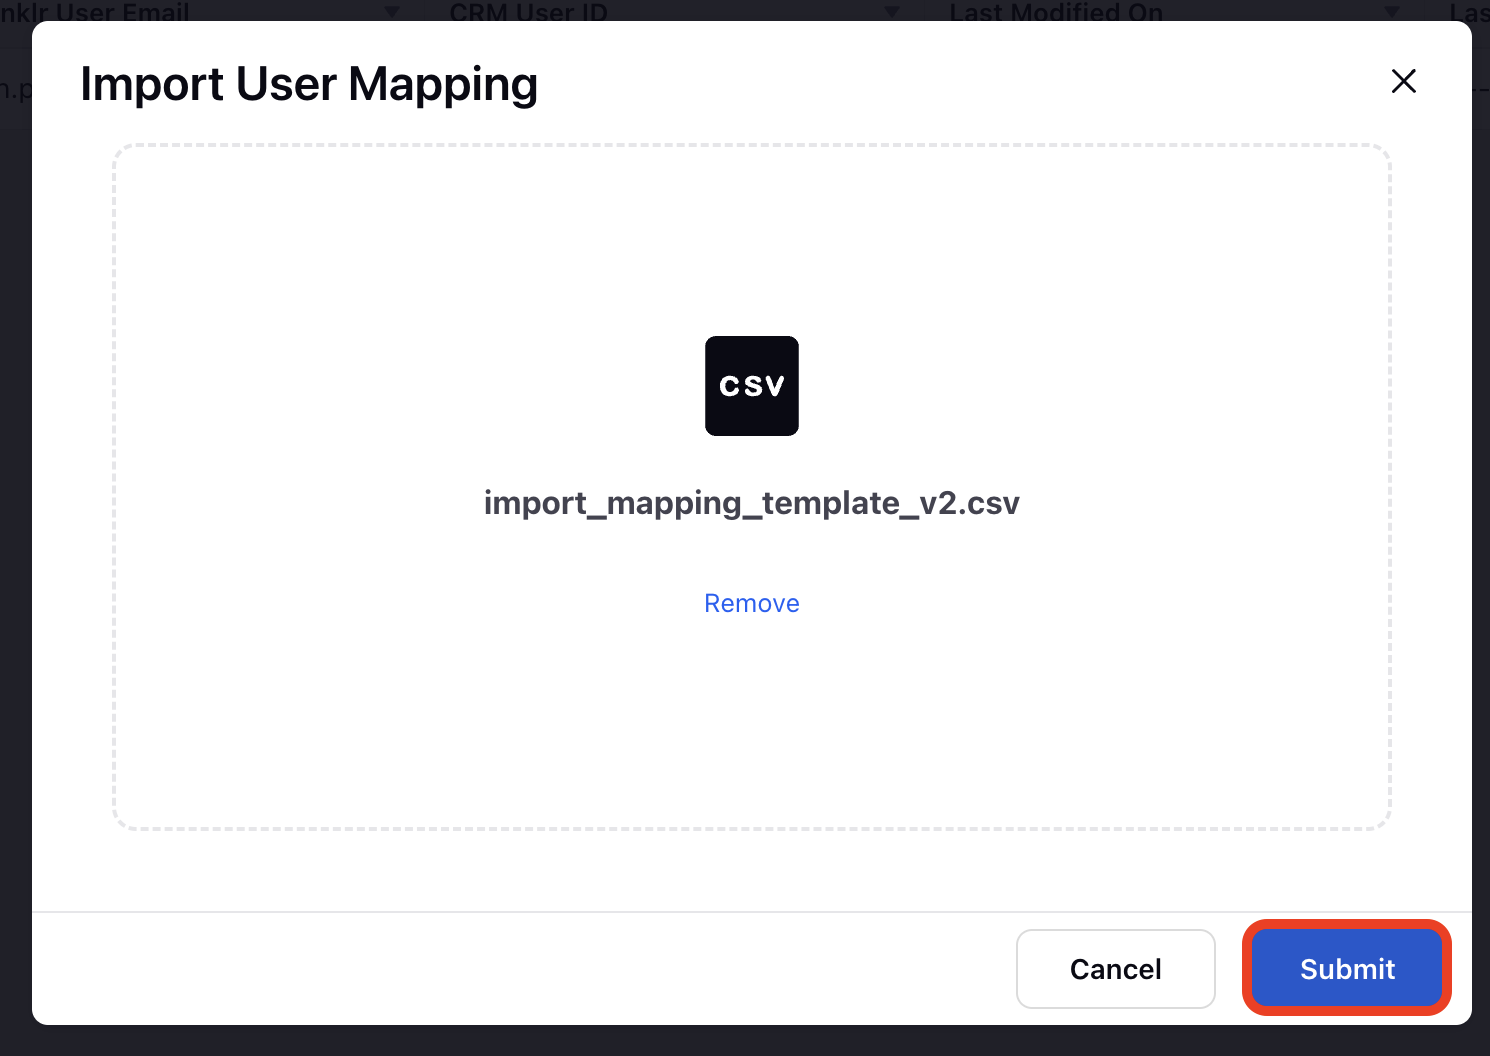
You have successfully completed a bulk import
Update User Mapping
User mappings may need to be updated over time as users or roles change. Updating a user mapping ensures that your systems remain synchronized with the latest information.
Update a Single User Mapping
When only one user’s mapping needs modification, you can update a single user mapping. This option lets you edit the details for a specific user directly within the interface.
Follow these steps to update user mapping:
Step 1: Select the User Mapping to Update
In the User Mapping window, browse through the list to find the user mapping you wish to update.
Select the specific user mapping that requires modification.
Step 2: Edit the User Mapping
Click the Edit button associated with the selected user mapping.
Modify the existing information as needed, such as updating the Sprinklr User ID or CRM User ID.
Step 3: Save the Updated Mapping
After making the necessary changes, click the Update button.
You have successfully updated the selected user mapping.
Bulk Update on User Mappings
If you have multiple user mappings that require changes, performing a bulk update allows you to modify and re-import the mappings efficiently, ensuring all updates are applied simultaneously.
Follow the steps below to do a bulk update on the existing user mapping:
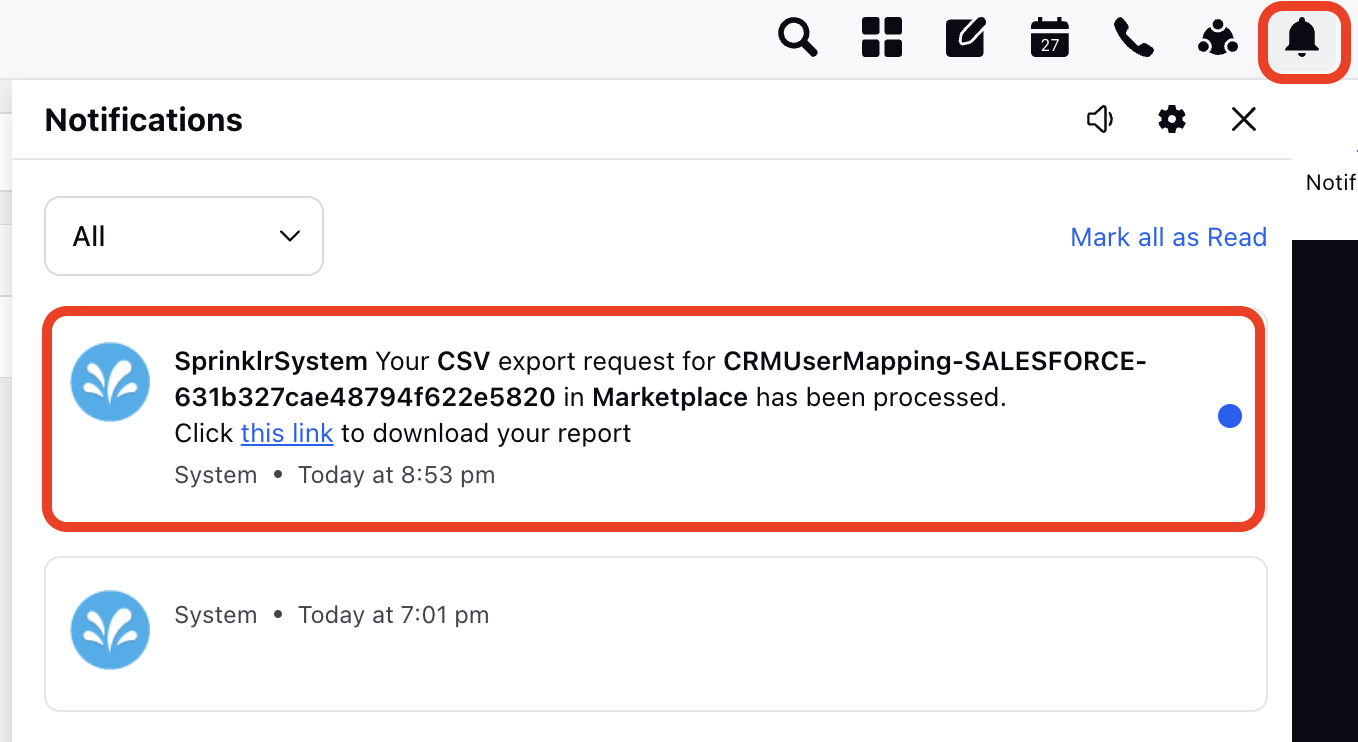
Step 1: Export Existing User Mapping
In the User Mapping window, click the Export button to export the existing mappings.
You will receive an in-platform notification once your export file is ready for download.

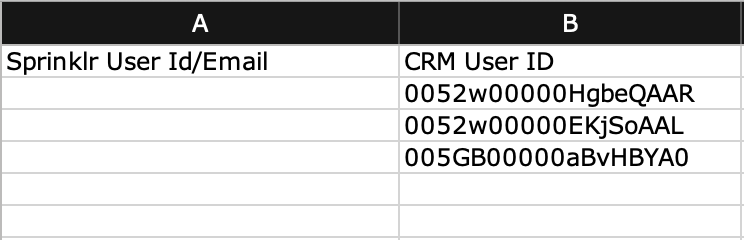
Step 2: Download and Edit the Exported File
Download the exported file from the notifications area within the platform.
Open the file using a spreadsheet editor (e.g., Excel).
Update the necessary columns, such as the Sprinklr User ID/Email or CRM User ID and save the file.
Step 3: Import the Updated File
Return to the User Mapping window in Sprinklr.
Click the Import button and upload the edited file by following the steps mentioned in the Bulk Import User Mapping section.
After the file is successfully uploaded, the user mappings will be updated according to the new data in the file.
Delete User Mapping
Occasionally, user mappings need to be removed, either because a user is no longer active, or the mapping is no longer necessary. Deleting user mappings helps maintain a clean and accurate system.
Delete a Single User Mapping
To remove an individual user’s mapping, you can delete a single user mapping. This option is useful when only one mapping needs to be discarded. Follow the steps below to remove individual user mapping.
Step 1: Open the User Mapping Window
Navigate to the User Mapping window within your Salesforce connector app.
Step 2: Select the User Mapping
Find the specific user mapping you want to delete. Click on the user mapping to highlight it.
Step 3: Click ‘Delete’ and Confirm
Once selected, click the ‘Delete’ button located at the top of the window.
A confirmation dialog will appear. Click ‘Submit’ to finalize and delete the selected user mapping.
You have successfully deleted the selected user mapping.
Bulk Delete User Mapping
When it is necessary to remove multiple user mappings at once, bulk delete allows you to quickly and efficiently clear out large numbers of mappings, helping to keep your system organized.
Follow these steps to delete all existing user mappings within the connector app:
Step 1: Select All Mappings
In the User Mapping window, click the checkbox located in the top-left corner of the list. This will select all user mappings in the list.
Step 2: Click ‘Delete’ and Confirm
With all mappings selected, click the ‘Delete’ button at the top of the window.
A confirmation dialog will appear. Confirm the action by clicking ‘Submit’.
This action will delete all user mappings currently present in the Salesforce connector app.
Additional Functionalities
The User Mapping interface provides several additional functionalities to enhance your experience, including Search, Export, Filter, and Refresh. Below is a breakdown of each function:

Search
Quickly locate specific user mappings within the interface using the search bar.
Export User Mapping
Click the "Export" button to export existing user mappings.
You will receive an in-platform notification when your export file is ready for download.
Download the exported file from the notifications area within the platform.
Refresh
Use the Refresh button to update the interface and ensure you are viewing the most current data.
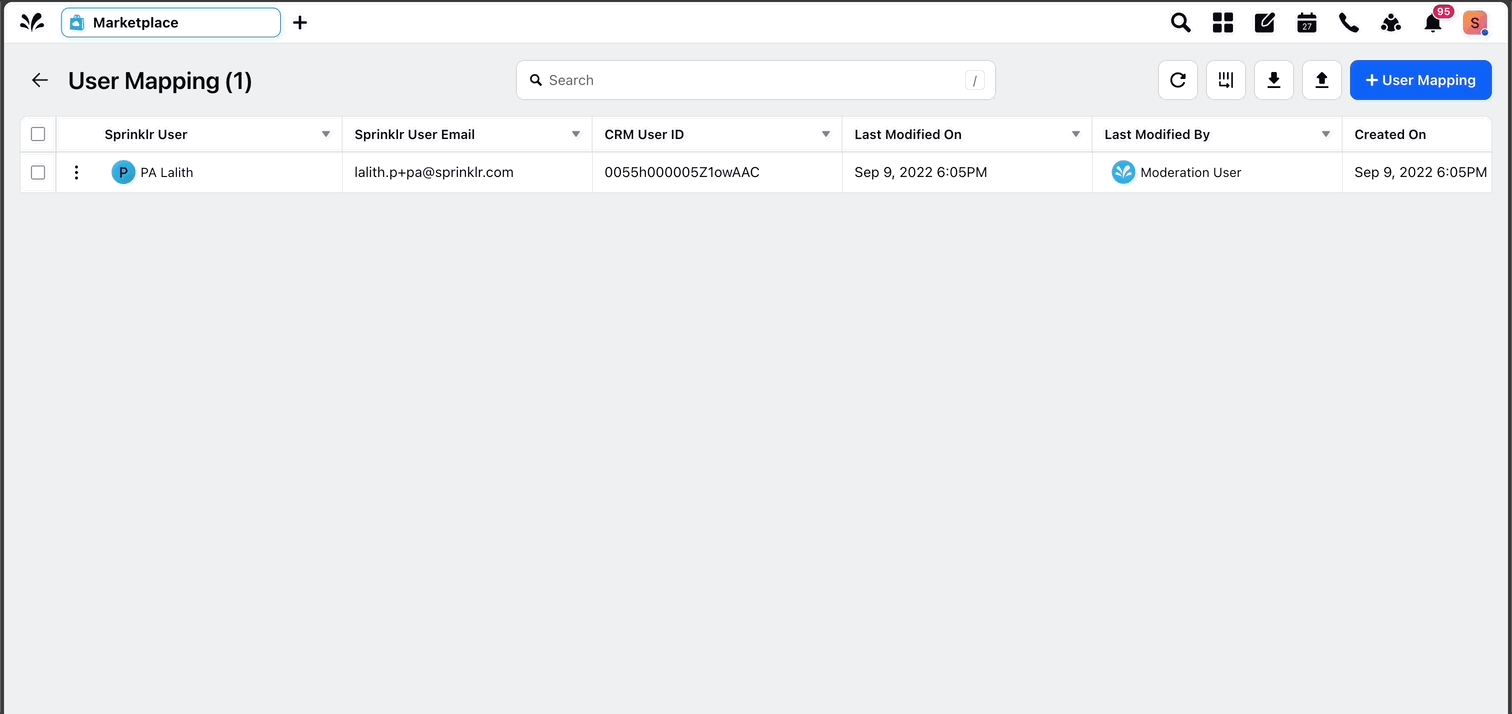
Customize Columns
Customize the displayed columns by selecting or deselecting the following options:
Sprinklr User
Sprinklr User Email
CRM User ID
CRM User Name
CRM User Email
Last Modified On
Last Modified By
Created On
Created By

User Mapping is a crucial component in the integration between Sprinklr and CRM system, ensuring that user permissions and data consistency are maintained across both platforms. By mapping CRM users to their corresponding Sprinklr identities, you enable seamless access to the Sprinklr Care Console iFrame within CRM system, providing a unified experience for users.
Refer to the CRM Error Handling for detailed instructions on resolving common errors.