Configuration Steps
Updated
In order to enable this feature, please reach out to support at tickets@sprinklr.com
Click the New Tab icon . Under the Sprinklr Service tab, select Live Stream Care within Listen.
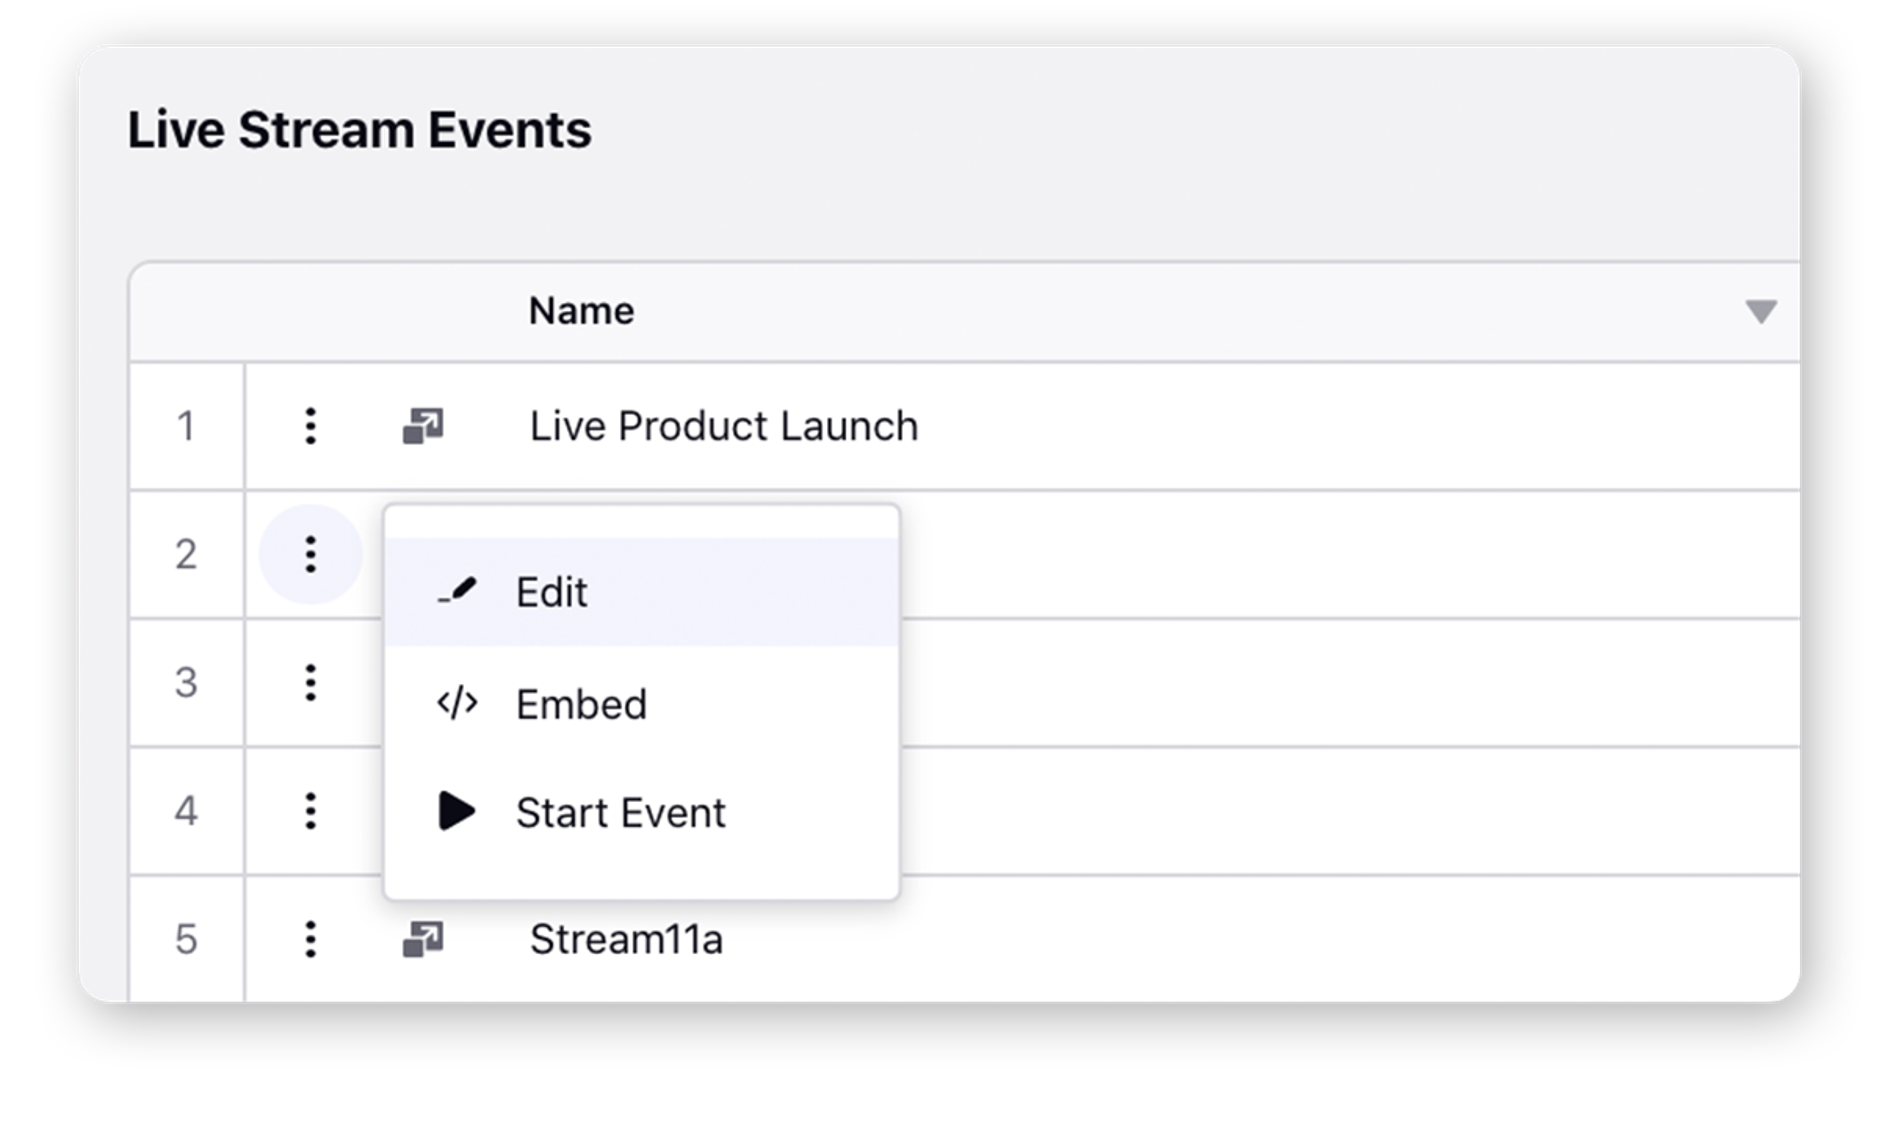
On the Live Stream Events window, click Add Live Stream in the top right corner.
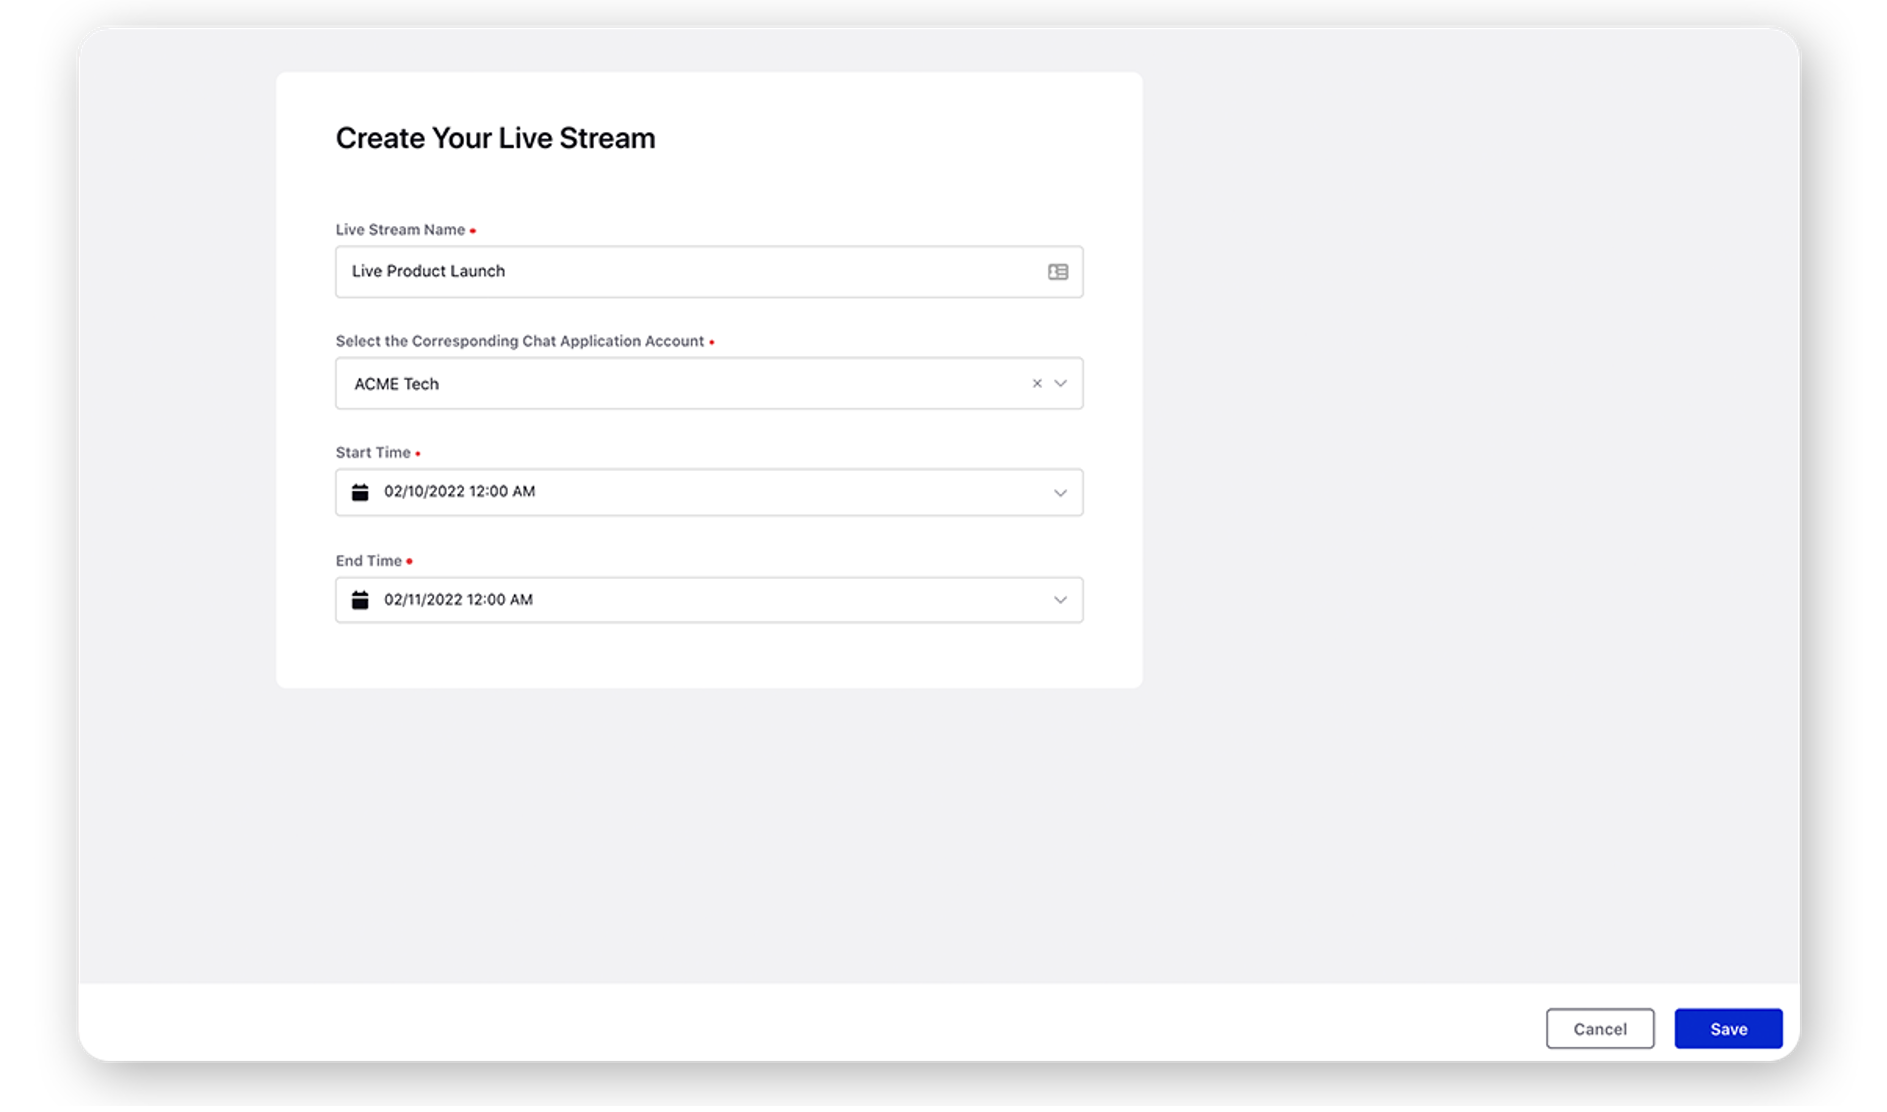
On the Create Your Live Stream window, add the Live Stream Name and select the Corresponding Chat Application Account from the dropdown. Also, select the Start Time and End Time for the stream.
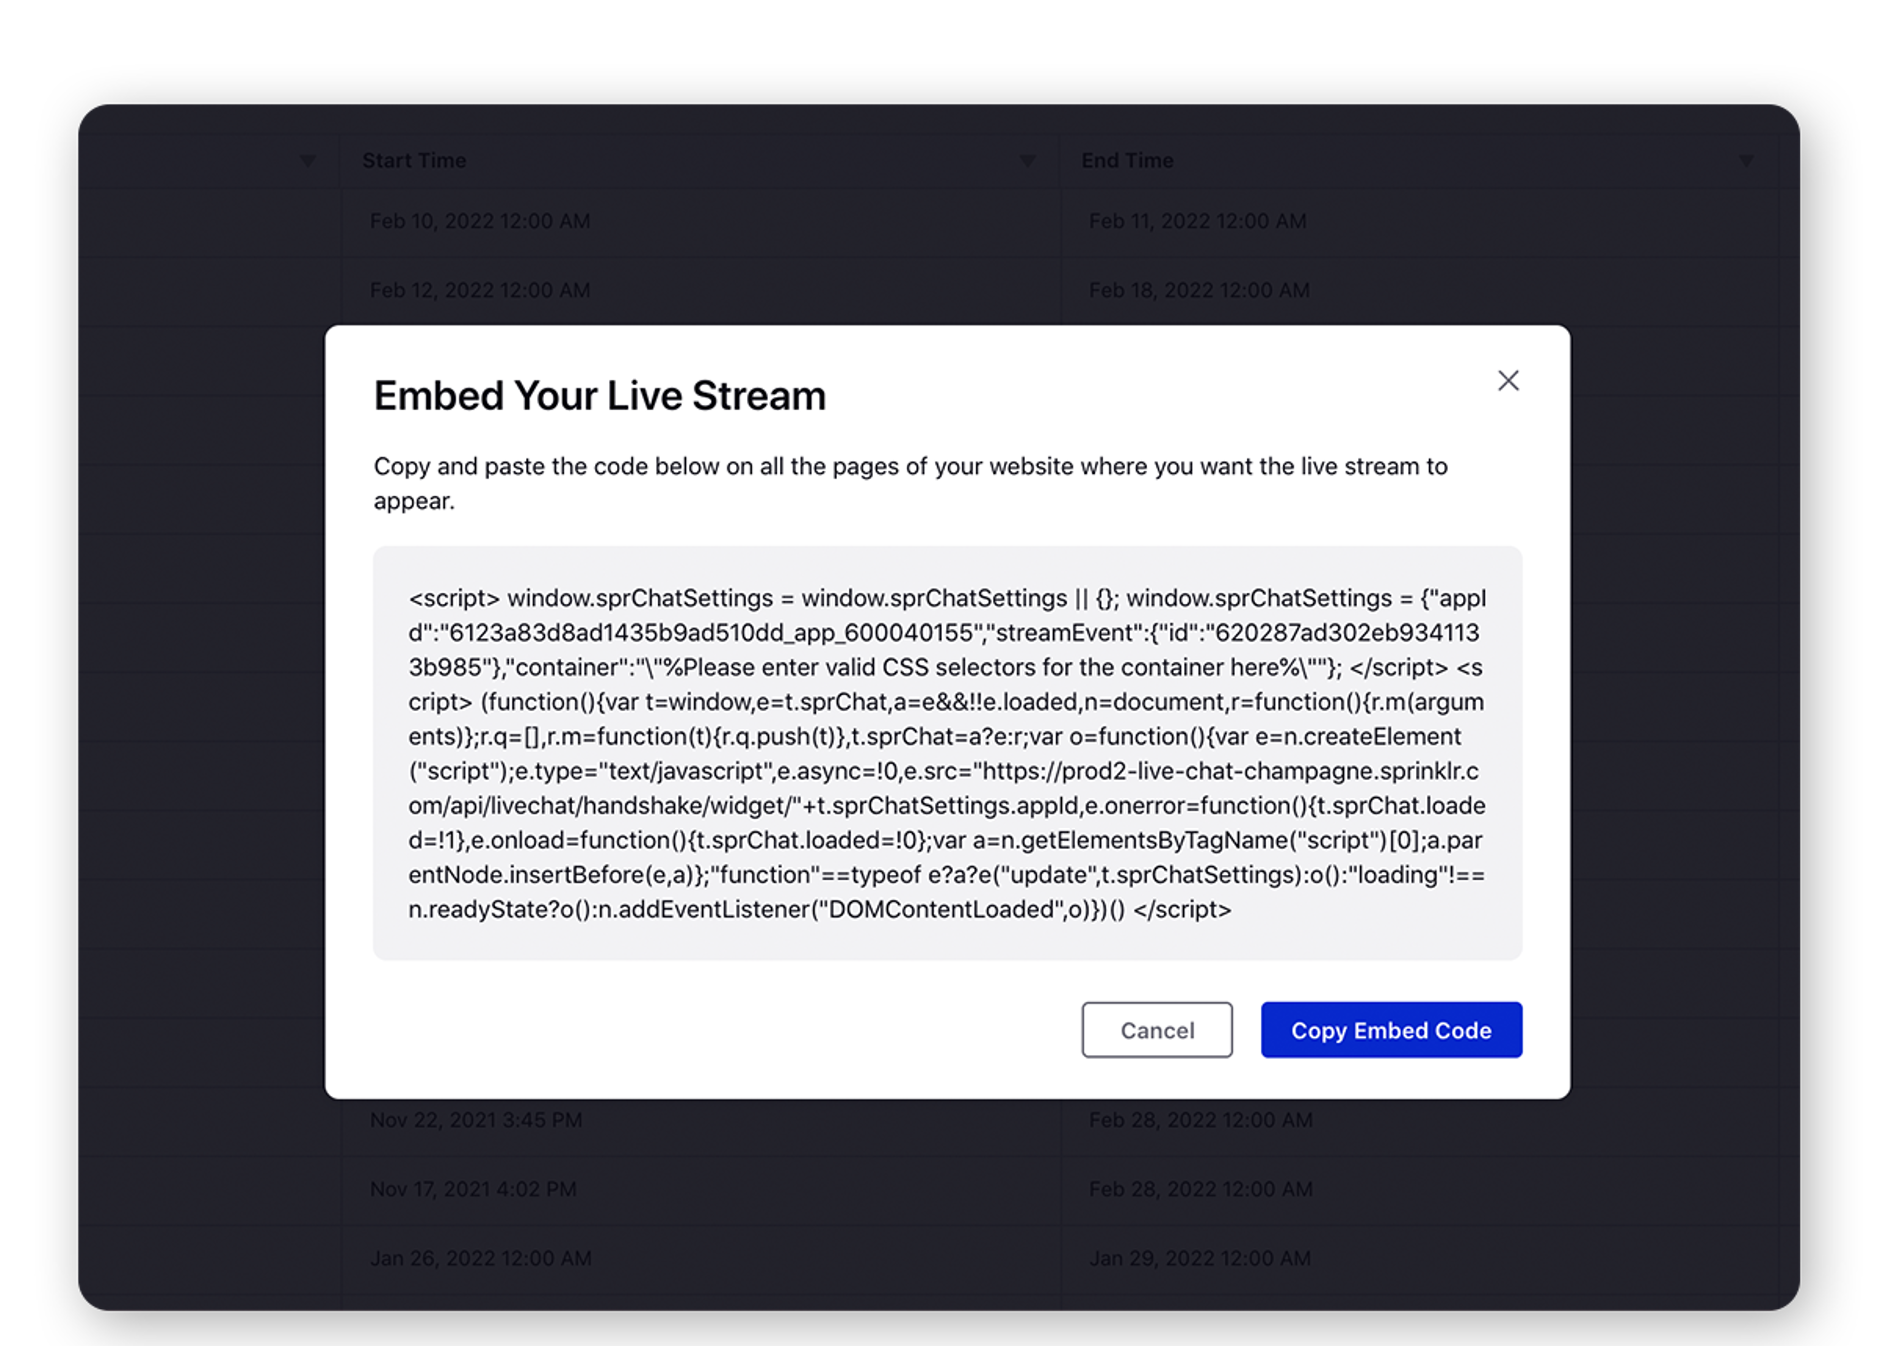
On the Embed Your Live Stream popup window, click Copy Embed Code. Paste the copied code on all the pages of your website where you want the live stream to appear.
Once embedded, your customers will be able to see the time due for the event to start.
You can start or end the stream event before the due time. Hover over the Options icon alongside the live stream event and select Start Event or End Event.
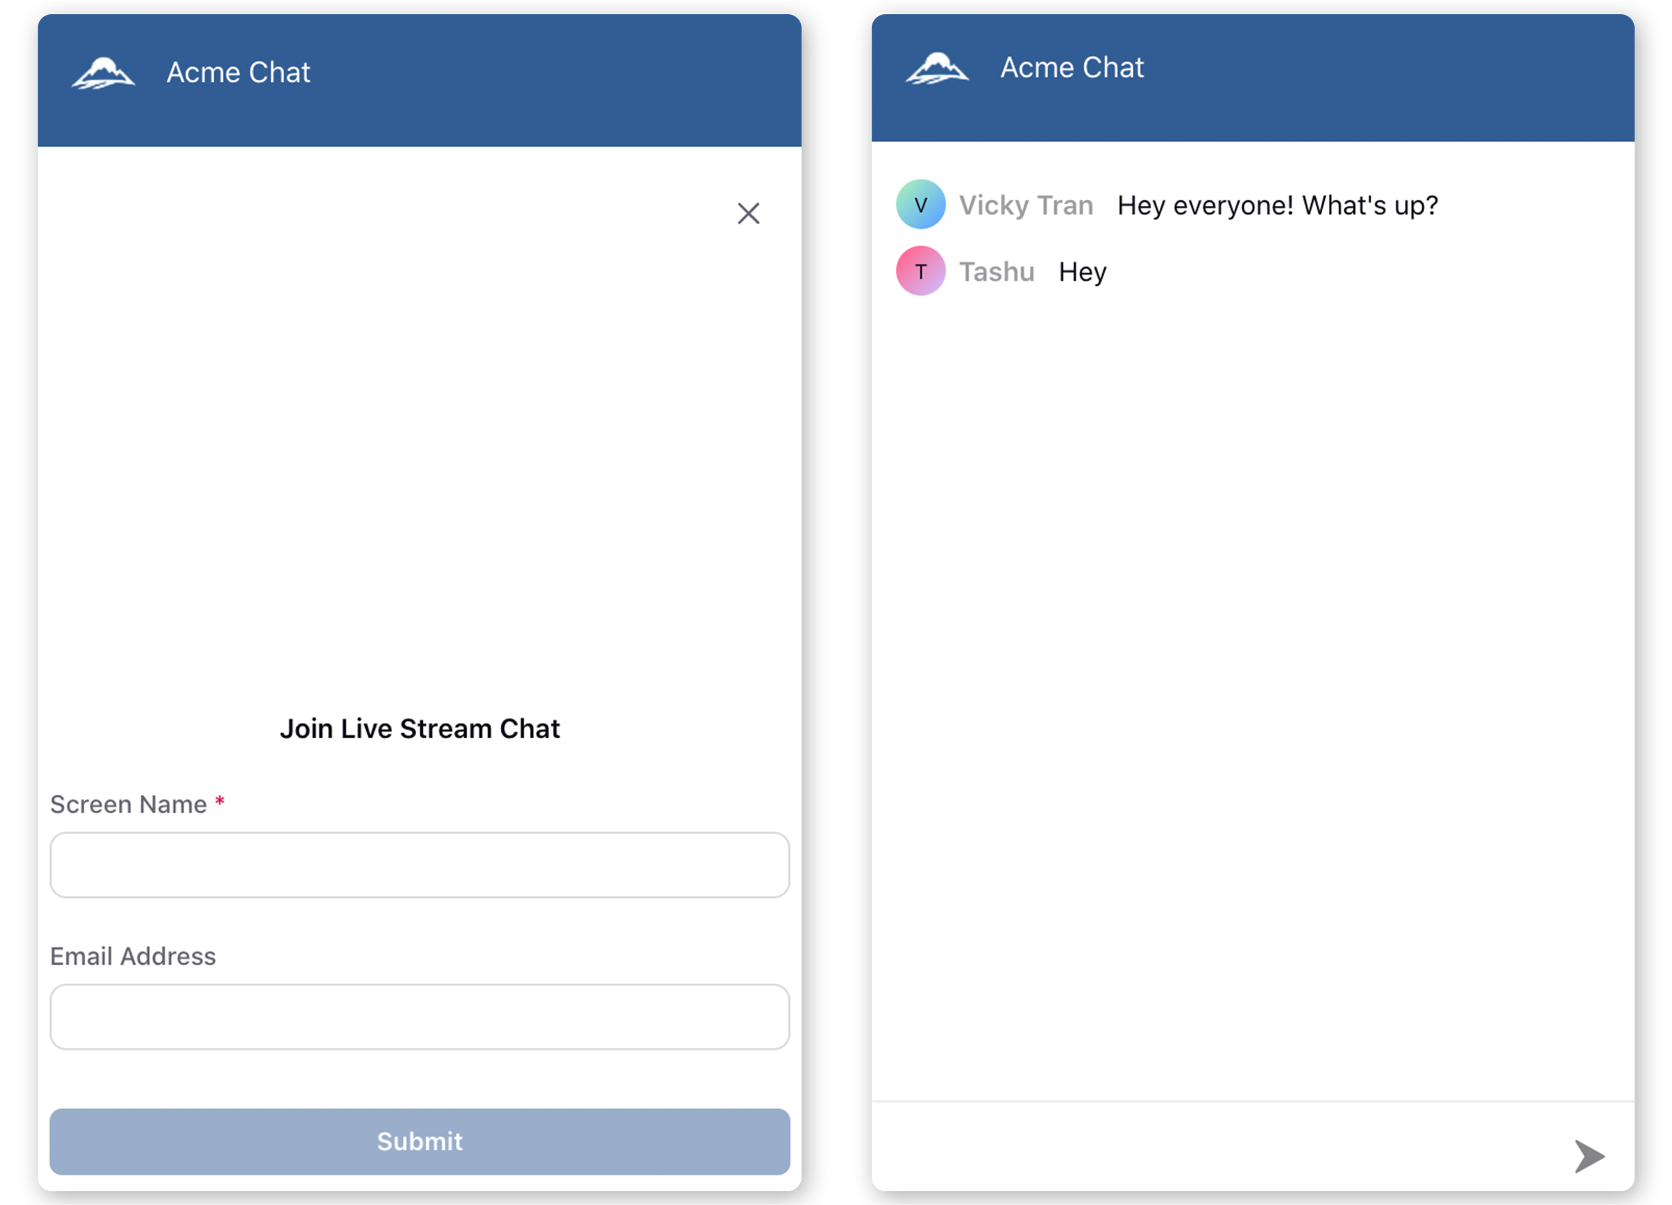
The users can join the live stream by submitting their details. If they share any URL and phone number in the stream, it will become clickable.
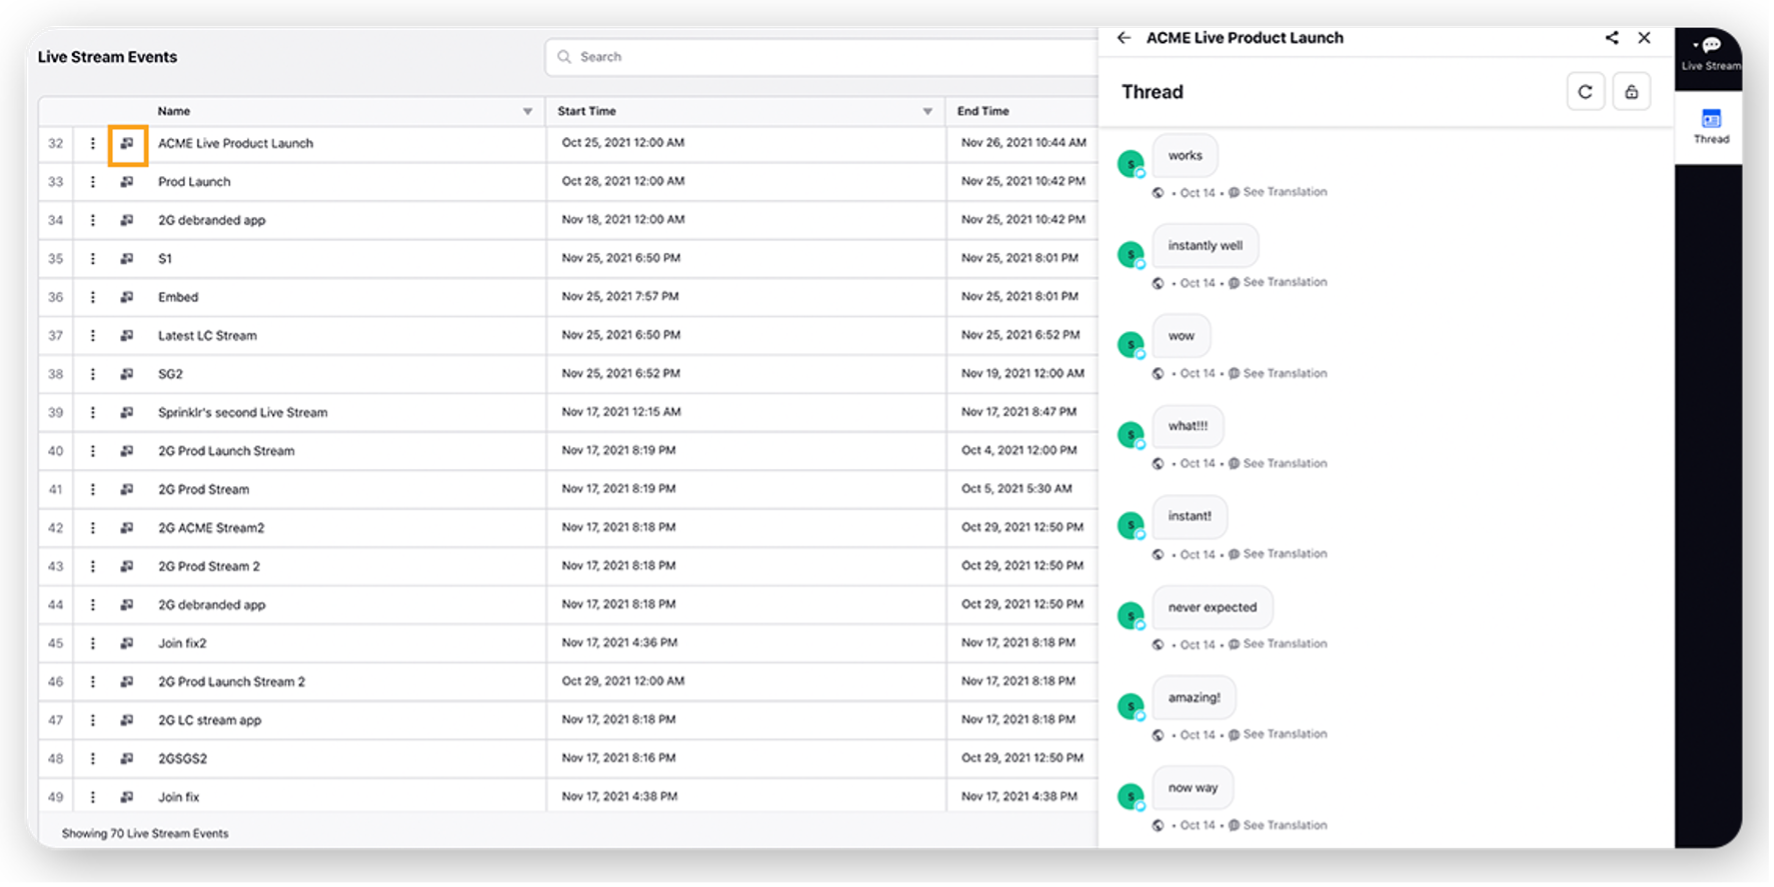
Once the live stream event starts, you can view the users' messages in real time. Click the Open Details icon alongside the stream event to open the Live Stream in the third pane.
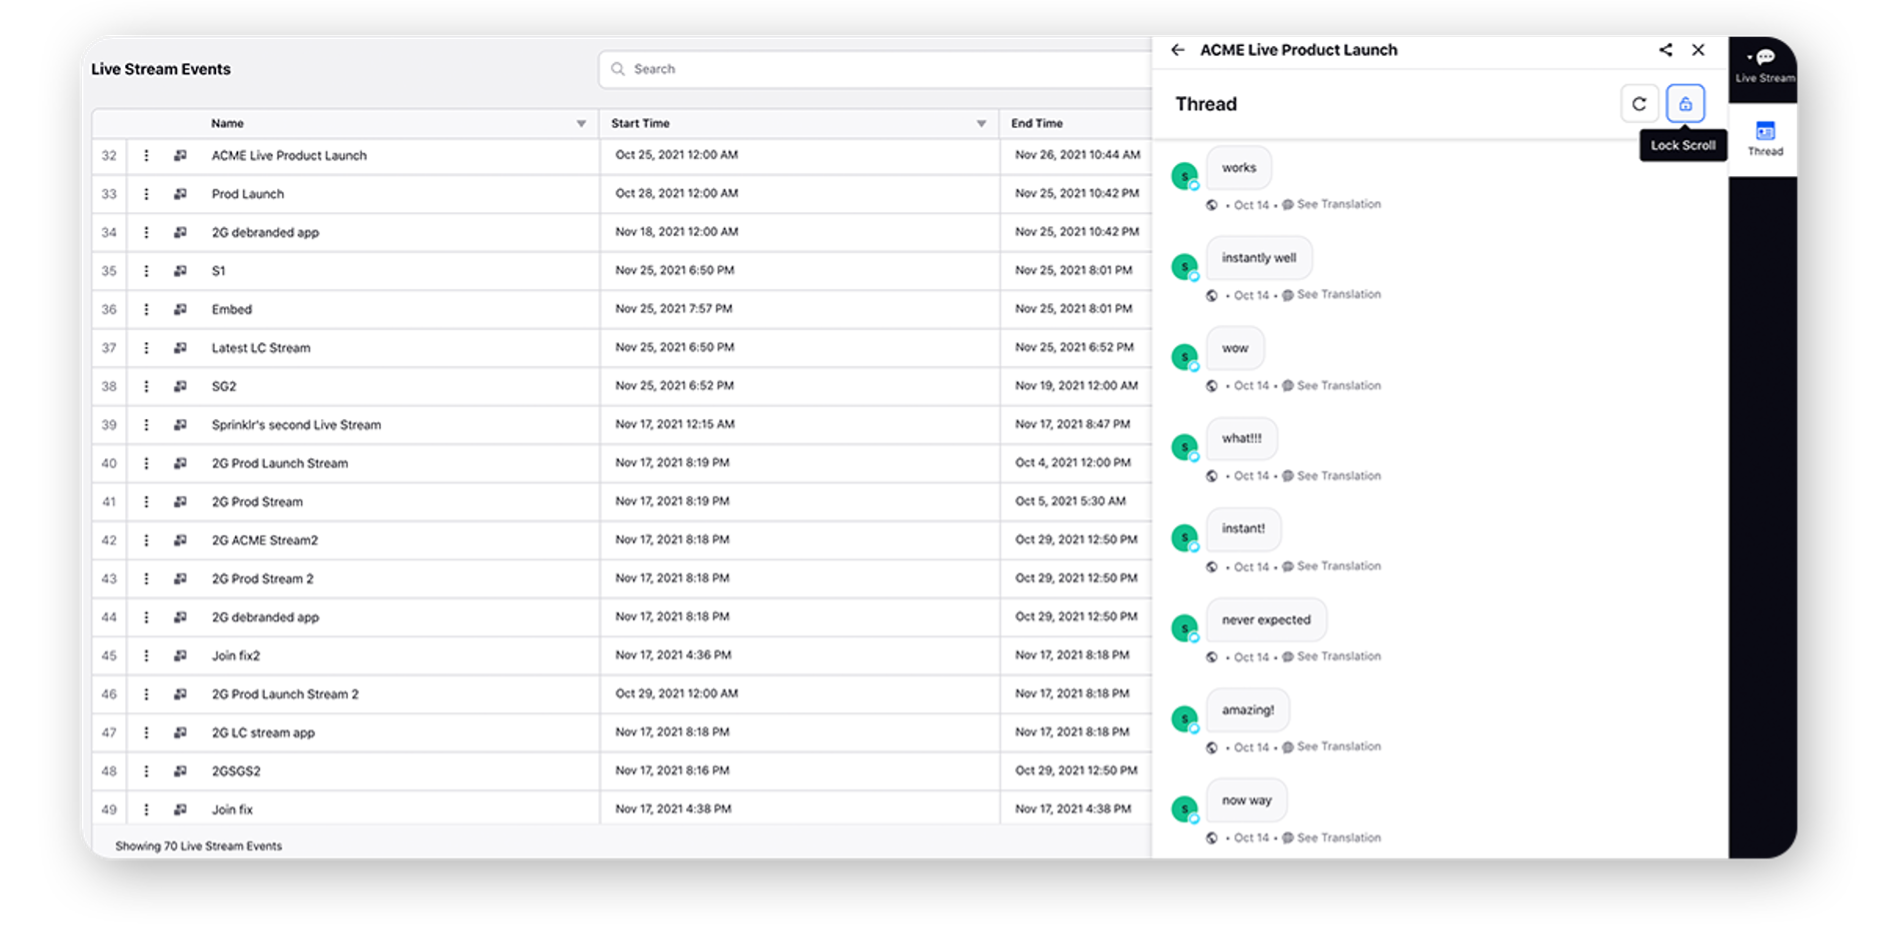
9. You can lock the scrolling of the messages by clicking the Lock Scroll icon in the top right corner of the third pane and take action on a particular message.
10. On a particular user message, you can take different actions such as deleting, applying
a macro, creating a case, marking it as spam,
