Creating Surveys
Updated
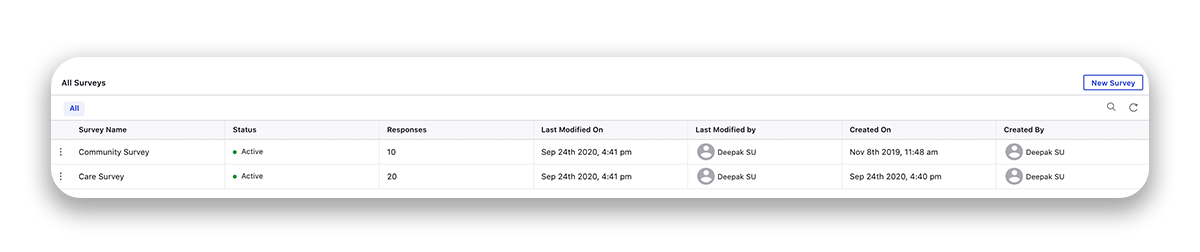
The survey builder allows you to create and customize surveys to meet your specific needs. In the Survey Builder, you can create new surveys, edit, delete, and clone your existing surveys. Here, you'll see information on your existing surveys, including the Survey Name, Status, the number of Responses, the Last Modified On date, the Last Modified By user, the Created On date, and the Created By user.
To create a survey
1. On the top-right corner of the Survey Builder window, click New Survey.
2. On the Create New Survey pop-up window, enter Survey Name and Select Base Language.
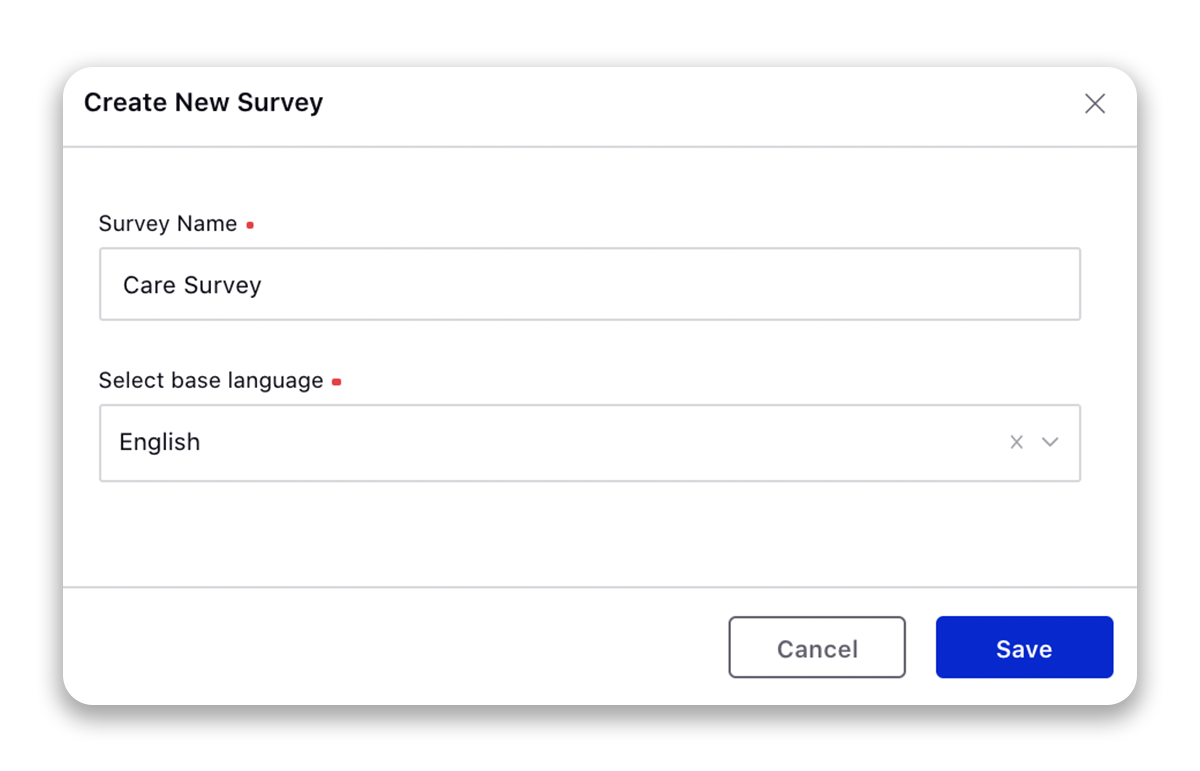
3. Click on Save to open the default survey template. The survey builder screen has 4 different tabs: Builder, Responses, Settings & Translations.
Survey Builder
On the Builder tab, you have access to a range of customization options, including the ability to:
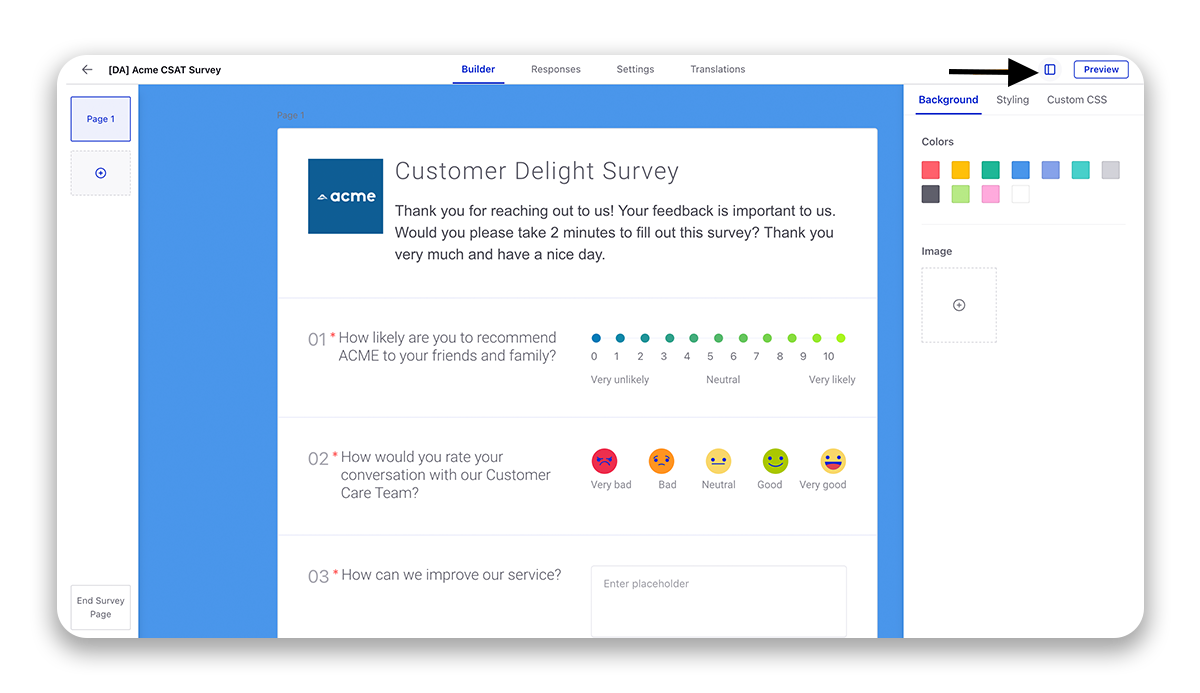
Customize the survey title, logo, and description: You can personalize the survey by adding your brand logo and a descriptive title that accurately reflects the survey's purpose.
![]() Note: The size for the image is restricted to 100px X 100px. You can use custom CSS section to customize the dimensions
Note: The size for the image is restricted to 100px X 100px. You can use custom CSS section to customize the dimensions
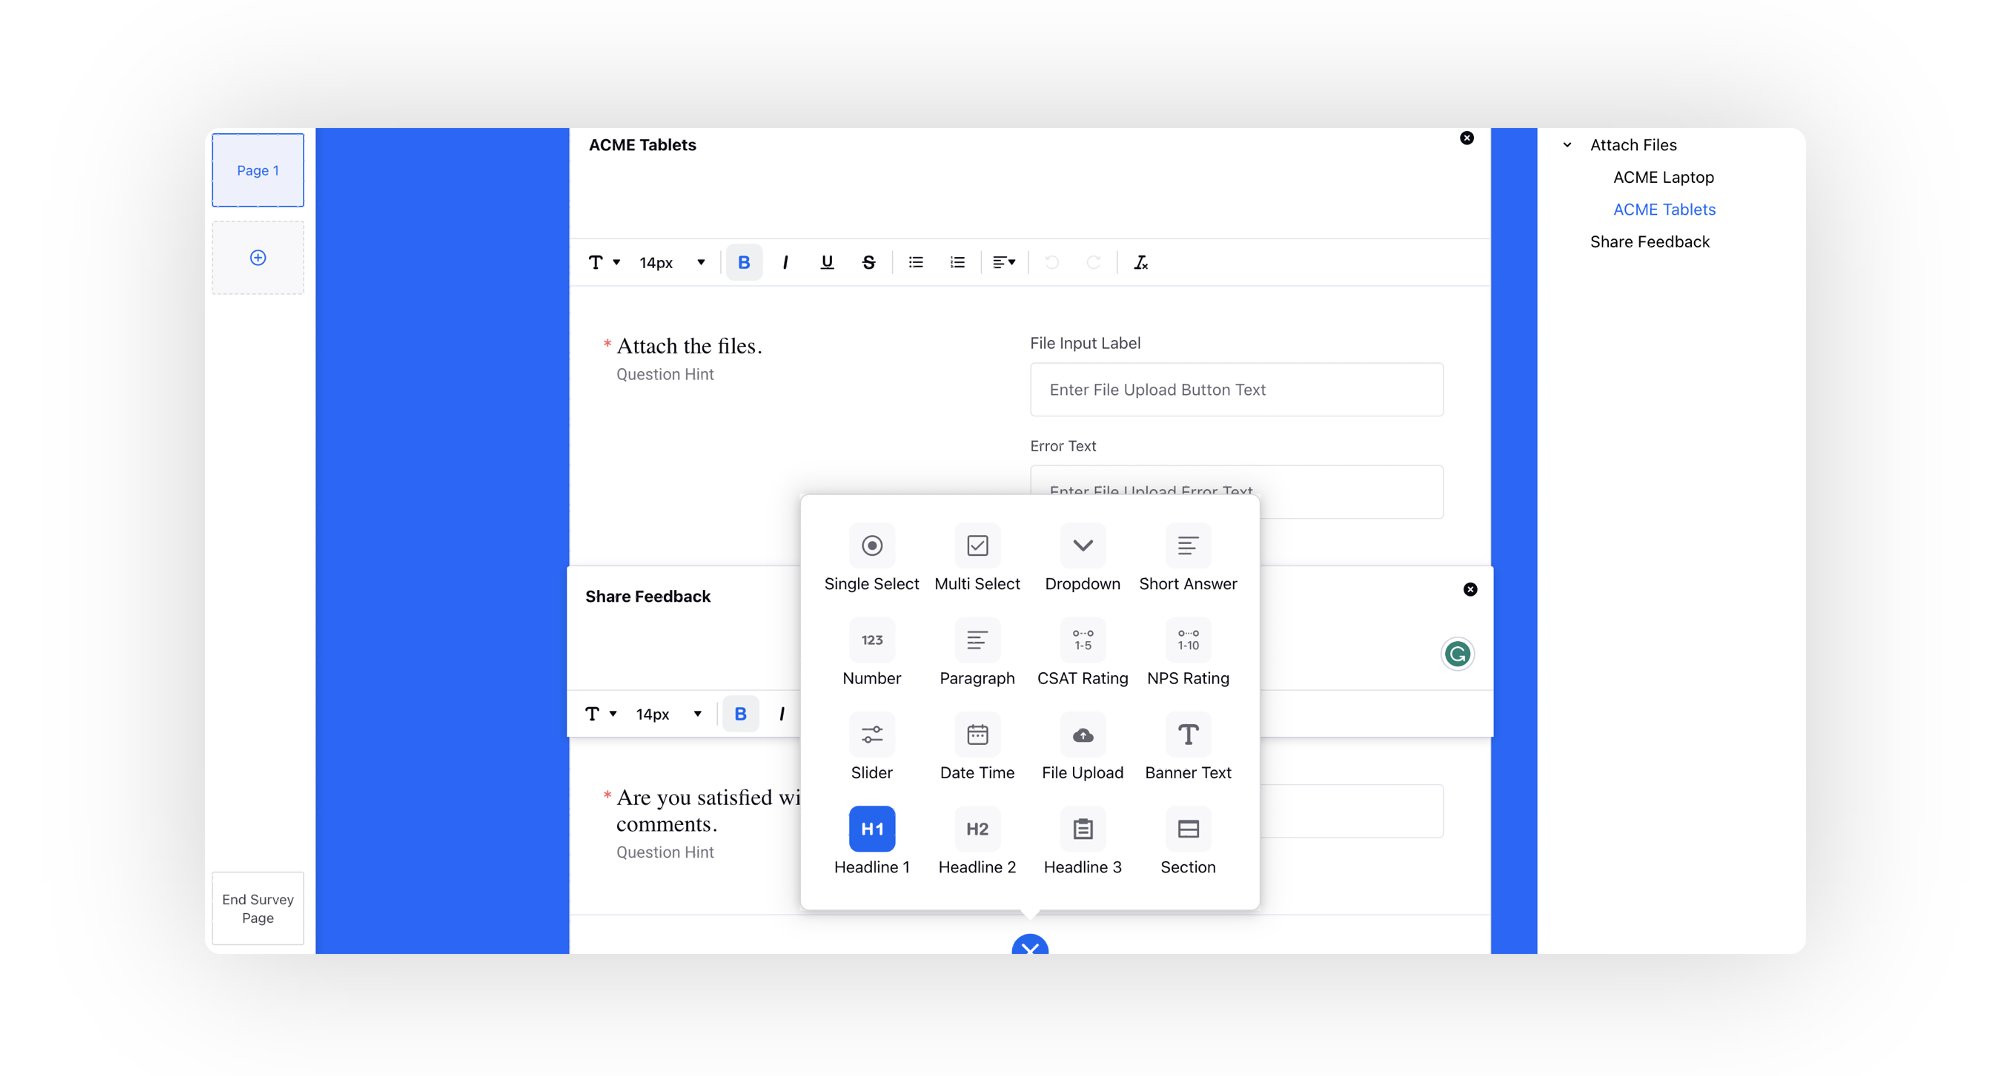
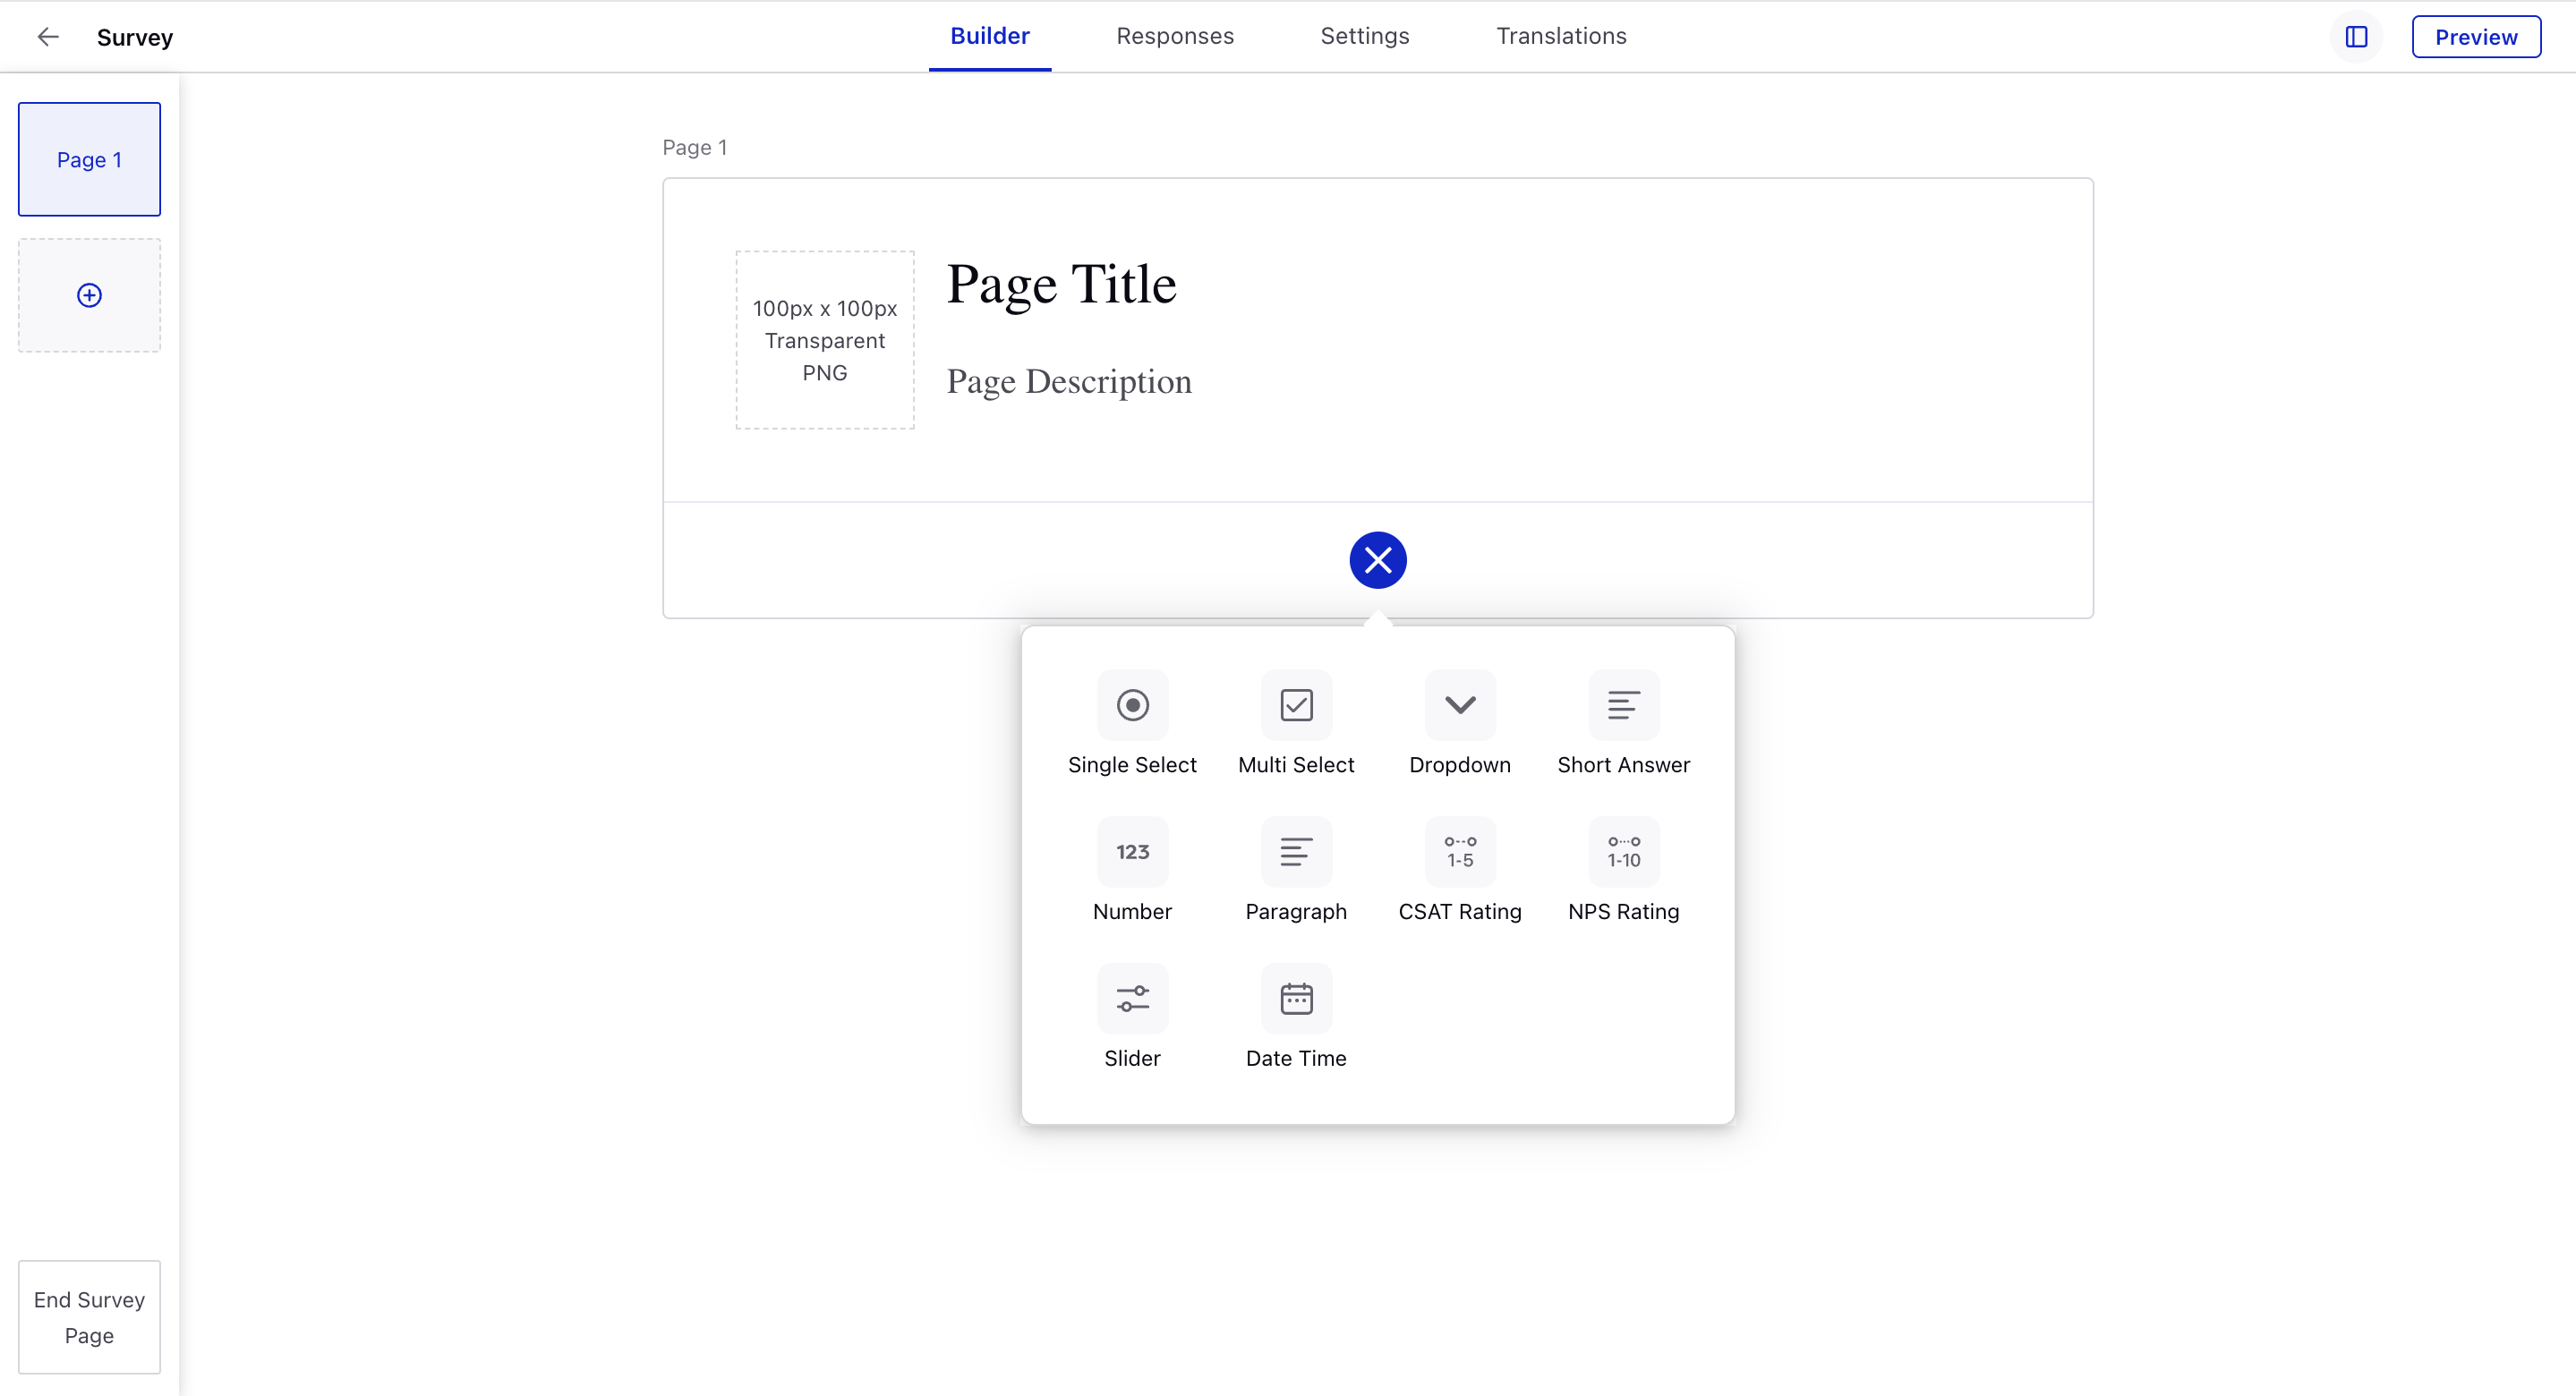
Add survey questions: You can add survey questions using different question types such as multiple-choice, rating scales, and open-ended questions, among others. This ensures that the survey questions are relevant to your target audience.
Add headings: The survey has the capability to be segmented into distinct categories, each of which can further encompass a range of individual questions. To do this, activate the toggle for Allow header addition under Survey Settings.
Categorization offers a heightened level of organization to a survey, particularly when seeking to gather similar question responses within specific overarching themes.
The categories are segregated into Header 1, Header 2, and Header 3 levels. The initiation of a Header 1 marks the commencement of a new category, up until another Header 1 emerges within the survey. This structure holds true for Header 2 and 3 as well.
For end users, navigation through the survey becomes intuitive as they can easily click on the desired category or subcategory to progress.
Define conditional logic: You can define conditional logic on your survey questions to create a personalized survey experience. This feature allows you to skip irrelevant questions and only show relevant questions based on the user's previous responses.
Break survey form into multiple pages: You can divide the survey form into multiple pages to make the survey more user-friendly and reduce survey fatigue. Surveys with multiple pages will present questions for each page with a Next button to prompt users to go to the next page. To add pages, simply click the Add icon located on the left. Additionally, you have the option to insert pages between existing ones by clicking the Add Page icon at the bottom.

Customize the end survey page: You can customize the final page of the survey that participants see after completing the survey. This allows you to thank participants for their time, provide additional resources or incentives, and encourage them to take future actions. You can also add conditional message using banners.
Customization option
Click the 
You have the option to choose between the Default template or Three Swipes template for surveys. The Three Swipes template provides additional background space between questions.
The Styling tab allows you to customize the visual appearance of your survey to match your brand or desired design. This feature provides options to modify various elements such as the background color, background image, and button styling for primary buttons throughout the survey, including header buttons, next page buttons, and more.
You also have the option to add custom CSS to further customize the appearance of your survey. This allows you to tailor the look and feel of the survey to match your brand or website. By adding custom CSS, you can modify the font styles, color scheme, layout, and other visual elements to create a more cohesive and visually appealing survey. Additionally, custom CSS can be used to optimize the survey for mobile devices, ensuring that the survey is accessible and user-friendly on all types of devices.
Preview mode
By clicking on the preview option, you can view how your survey will appear to respondents on various devices, such as web browsers, mobile apps, or tablets. This feature is useful as it allows you to check how your survey will look and function across different platforms before it goes live.
Survey Responses
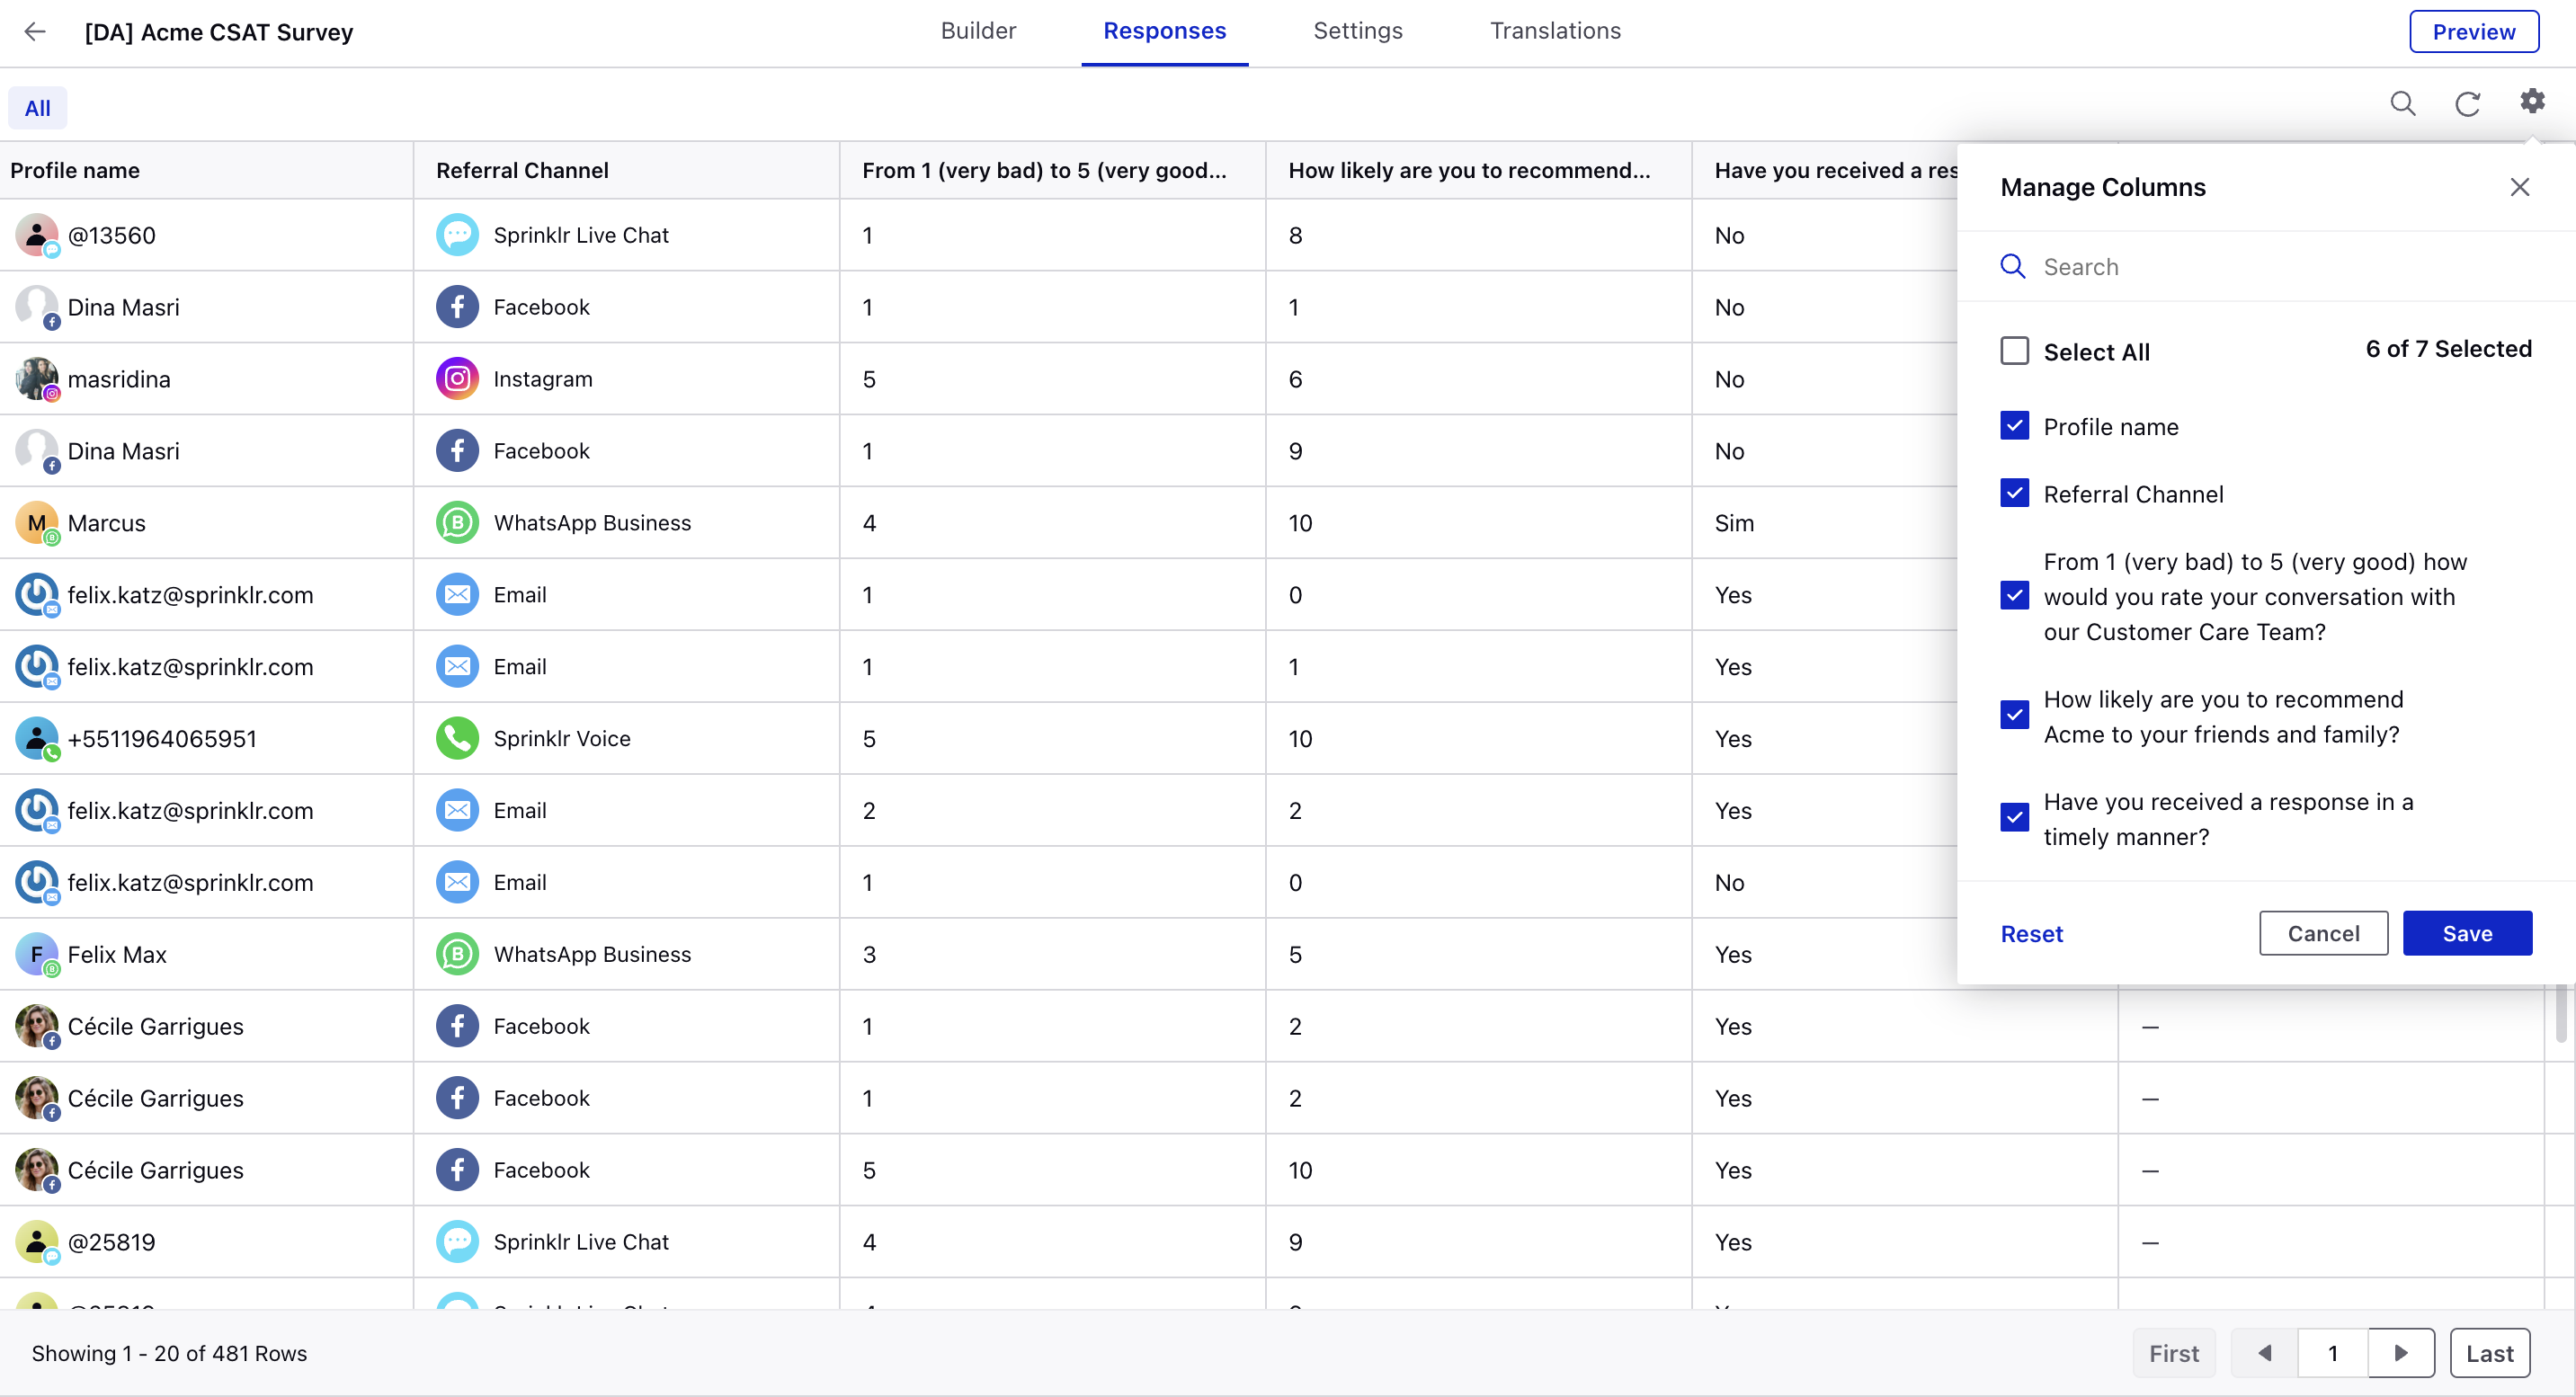
The Responses tab provides you with a comprehensive overview of the data collected through your survey. You can access a list view of all the responses your survey has received. This view provides you with an overview of the data collected, including the survey questions and responses received from each participants.
To customize the view, you have the ability to select the columns you would like to view, which allows you to focus on specific data points that are most relevant to your analysis. For example, you might choose to view the participant's name, email address, or other identifying information, along with their responses to specific survey questions.
Survey Settings
In the Settings tab, you can configure the Survey Details, Page Settings, Button Settings, Survey Link Settings, and Language Switcher Settings of your survey.
Survey Translations
In the Translations tab, you can add translations to your survey in multiple languages. This feature is helpful if you have a global audience or if you want to make your survey more accessible to non-native speakers. To set the selected language of a survey based on the user's browser language when a translation is available, you can reach out to Sprinklr support for configuration.
Note that once a survey question is answered in the selected language, the language switcher will be disabled, ensuring a consistent language experience throughout the survey.
Survey Configurations
You can reach out to Sprinklr support for the following capabilities.
1. To enable the configuration for displaying an error message when a user fails to fill a mandatory question.

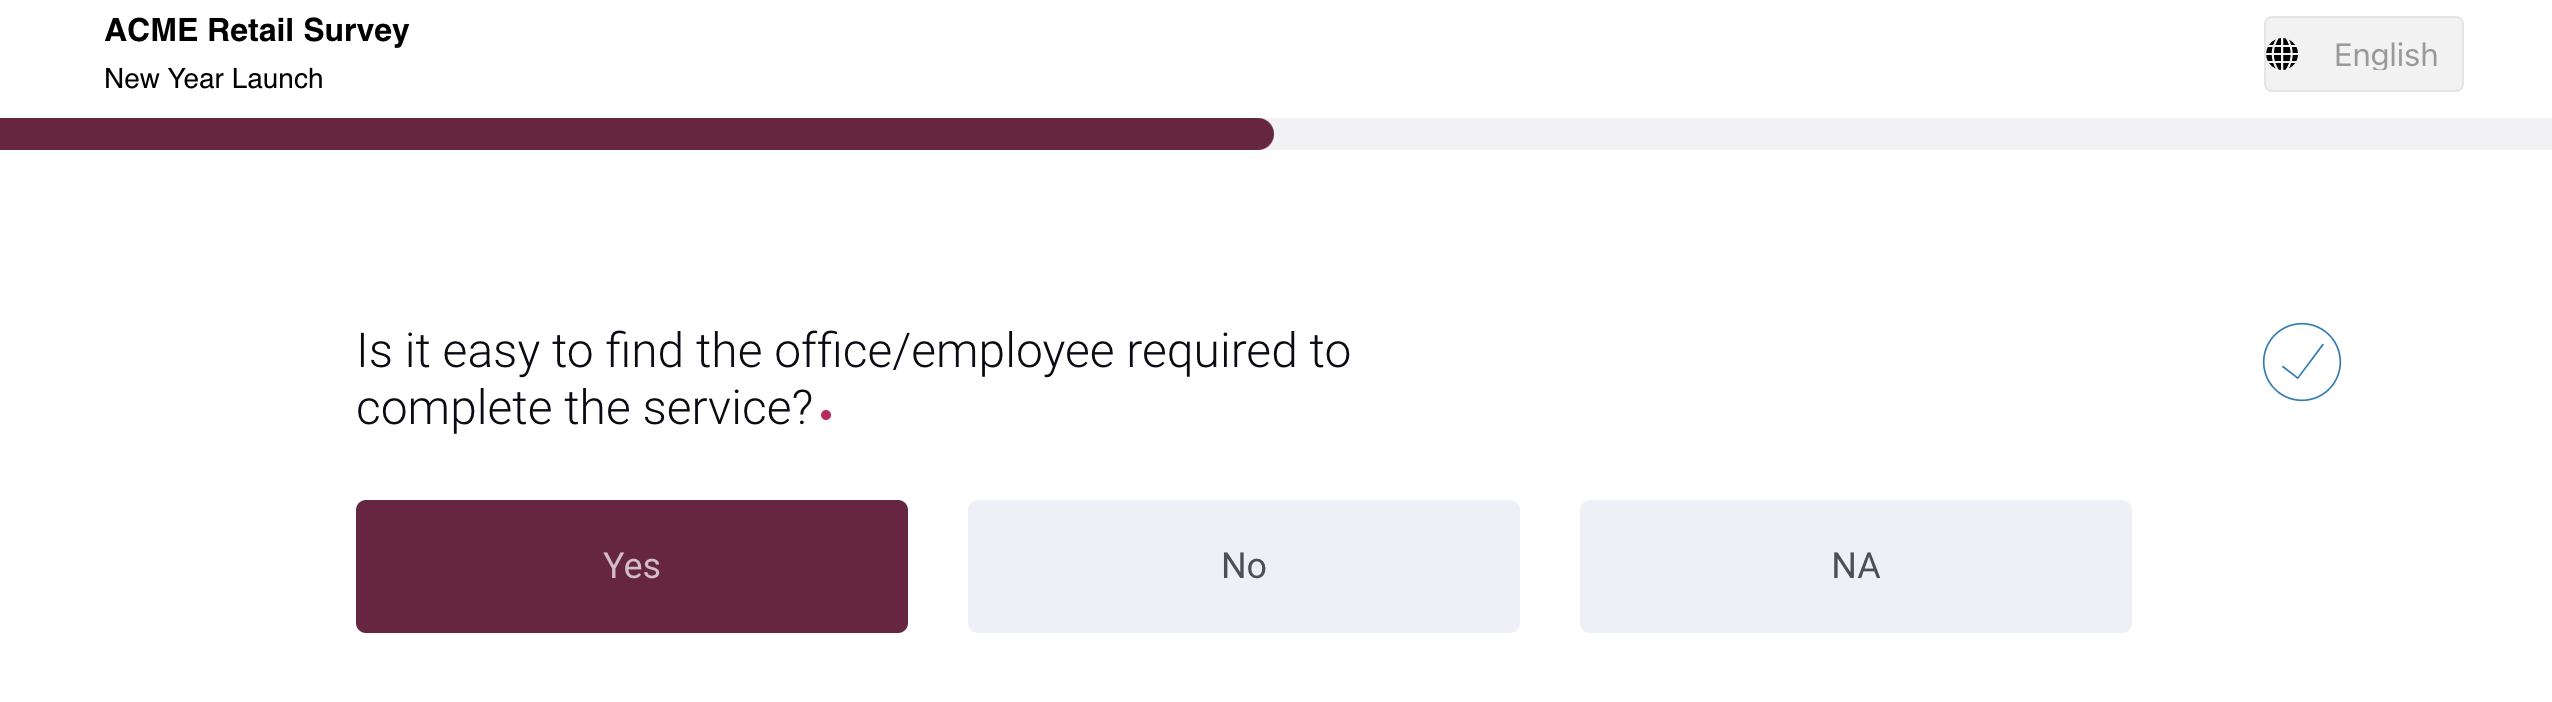
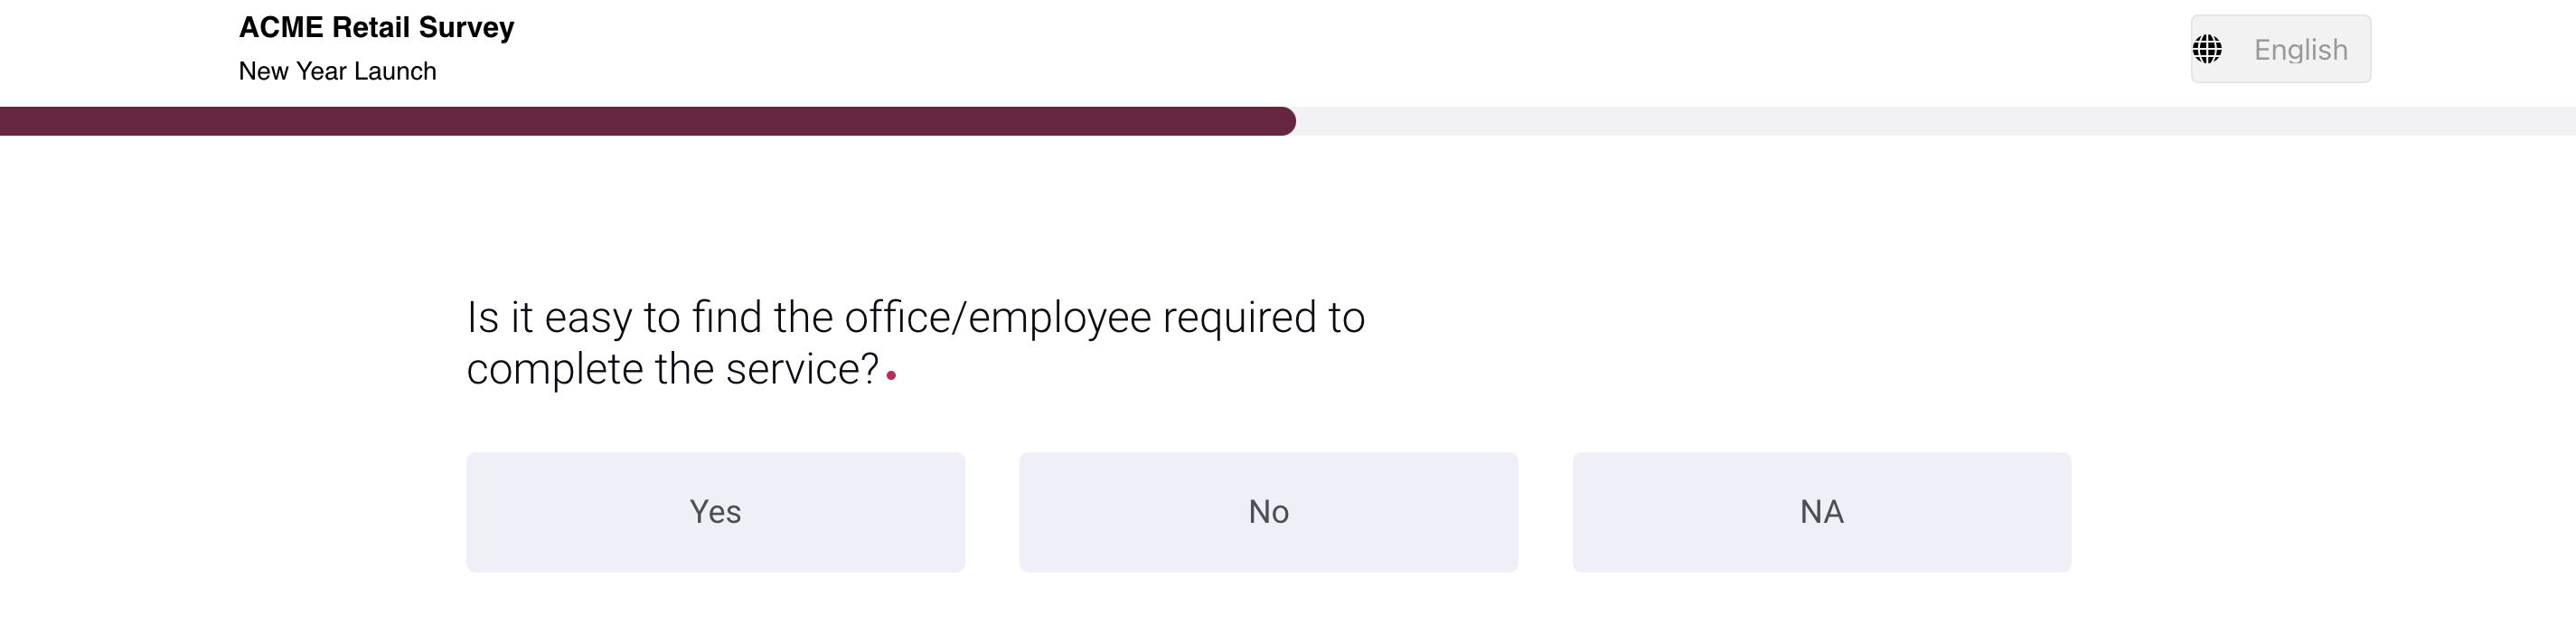
2. To enable the header variant, progress bar, and button variant for single-select questions as shown in the image below.

3. To display text between questions, at the top of the page, or at the bottom. This allows you to add custom text or message to provide additional instructions, context, or information to the participants.

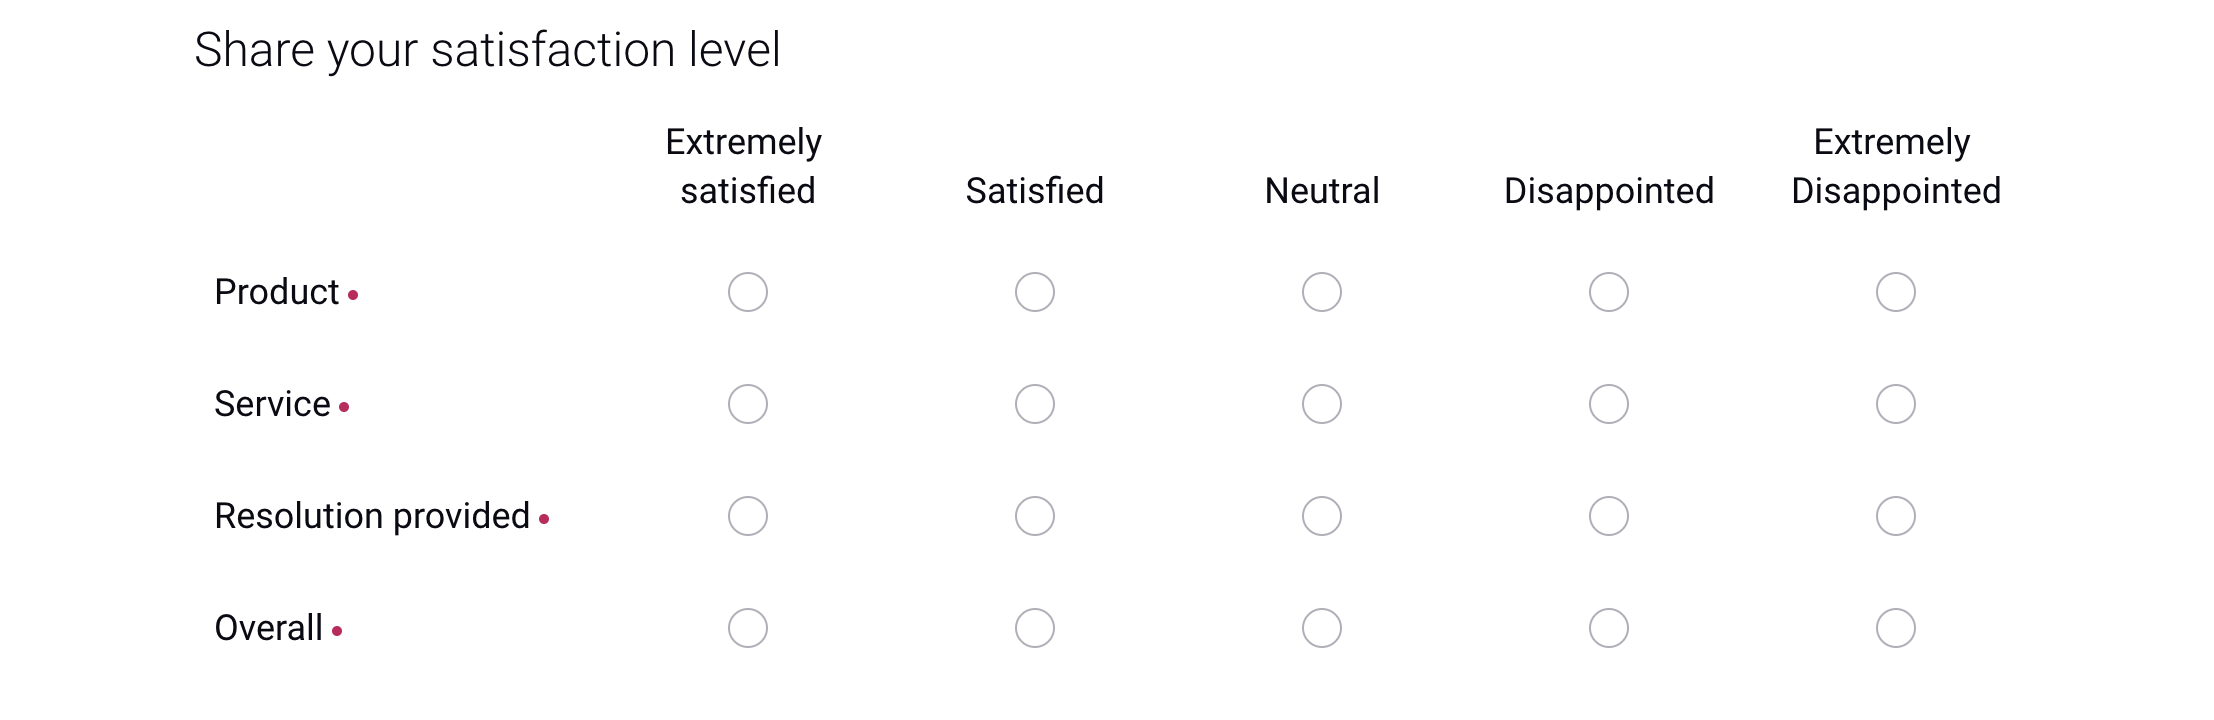
4. To include a matrix-type CSAT (Customer Satisfaction) question in your survey where respondents can rate different aspects or attributes based on their satisfaction level.