Customize Pop-up in Task Calendar View
Updated
In the Task Calendar View, you can customize the details displayed in the task detail popup when you click on a task bar.

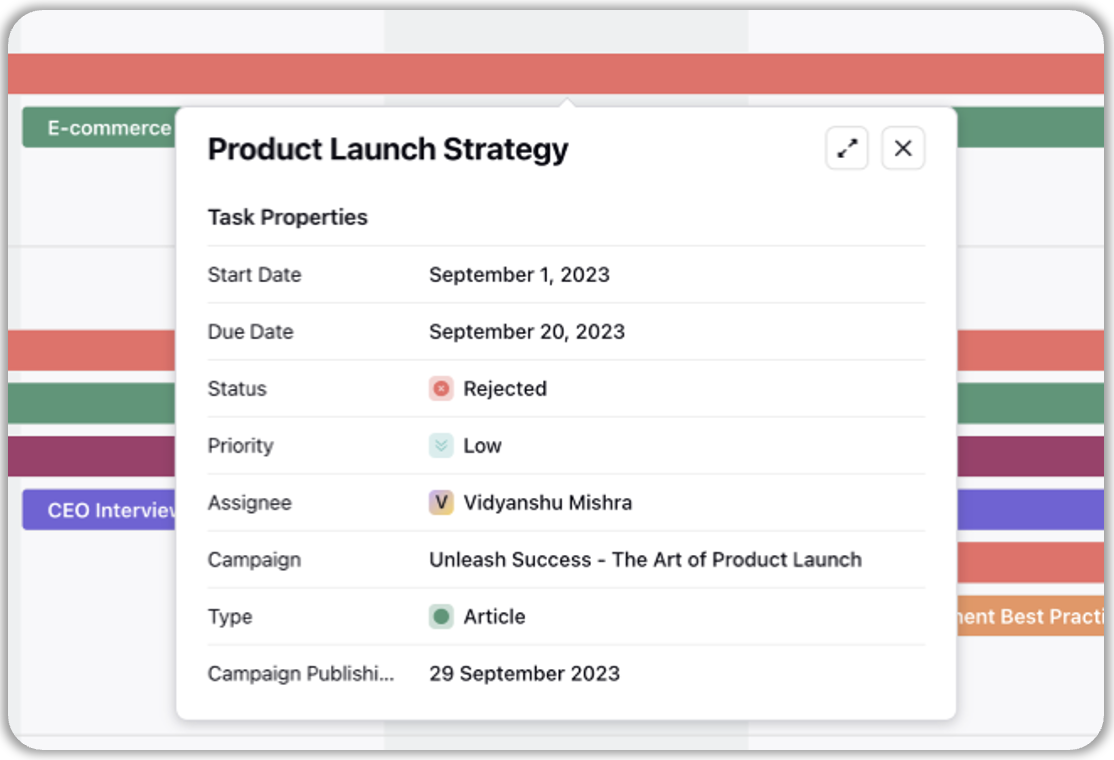
For example, upon clicking on “Product Launch Strategy” task bar in above screen, on the popup we see the Task Name and eight other task properties which are Start Date, Due Date, Status, Priority, Assignee, Campaign, Type and Campaign Publishing Date. The details shown are customizable. You can either replace them or add more fields to the popup. To do so, follow the steps below:
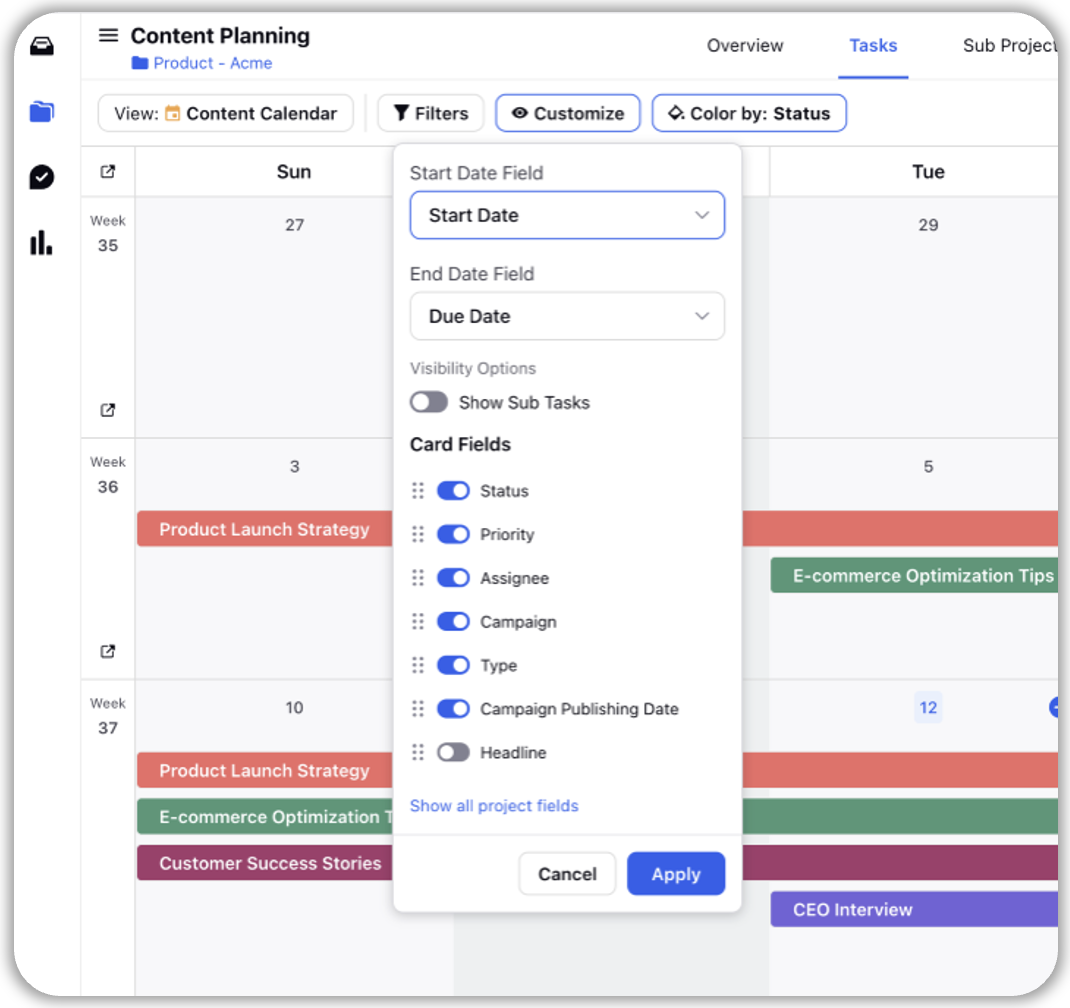
Click on the "Customize" option present on the top bar in Calendar View.

Here, it's crucial to select the start date and end date fields. By default, ’Start Date’ and ’Due Date’ fields are displayed in the popup and are essential for generating the calendar view, as the task bar in the calendar commences on a start date and concludes on due date. It's worth noting that you aren't restricted to use the default start and due date fields; you can opt for any two date-type fields which you are using to track the start and end dates.
To view subtasks within the calendar view, simply toggle on the “Show Sub Tasks” button. If you prefer not to display the subtasks, you can toggle it off.
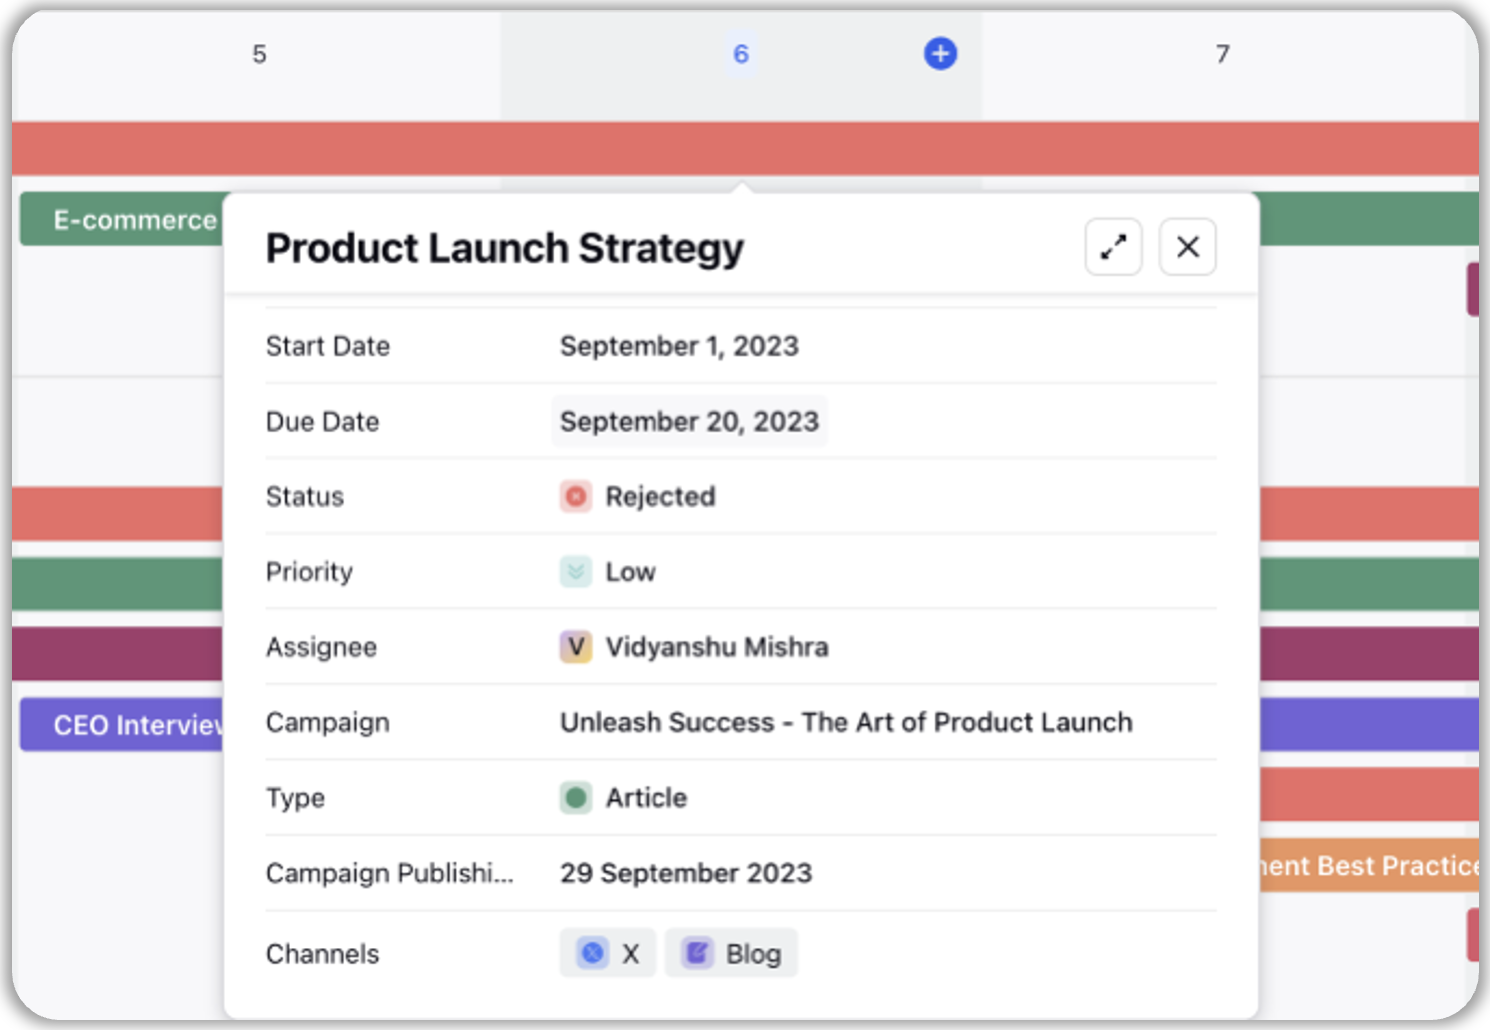
Click on "Show all project fields" to view all available fields that can be displayed on the popup. These fields are categorized into "Active Columns" and "Inactive Columns". To display a field(s) from the inactive section on the popup, simply toggle it on and click "Apply”. For example, if you want to display the "Channels" where the campaign will be published on the details card, simply toggle it on.

You can also change the order in which you wish to see the details in the popup. This can be done by reordering fields by dragging the fields to change their order.
If you want to remove a certain field from the popup, you can simply toggle it off
Note: Clicking on expand icon in the task details popup opens task overlay. You can read more about task overlay in Task Overlay. |