Create Automated Approval Workflows
Updated
Overview
You can create Automations to manage Approvals for your task and maintain a smooth workflow. You can specify individual users as Approvers or automatically select Approvers from a column. Approvers receive platform and email notifications and can approve or reject Tasks from the notification itself. Approval workflows simplify content production and publishing and ensures proper and timely review.
Create an Approval Workflow
1. Click the Arrow button next to Add Task on the top right corner of your window. From the dropdown select Add Automation > Start from Scratch.
2. Give your Automation a name and optionally a description. Make sure you select Task Updates as the Automation type. Click Create.
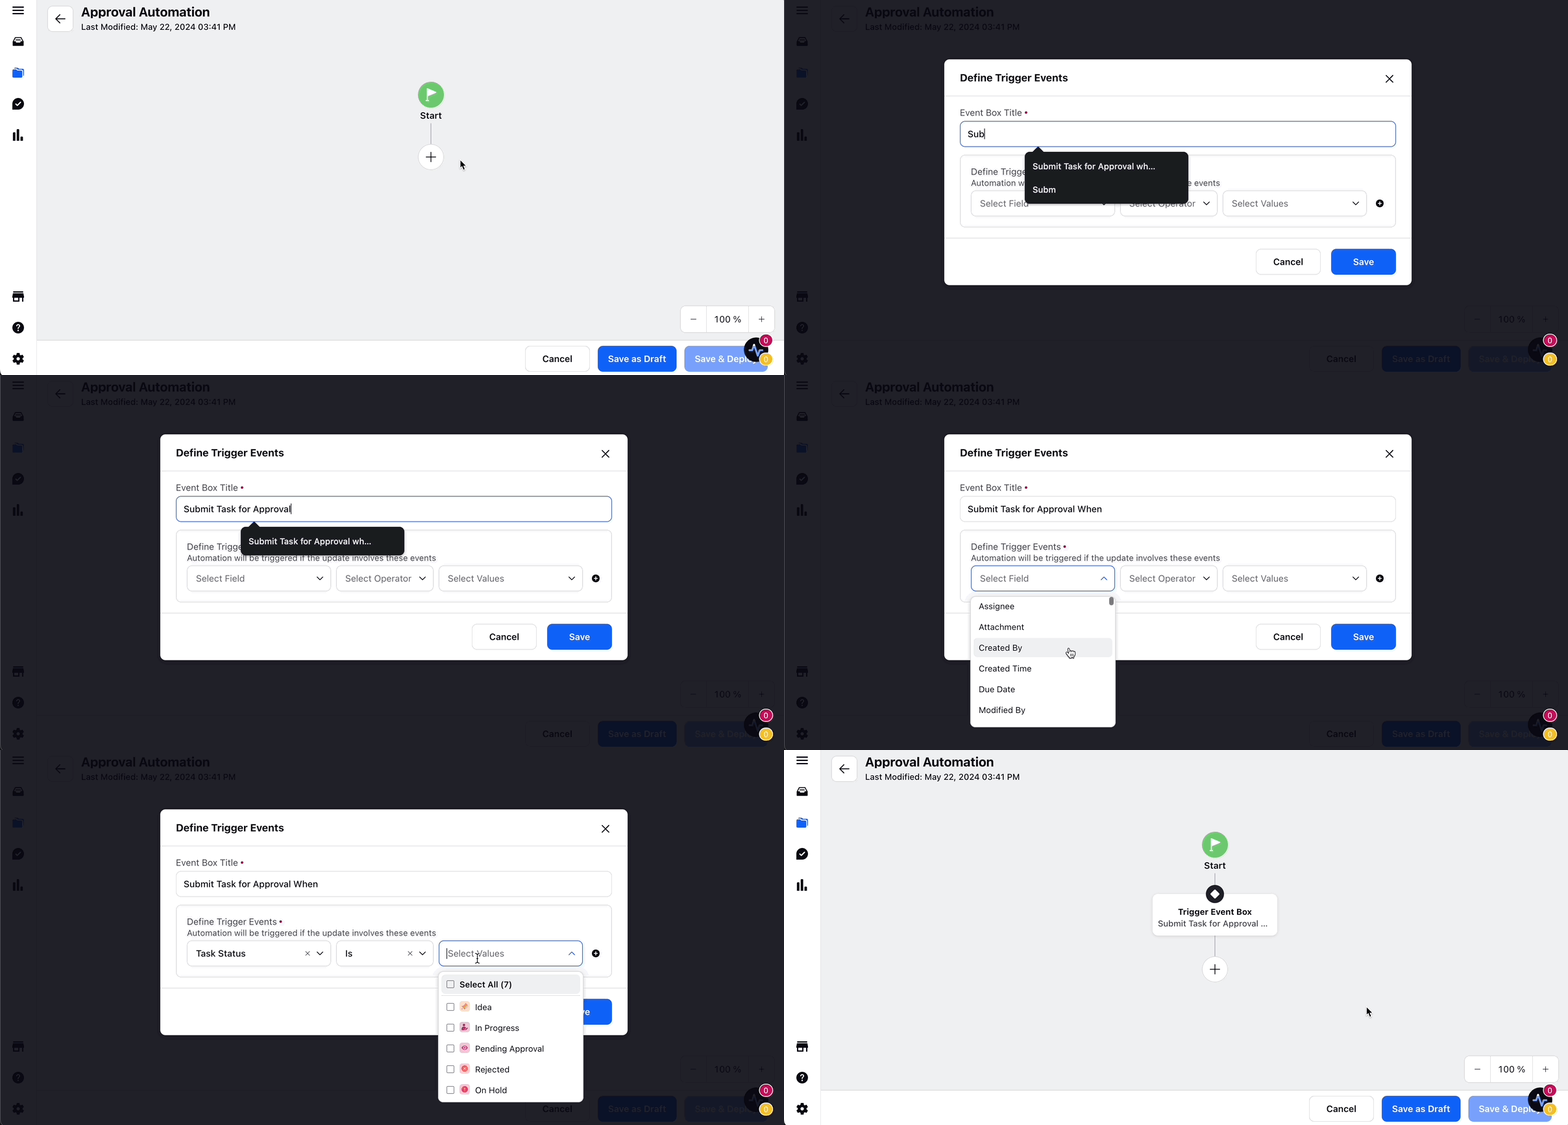
3. Click the Add Element (+) icon to add a trigger event for your Automation. Use the pop-up to specify the trigger and click Save.

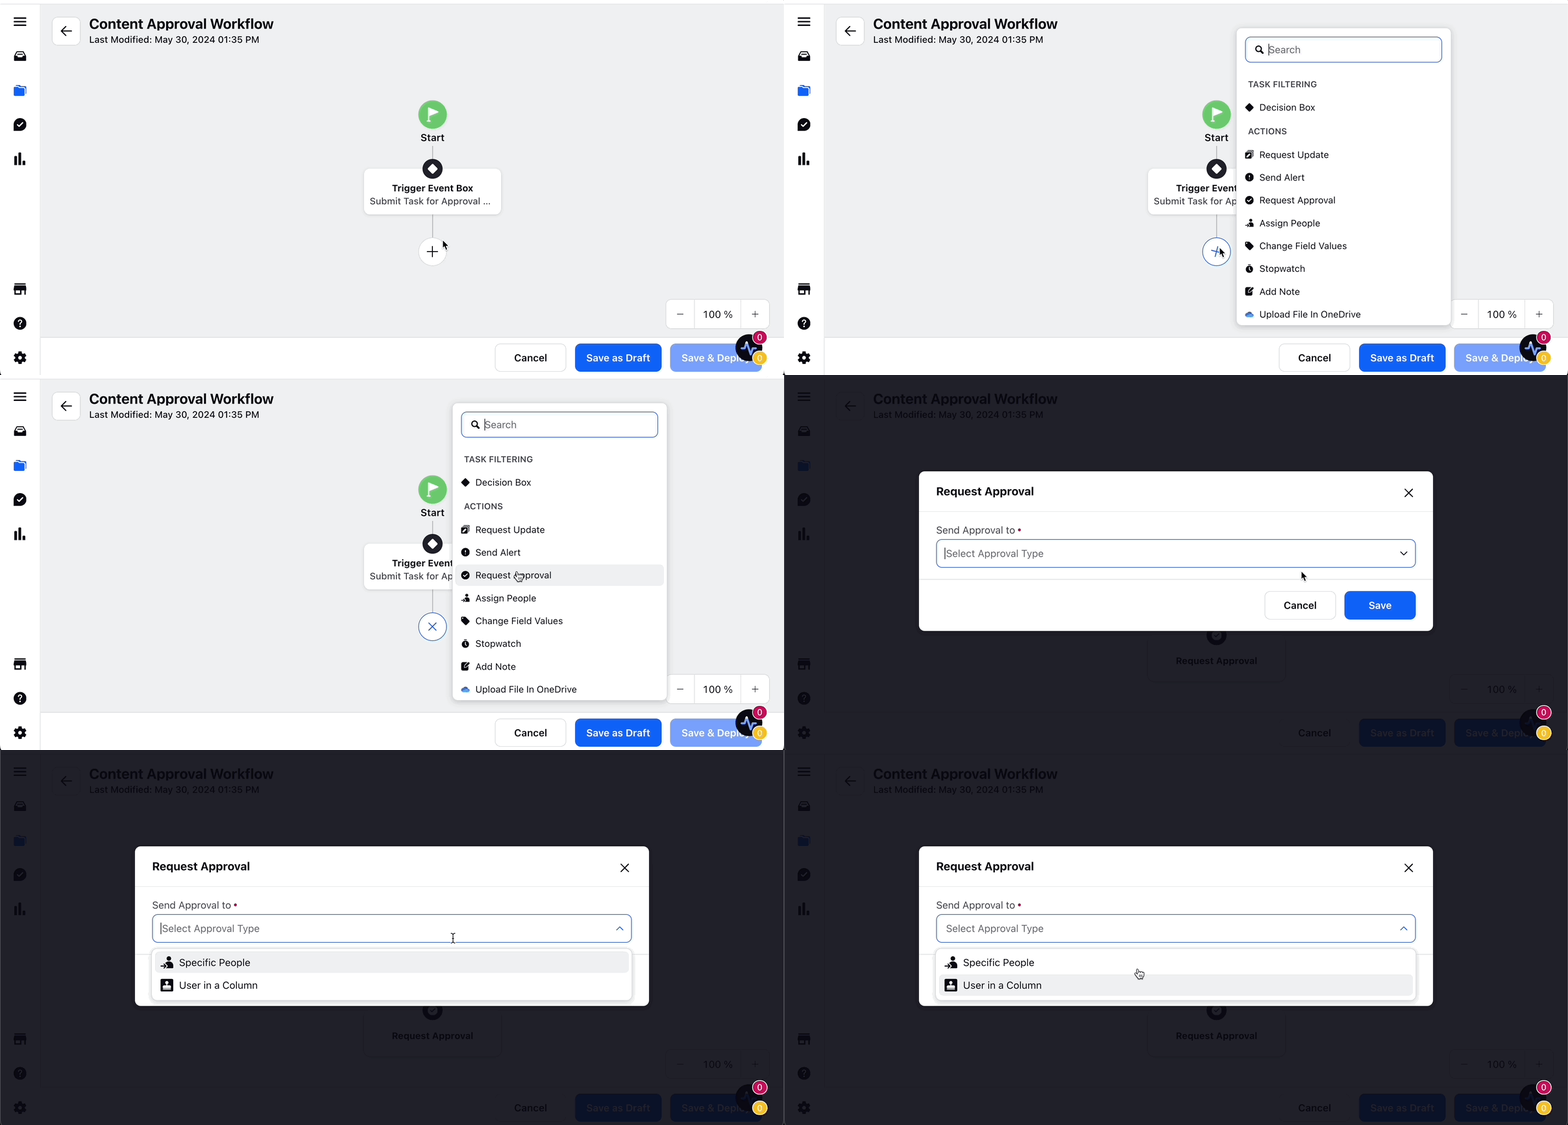
4. Click the Add Element (+) icon again and select Request Approval from the dropdown. From the pop-up, you can choose whom to send the Approval Request to.
5. If you choose Specific People, you can specify Approvers within the automation itself. Select User in a Column to specify a column from where Approvers will be assigned.

6. Use the pop-up to specify the Approvers if you chose Specific People. You can mandate approval from all the Approvers or any one of the selected Approvers
7. You can enable the toggle for Save Approval Response in a Column. This will update Task fields based on the approval status. You will need to choose which Task field to update and how to update them based on the approval status.
8. You can also choose to send automated reminders to the Approvers to ensure content production stays on track and isn't delayed due to approval delays.
9. If you choose User in a Column, you will have to specify the column from which Approvers can be selected. You can choose multiple columns for this. The other options remain the same and you can specify them as per your needs.
10. The Request Approval element will create two paths. Select what actions to take when a Task is approved and when it is rejected.
11. Once you are done with the Automation click Add Element again and select End Connection to indicate the Automation is finished. You will need to add this at the end of each path in the Automation.
12. Click Save & Deploy to deploy the Automation.
13. Click Save as Draft to save the Automation without deploying it.