Decision Box in a Workflow
Updated
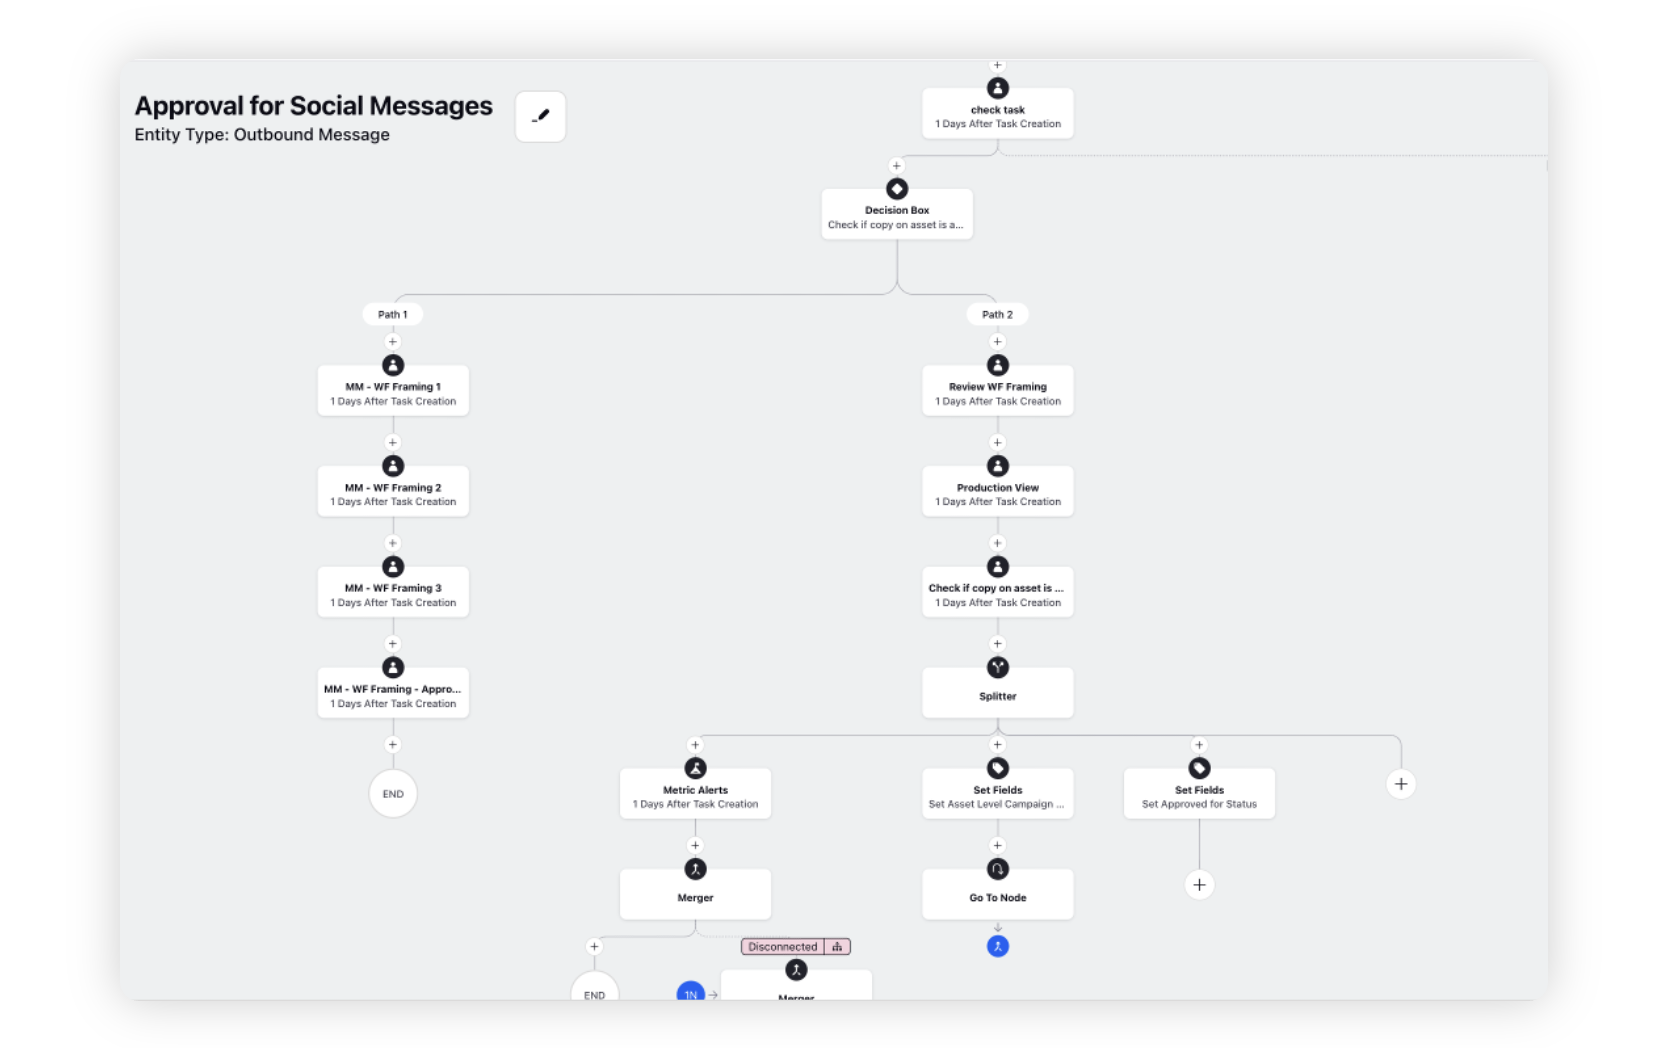
A Decision Box is used in the workflow to define specific pathways on the basis of certain properties. In this guide, we will go over how to define Decision Boxes within a Workflow.
Set Fields in a Workflow
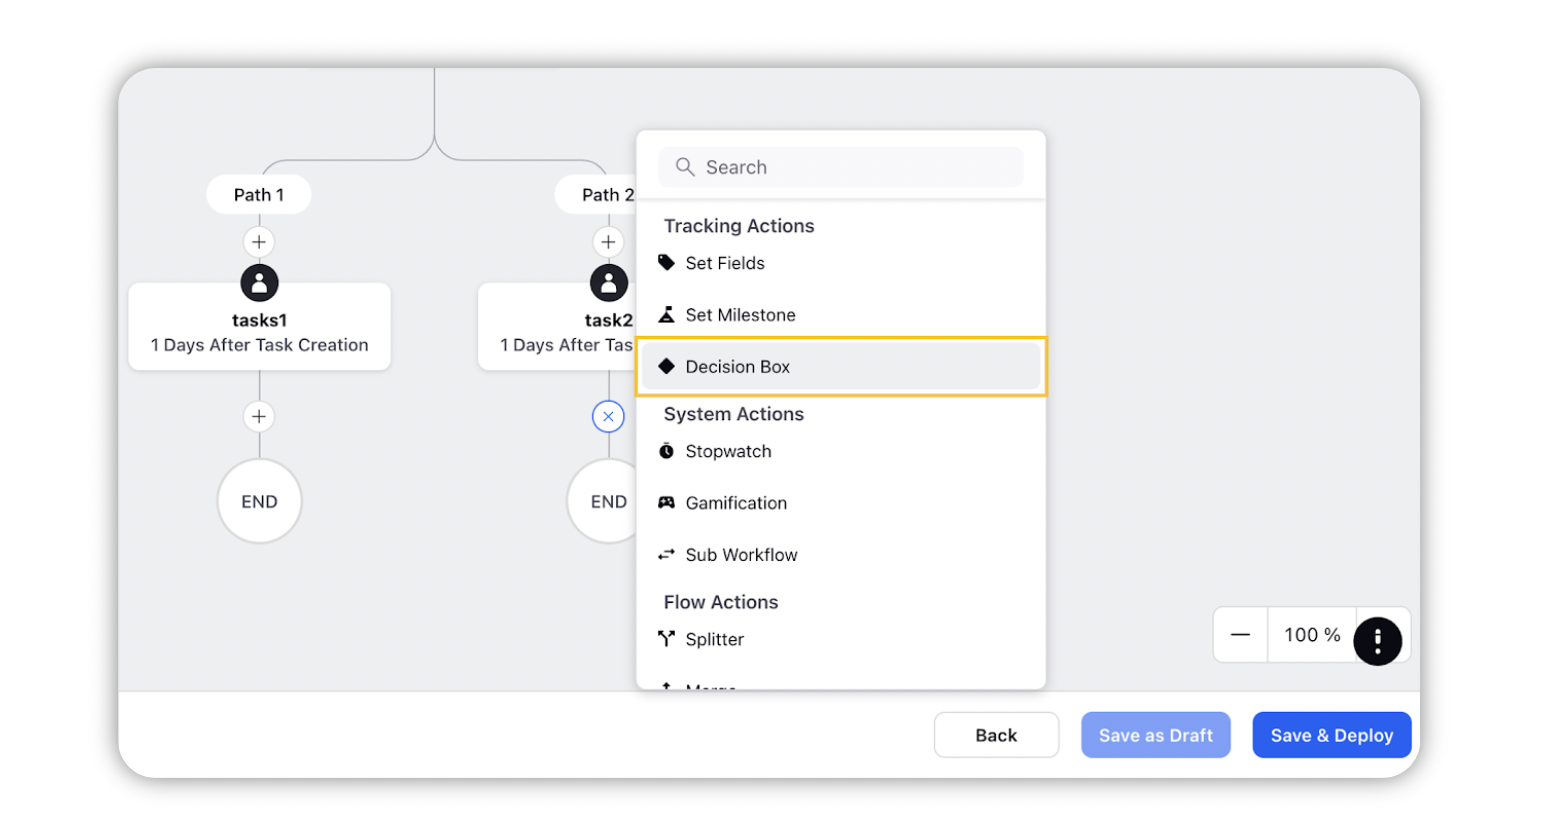
On the Workflow Engine window, click the Addition icon and select the Decision Box.
Fill in the required details such as Label, Description, Name (of the Path), etc. For more information, see Decision Box — Field Descriptions. Define the workflow path under the Path section by adding logical conditions and actions for the same.
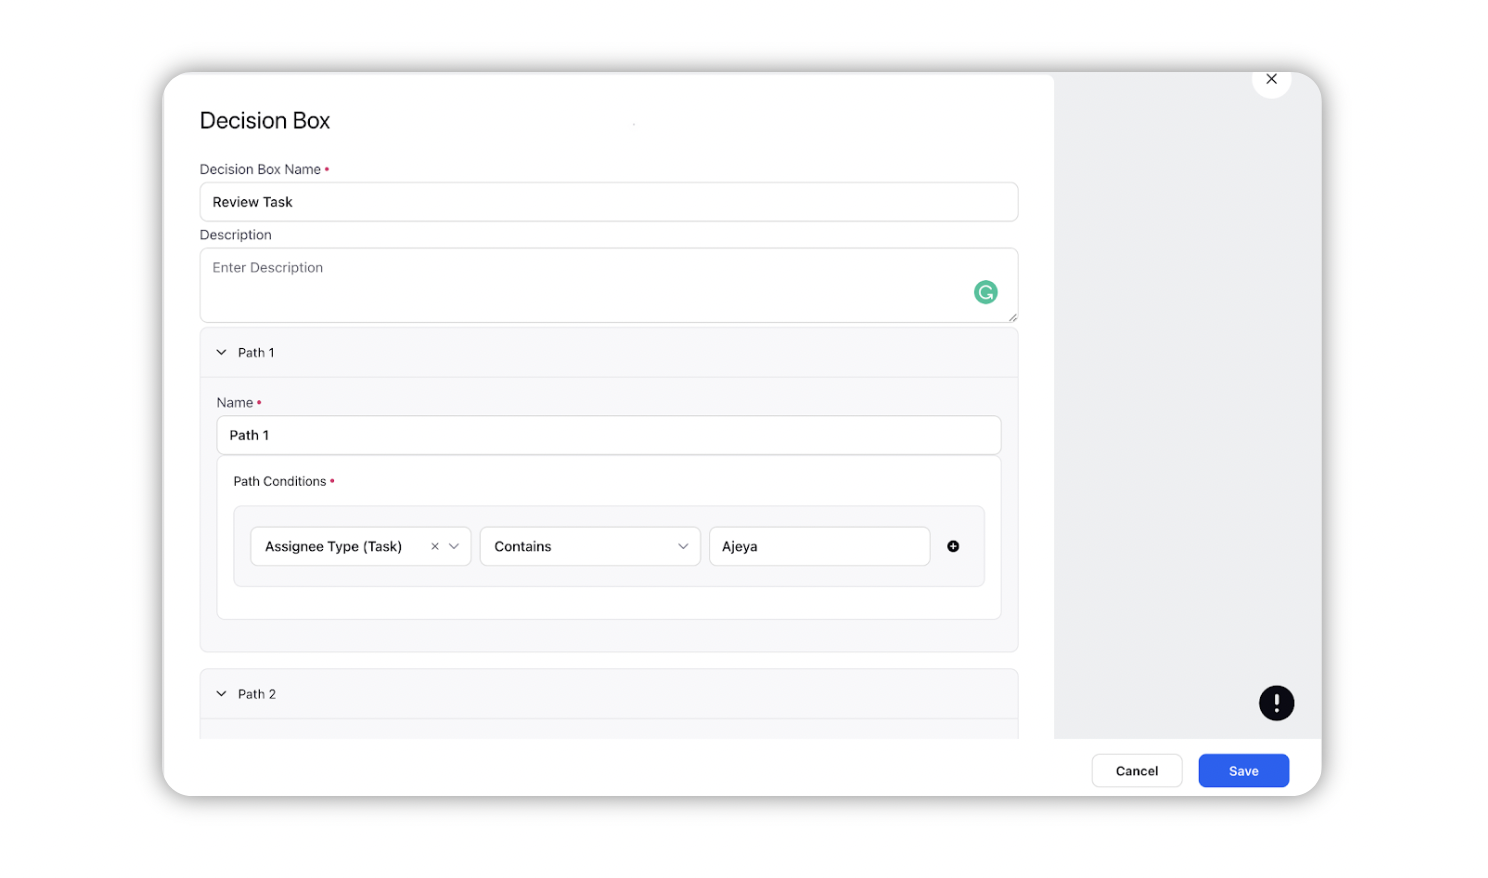
Click Save in the bottom right corner.
Decision Box — Field Descriptions
Term | Description |
Label | Provide a Label to your Decision Box. |
Description | Provide a description of your Decision Path. |
Define Path | Define a path for your Decision Box by setting conditions. |
Name the Path | Provide a name for your path. |
Condition | Set a condition for your path:
|
Add Condition | Click to set more than one condition for the same path. |
Add New Path | Click if you want to set more than one path for your Decision Box |
Operator Type — Field Descriptions
Condition | Operator Type |
Outbound Message Fields | |
If the condition to be applied is Date or Number type custom field. | The operator type will be:
|
If the condition to be applied is Text or TextArea type custom field | The operator type will be:
|
If the condition to be applied is Picklist type custom field | The operator type will be:
|
If the condition to be applied is Textmulti or Picklist Multiselect type custom field | The operator type will be:
|
Retain Workflow on Deletion of Decision Box
On deletion of decision box within a workflow, the sub-tasks and other action items will not get deleted. You can retain the nodes and branches emerging from the decision box to avoid complete reconstruction of the workflow.
Hover over the Decision Box and click the Options icon.
Select Move Element With Subtree or Copy Element With Subtree.
Select a Destination Node to which you want to Move or Attach the copied nodes to.
Click Save as Draft or Save & Deploy.