Manage Users
Updated
From User settings, you can view user details, edit users, view user's activity, send a message, change a user's password and notification preferences, and delete a user.
User Record Manager
Using the record manager, a brand can view and manage all the users in one place along with viewing basic information of the users as different columns such as Username, Email Address, Status, User Type, Last Logged In, Last Access Time, User Groups, Designation etc. Columns that are to be visible in the record manager can be configured using the Manage Columns button present on the top right of the record manager.

Last Access Time is one of the columns for the record manager for enhanced monitoring. Following are the definitions of Last Login Time and Last Access Time to understand the difference between both.
Last Login Time: Most recent time of user logging into the platform i.e. either the time at which user was authenticated by the SSO or the time at which the user was authenticated by entering right credentials to login.
Last Access Time: Most recent time of user accessing a part of the platform such as navigating to Campaigns section in Sprinklr Marketing or performing an action such as creating a reporting dashboard or changing the assignee of a case, etc.
 Note: Last Login Time updates every time a user logs in while Last Access Time is refreshed every 12 hours.
For example, let's suppose, Last Access Time timestamps are refreshed on 20th April at 10 AM, and the user did some Activity at 3 PM, and then at 5PM,
When the Last Access Time timestamps are refreshed the next time around 10PM on 20th April, the last access time of the user will be updated to 20th April 5PM.
Add Custom Fields as Columns
You can add custom fields as columns in the Users page using Manage Columns. For more information on adding Custom Fields, refer to the Add a Custom Field article.
All eligible custom fields and system fields are available for selection in the Manage Columns UI.
Once added, these fields appear as columns in the Users table and can be reordered as needed.
Custom fields and their values are governed by visibility controls:
A custom field is available in Manage Columns only if it is:
Enabled
Configured for the User asset type
Marked as Visible in Users Page
Shared with your access scope (workspace, user group, or role)
Field values are shown only if you have permission to view them:
If the field is not shared with you, it will not appear in Manage Columns.
If the field is visible but value visibility is restricted, values may be hidden or partially visible.
If a custom field contains masked or encrypted values, data protection rules are enforced:
Authorized users can view actual values.
Unauthorized users will see masked or hidden values.
View Masked User Information
To help protect sensitive user information, user details such as first names, last names, and email addresses may appear masked on the Users page. If you have the required permissions, you can temporarily reveal user information using the Click-to-View option.
 Note: This is a Limited Availability feature. To enable this feature in your environment, contact Sprinklr Support at tickets@sprinklr.com.
Access to this feature is controlled by the dynamic property ENABLE_TOKENIZER and CLICK_TO_VIEW_PERMISSION_ENABLED.
Use this DP for Display of Sensitive Information: MASK_PARTNER_SENSITIVE_DATA. This protects data on UI but not on database level
Permission - Ensure that your role includes permission to view user information through Click To View. The Click To View permission is available in the Tokenization section of the Roles Permissions section.

Note: When Click-to-View is enabled on any supported Governance page, the revealed state applies across Users, User Groups, Workspace Roles, and Global Roles for the duration of the current session. The state is reset after browser refresh, logout, or session expiration.
View User Information
Click Launchpad
 or New Tab
 . Under Platform Modules, select All Settings within Settings.
From the left pane, expand User Management and then select Users.
Click the Click-to-View
 icon above the user list to view masked user information.


User information remains visible throughout your current Governance session.
Notes:
Click-to-View applies to all visible user records on the page.
The visible state is removed when you refresh the browser, sign-out, or your session expires.
User information may be audited for compliance purposes.
To View User Details
Click Launchpad
or New Tab From the left pane, expand User Management and then select Users.
Hover over the user's Options icon
and select the Details option.
Toggle between Overview, Permissions, and Notification Preferences to view all user details.
To Edit User Details
Hover over the user's Options icon
and select the Details option. Once you've opened up the User Details window, click Edit in the top right corner.
Alternatively, hover over the user's Options iconand select the Edit option.
On the Update User window, edit the user details such as their Name, Email, Language, Roles, etc. See the complete list of fields here.
Click Save in the bottom right corner to save all of your changes made to the user.
To View Activity Associated with a User
Hover over the user's Options icon
and select the Activity option.
You can see all the activities associated with the user in the Activity pane on the right.
To Send Message to the User
Hover over the user's Options icon
and select the Send Message option.
On the Message User pop-up window, write your message in the text box and click Send in the bottom right corner to send the message.
To Change User Password
Hover over the user's Options icon
and select the Change Password option.
On the Change Password for User pop-up window, enter your new password and click Save in the bottom right corner. Check the box alongside Notify User to notify the user.
To Change Notification Preferences
Hover over the user's Options icon
and select the Change Notification Preferences option.
Check the boxes for your desired set of notification preferences.
To Delete a User
Hover over the user's Options icon
and select the Delete option.
On the Delete User pop-up window, select the desired Workspace(s) and click Delete in the bottom right corner.
To Delete a Distributed User
Note: To learn more about getting this capability enabled in your environment, please work with your Success Manager.
Note: Use this DP: ACCOUNT_DEACTIVATION_ON_USER_DEACTIVATION_ENABLED("account.deactivation.on.user.deactivation.enabled", BOOLEAN, PARTNER)
When a Distributed User is deleted, all the accounts owned by the user will also get deactivated.
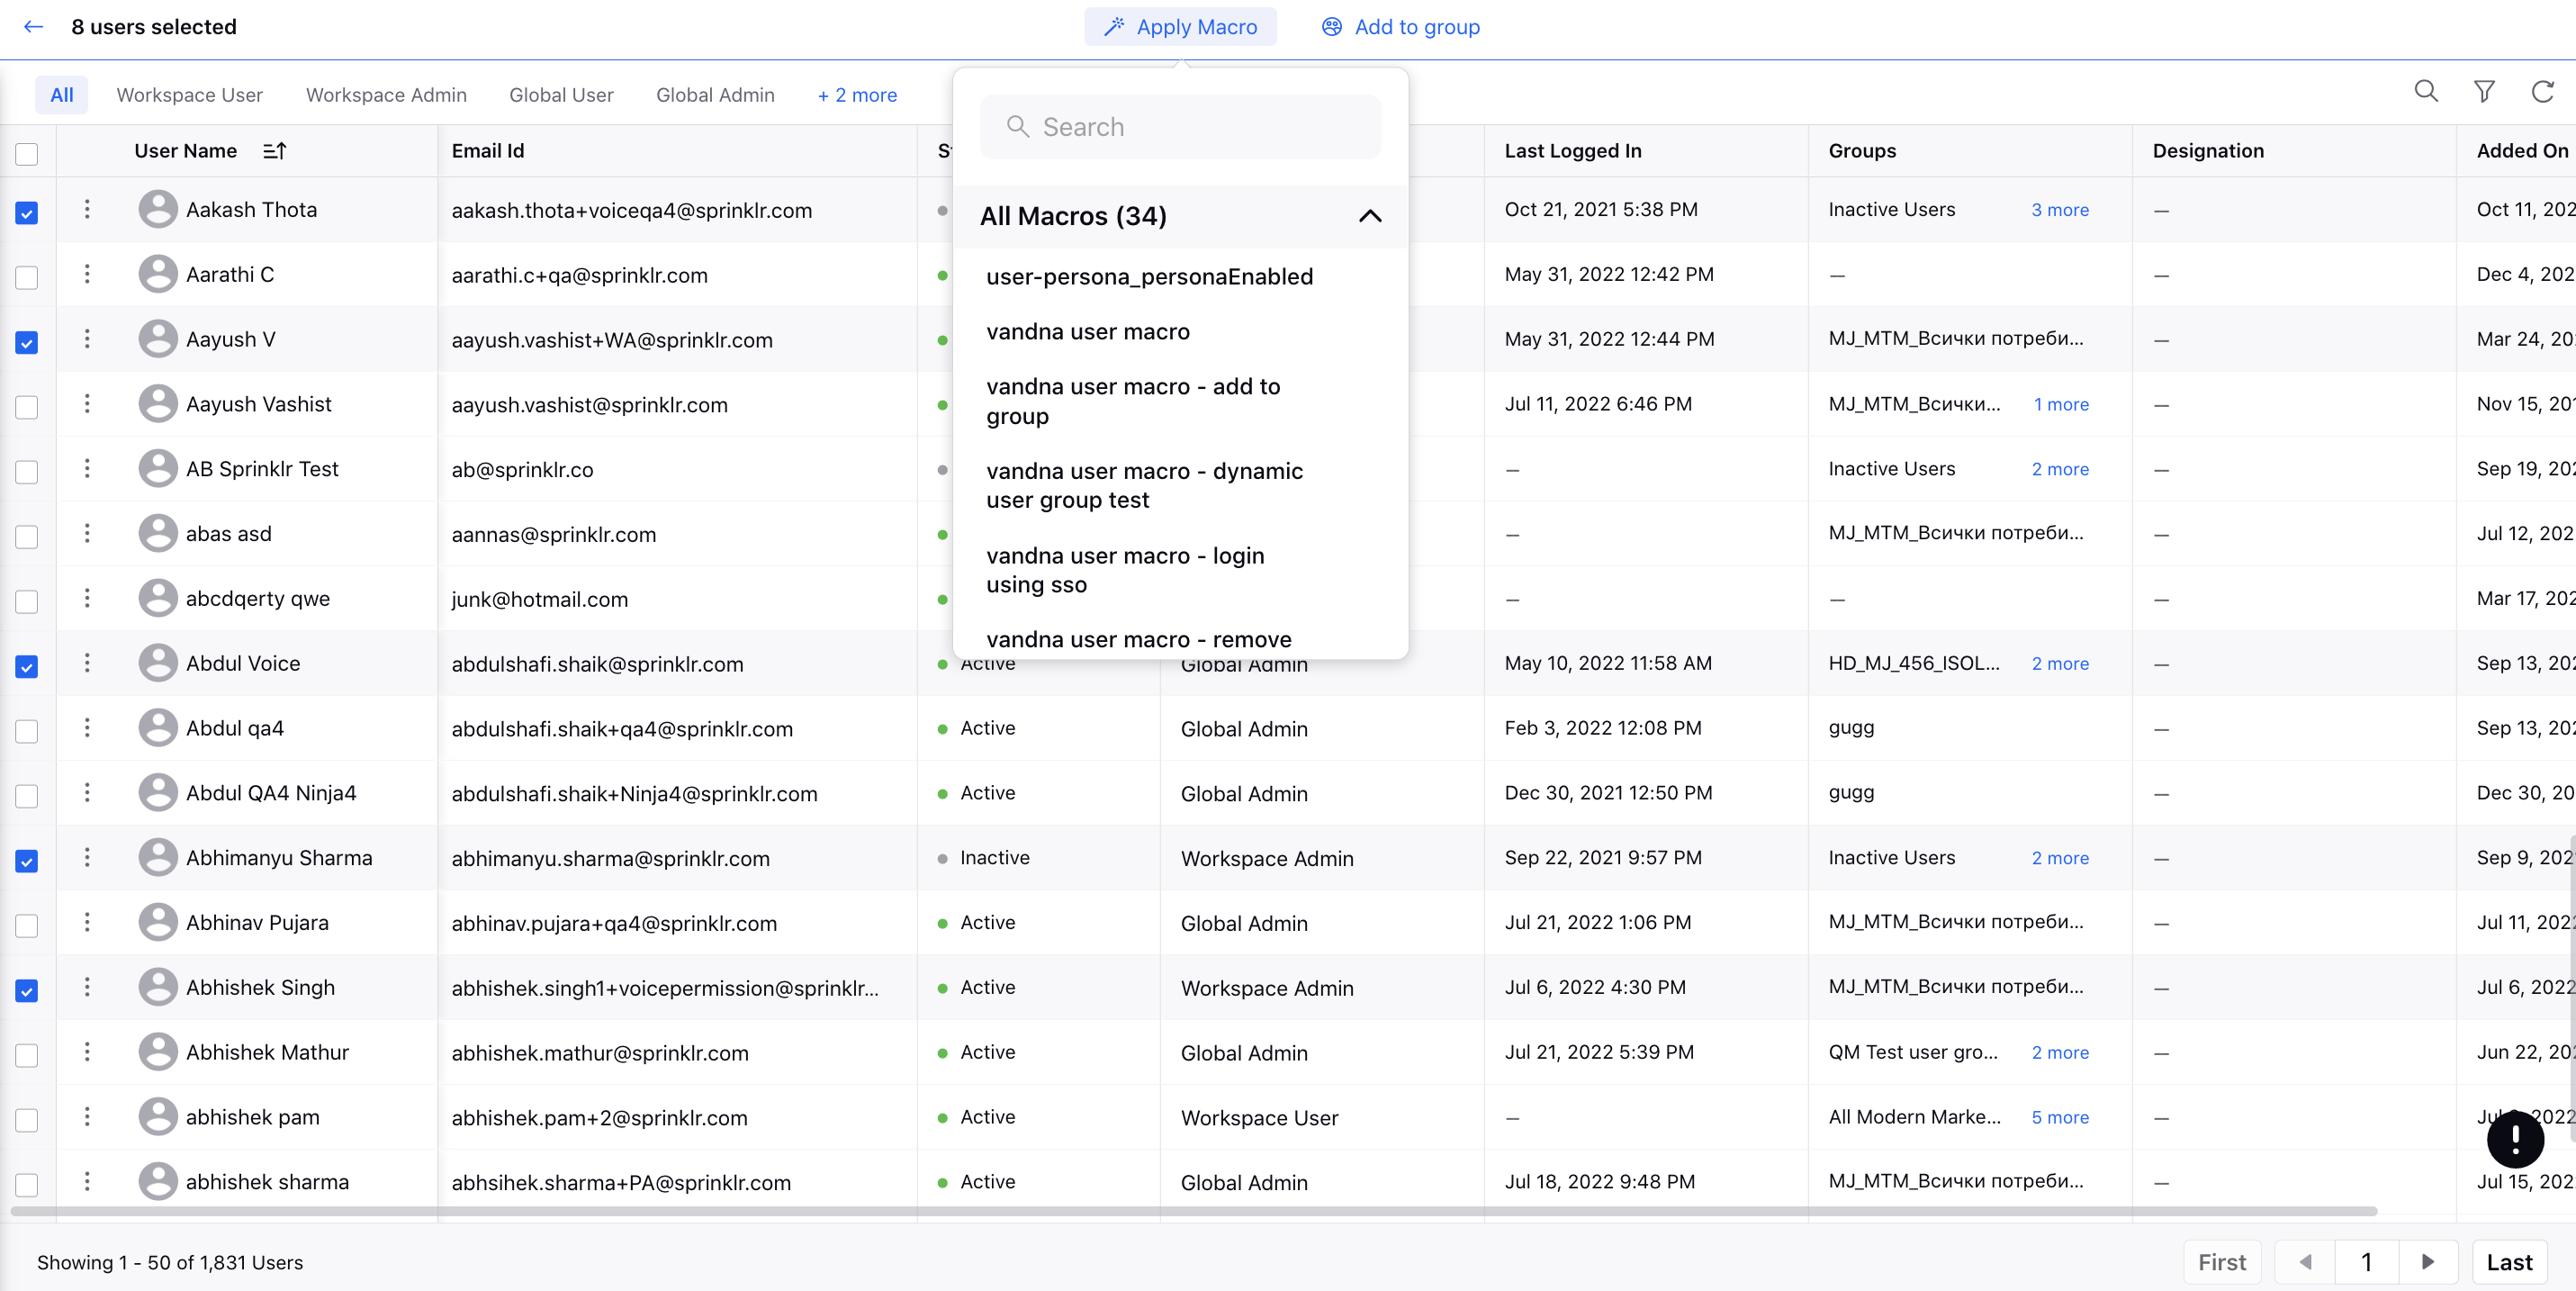
To Take Bulk Actions
Select the desired users by checking the box alongside and and apply the desired User Macro or Add to Group.
To learn more about getting the Apply Macro action enabled, please work with your Success Manager.
Note: To learn more about getting this capability enabled in your environment, please work with your Success Manager.
Note: Use this DP: USER_BULK_UPDATE_MACRO_ENABLED
To Manage Signatures
You can set agents' signatures (their initials) for social accounts within their Sprinklr Profiles and also update them in the Bulk Insert template which is used to insert and update profiles. Signatures will automatically be inserted while replying to end-users from the desired account depending upon the channel.
You can define the following types of signatures:
Default Signature - If not specified explicitly, this will be your default signature for all messages.
Channel Specific Signatures - Configure a custom signature for specific channels. This will override the default signature.
Account Specific Signatures - Configure custom signature for specific accounts. This will override channel-specific and default signatures.
Note:To learn more about getting this capability enabled in your environment, please work with your Success Manager.
Note: Use this DP: ACCOUNT_USER_SIGNATURE_MOVED_TO_NEW_STRUCTURE
To Send Automated Email to the User
If the user has been inactive for the past 30 days, an automated email will be sent on their mail.
Note: To learn more about getting this capability enabled in your environment, please work with your Success Manager.
Note: Use this DP:
USER_REMINDER_NOTIFICATIONS_ENABLED("user.reminder.notifications.enabled", BOOLEAN, PARTNER)
USER_REMINDER_NOTIFICATION_TYPES_DISABLED("user.reminder.notification.types.disabled", SET, PARTNER)