Product Level Videos in Sprinklr for Meta
Updated
Product Level Video: Overview
Product Level Video (PLV) allows advertisers to enhance Advantage+ Catalog Ads by incorporating video assets at the product/SKU level. This integration enables advertisers to effectively reach their audience with product-focused videos across all Meta placements, such as Feed, Explore, Reels, and Stories.
Using Sprinklr, you can simplify the video production process for numerous products, reducing manual efforts and eliminating the requirement for extra designers or budget. From developing consistent video templates at scale to launching video ads tailored to specific products, all aspects can now be efficiently managed with this feature.
How to Apply Dynamic Video Template on Catalogs
Applying Dynamic Video Templates (DVTs) on catalogs within Sprinklr allows advertisers to leverage videos in their Advantage+ Catalog Ads efficiently. Listed below are the steps that user must follow to apply DVTs effectively:
Application of DVT After Initial Non-Application
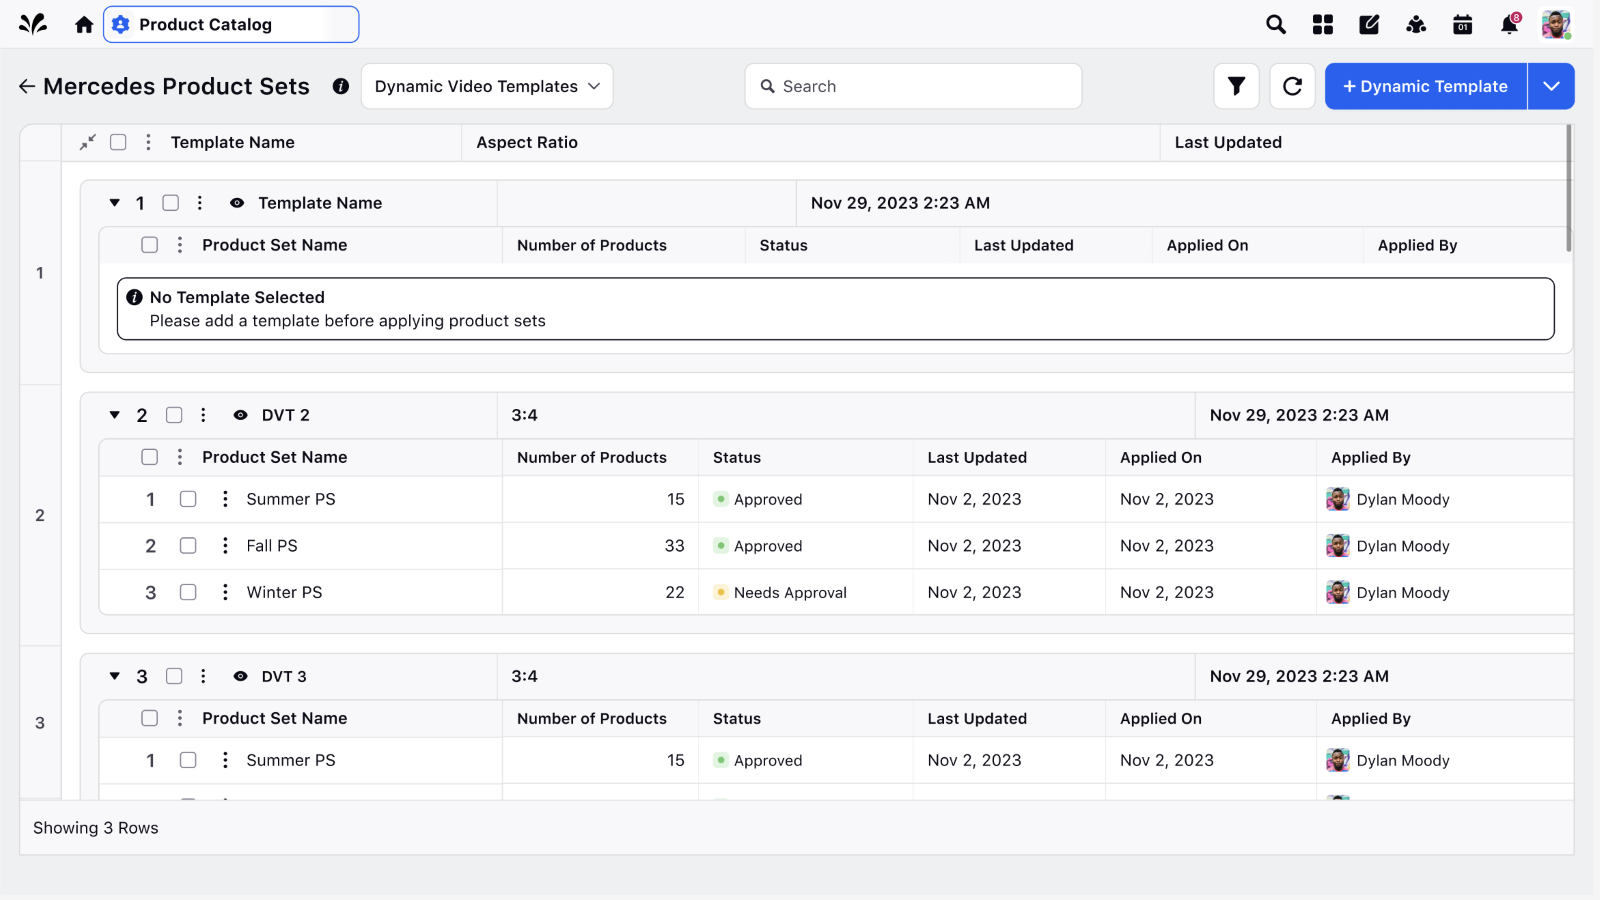
Step 1: Login into the Sprinklr Platform. In the main menu or sidebar, locate and click on "Dynamic Templates" in "Product Catalog".

Adding a Dynamic Video Template (DVT)
Step 2: If no template is applied, the page will display "No Template is Selected". Click on the "Add Dynamic Template" button at the top right of the page.
Note: Users are limited to adding one template per aspect ratio for a catalog.
Step 3: Choose from the available aspect ratios (9:16, 1:1, or 4:5) from the dropdown menu. The selected aspect ratio will determine the template options available.

Step 4: Use the search function or scroll to find the product sets within your catalog. Tick the checkbox next to each product set you wish to apply the DVT to.

Selecting Product Sets and Mapping Elements
Step 5: From the dropdown, select a DVT that matches the chosen aspect ratio.
.png)
Note: Templates are filtered based on the aspect ratio to ensure compatibility.
You can also create a DVT in the Sprinklr's video editor.
.png)
Step 6: Proceed to map dynamic elements from the DVT to columns in the catalog feed file. Ensure all required elements are mapped accurately for each selected product set
Preview and Save
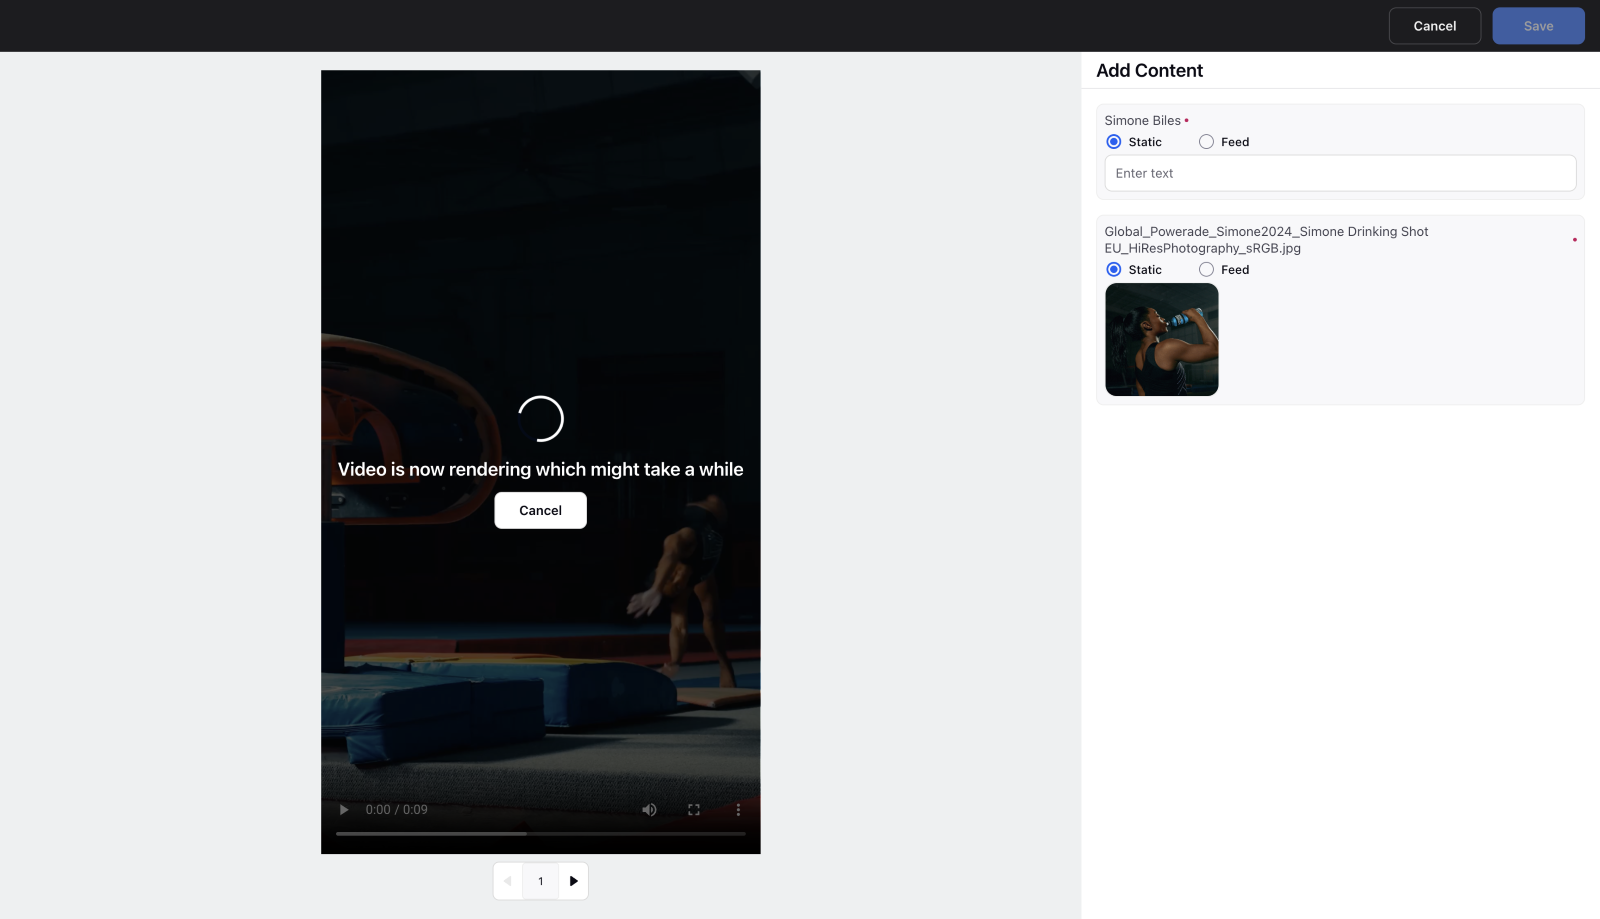
Step 7: As you map elements, a real-time preview of the video for the first 10 products will display. Use the arrow buttons to navigate through different previews.
Note: Only the first 10 items of the Product Sets would be rendered.
.png)
The video is being rendered in real-time.

If it is processed, it would be shown in a loading state. If cancelled the video rendering will stop with a message saying: "Click on the Generate button to render the preview" with a Generate button.

Clicking on the eye icon at the top right of the mapping fetches column headers with product-wise data for the 10 rows, highlighting the previewed product in the table.

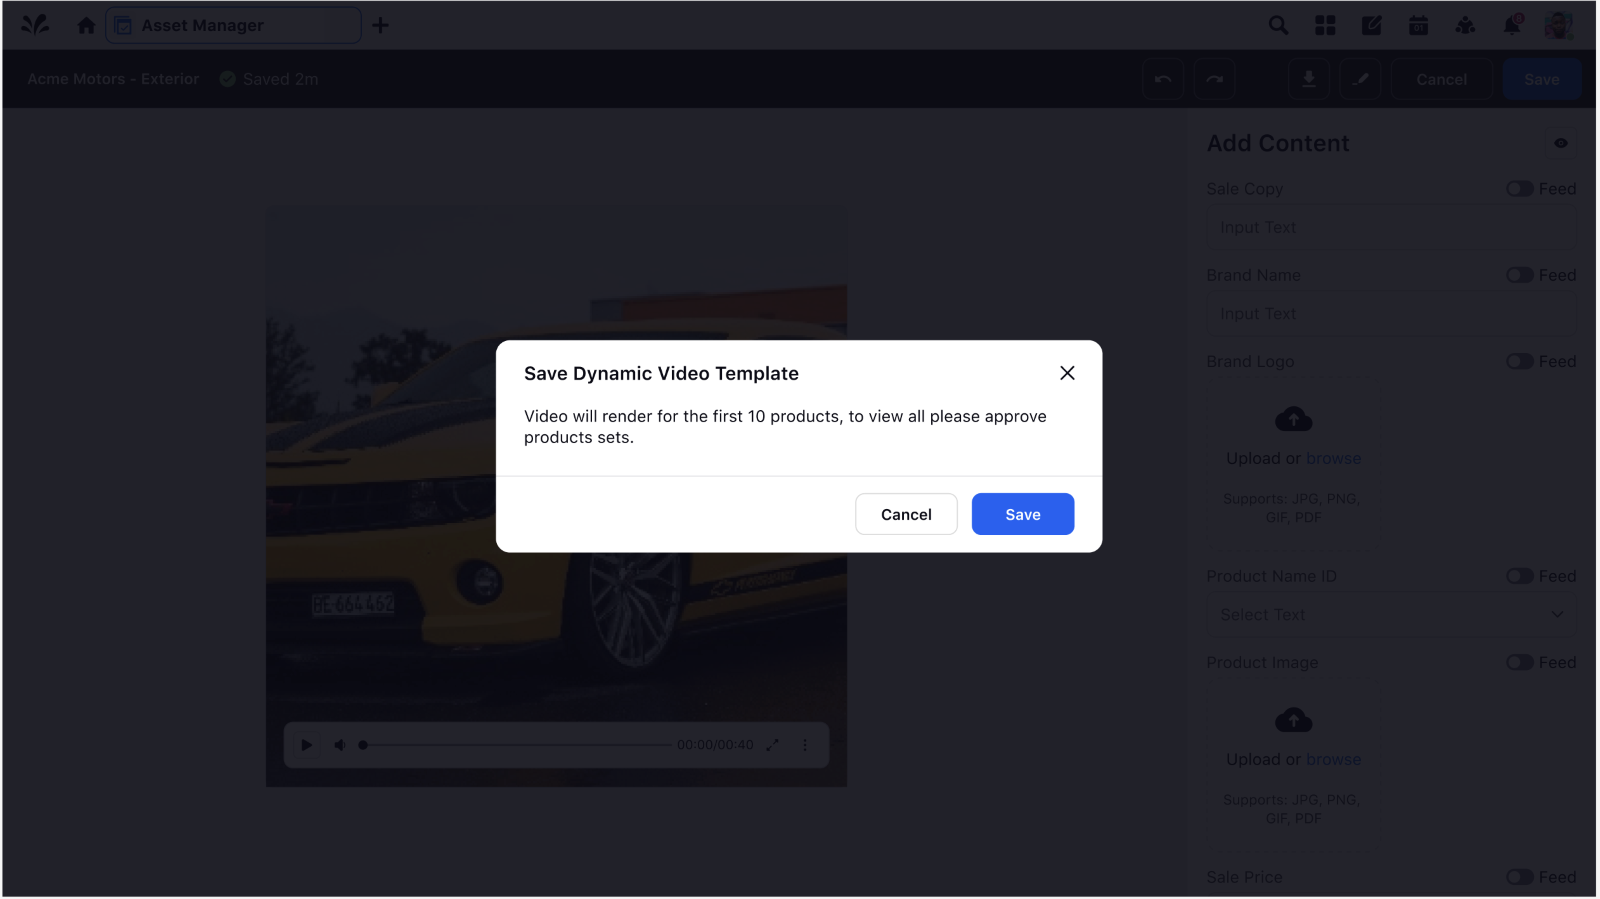
Step 8: Once mapping is complete, click on the "Save" button. A confirmation message will appear, indicating that videos will render for the mapped products.

The product sets selected will now appear in the table with the status as "Processing". The status will transition to "Needs Approval" after 10 videos in the product set are processed and are ready for review.
.png)
Approval Process
Step 9: The status of applied DVTs will initially show as "Processing" once videos start rendering. After processing, status will change to "Needs Approval" for each product set.

Step 10: Navigate to the Dynamic Video Templates screen and locate the product sets marked as "Needs Approval". Review each product set and either approve or reject the applied DVT.
Incorporating Product Sets into an Existing DVT Application
Step 1: Add Product Set Option. Navigate to the options icon along the name of the Dynamic Video Template, where an "Add Product Set" option is prominently available.
.png)
Step 2: Upon clicking "Add Product Set," users are redirected to a screen where existing product sets included in the Dynamic Video Template (DVT) are pre-selected. New product sets can be created, or existing ones and added to the existing DVT setup from this screen.
Step 3: Since mapping already exists for the DVT and catalog columns, the mapping steps are bypassed. The message confirms: "Videos will render for the first 10 products of the product set; for complete rendering, please proceed to approval".
Apply Dynamic Video Template from the Product Sets page
Step 1: Navigate to the Product Sets page by clicking on the "Product Set" option in the dropdown.
.png)
Step 2: Under the Options icon, there will be an additional option to "Apply Dynamic Video Template".
Step 3: Once clicked on this option, a screen will appear where pre-applied templates of different aspect ratios will be seen. The preview of the DVT will be seen on the right side.
.png)
Step 4: Since mapping already exists for the DVT and catalog columns, the mapping steps are bypassed. The message confirms: "Videos will render for the first 10 products of the product set; for complete rendering, please proceed to approval".
DVT Applied but Mapping Needs to be Edited
Access Edit Mapping Option:
Locate and click on the "Edit Mapping" option available against the DVT table.

Navigate to Mapping Screen:
Upon clicking, the user is redirected to the mapping screen where all column headers are displayed as previously defined.To remove an applied DVT, click on the "Delete" button and confirm the action.

Make Changes and Save:
Modify the mapping as needed. Upon saving the changes, a notification informs the user that all affected product sets will transition to a "Needs Approval" state.
.png)
Handling Errors and Reporting
Monitor for any errors during the video rendering process, such as rendering failures or exceeding video render limits. Use the diagnostics feature to troubleshoot and resolve issues promptly.
Note: To learn about how to create product led video ads, click here.