How to Prepare a Template .zip File for a Dynamic Video Template
Updated
Learn about all the requirements you need to meet to upload the zip file for the dynamic video template.
Sprinklr has opened several new possibilities related to video content for businesses with the Dynamic Video Template. Users can easily edit and create videos in bulk on the template they upload to Sprinklr's Asset Manager. However, certain instructions must be kept in mind so the After Effects file can be smoothly uploaded into the system without showing any errors. In this article, you will learn about these instructions in detail.
![]() Note: Please understand the basic concept that Sprinklr will use After Effects only to render videos. We support AE 2025 Version. If you face any issue in the final video output, try inputing the same values in Aftereffects and render natively. We expect exact same results through Aftereffects. This will help you understanding why and how on the descrepency and will help you to fix the templates.
Note: Please understand the basic concept that Sprinklr will use After Effects only to render videos. We support AE 2025 Version. If you face any issue in the final video output, try inputing the same values in Aftereffects and render natively. We expect exact same results through Aftereffects. This will help you understanding why and how on the descrepency and will help you to fix the templates.
Maximum allowed file size is 300 MBs. Please optimise your file before uploading
Compress Video Files: Convert raw files to H.264 or HEVC (H.265) instead of heavy .mov files.
Pre-render Heavy Effects: Reduce processing load by pre-rendering complex effects in After Effects before adding them to the project.
Trim & Shorten Media: Remove unnecessary portions of video & audio to minimize file size.
Optimize Images: Use compressed formats like JPEG/WebP instead of large PNGs.
Remove Unused Assets: Keep only necessary files in the AE project & media folder.
Efficient ZIP Compression: Use the best compression settings to keep the file under 300 MB.
Optimize Fonts: Include only required font variations and verify the format using Font Drop.
![]() Sample .zip file: Download our sample video template for your exploration from below
Sample .zip file: Download our sample video template for your exploration from below
DVT Sample Template.zip
4.82 MB
Composition Settings for the After Effects File
As for the first step of preparing the After Effects file, let’s start by correctly setting up the project file’s composition.
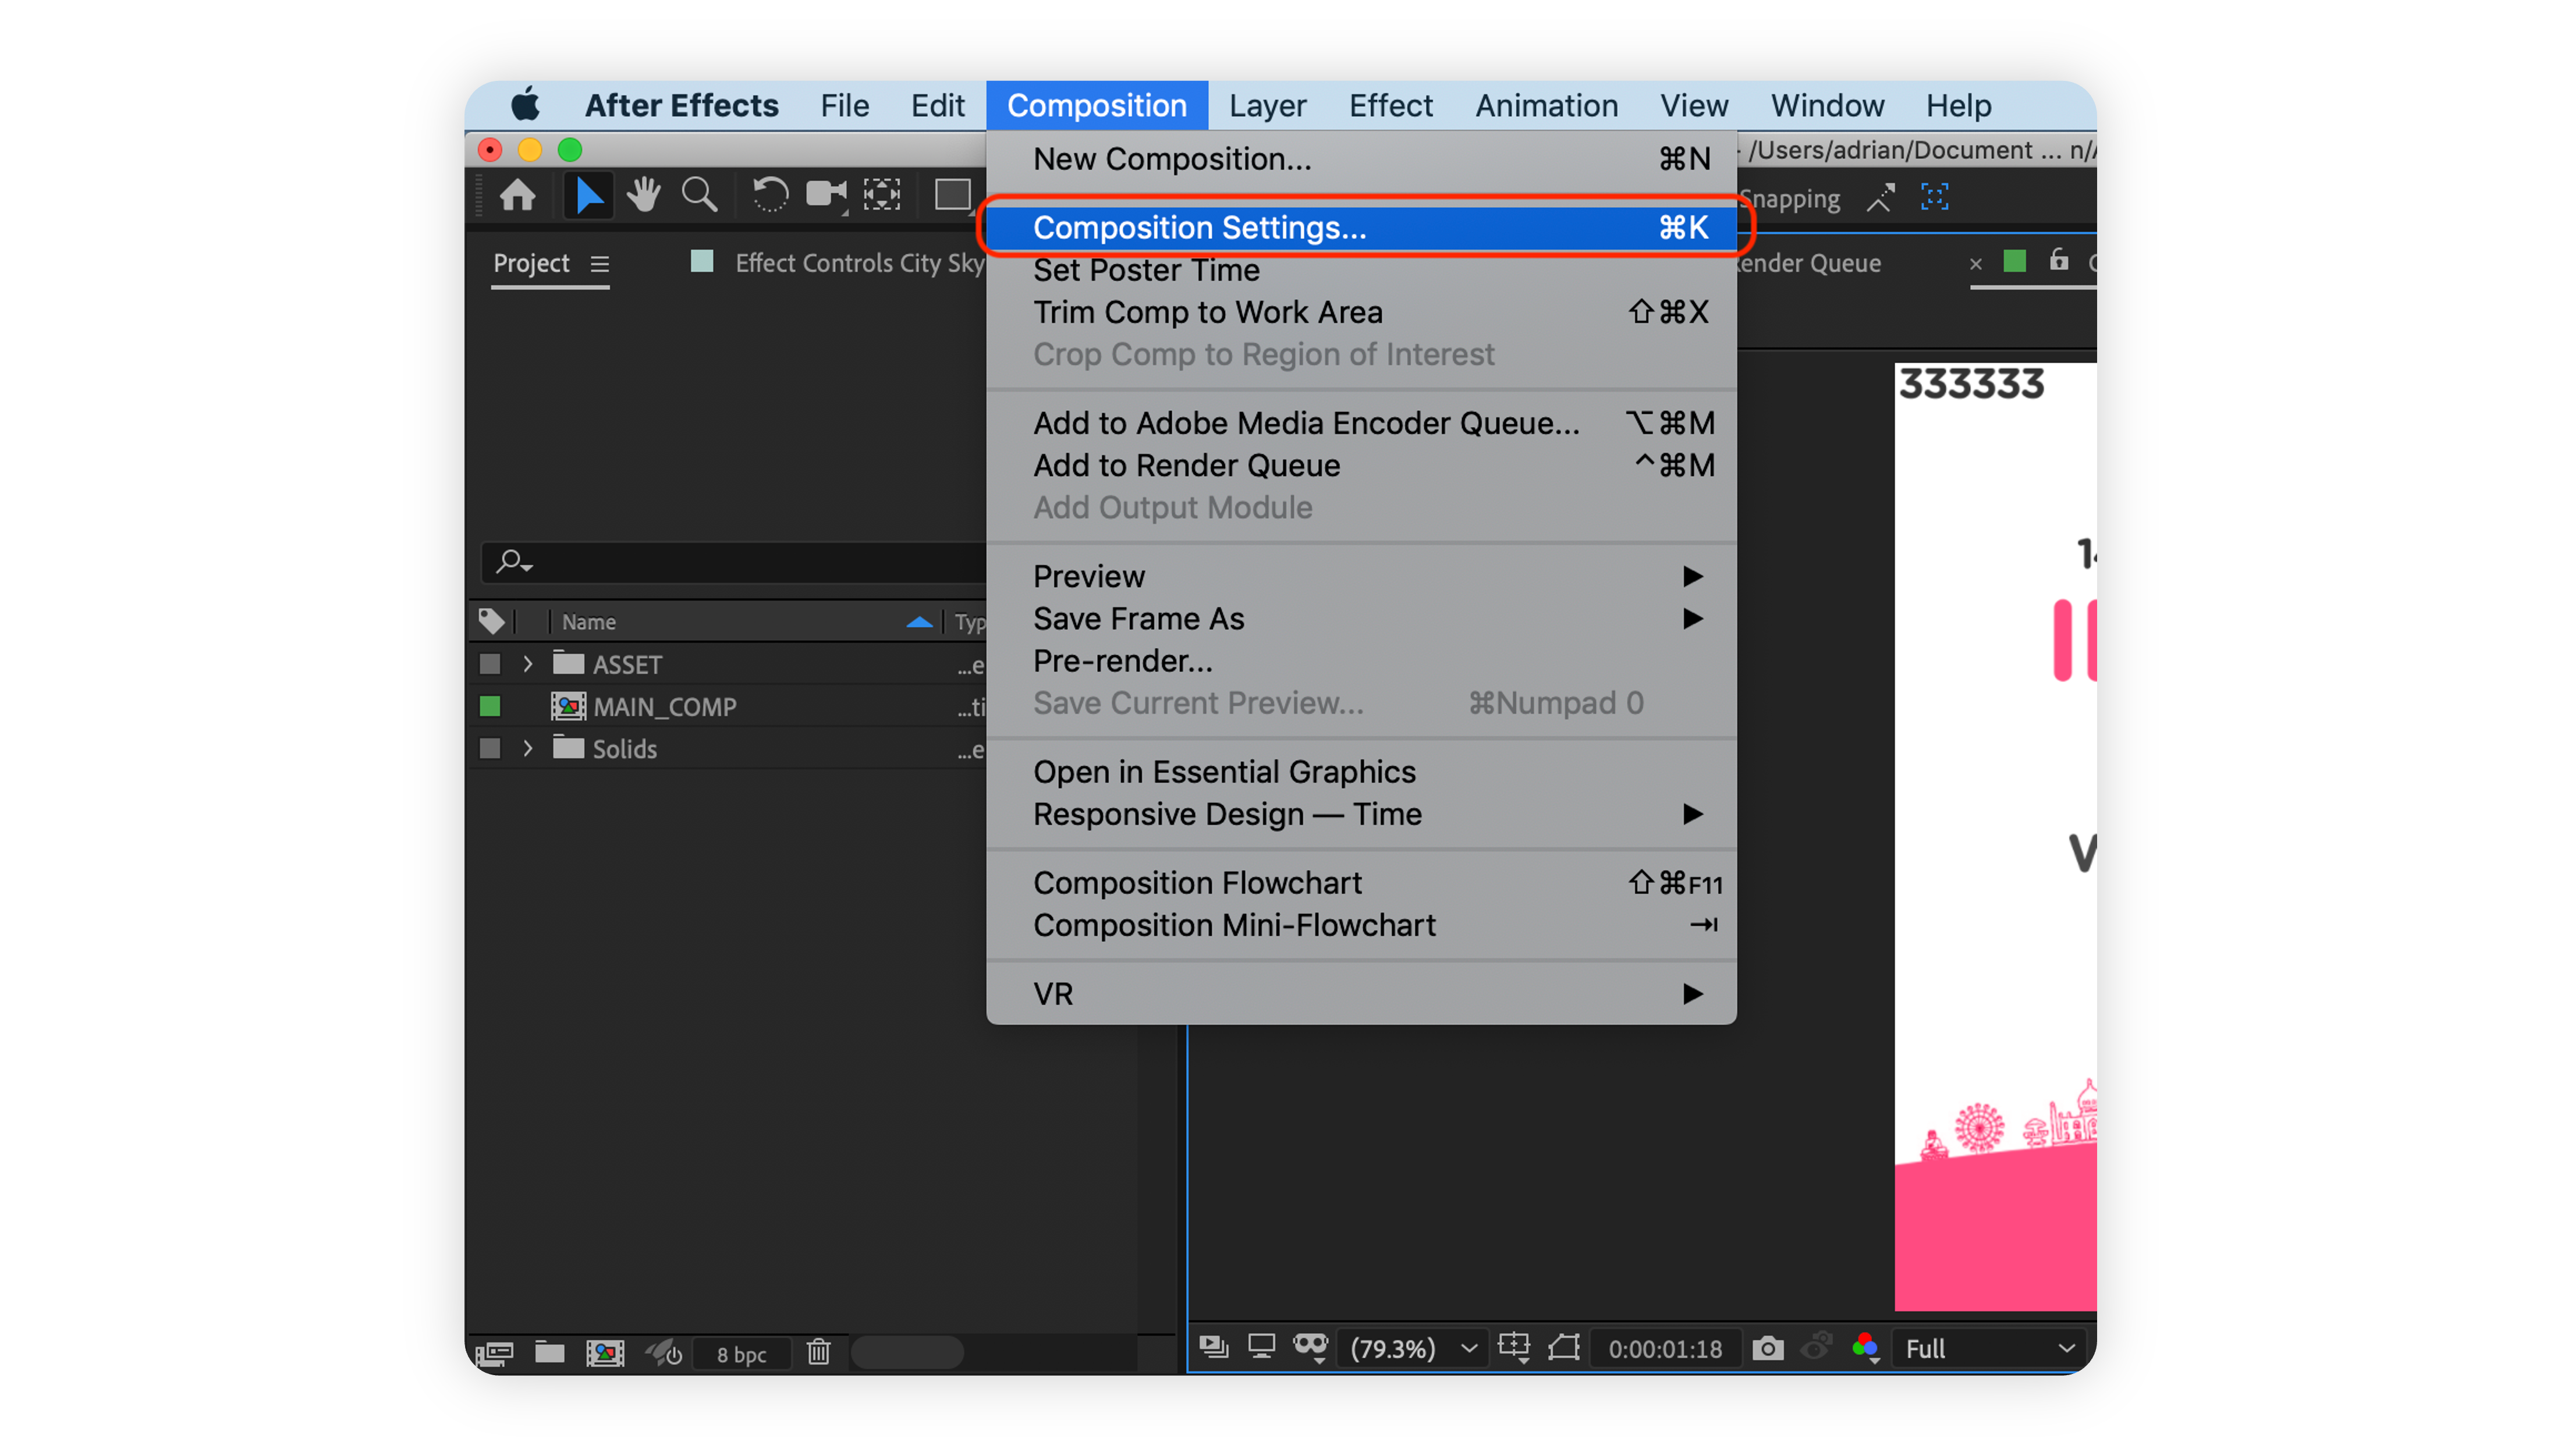
Setting the Name of the Final Composition: To let the automated system know which composition is supposed to be rendered, please rename the final composition to “MAIN_COMP”.
 Note: We recommend you to keep one "MAIN_COMP" composition in a project.
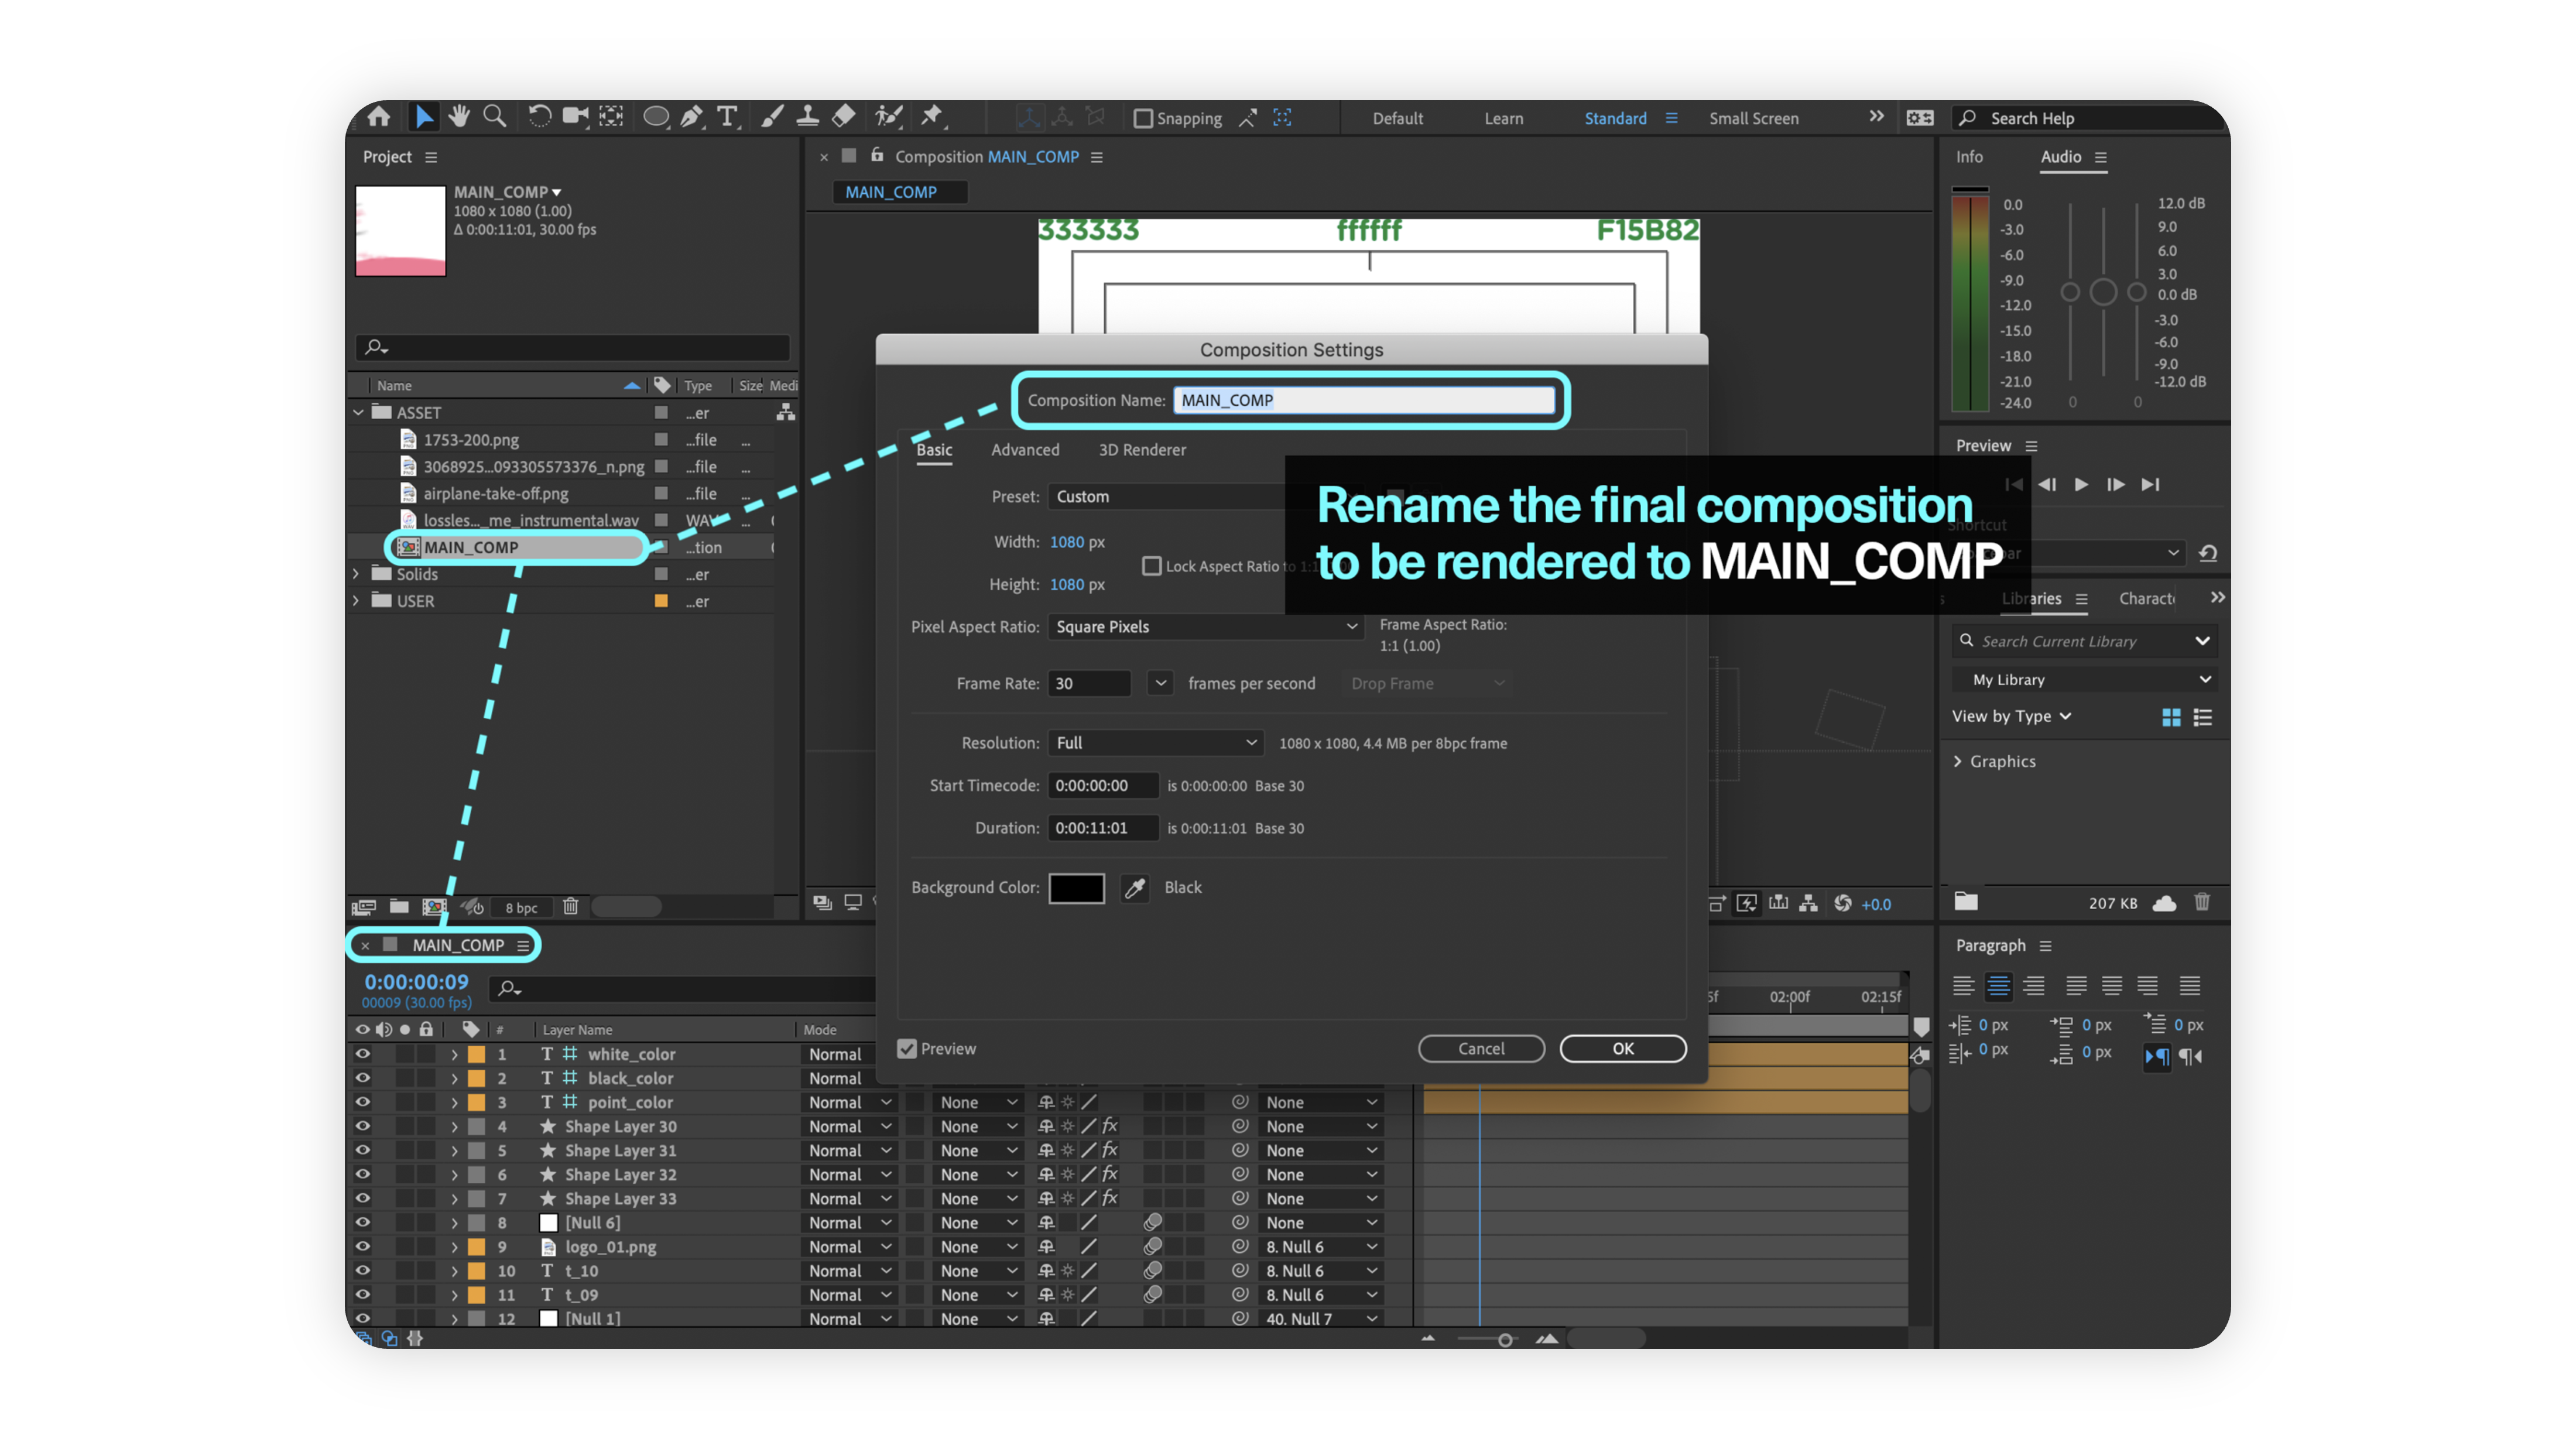
Aspect Ratio and Size: We recommend 1:1, 4:5, 9:16, 16:9 aspect ratios commonly used in video production and popular in social media and advertising channels. For all video sizes, the shortest side should be at least 720px. Other ratios/sizes might result in unexpected rendering issues in the automated system.
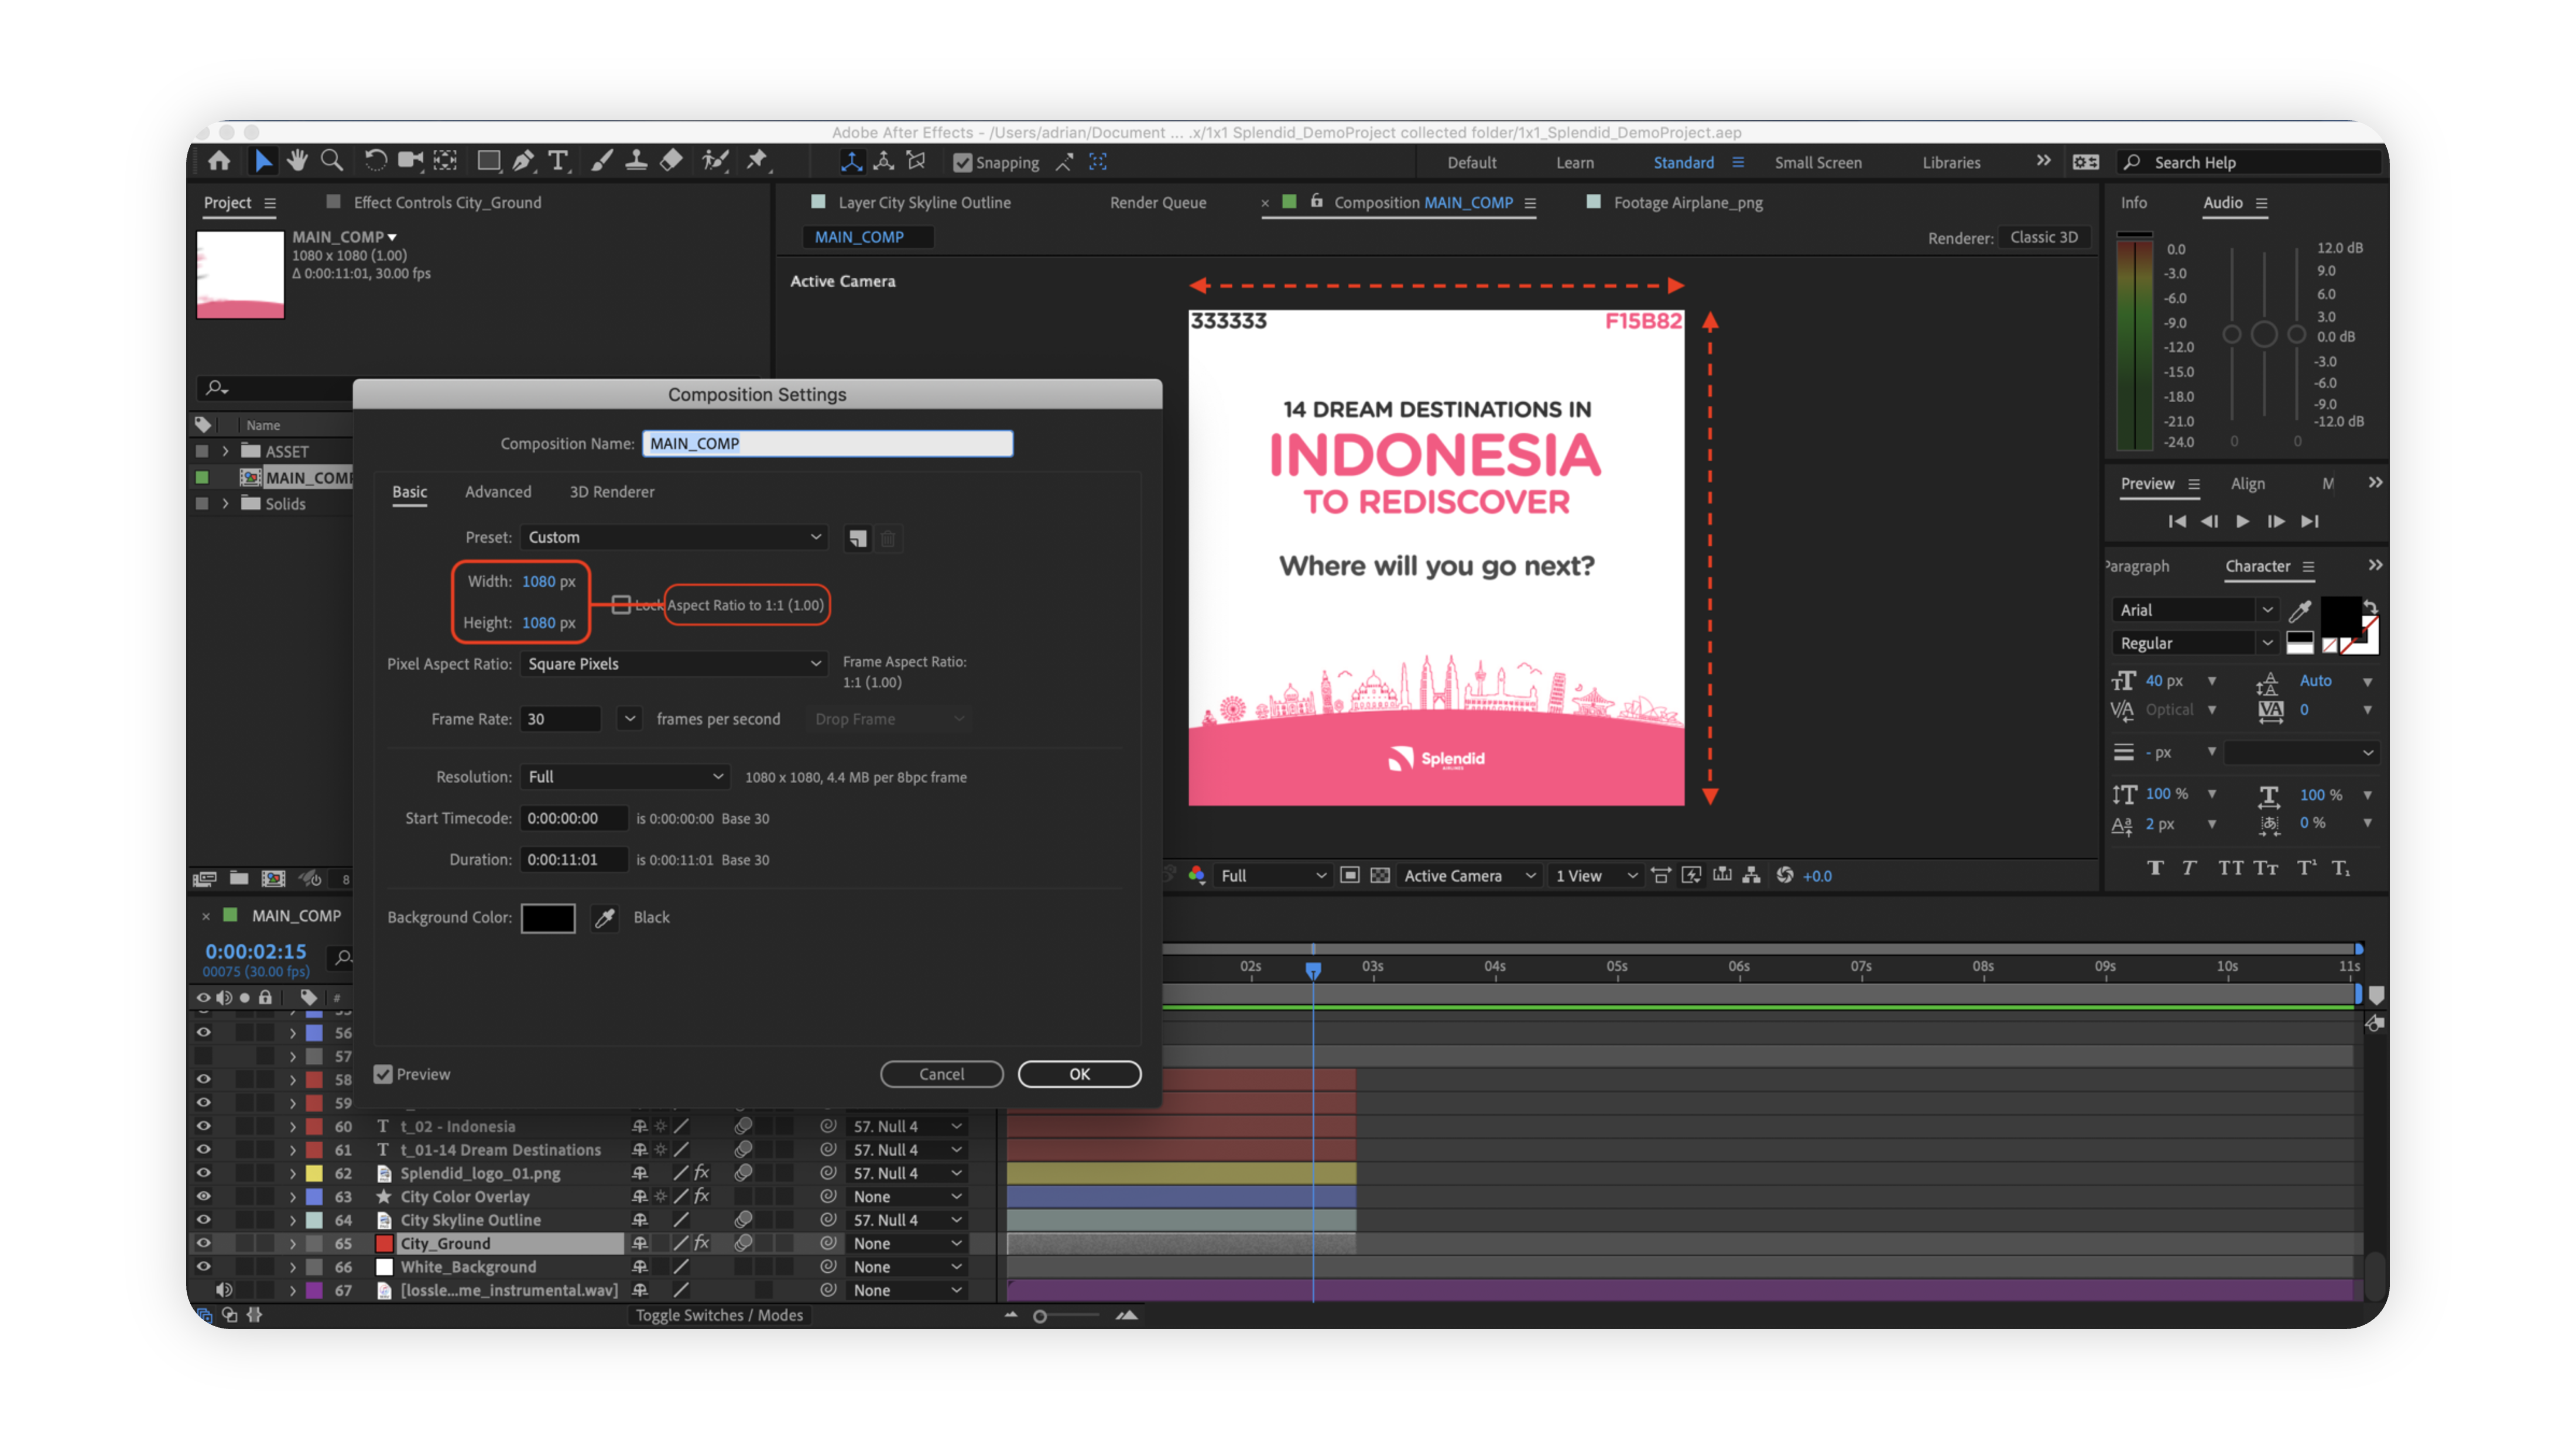
Aspect Ratio - 1:1 -Square – 1080 x 1080px
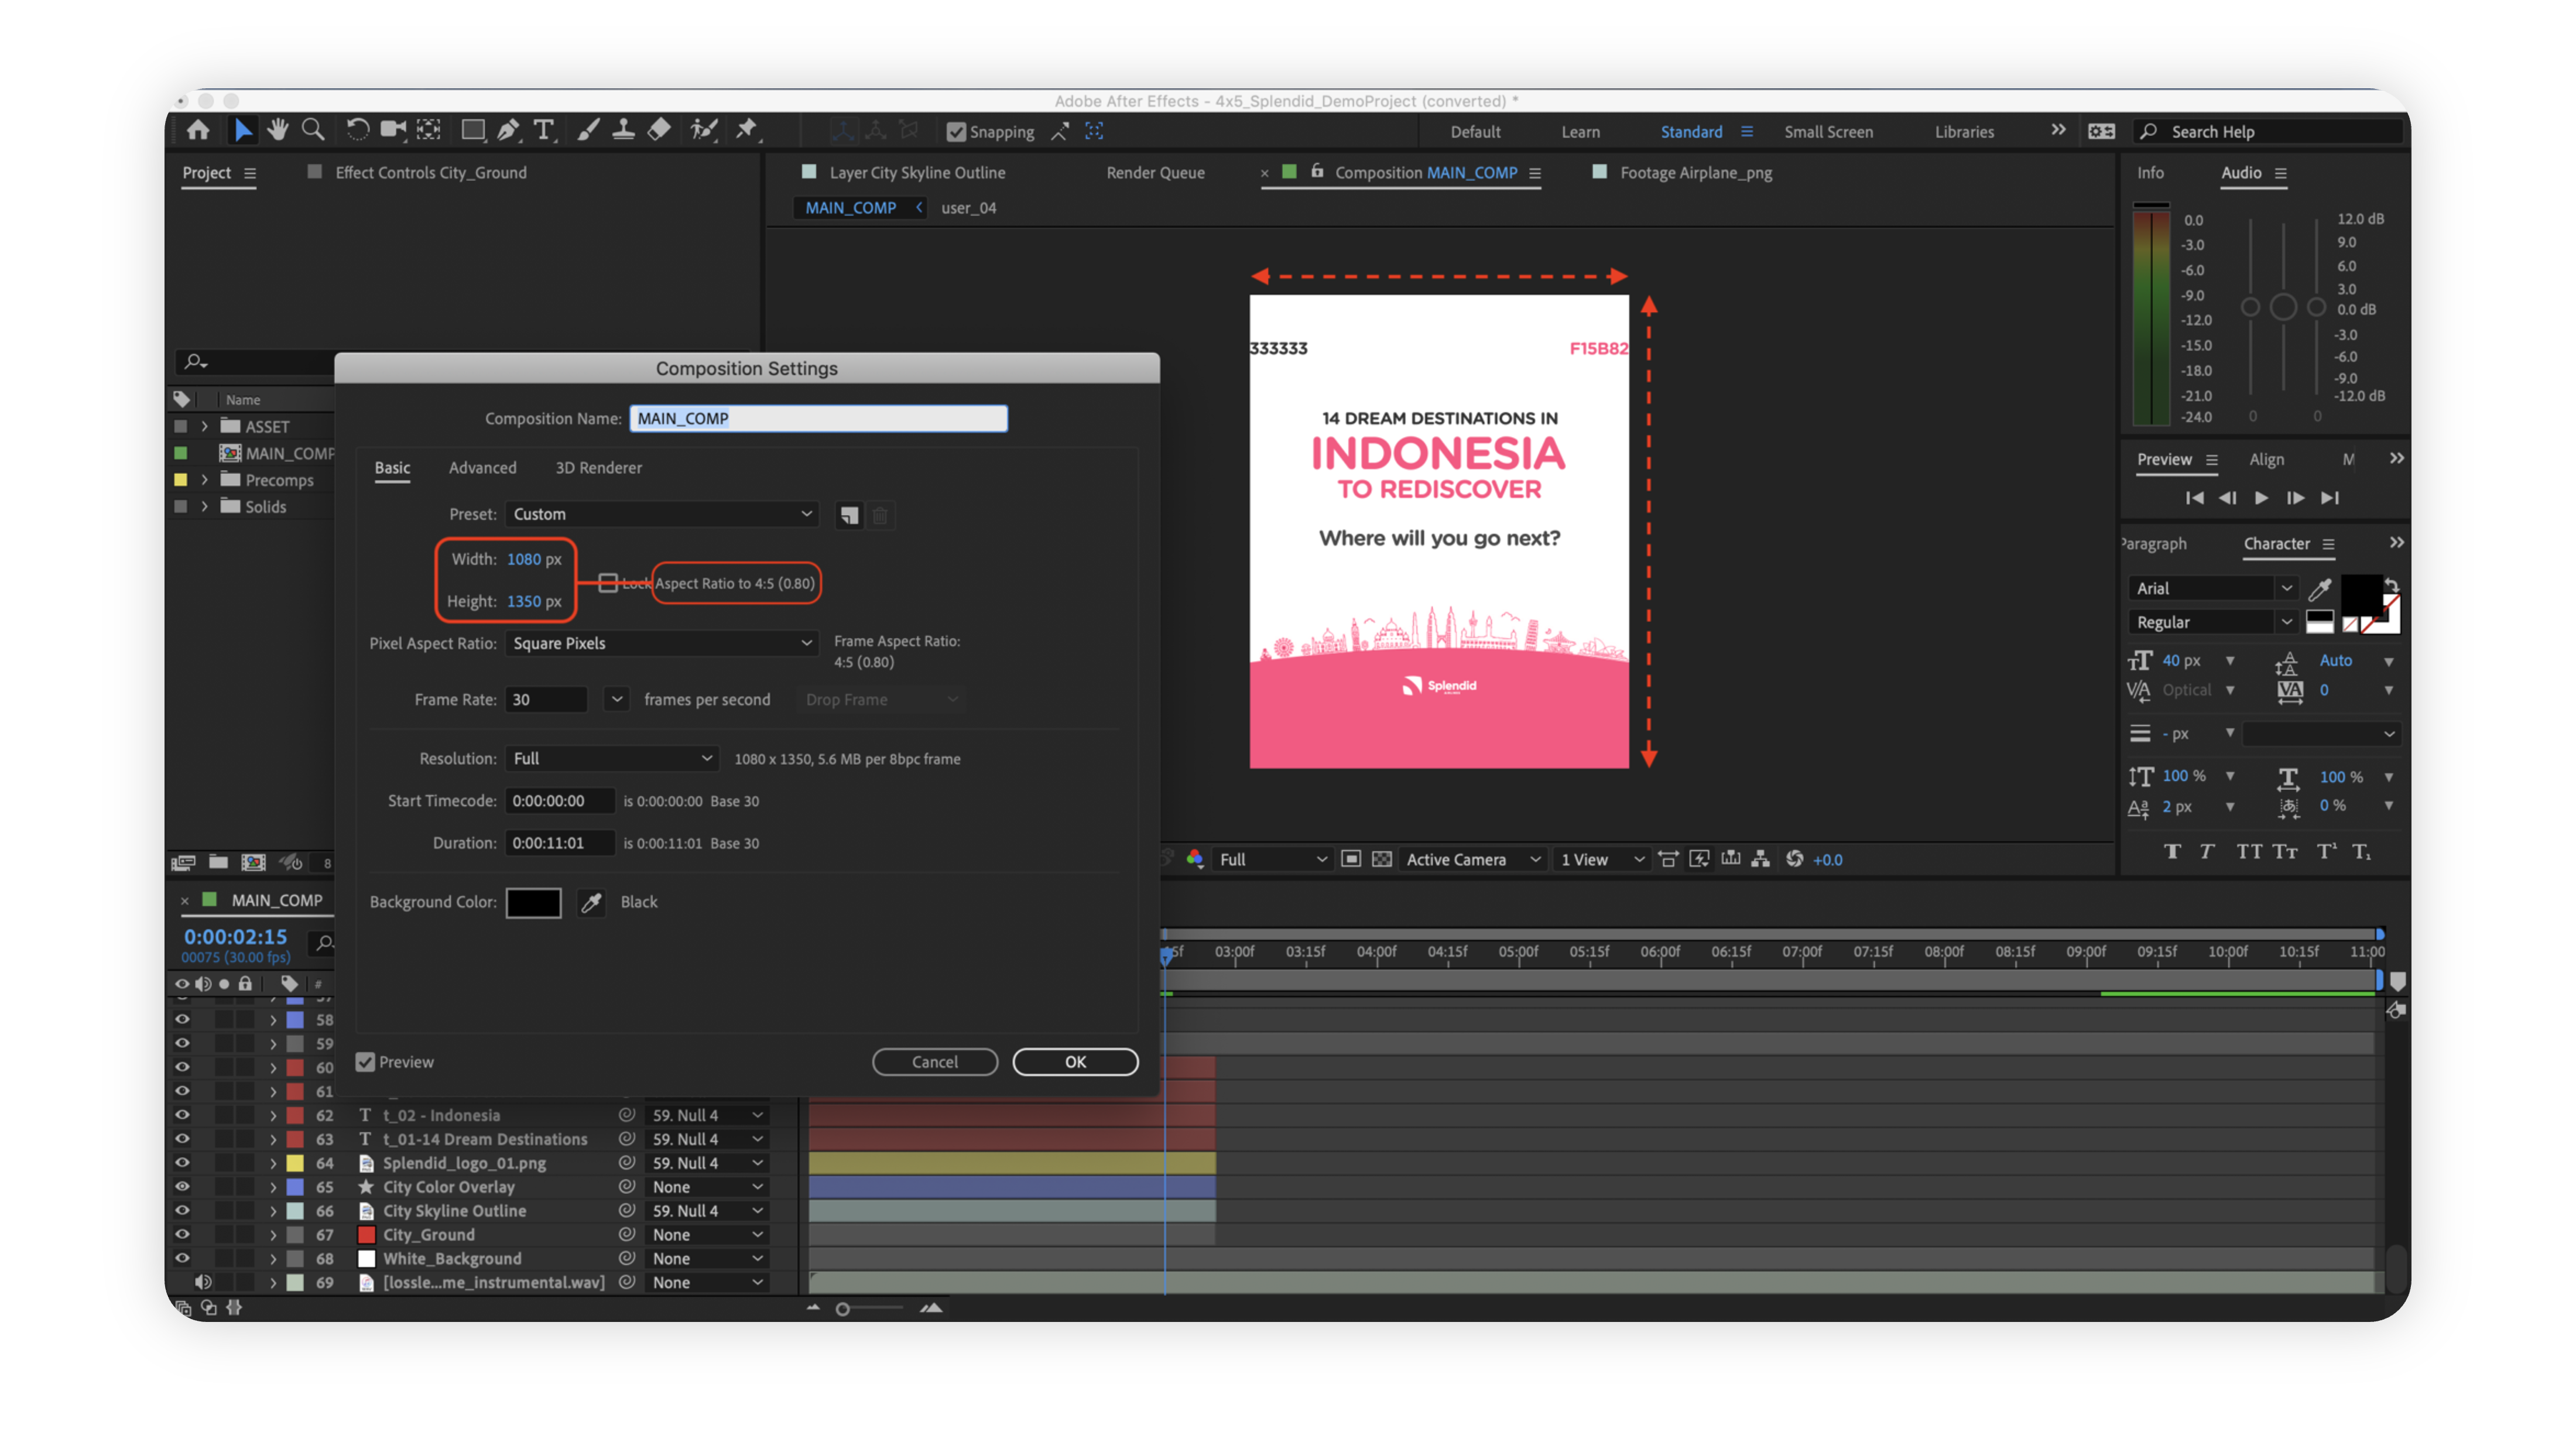
Aspect Ratio - 4:5 – Portrait – 1080 x 1350px
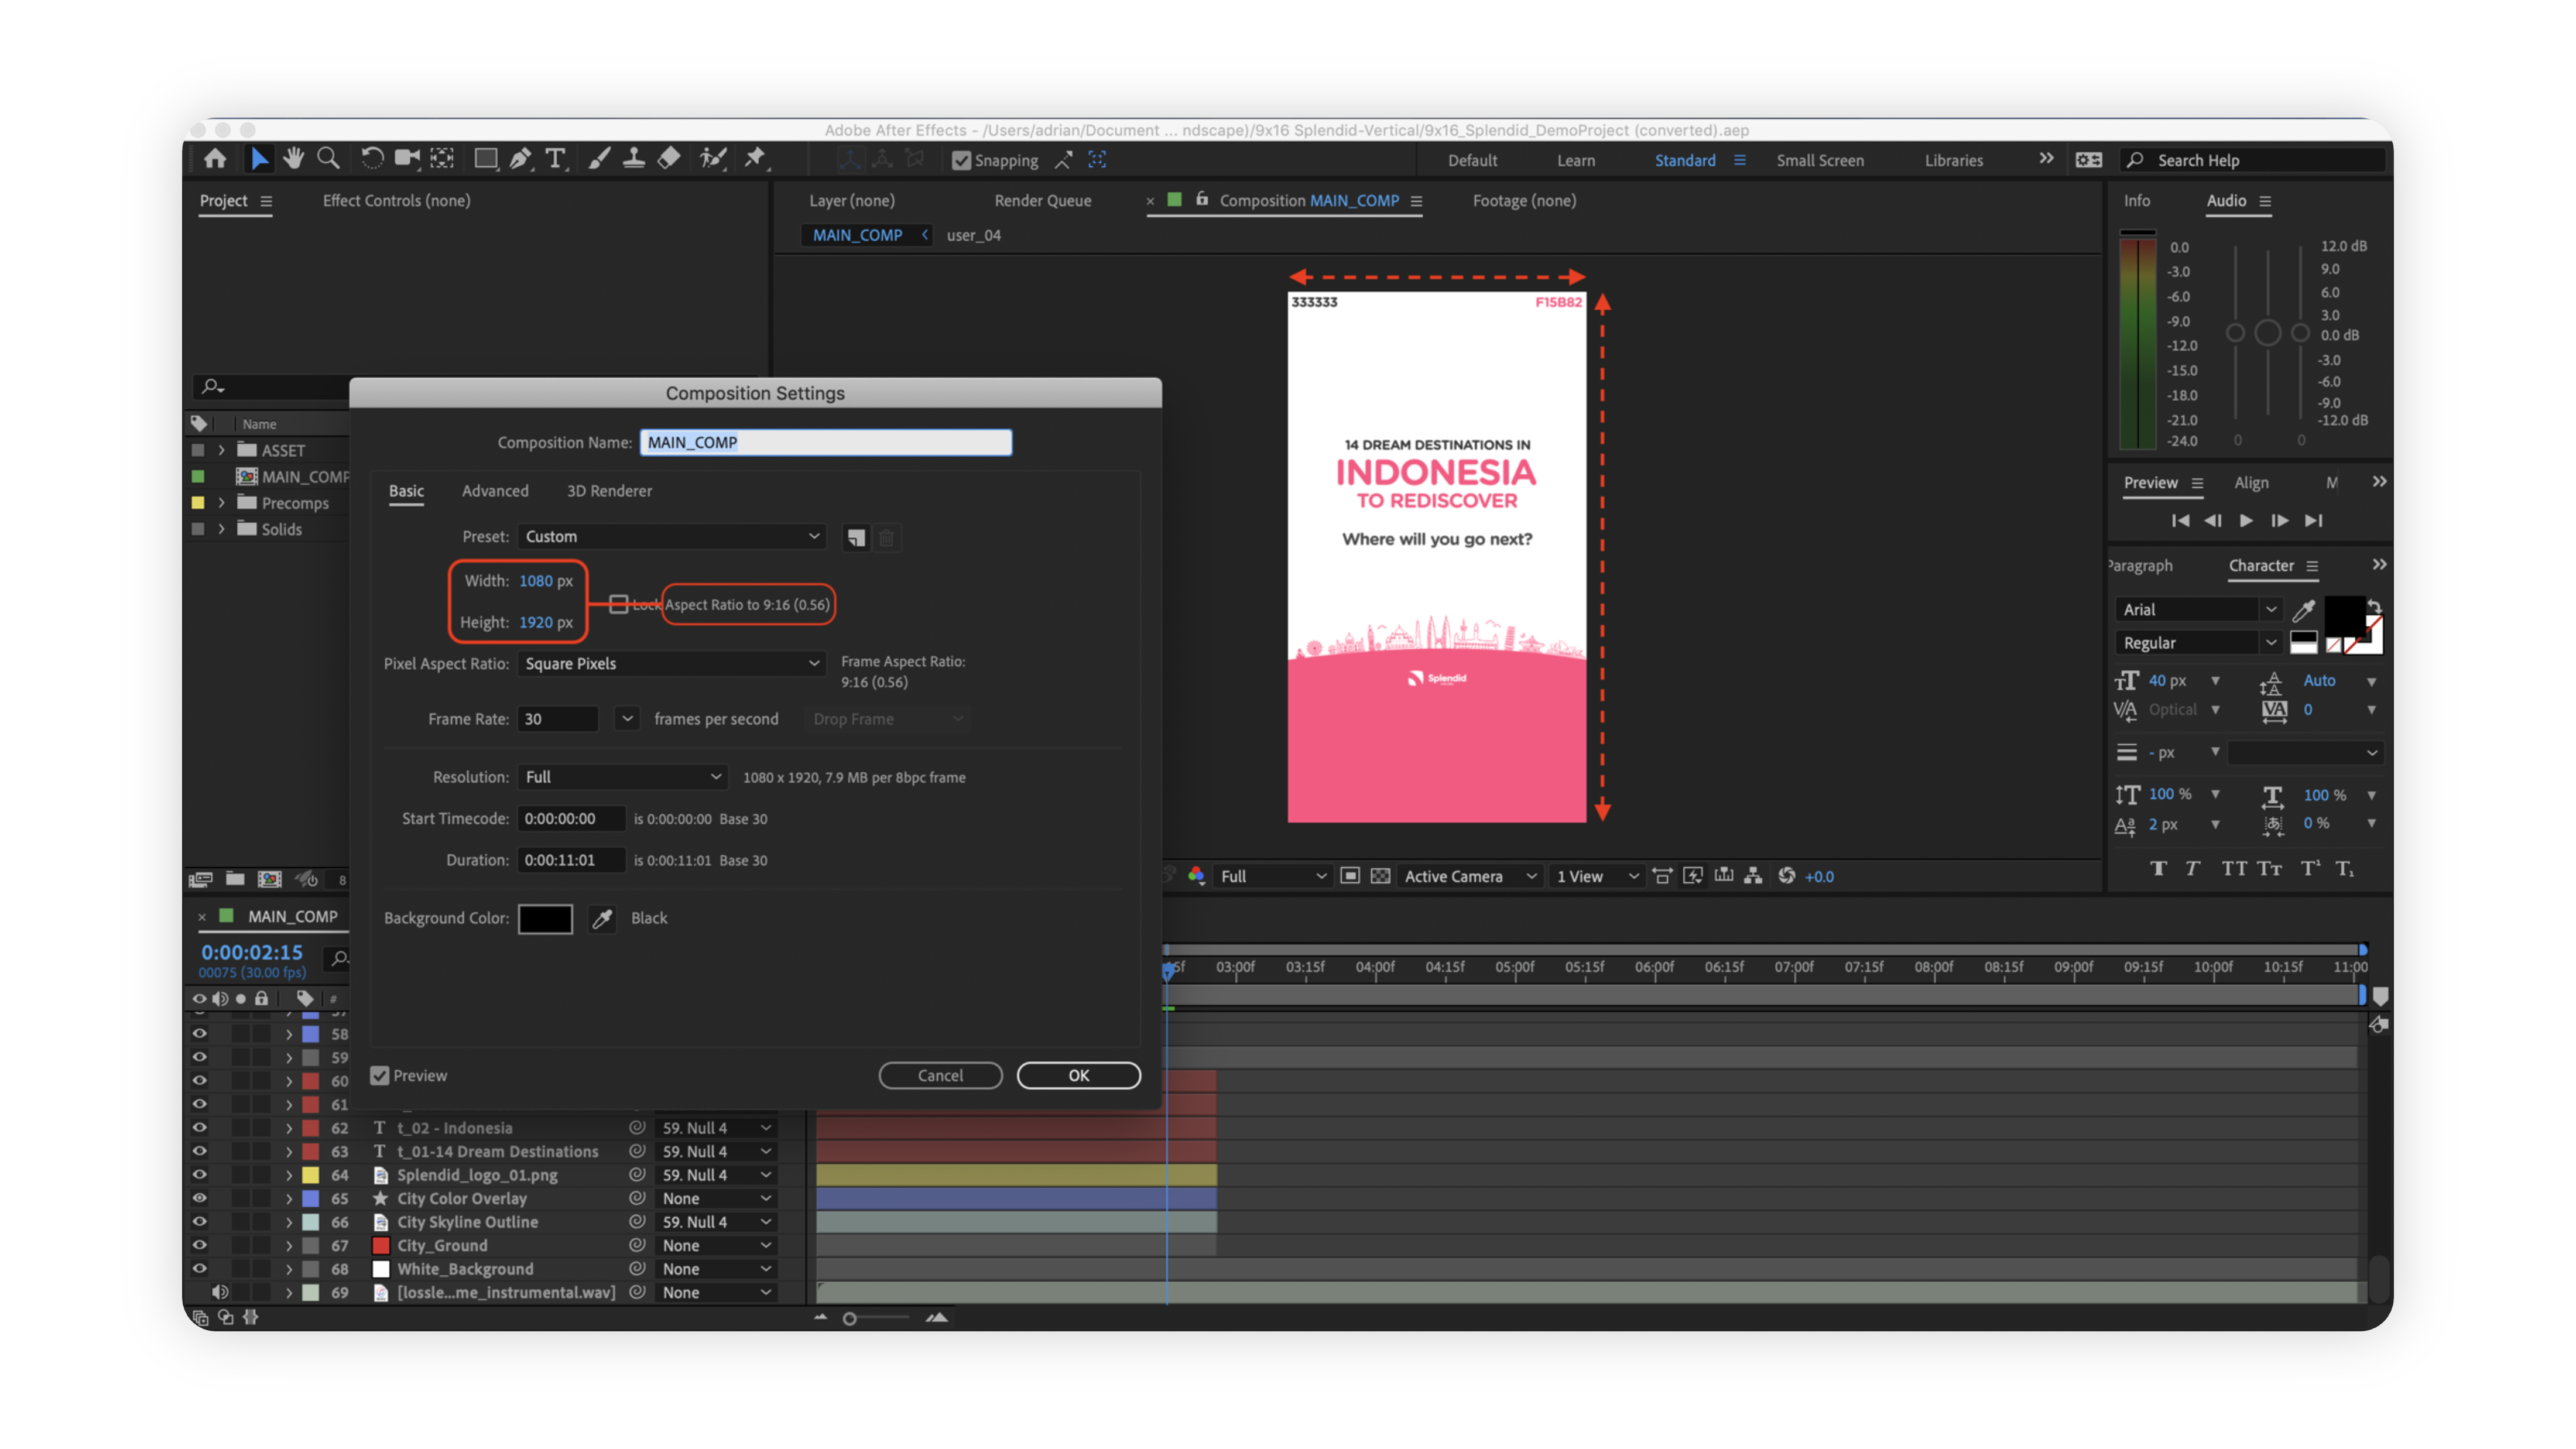
Aspect Ratio - 9:16 – Vertical – 1080 x 1920px

Aspect Ratio - 16:9 – Landscape – 1920 x 1080px
Dimensions
Square
Portrait
Vertical
Landscape
Aspect Ratio
1:1
4:5
9:16
16:9
Pixel Size(Width x Height)
1080 x 1080
1080 x 1350
1080 x 1920
1920 x 1080
Frame Rate: Although you can use other frame rates, we recommend 30 frames per second to avoid additional issues. The recommended 30 fps is optimized to achieve best results for your uploaded video.

Duration: Since longer creative templates tend to be quite challenging to make and take more time to render, please try to keep your creative templates under 30 seconds.
Note: Creative templates longer than 1 minute cannot be deployed.
 Note: Make sure to set the start time of the composition to 0:00:00.00.
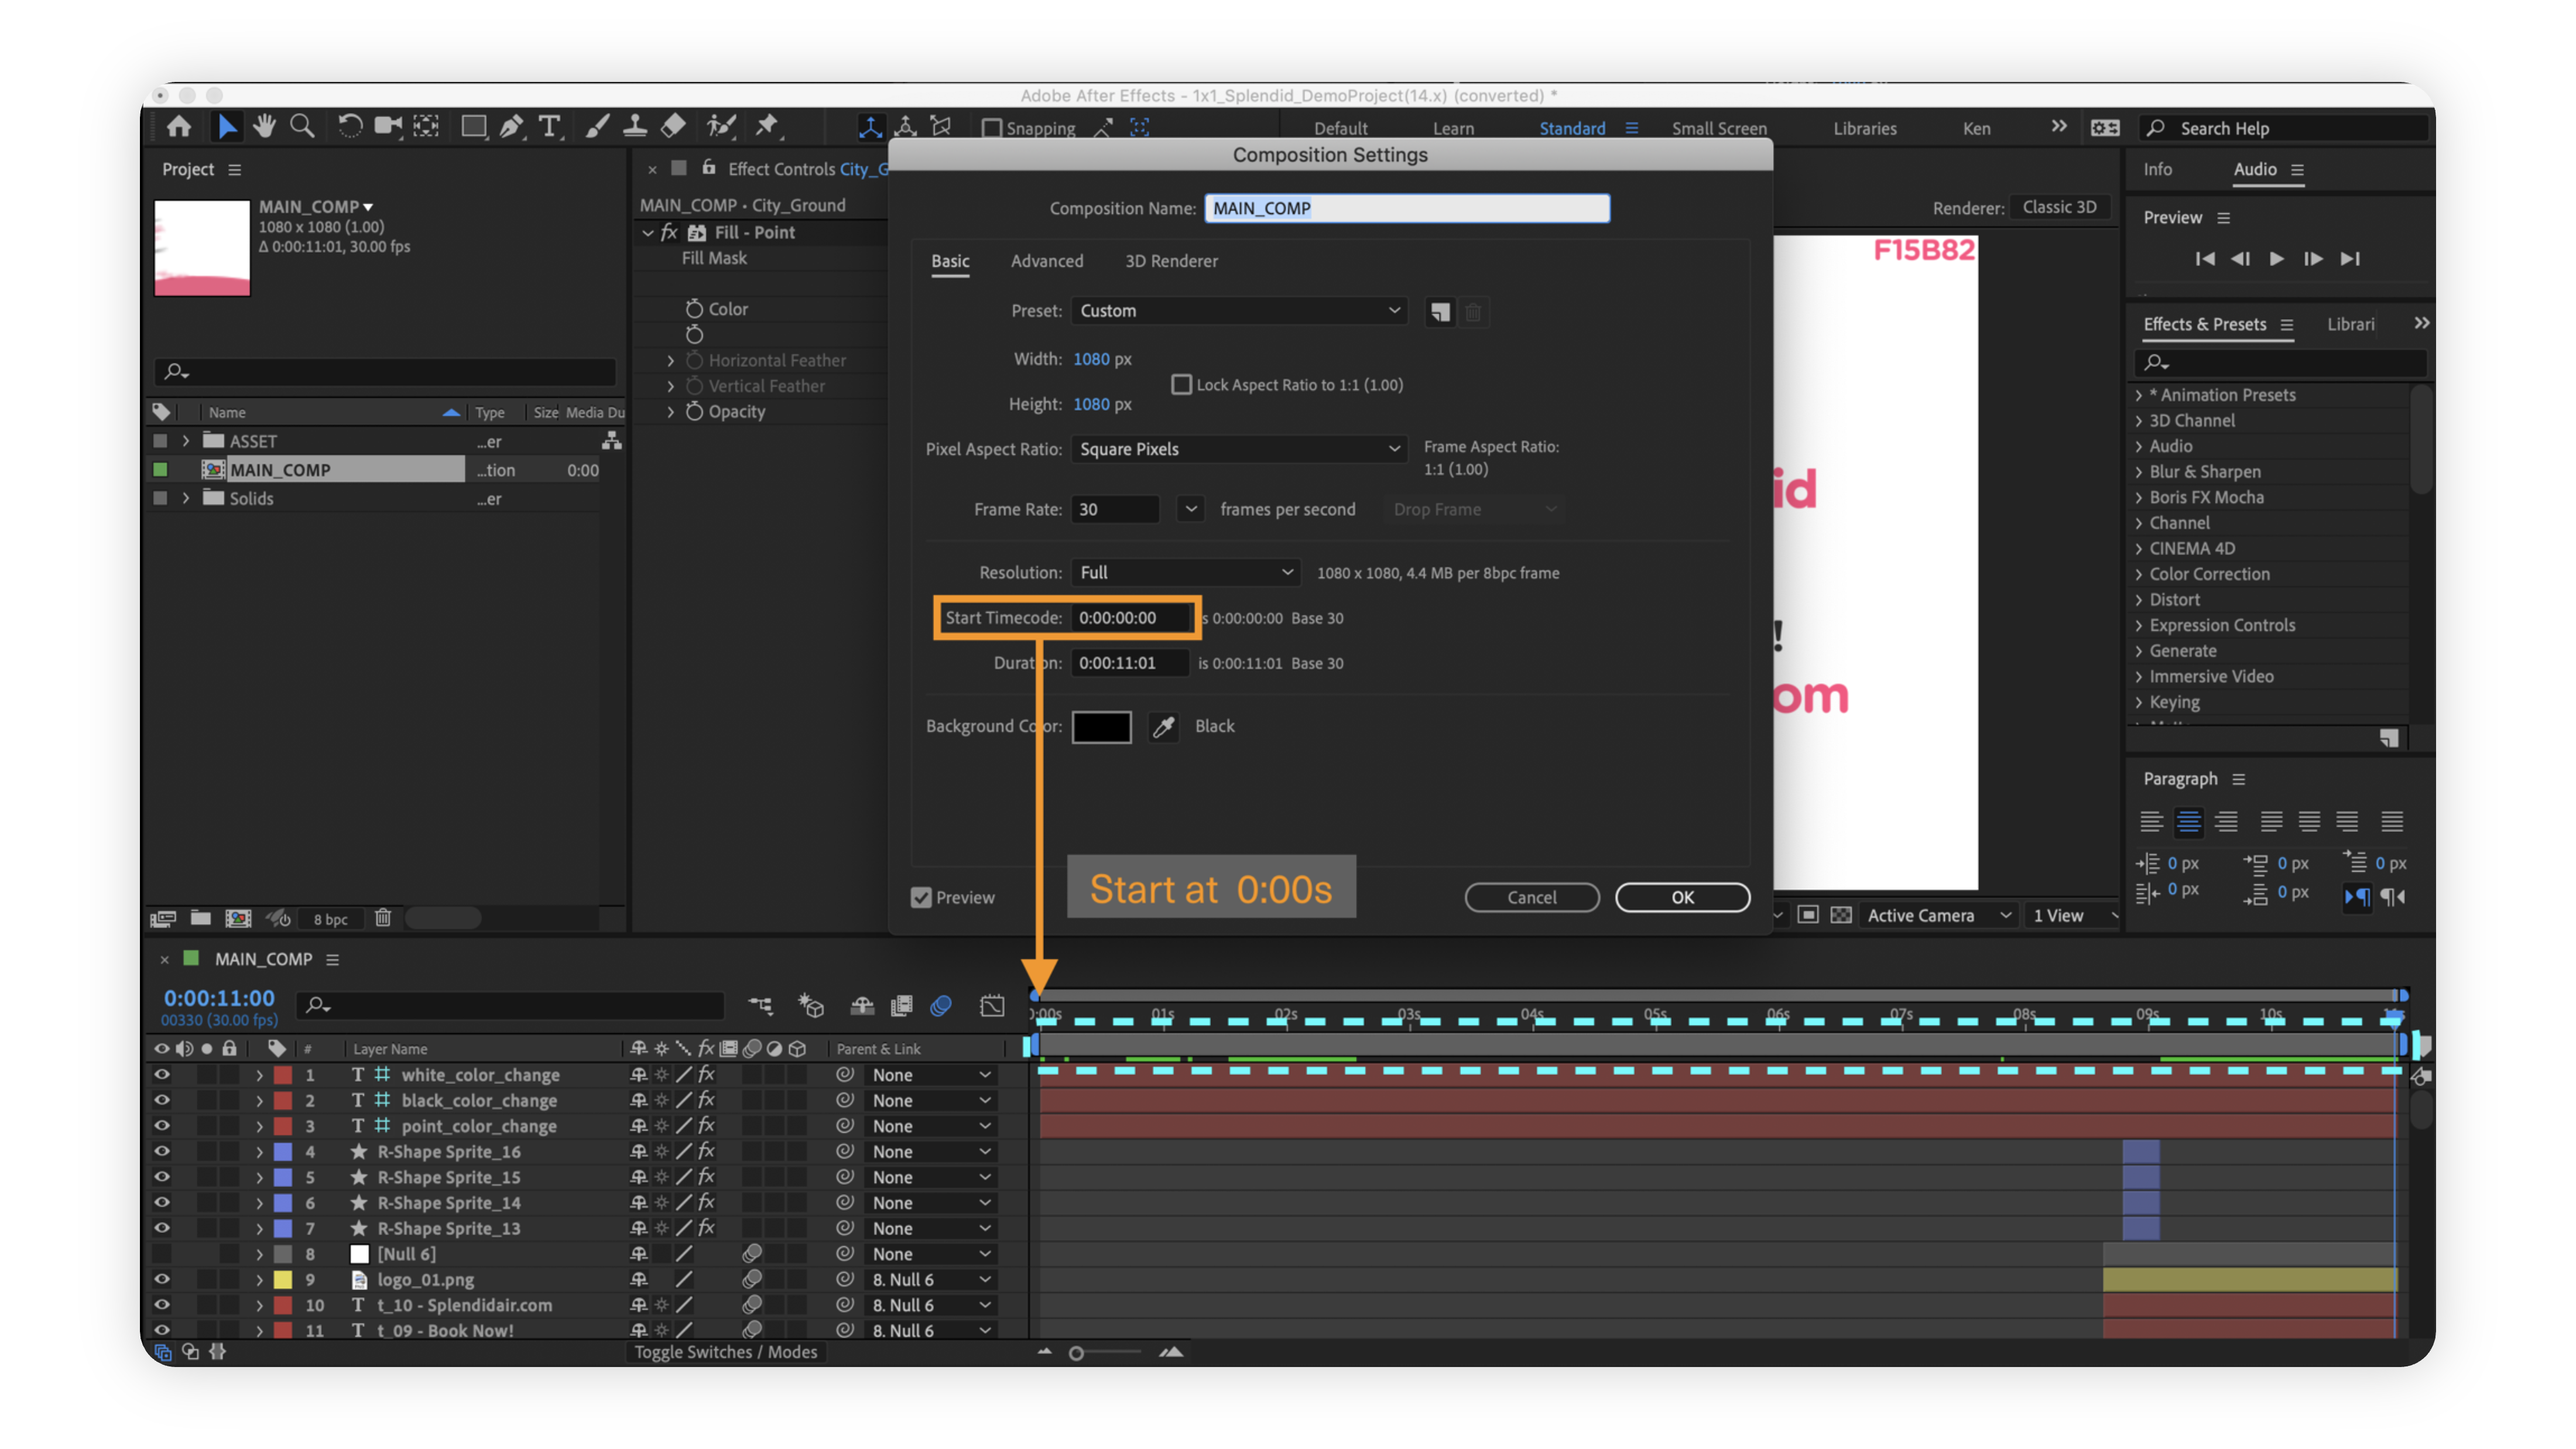
Composition Starts at 00:00:00
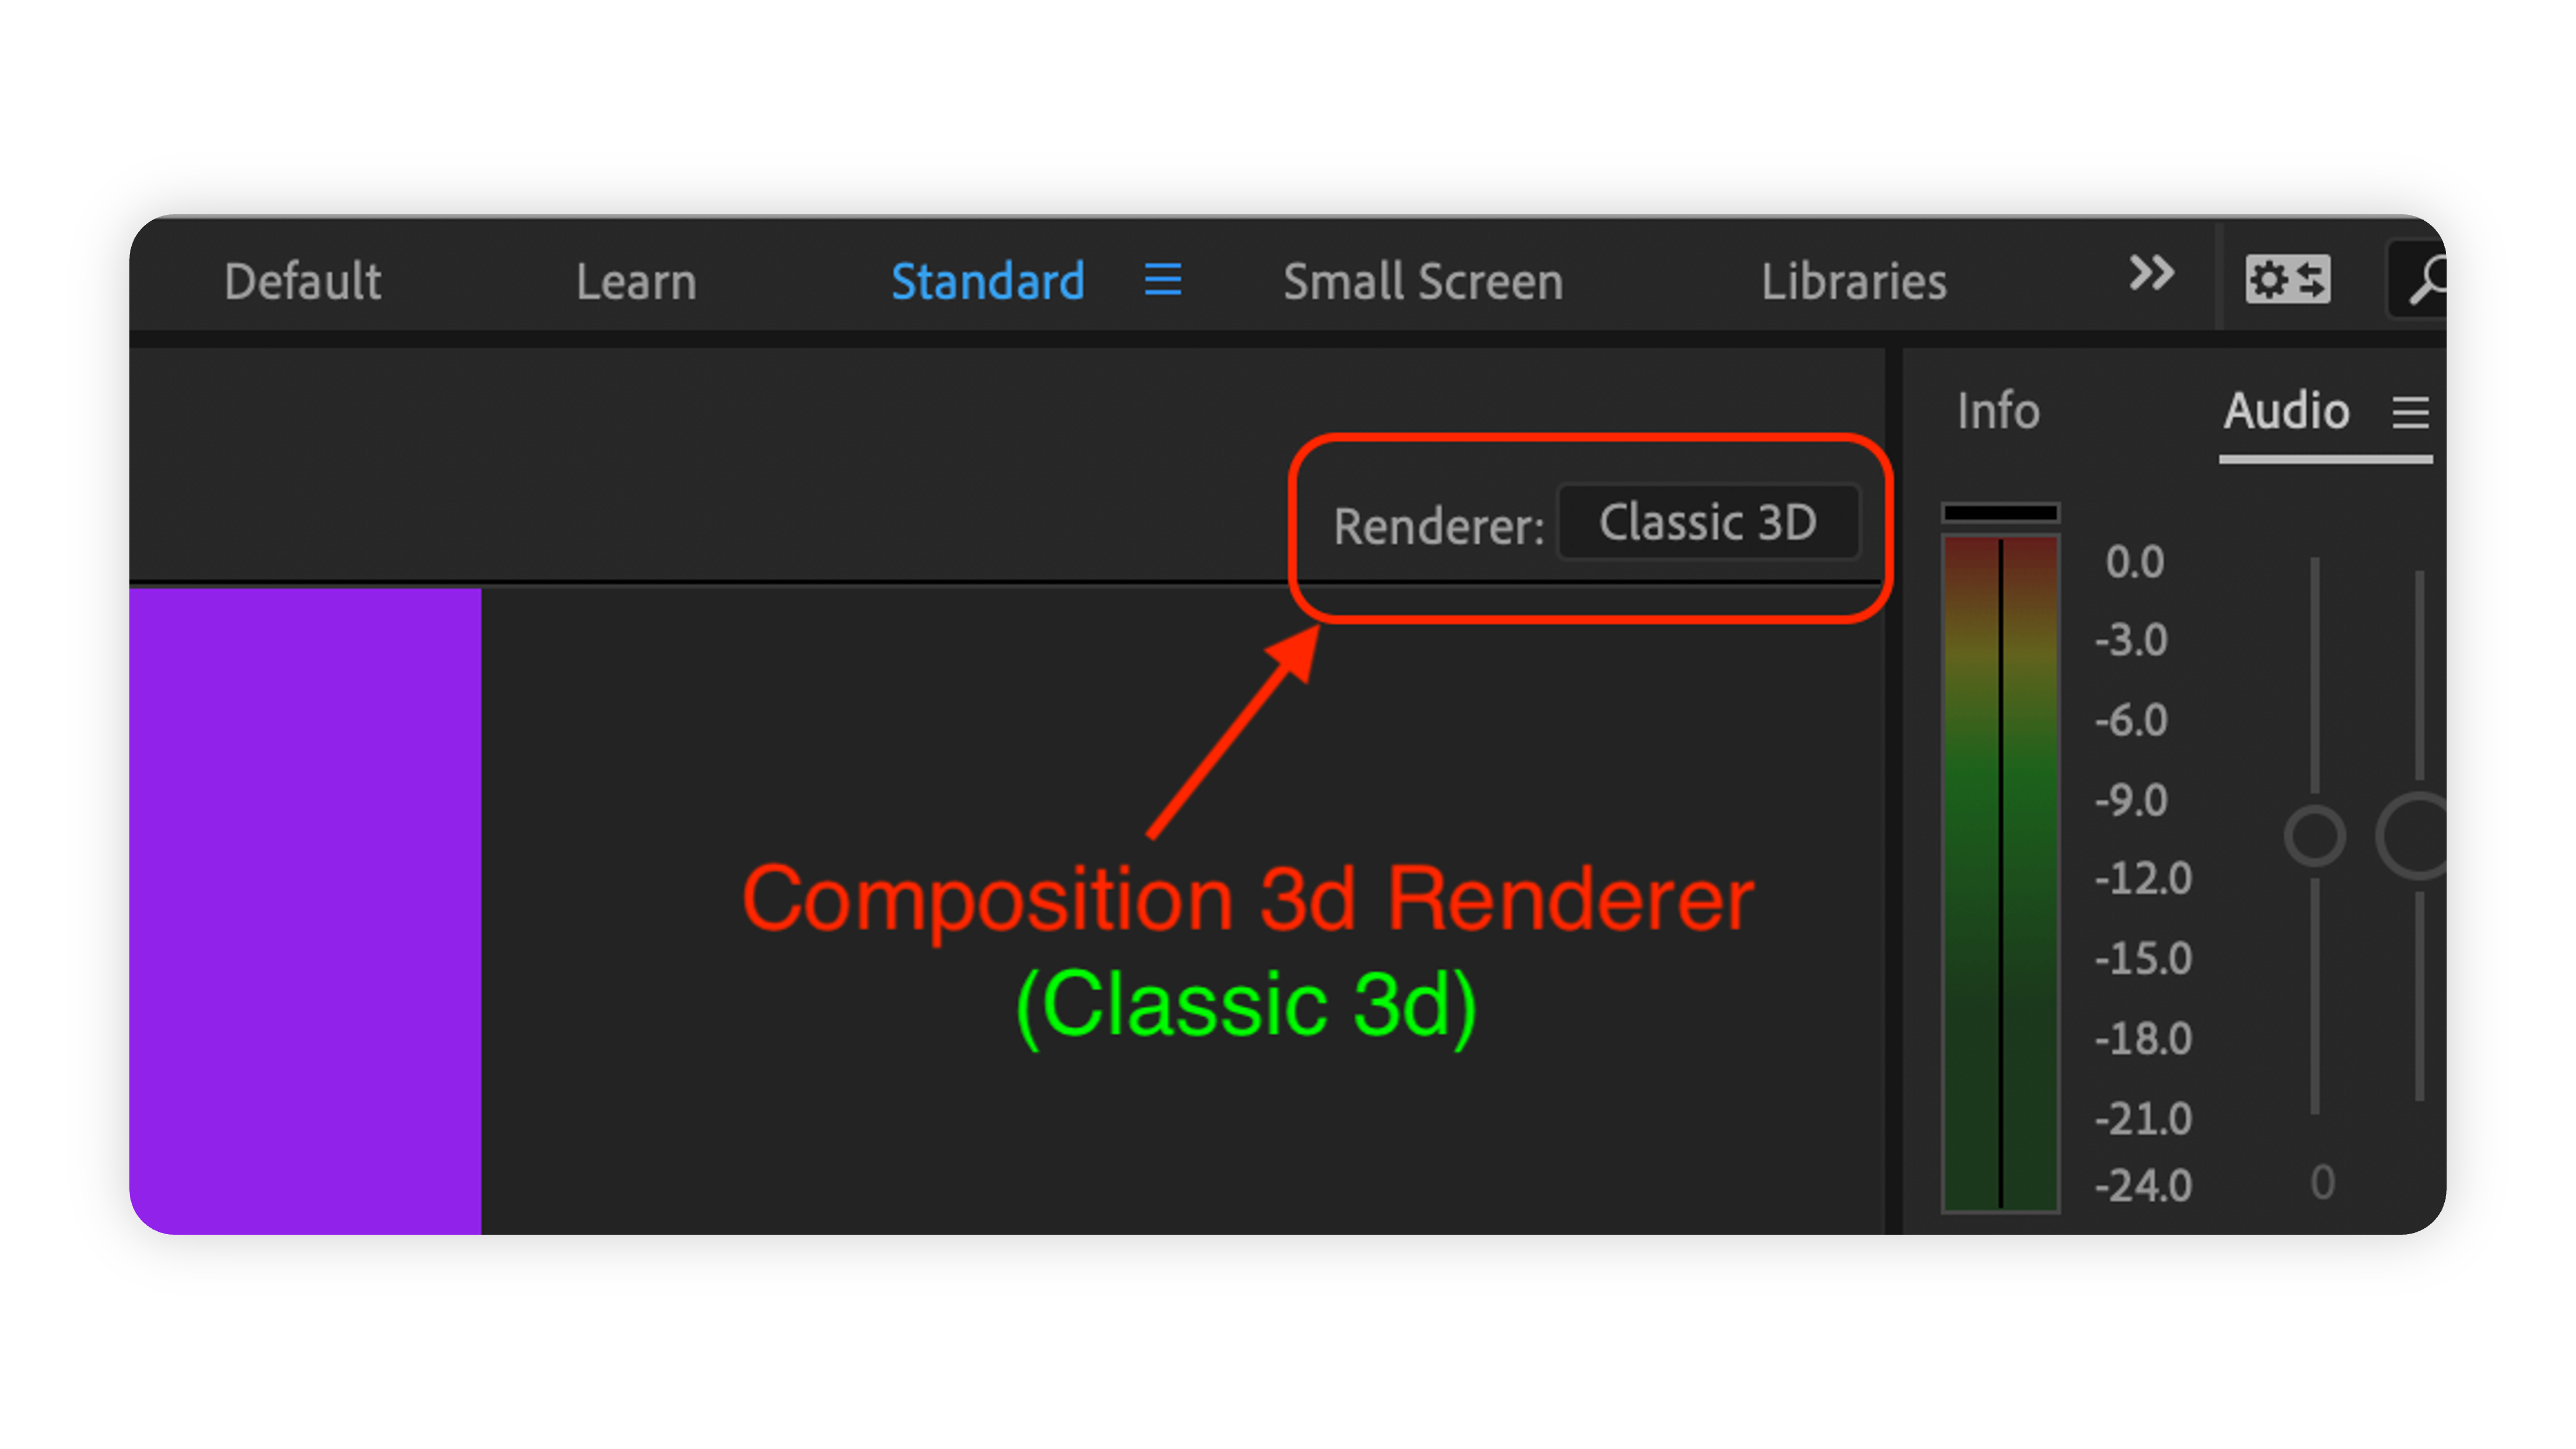
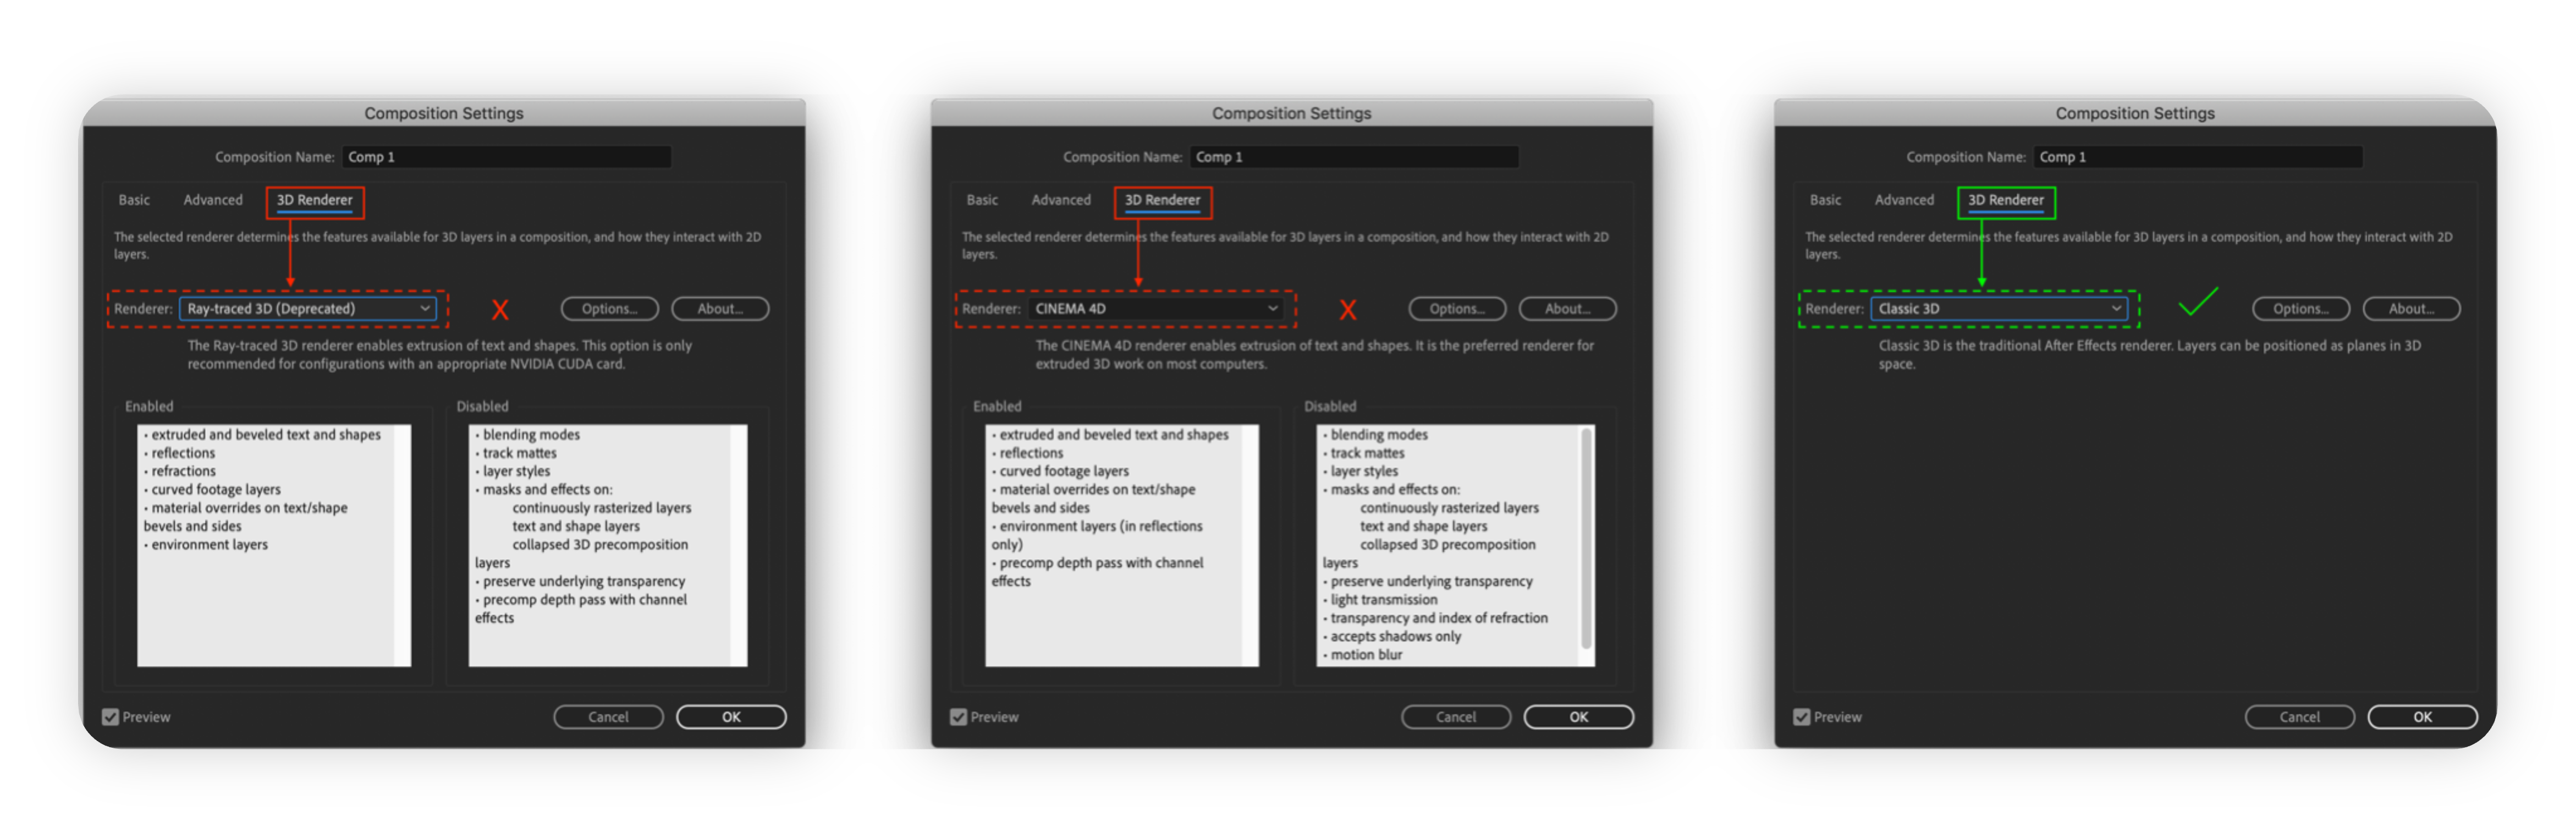
3D Renderer Settings: The Platform’s Rendering System supports Classic 3D renderer, but does not support Ray-traced 3D and CINEMA 4D renderer.

Audio
-10dB Audio Level Standard: To avoid audio that’s too loud and startling to audiences it’s important to adjust audio levels accordingly.
 Note: Audio peaking above -3.0 dB is considered too loud.
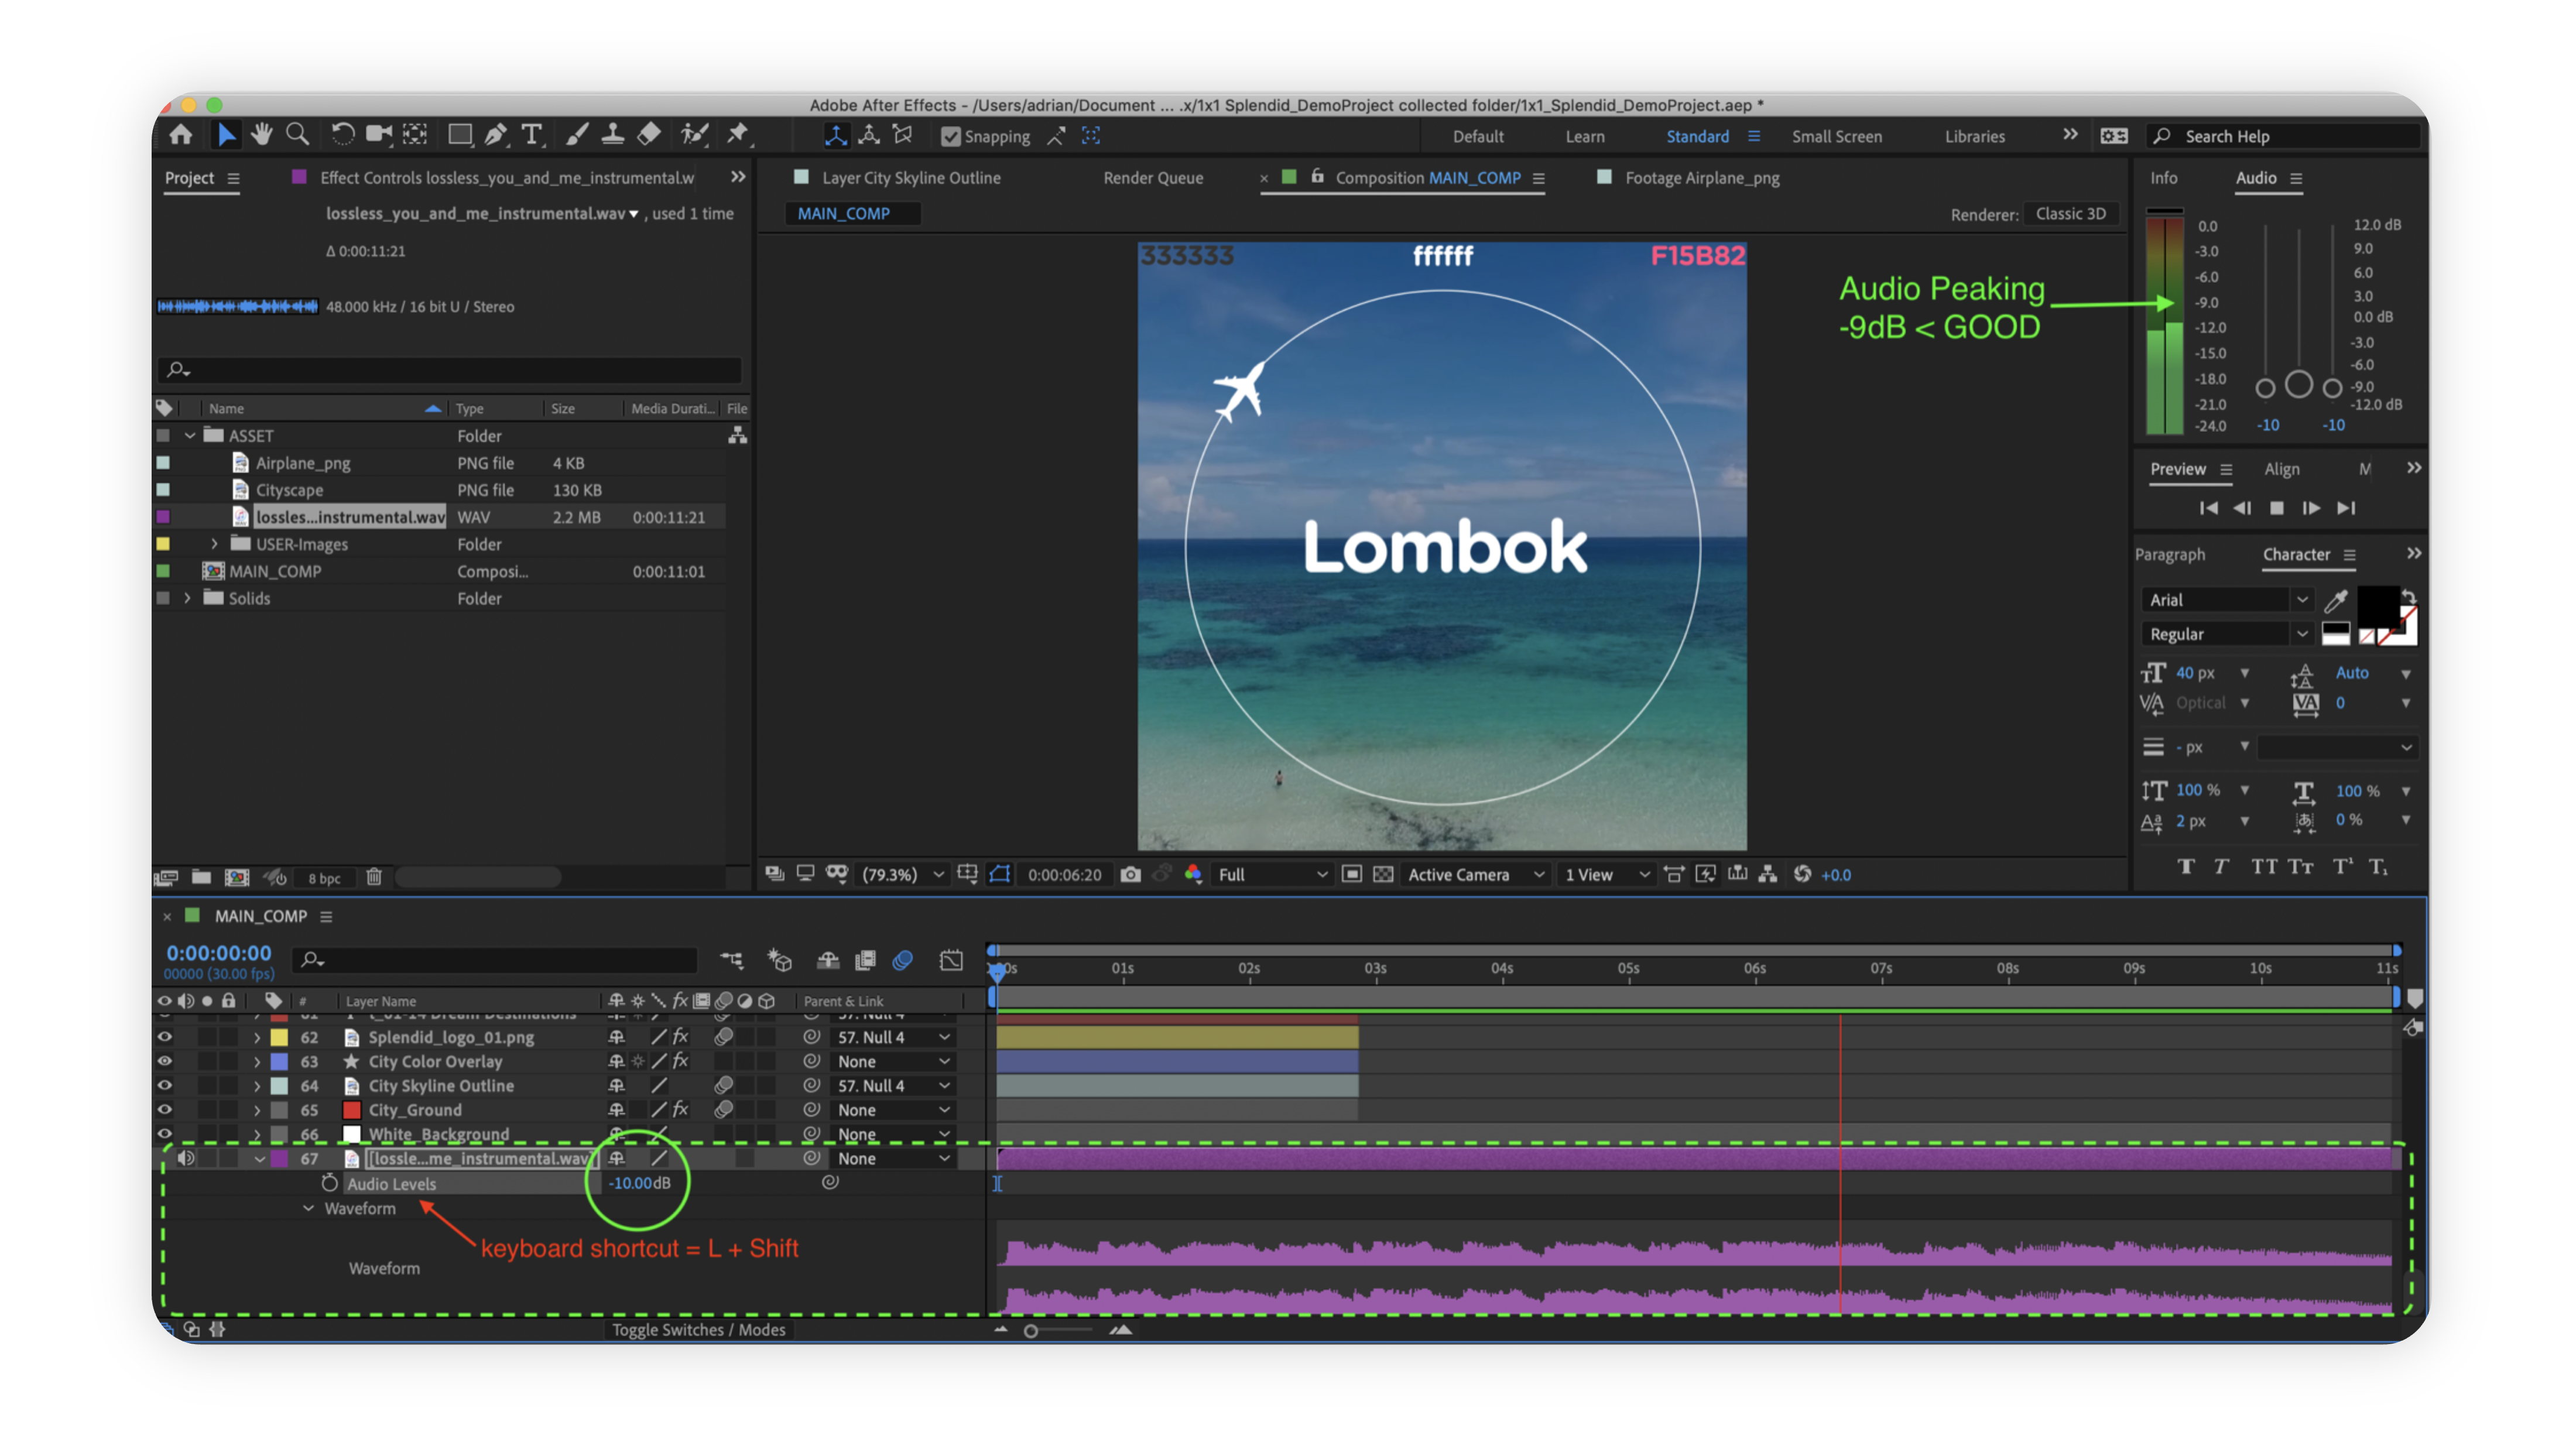 Note: Audio should peak under -9.0 dB.
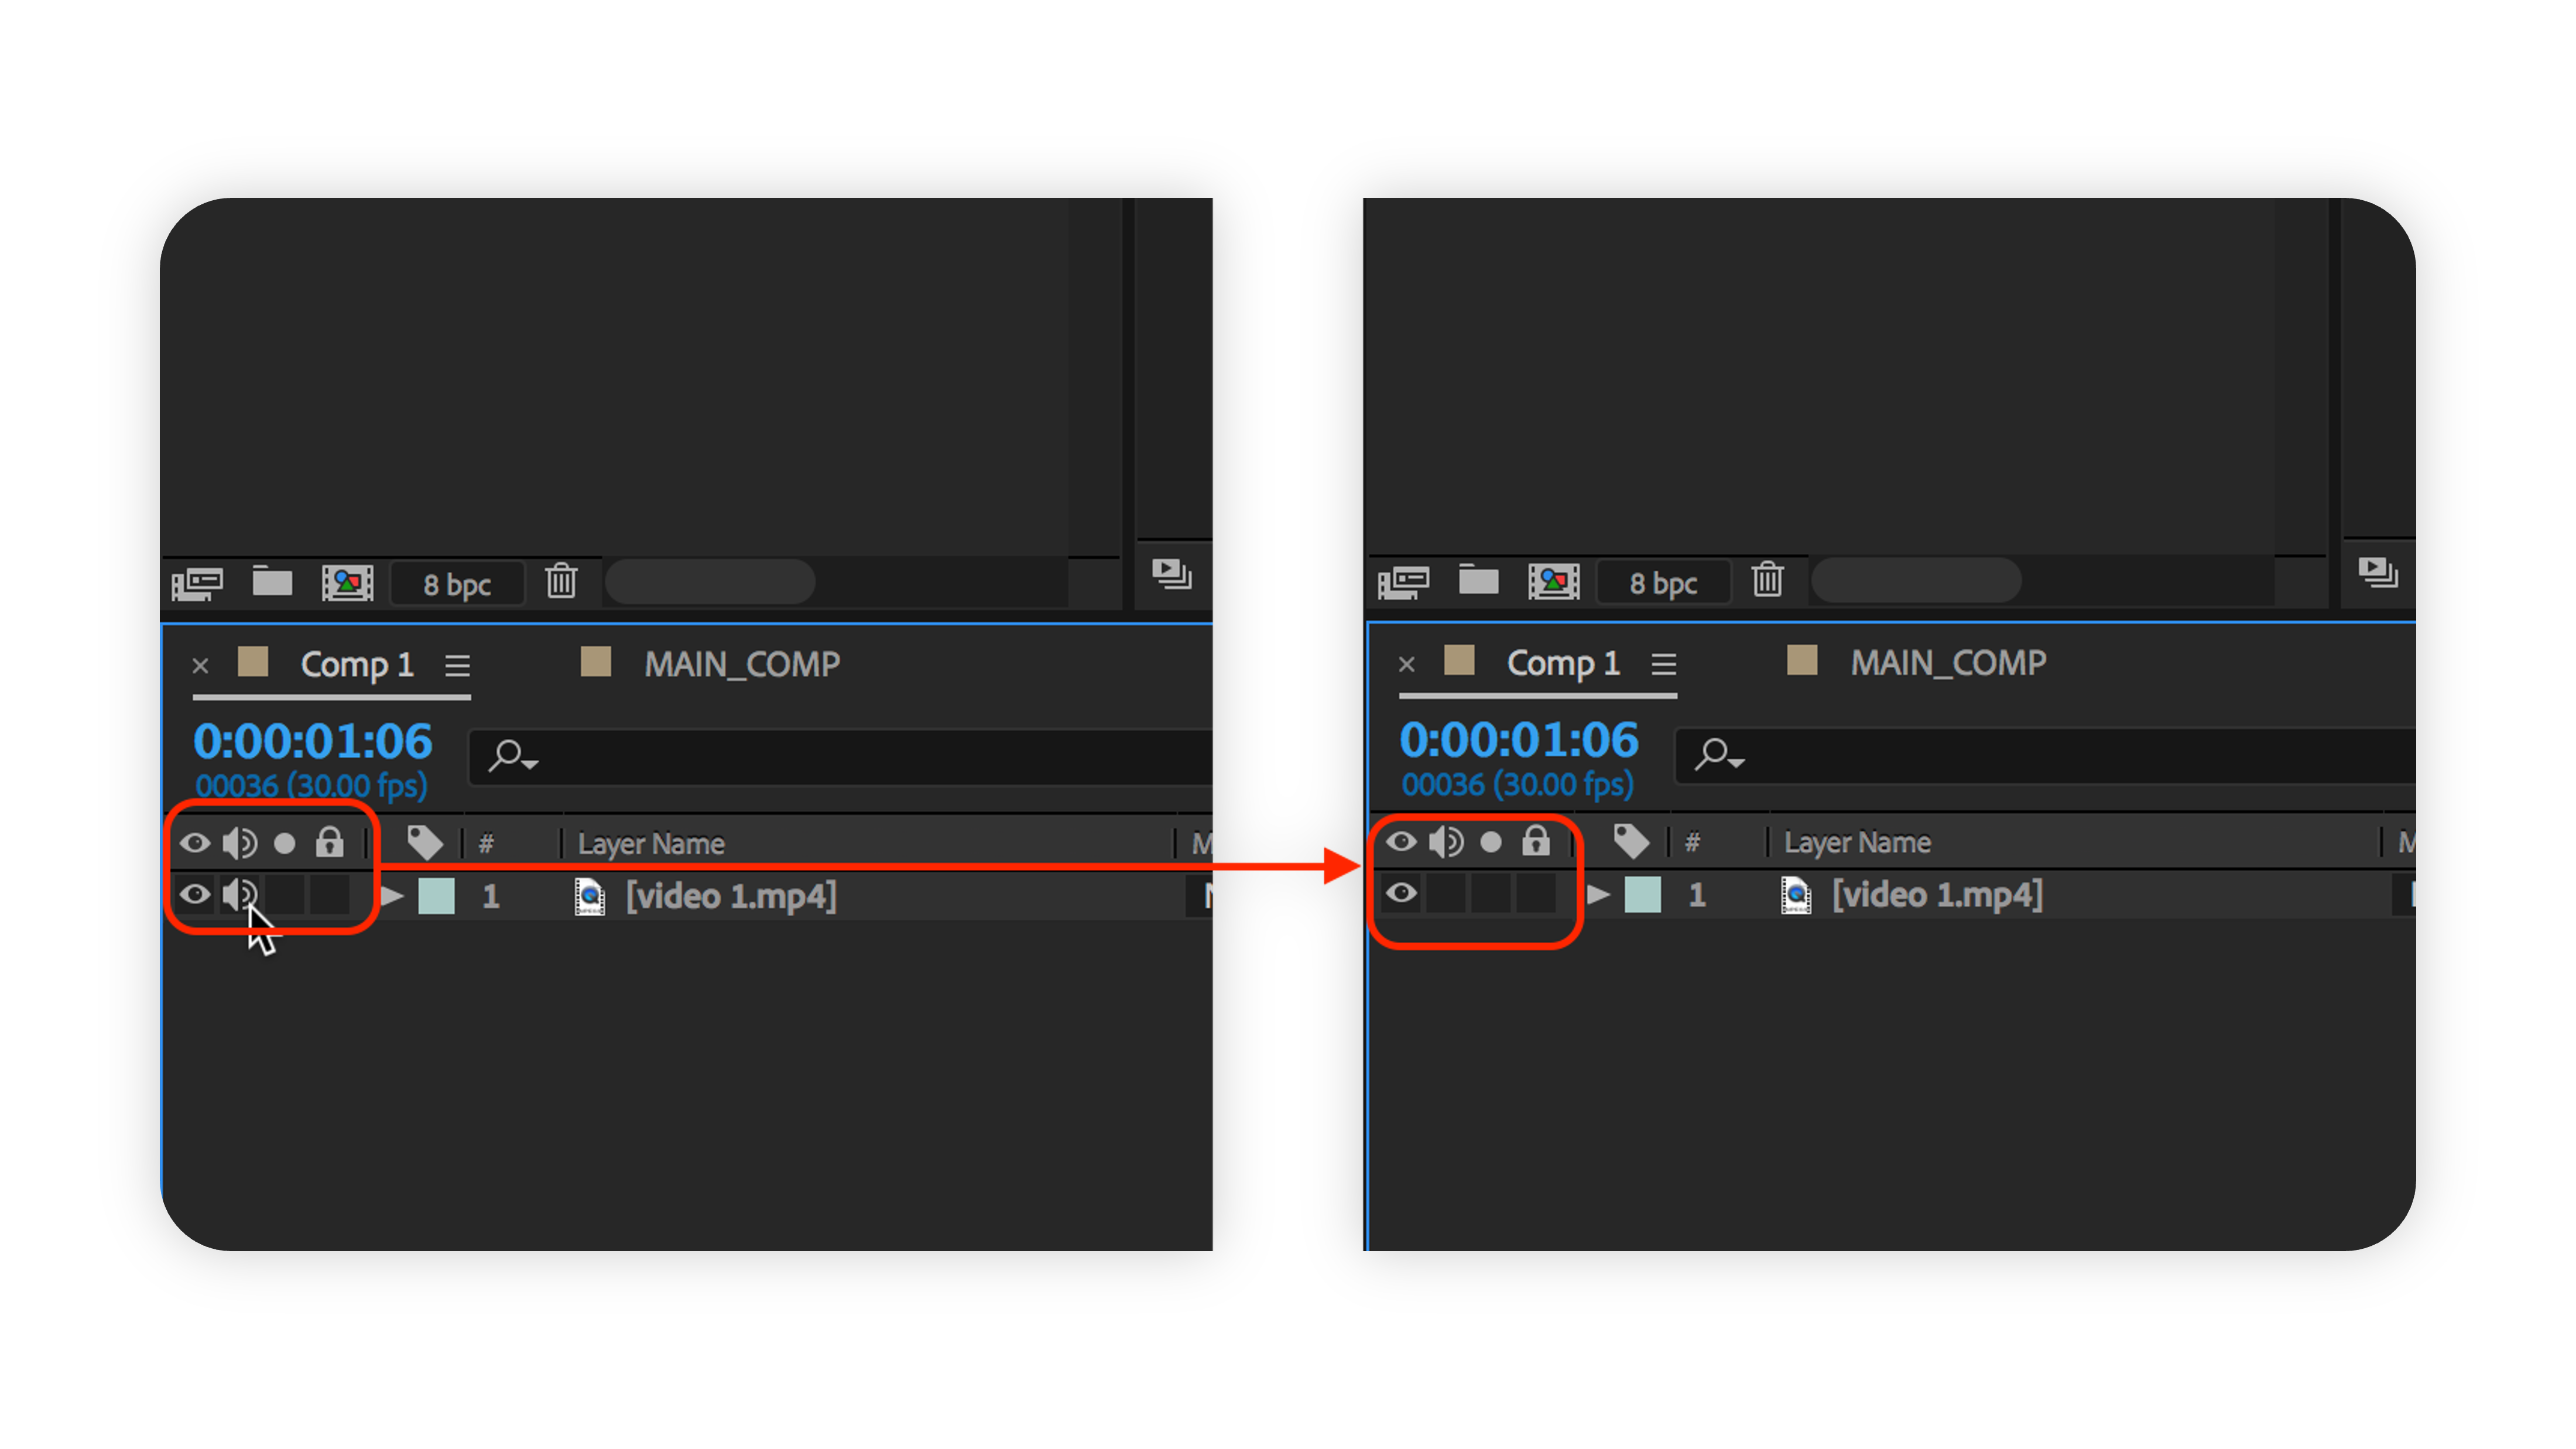
Turning Off Sound of Videos: Unless you’re making an interview creative template, make sure to mute the video layer’s sound to avoid any sound collision with the background music.
|
Footage
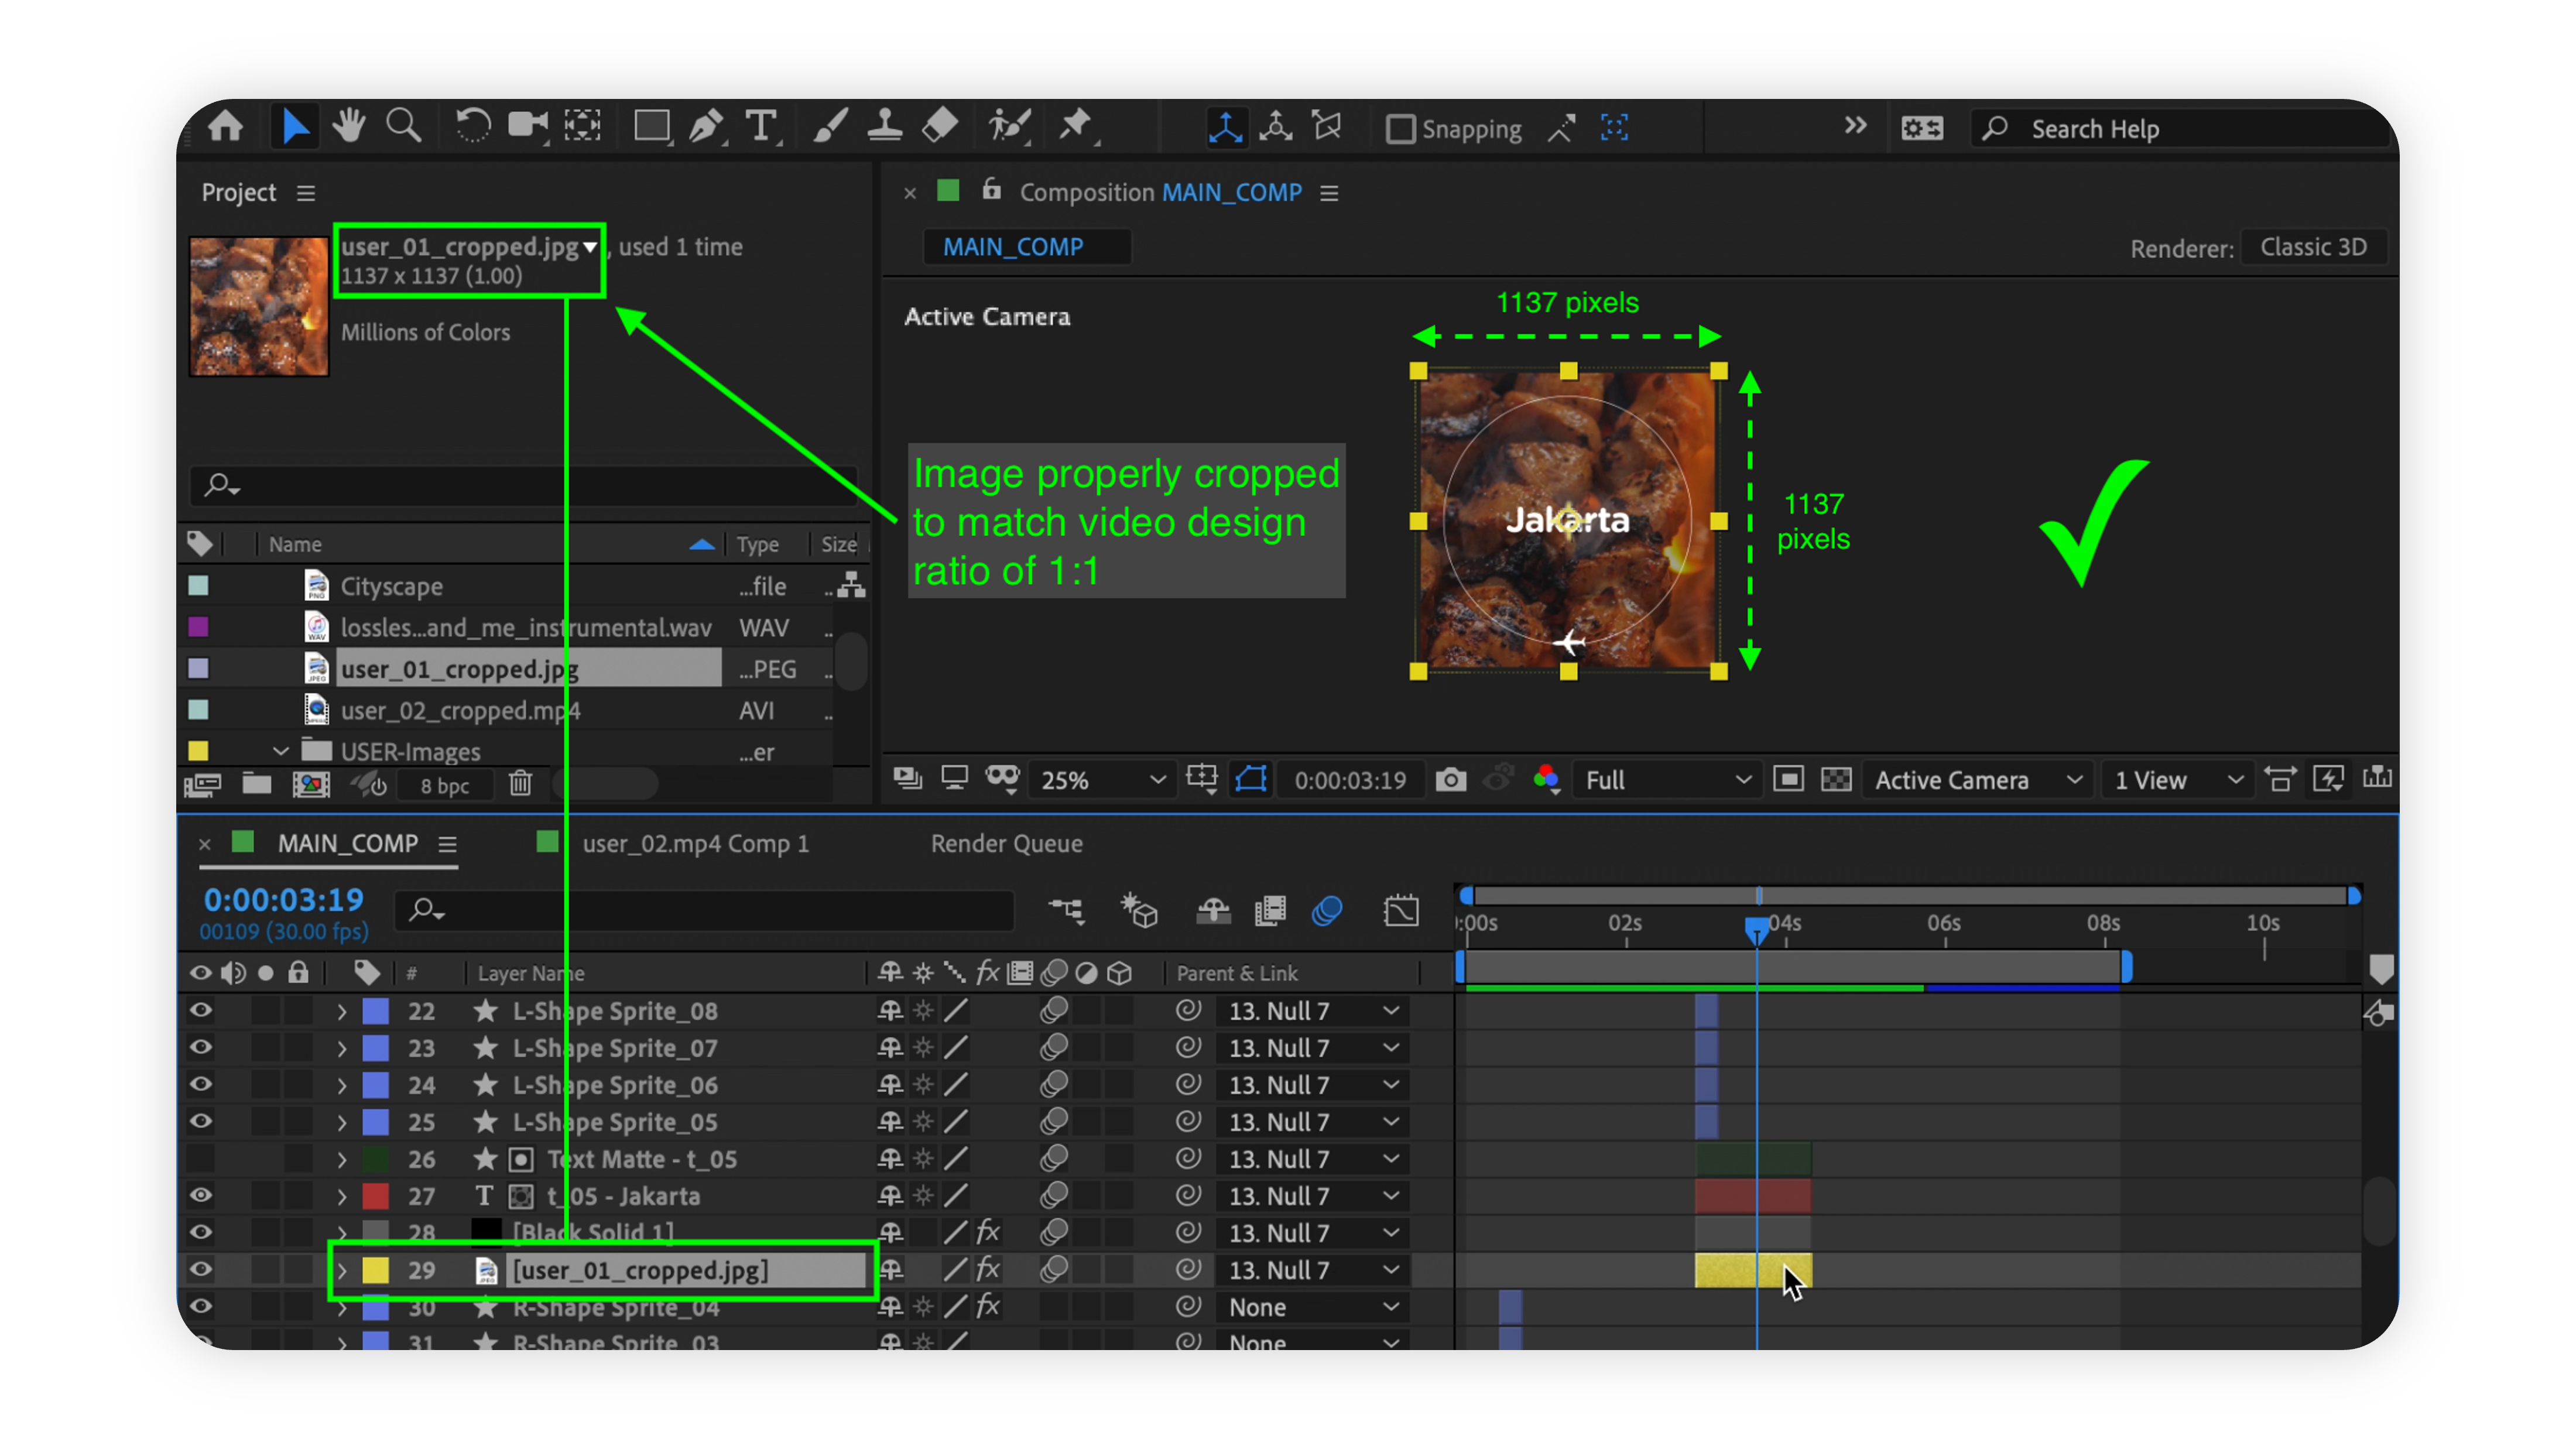
Cropping Assets: Follow these instructions for images and videos.
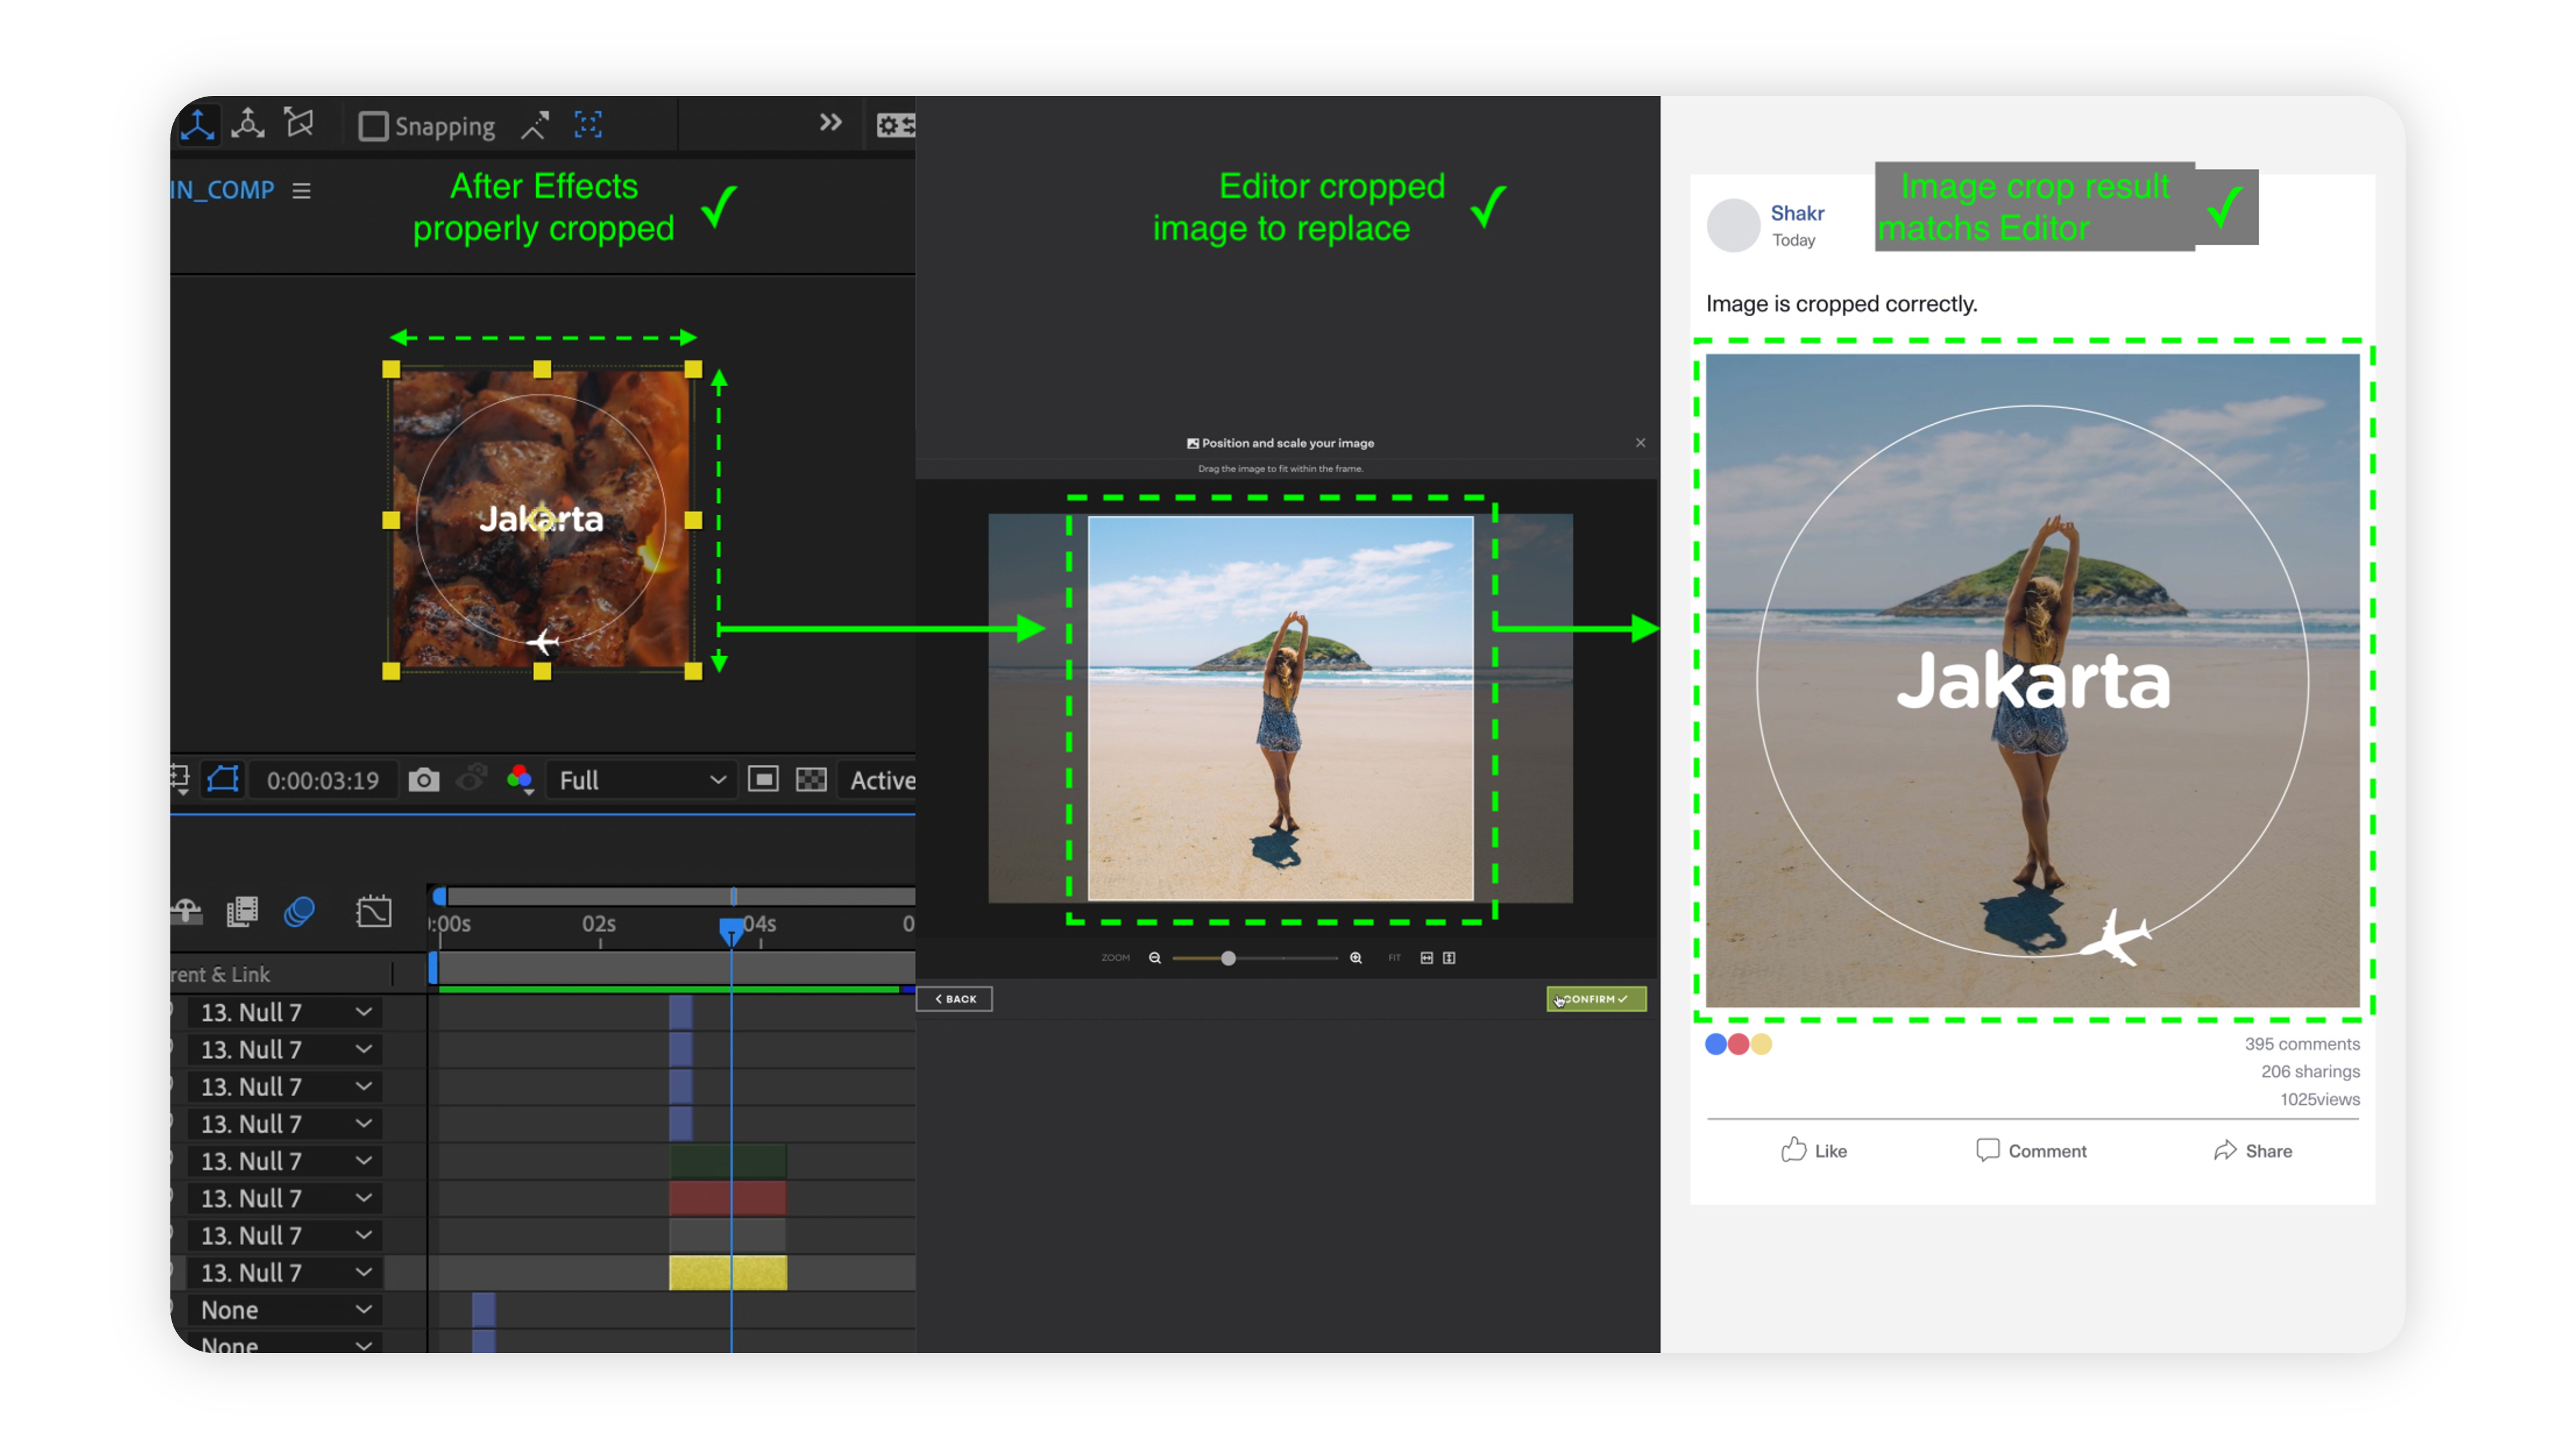
For cropped image/videos, make sure to crop and save the file before inserting it into the project file. For example, if you’re making a square creative template, each sample image should be the cropped as 1:1 ratio.
This process will allow the user to crop their image/video in the Platform Editor with confidence.
No Crop Example
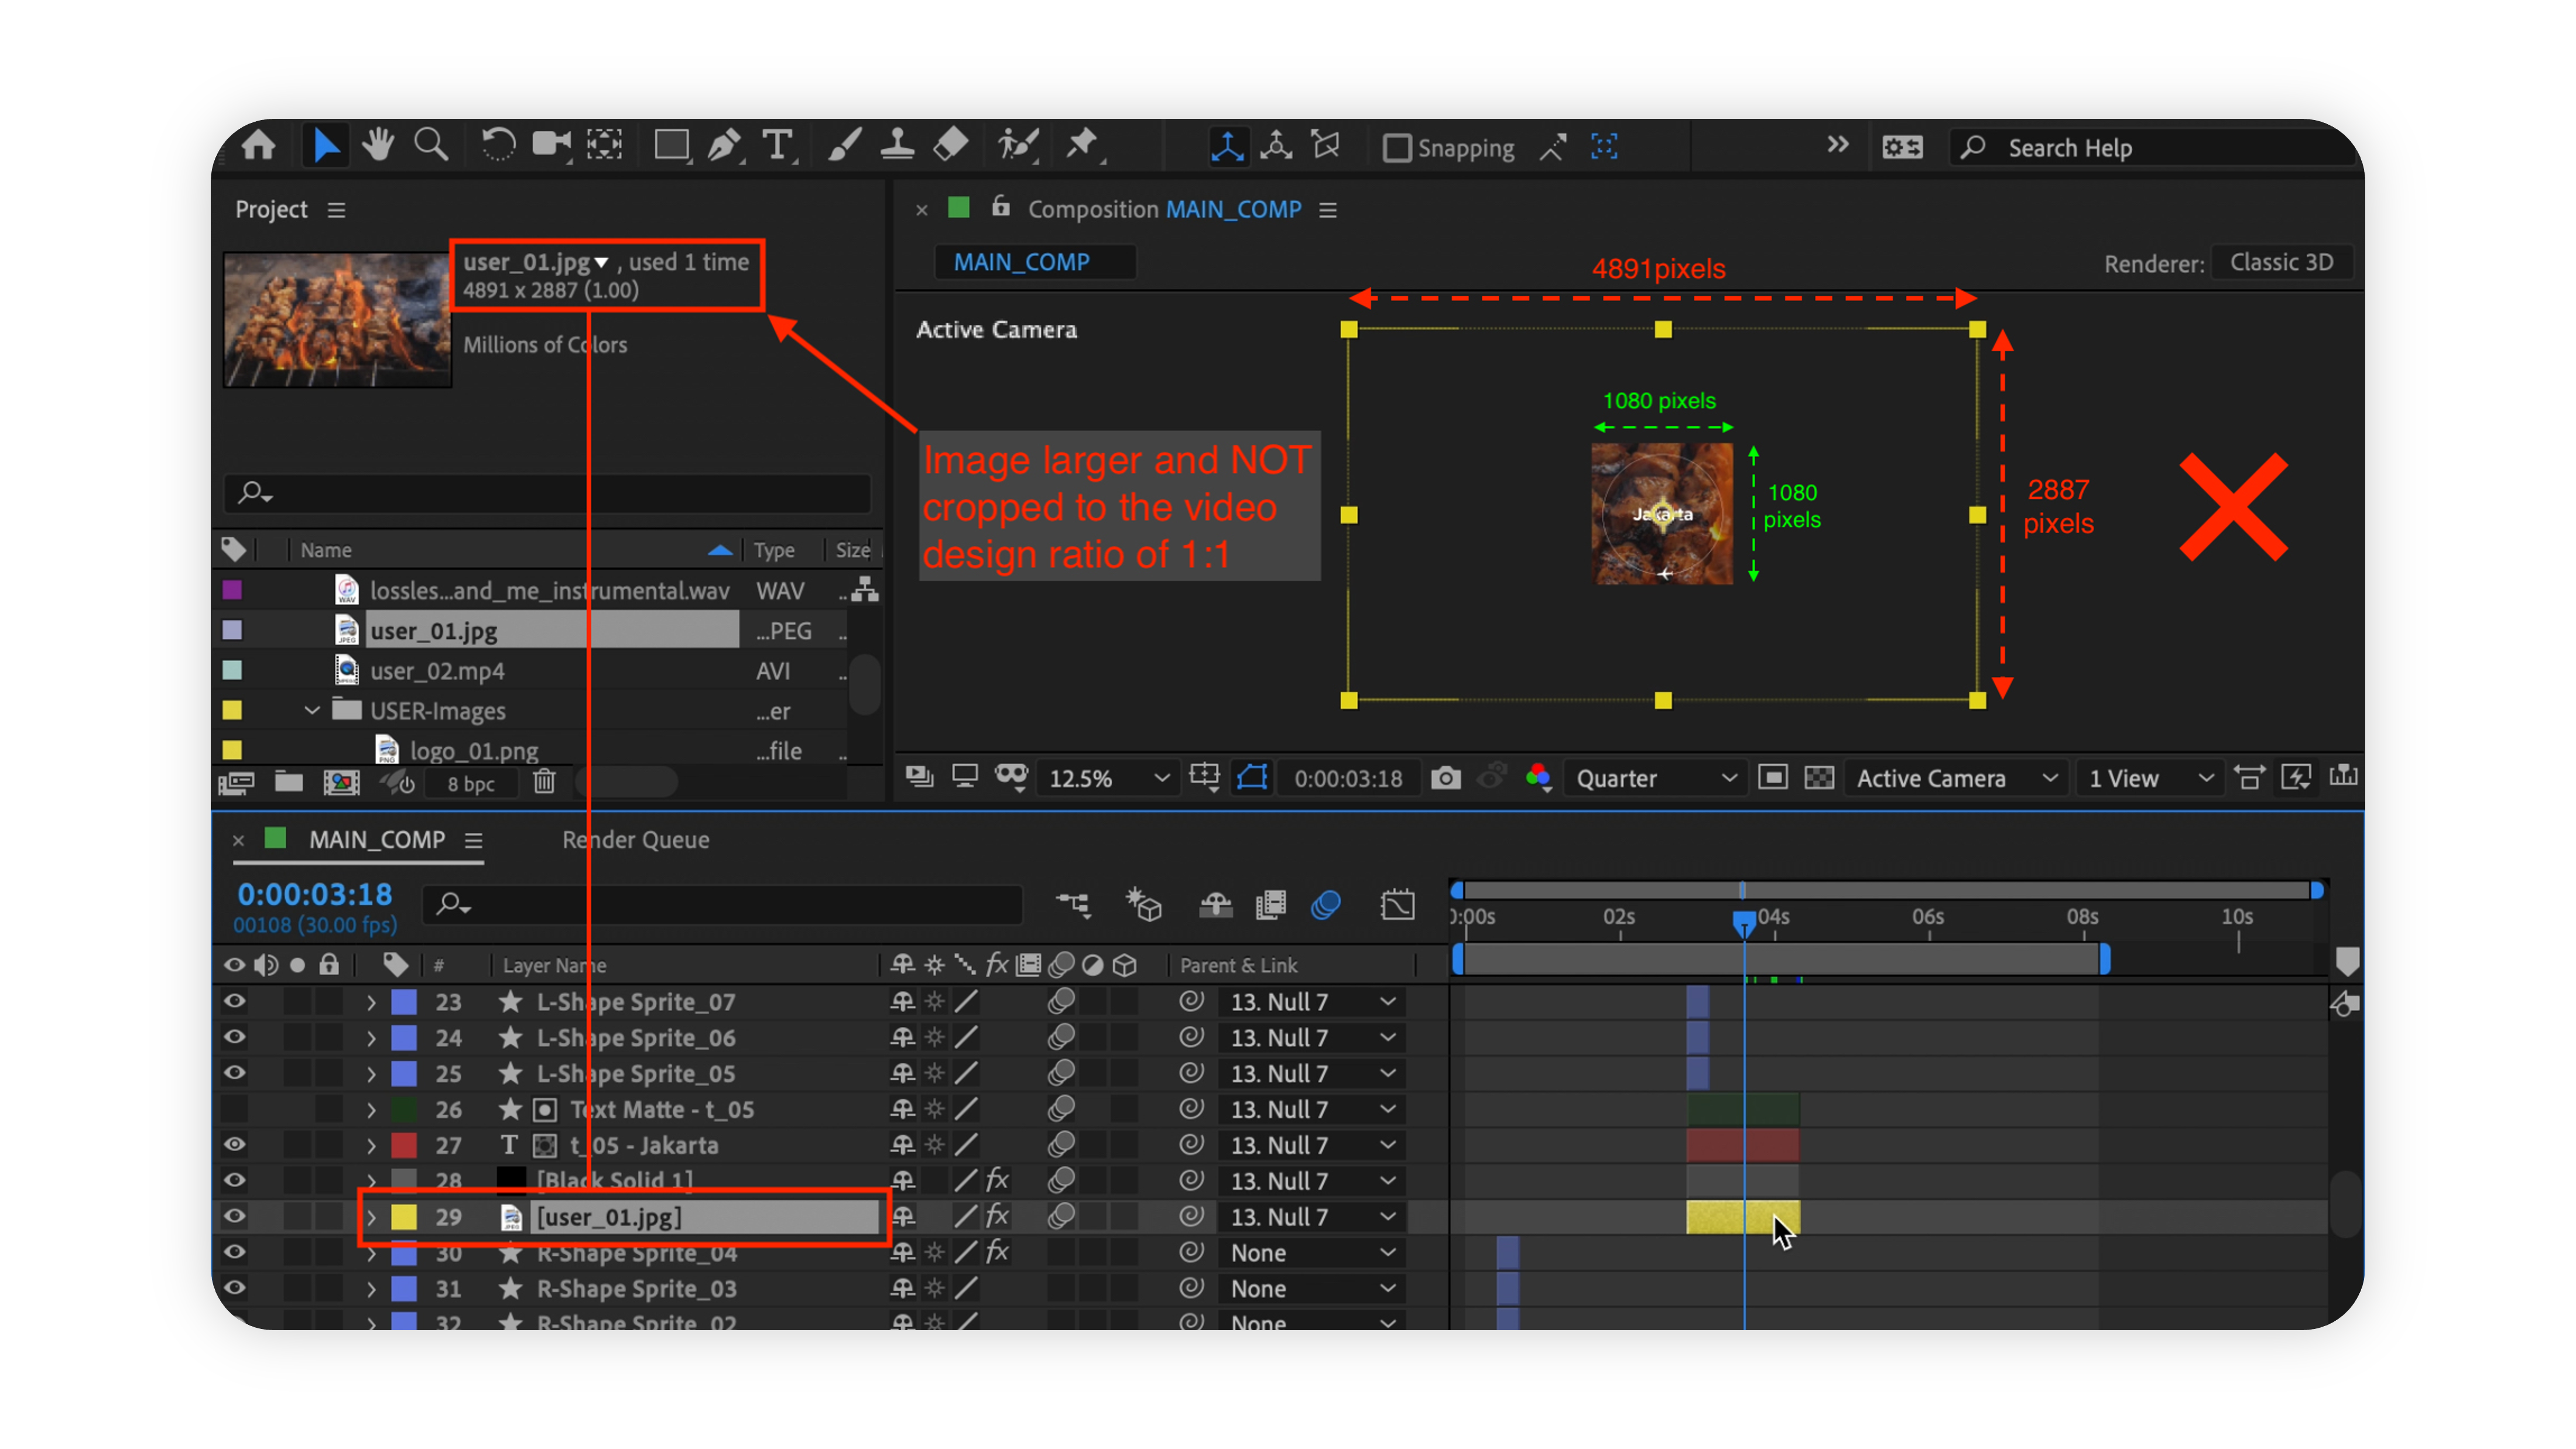
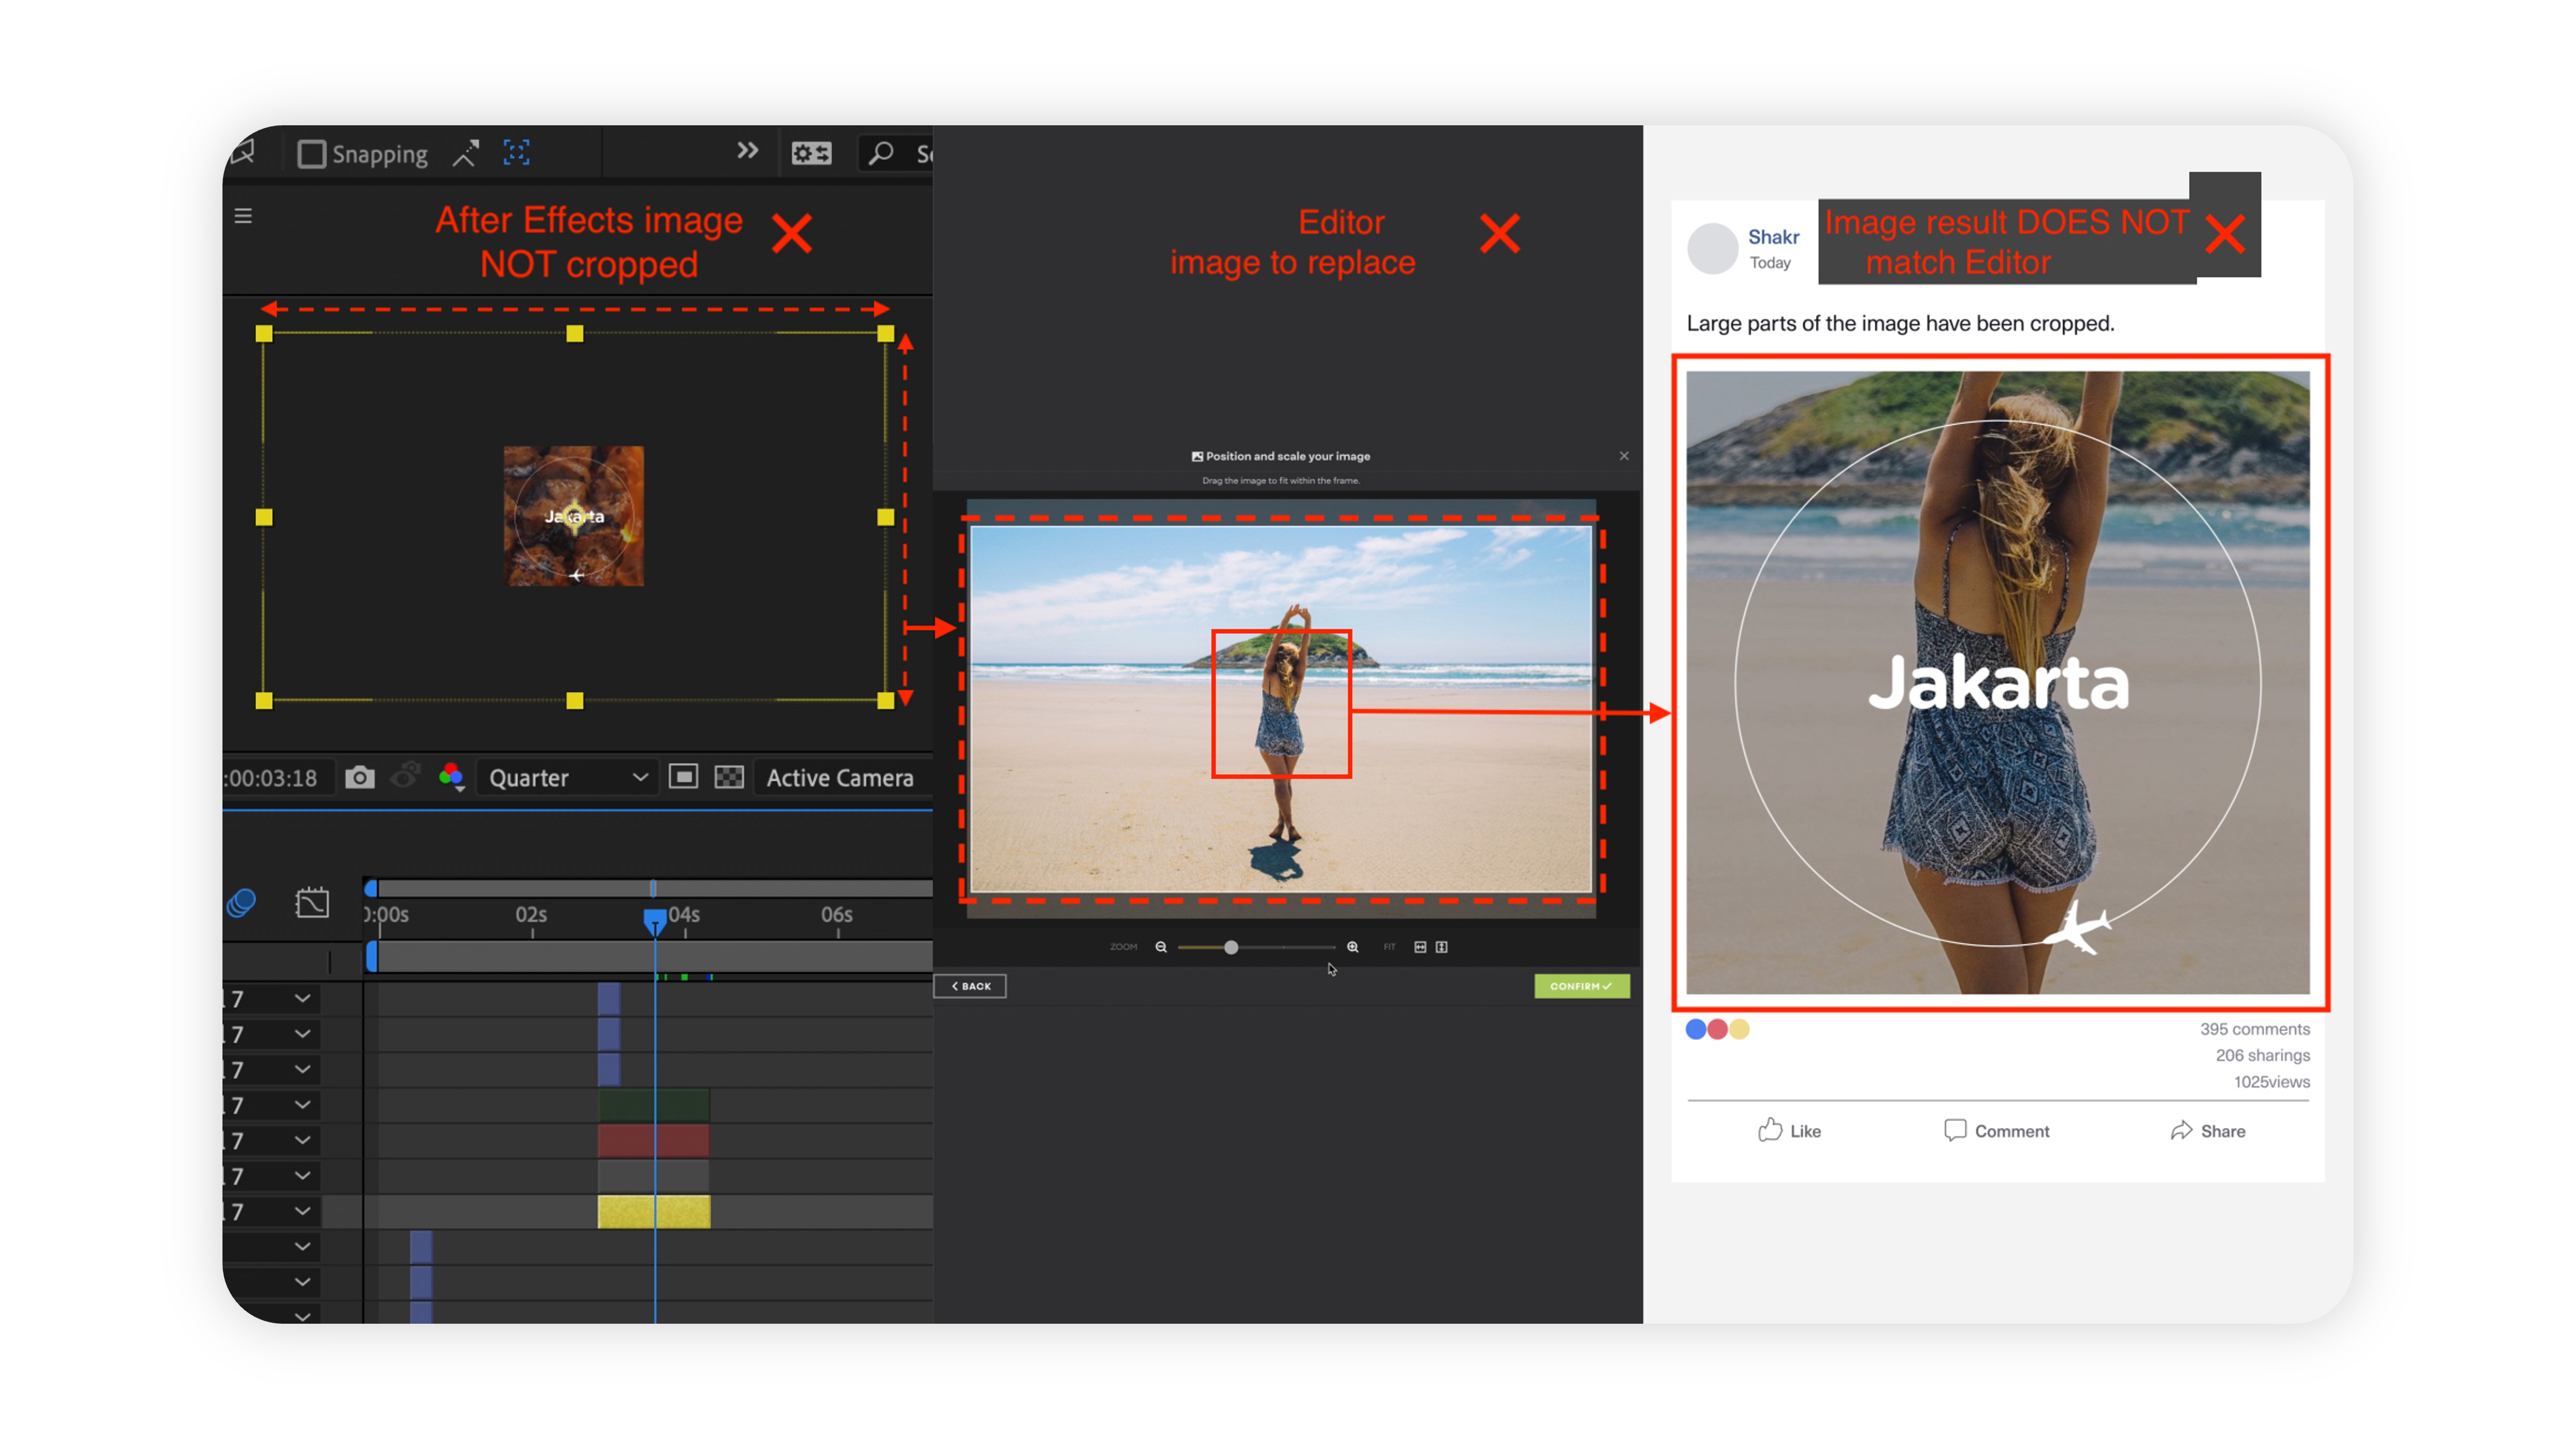
The final creative made with the above template for example, will only show a portion of the image (and will be low quality).
Crop Example
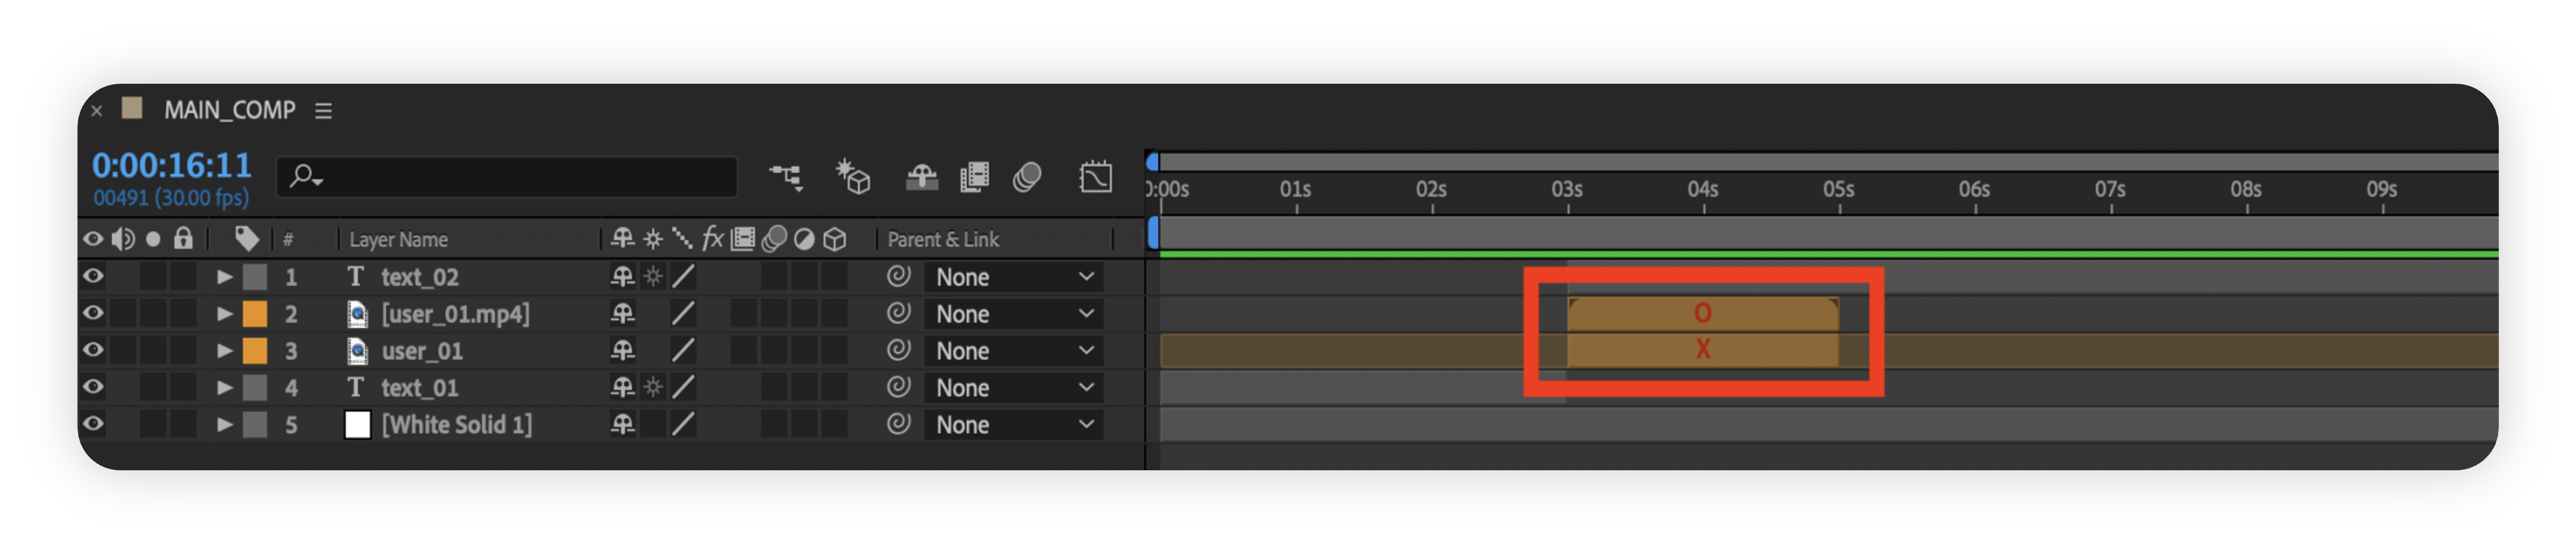
Trimming Video: Please don’t forget to trim the video length and save it as a new file before using it as sample footage. If not, the user will need to insert the same length of the original video in the Platform input and will not be able to use the video selection function.
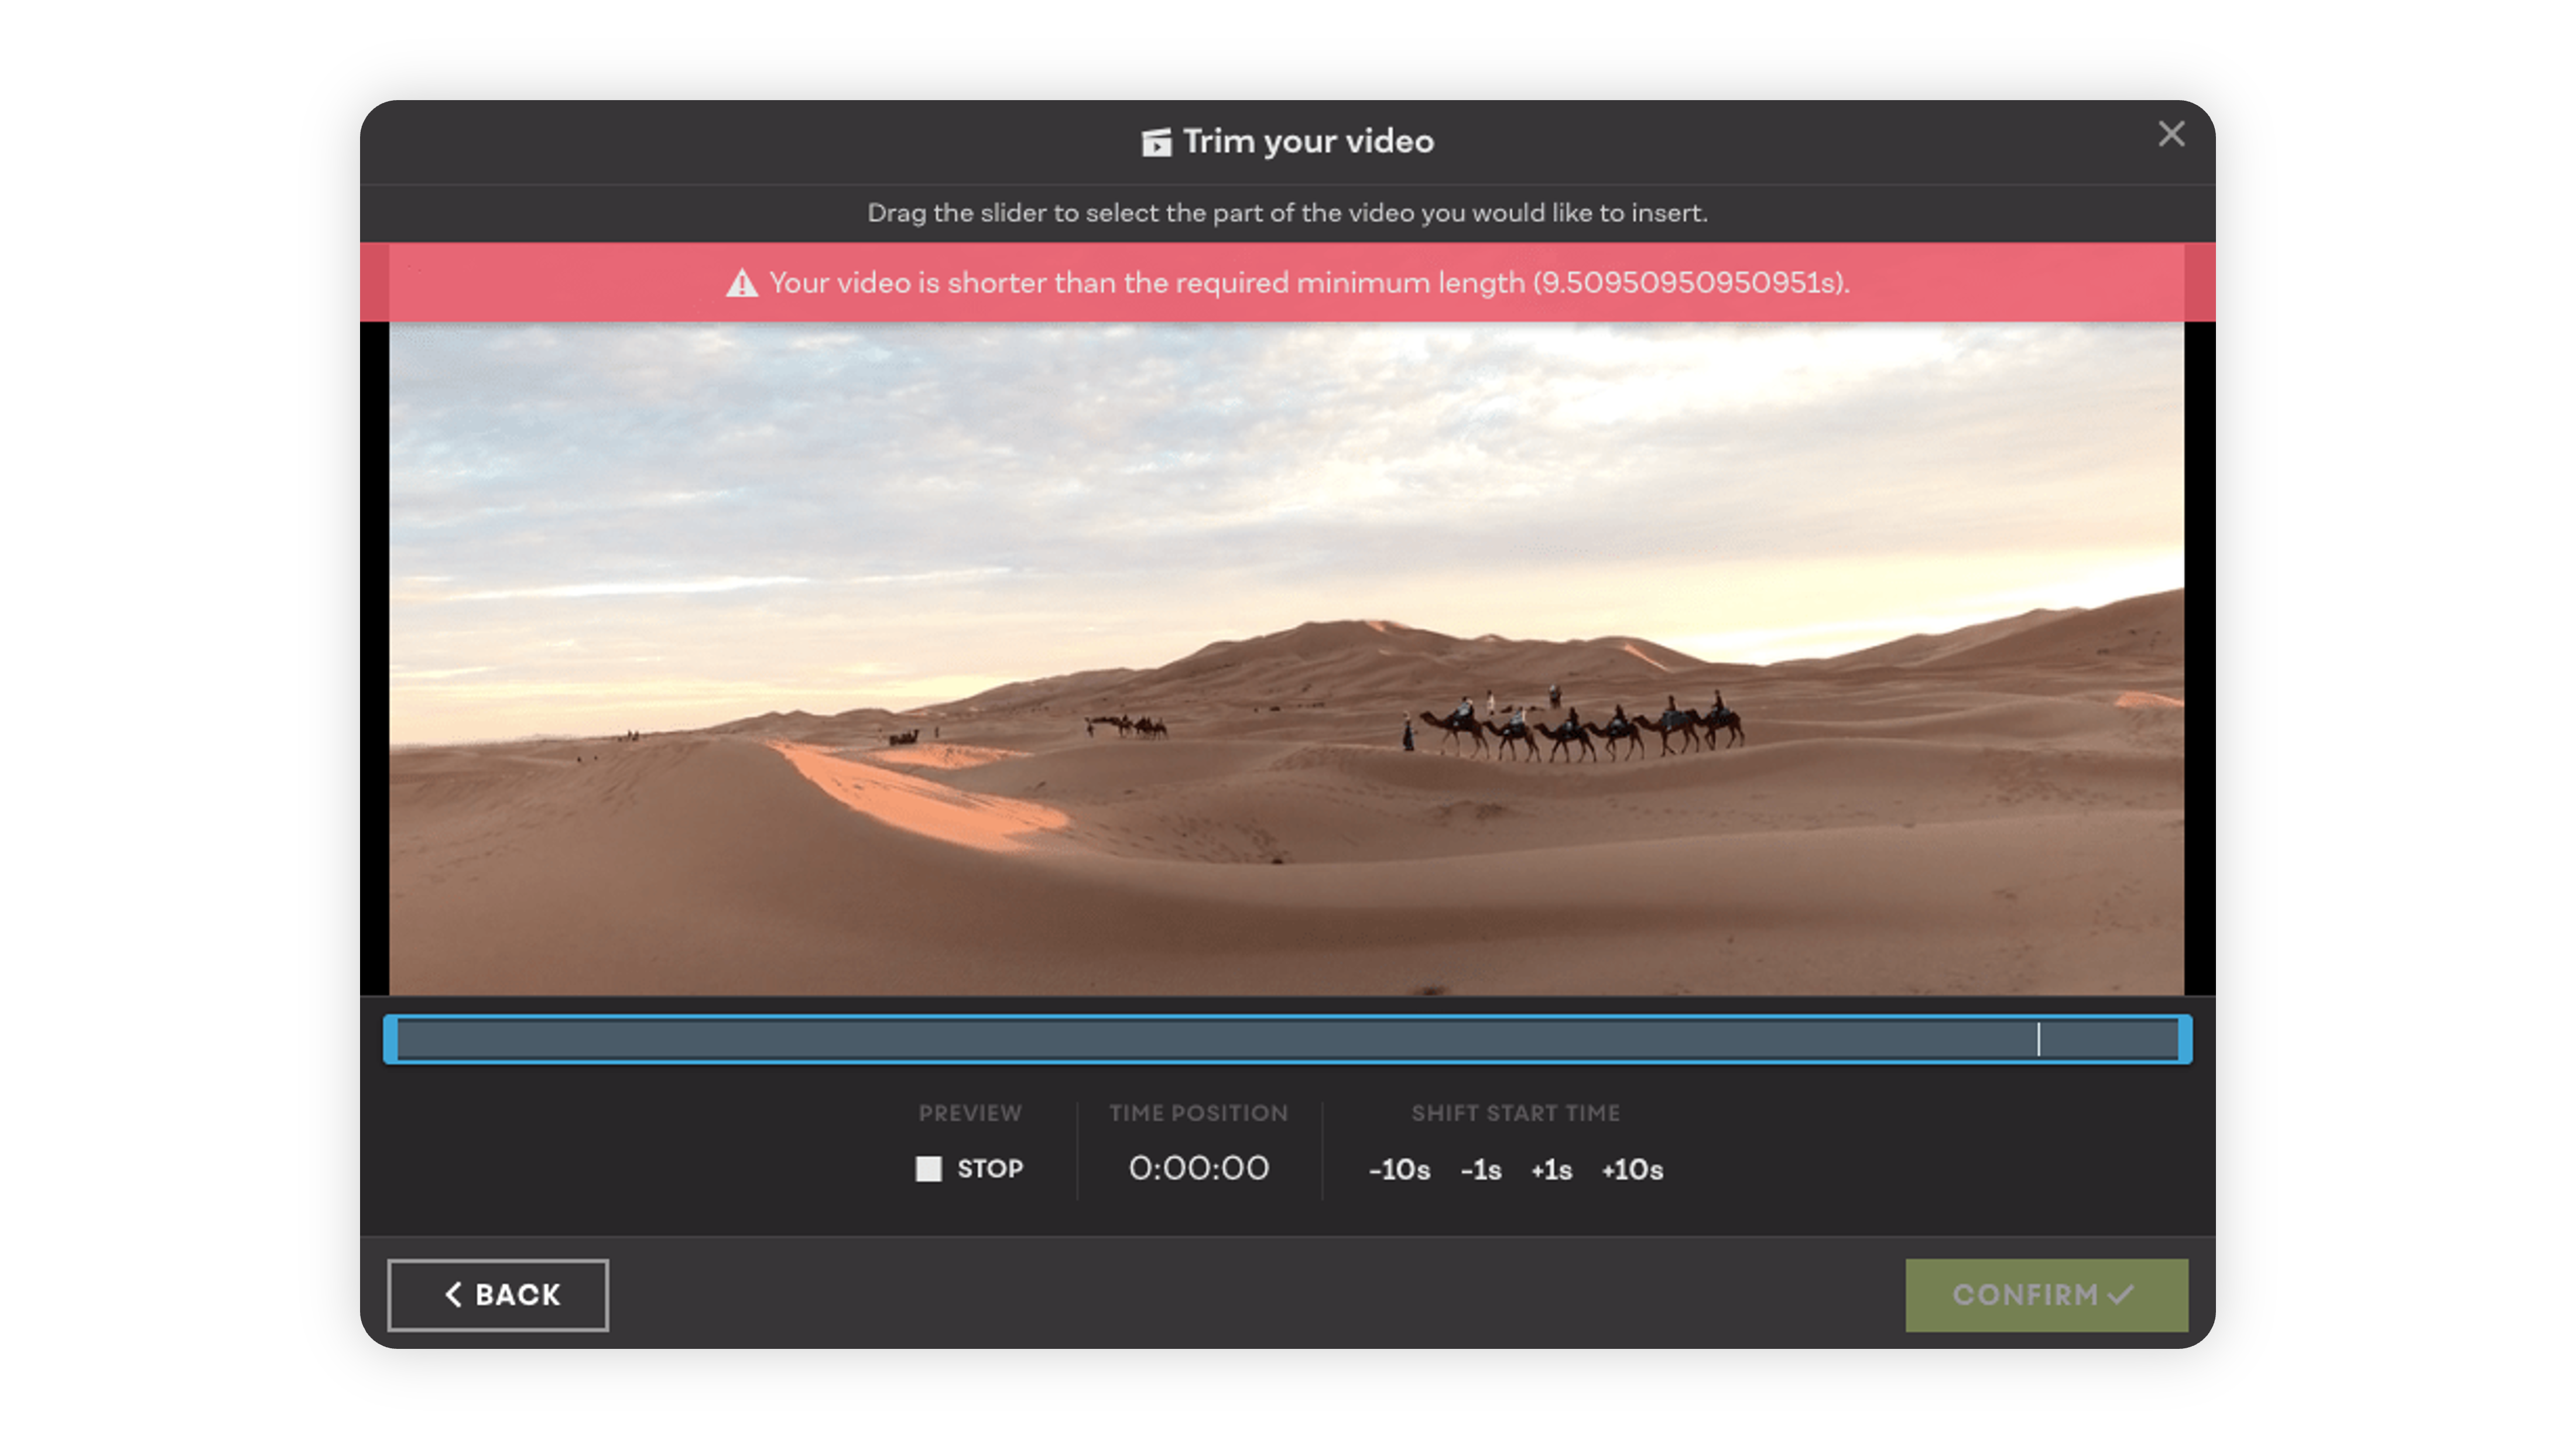 Note: The frame rate length may differ due to the uploaded user video’s frame rate and other technical circumstances. For video transitions, since it can make the video a bit shorter, we recommend to crop your footage longer.
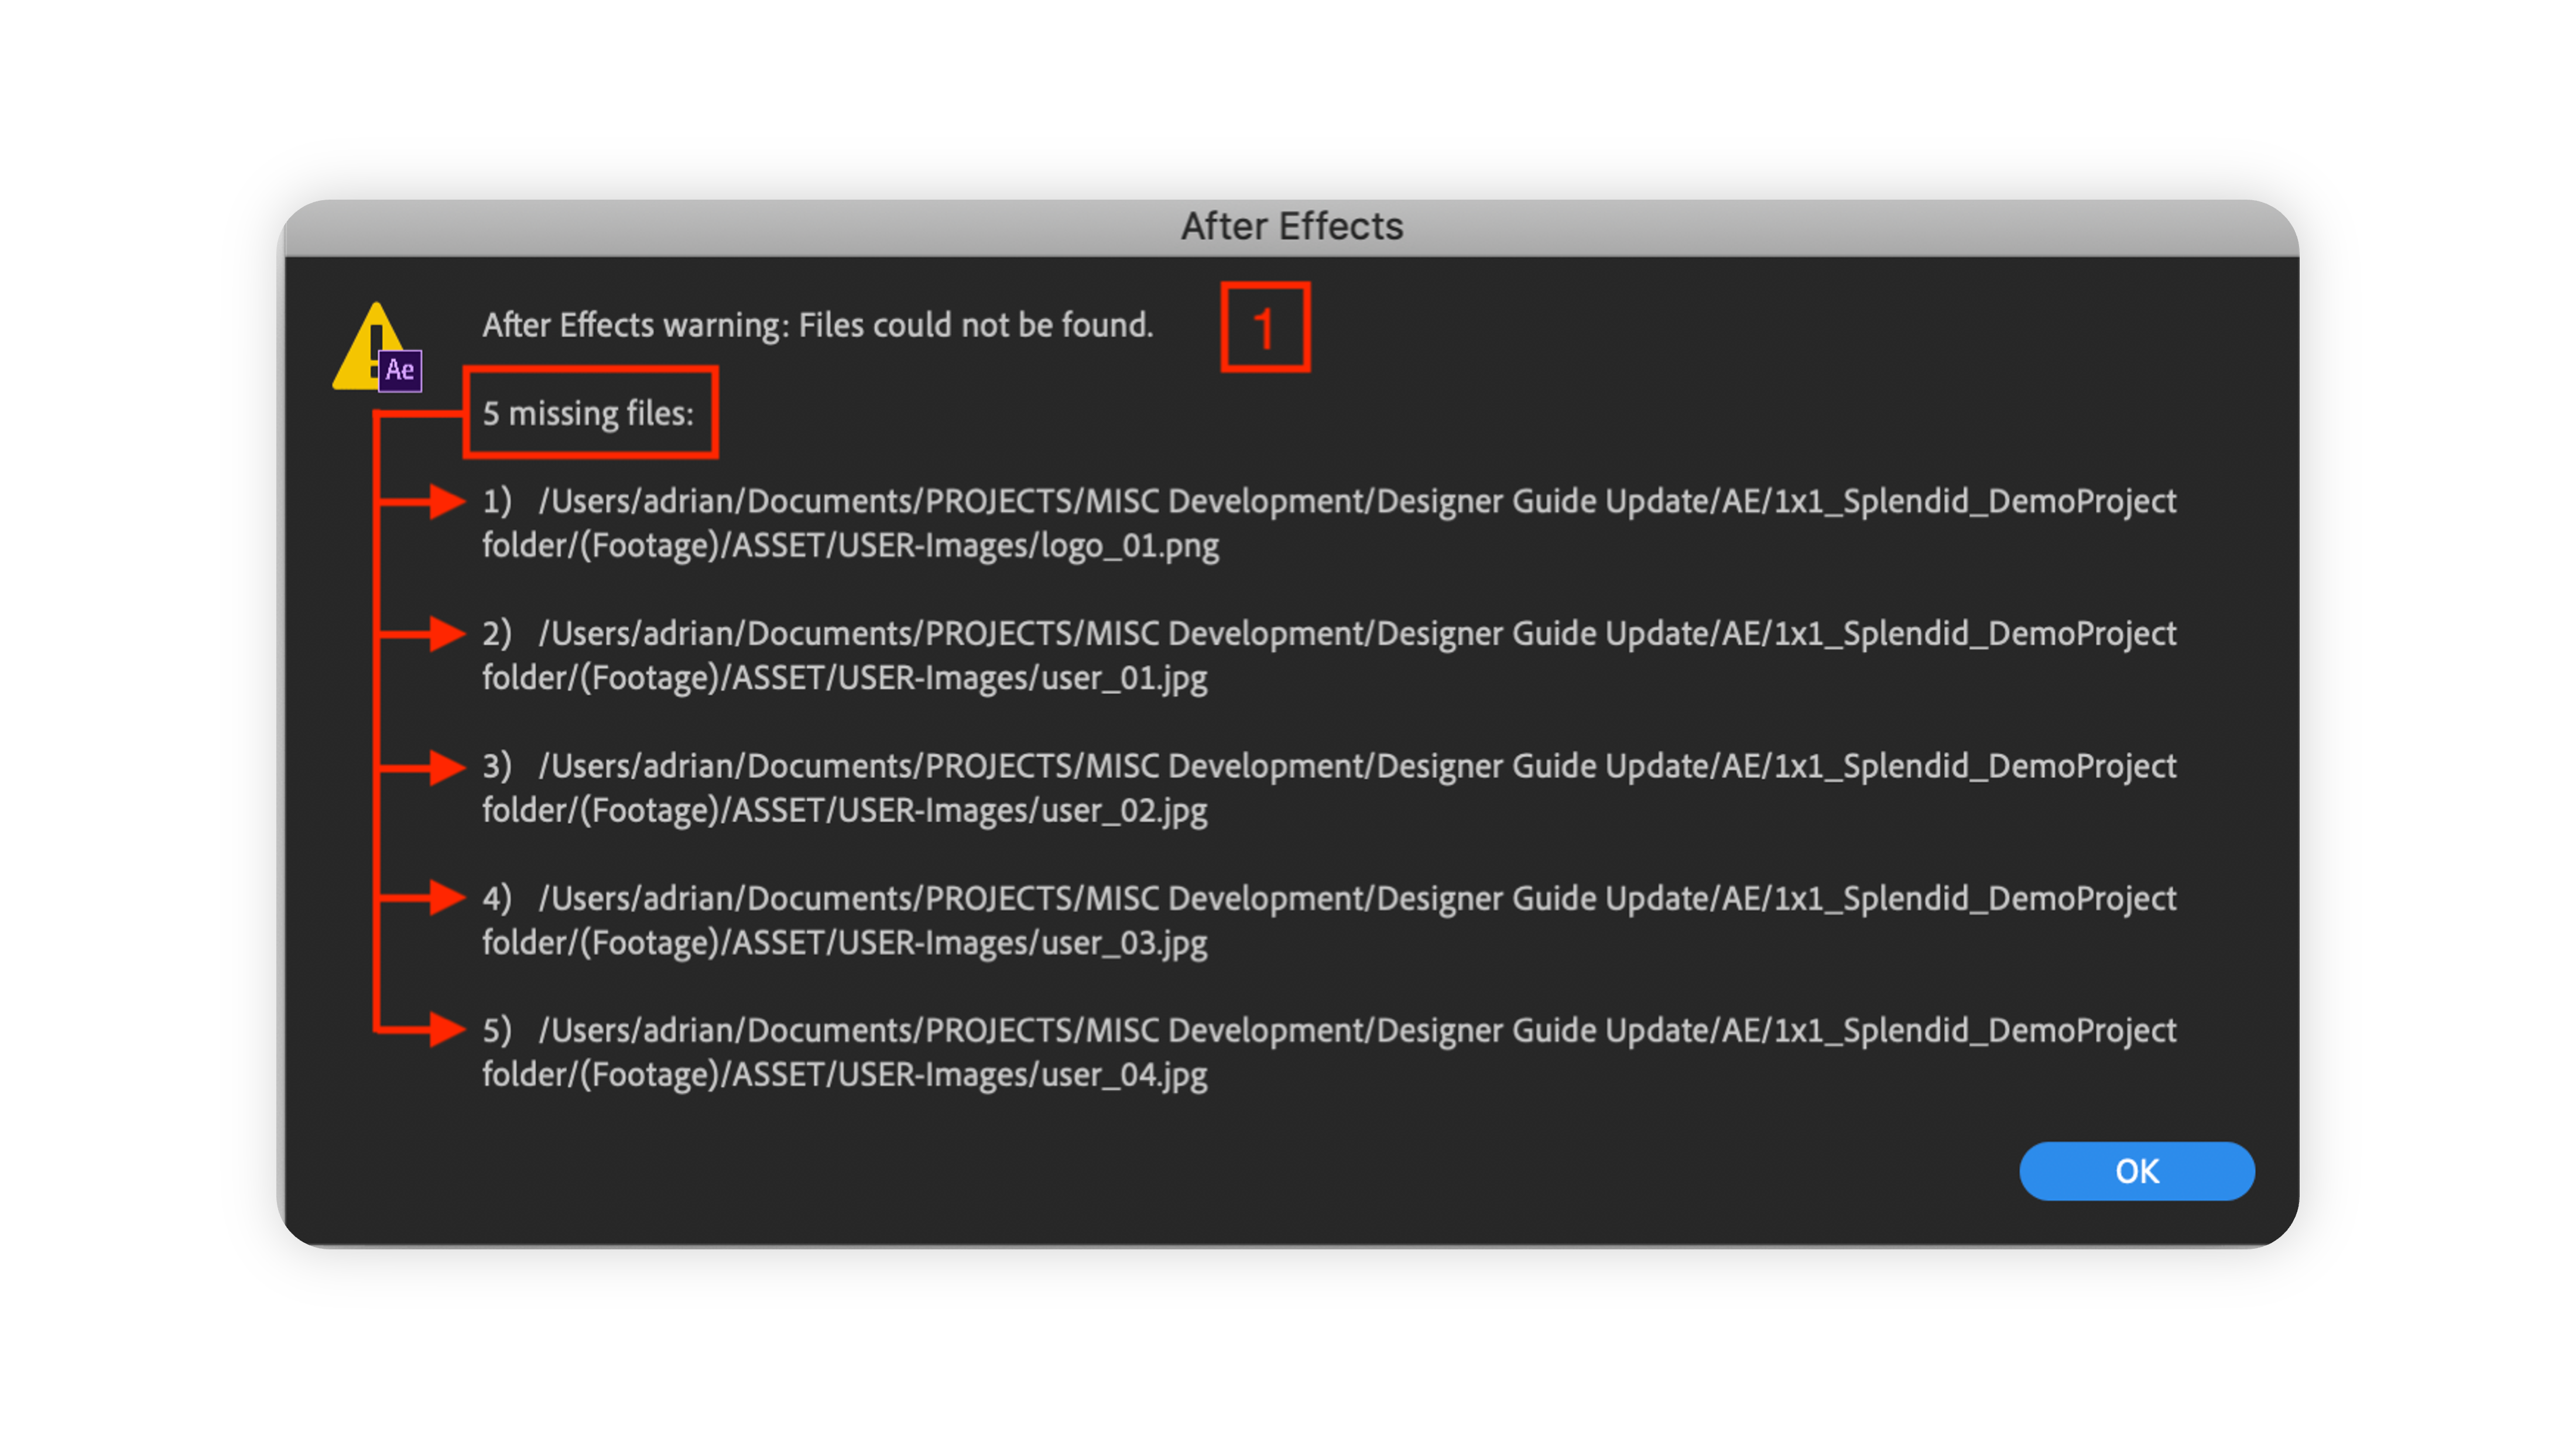
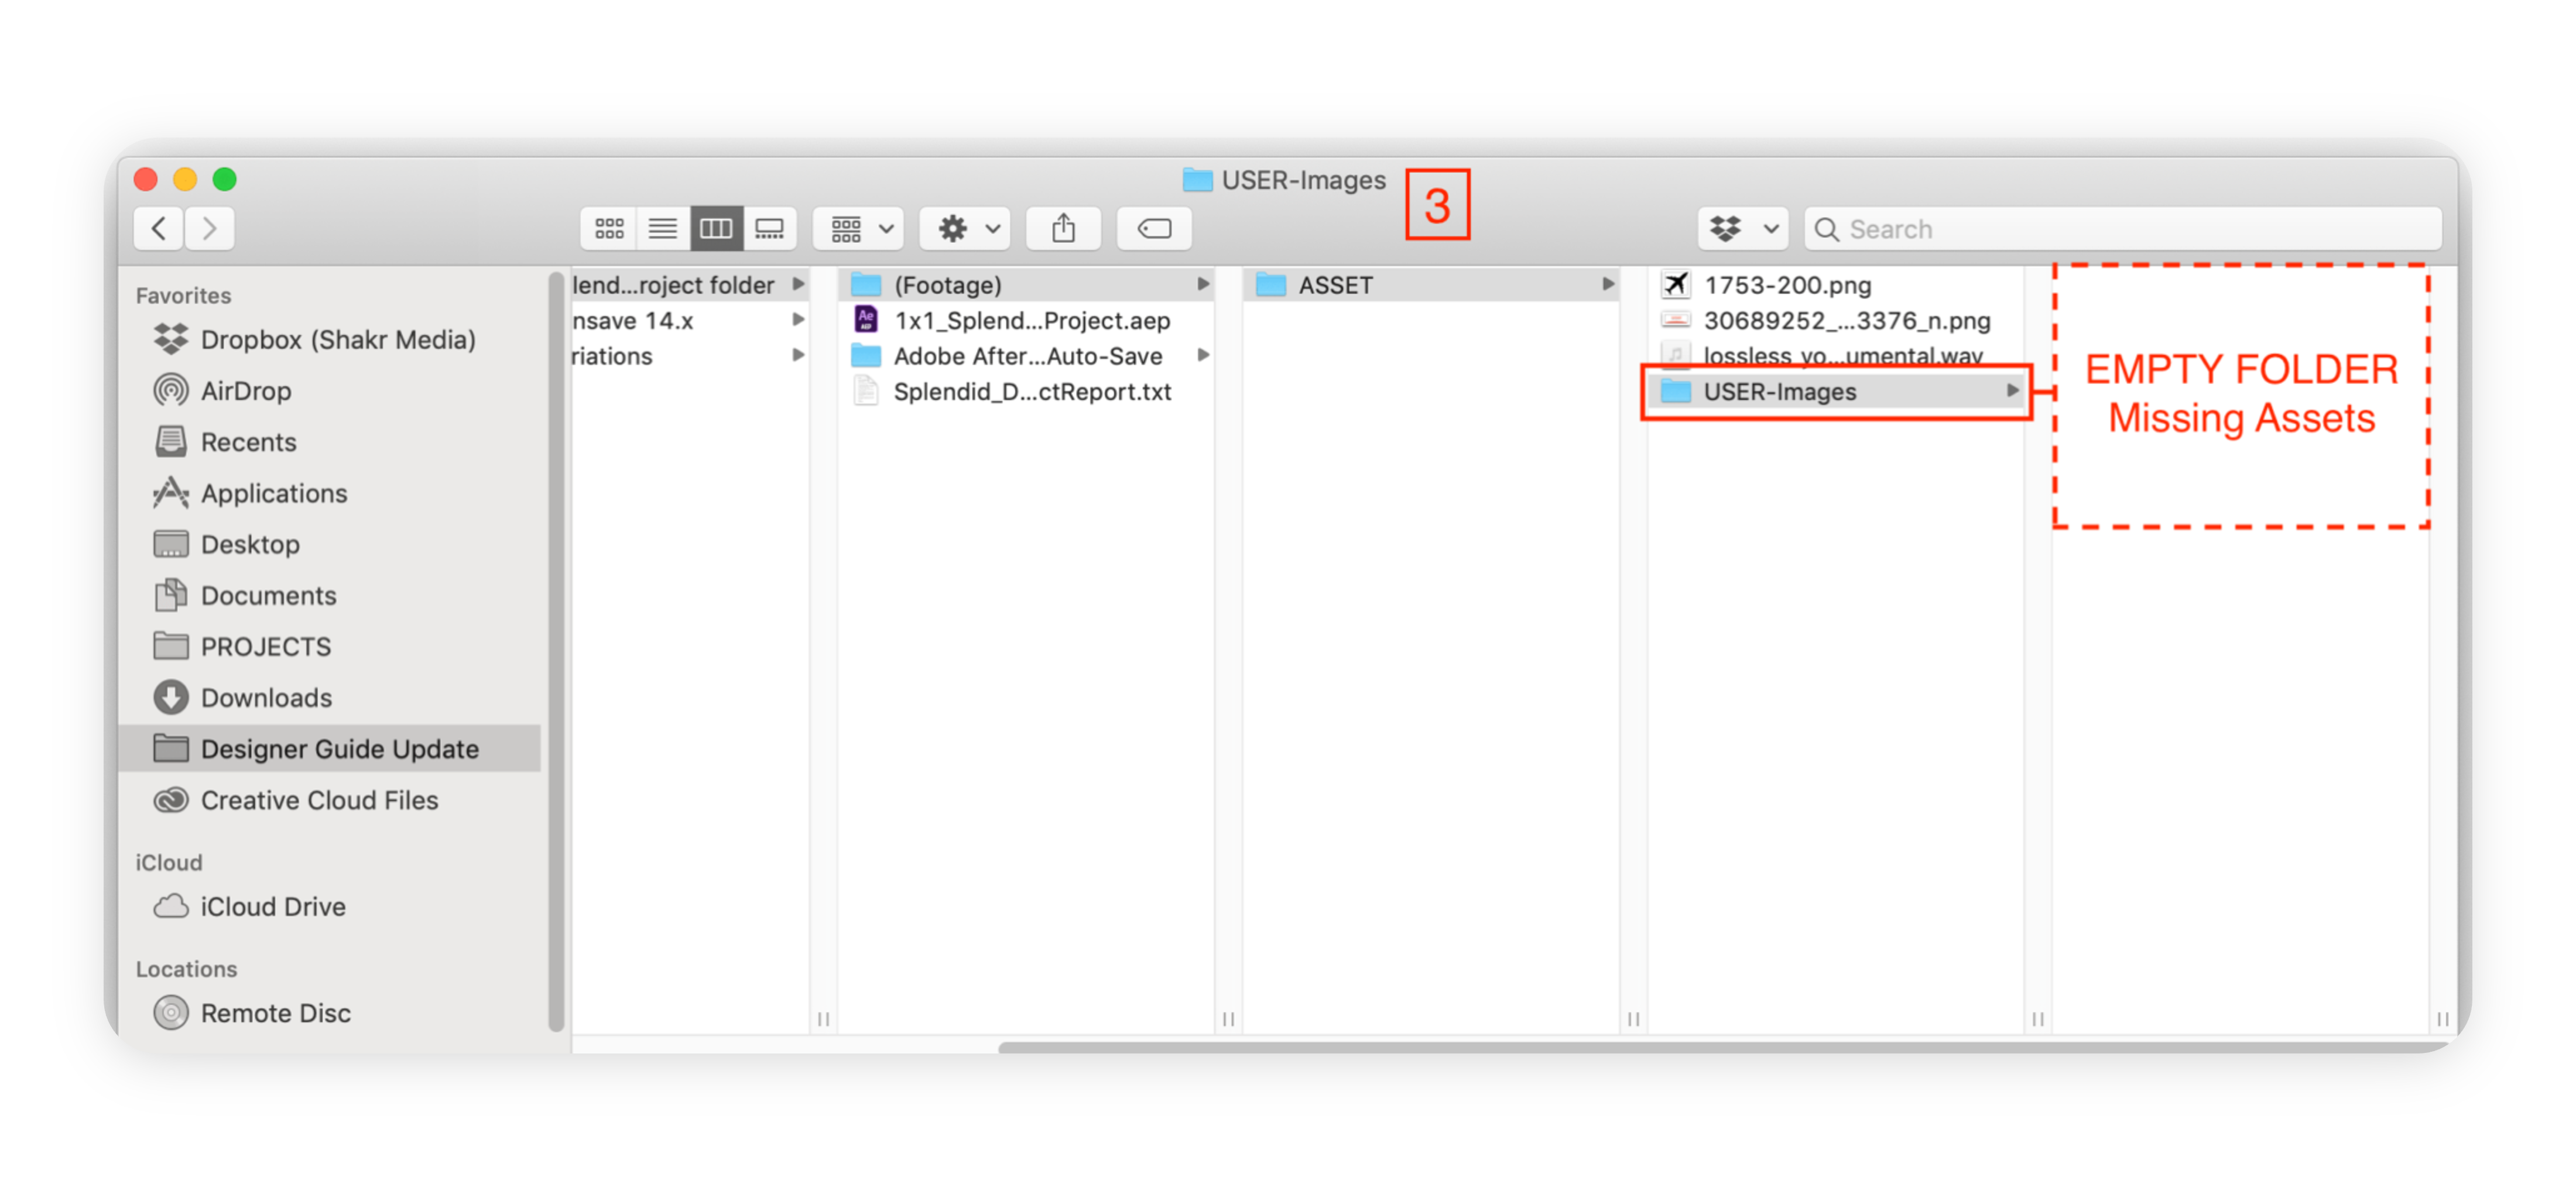
Missing Footage: Any missing footage in After Effects can cause issues with the automated system so be sure to properly collect the Project file (refer to Prepare for Upload) as well as deleting any unused footage.

Effects
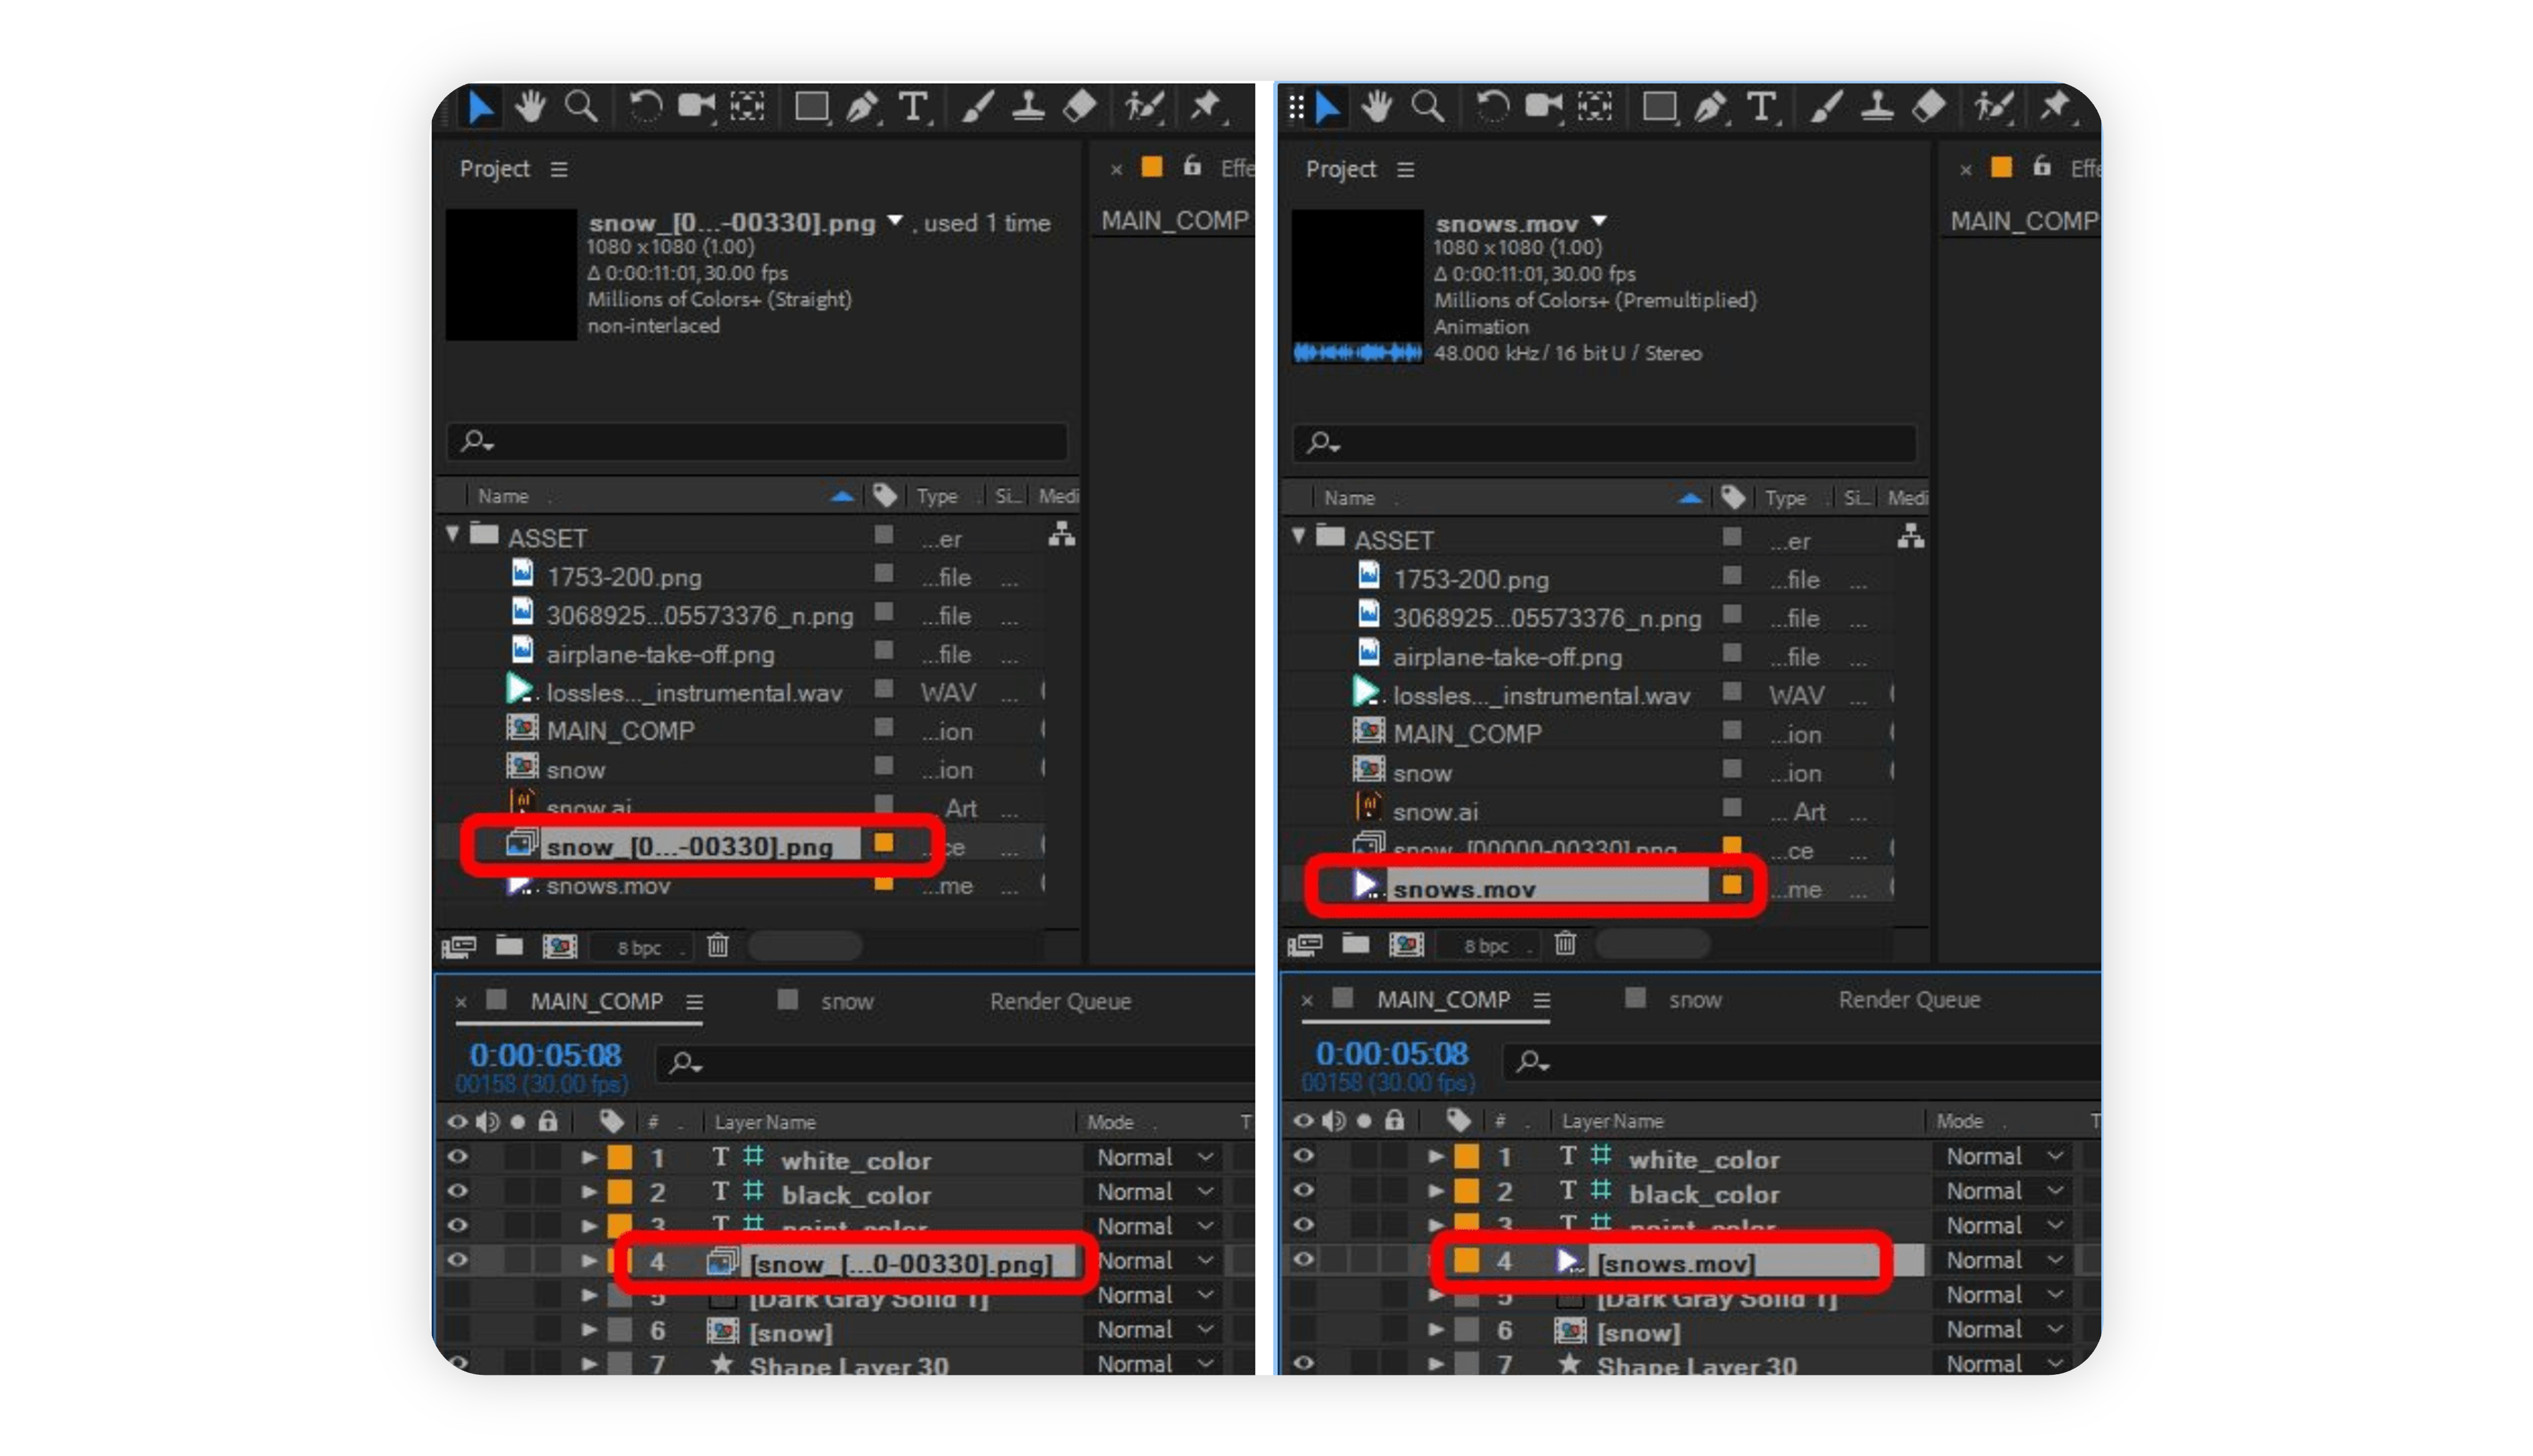
Commercial Effects: Creative templates that include effects that are not included in After Effects (any effects that you need to install) might result in rendering issues. For effects such as Optical Flare which will not be applied as User Contents but as a design source, export and render them as a JPEG/PNG sequence before use.
 Note:You cannot use plugin effects in the Platform.
Next, Render the effects as MOV or PNG sequence with channel RGB-Alpha.
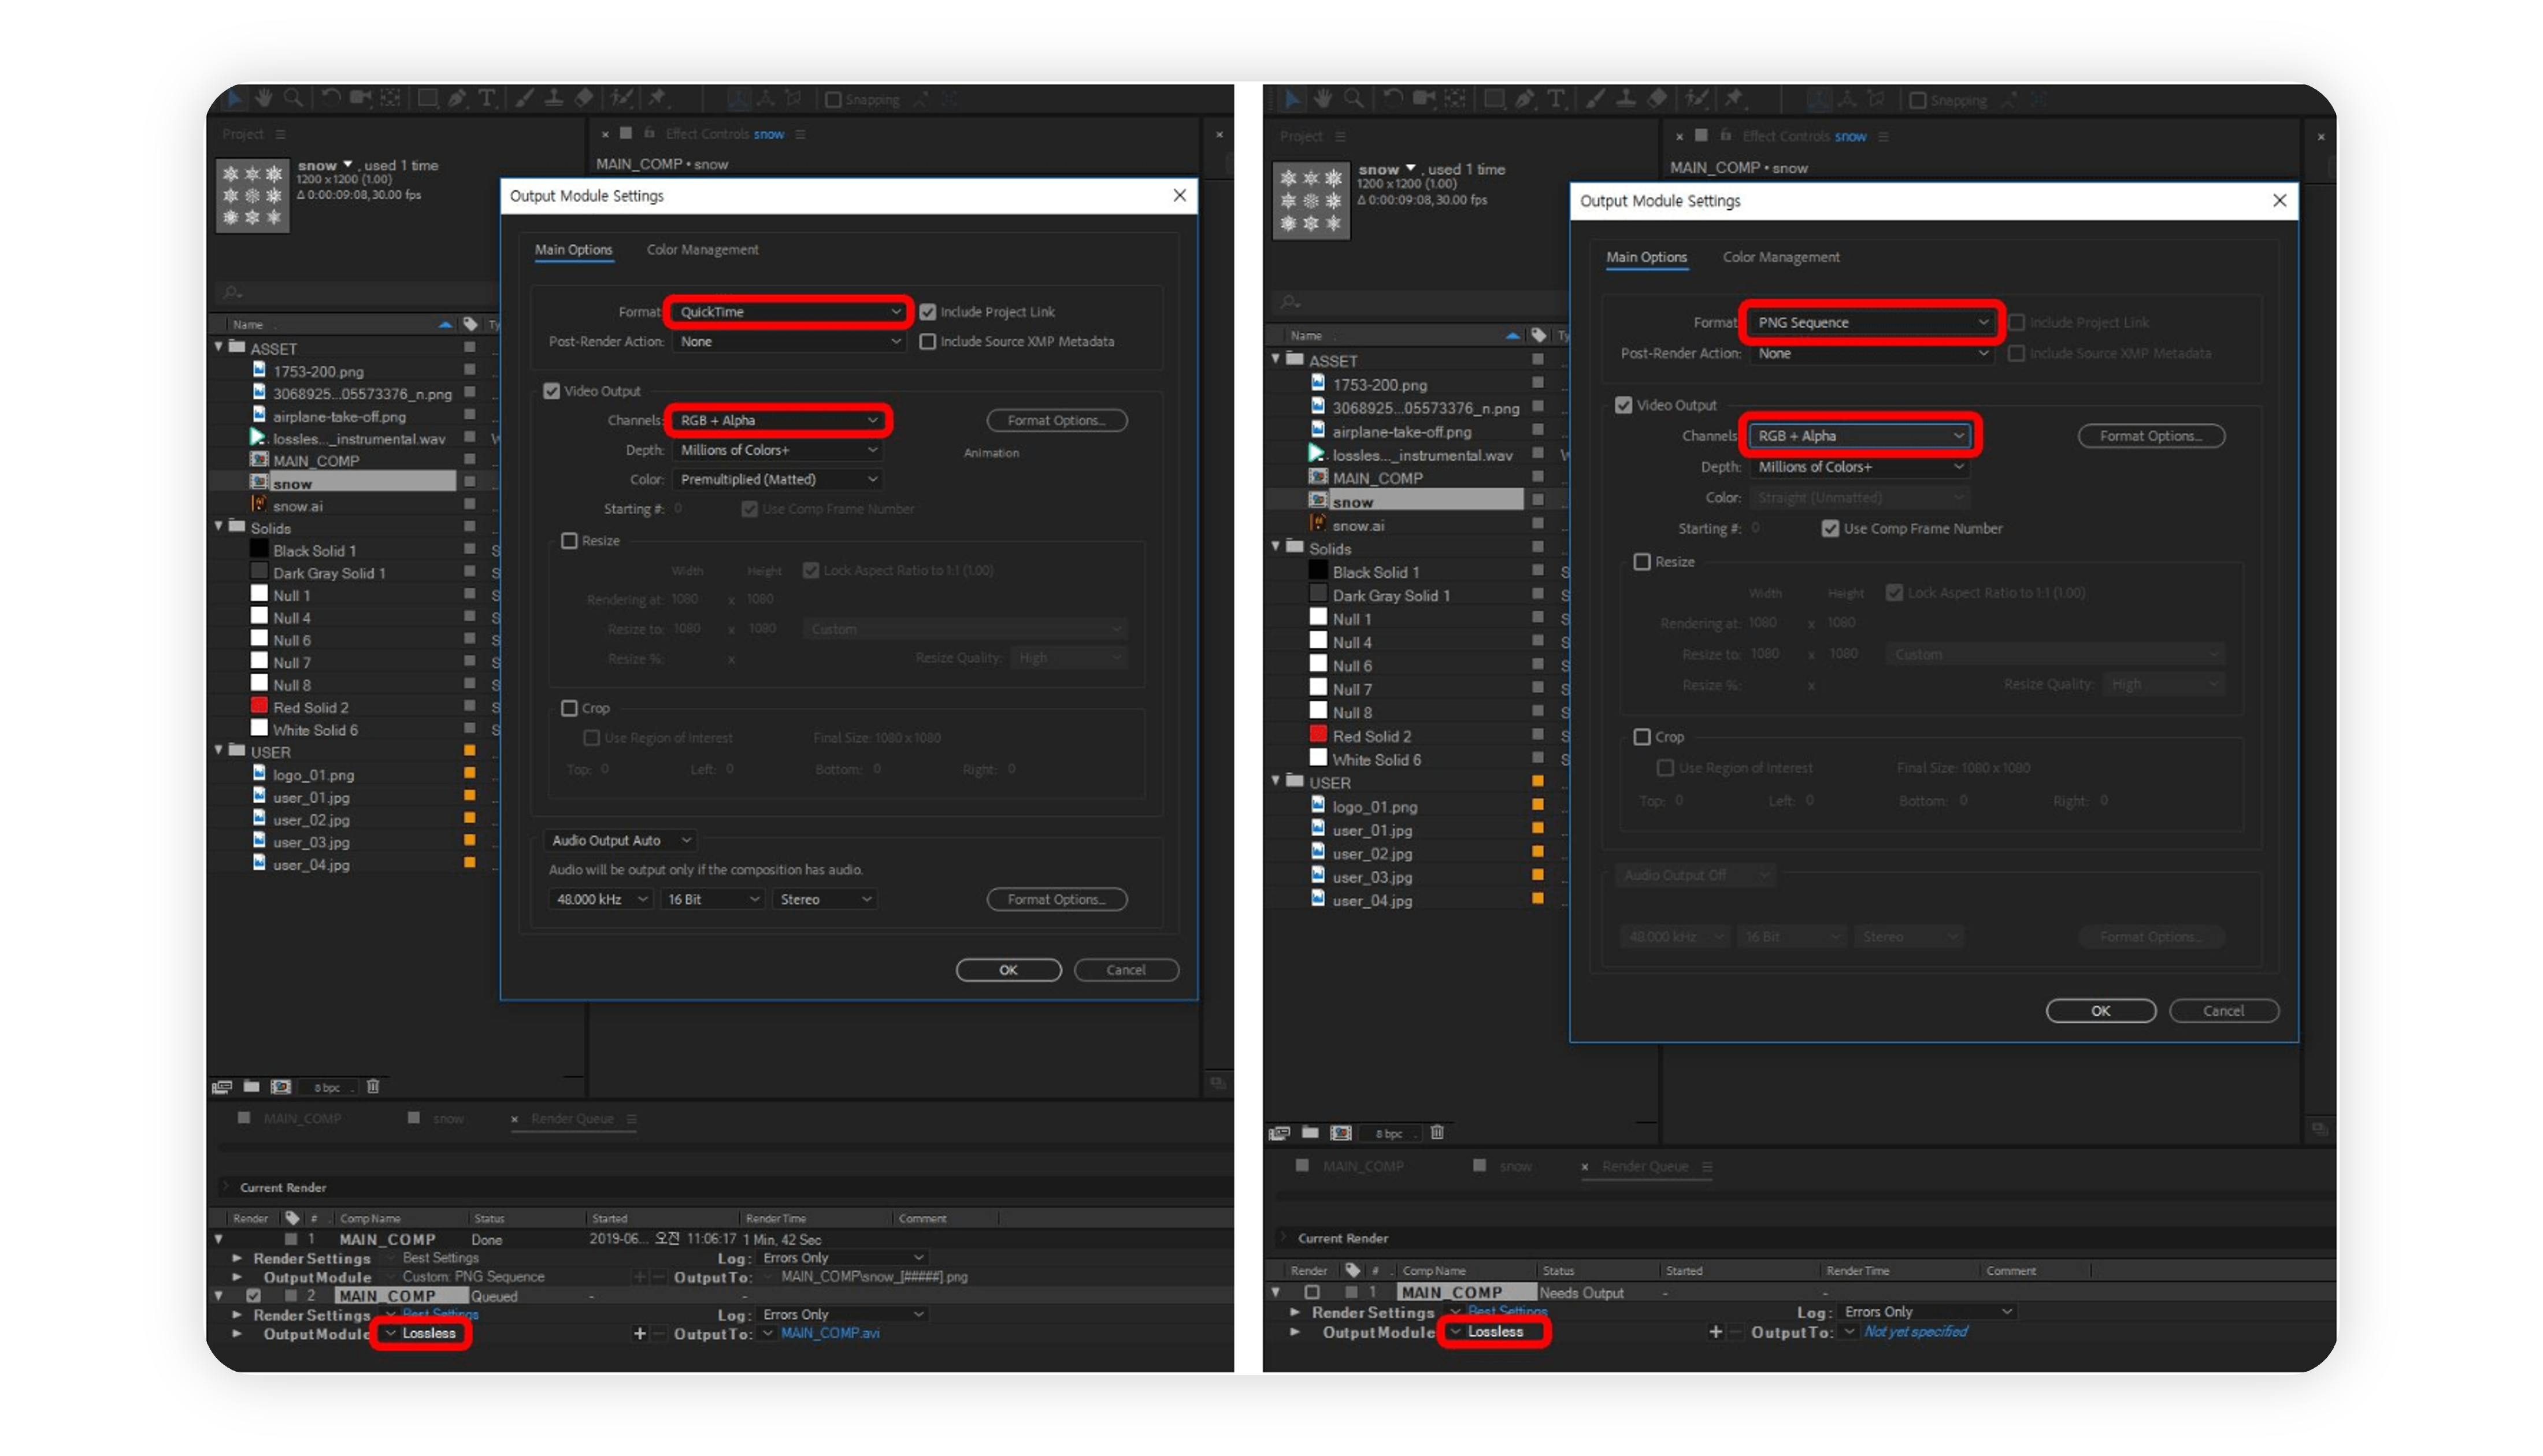
Replace MOV or PNG sequence and remove the original plugin effect in After Effects.
Effects that may cause issues on the Platform: Avoid using the effects mentioned below, since they might cause unexpected technical issues in the user’s video.
Time Remap
CC Line Sweep
3D Layer, Fancy Effects: Heavy effects such as 3D layer and blur effects will add extra rendering time for the user’s video. Please avoid using heavy effects or go through a pre-rendering process. (User Contents should not be pre-rendered).
Note: The creative template’s render time should be under 5 minutes.
Texts
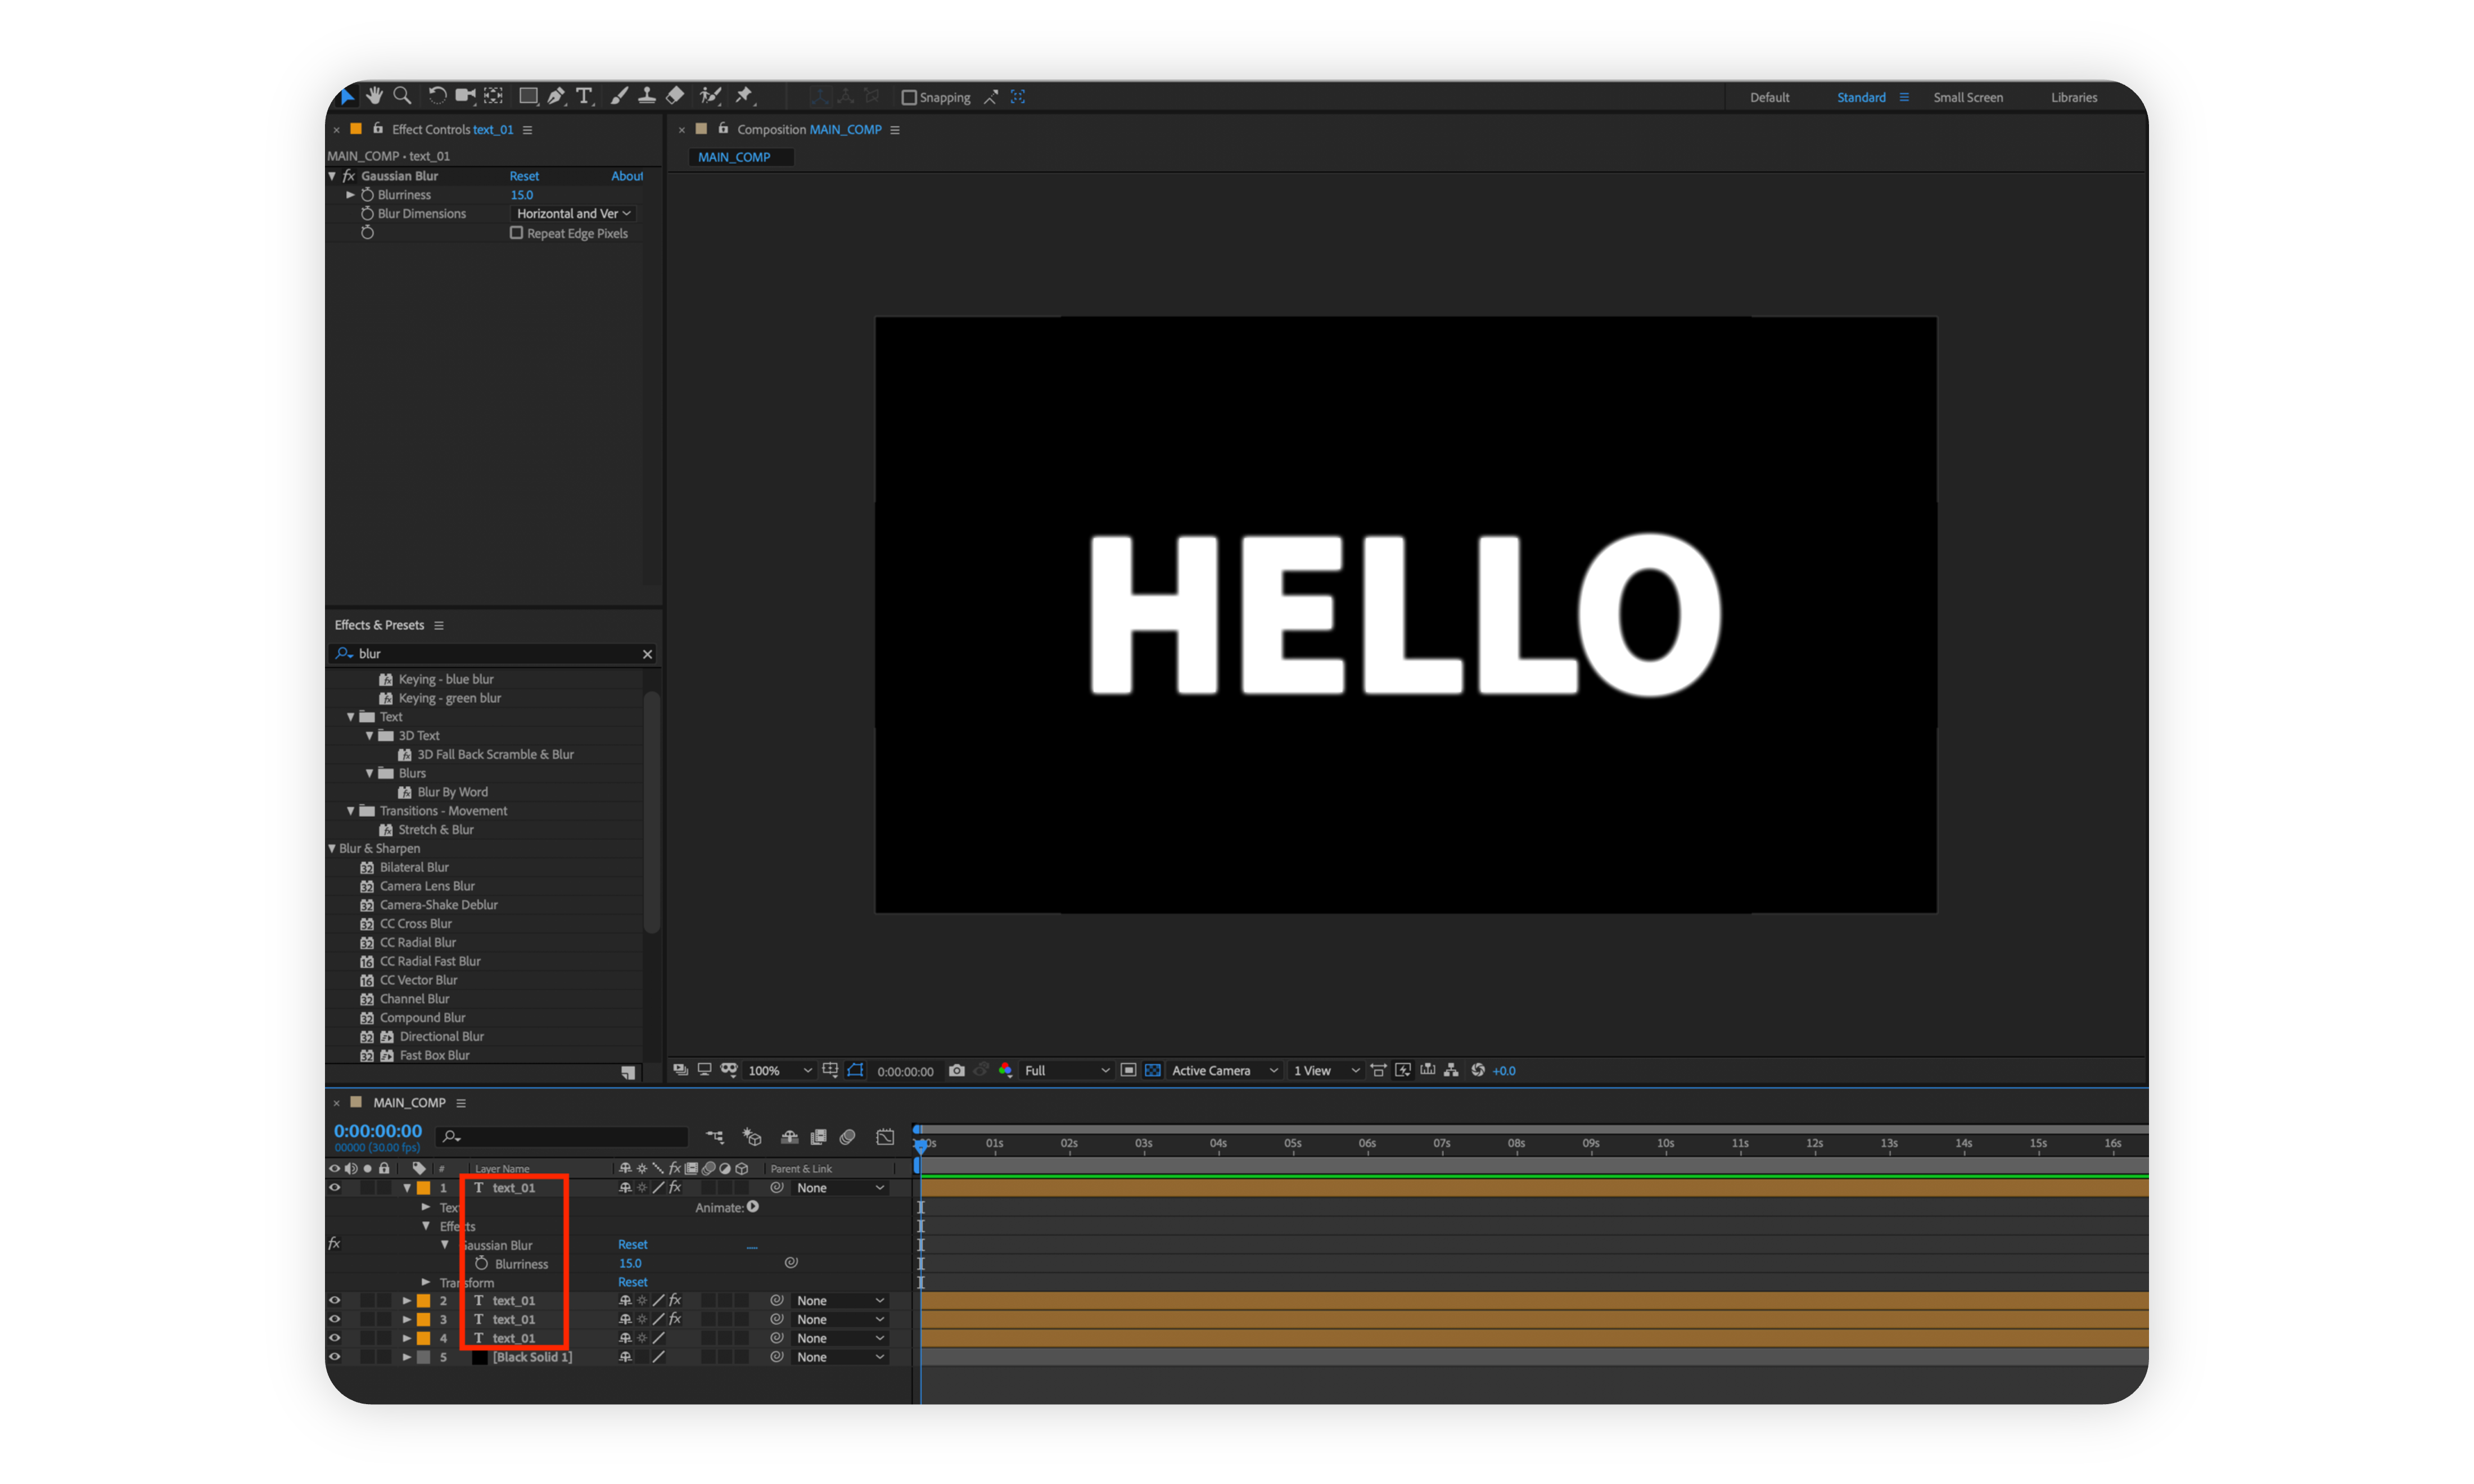
The Platform supports AE single line Point text, Paragraph text, and Platform customized Pseudo-Paragraph text.
![]() Note: Please remove any manual line-break in a text layer. Make sure each text layer can have only one text style & format.
Note: Please remove any manual line-break in a text layer. Make sure each text layer can have only one text style & format.
For point text with multiple lines of copy, make each text line as a separate layer. By setting the same layer name to multiple text layers, the system will recognize them as one text. When a user inserts a text to one of them, other layers will automatically fill in the same content.
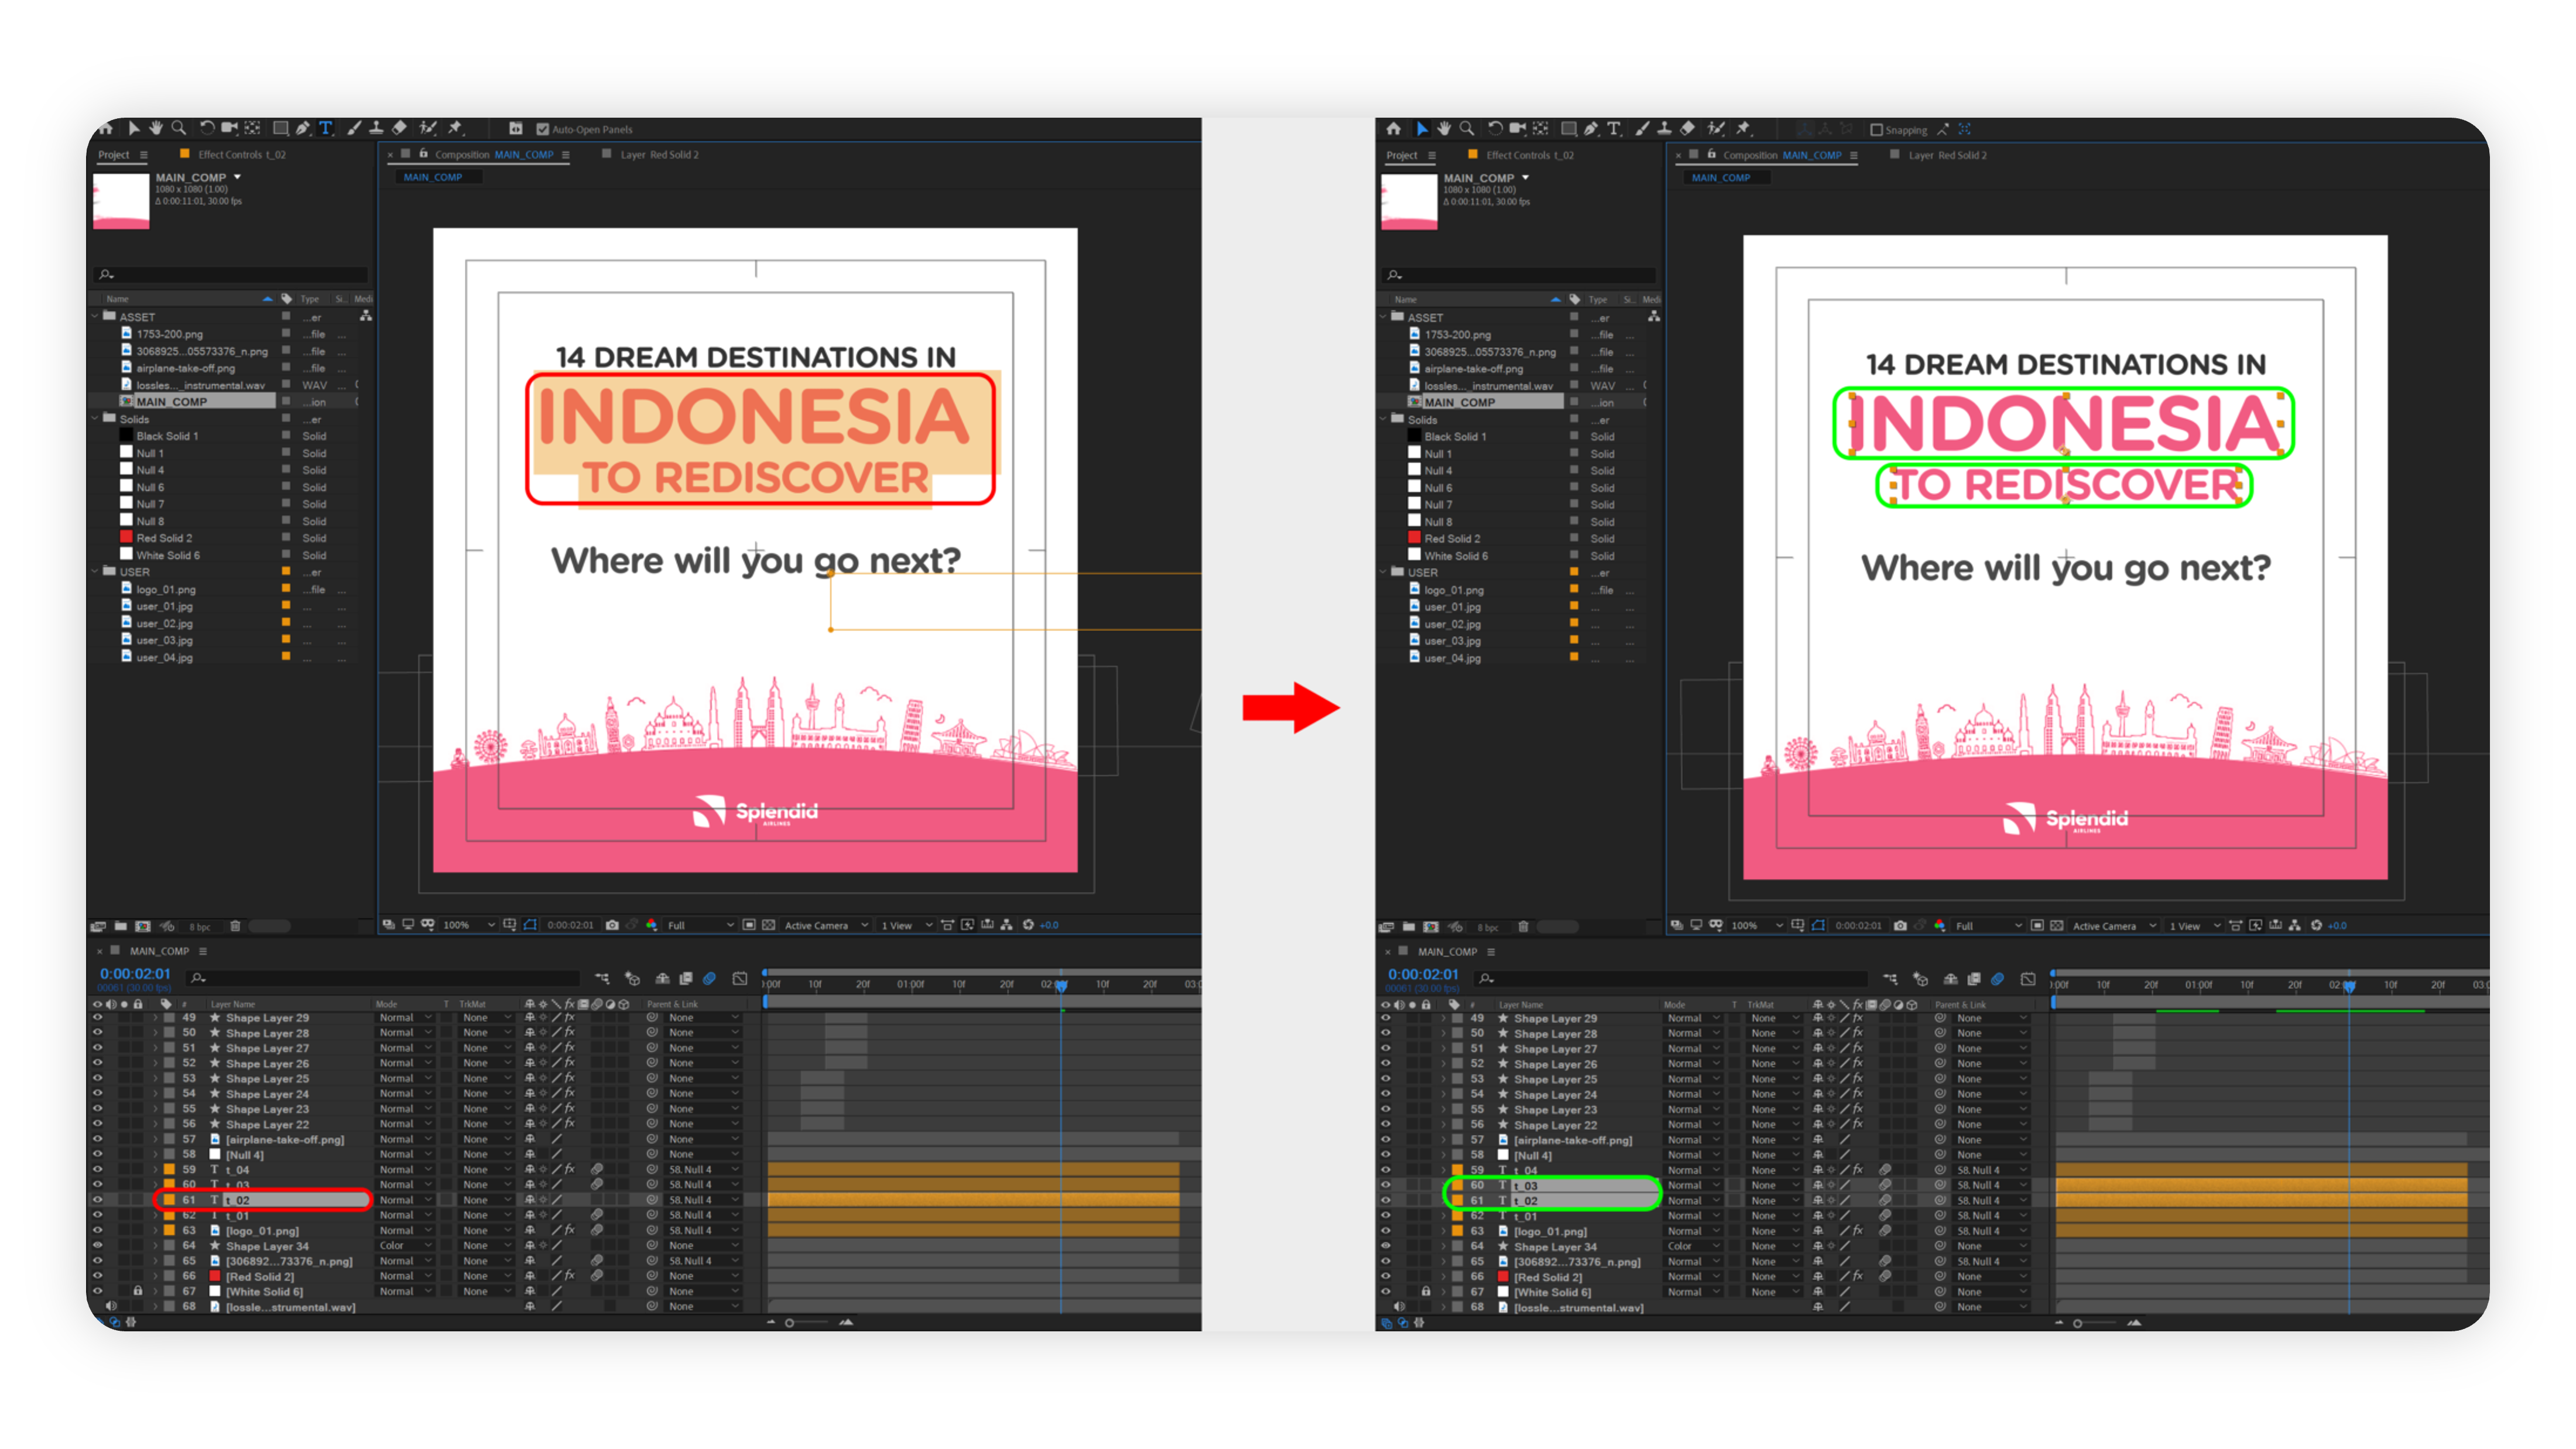
Text layers should have the same layer name if they’re the same.
Preparing for Upload
Follow the guide below to properly collect the After Effects project, down save to supported versions and compress into one file. Then you can upload that AE project file to the Platform.
Convert into supported versions: The current Platform Version supports the following After Effect versions:
Note: Shakr supports Adobe After Effects version up to 2022(version 22.x). Please use an old version of After Effects to ensure best compatibility.Alternatively, you can use “File > Save As > Save a Copy (22.x)” on the latest version of After Effects to export project files in compatible format.
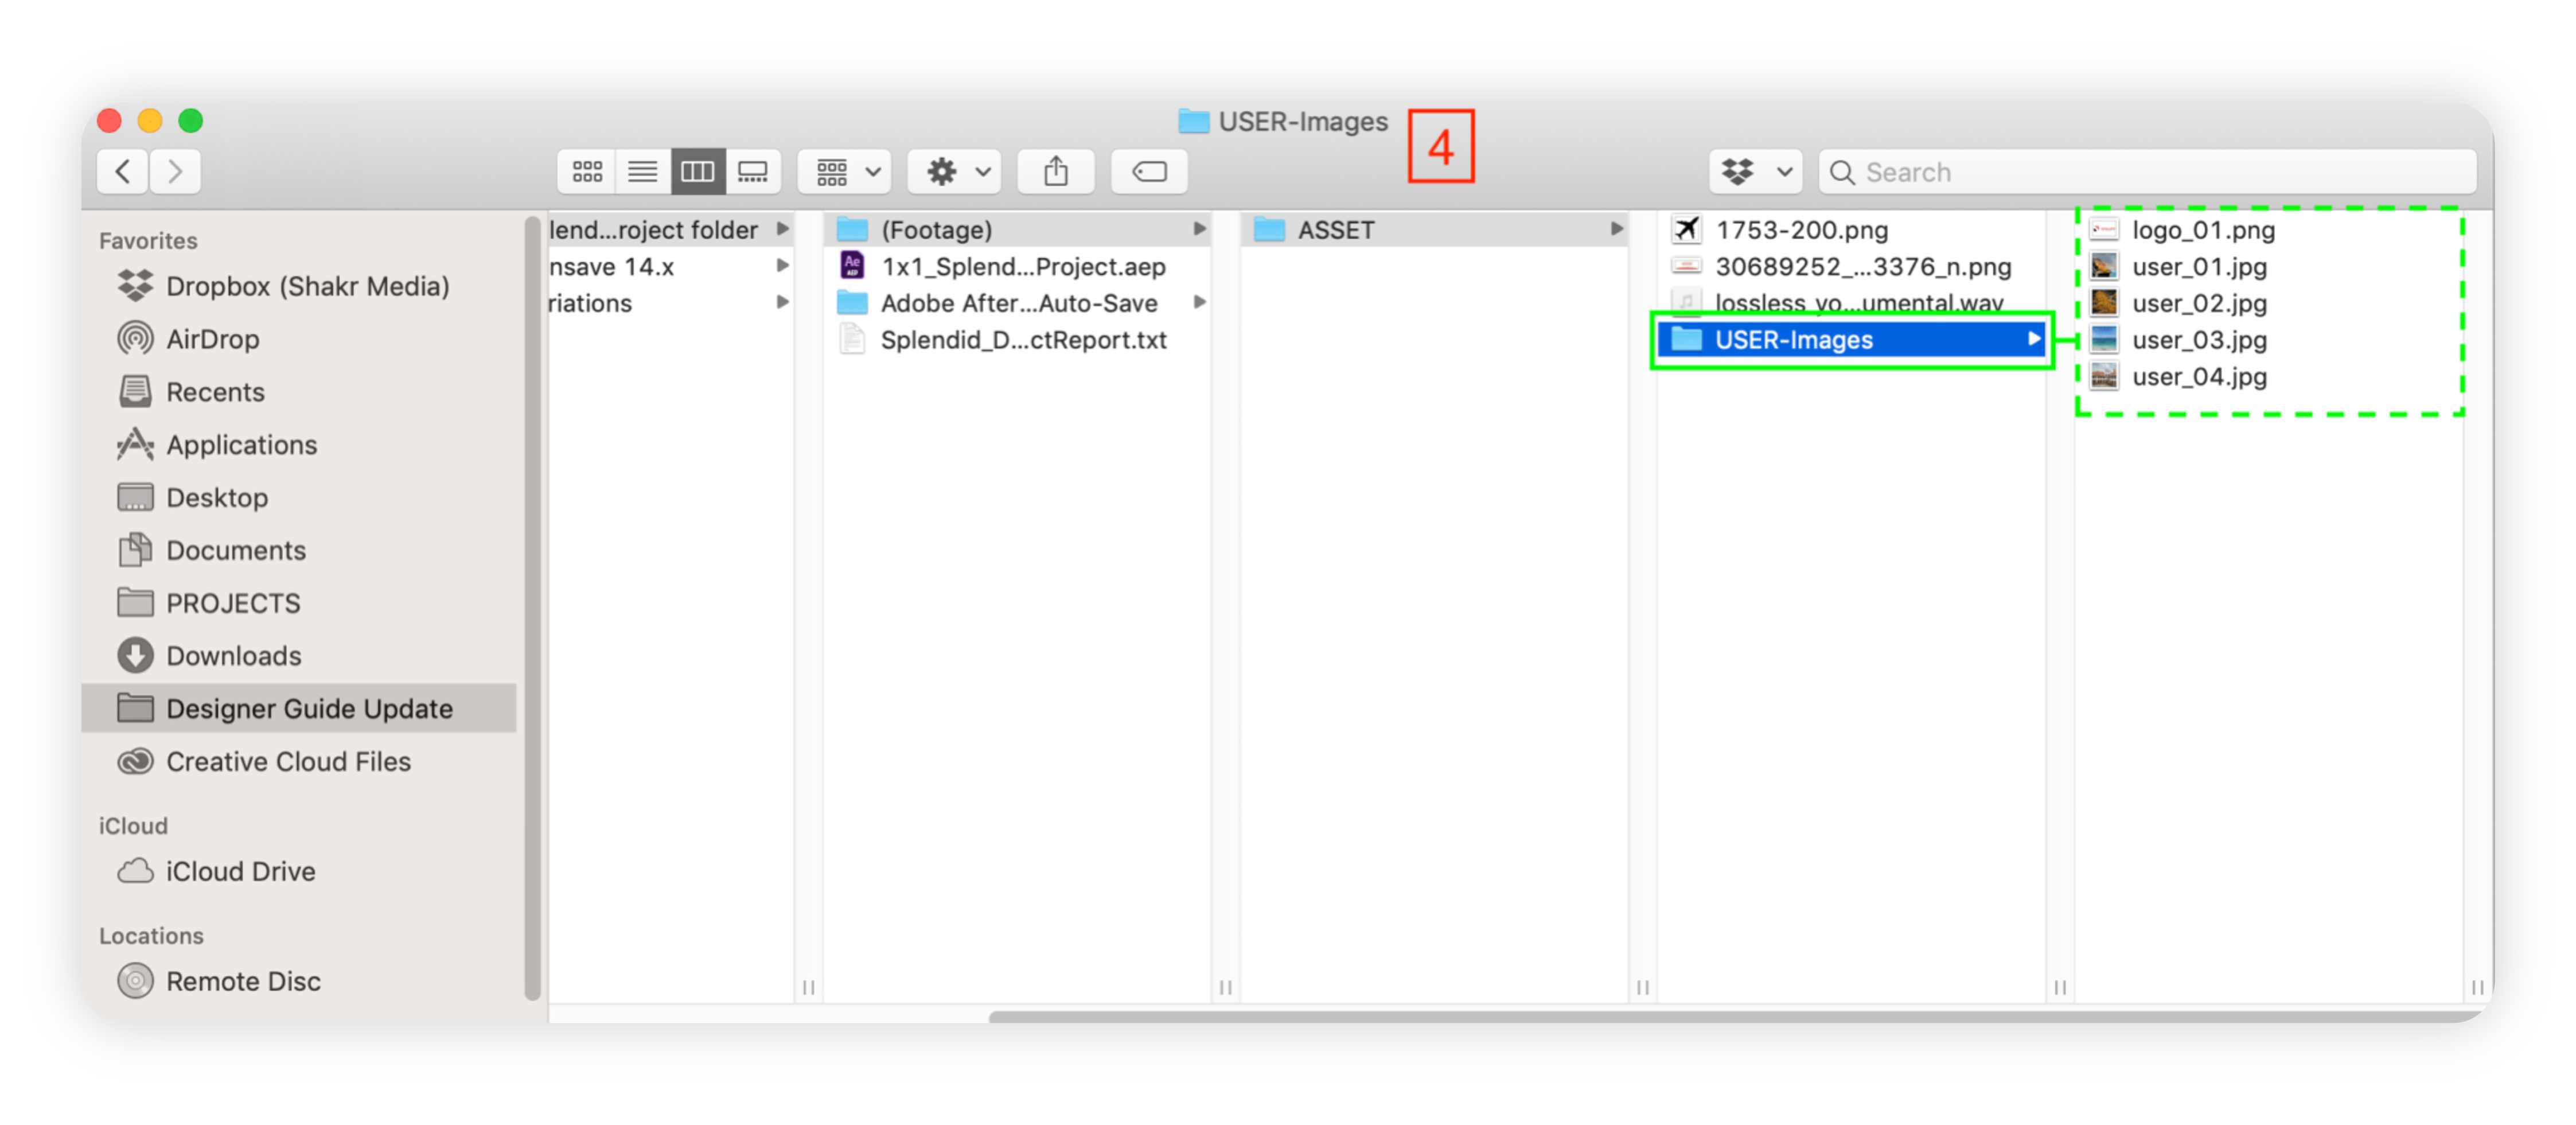
Collect the After Effects Project: To allow access to your creative templates, save as a new project file by selecting [File]>[Dependencies]>[Collect Files…].
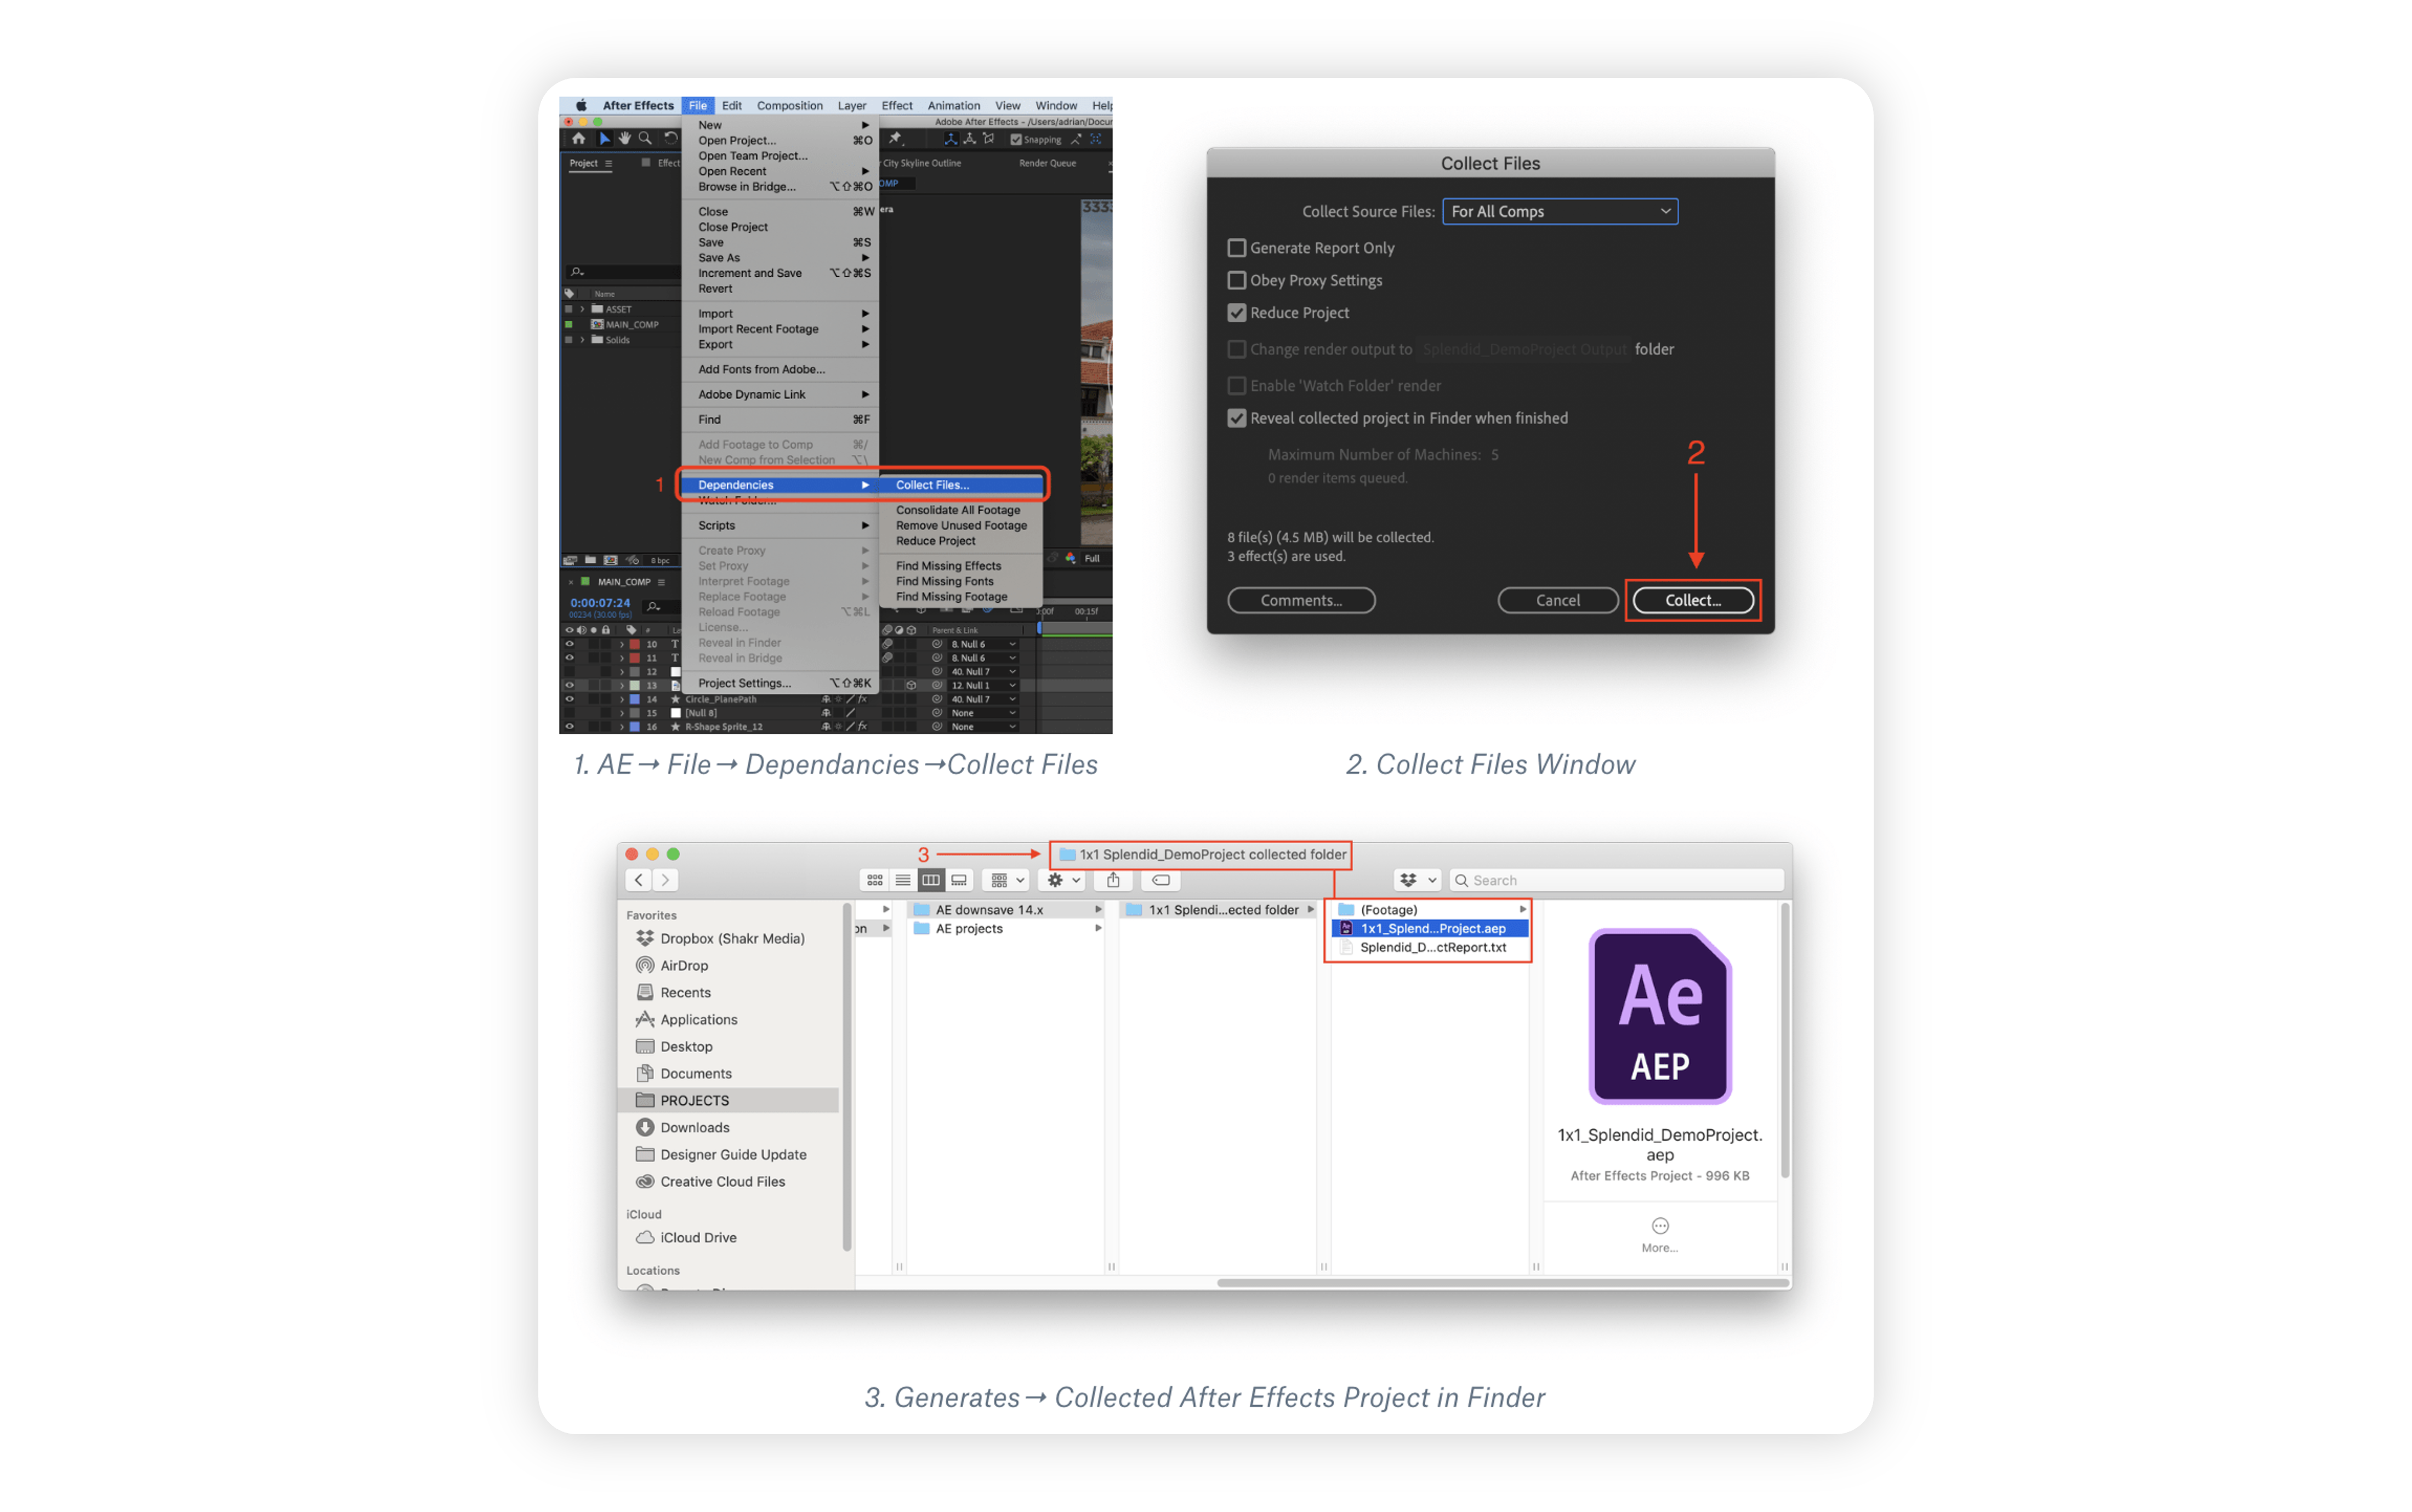
A properly collected After Effects project will generate a new [ProjectName] collected folder, which contains the Reduced .aep file, a text report file of the project and a Footage folder holding any assets (photos, videos, logos, etc) used in the creative templates.
Note: If you need to edit your creative templates, you can open and edit the collected project file. (No need to re-collect the project.) Be sure to open the new, generated Ae project moving forward in the process to avoid any missing footage or connection errors.
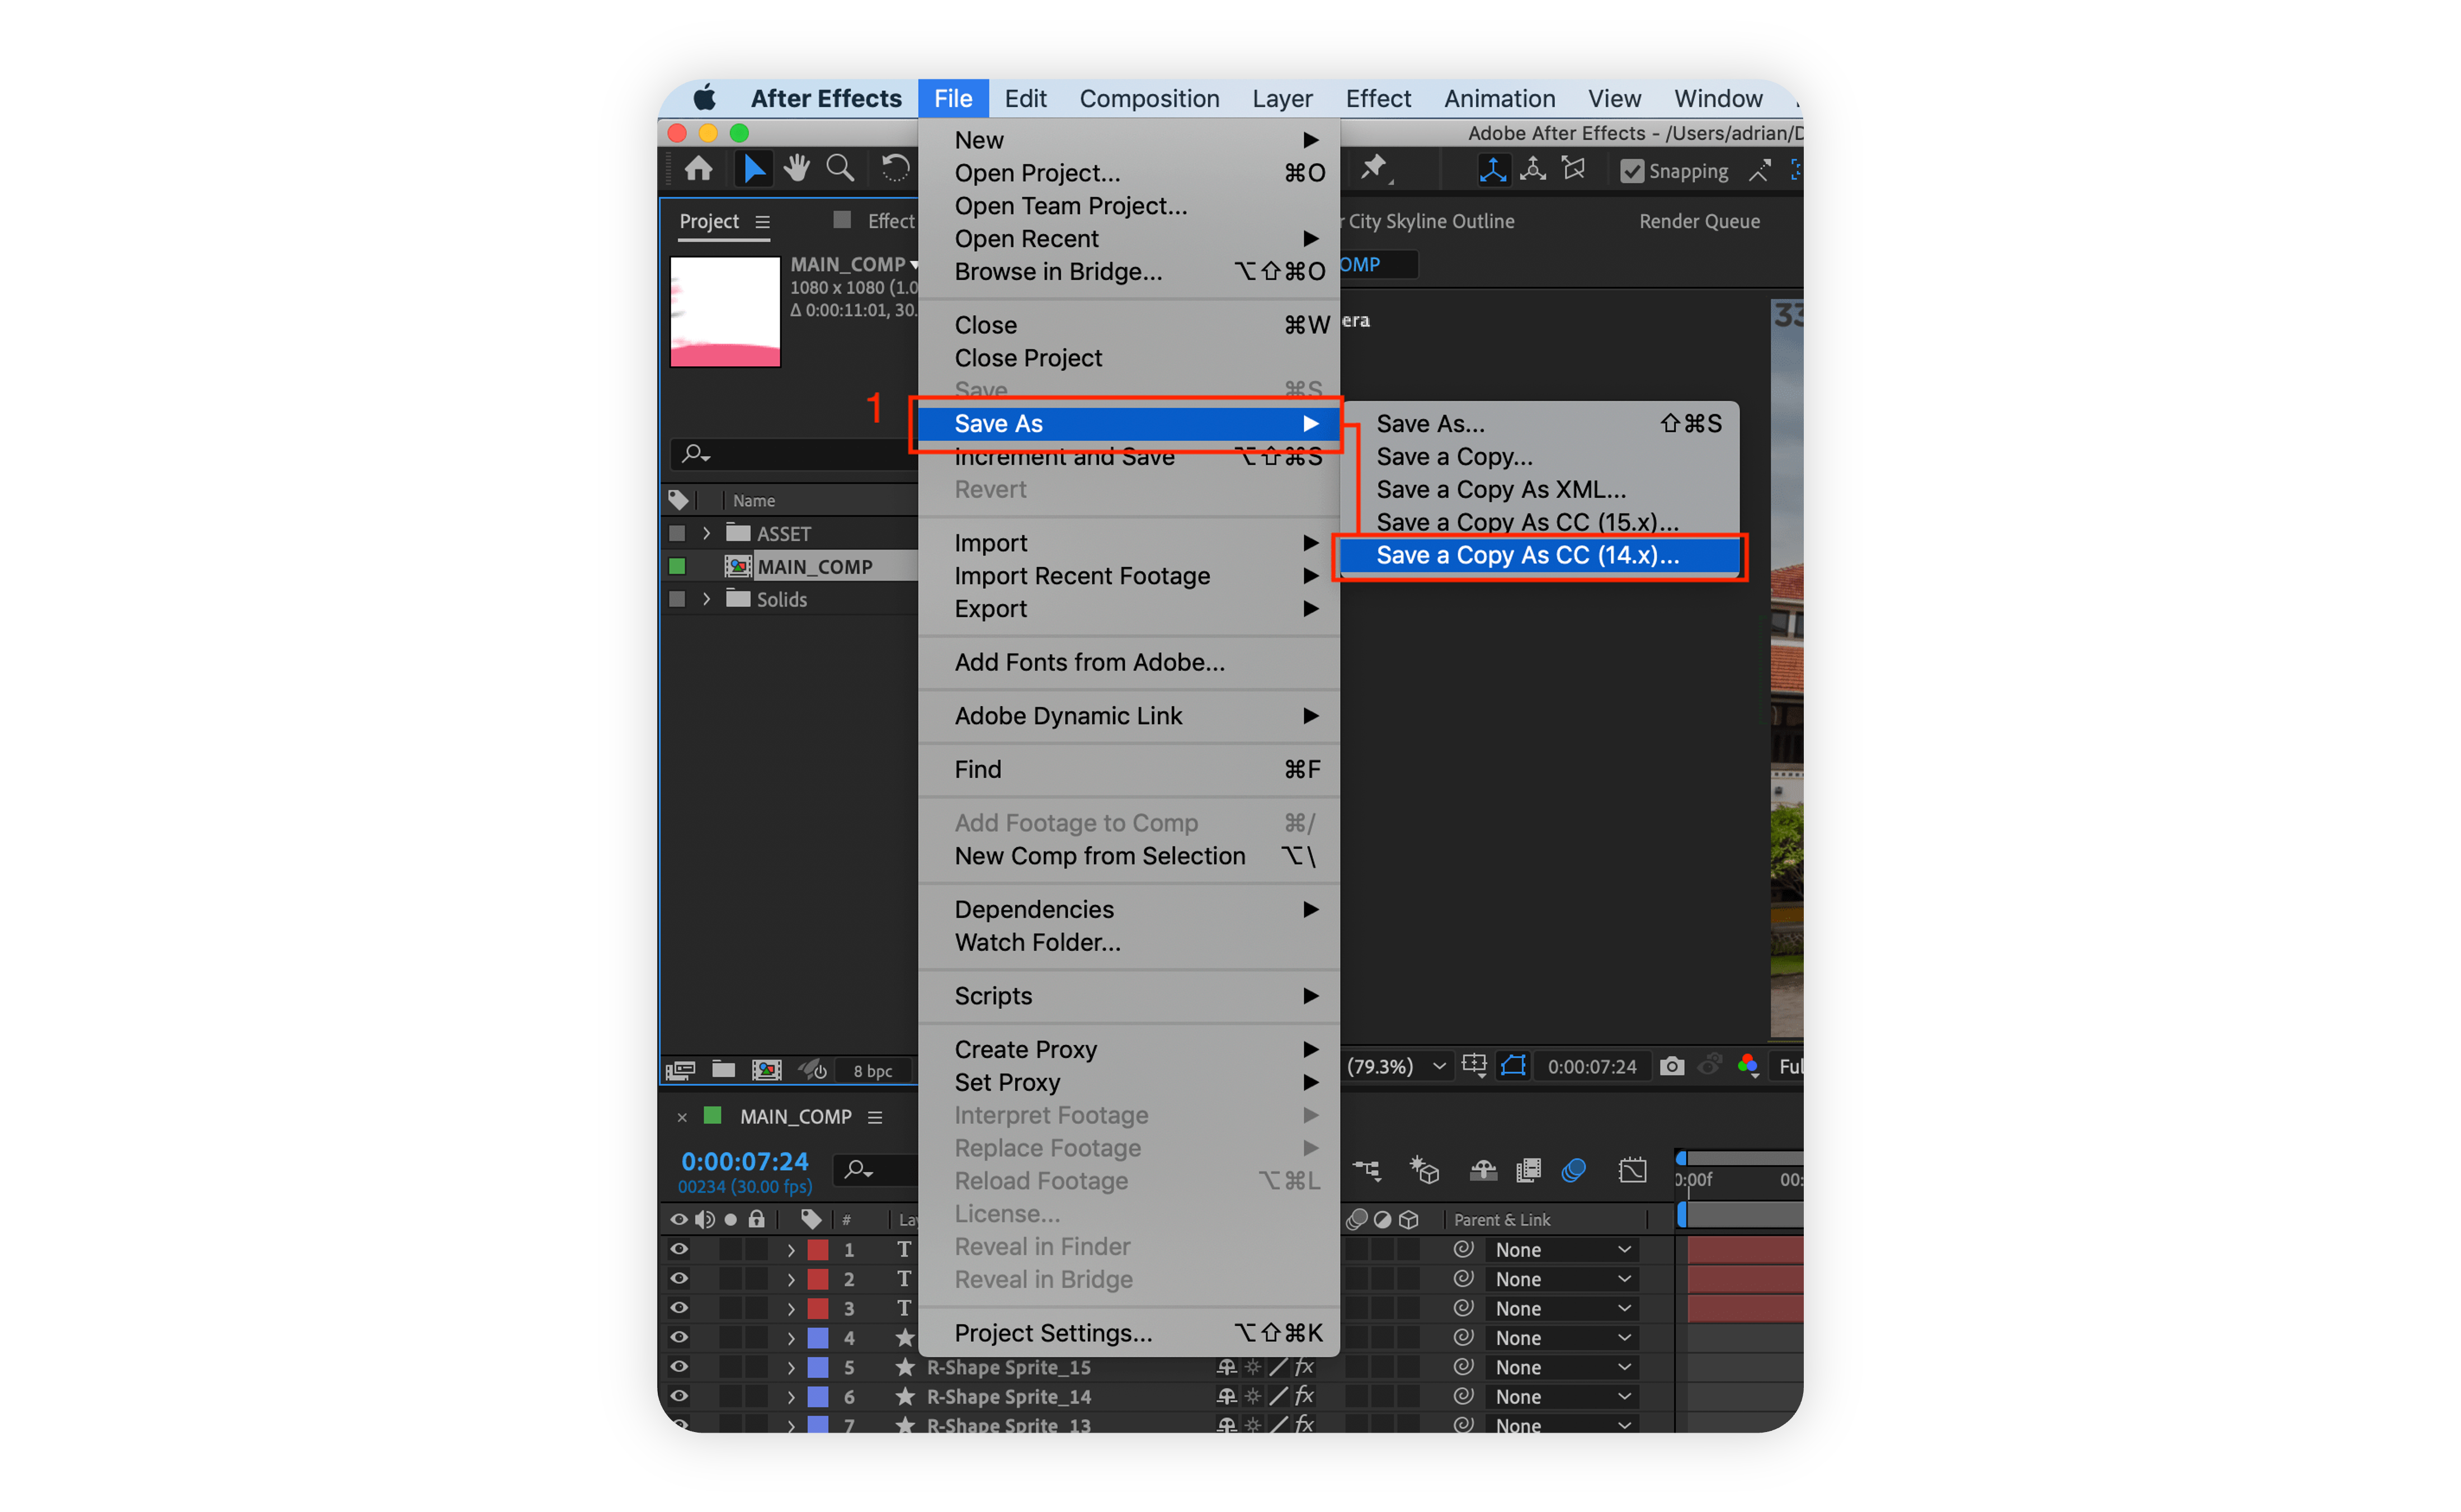
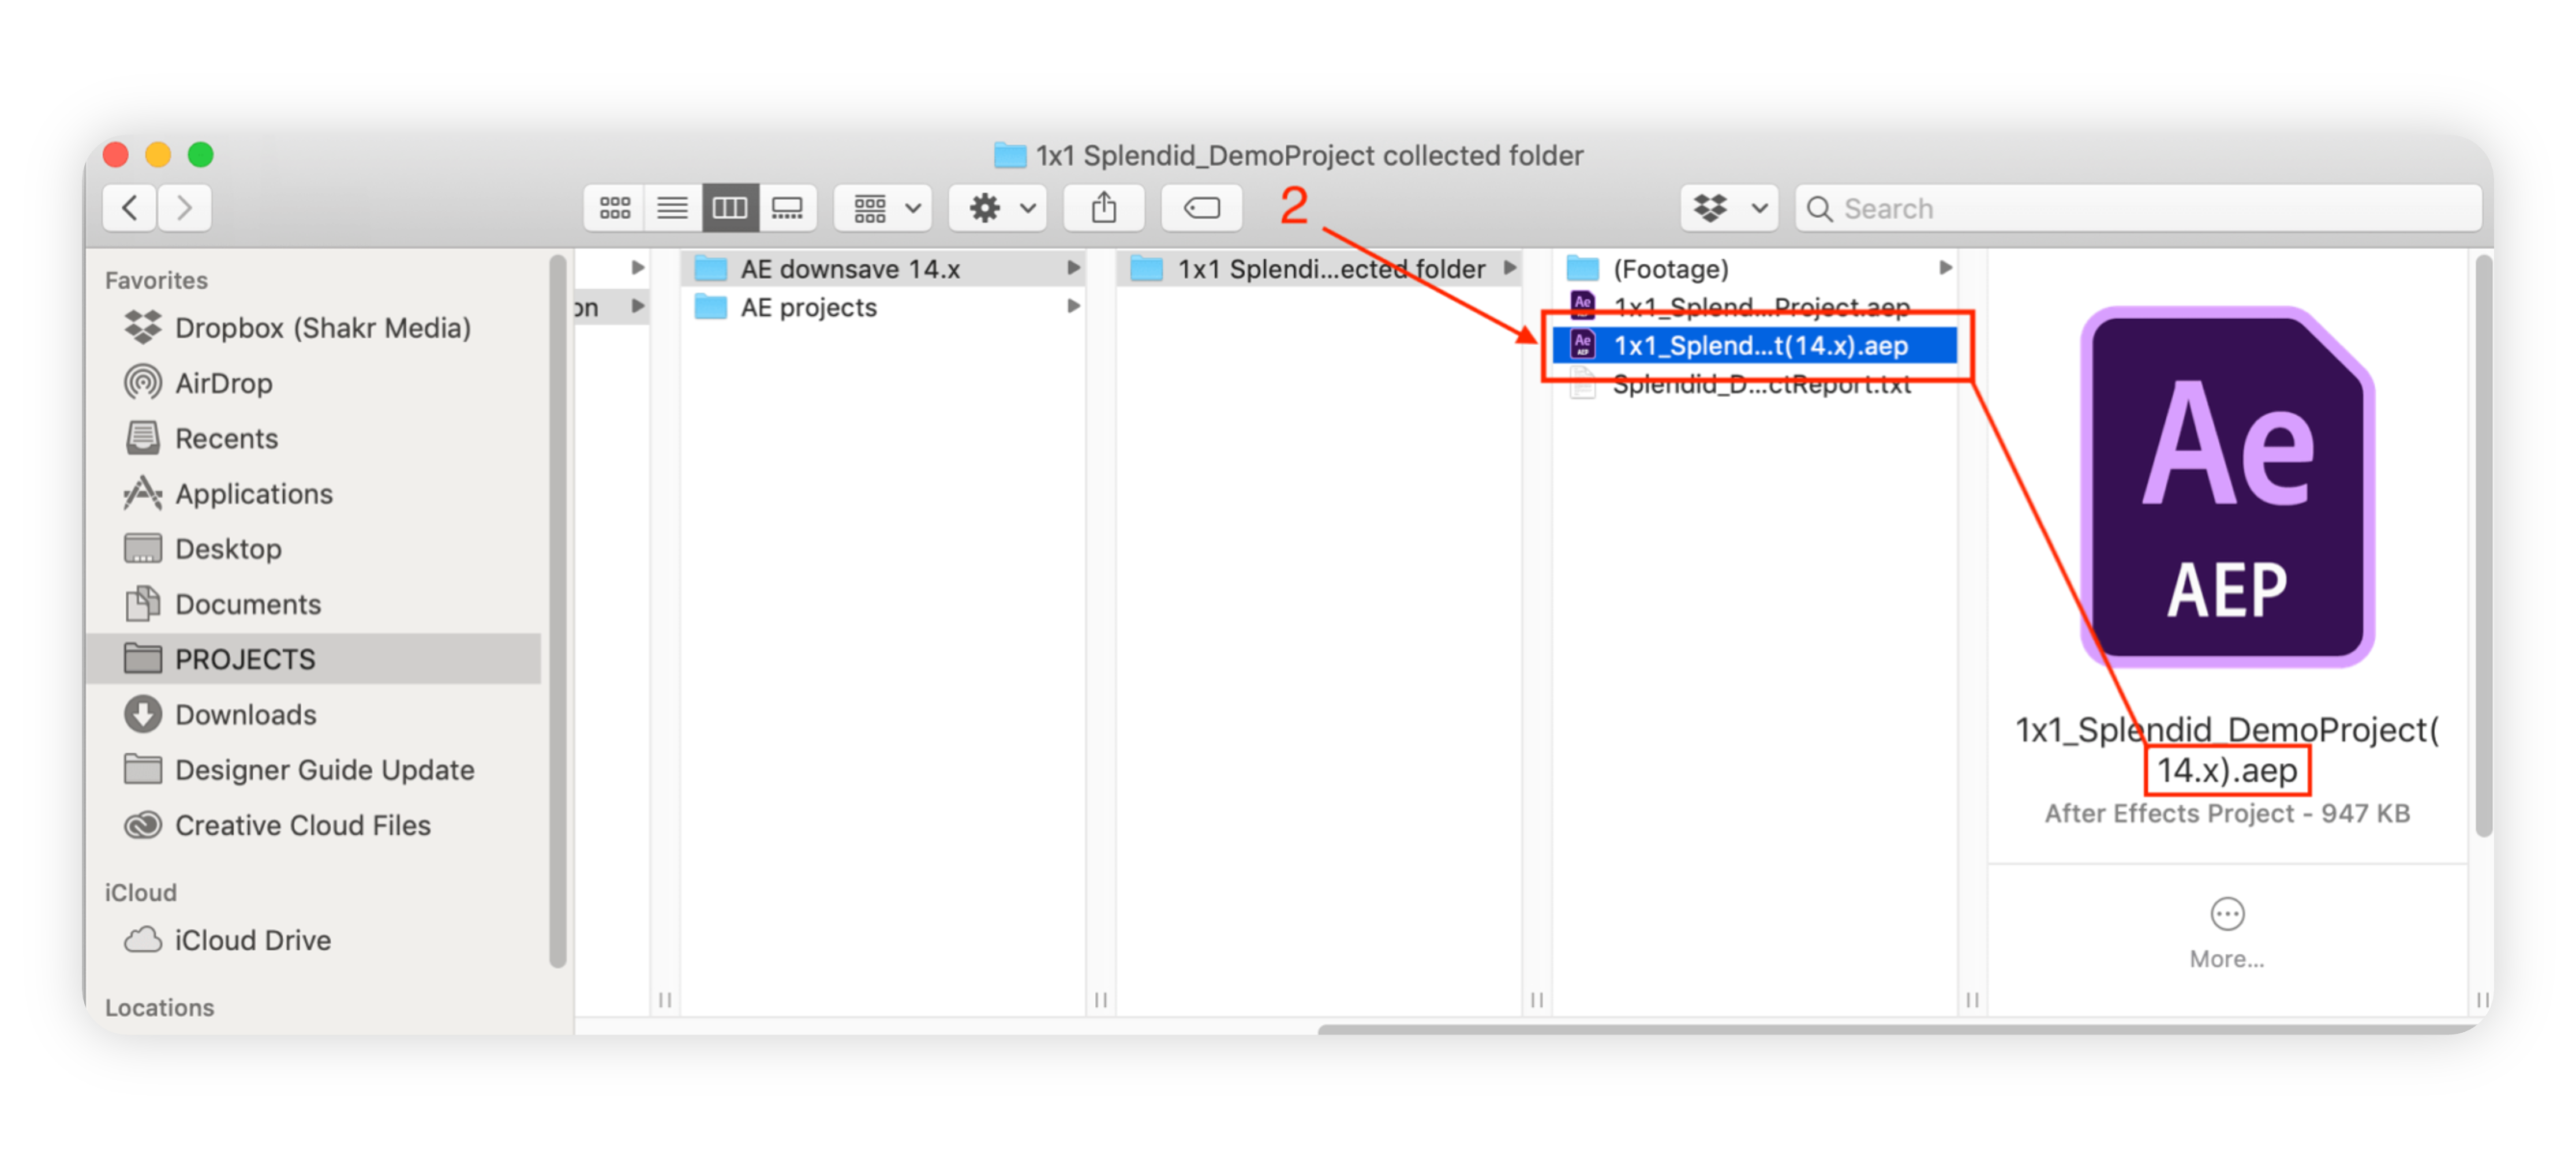
Save a copy as CC: If you already started working with CC 2018 or higher, convert your project file by selecting File > Save As > Save a Copy As CC (14.x) and continue with supported versions of AE.
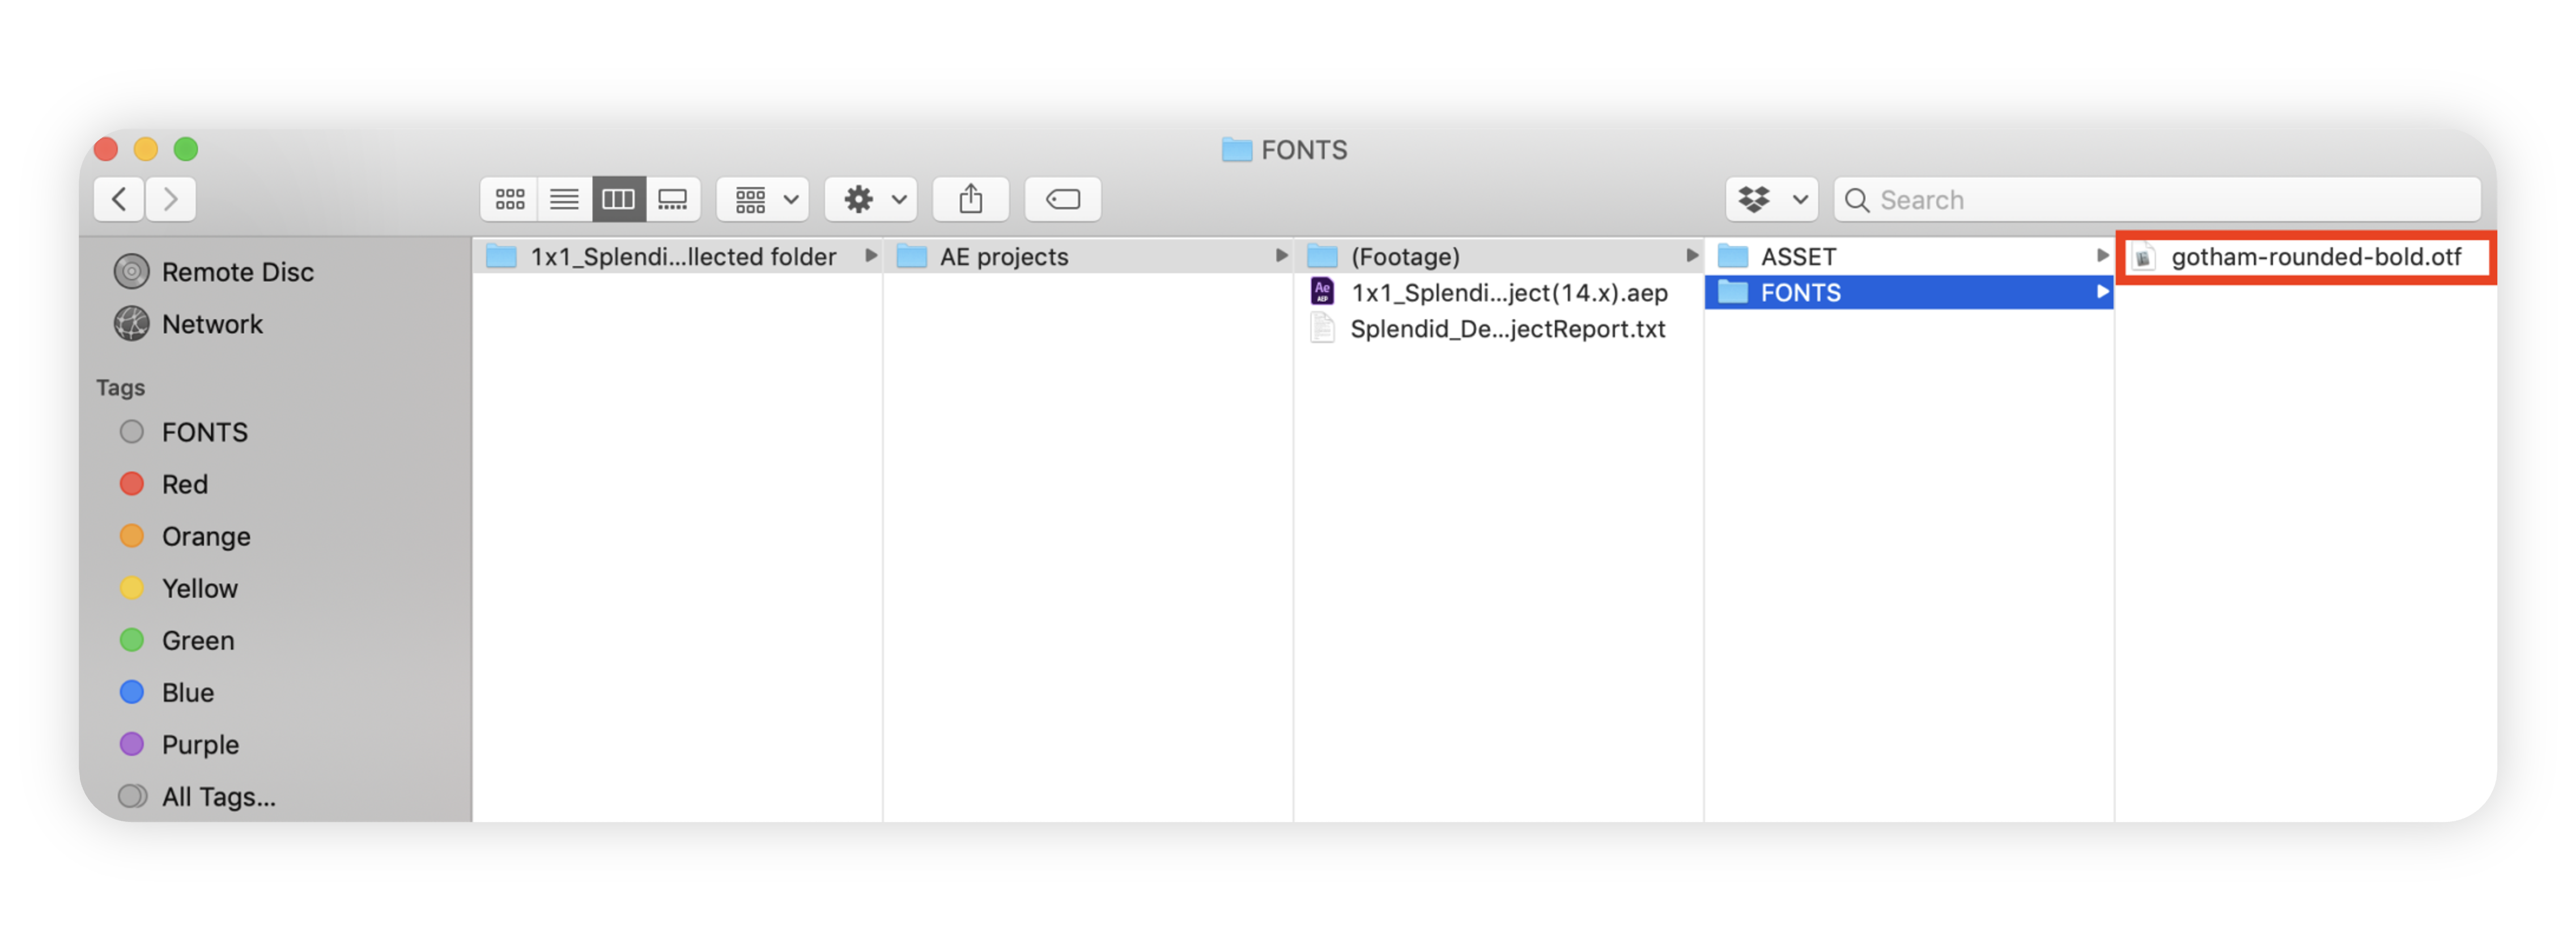
Include custom fonts: Please include the font files (OTF/ TTF) in the upload folder if it is not a font supported by automated system.
Compress files to Archive.zip: Compress the generated project files and assets as a zip file.
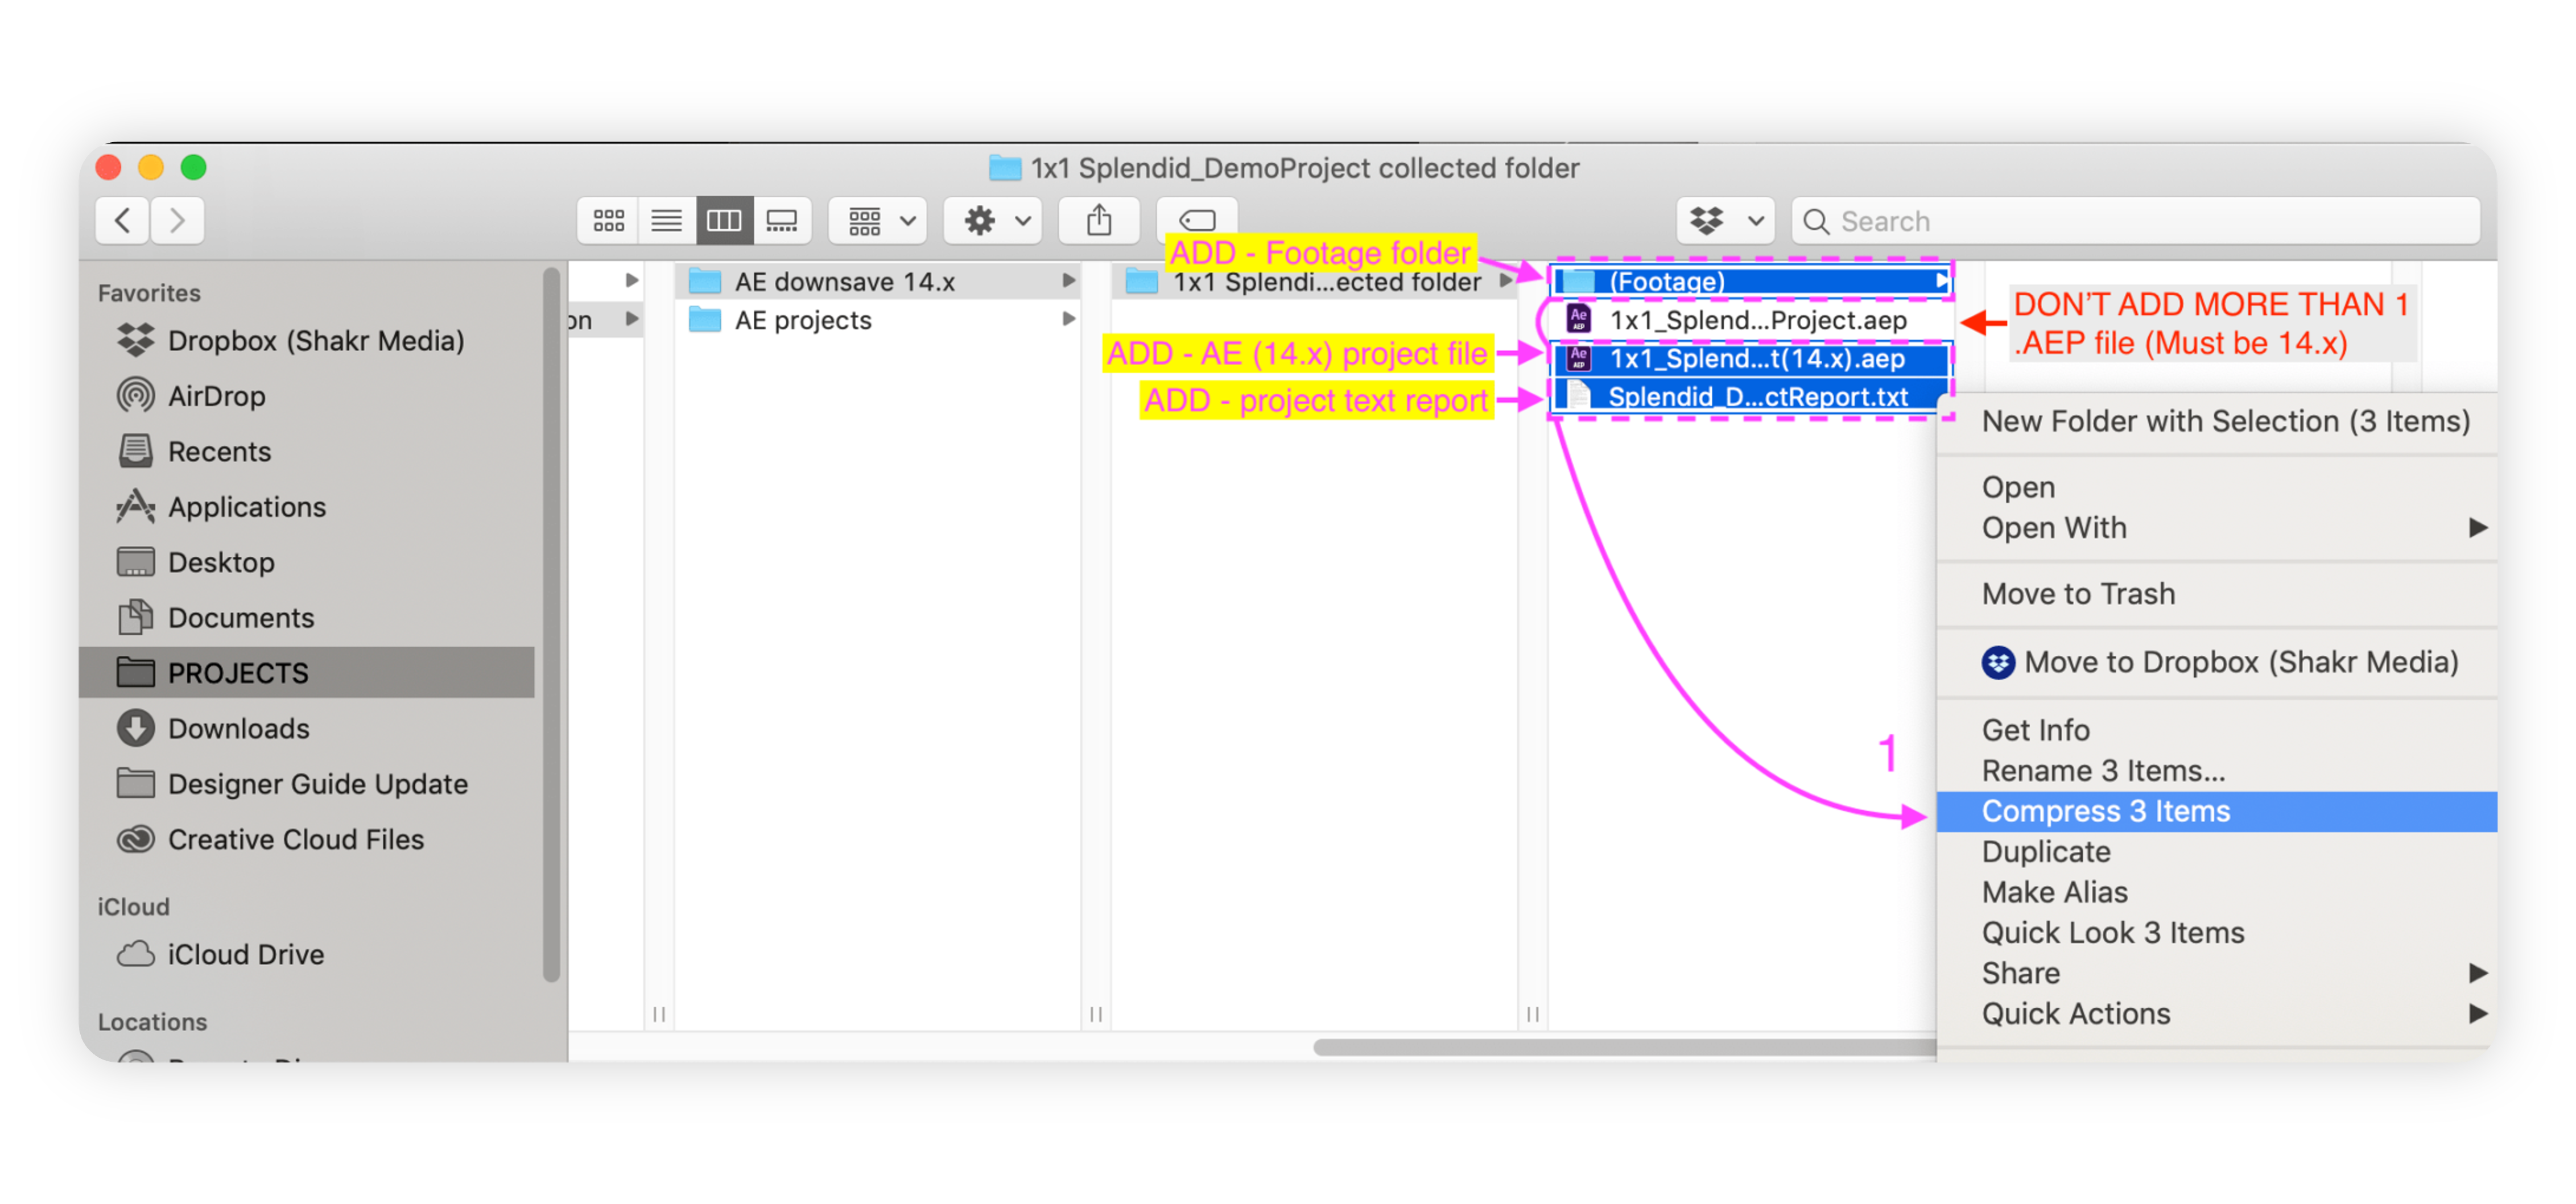 Note: Don’t add more than 1 AEP file in the folder.
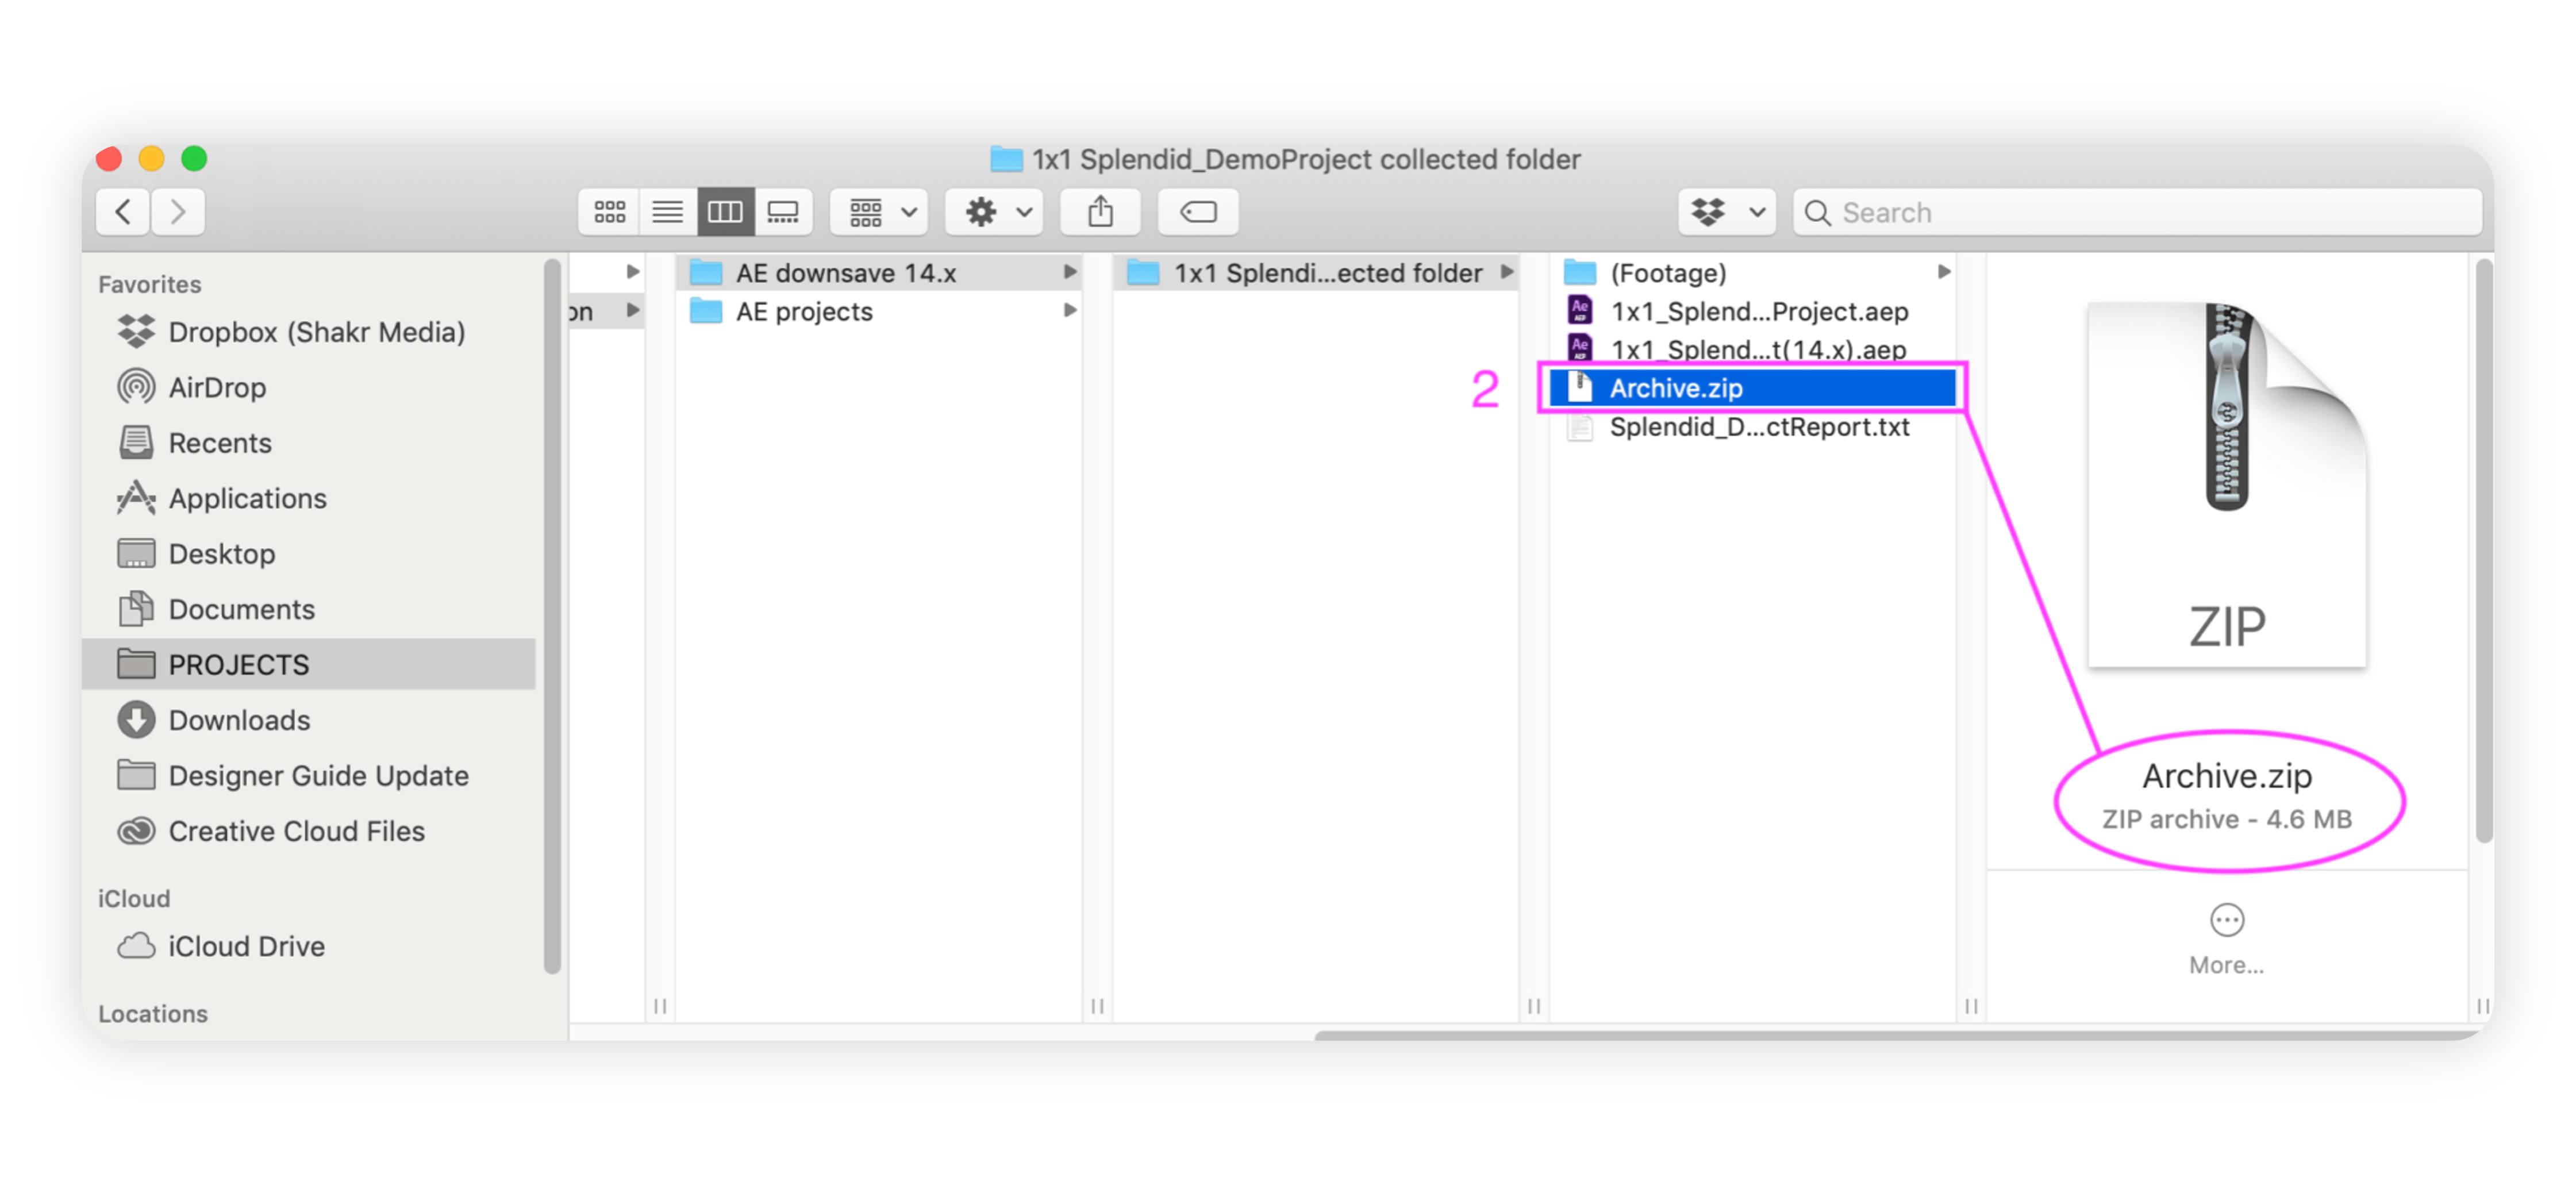
Now you can upload your creative templates to the Platform. Now that you have prepared compiling the After Effects project file, let’s now move on to going through the automation process in order to optimize your After Effects project file as a creative templates in the platform.
Related Articles |