DVT Part 2: How to Use a Dynamic Video Template to Create a Video
Updated
Learn how to easily create videos using video templates in Sprinklr. Once a video template is created, you can use it to create variations. This article guides you through using a template in Asset Manager for creating single or bulk videos in Sprinklr.
Step 1: Select a Template from creating videos
Open a new tab and go to Sprinklr Marketing > Advertising > Creative Library.
You will be redirected to the Digital Asset Manager (DAM) with Ad Creatives selected by default.
In the top right corner of the DAM window, click on Create Asset and select Video.
Click the Video Templates tab and check Single Video.
Select the template you want to use and click next.
Step 2: Edit Video
Scene (Still-cuts) Editor
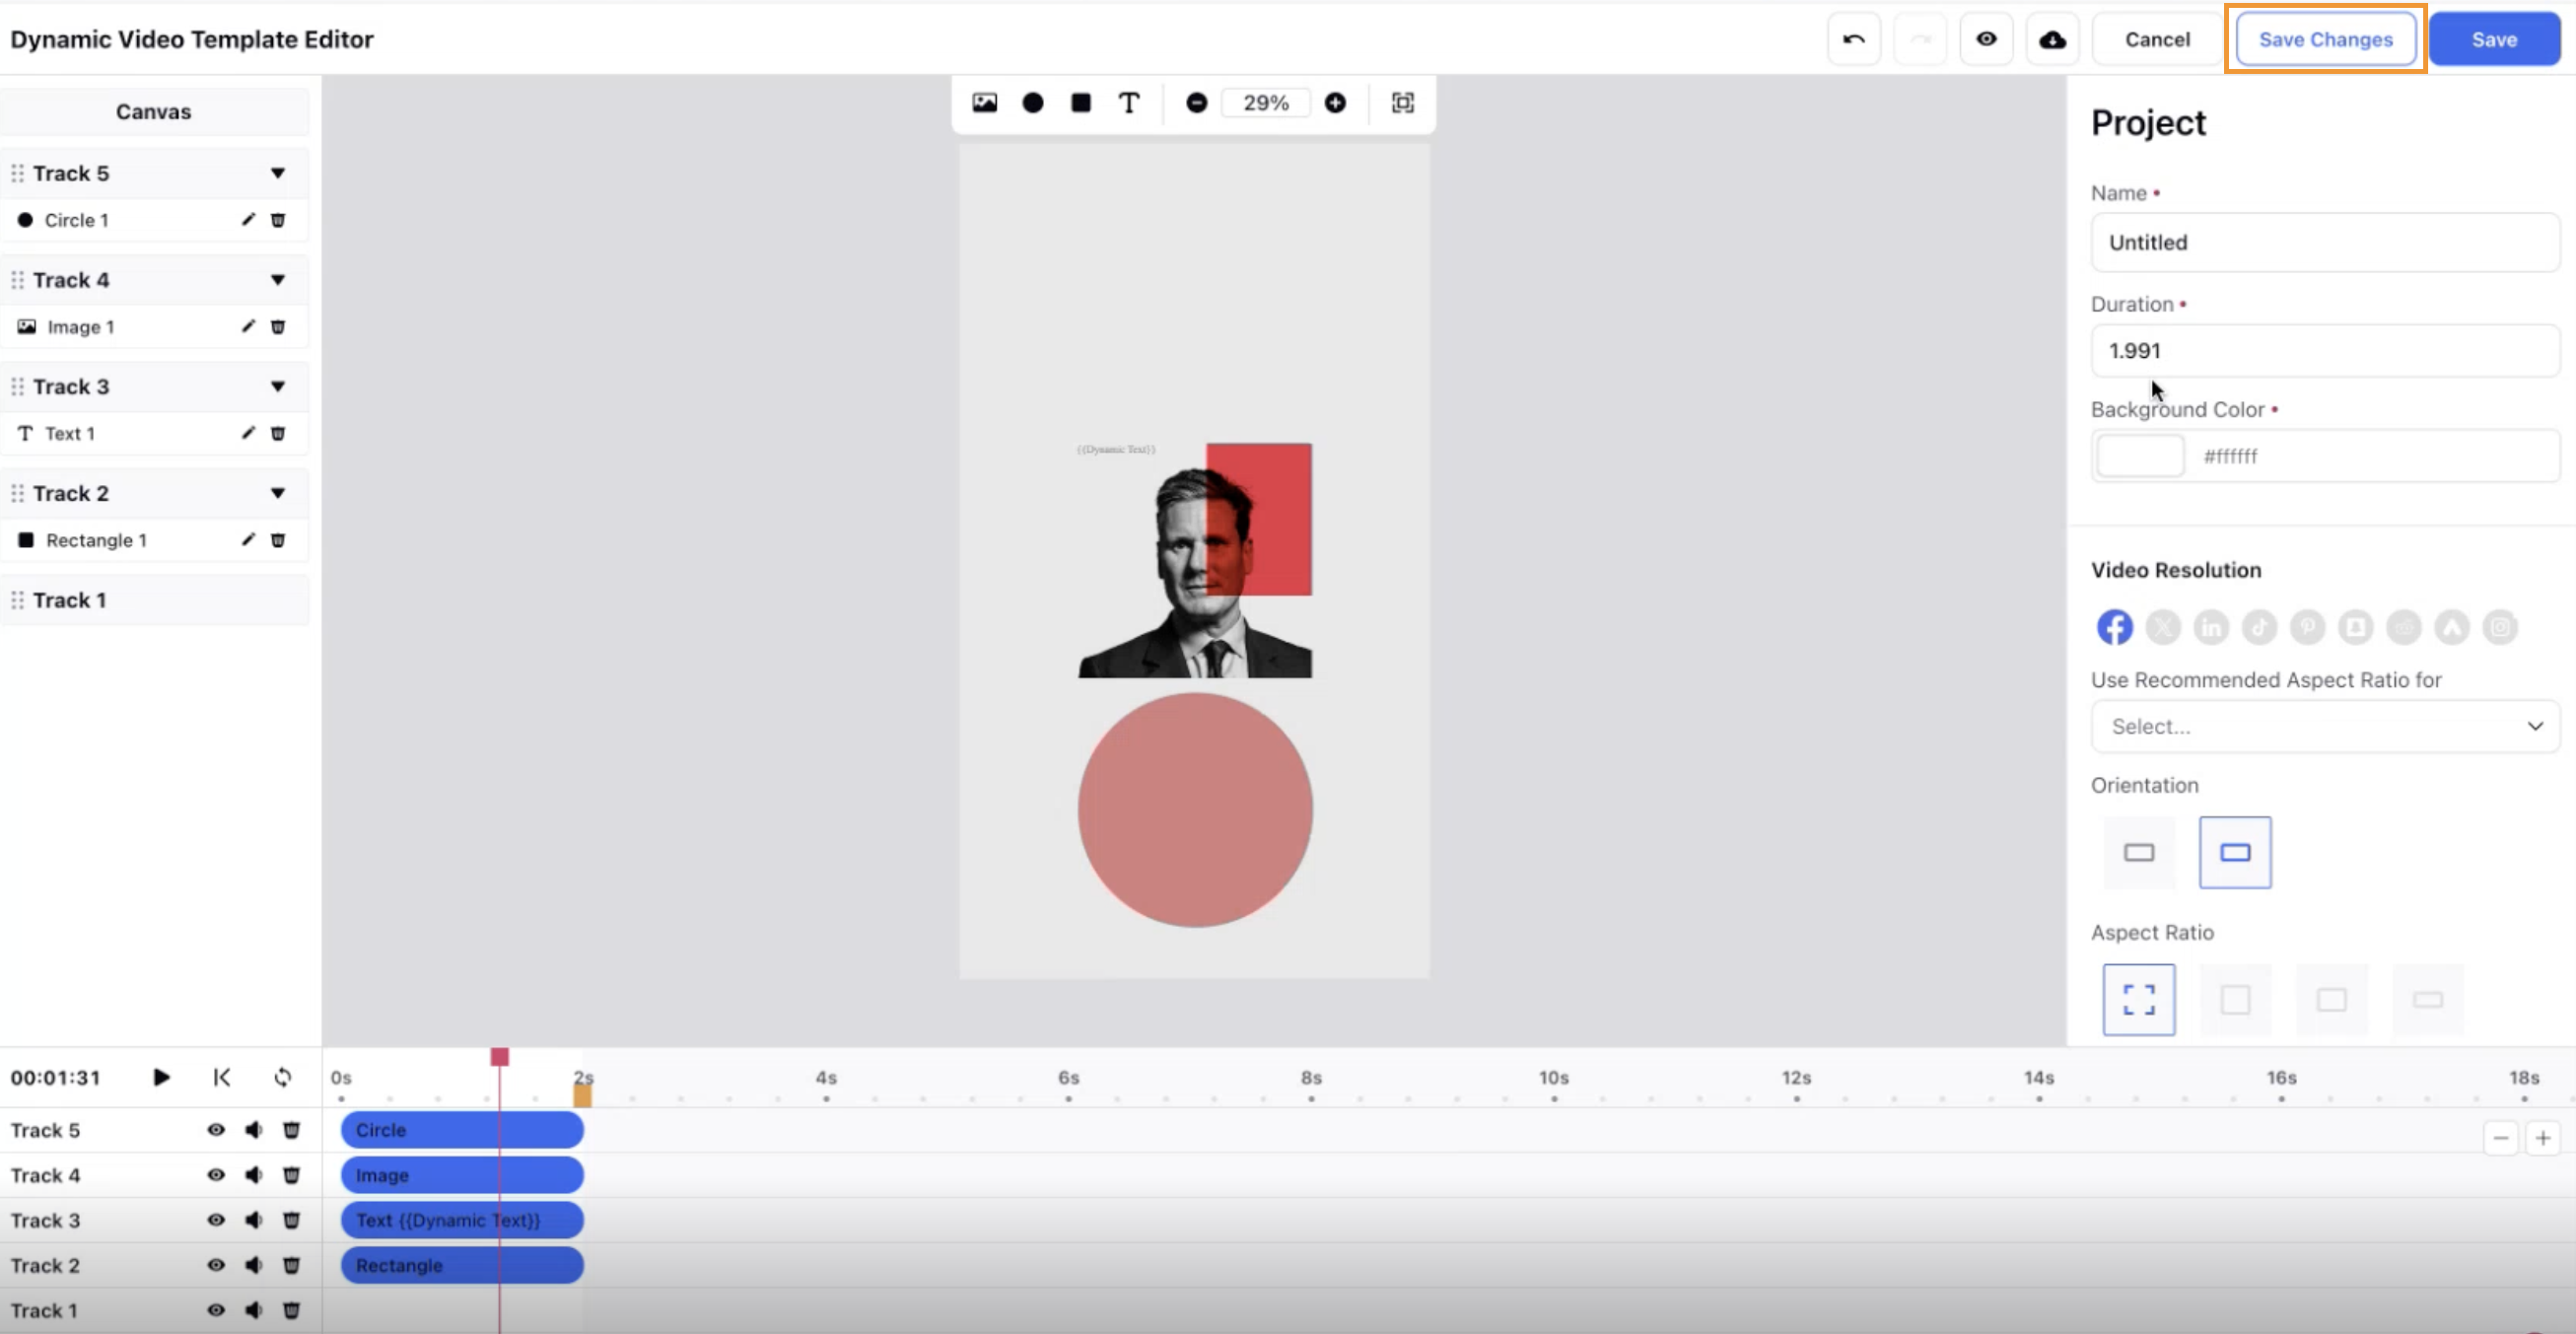
You will see an enlarged view of each scene in the creative templates. This is where you insert required editable slots (texts, images, video clips) for the scene. Click on each editable to make edits, insert necessary media files, and so forth.
Click Save Changes in the top right corner to save any edits made to the video and avoid losing any updates. You can also save the changes by using the keyboard shortcuts - command + S (Mac) and ctrl + S (Windows).
Scene (Still-cuts) Navigation
At the bottom of the ‘Scene Editor,’ all of the scenes that exist in the creative templates are portrayed in a filmstrip view. Below each scene block (or still-cuts) you can see the number of editable slots (texts, images, video-clips) that are required for you to insert. The scene will portray a ‘green tick’ at the bottom right corner of the scene block once the scene is filled with all of the necessary editable elements.
Video Editor Settings
By clicking on the ‘gear’ icon at the bottom-left of the screen, you can:
Auto-advance scenes: When you finish filling up all slots in a scene, the editor will automatically advance to the next scene.
Enable Low-bandwidth mode: Load still image cuts instead of video-clips. Turn this option on if you have a slow Internet connection.
Fast-forward Video (3x): Video playback in-between scene transitions will play 3x faster.
Mute Sound in Editor: Mute sound while working in the editor. You will still have sound in the final rendered video.
Step 3: Inputting Texts
It is very easy to edit texts when using Video Editor.
First, click on a text editable element to edit the text in the area. Text editable slots are indicated with a T icon in the scene editing screen.
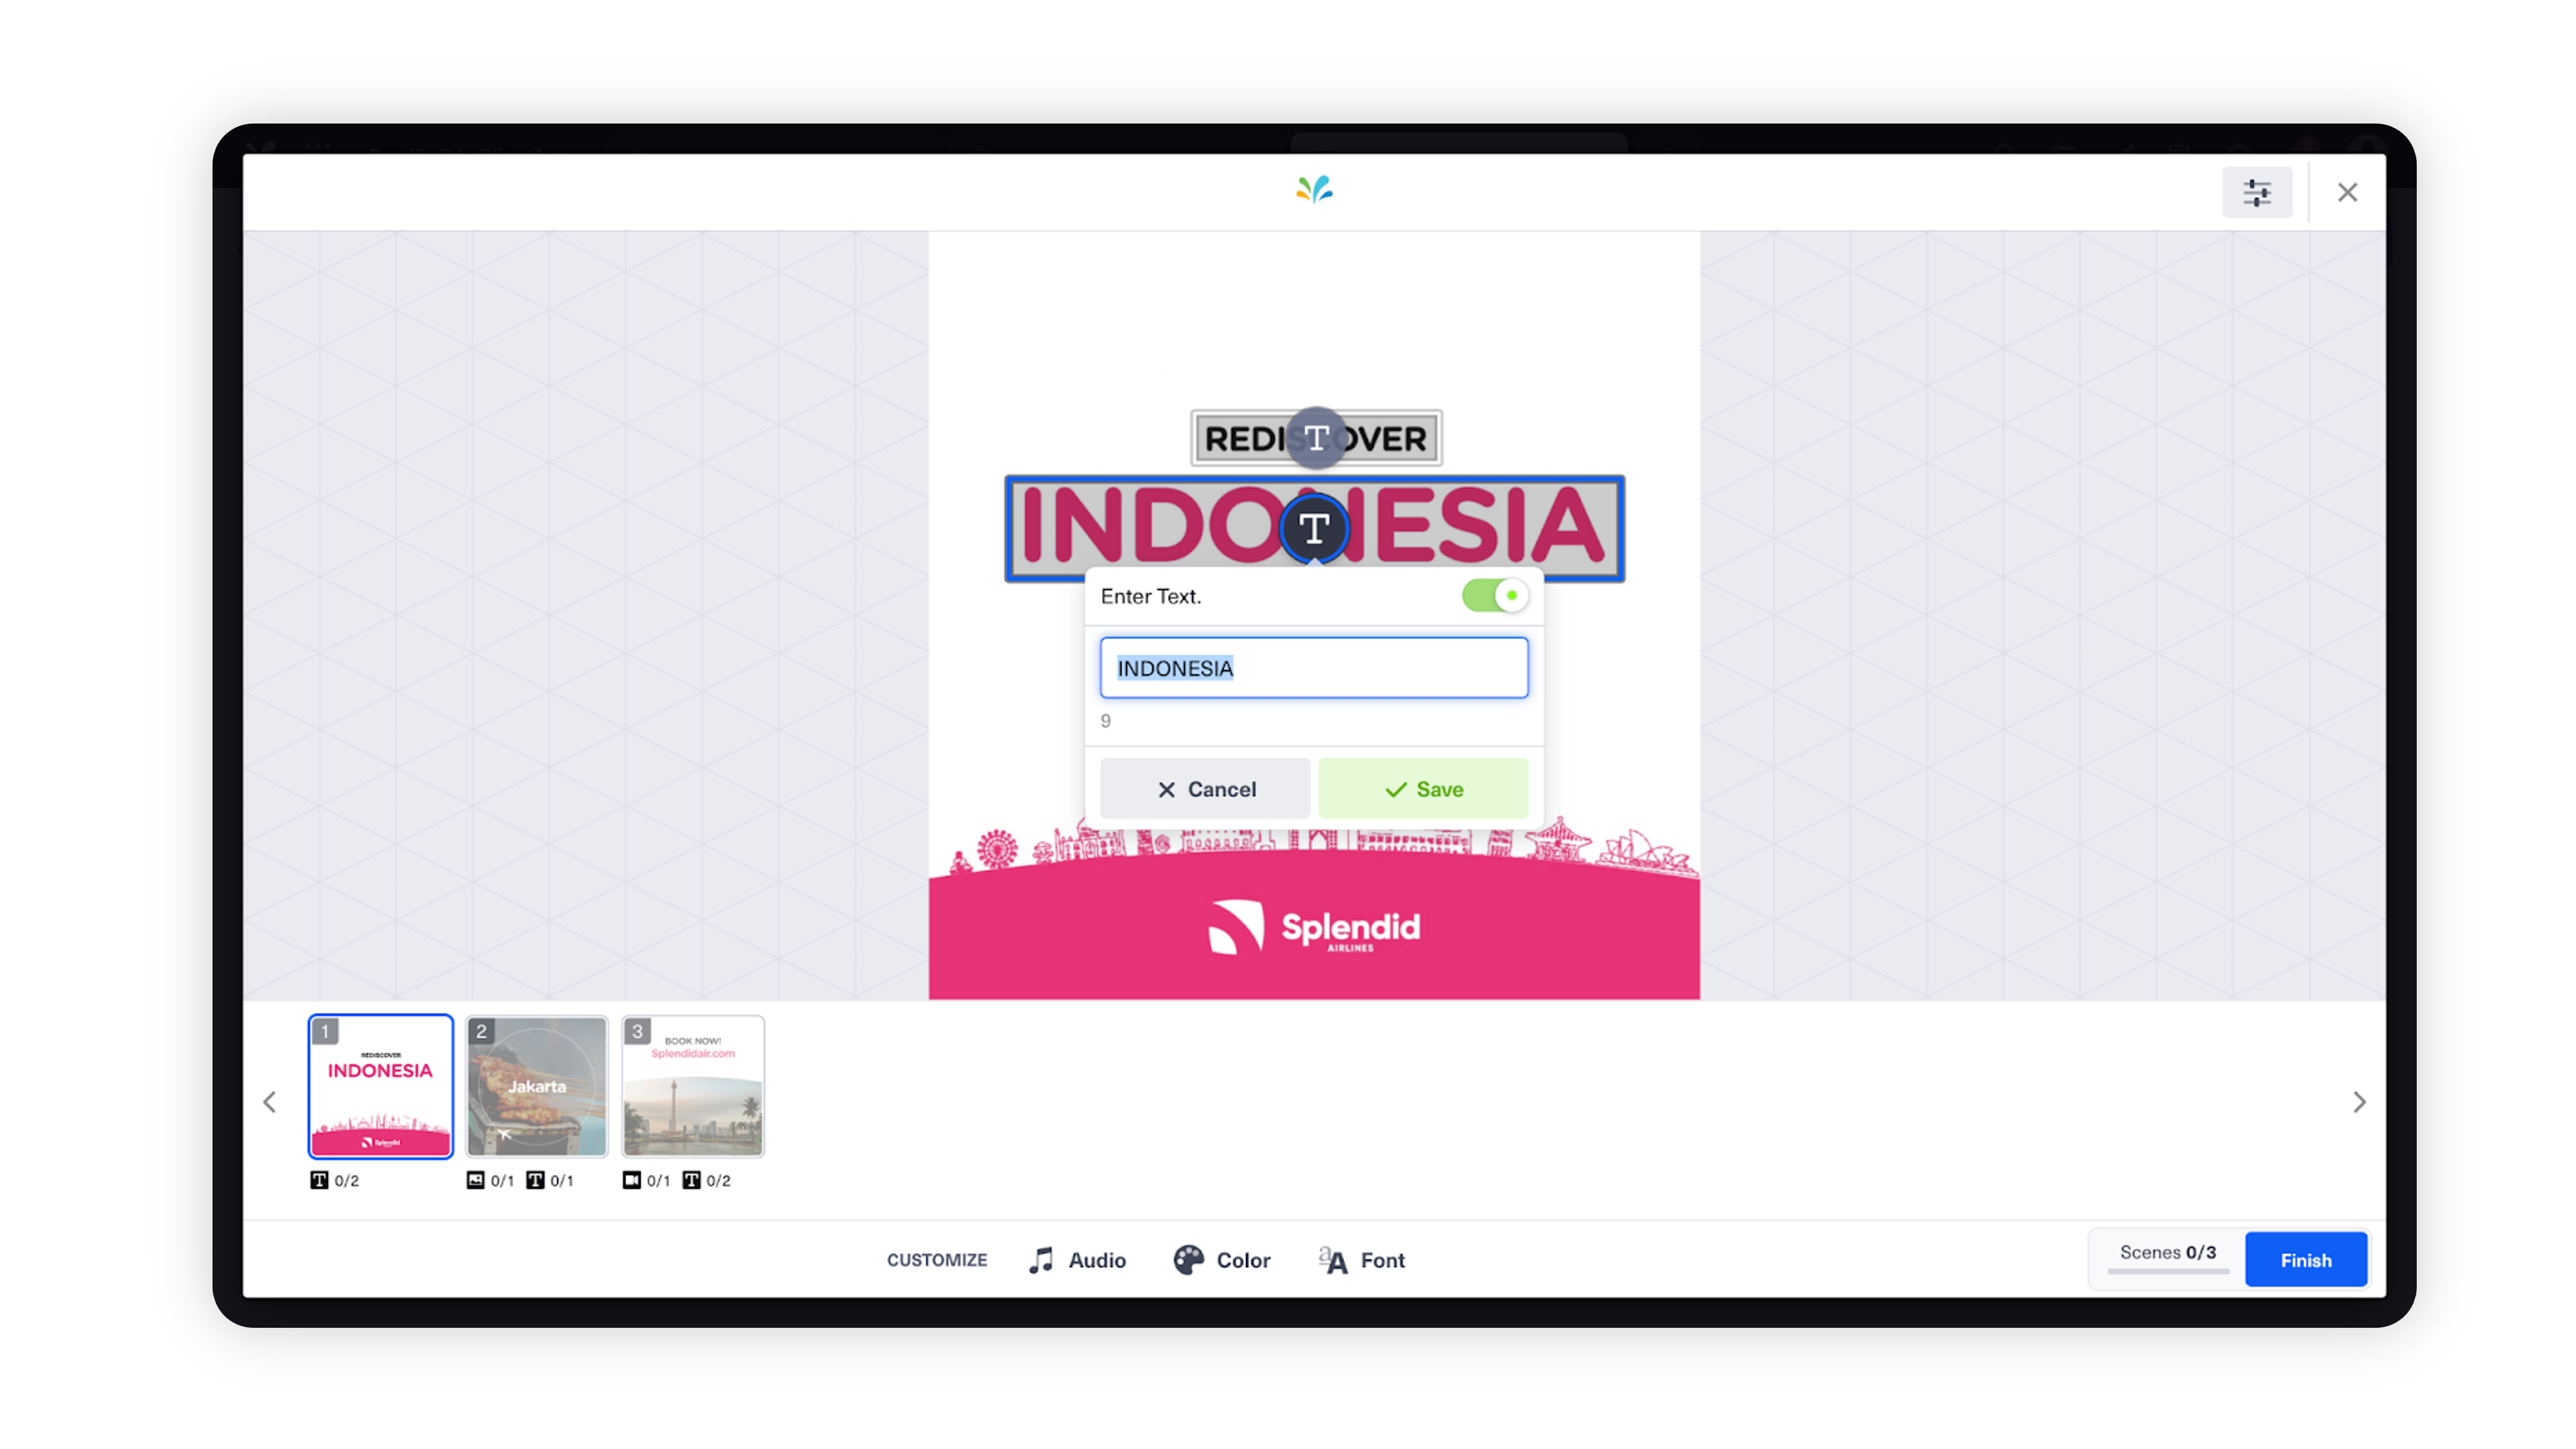
You can input the text you want on the main text box. Also, it is possible to disable the whole text box by turning off the toggle on top right. Then, the text area will render empty in the final video.
Note:
|
Step 4: Uploading Media Files (Images and Videos)
Click on the media editable elements to start the process of uploading media. These elements are indicated by either a video icon or an image icon.
From here you can select directly from Sprinklr’s asset manager or you can also drag files you want to upload from your desktop.
Here are the recommended media file specs for your reference:
Image
|
Video Clip
|
|
|
Step 5: Customizing Fonts
In the Video Editor, click on the audio icon on the bottom of the screen. Then click on the Use custom audio track button.
Browse for an audio file from your desktop. You can also drag and drop files from the desktop into the editor.
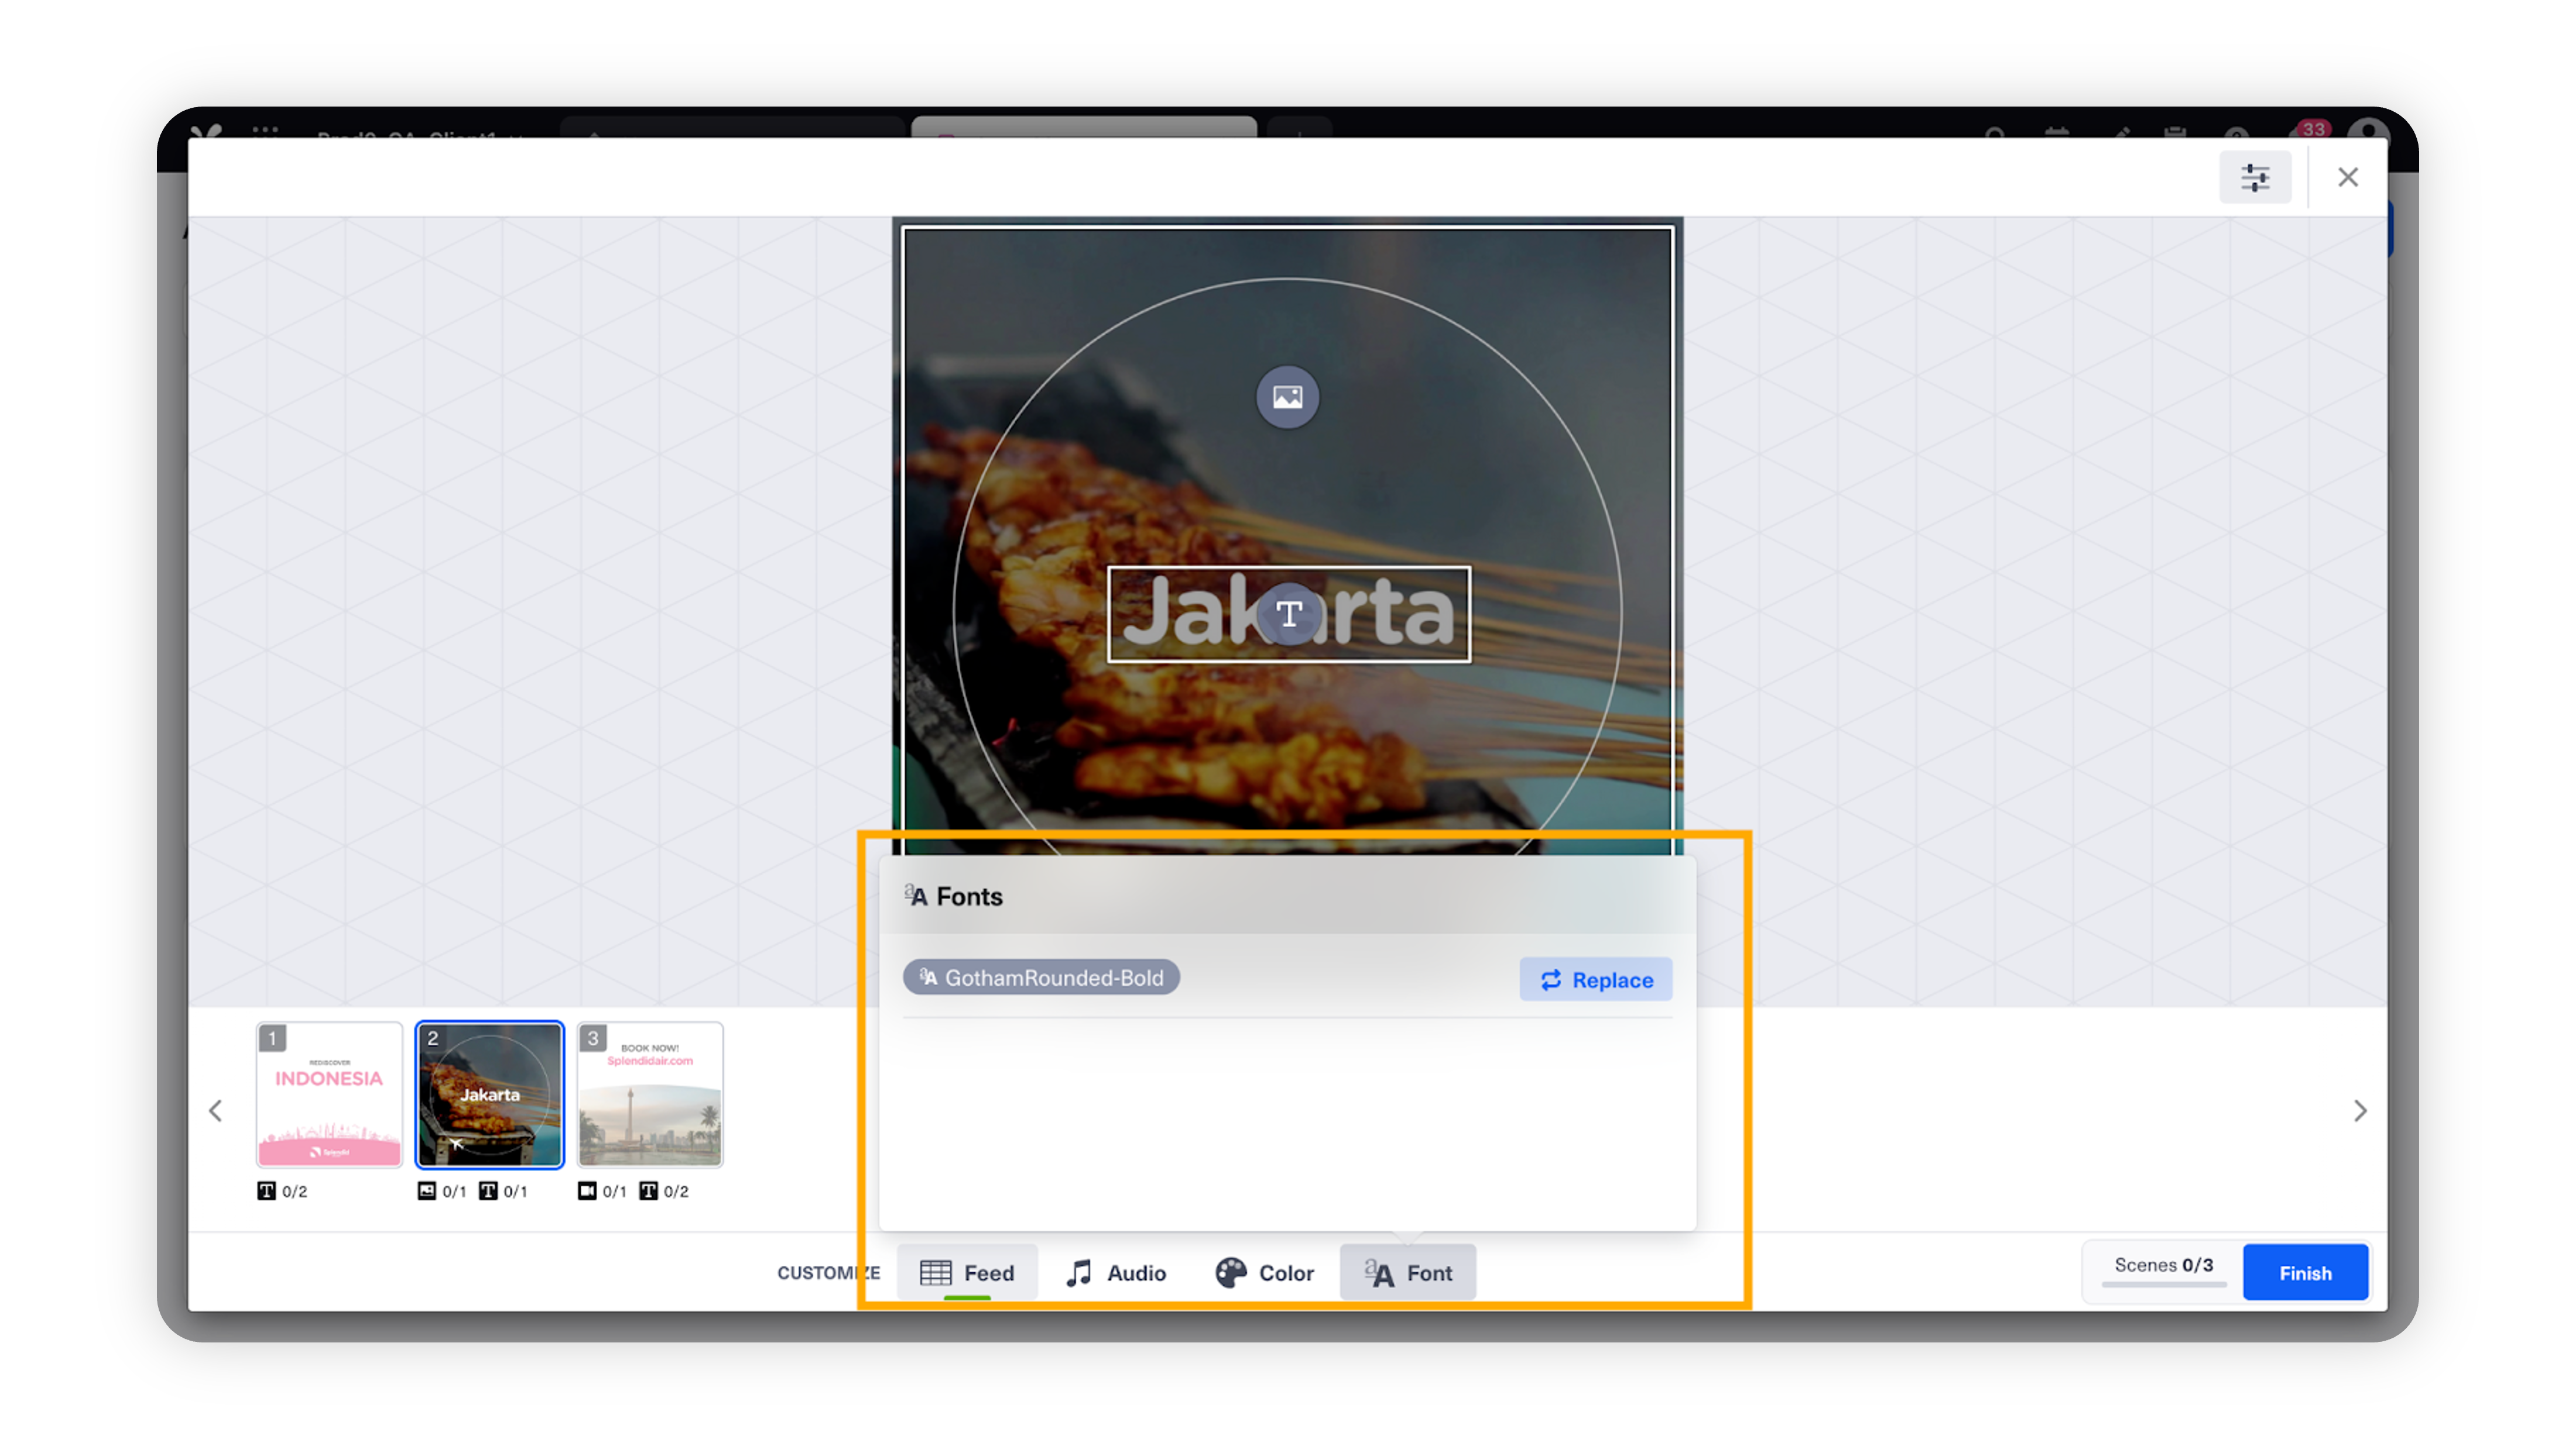
You can also customize fonts used on the creative template. The Customize Font button can be found at the bottom of the Video Editor. You can select any fonts which are available in the asset manager.
Once you have chosen the font you want to use, then click on Import. The font you have selected will be applied after the video editing and rendering has been finished.
Step 6: Customizing Audio
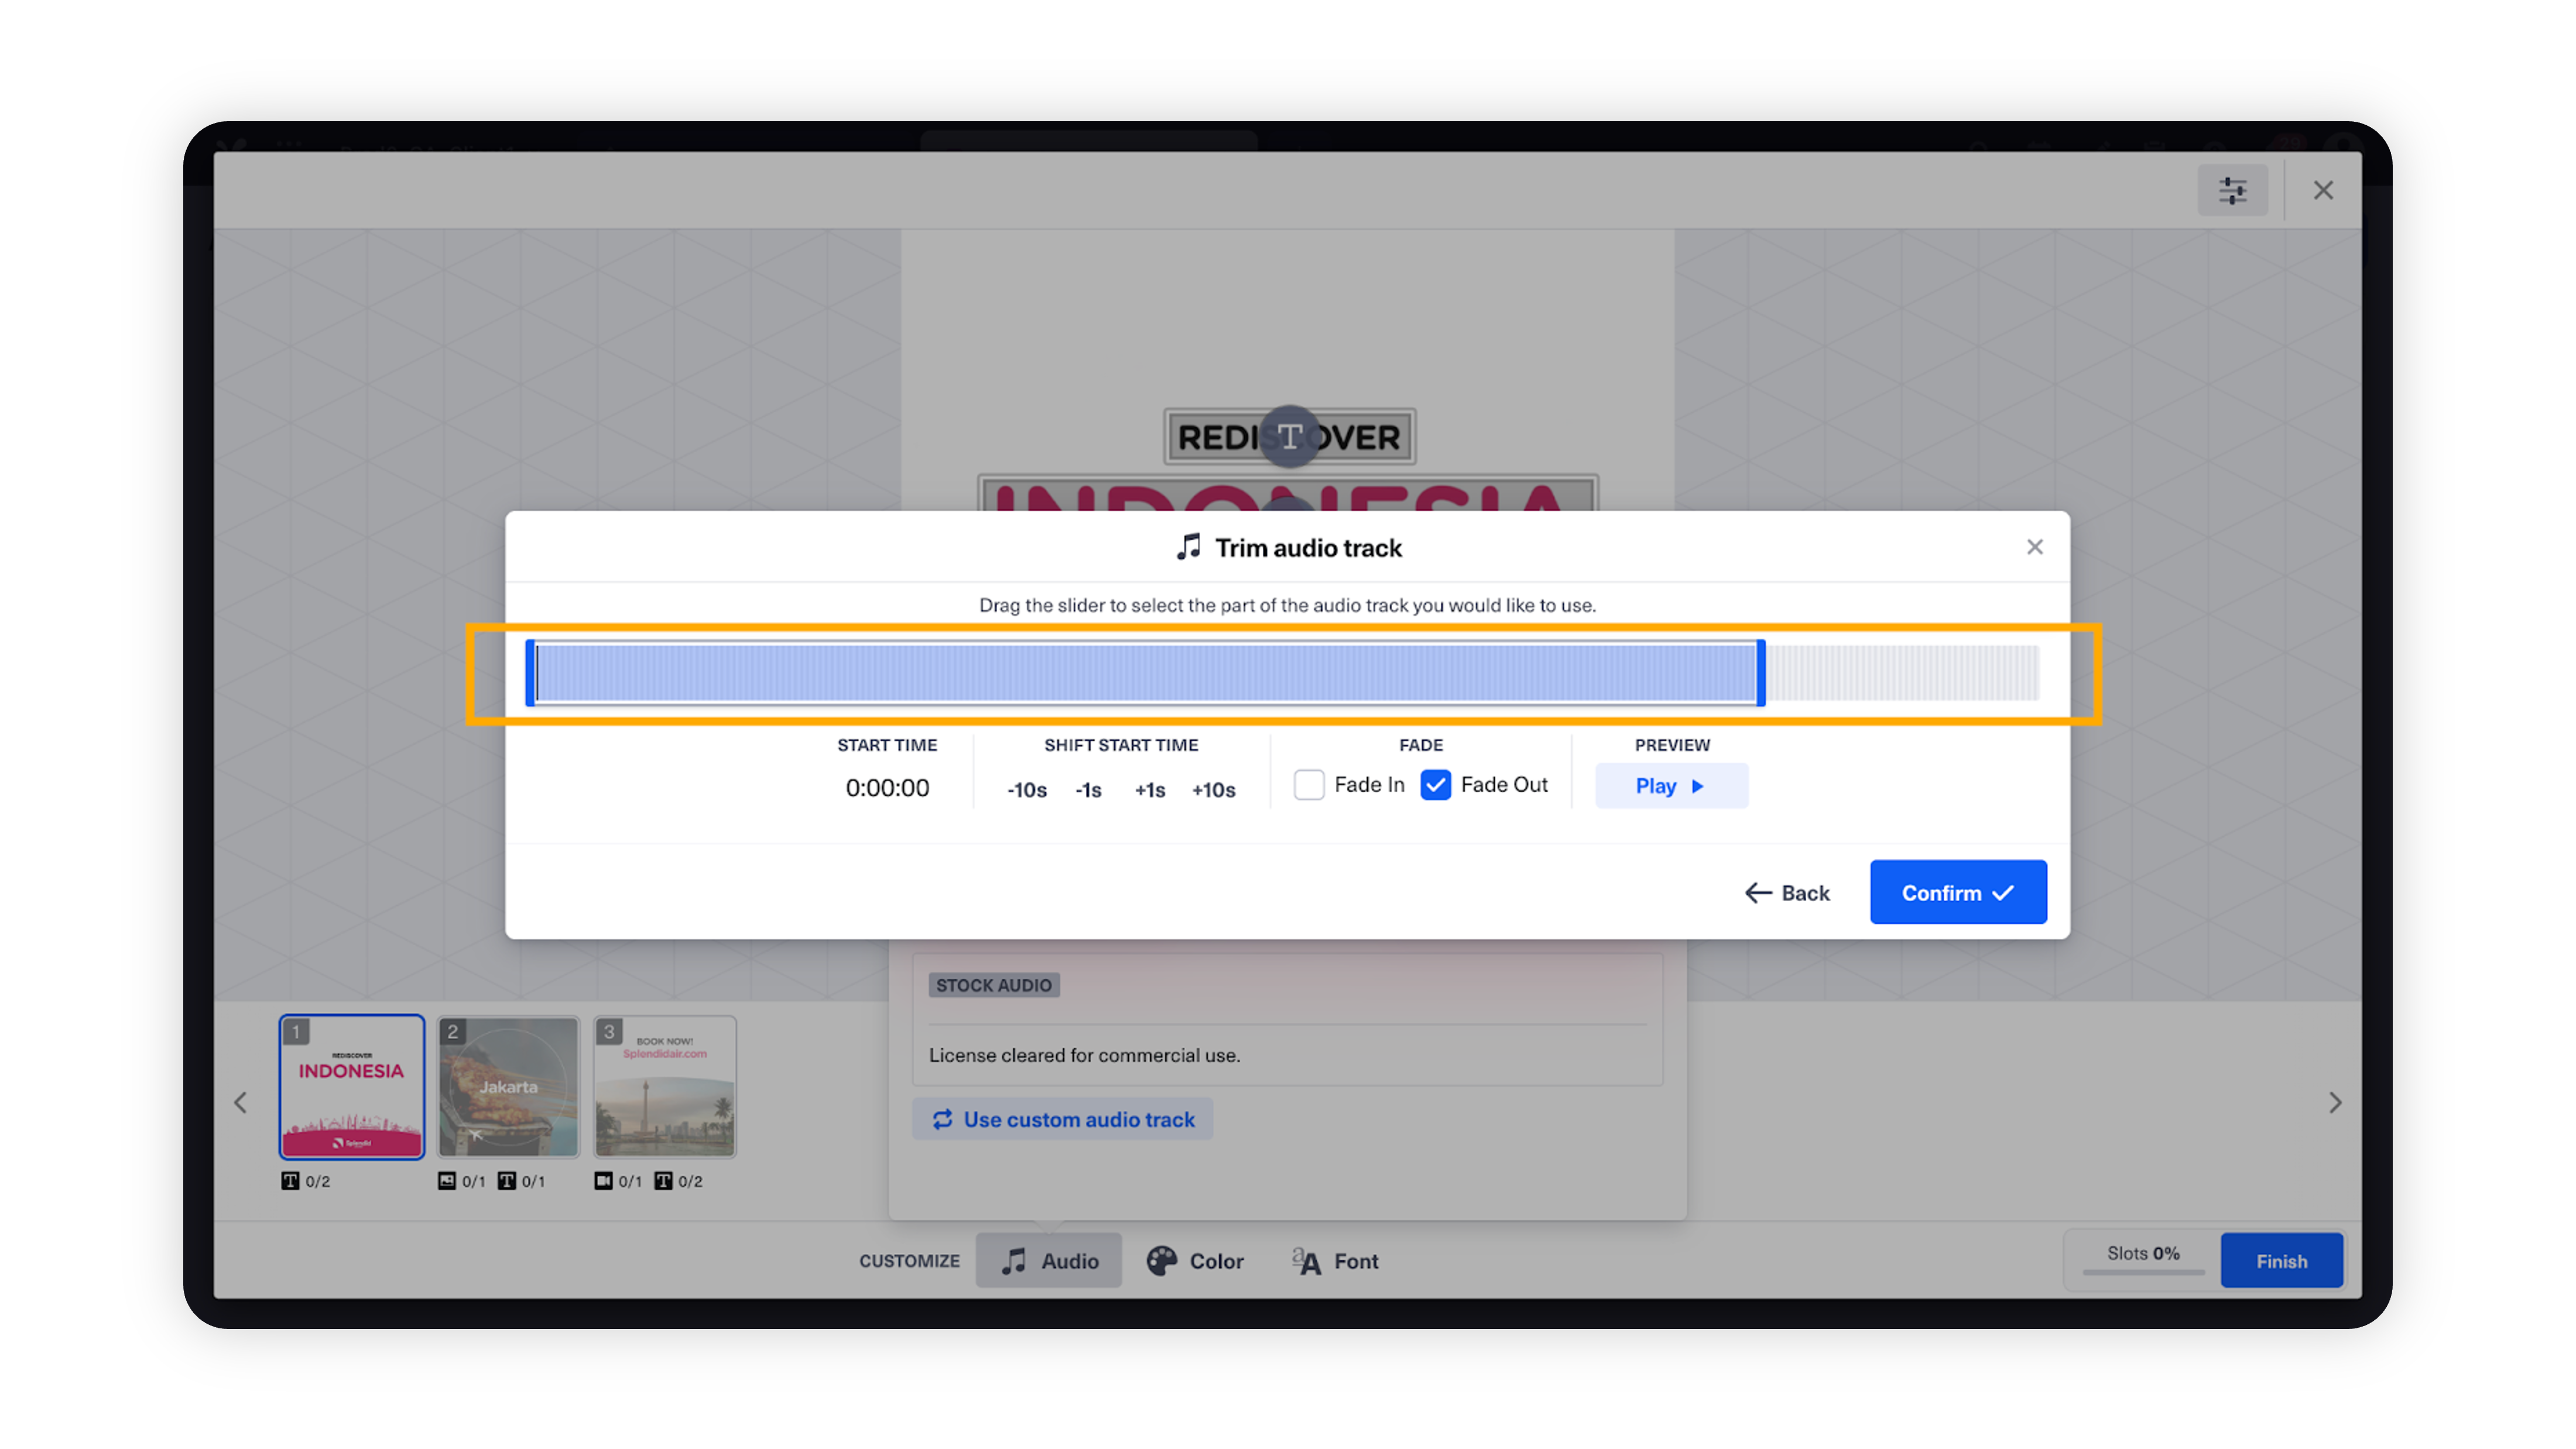
The audio area covered by the ‘blue slider’ will be applied to the actual video.
In the Video Editor, click on the audio icon on the bottom of the screen.
Then click on the Use custom audio track button. Browse for an audio file from your desktop. You can also drag and drop files from the desktop into the editor.
Note:
When you add a custom audio file, it should be at least 1~2 second longer than the template length as the system requires a “bumper” to avoid any kind of rendering issues.
Once you have chosen the audio track, select the part of the audio track you’d like to use for your video. The length of the audio you can use equals the total duration of the video.
Step 7: Customizing Color
For some templates based on template design, it’ll be possible to customize color in the video.
In the Video Editor, click on the color icon on bottom of the screen.
Then choose a part of the creative that you want the color to be changed.
We provide three methods to change the colors.
Curated colors: These are a collection of colors that are generally popular and go well with most of the creatives.
Color slider: You can select the hue and the exact saturation point.
HEX code: You can put in an exact HEX code if you have one. It can be very useful if your brand has a specific brand color with defined HEX code.
When you are finished with the color selection, click on Save. The selected color will render when the whole video production is finished.
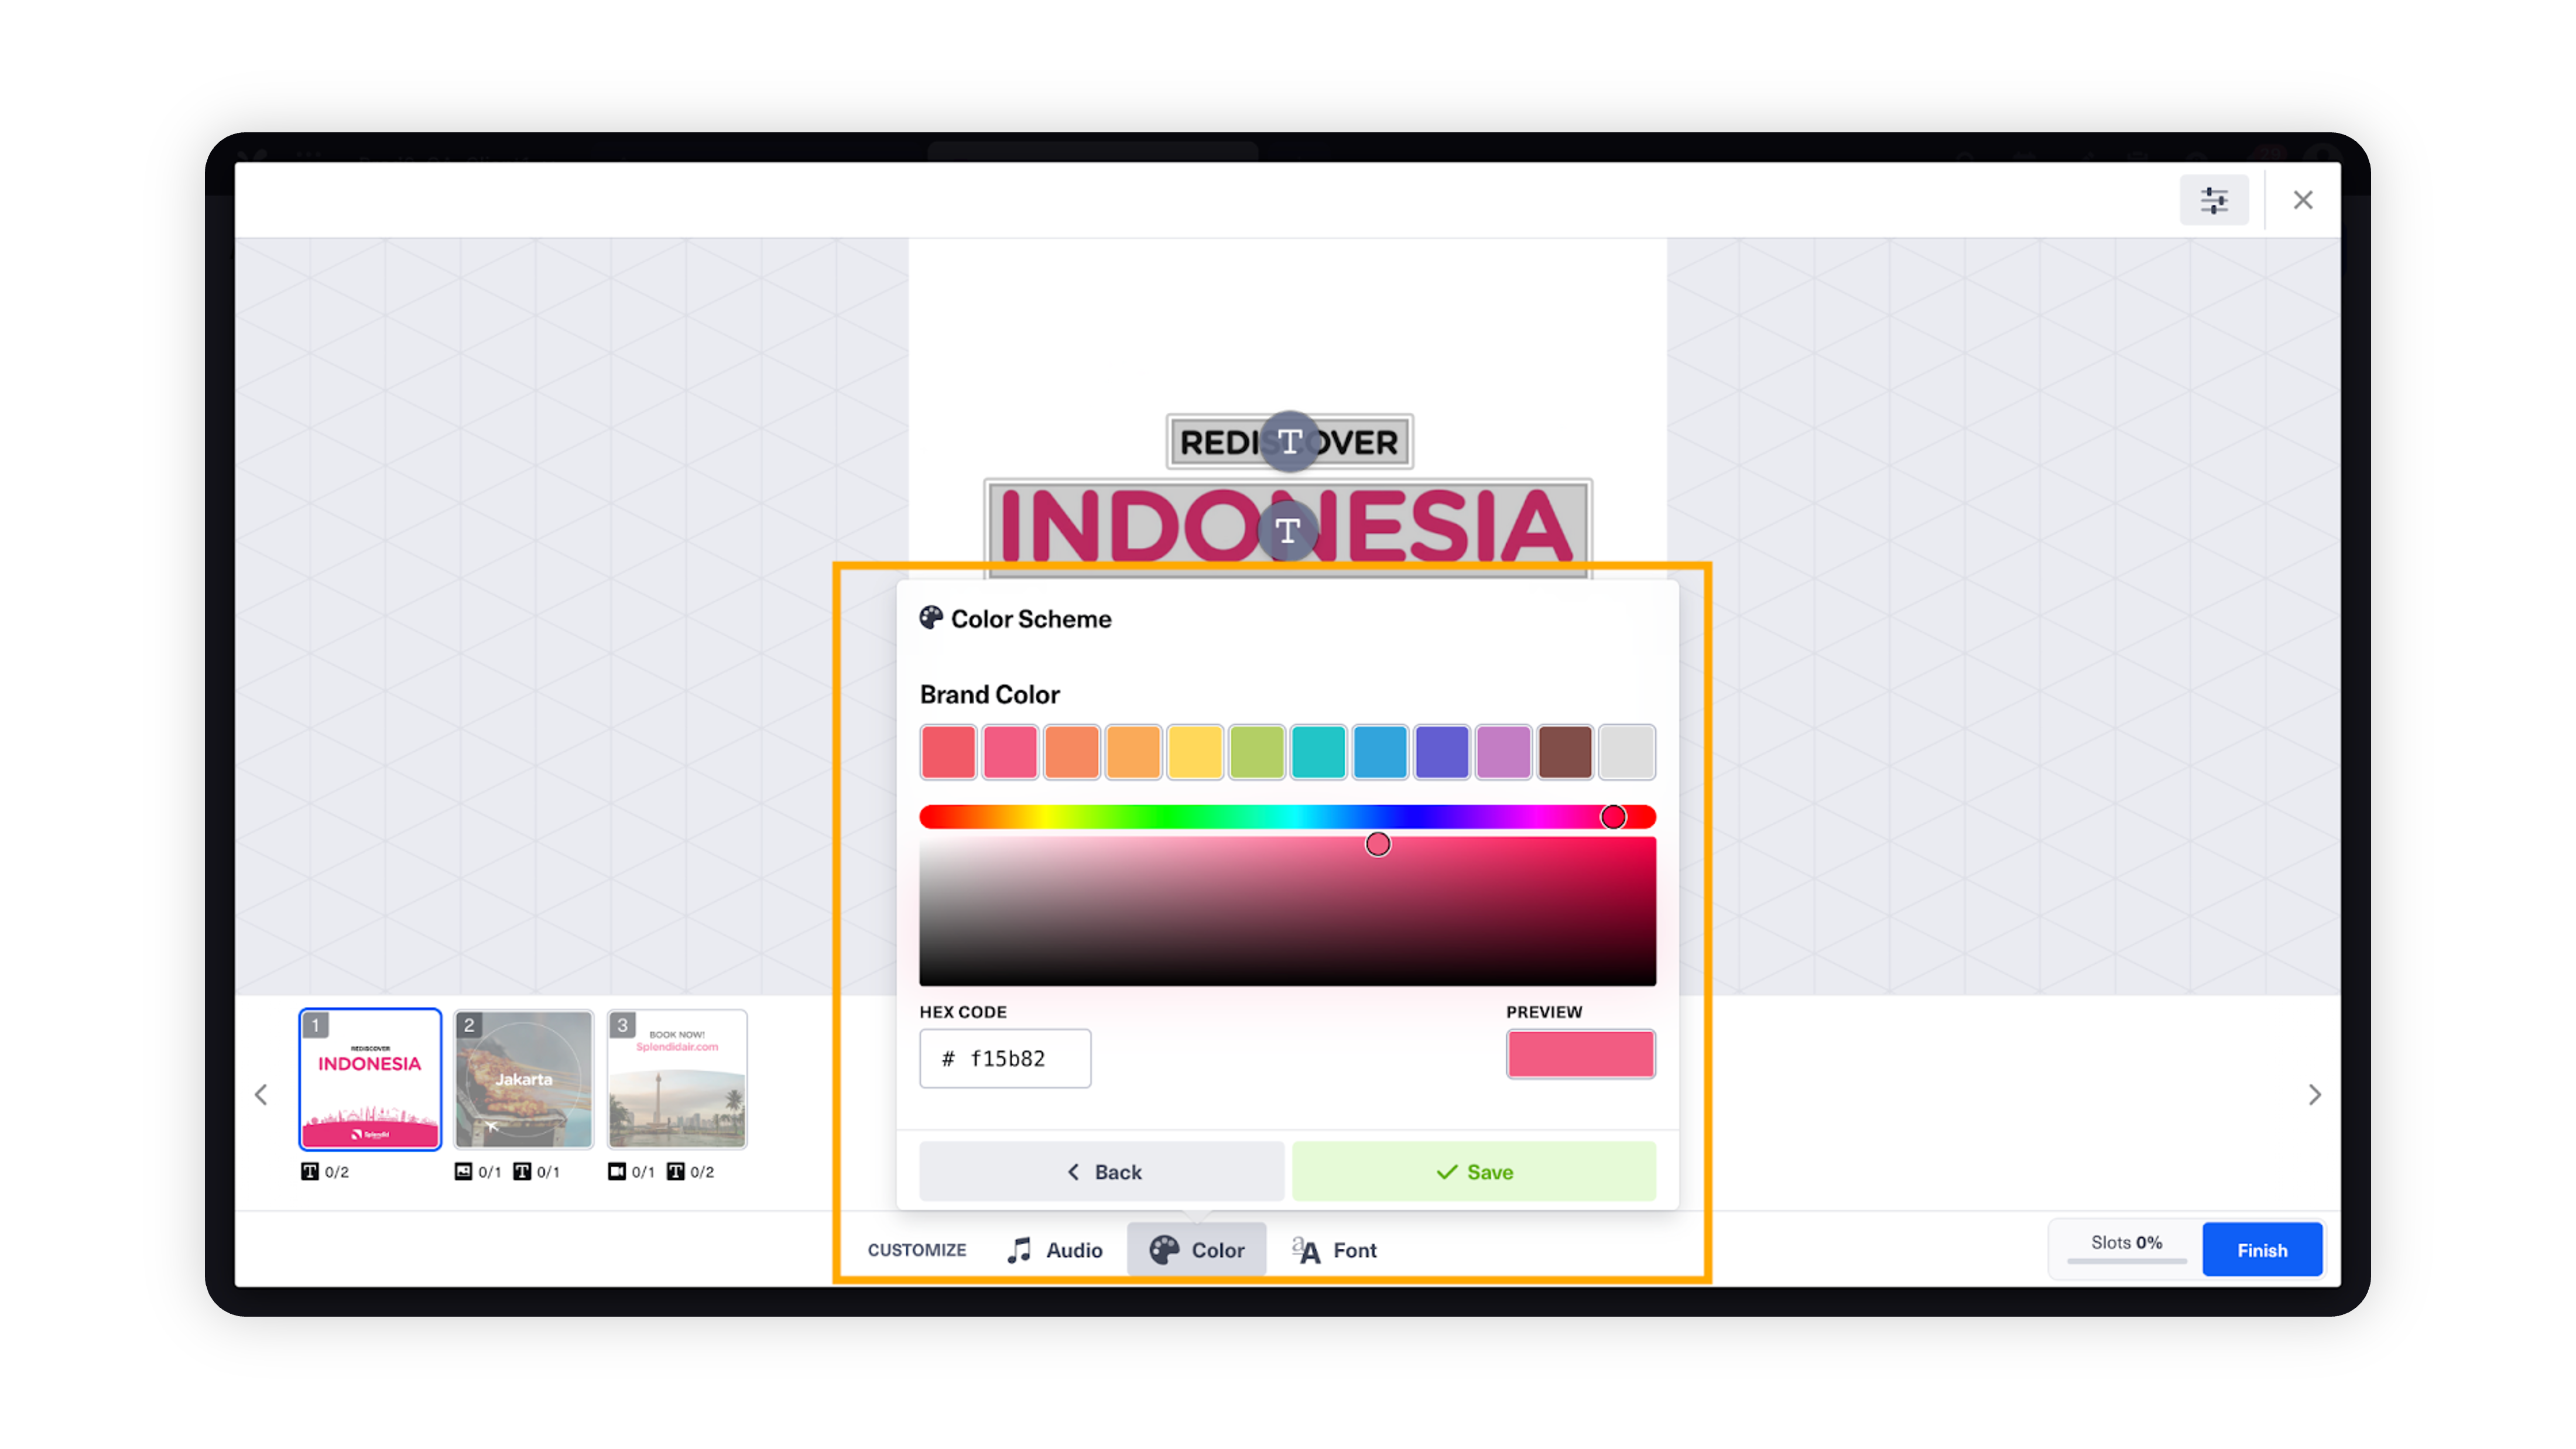
The Customize Color button can be found at the bottom of the Video Editor.
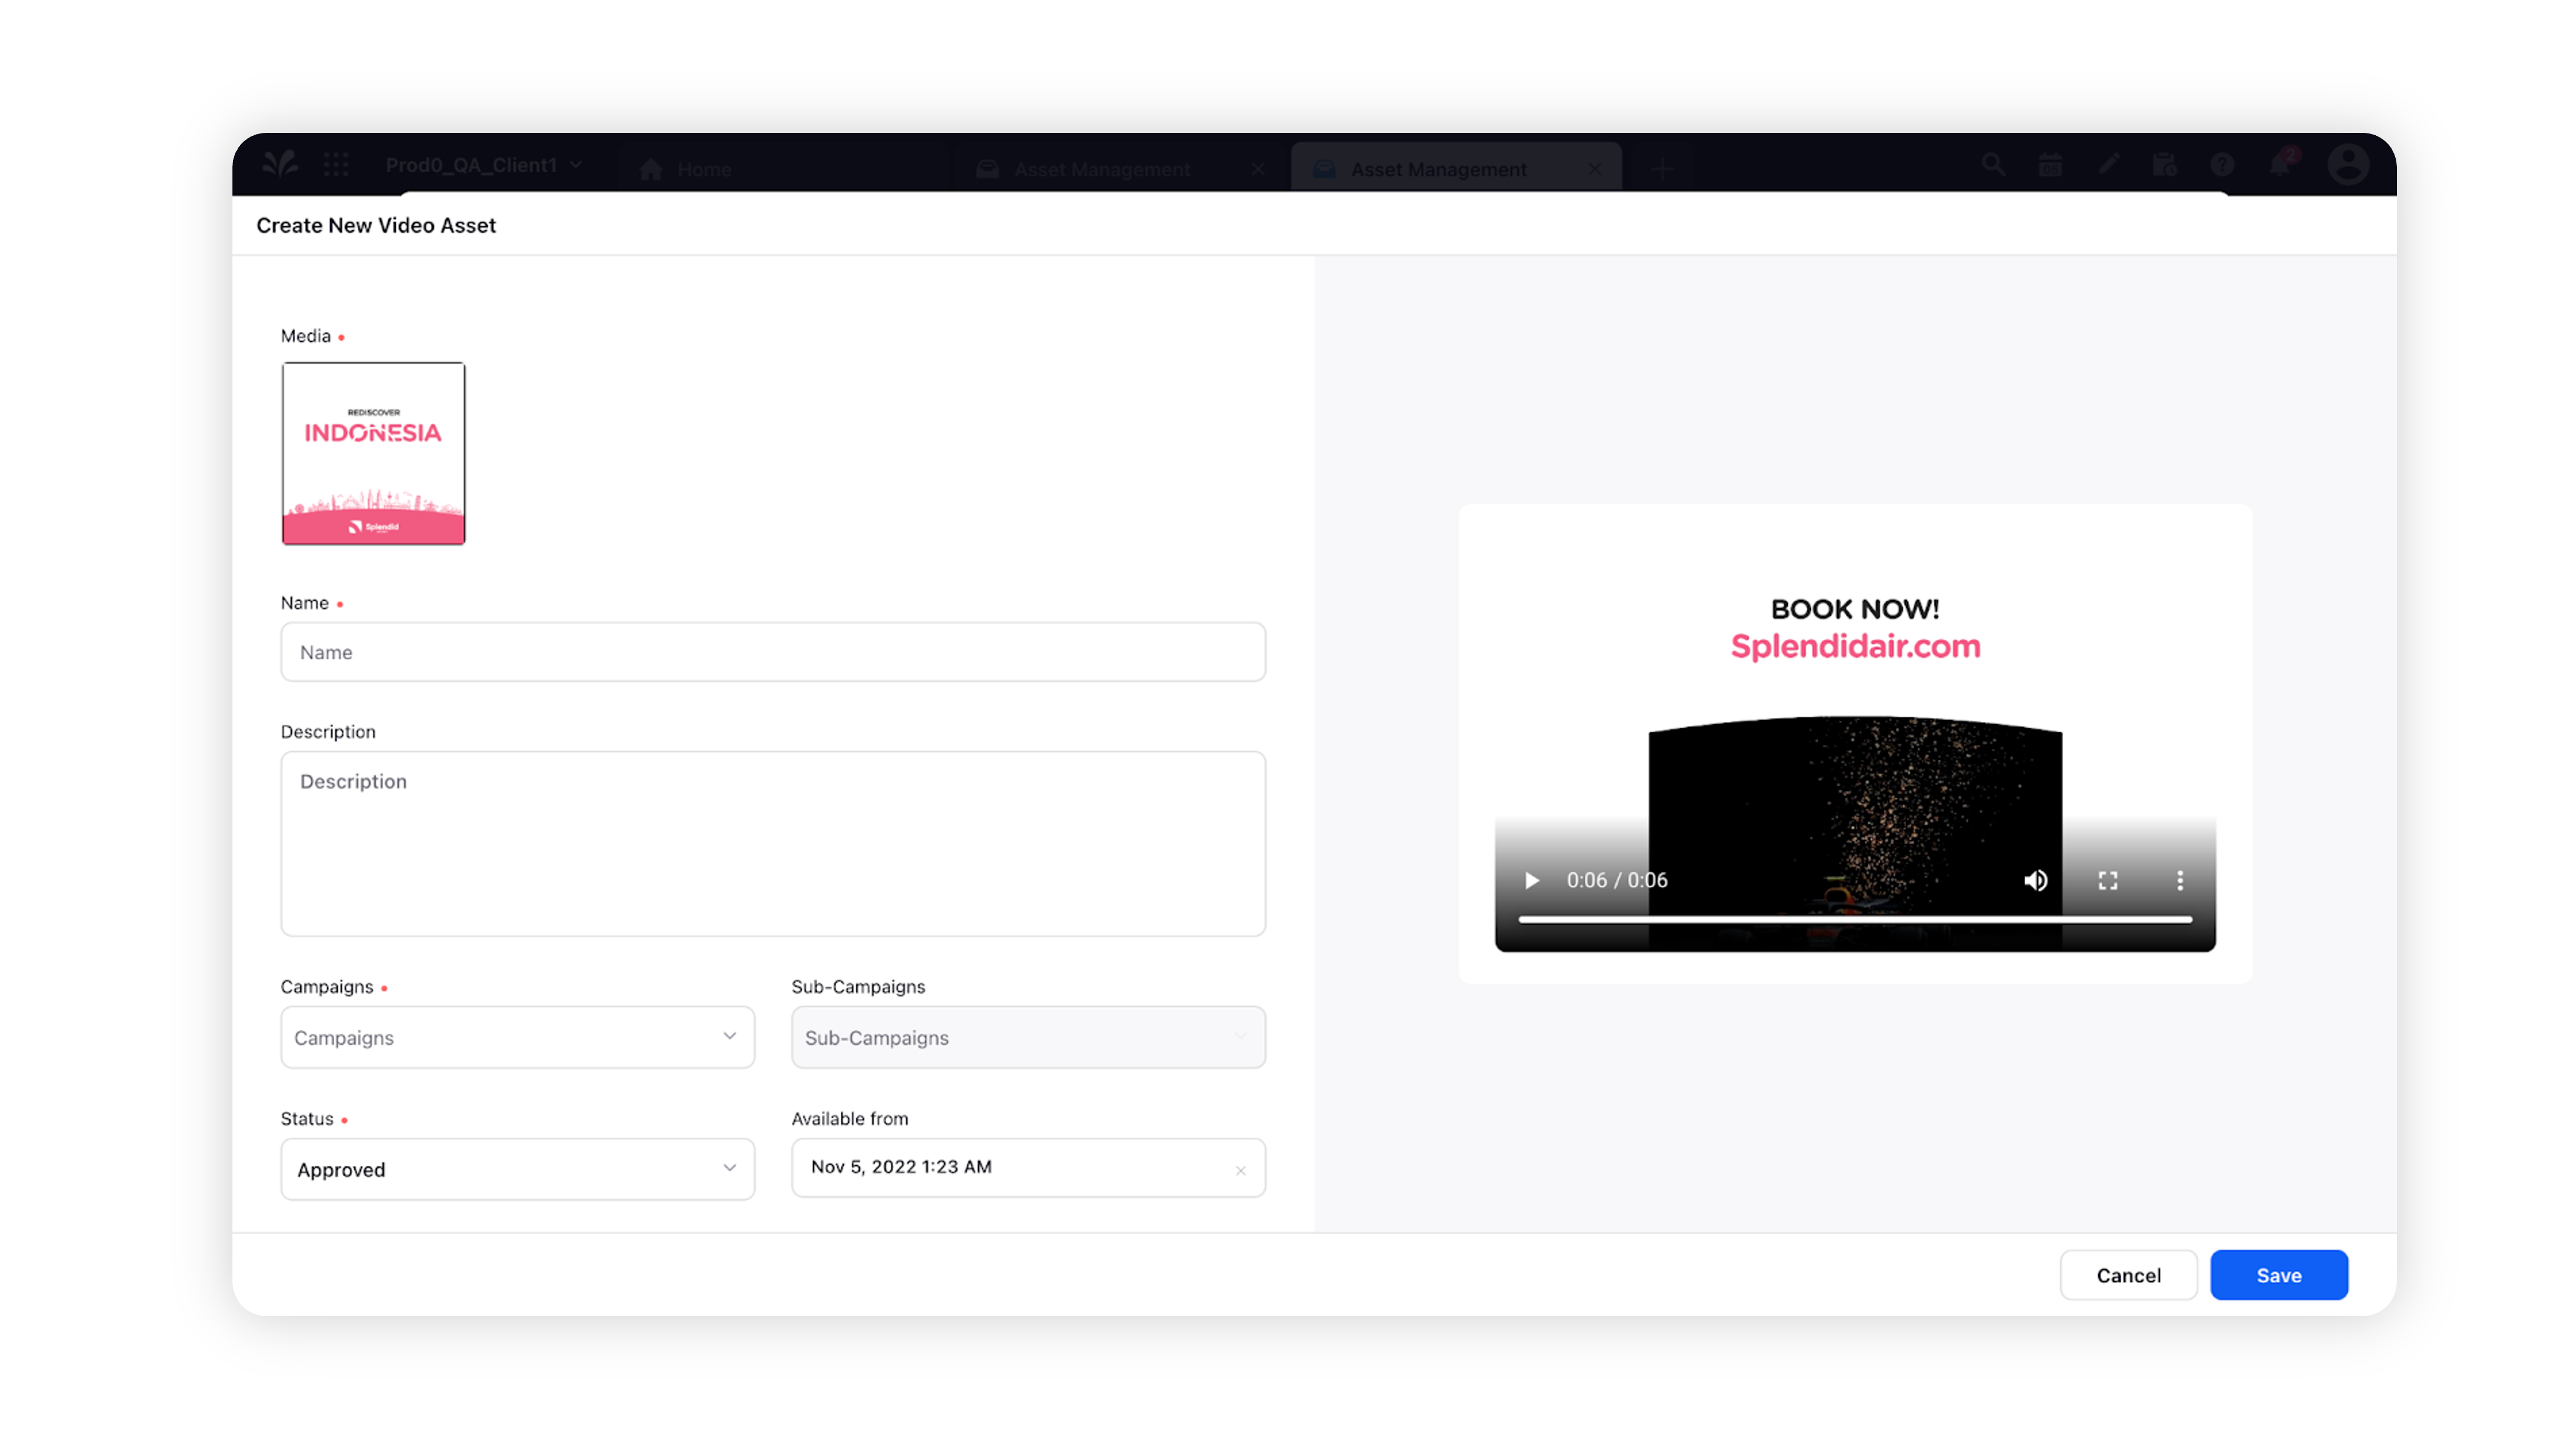
Step 8: Finish & Save
Revisit each scene to review if all slots have been filled properly and save. Once saved you’ll see that video is now rendering. You can set the video name, description and all the Asset Manager Properties and save the asset. Once rendered successfully you will find your new video in the Asset Manager.