View Reporting on Content Themes
Updated
Your outbound content will be classified into different themes based on AI. With the help of our AI model, you can analyze the performance of your content categorized by these themes. This is done by creating a widget in the Reporting Dashboard.
Our AI model will label outbound messages with predefined content themes based on their text content indicating which emotional appeal it corresponds to. This will help you better analyze the top-performing content or types of posts which are gaining high engagement.
The following themes are supported: Motivation, News & Information, Quality & Performance, Modernization & Technological, Inquisition, Cost Savings & Favorable Price, Collectivism, Products & Features, Admiration, Happiness & Joyous, Convenience & Efficiency, Scarcity & Urgency, Gratitude, Exclusivity, Word Play, Safety & Security, Opportunity, Popularity, Proud, Feminism & Empowerment, Health & Wellness, Competition & Challenge, Charity, Self Reliance and Independence, Amazement, Testimonial, Leisure, Love & Relationships, Family, Adventure, Pleasure, Luxury, Traditional, Fear & Anxiety, Mysticism & Magic, Morality, Beauty & Personal Wellness, Endorsement, Excellence, Empathy, Guarantee, Patriotism, Youth, Less-than-perfect, Humor, Earnest, Feel Good and Humor, Nostalgic, Contrasting, Gender Targeting, and Bandwagon.
To View Reporting for Content Themes
Click the New Tab icon and select Reporting within Analyze under Sprinklr Marketing → Marketing tab.
On the Reporting Dashboard window, click Add Widget in the top right corner.
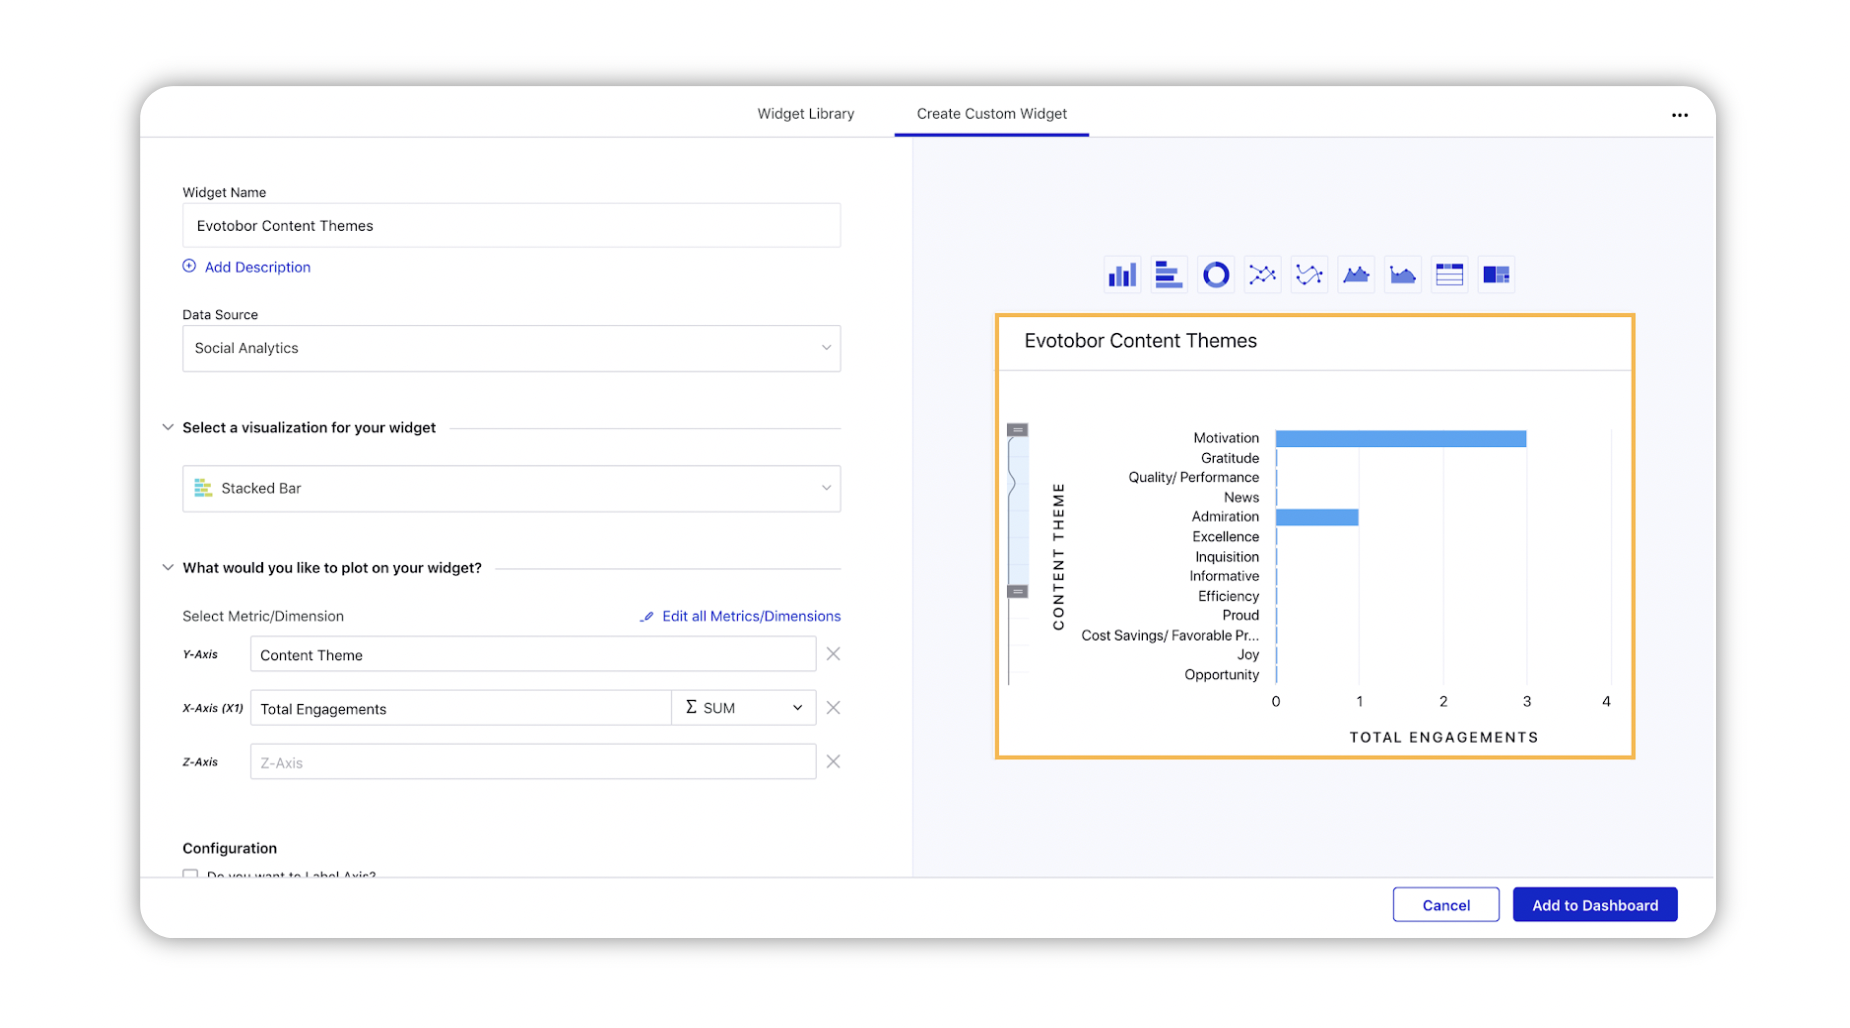
On the Create Custom Widget tab, give a name to the widget in the Widget Name field. You can also add a description if needed by clicking Add Description.
From the Data Source dropdown, select Social Analytics.
Under Select a visualization for your widget, select Stacked Bar.
Under Select Metric/Dimension, select Content Theme from the Y-Axis dropdown.
From the X-Axis (X1) dropdown, select Total Engagements. You can preview the created widget on the right side of the Create Custom Widget tab.

Add other related information such as Configuration, Filters and Display Options if needed.
Click Add to Dashboard in the bottom right corner.
