Create a Workflow
Updated
Automate the logical flow of user tasks on various entities with Workflow Engine.
To Create a workflow:
Prerequisite setup:
Clearly lay out the brand’s process and identify the various phases in it.
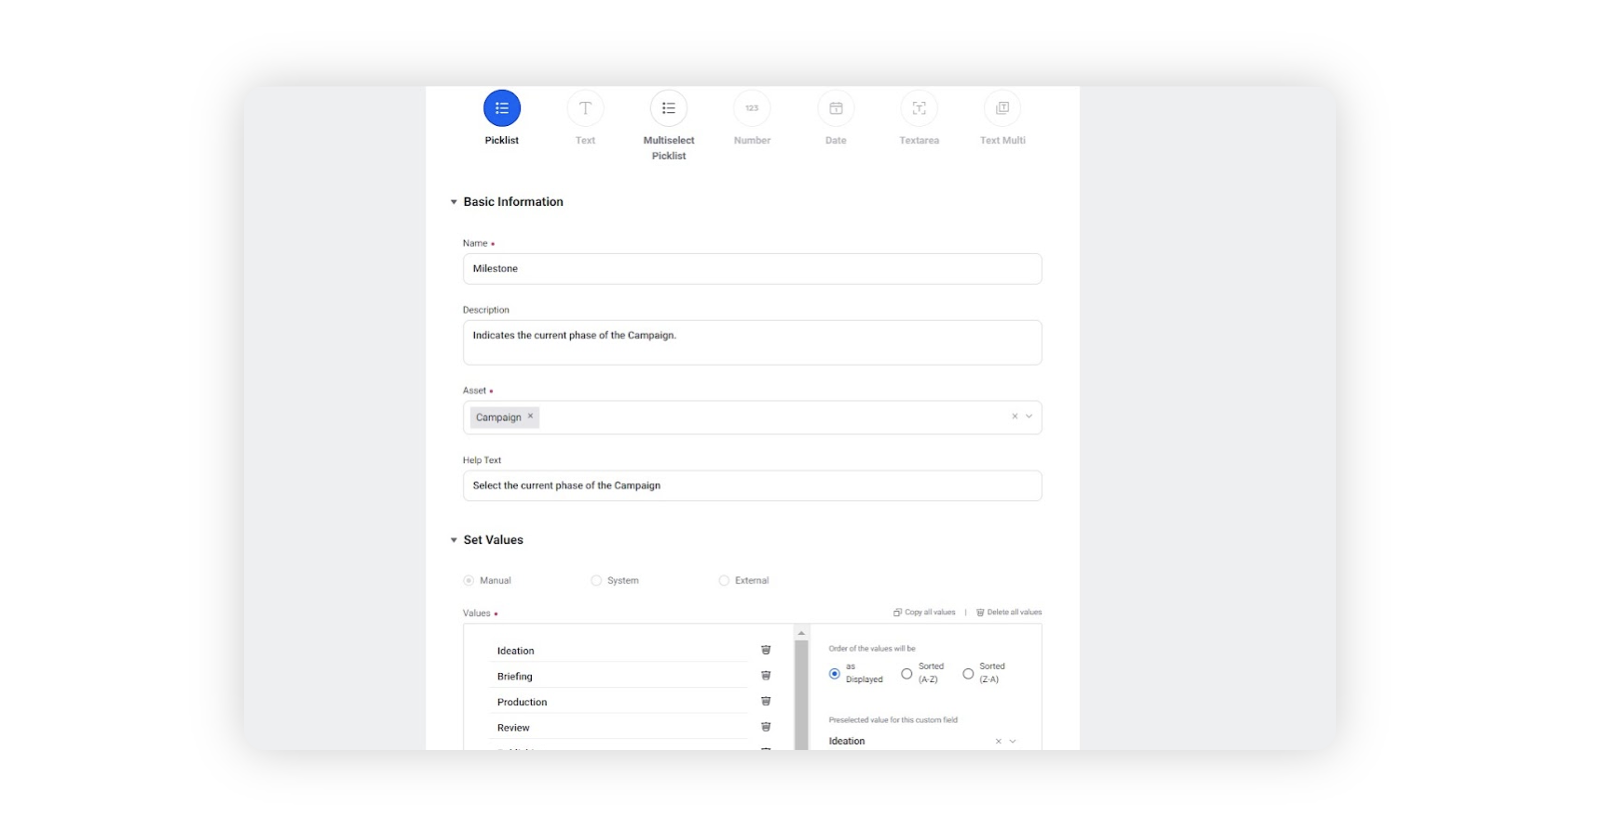
Create a picklist custom field named “MIlestone” on the required Asset classes to indicate the current phase of the campaign, sub-campaign or outbound message. The values of the custom field should represent the various phases of the brand’s process such as Briefing, Ideation, Production, Planning, Review, Publishing, Optimisation / Analysis & Completed.
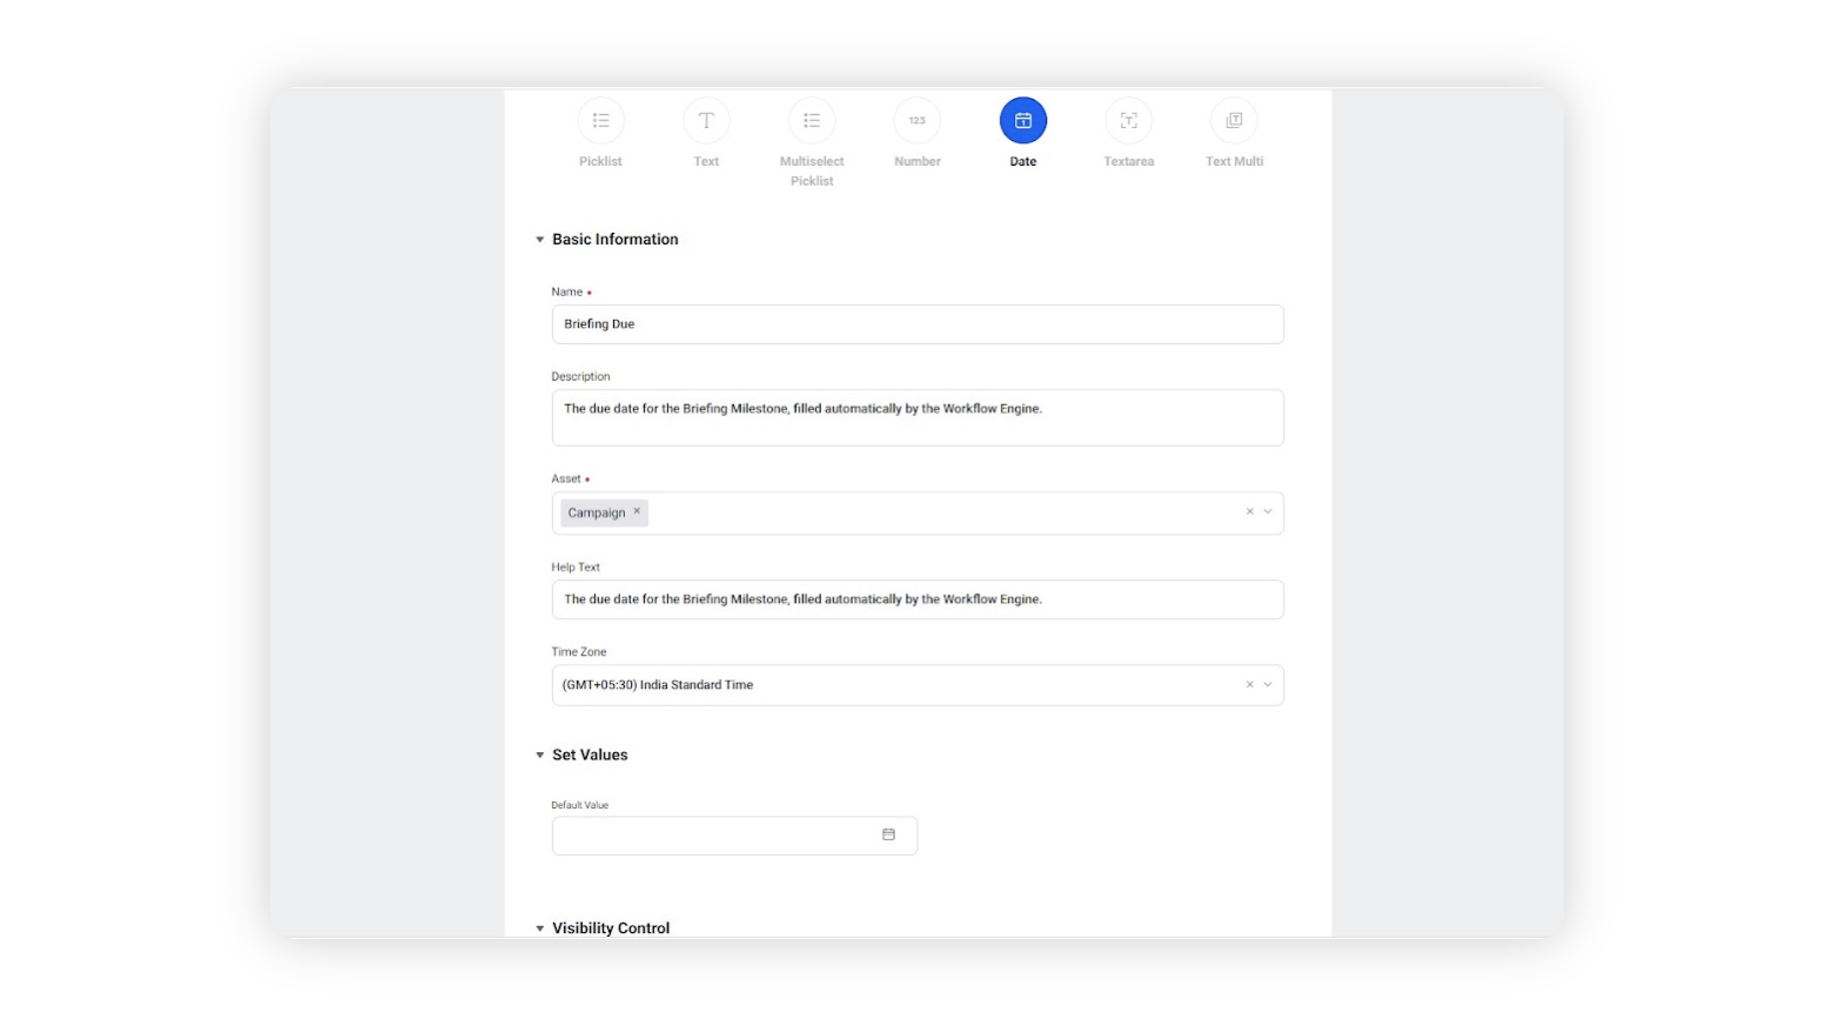
Set up date custom fields for due dates and completion dates for each of the milestones. For example, for the Briefing value of the milestone custom field, we’d need one “Briefing Due” custom field and one “Briefing Completed” custom field. Similarly, we’d need two such custom fields for each of the milestones on the needed asset classes.
Workflow setup steps:
You may access Workflow Engine by clicking the New Tab icon. Under Sprinklr Marketing → Marketing Tab, click Workflow Engine within Produce.
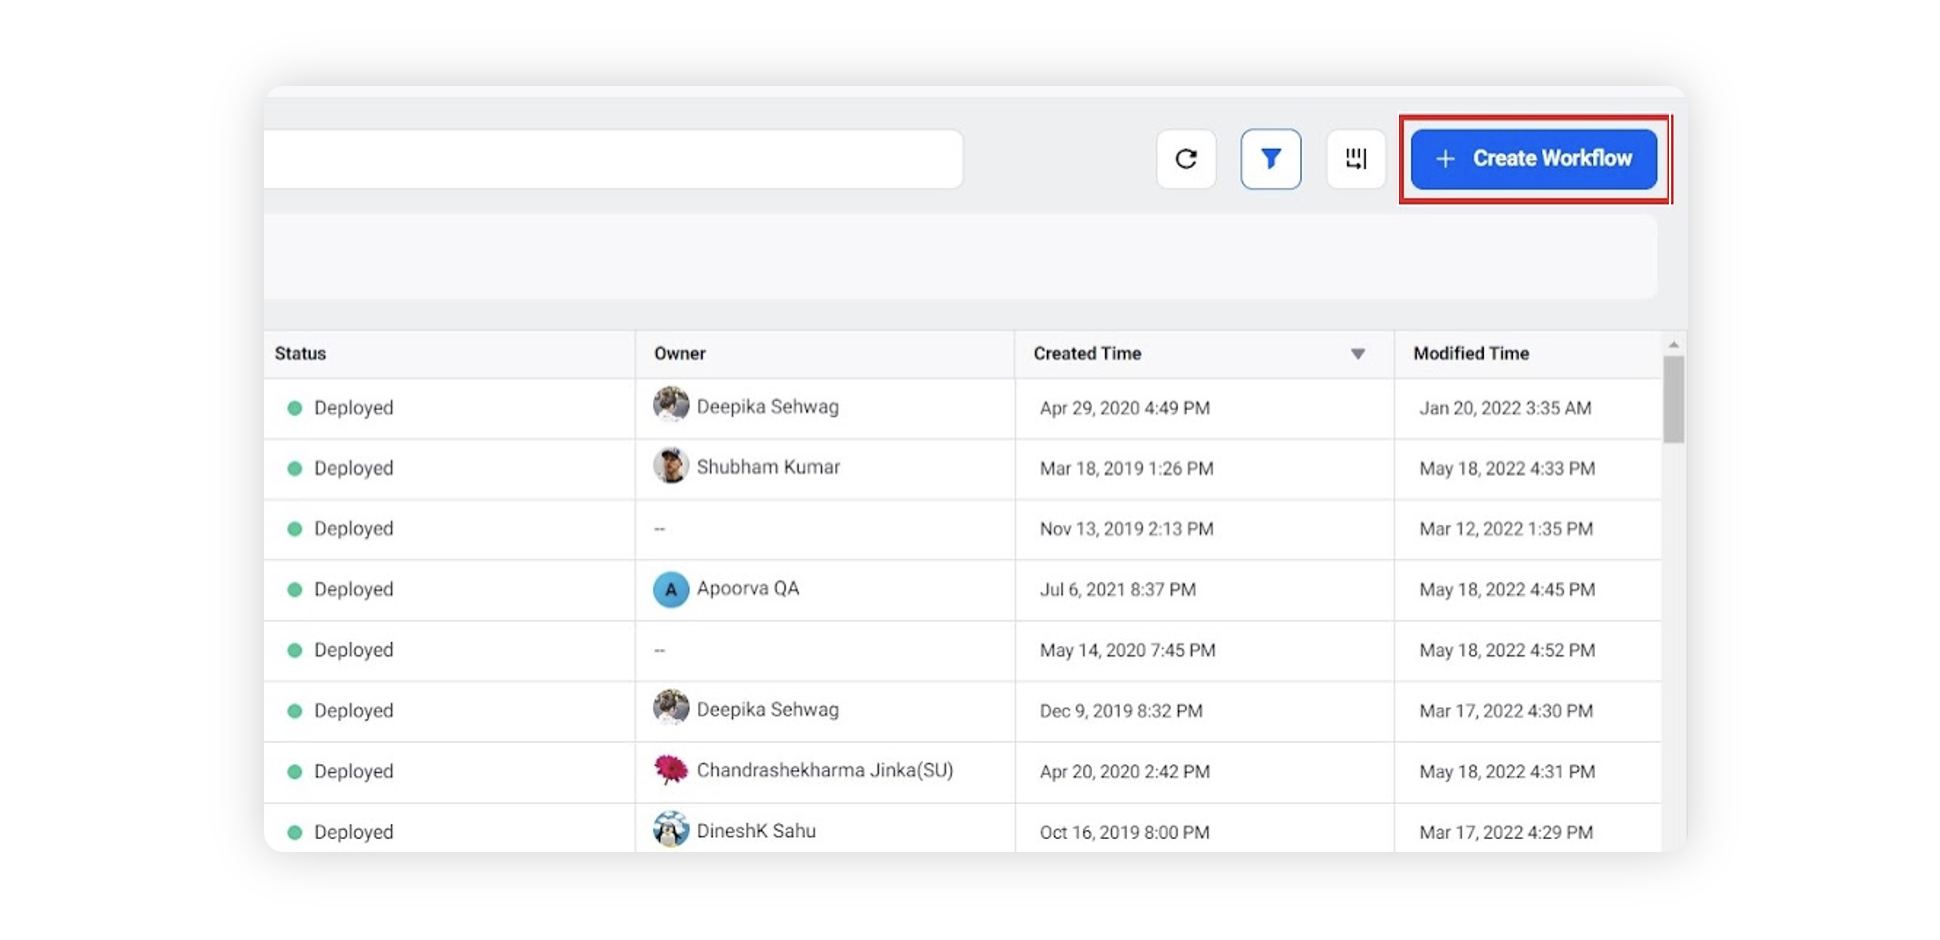
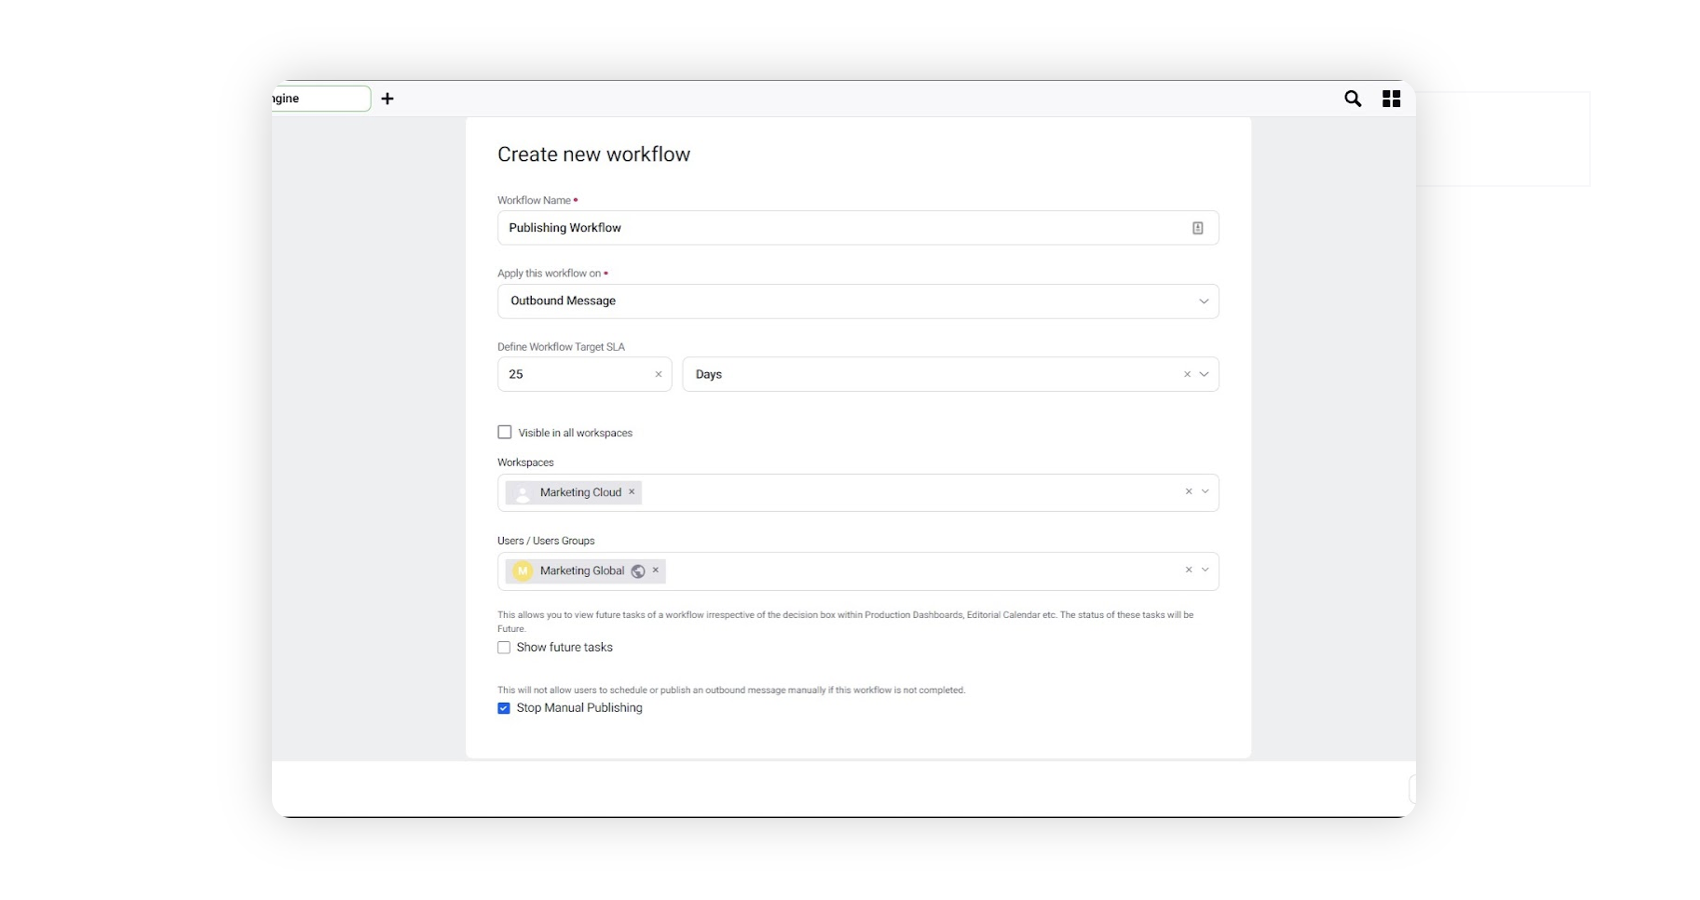
In the top right corner of the Workflow Engine window, click Create Workflow.
On the Create new Workflow window, provide basic details such as name and entity to apply the workflow on.
Click Create. You will be redirected to Workflow Builder.
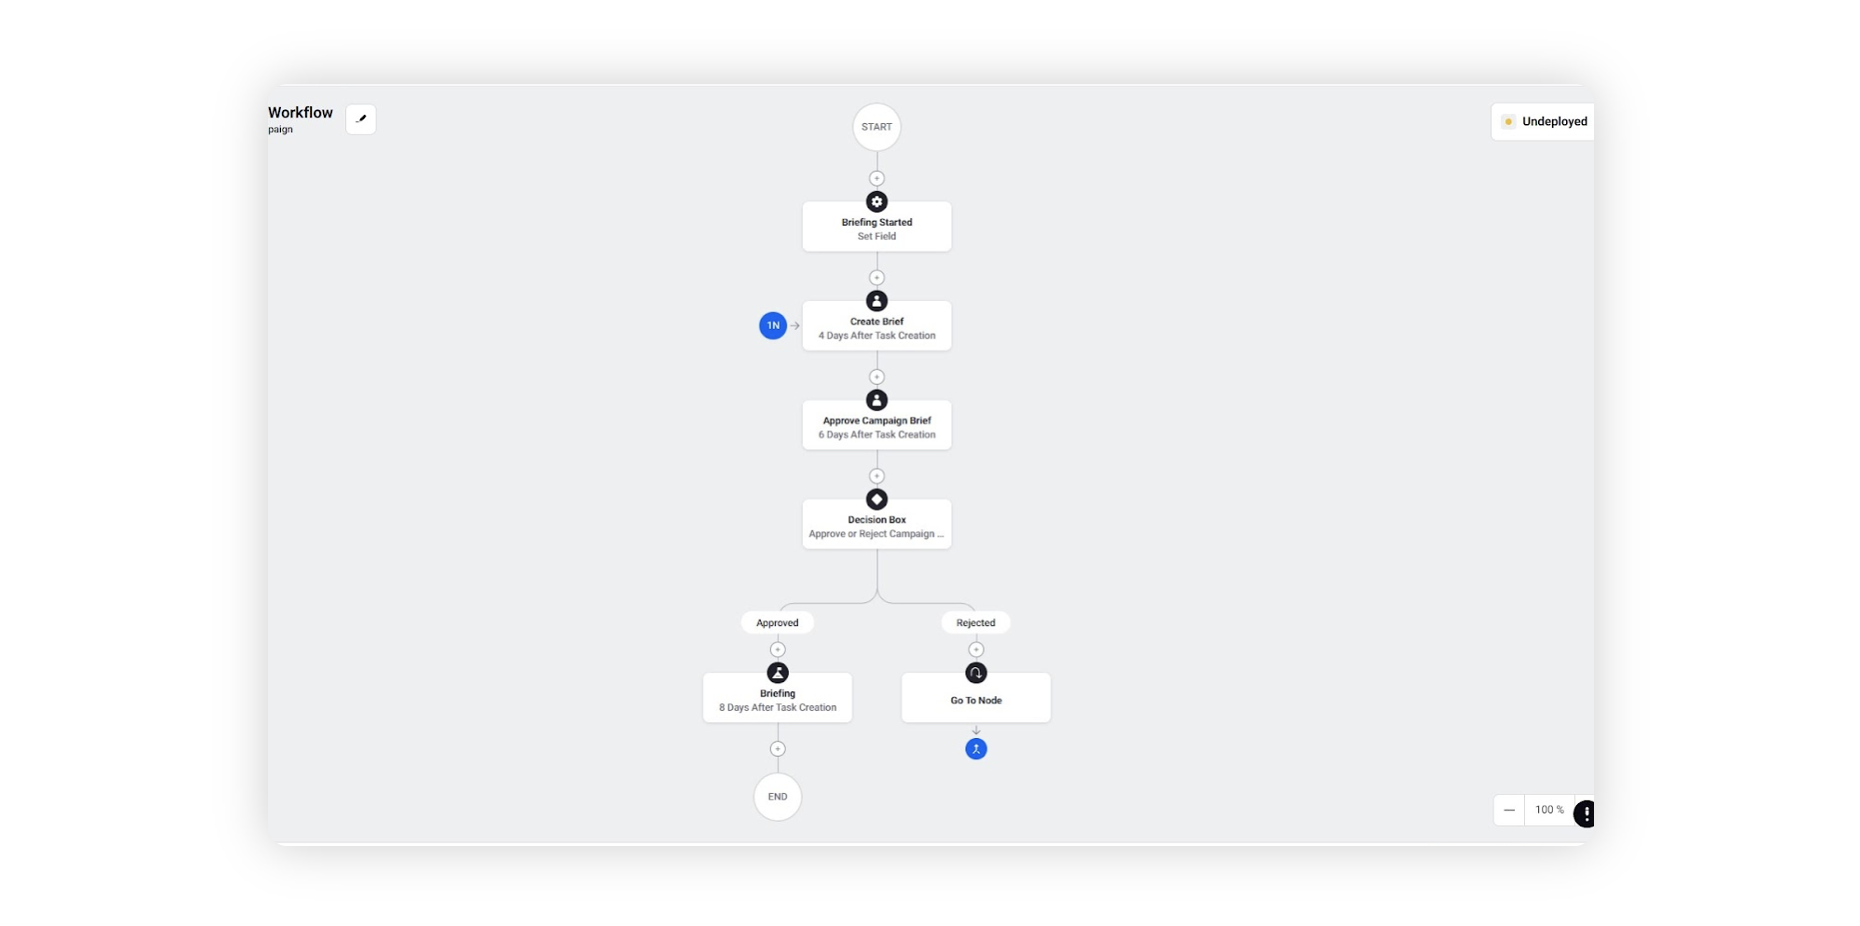
On the Workflow Builder window, click the Addition icon to select components for your workflow. For more information, see Workflow Components — Field Descriptions.
Start by setting up a Service Task.
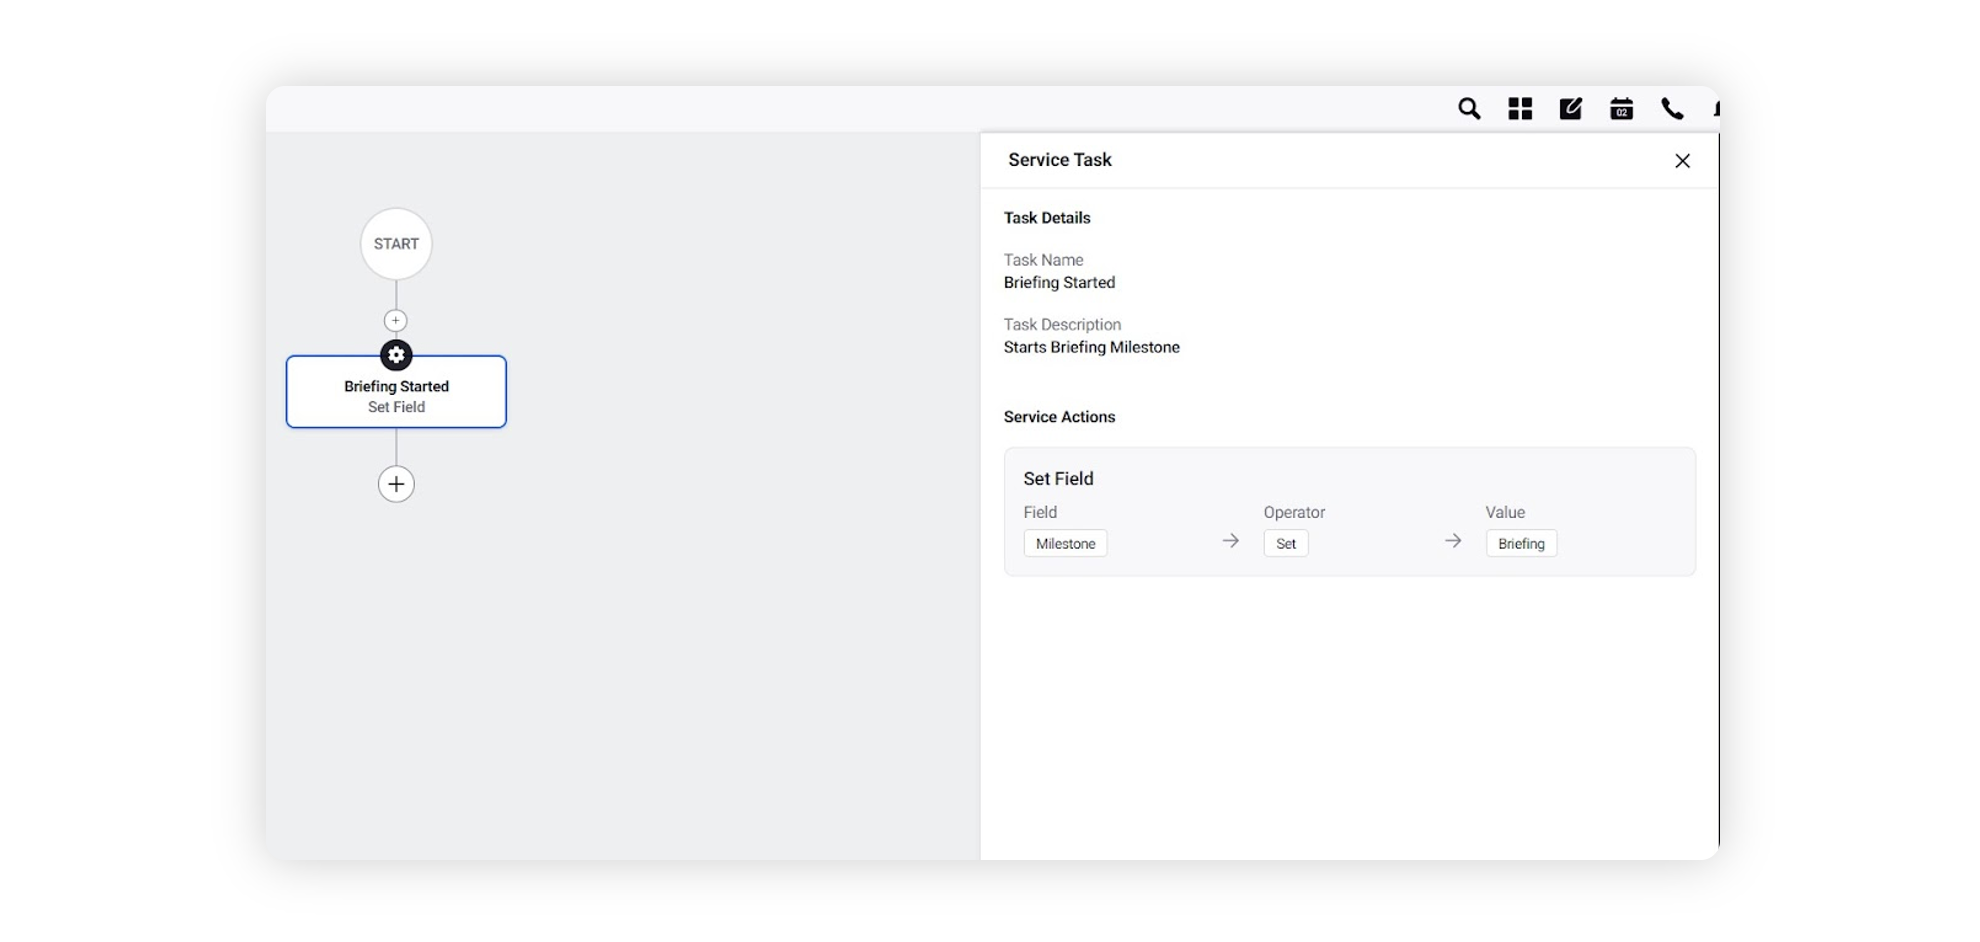
In the Edit Service Task window, click on Addition action. Select Set Field under Add Action.
Select the Milestone custom field and set the value as the first phase - Briefing.
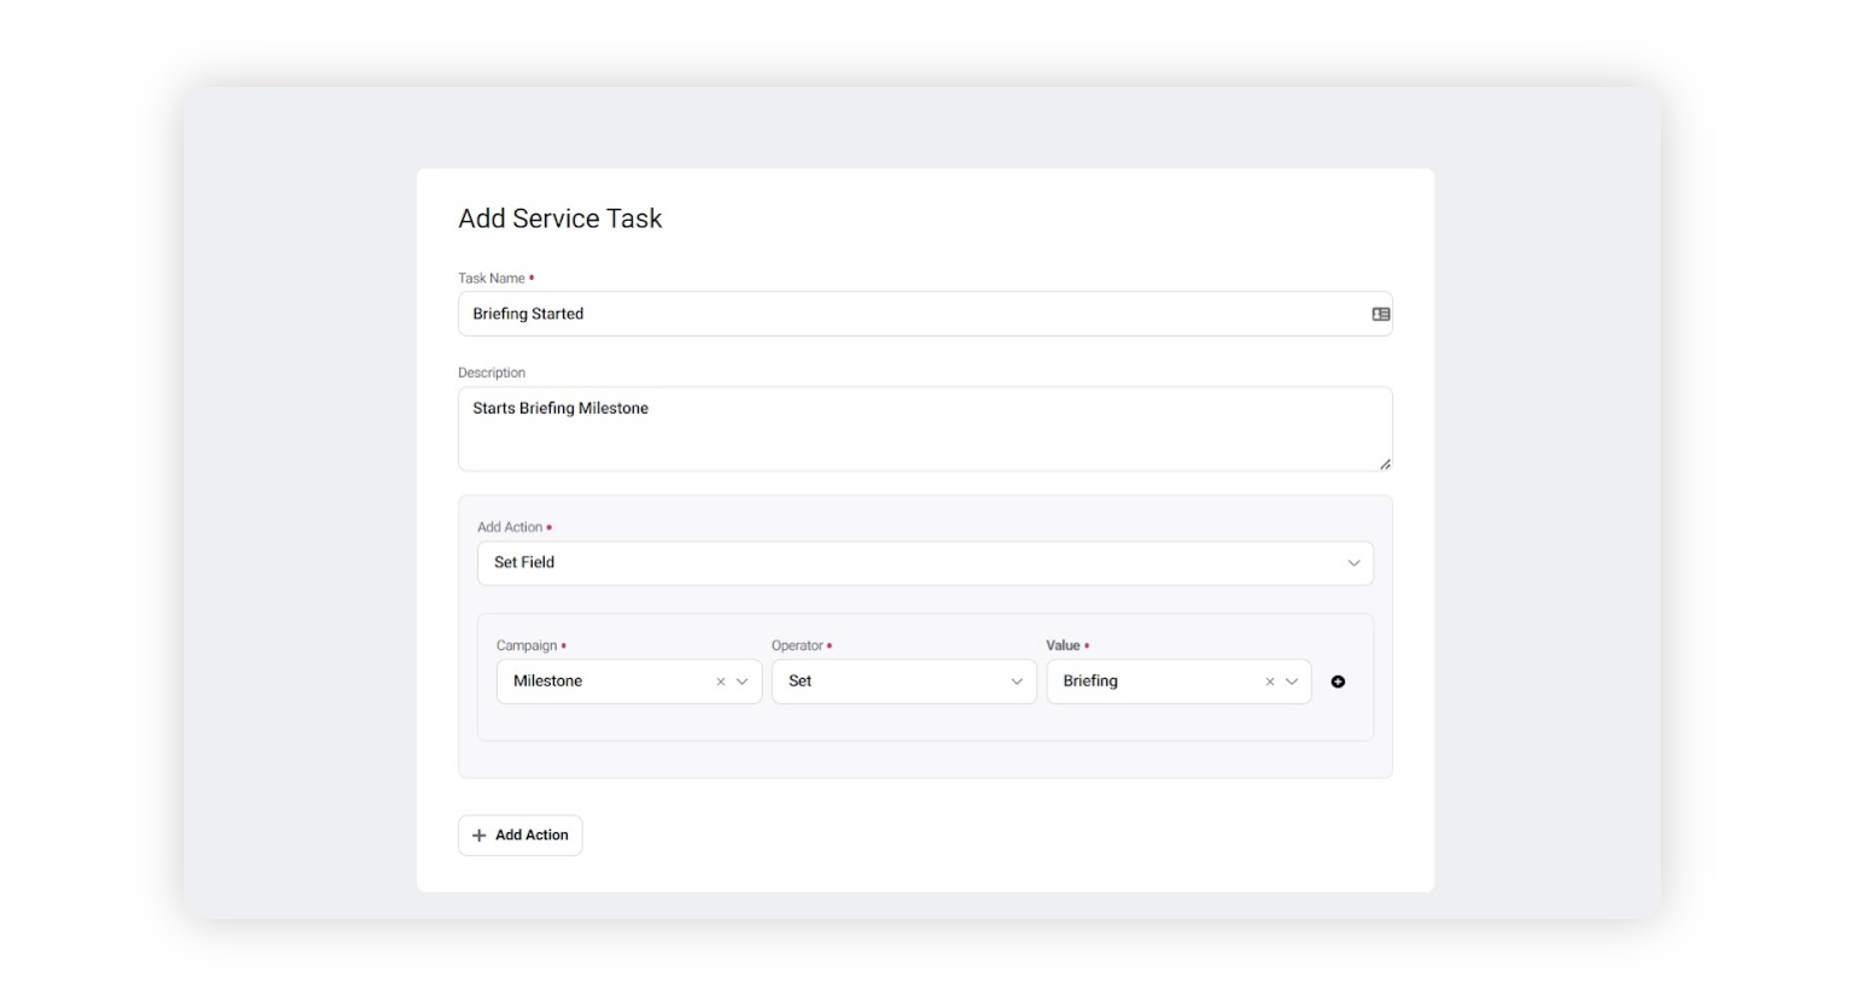
Click on Save to save your changes.
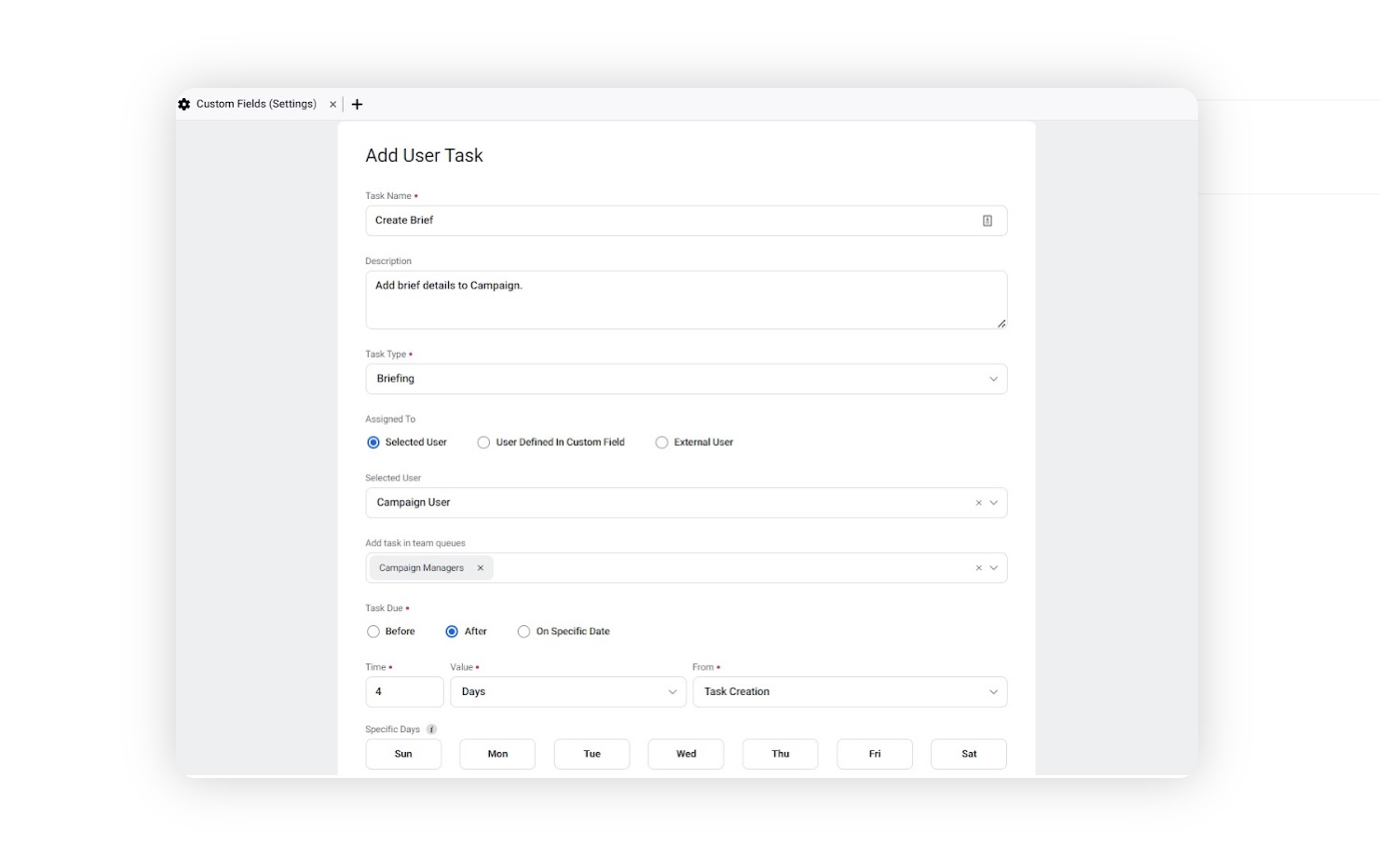
Set up user tasks for the milestones such as Create a Brief.
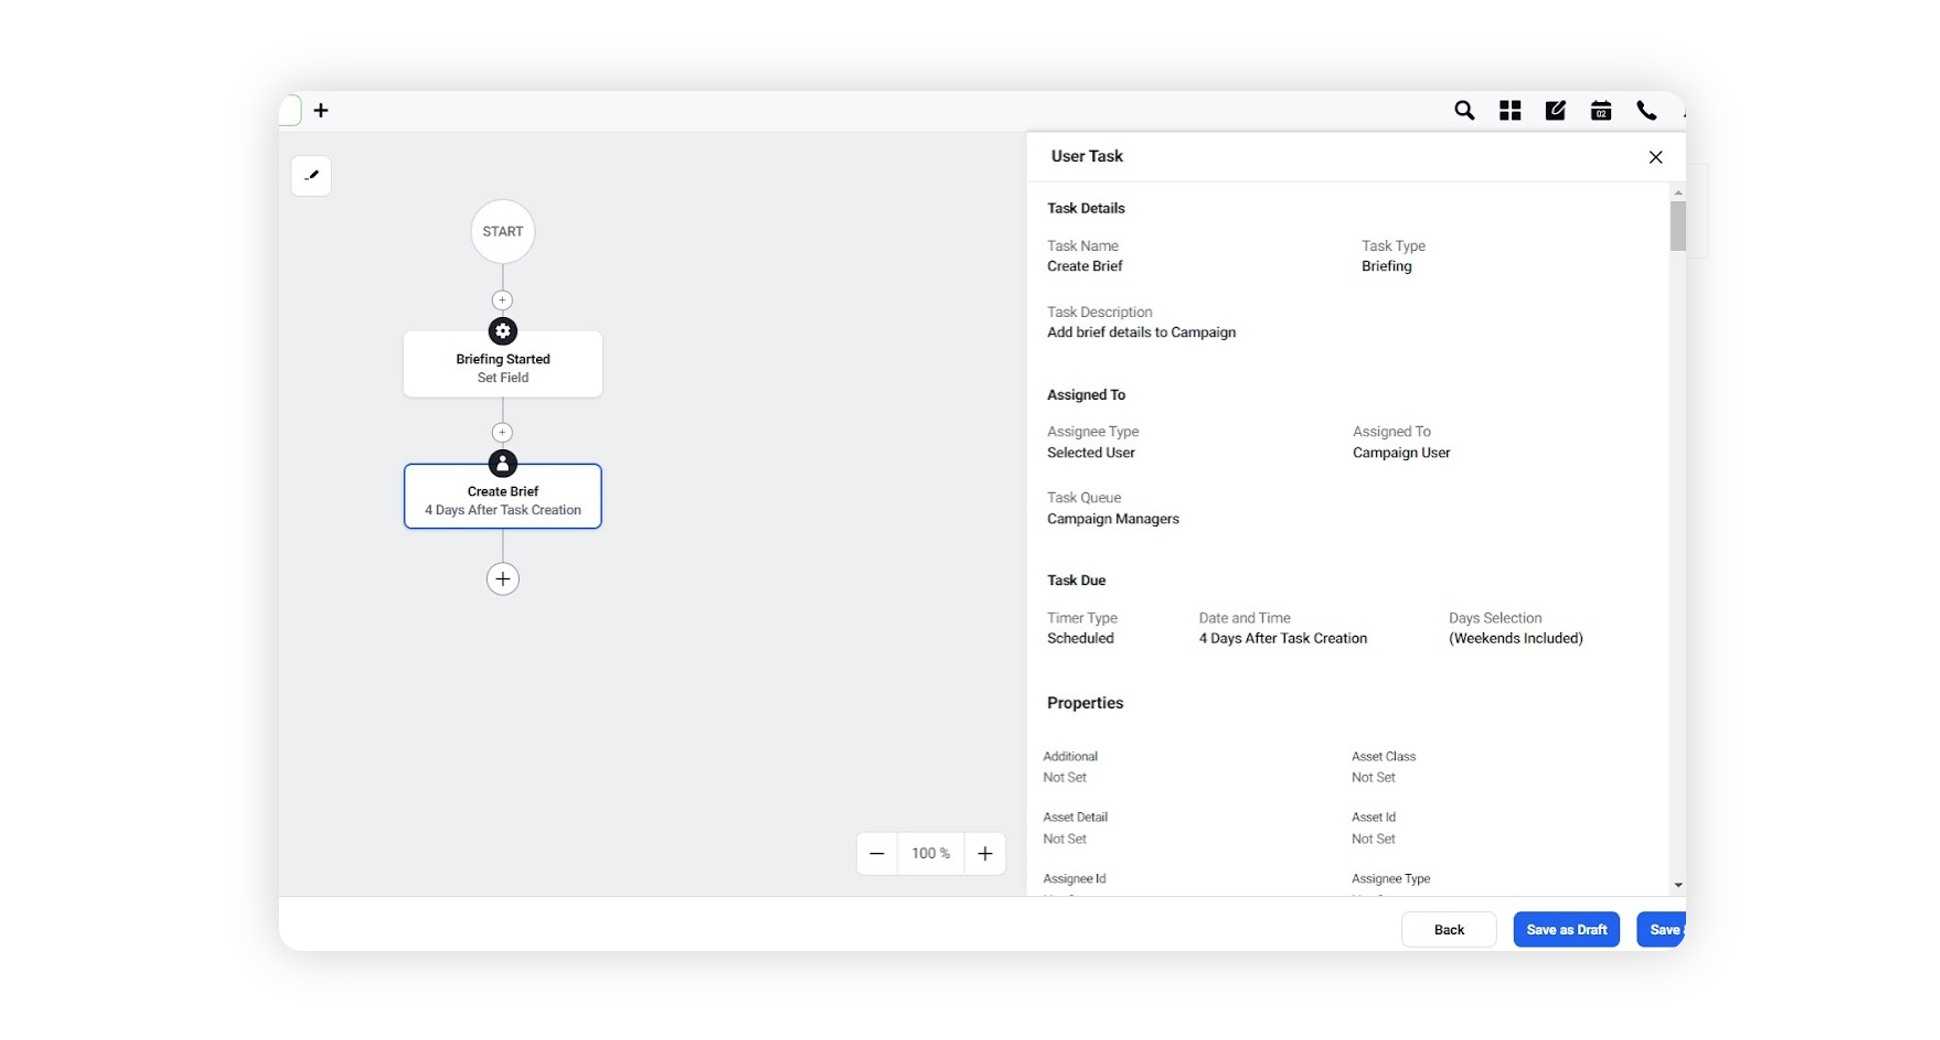
In the Edit User Task window, set the task type appropriately as the first phase of the process - Briefing.
Define who the task should be assigned to. This can be done by assigning it to a selected user, user defined in custom field or an external user.
You can also add in any additional properties based on the requirements within the Edit User Task window.
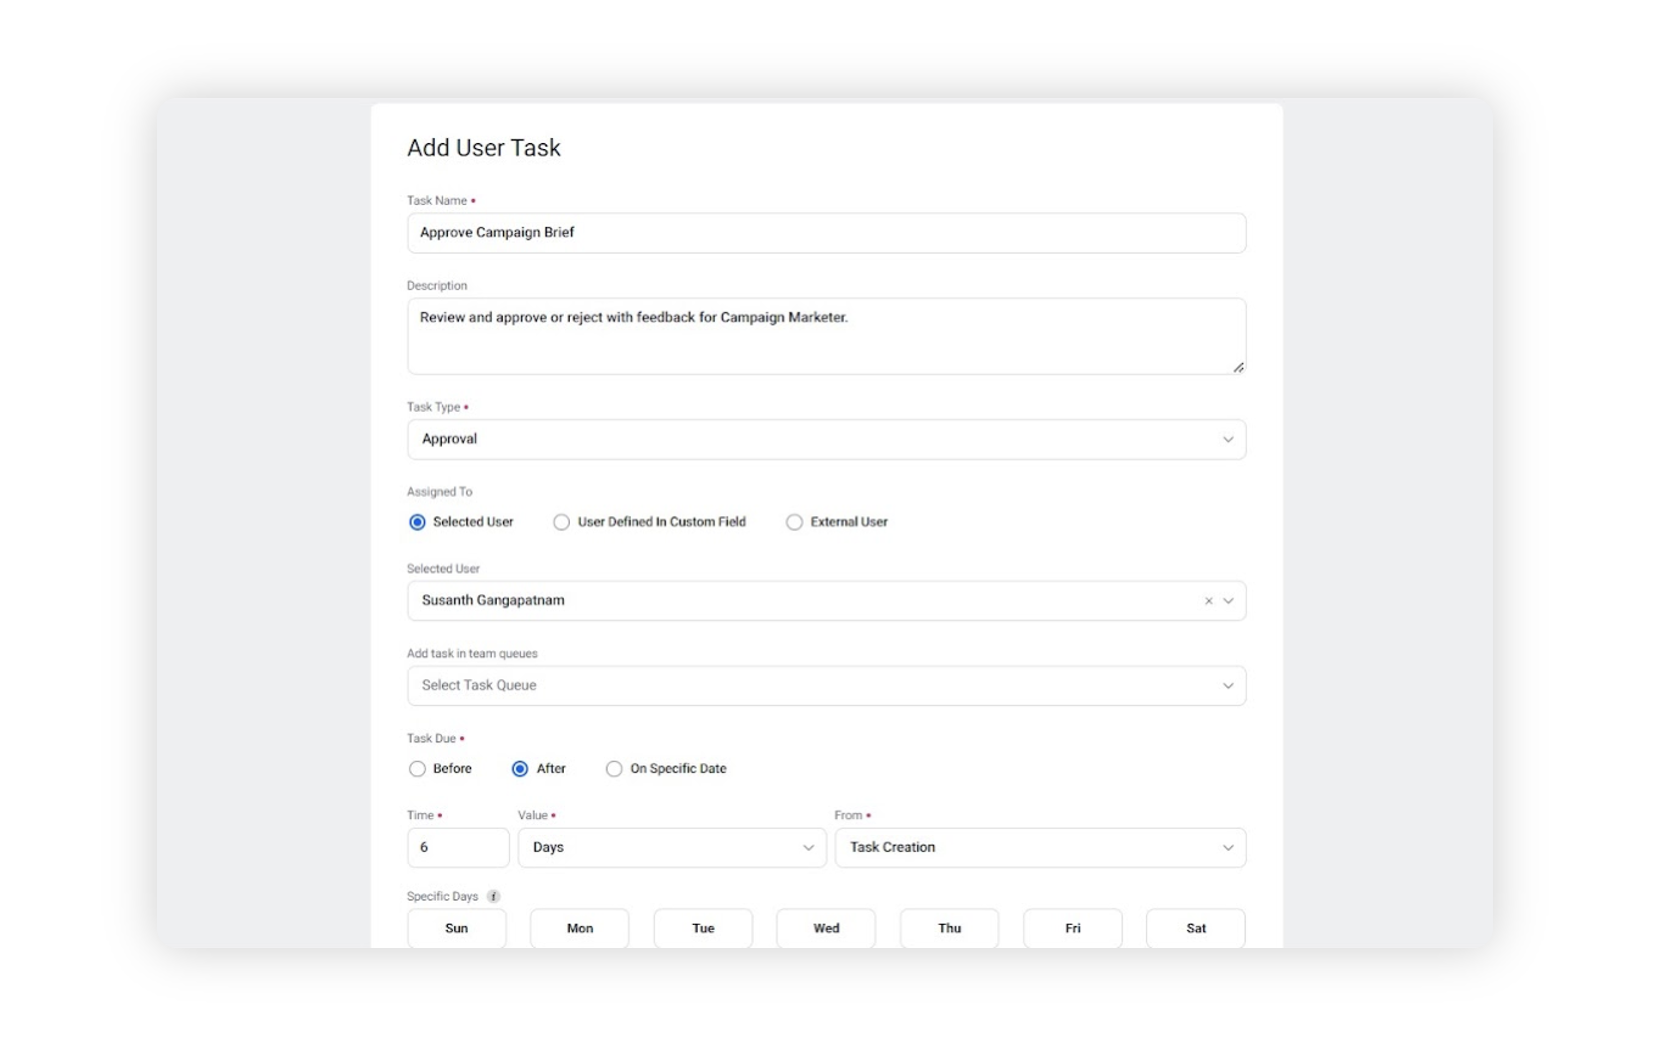
Set up user tasks for the approval of content / work such as Approve the Brief per process requirements.

On the Edit User Task window, set the task type as the first phase of the process - Approval.
Follow the same steps as any User Task and make appropriate changes.
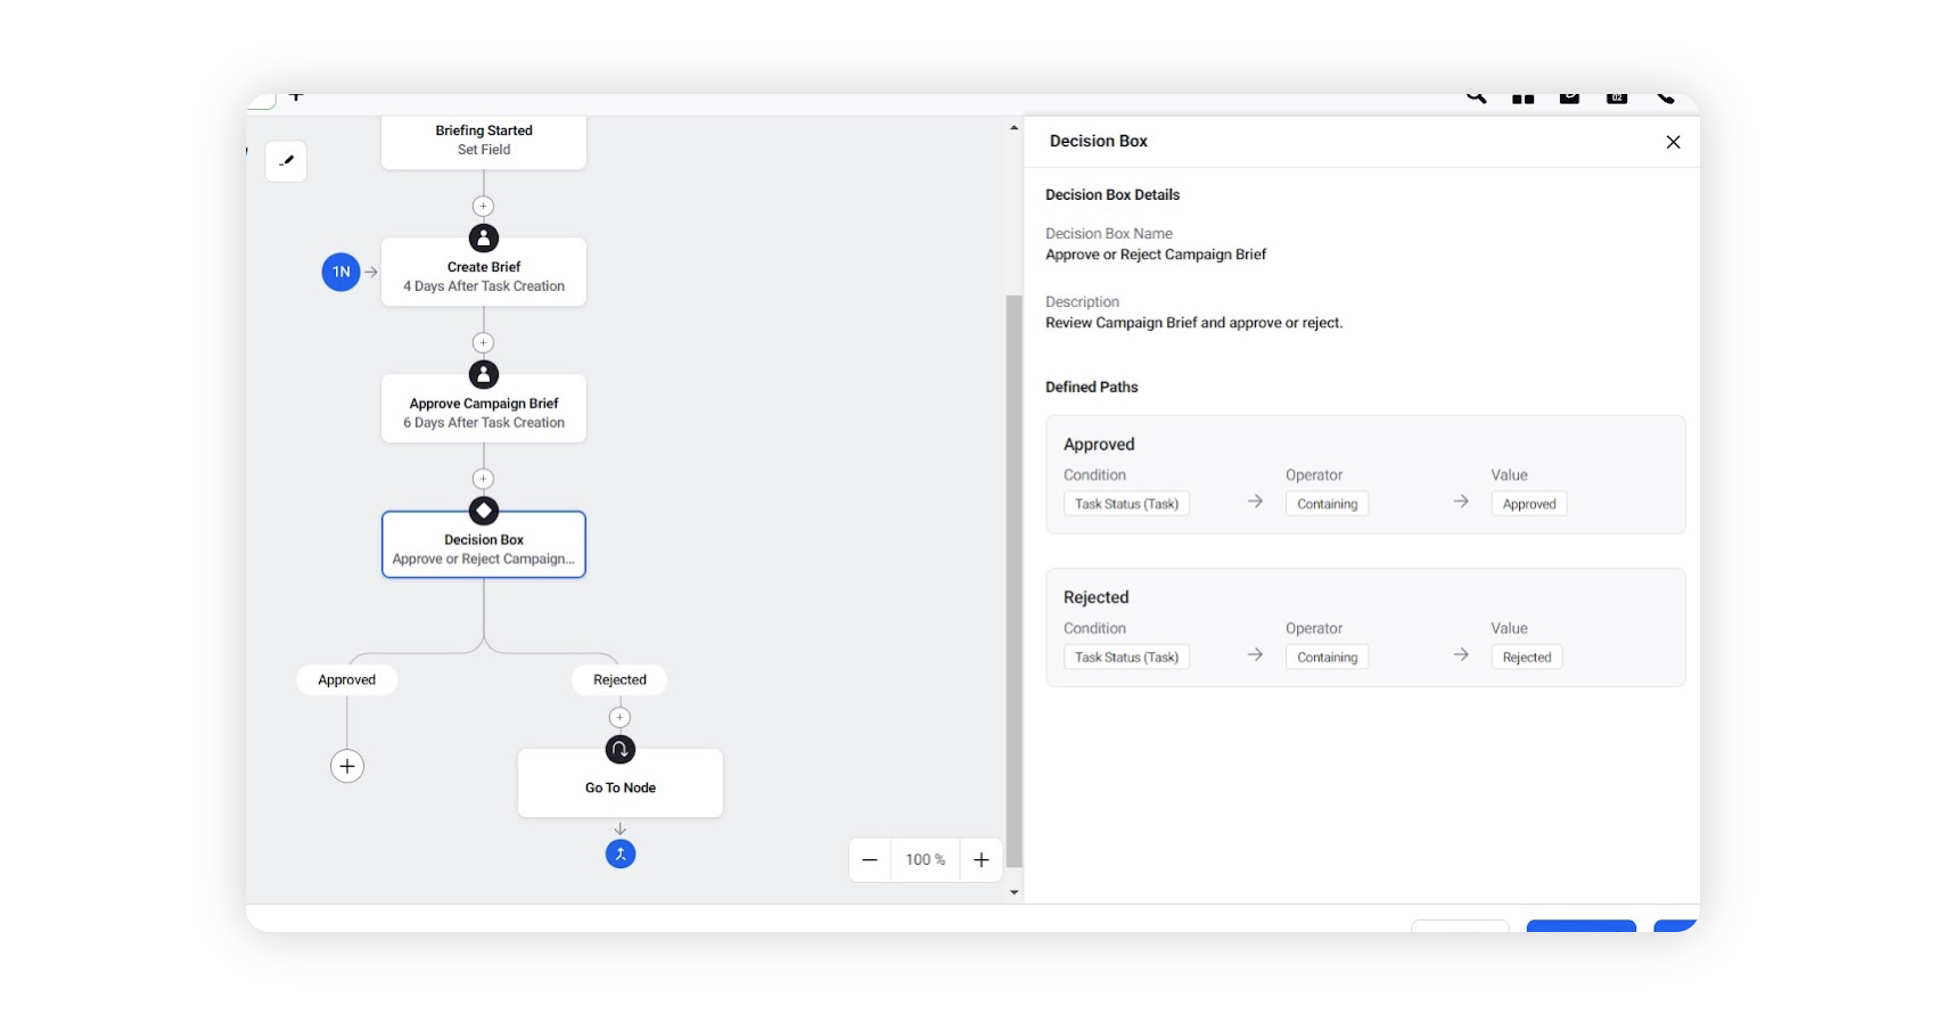
Create a Decision Box for Approval tasks. Use the Task Status custom field to define the paths.
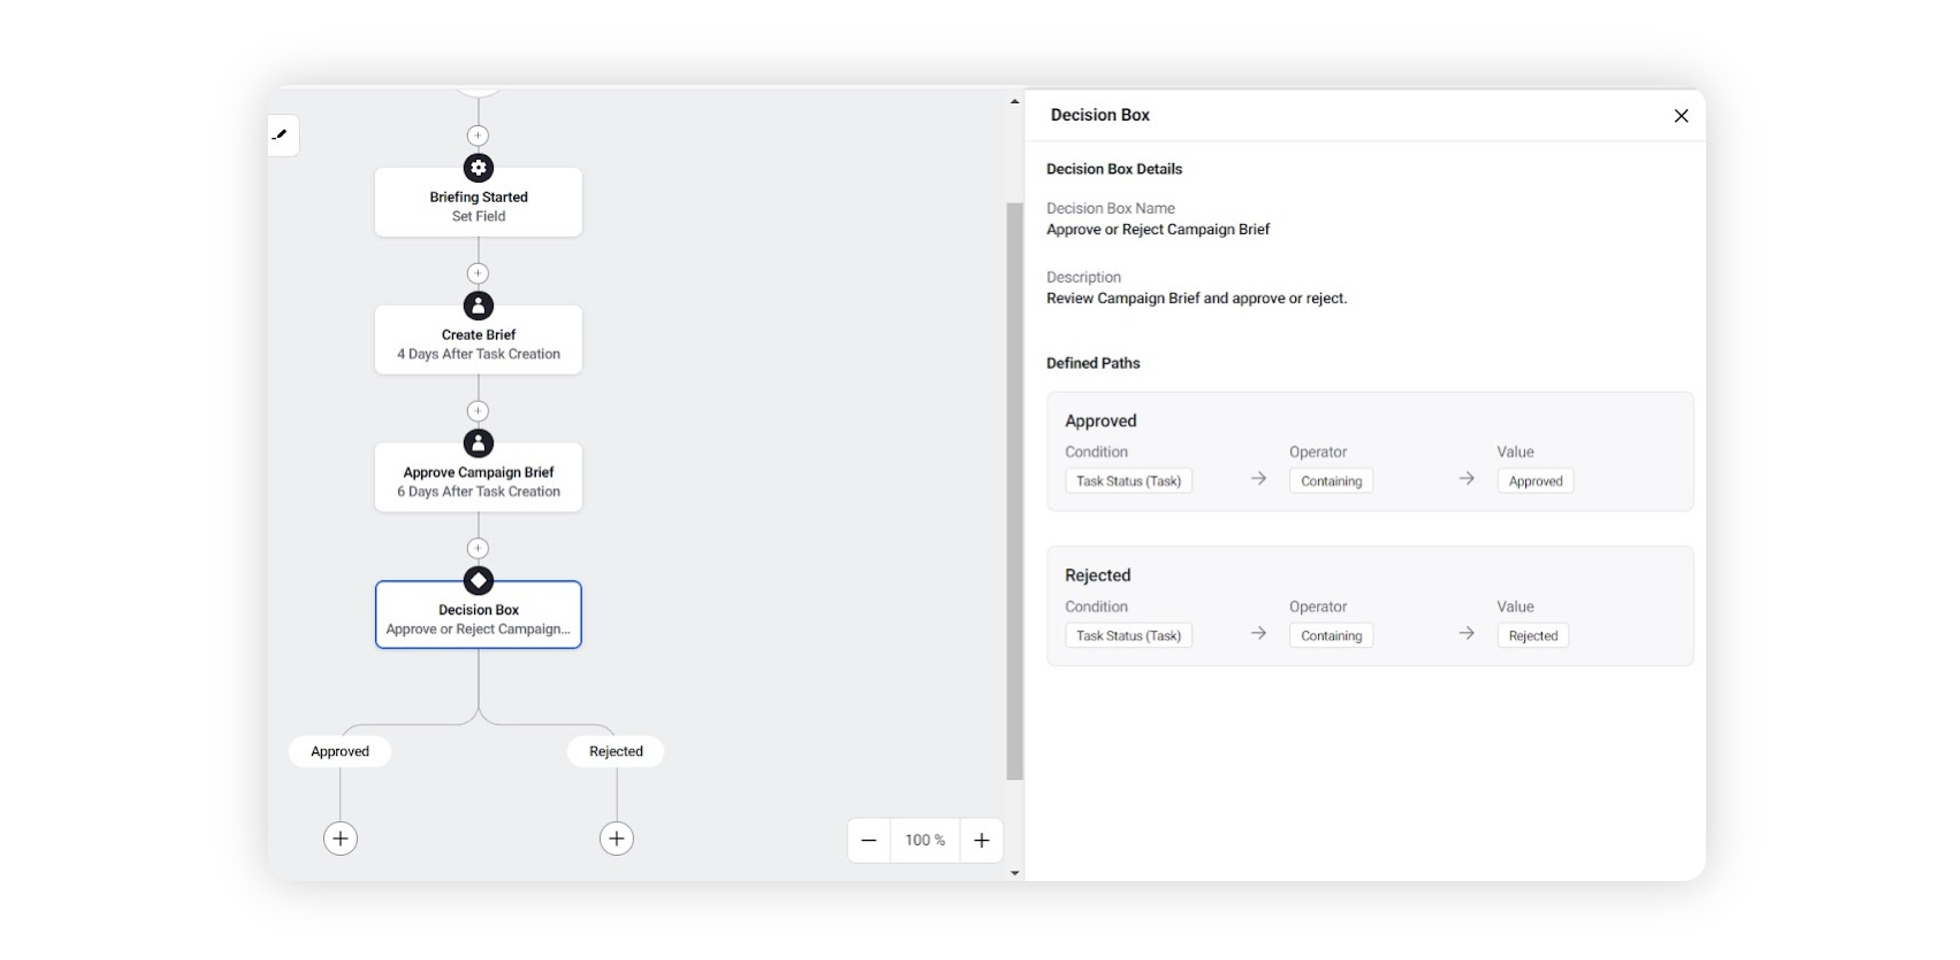
Send the Rejected task for rework. Click on Go to Node to select the task that needs to be done again.
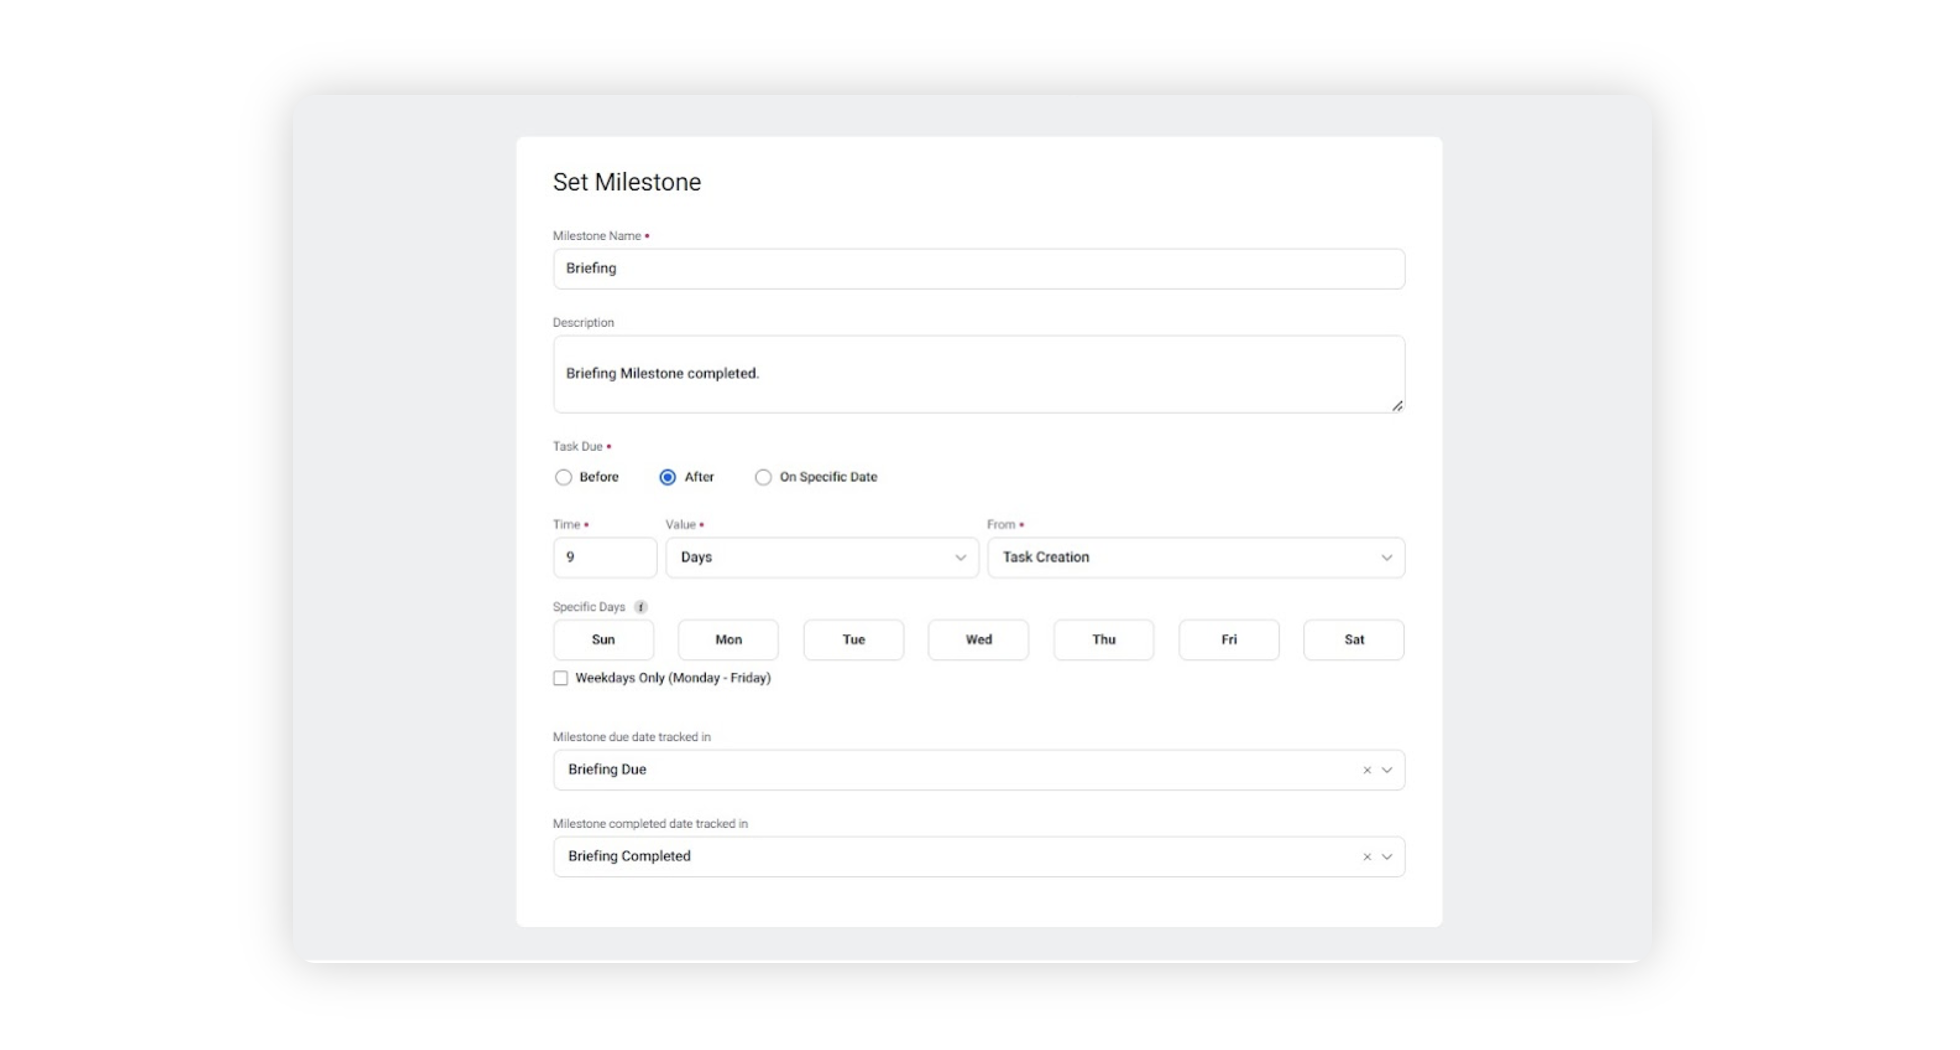
Set Milestones to mark the completion of a phase.
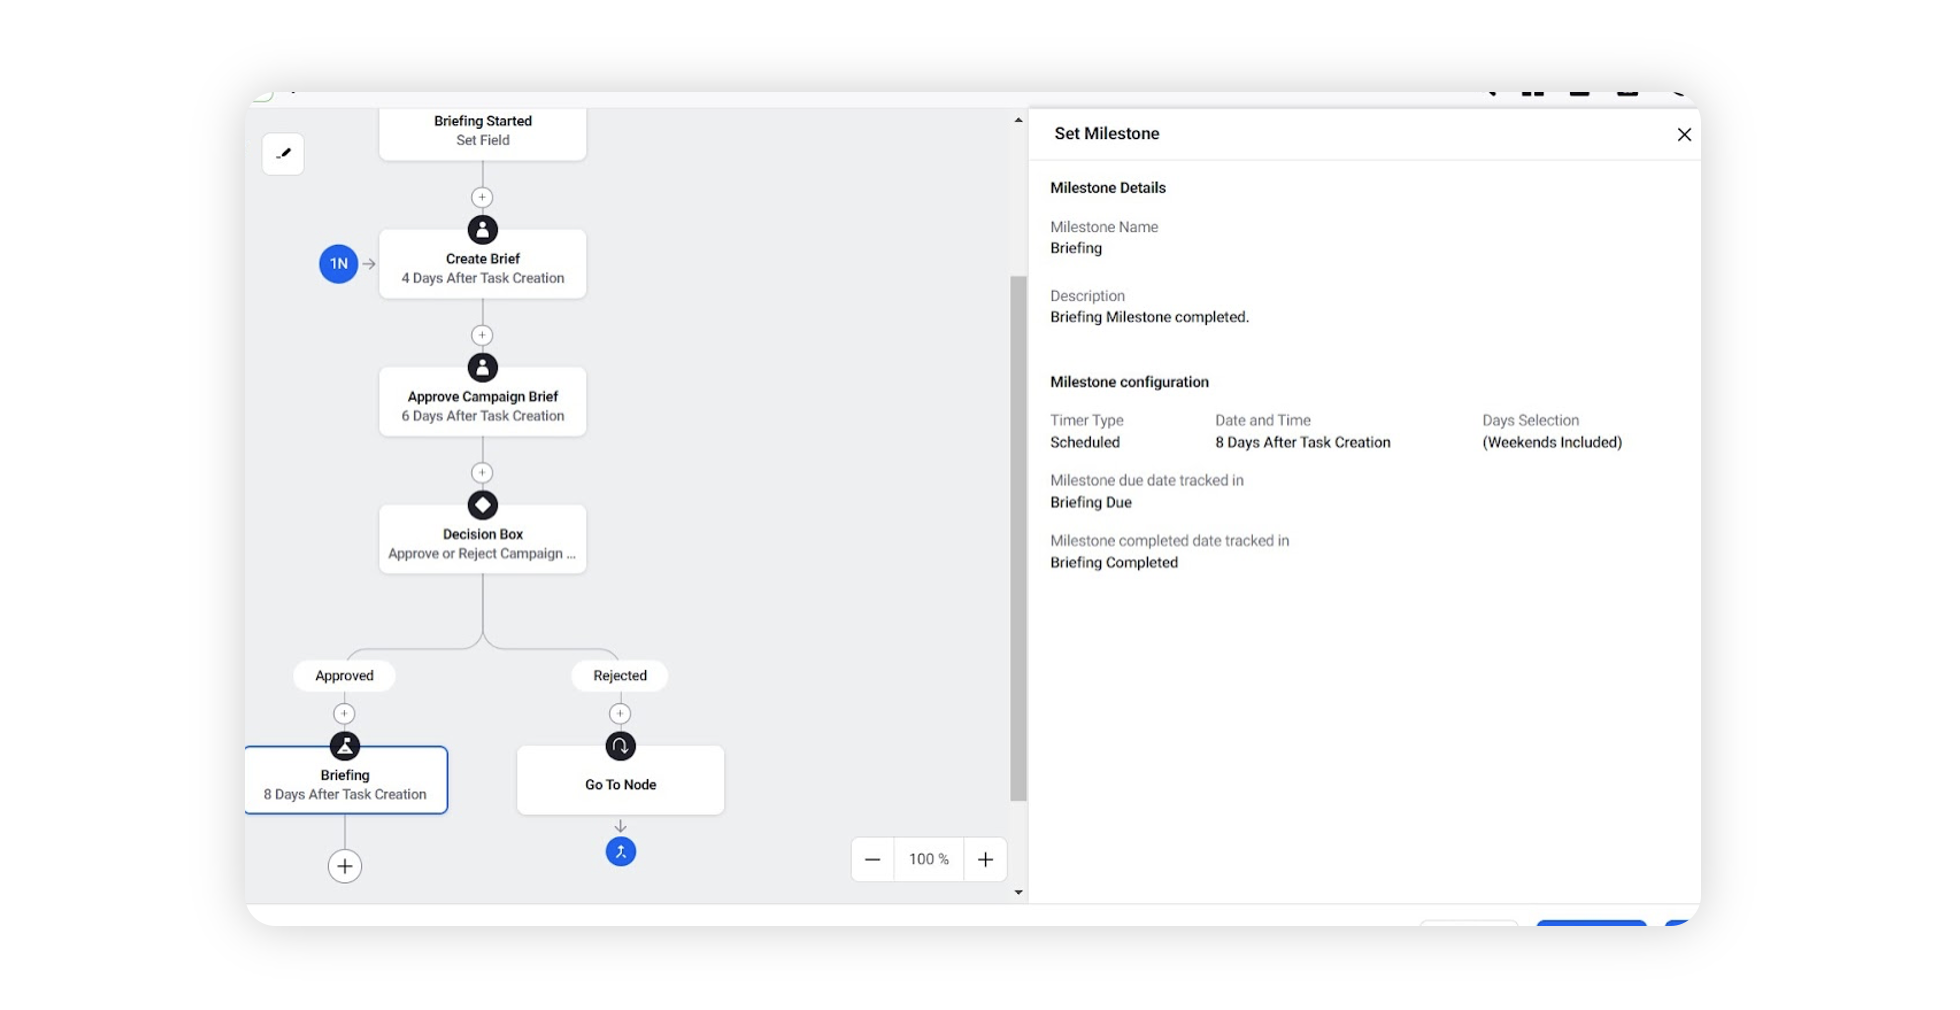
In the Set Milestone window, define where the milestone due date and completion date will be tracked.
Set Milestone due date tracked in as the custom field created for the estimated due of the phase - Briefing Due. Similarly, set Milestone completed date tracked in as the custom field created for the completion of the phase - Briefing Completed.
Similarly, set up all the phases of your process utilizing various features within the Workflow Builder. After defining the entire process, End the workflow.
Click Save & Deploy in the bottom right corner to activate and deploy the workflow.