Broadcast an announcement
Updated
In Sprinklr the announcement capability allows system administrators to send announcements to all the users within the platform. Announcements can be created to be displayed once. Administrators can also customize the end date for displaying the announcements. A common use case for announcements is to share risk mitigation instructions with the team if there is any issue in the platform. This article shares how to create these announcements.
Required Permissions
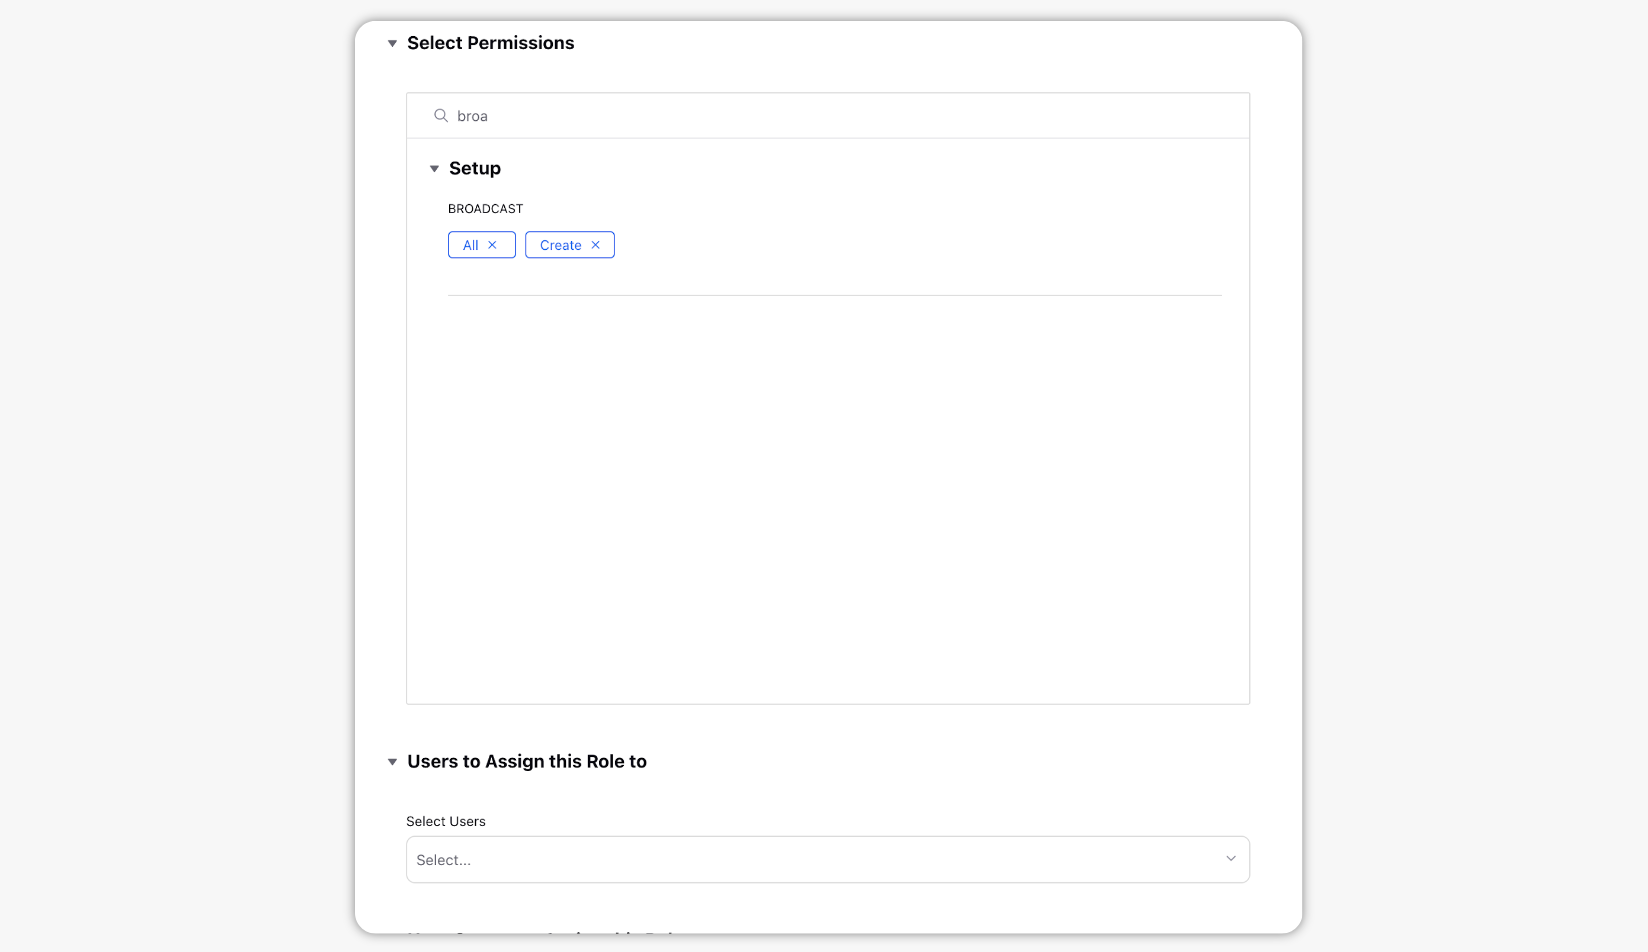
To be able to broadcast an announcement, you need to have permission named “Broadcast” under the Setup section. Here are the steps on how that can be assigned to a user:
Click the New Tab icon
. Under Platform Modules, click All Settings within Listen.
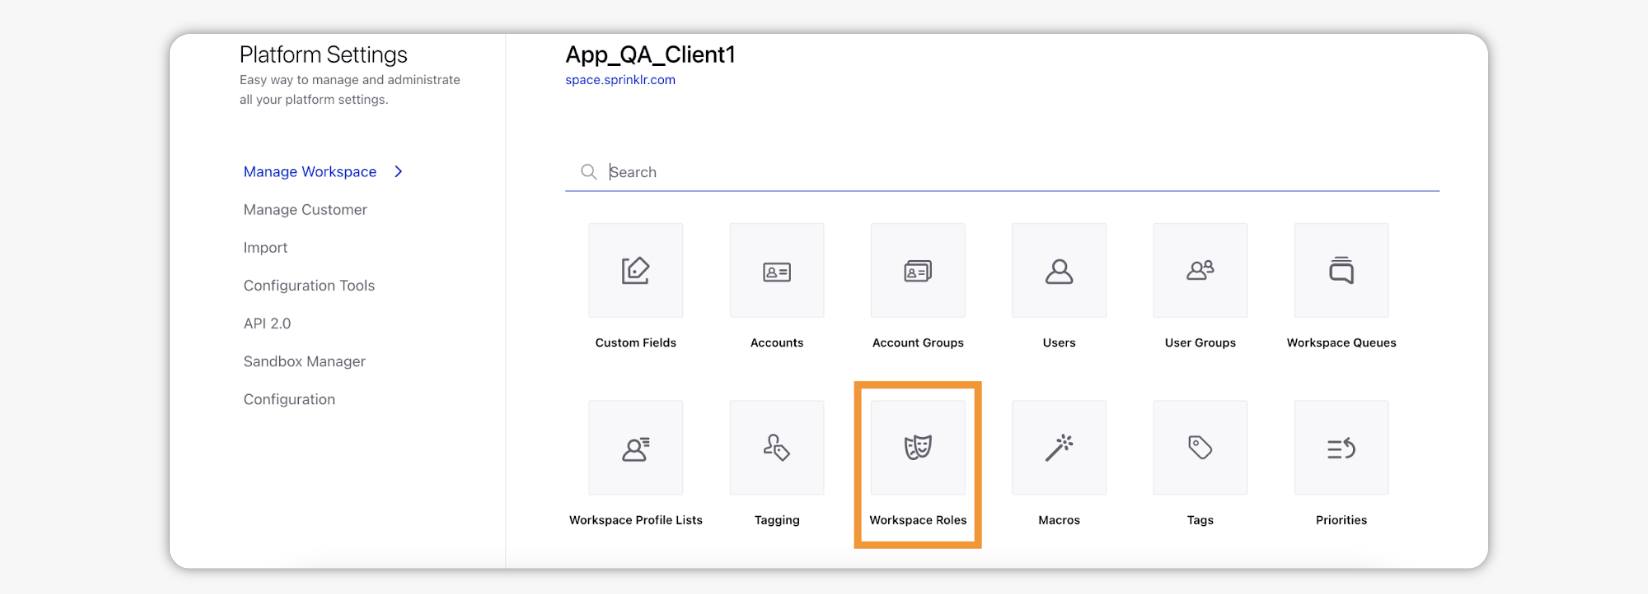
In the Platform Settings window, select Workspace Roles within Manage Workspace.
In the Roles window, click Create Role in the top right corner to add a role.
In the Add Role popup window, fill in the role details, including users/user groups you want to assign it to.
Click Save in the bottom right corner and the required permission for announcement will be assigned to the selected user/user groups.
Steps to create an announcement
Click the Notifications icon 🛎️ in the top right of the navigation bar.
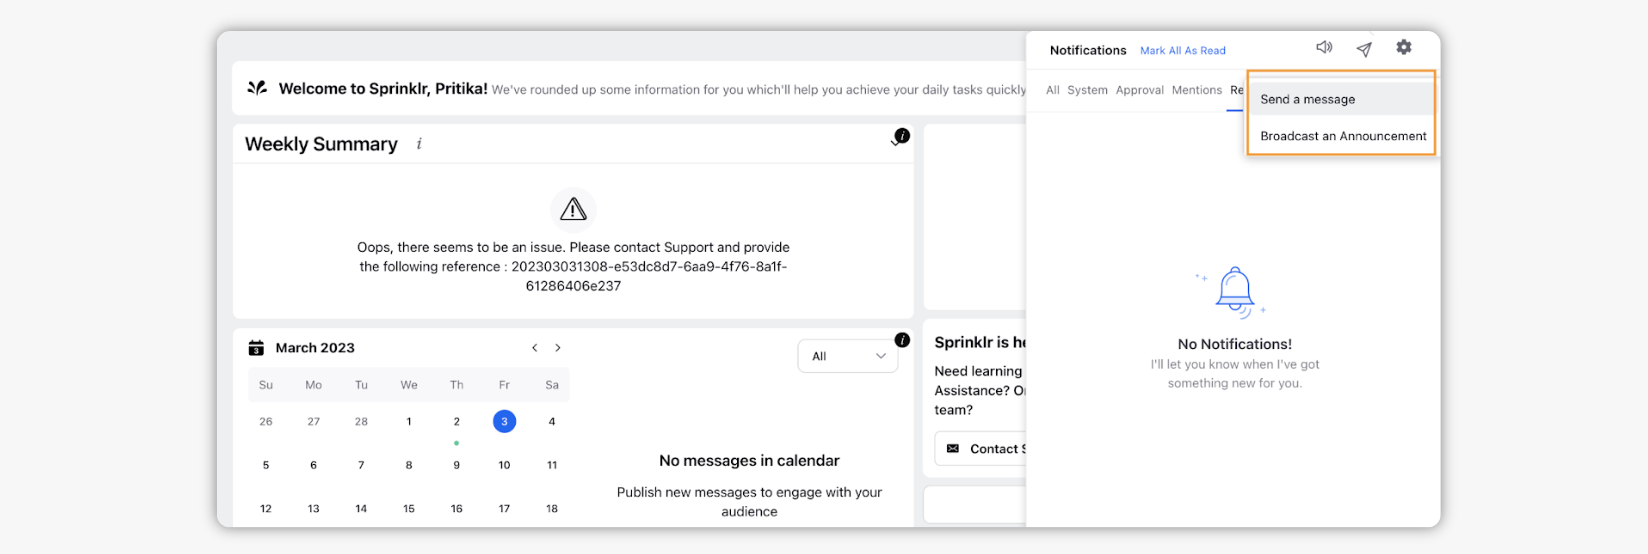
In the Notifications pane, click the Send a Message/Announcement icon in the top right corner and select Broadcast an Announcement from the drop-down list.
In the Broadcast an Announcement window, select the desired Type of Message from the drop-down menu. The available options are Text and Media & Text.
Once you have selected the Type of Message you would like to broadcast to, enter the content for the post in the Message box.
Within the Message box, click Select Media to add a media file from the Media Uploader (or Upload media to select media to upload from your device).
Enter a Title and Description to your selected Type of Message. Next, click the Emoji Picker icon 😀 from the content box to open the emoji menu. Use the icons at the top to browse categories, or search the emoji. Click your chosen emoji, and it'll be added to your description.
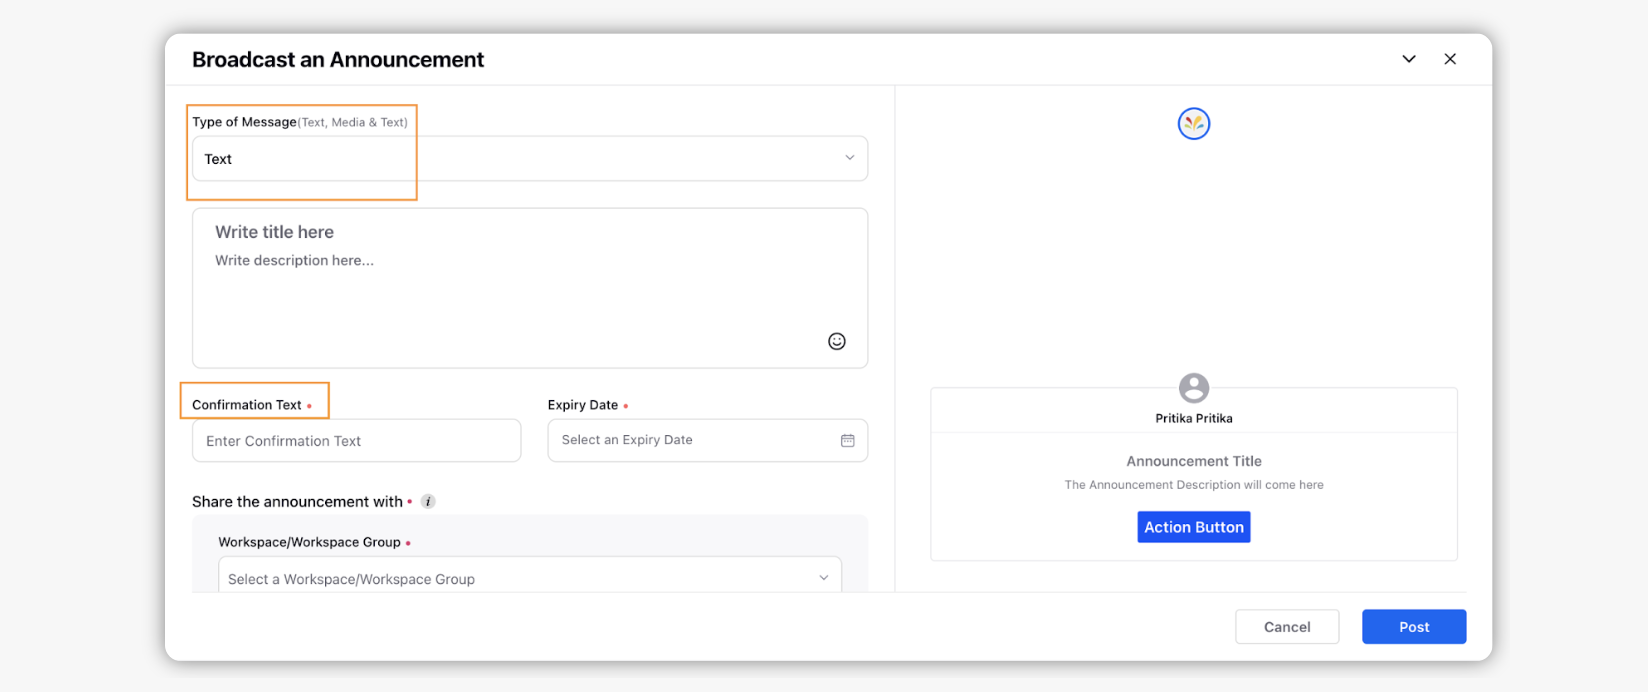
Enter the Confirmation Text and set an Expiry Date for the announcement.
Under Share the announcement with section, you can share the announcement with a User, User group, Workspace, Workspace group or a combination of all.
Under Approval, set an Approval Type for your post. You can also add an Approval Note.
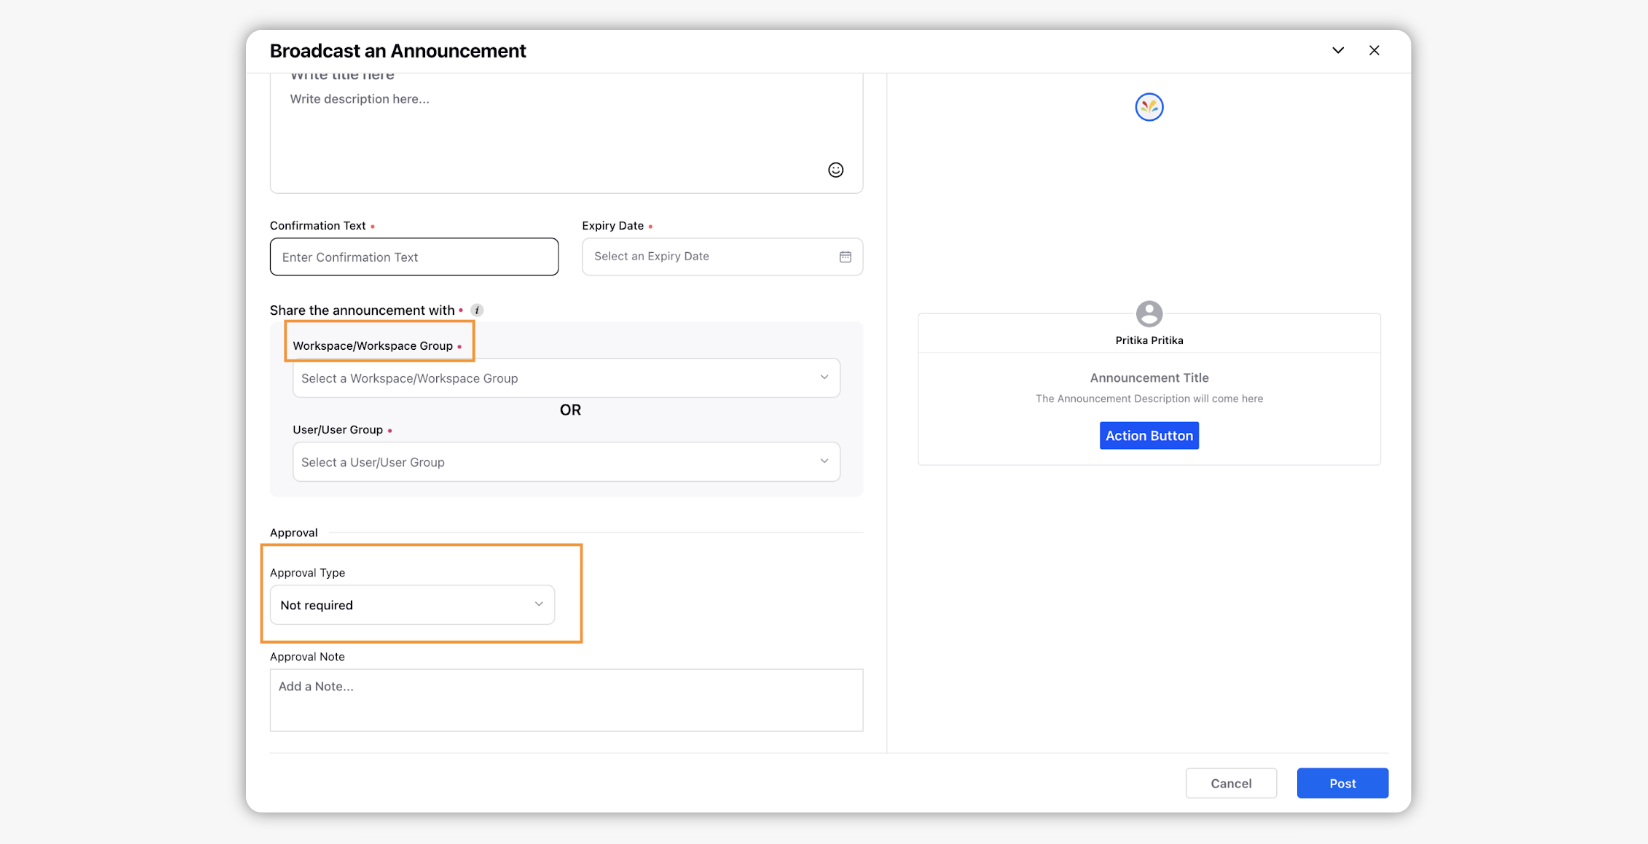
Note: If the approval is rejected, then the announcement will not be published.
Click Post in the bottom right corner to broadcast your announcement.