Publish Organic Dark Posts
Updated
Dark Posts are typically used to create ads that can target multiple audiences while keeping the user page feed ad-free. Dark posts allow you to create content without publishing the content on the channel page, and hence, these are also called unpublished posts. In the Sprinklr Platform, Organic Dark posts are only available for Facebook and Twitter channels.
Steps to create an Organic Dark Post
Click the New Tab icon
. Under Sprinklr Social, click Quick Publish within Engage.
From the Create Post window, select the account(s) where you want to publish. You can also use Advanced Search to narrow your searches by a series of different filters.
Compose your publishing content and select the additional fields for publishing.
Scroll down the message editor, and click Publish this page as a Dark Post for Facebook pages (Or Publish this post as a Dark post for Twitter)
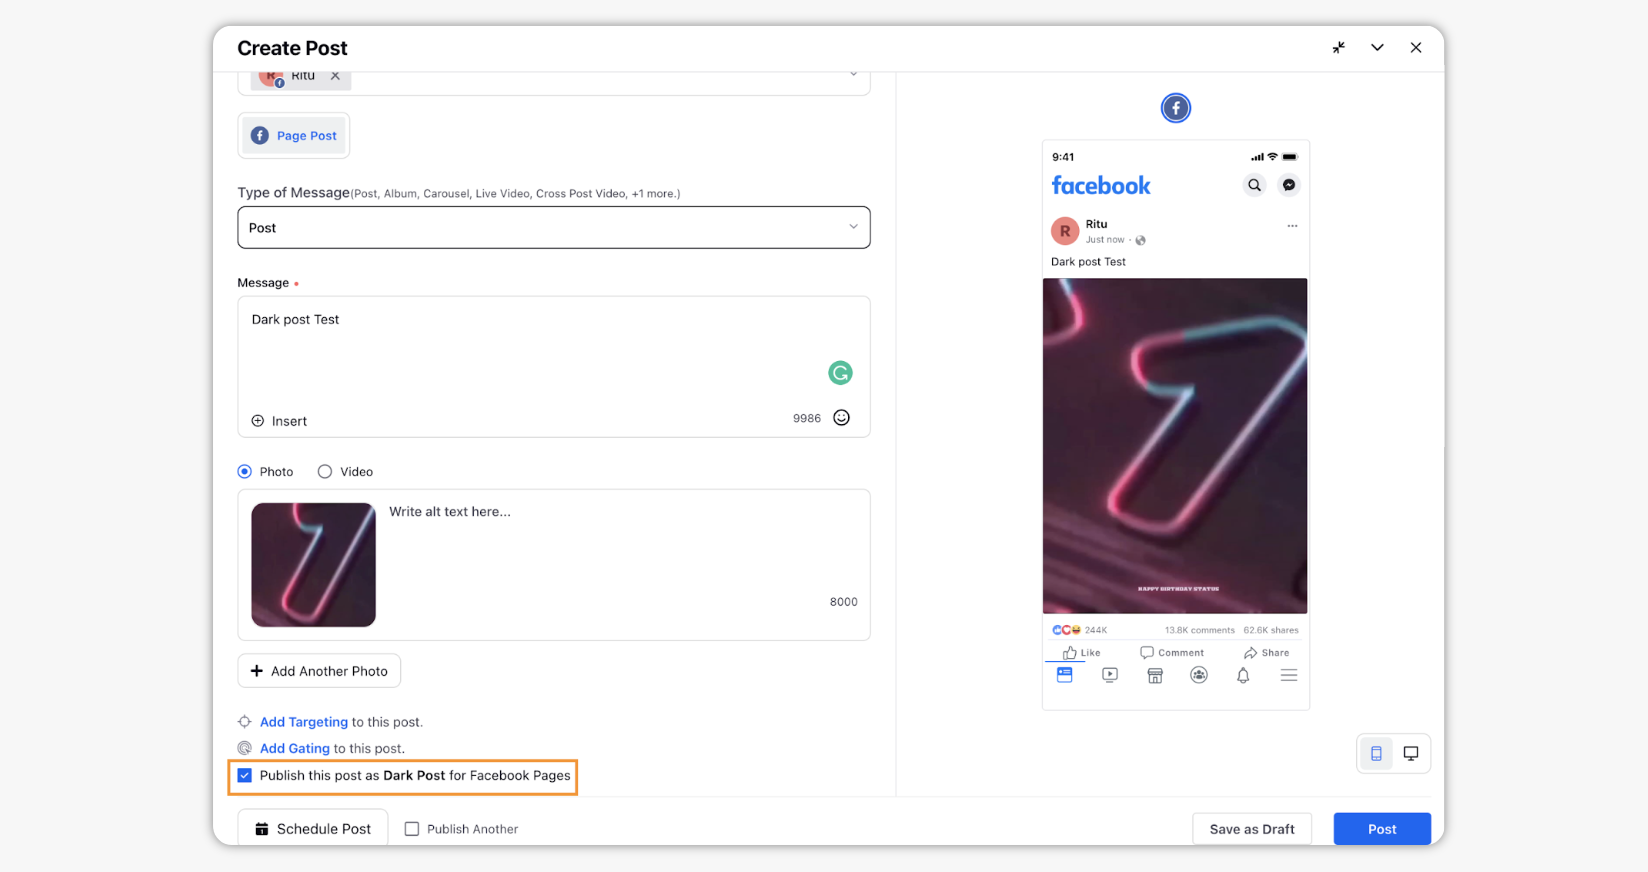
Click Post in the bottom right corner after filling in all desired information.
How to view Dark Posts in the Editorial Calendar?
After publishing the dark post through QP, users can see the post in the planner sections. Please refer to the below-mentioned steps for dark post viewing in the editorial calendar.
Once you have published your Dark Post, the post will appear with the Dark Post icon alongside the post in the Editorial Calendar.
Hover over the Dark Post in the Planner and click the Post's timestamp to view it natively on Facebook. The timestamp will direct you to the Dark Post's permalink, the specific URL of the Facebook unpublished post.

How to view Dark Posts in the Engagement Dashboards
Users can create an engagement dashboard under the Social sprinklr within the Engage section. Dark Posts will appear in the Monitoring Dashboards with a Dark Post icon in the upper right corner of the message. Please refer below-mentioned to create a dashboard for the dark posts.
Click the New Tab icon
In the desired Engagement Dashboard, click Add Column in either the top right corner of the dashboard or in the middle of the dashboard.
In the Add New Column window, search and select Outbound or Facebook as a Source from the available column category icons for your new column.
Certain Column configurations can help limit the column to Dark Posts or exclude Dark Posts from the display. In Outbound Columns, you can use the selection Exclude Dark Post to exclude Dark Posts from displaying in your Outbound Column. In Facebook Columns, you can use the Published Status field to apply Only Unpublished to restrict your column display to only Dark Posts.

Dark Posts published natively on Facebook will not be pulled into Sprinklr unless a comment is made on the post. A comment action on the Dark Post will cause the Dark Post to be imported into the Sprinklr platform.
To delete a Facebook dark post, hover over the three-dot icons in the bottom-right corner of the message and select Delete.