Create Smart Alerts using Rule Engine
Updated
Learn how to create smart alerts using the Rule Engine and view them in one place.
Sprinklr's Smart Alert emails help executives keep a tab on sensitive topics and give them context around an emerging crisis. The email alert is sent when you set an alert for Topic Groups, Topics, and Topic Tags.
There are three ways to create Smart Alerts in the Sprinklr platform –
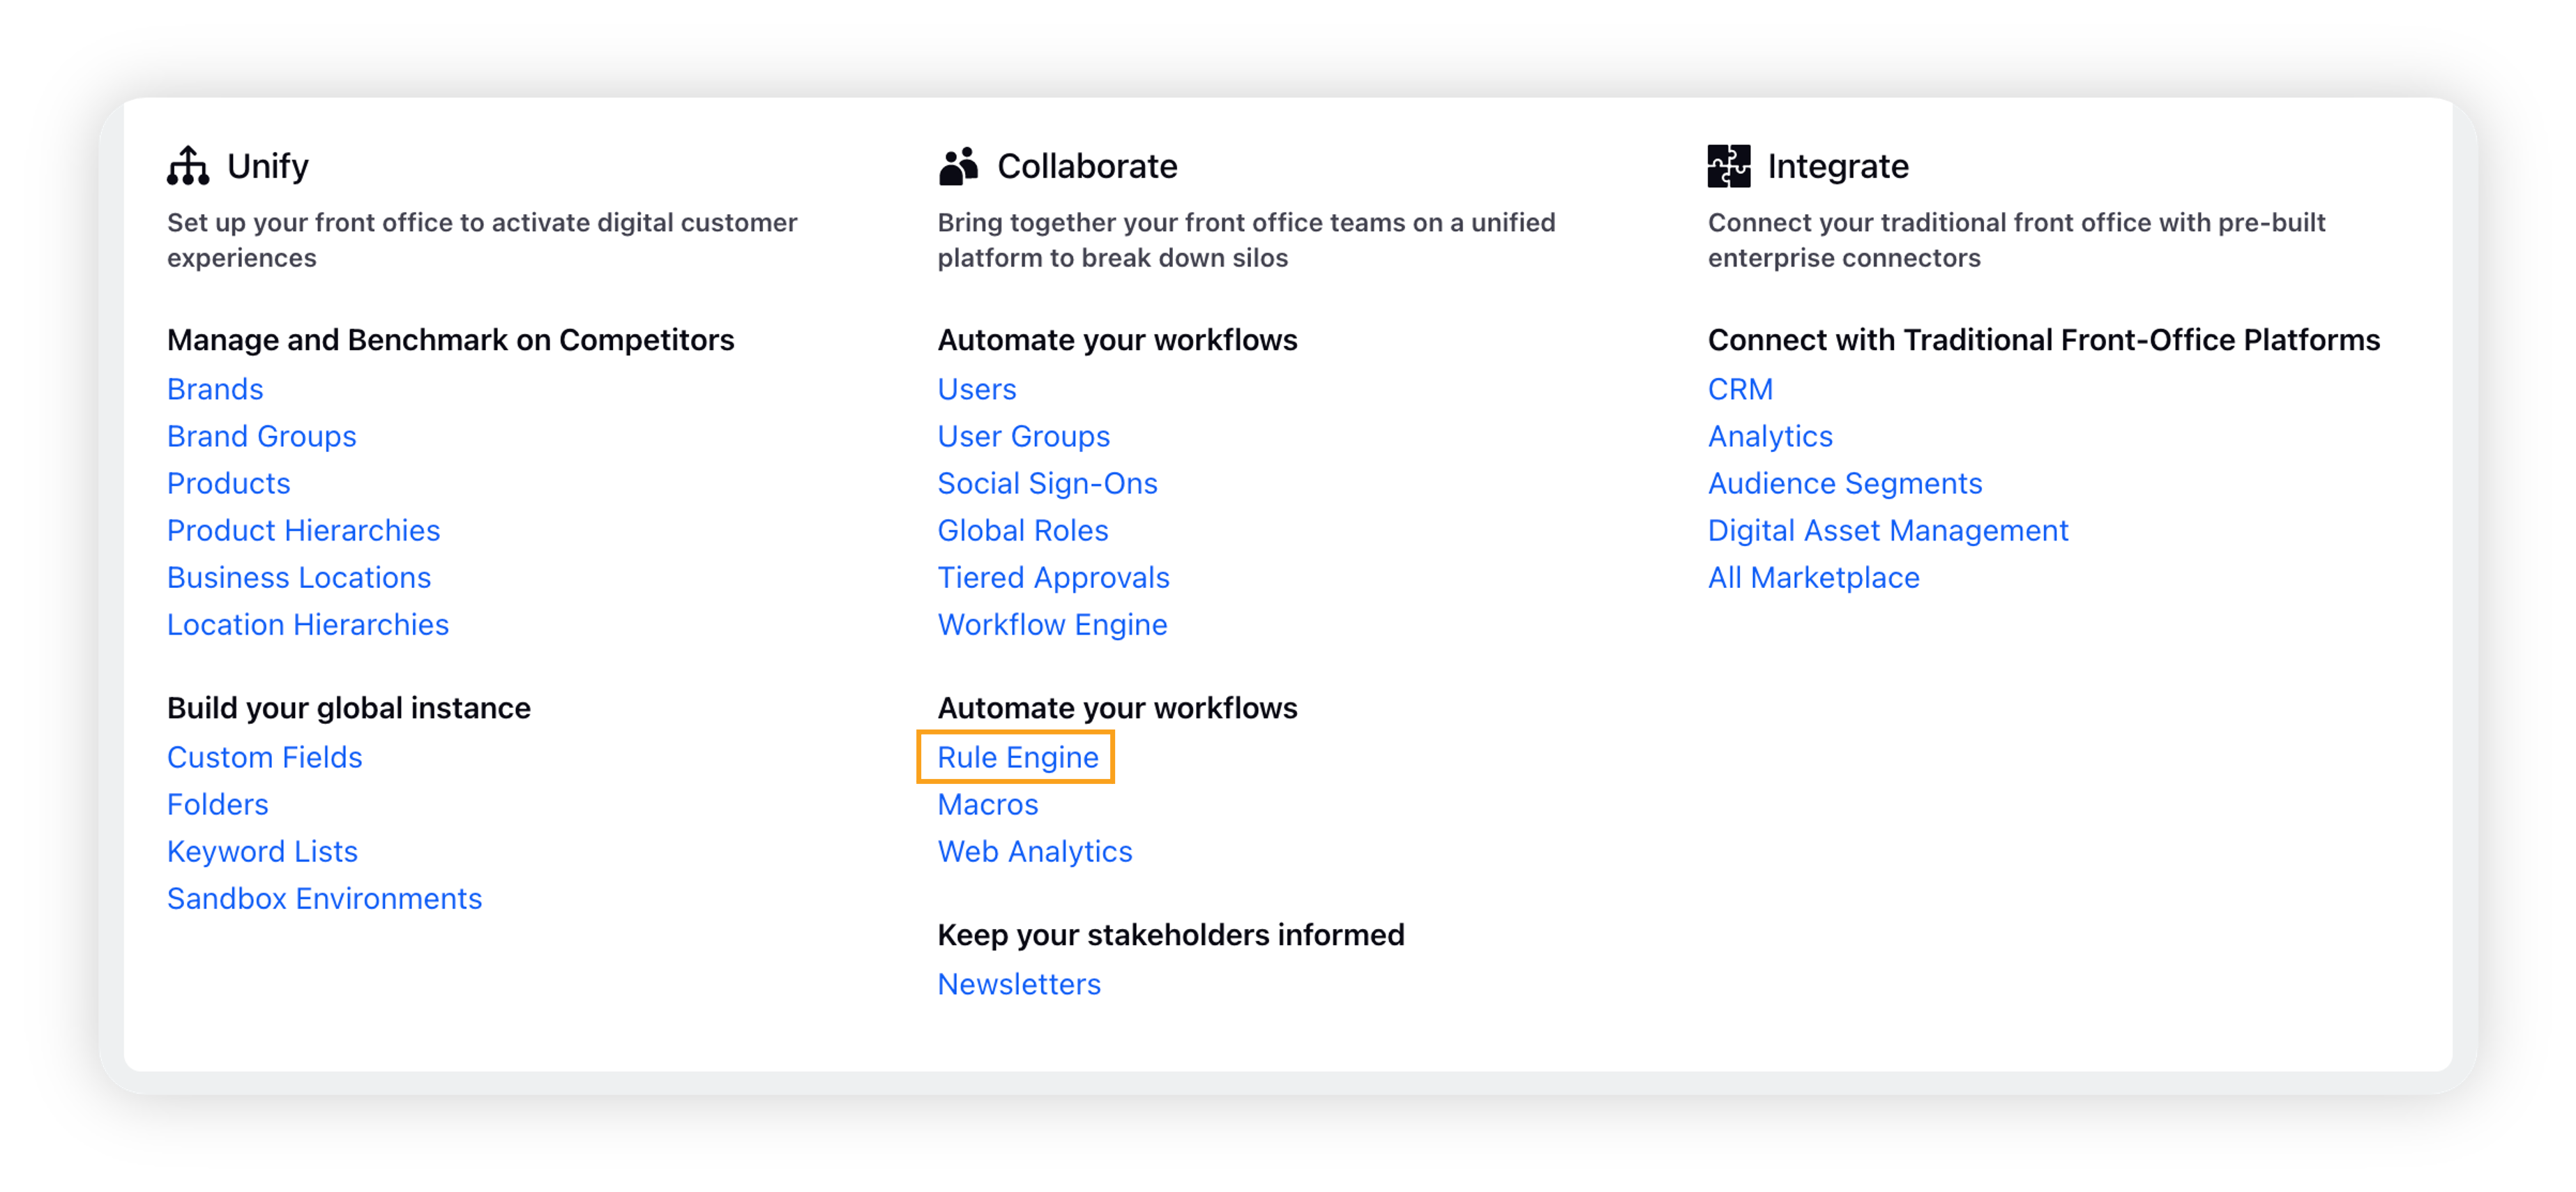
Via Rule Engine
In this article, we will walk you through the entire process of creating smart alerts using Rule Engine. We have split the process into two parts so that it becomes easy for you to understand each and every step thoroughly.
To set up email alerts in Rule Engine
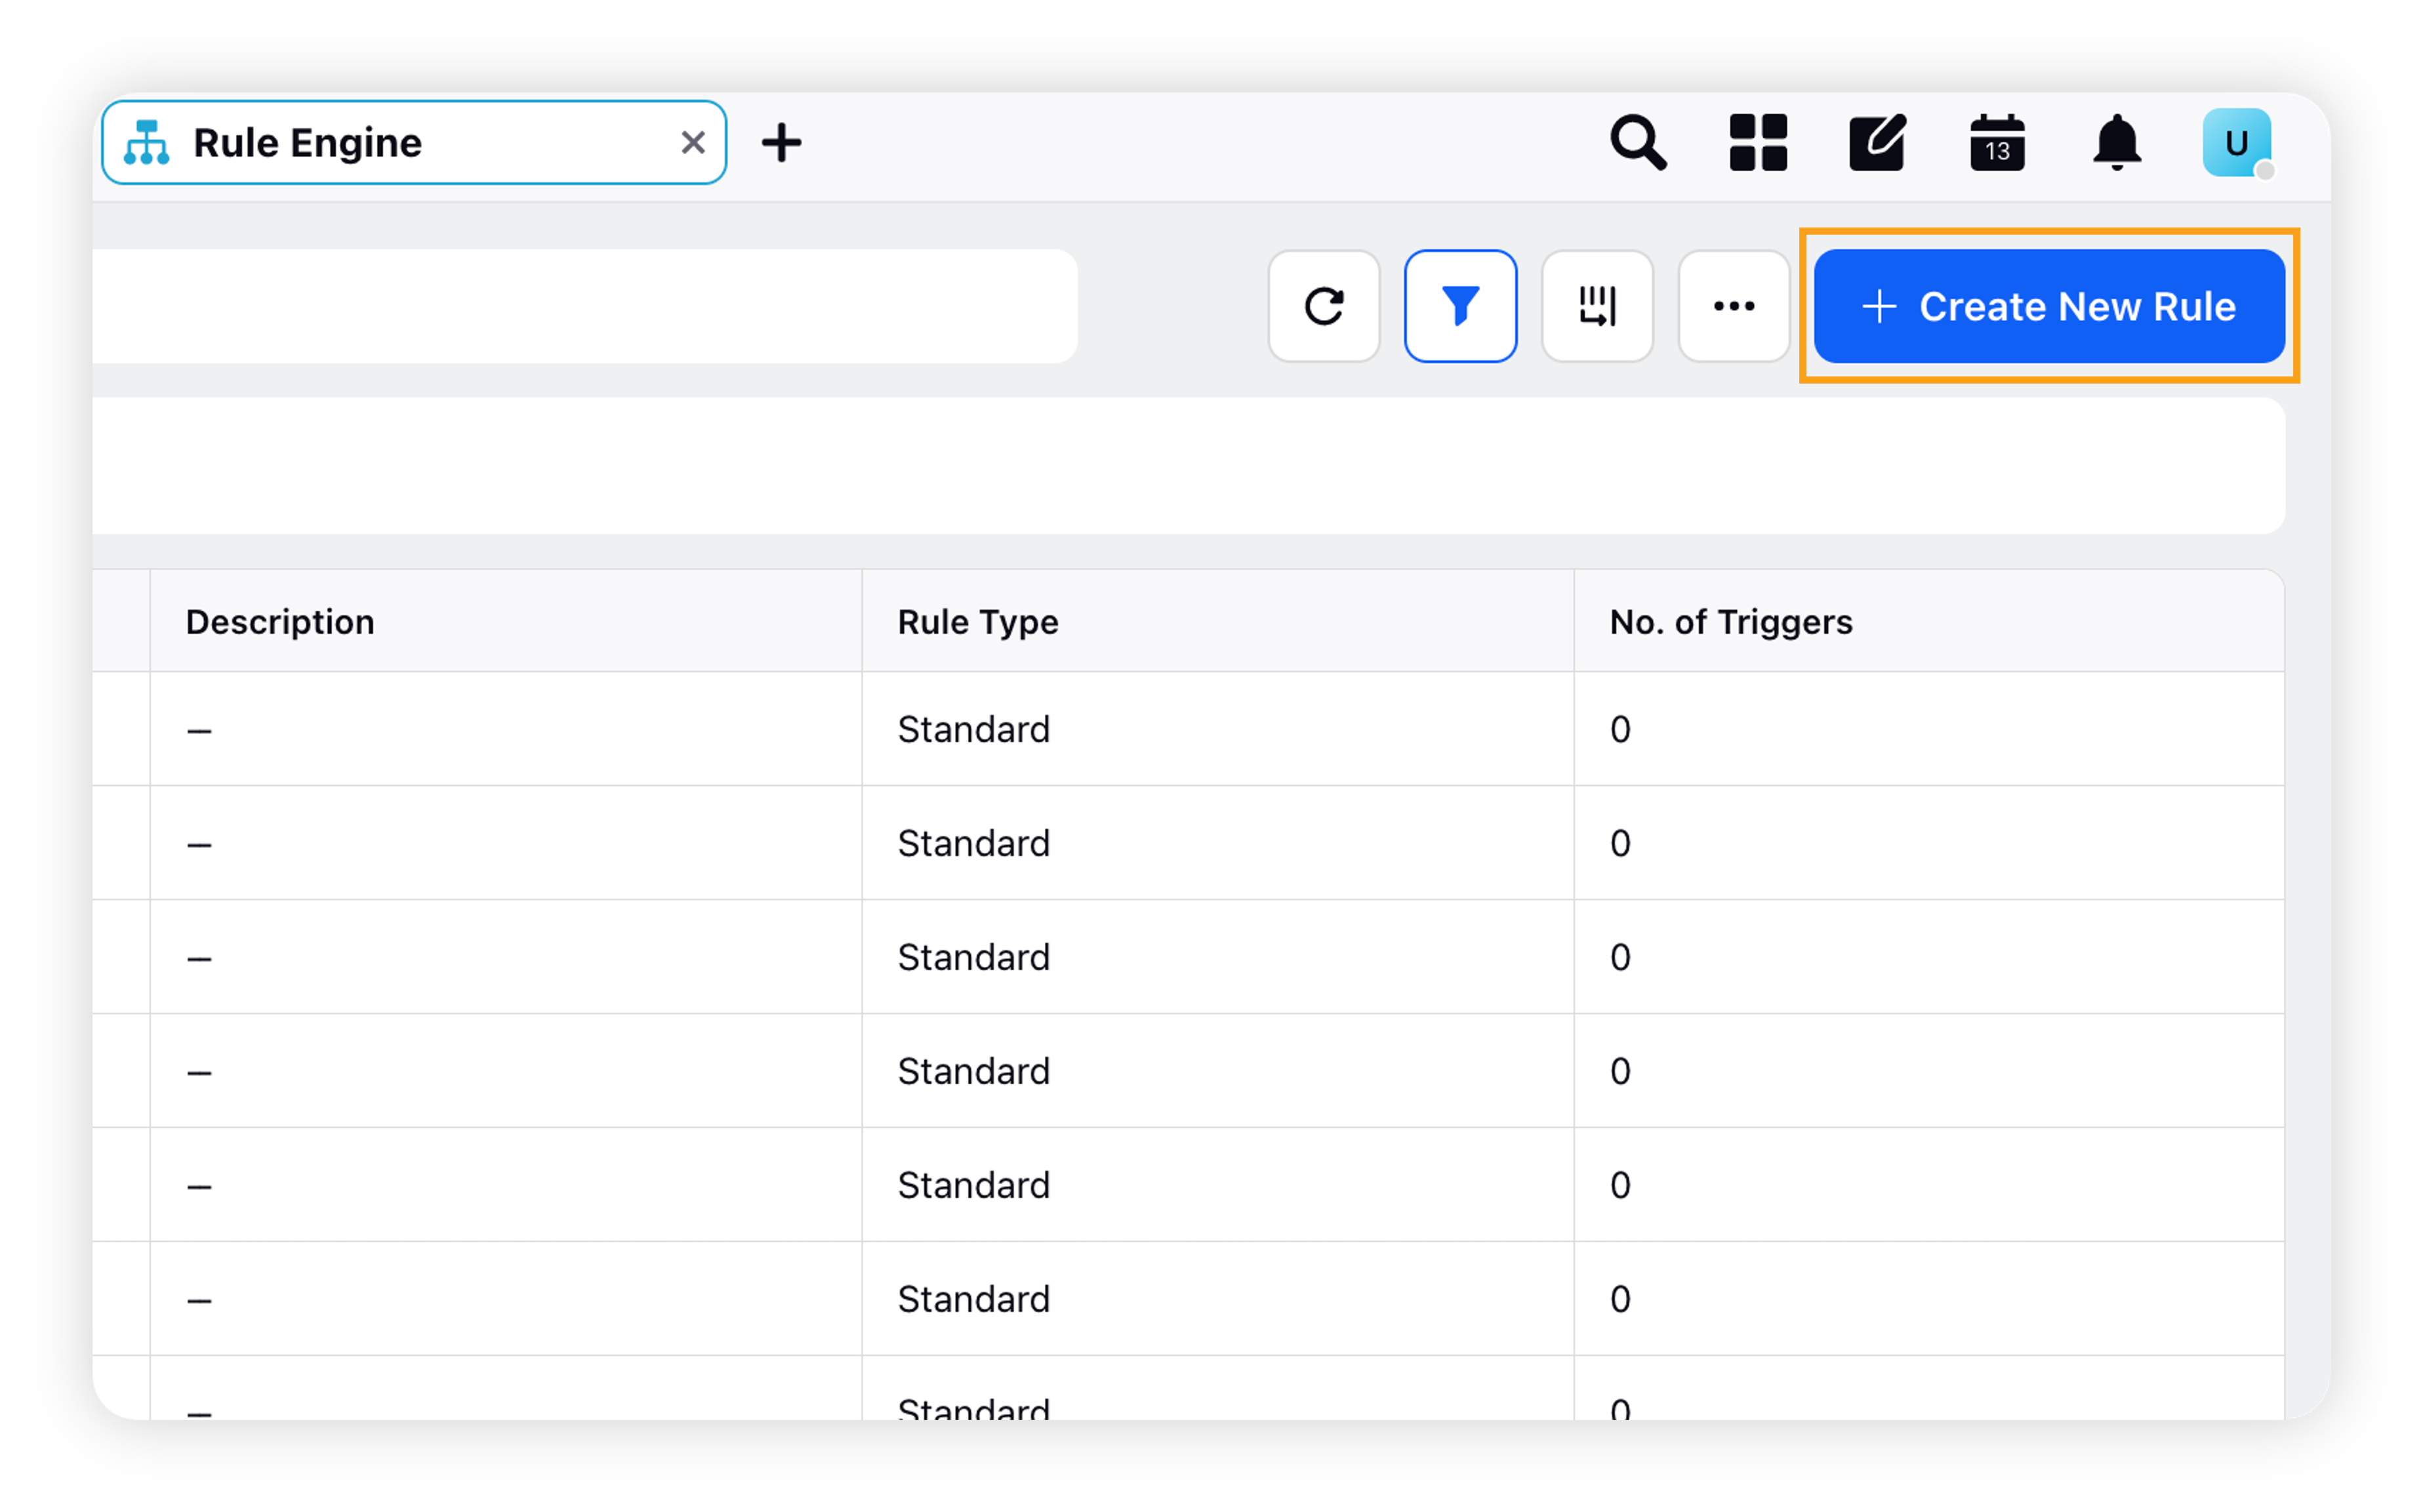
Click the New Tab icon. Under Platform Modules, click Rule Engine under Collaborate.
On the Rule Engine window, click Create New Rule in the top right corner.
On the New Rule window, enter a Name and Description (optional) for your rule.
Select Customer from the Rule Scope drop-down menu and Inbound or Listening from the Context dropdown menu.
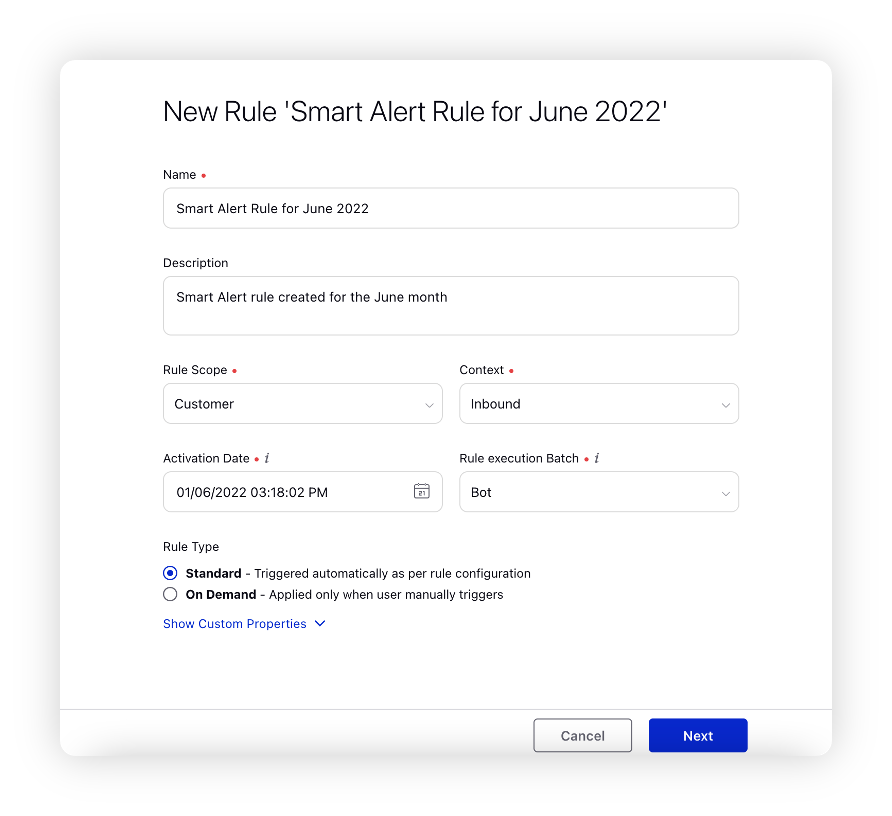
Select the Activation date (the rule will be activated on the defined date) and the Rule Execution Batch (contains the rules for specific entities and shows the flow of rule execution).
Select the Rule Type -
Standard (Rule applies automatically as per rule configuration)
On-Demand (Rule applies only when manually triggered)
Click Next in the bottom-right corner to go to the Rule Builder window.
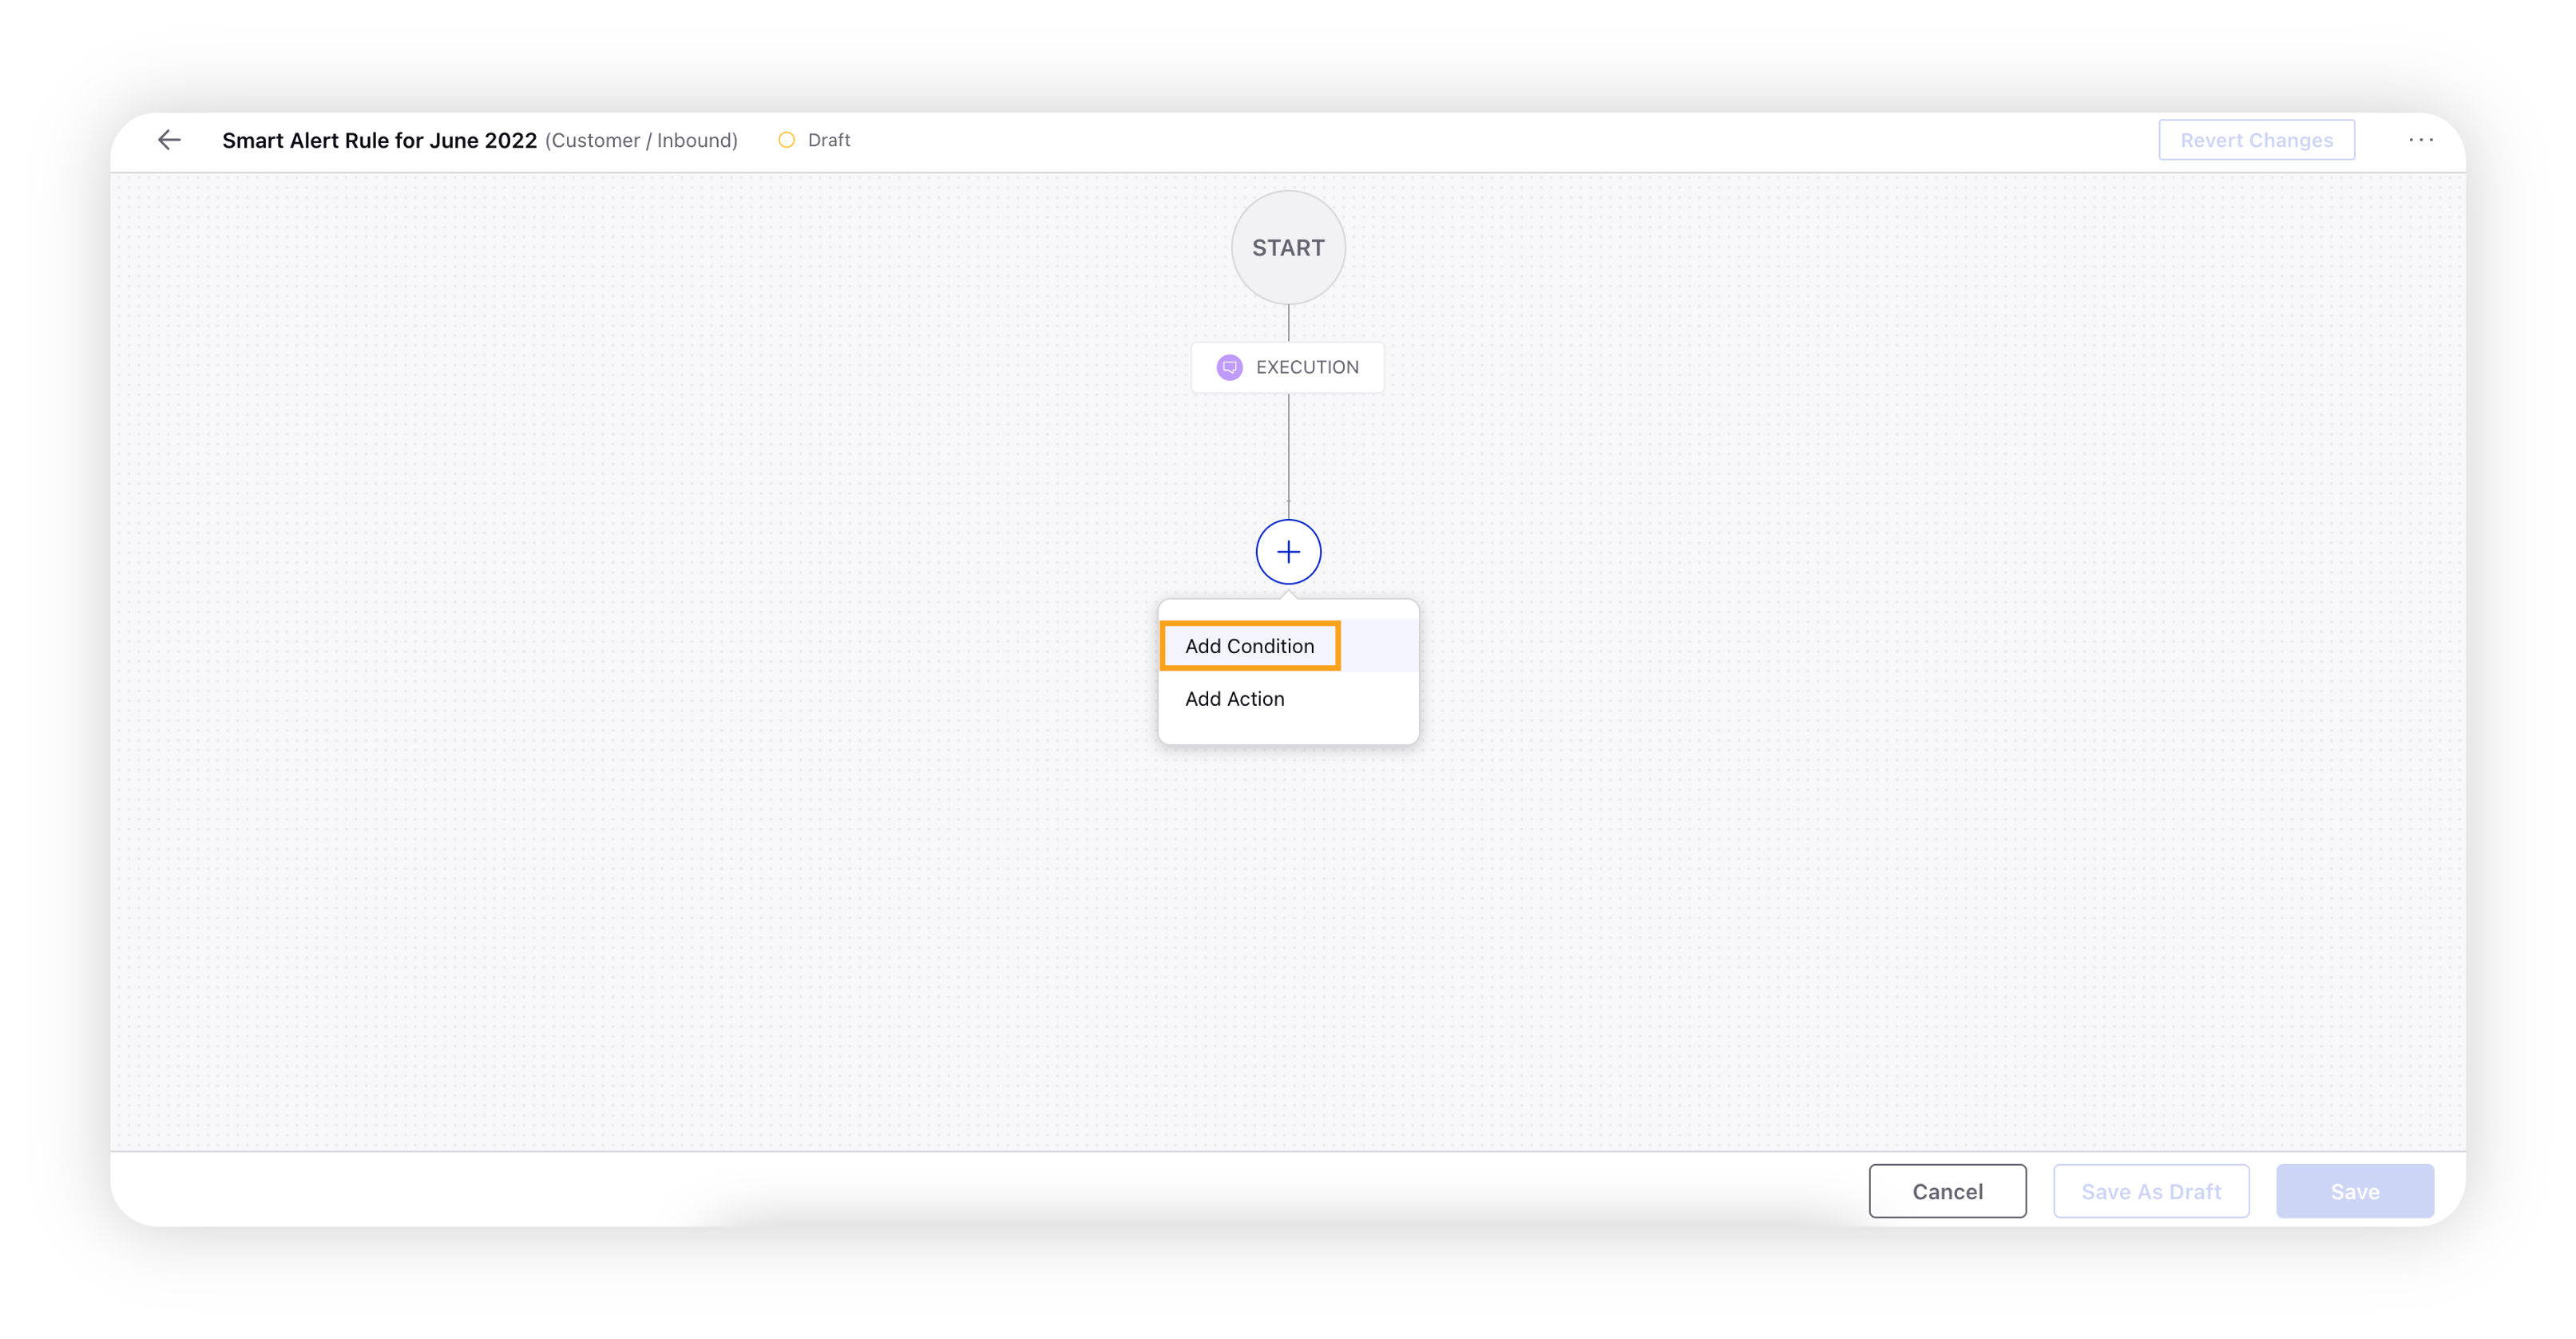
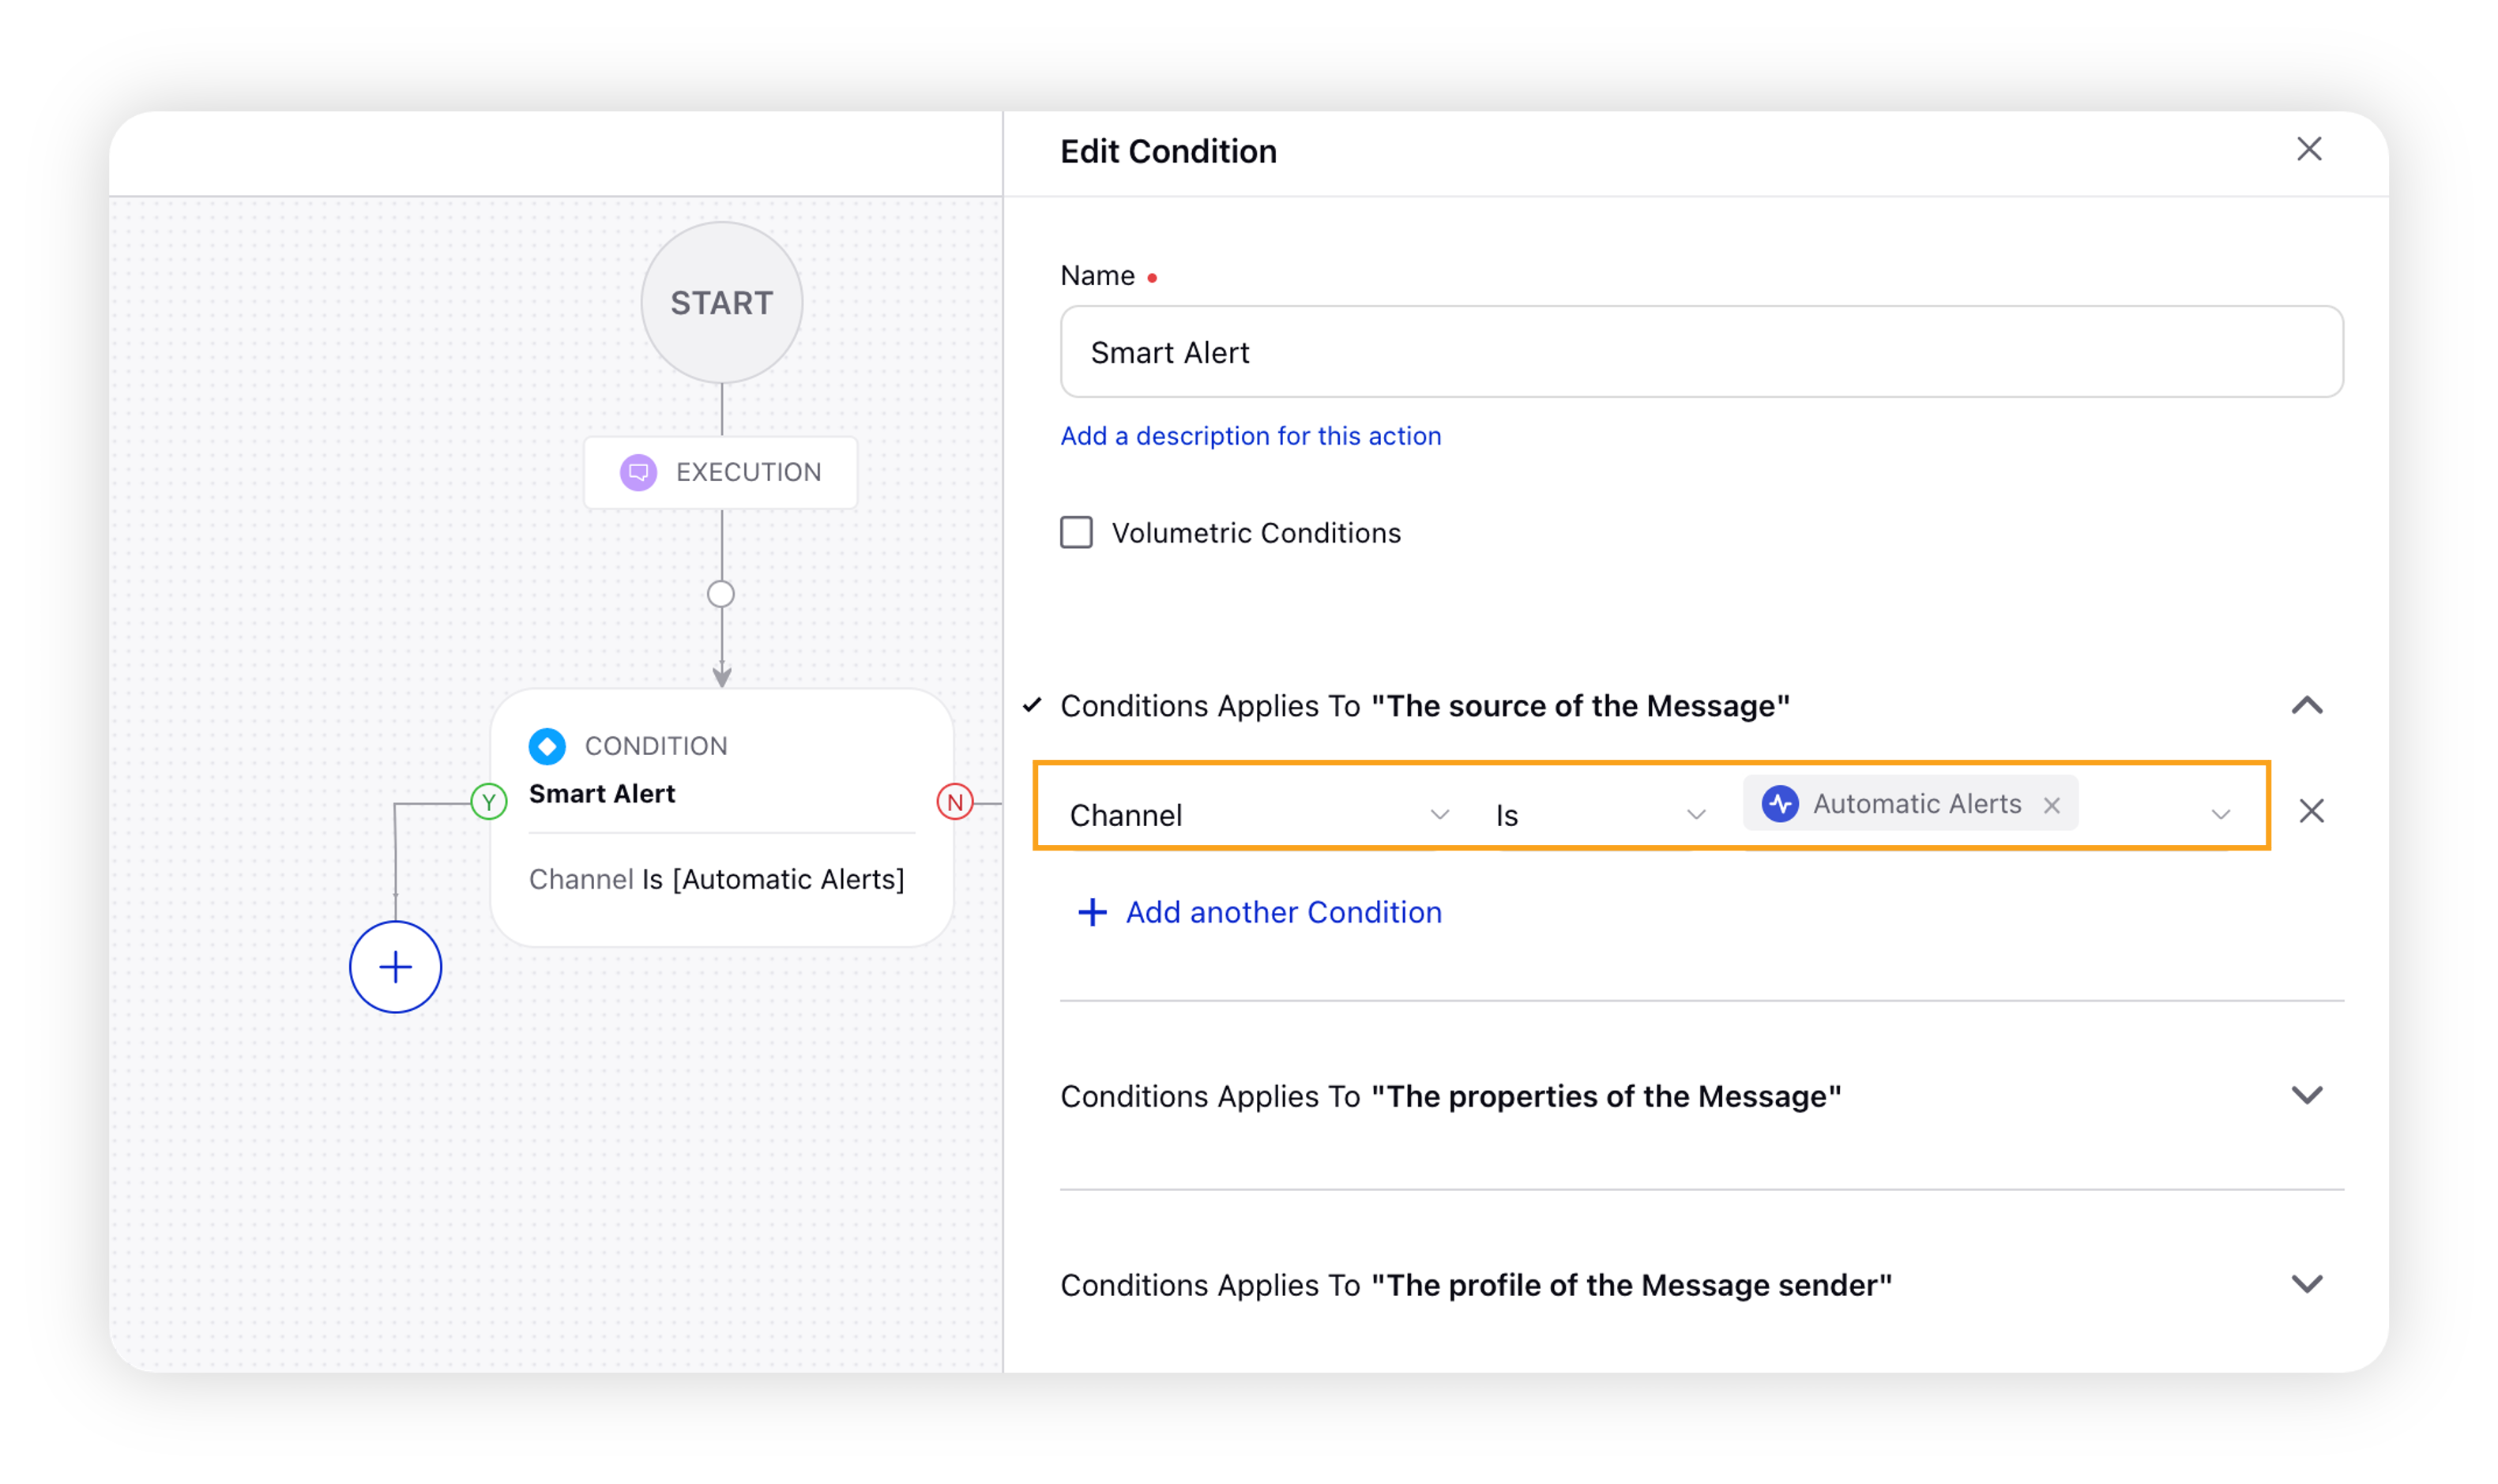
On the Rule Builder window, click the Addition icon and select Add Condition.
On the Edit Condition pane in the right, enter a Name of the condition. In the Conditions Applies To "The Source of the Message" section, select Channel as a Condition and Automatic Alerts as Channel.
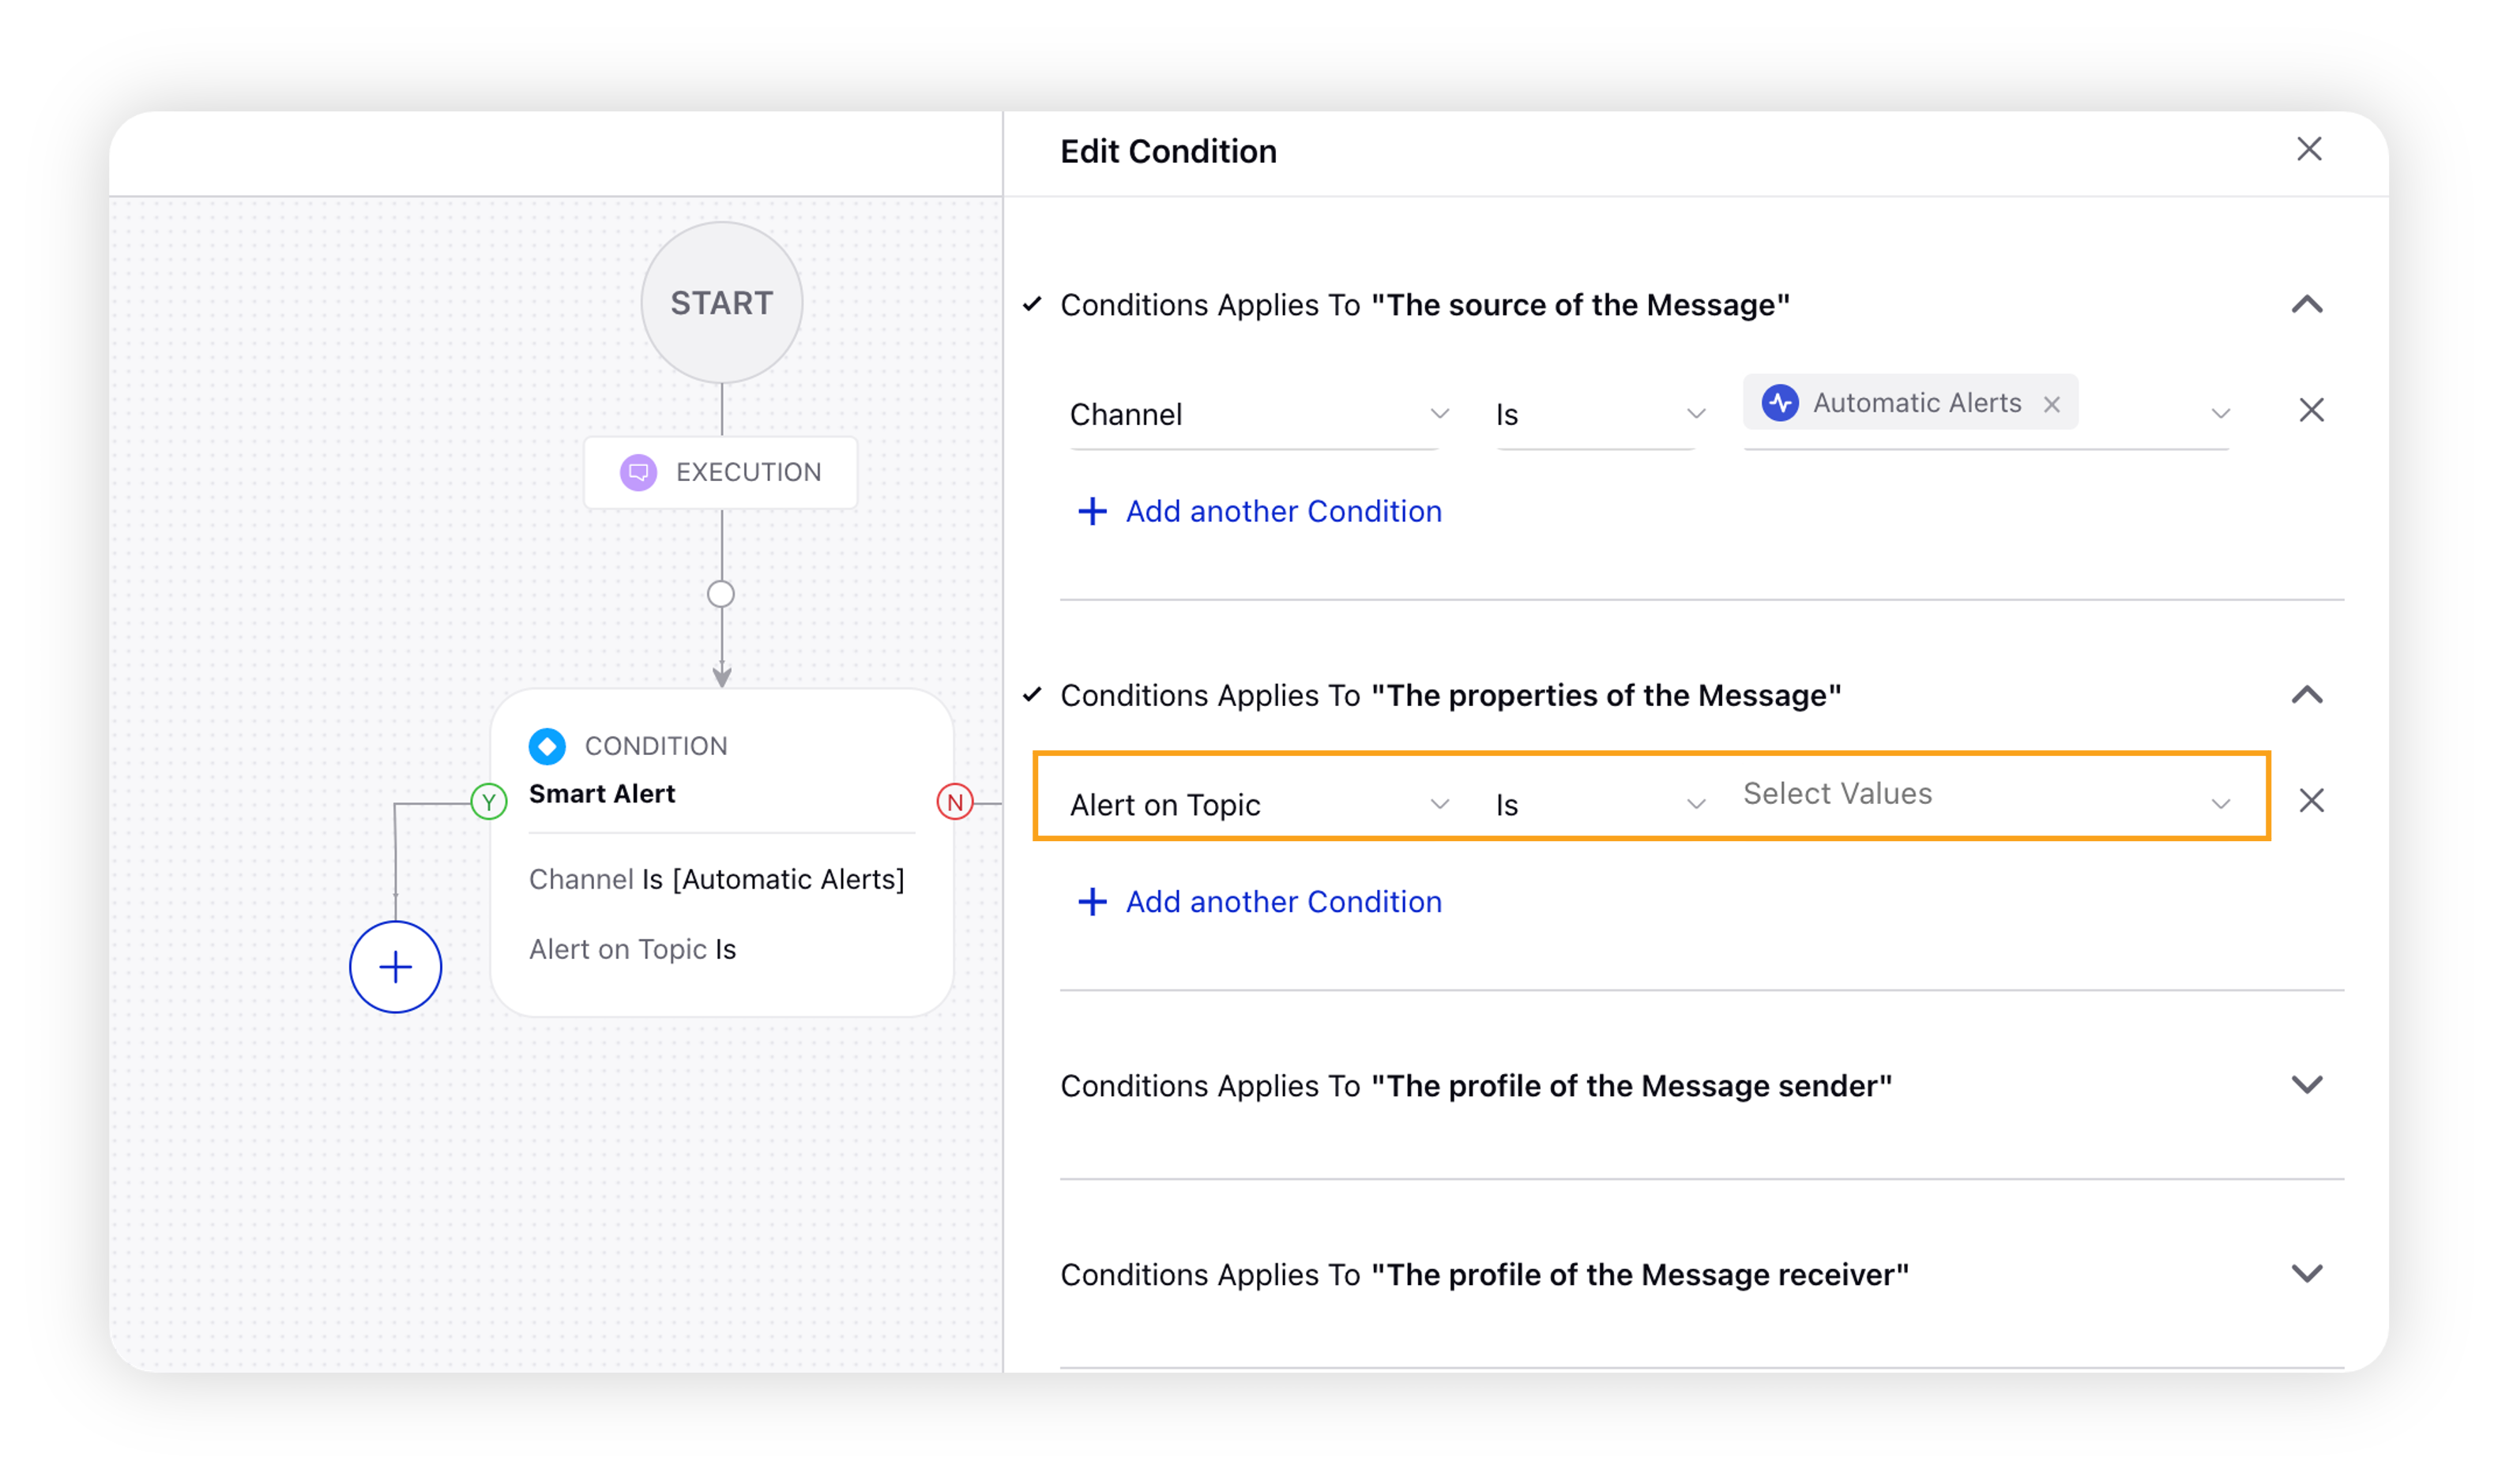
In the Conditions Applies To "The Properties of the Message" section, select Alert for Topic as a Condition and Select Values as desired from the drop-down.
If you wish, you may also set the severity measure as a condition for your smart alerts. In the Conditions Applies To "The Properties of the Message" section, click Add another condition.
Select Alert Severity as a Condition and select the severity value between 1-10. You can also set Alert Severity Increase as Yes in order to get alerts only when the severity level is higher than the previously received alert.
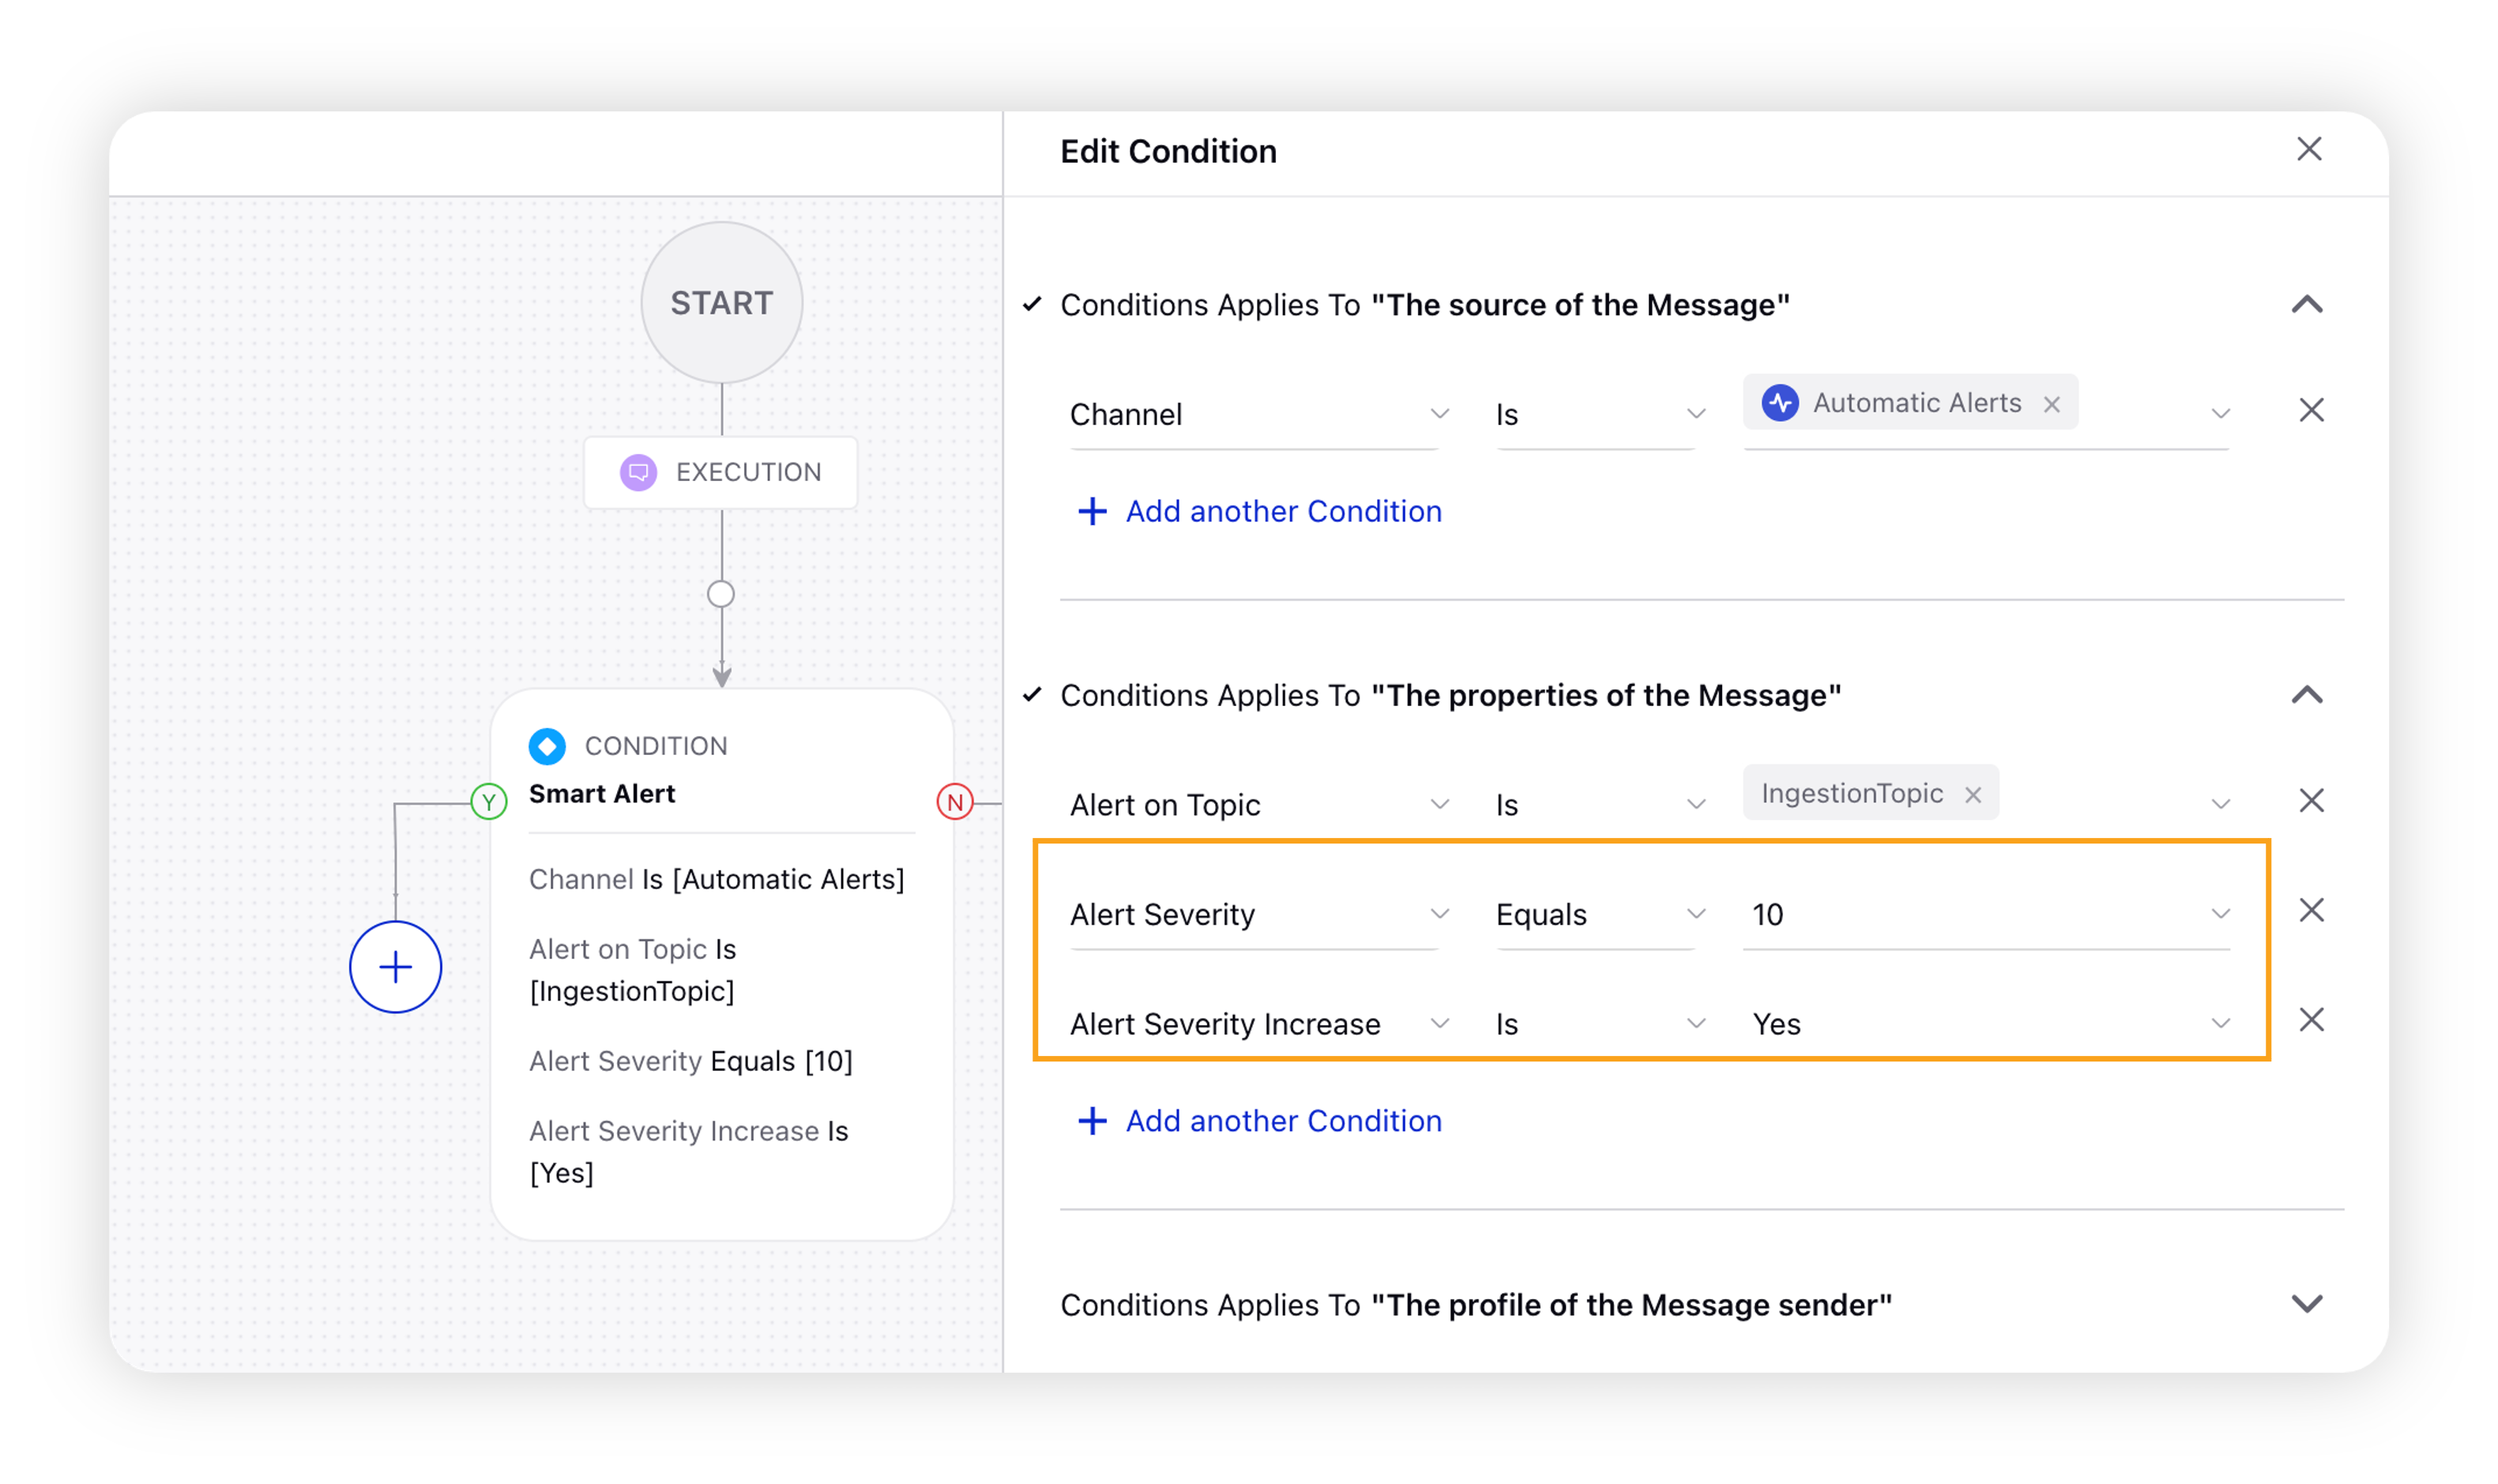
 Note: Severity measure tells you how severe the anomaly is, 1 being the lowest and 10 the highest. This helps to configure email alerts to be sent only when the alert severity condition is met.
 If you wish, you may also add the following conditions to your rule under the Conditions Applies To "The Properties of the Message" section –
Alert Longevity: Longevity is used to measure the persistence of an issue. Users can now choose to get an alert only if there are more than a specific number of alerts on the same topic or topic group.
Re-tweets Gained: Retweets Gained can be used to measure the severity of the issue. Users can select to get an alert only if an engagement level alert has more than a specific number of retweets gained within a duration of 15 minutes.
Total Retweets: Total Re-tweets can be used to measure the total number of Retweets.
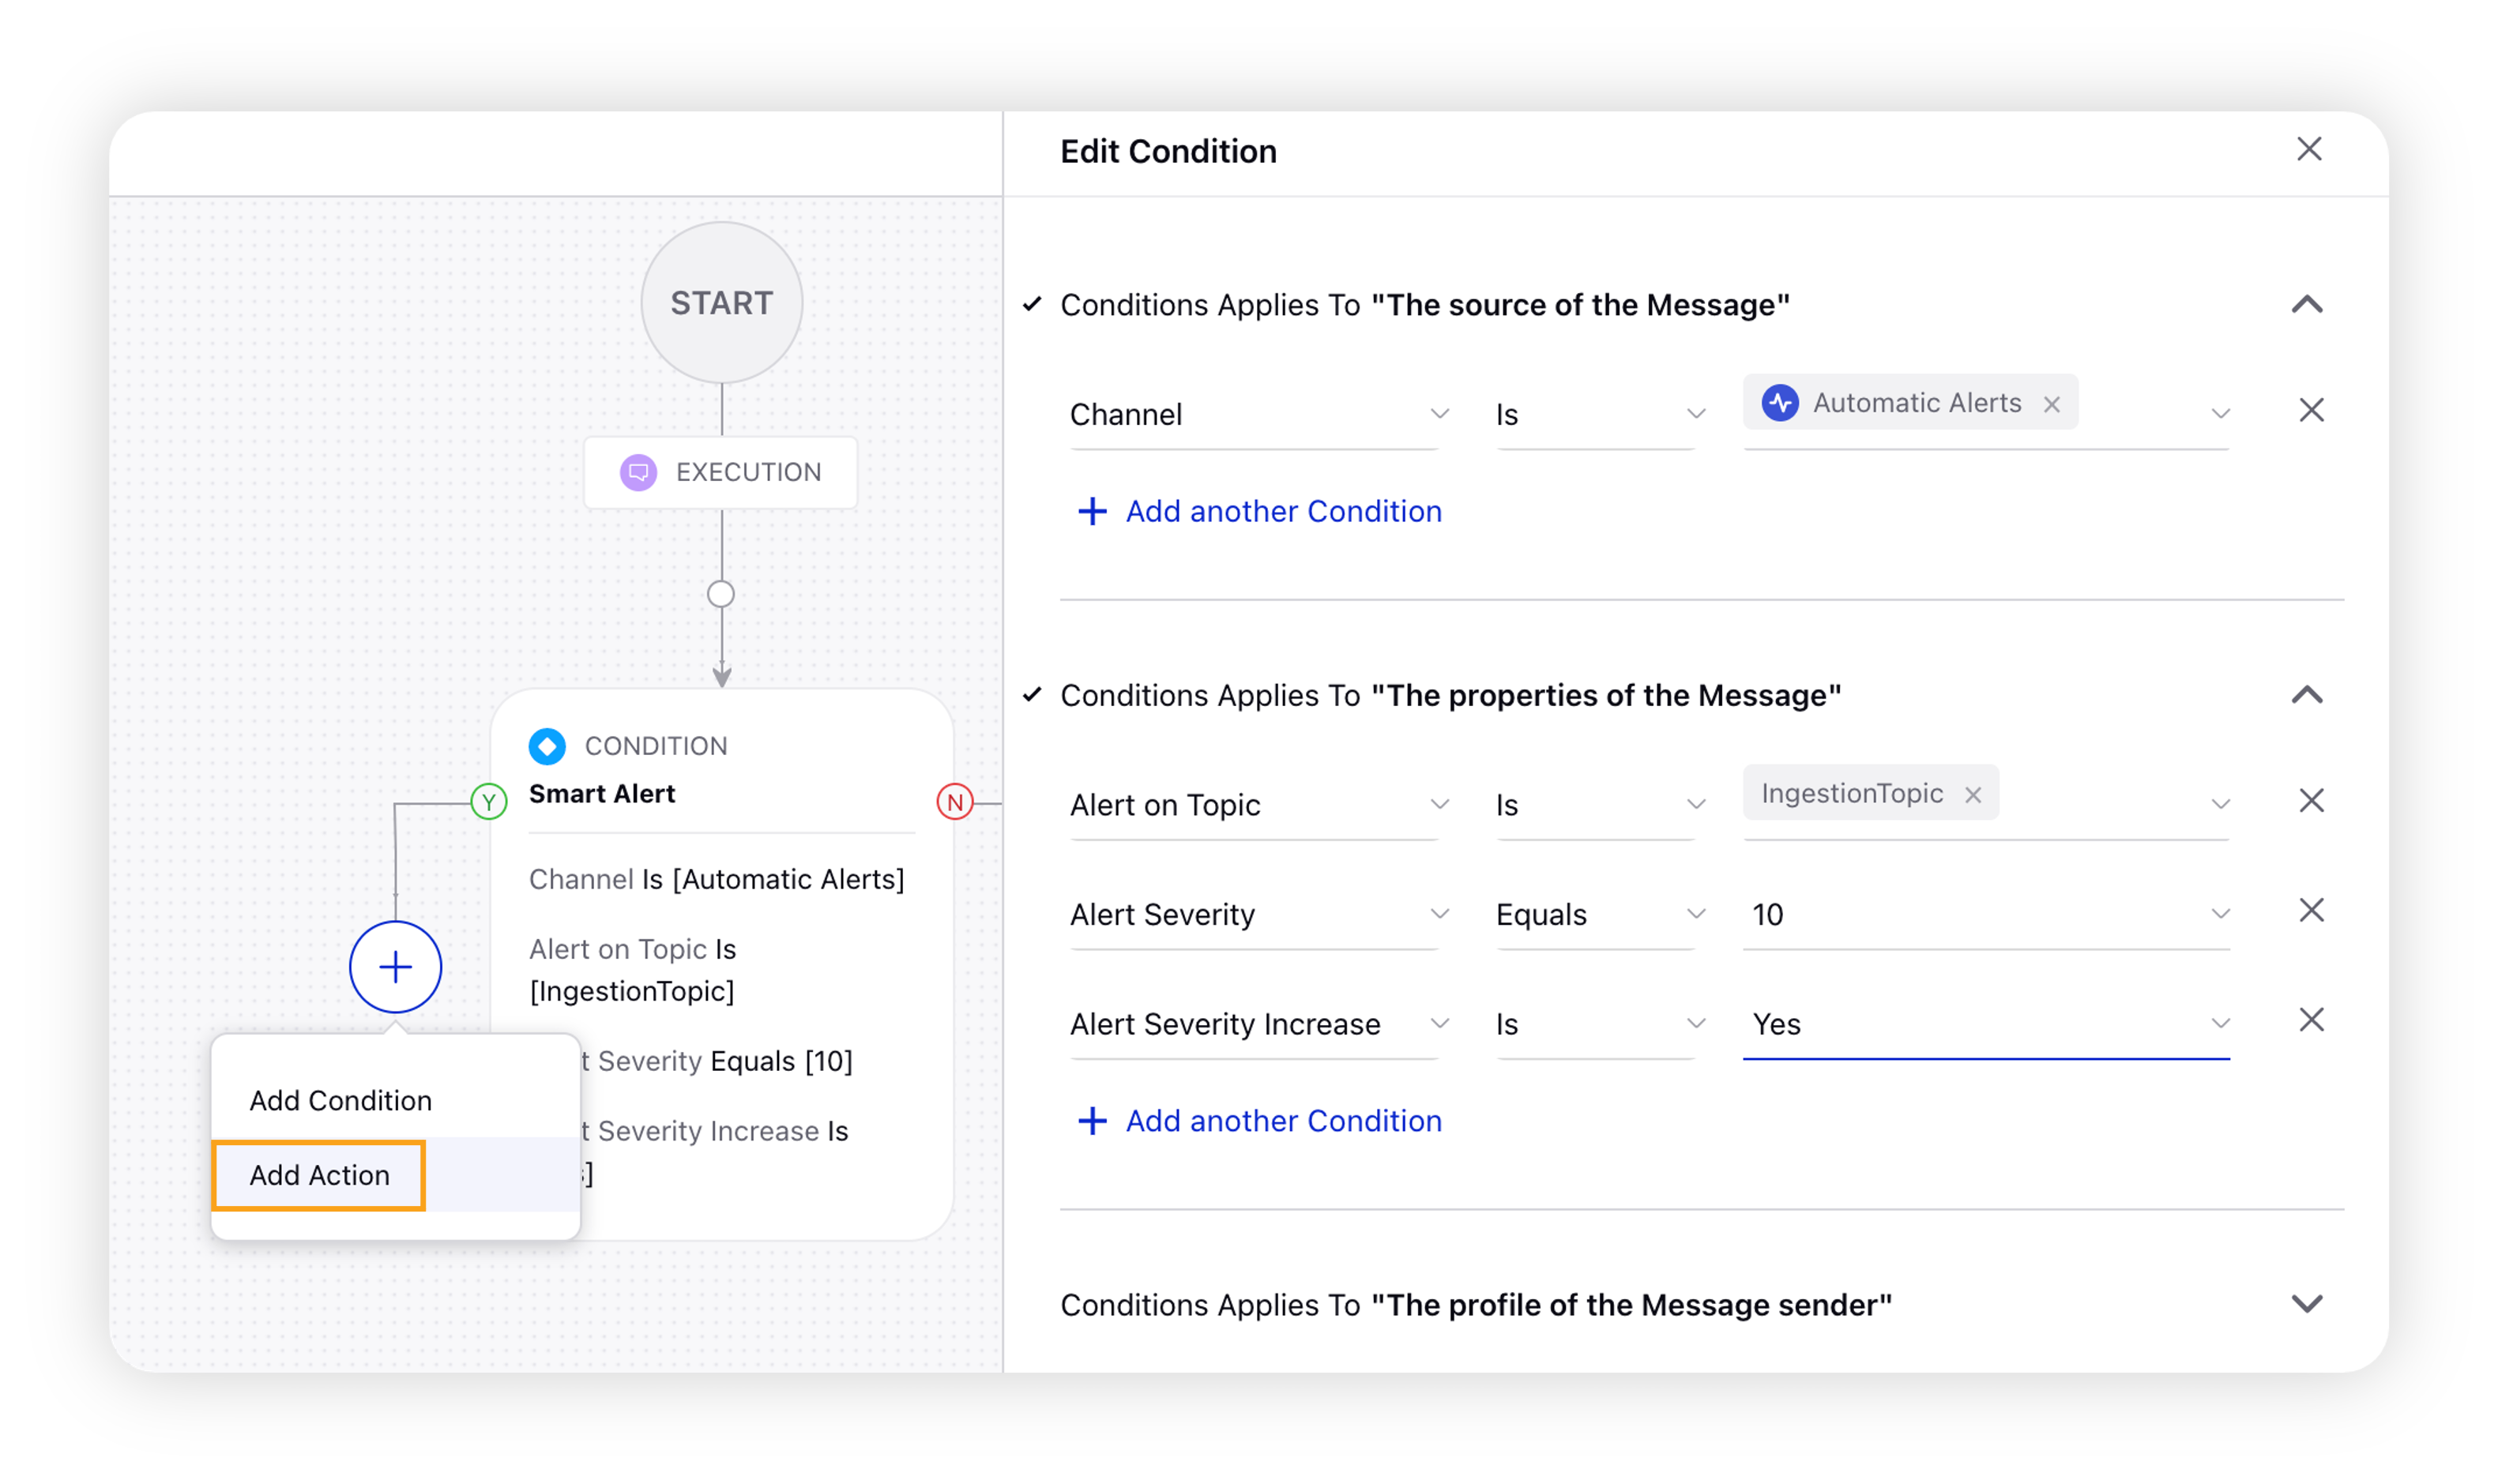
On the Rule Builder window, click the Addition icon and select Add Action.
On the Edit Action pane in the right, enter a Name of the action. Under the Actions To "Assign a message to a User/Queue" section, select Add to Partner Queue and Send Automatic Alert Email as Actions and the respective values.
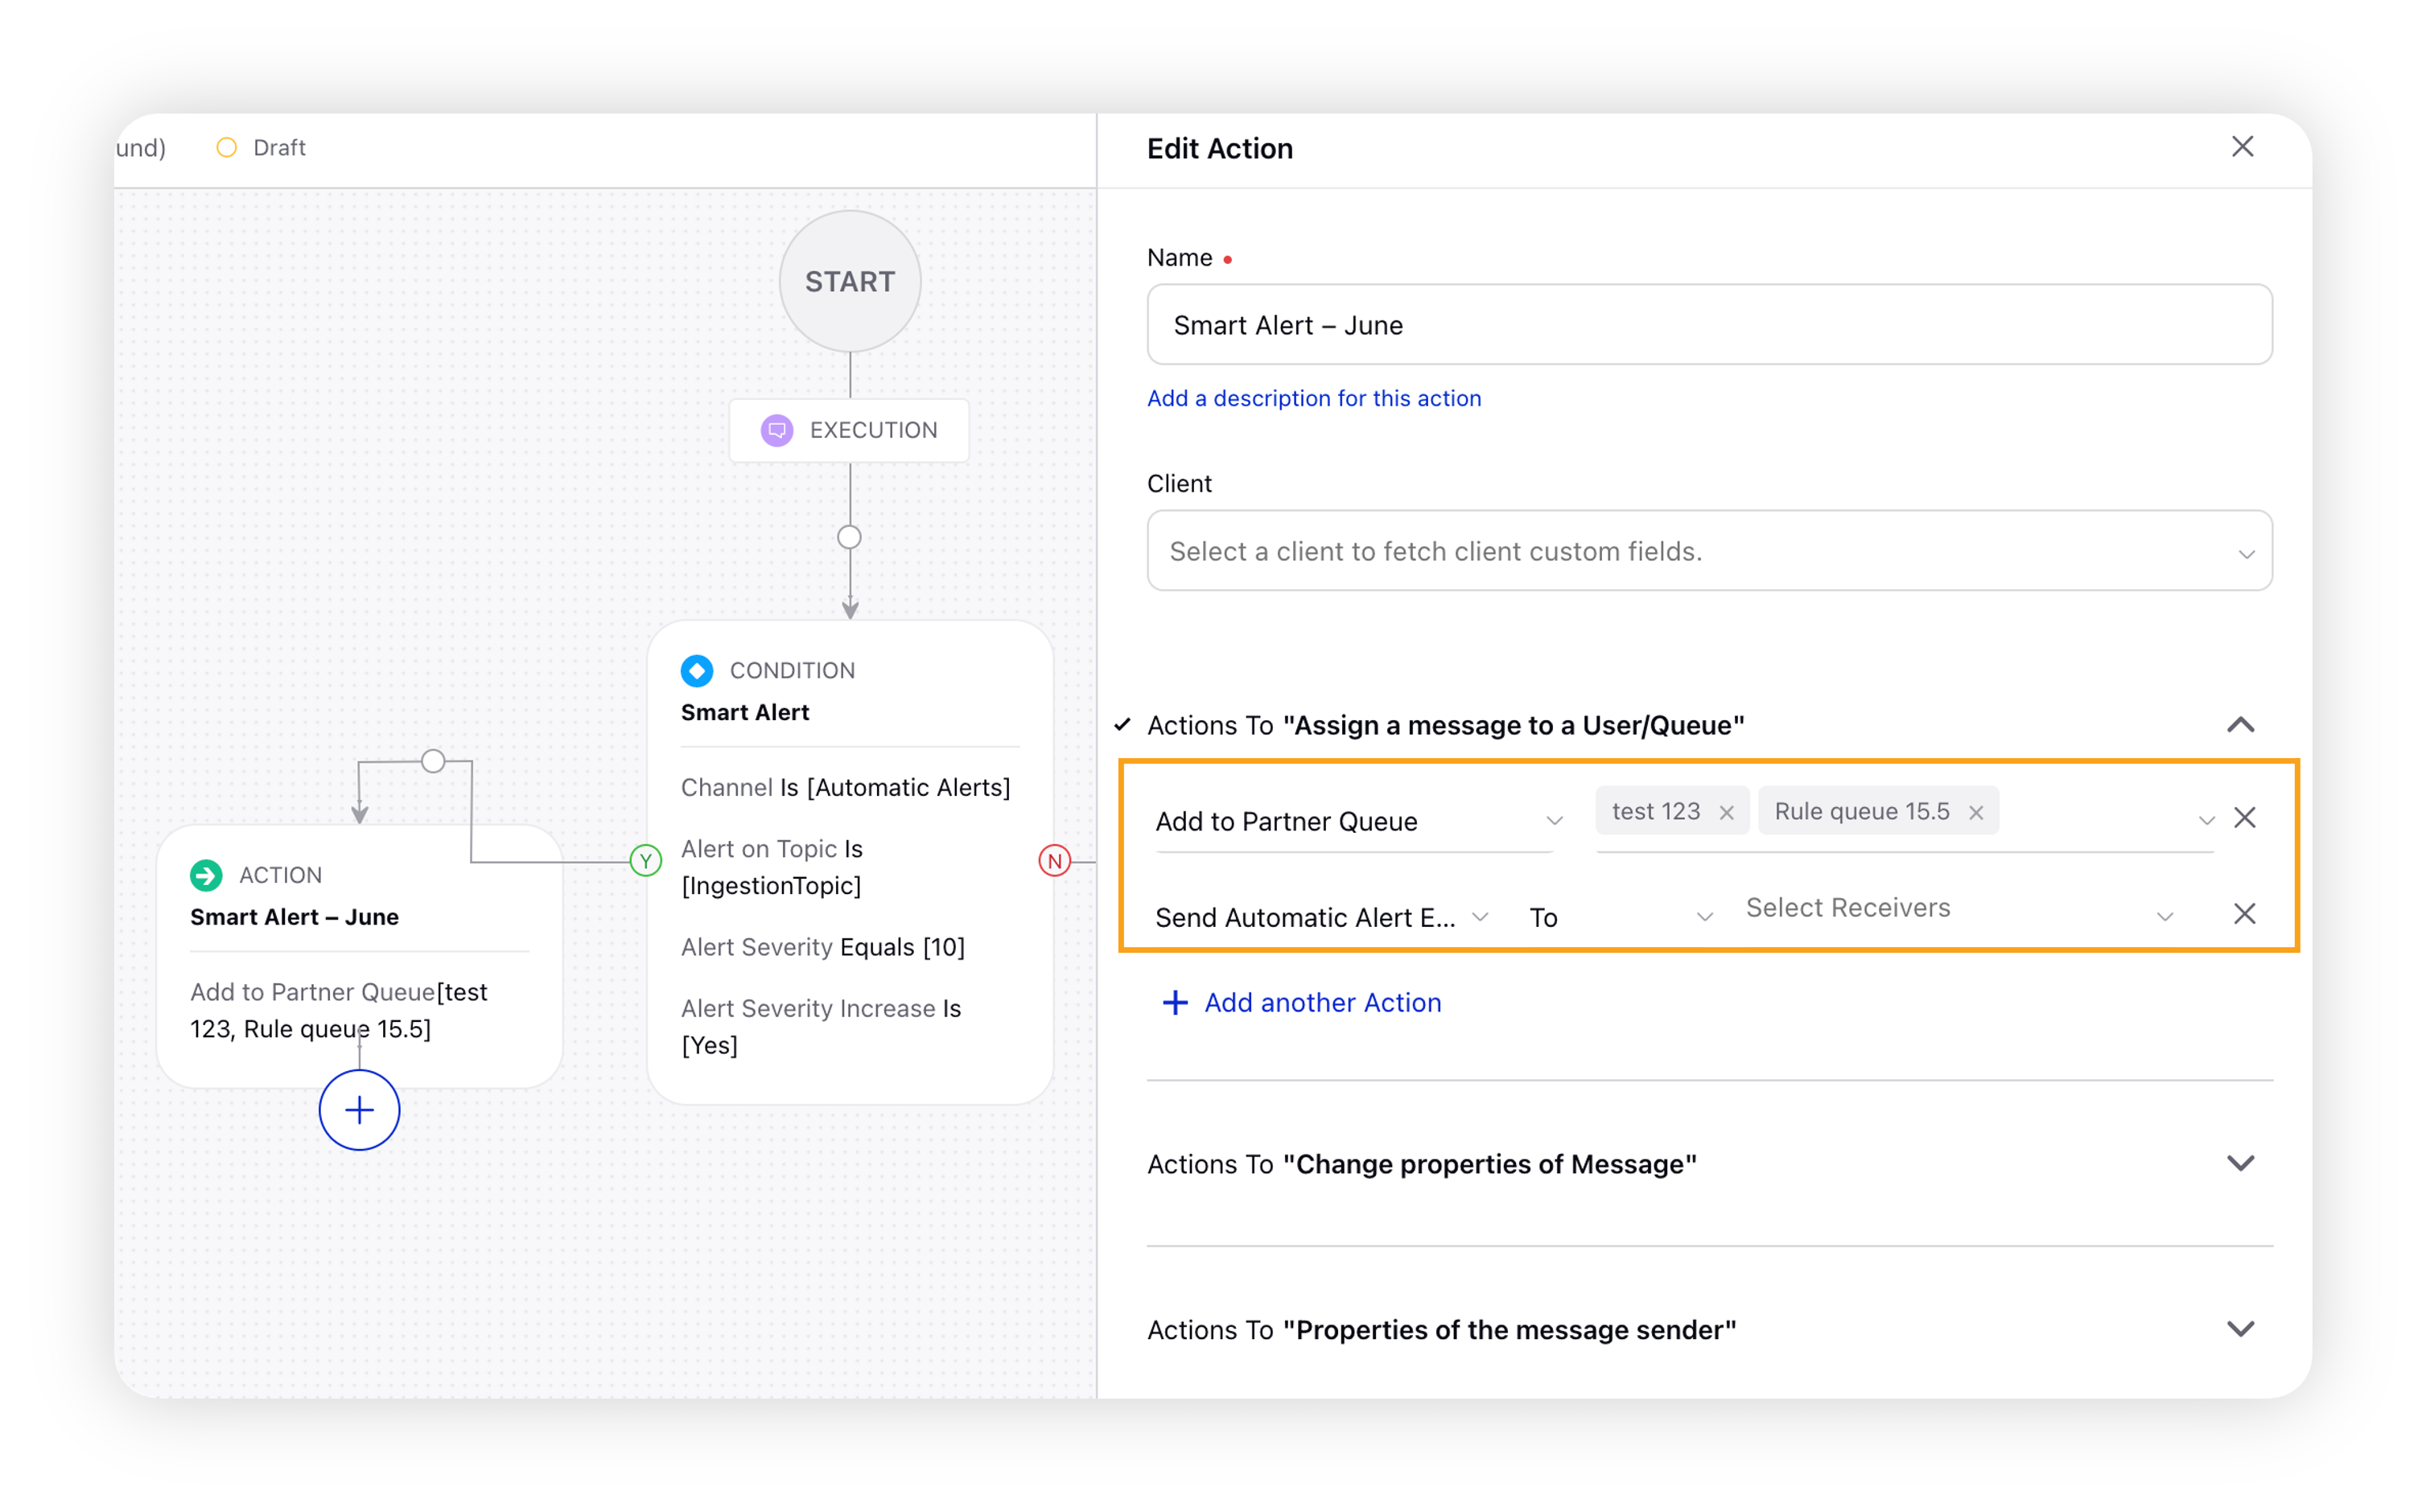
Click Save in the bottom right corner.
To create an Automatic Alerts column
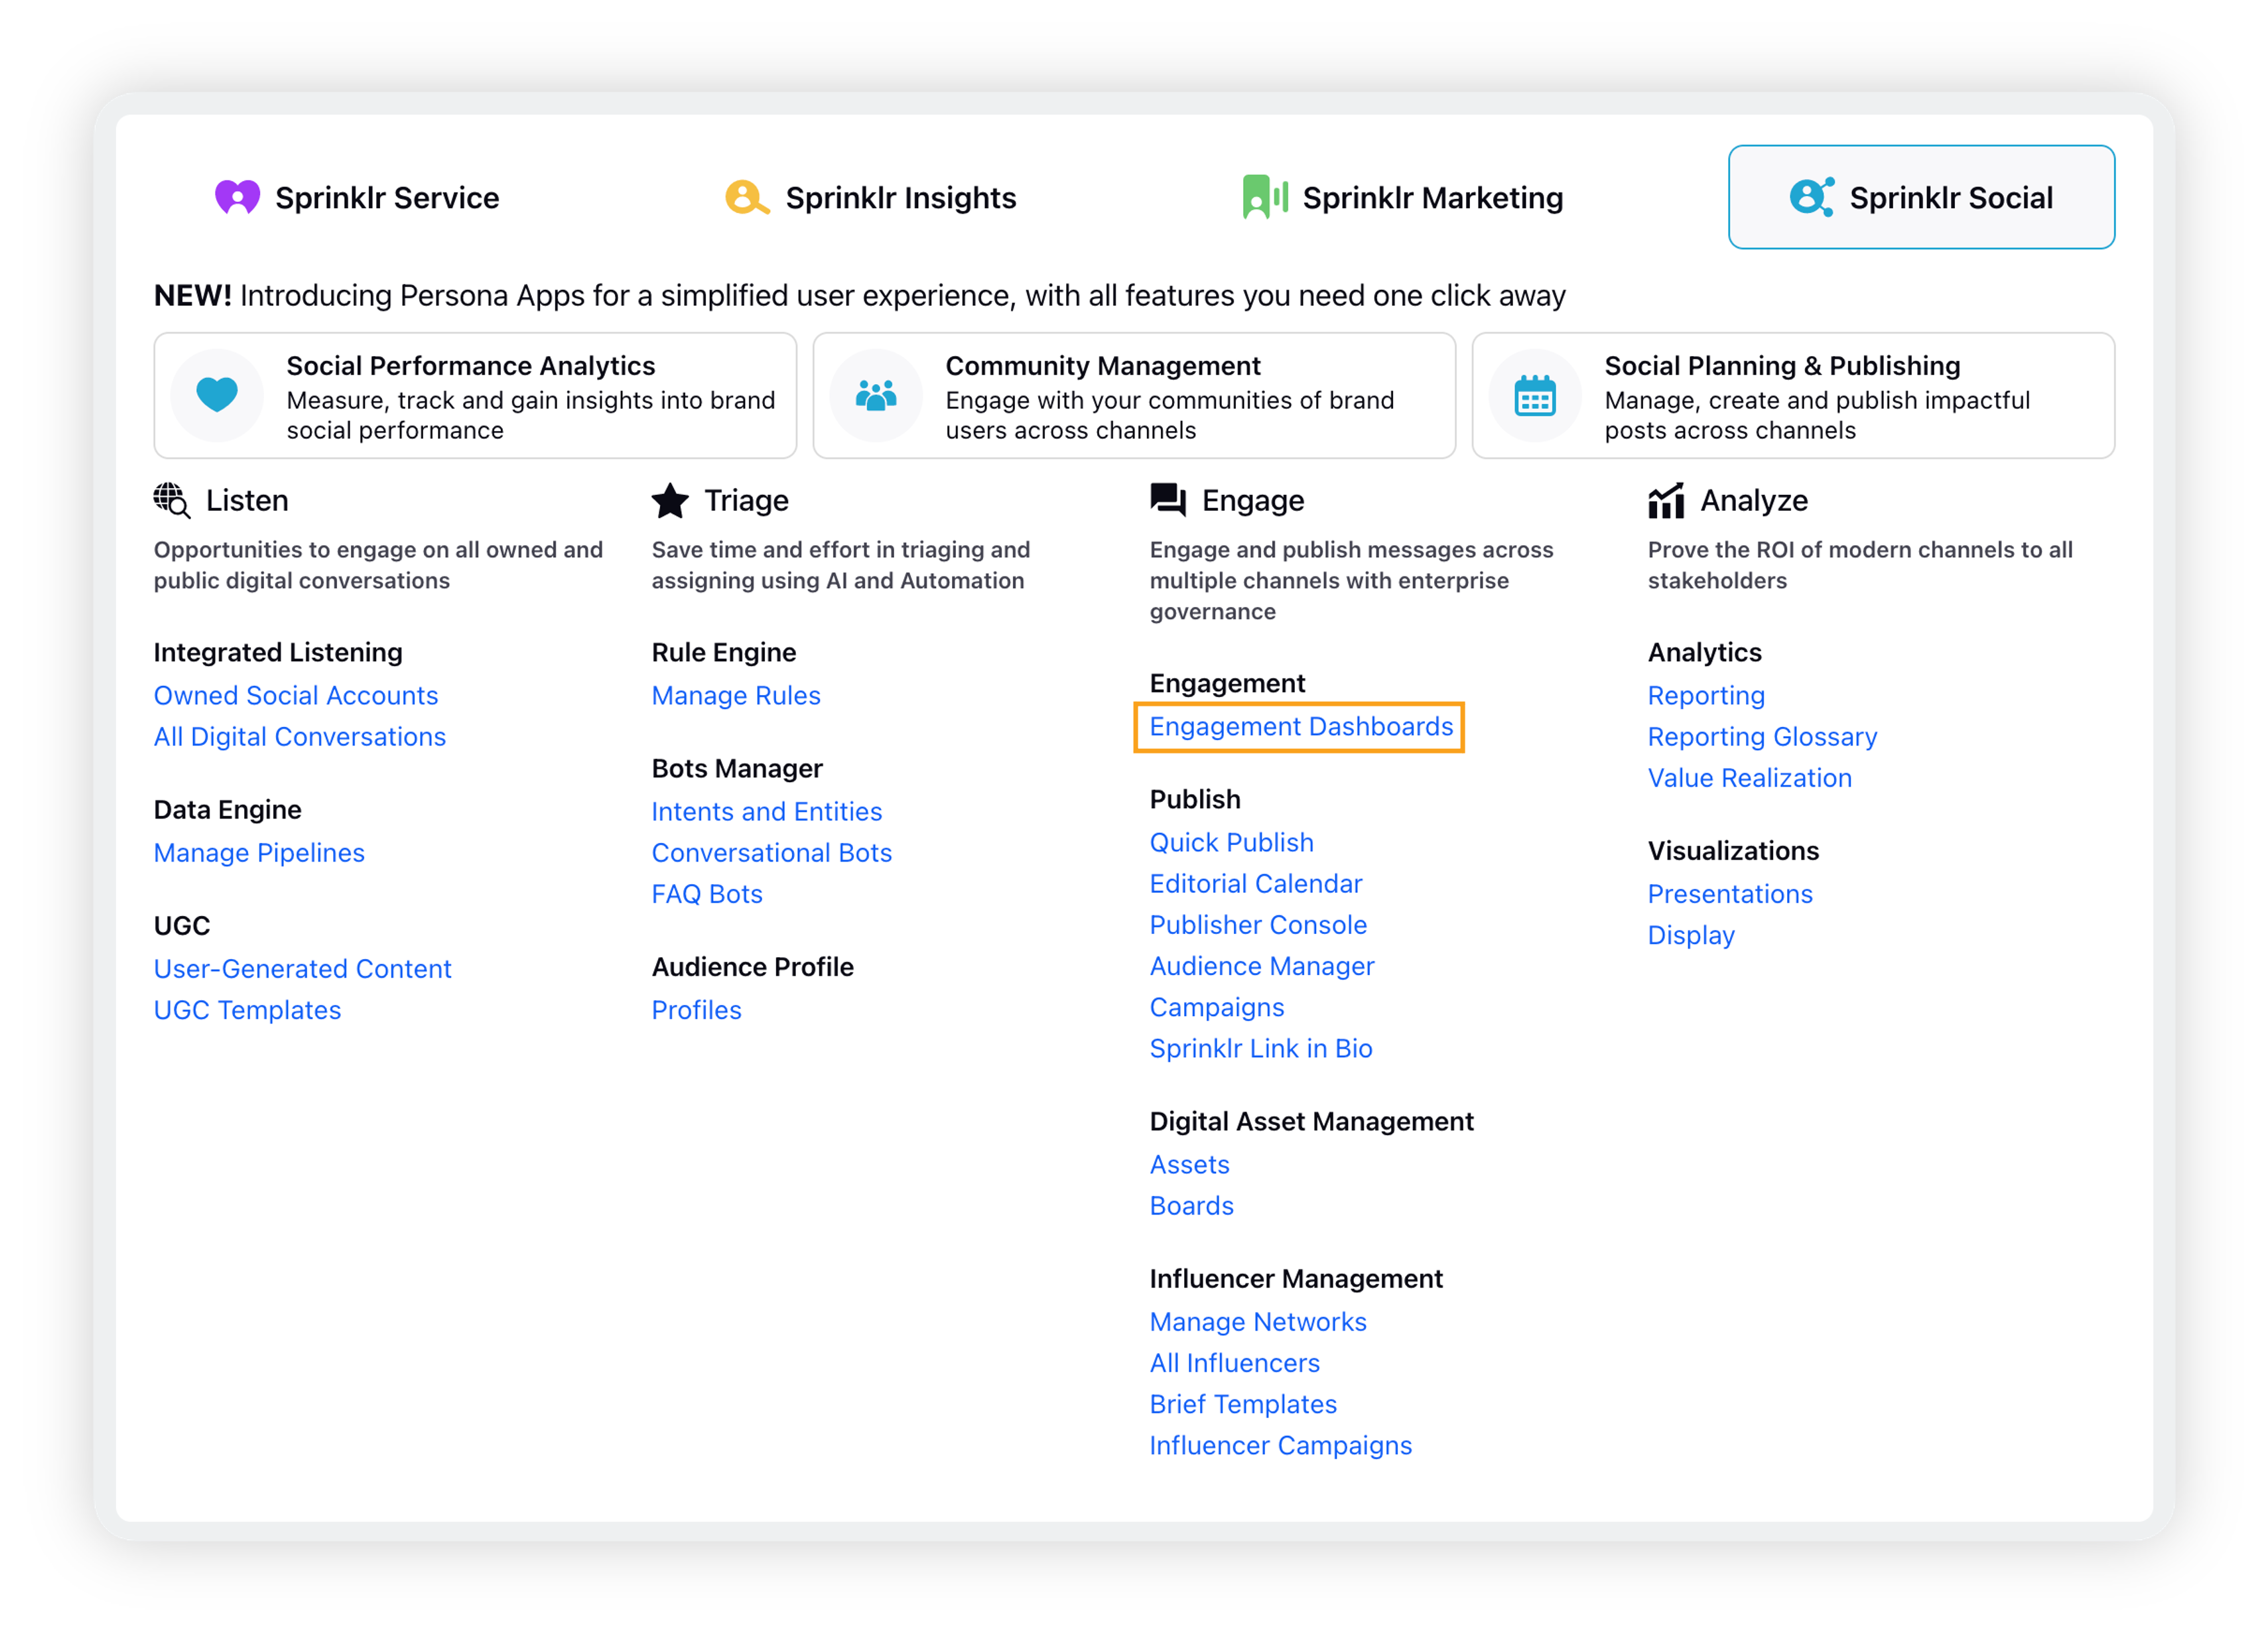
Click the New Tab icon. Under Sprinklr Social, click Engagement Dashboards within Engage.
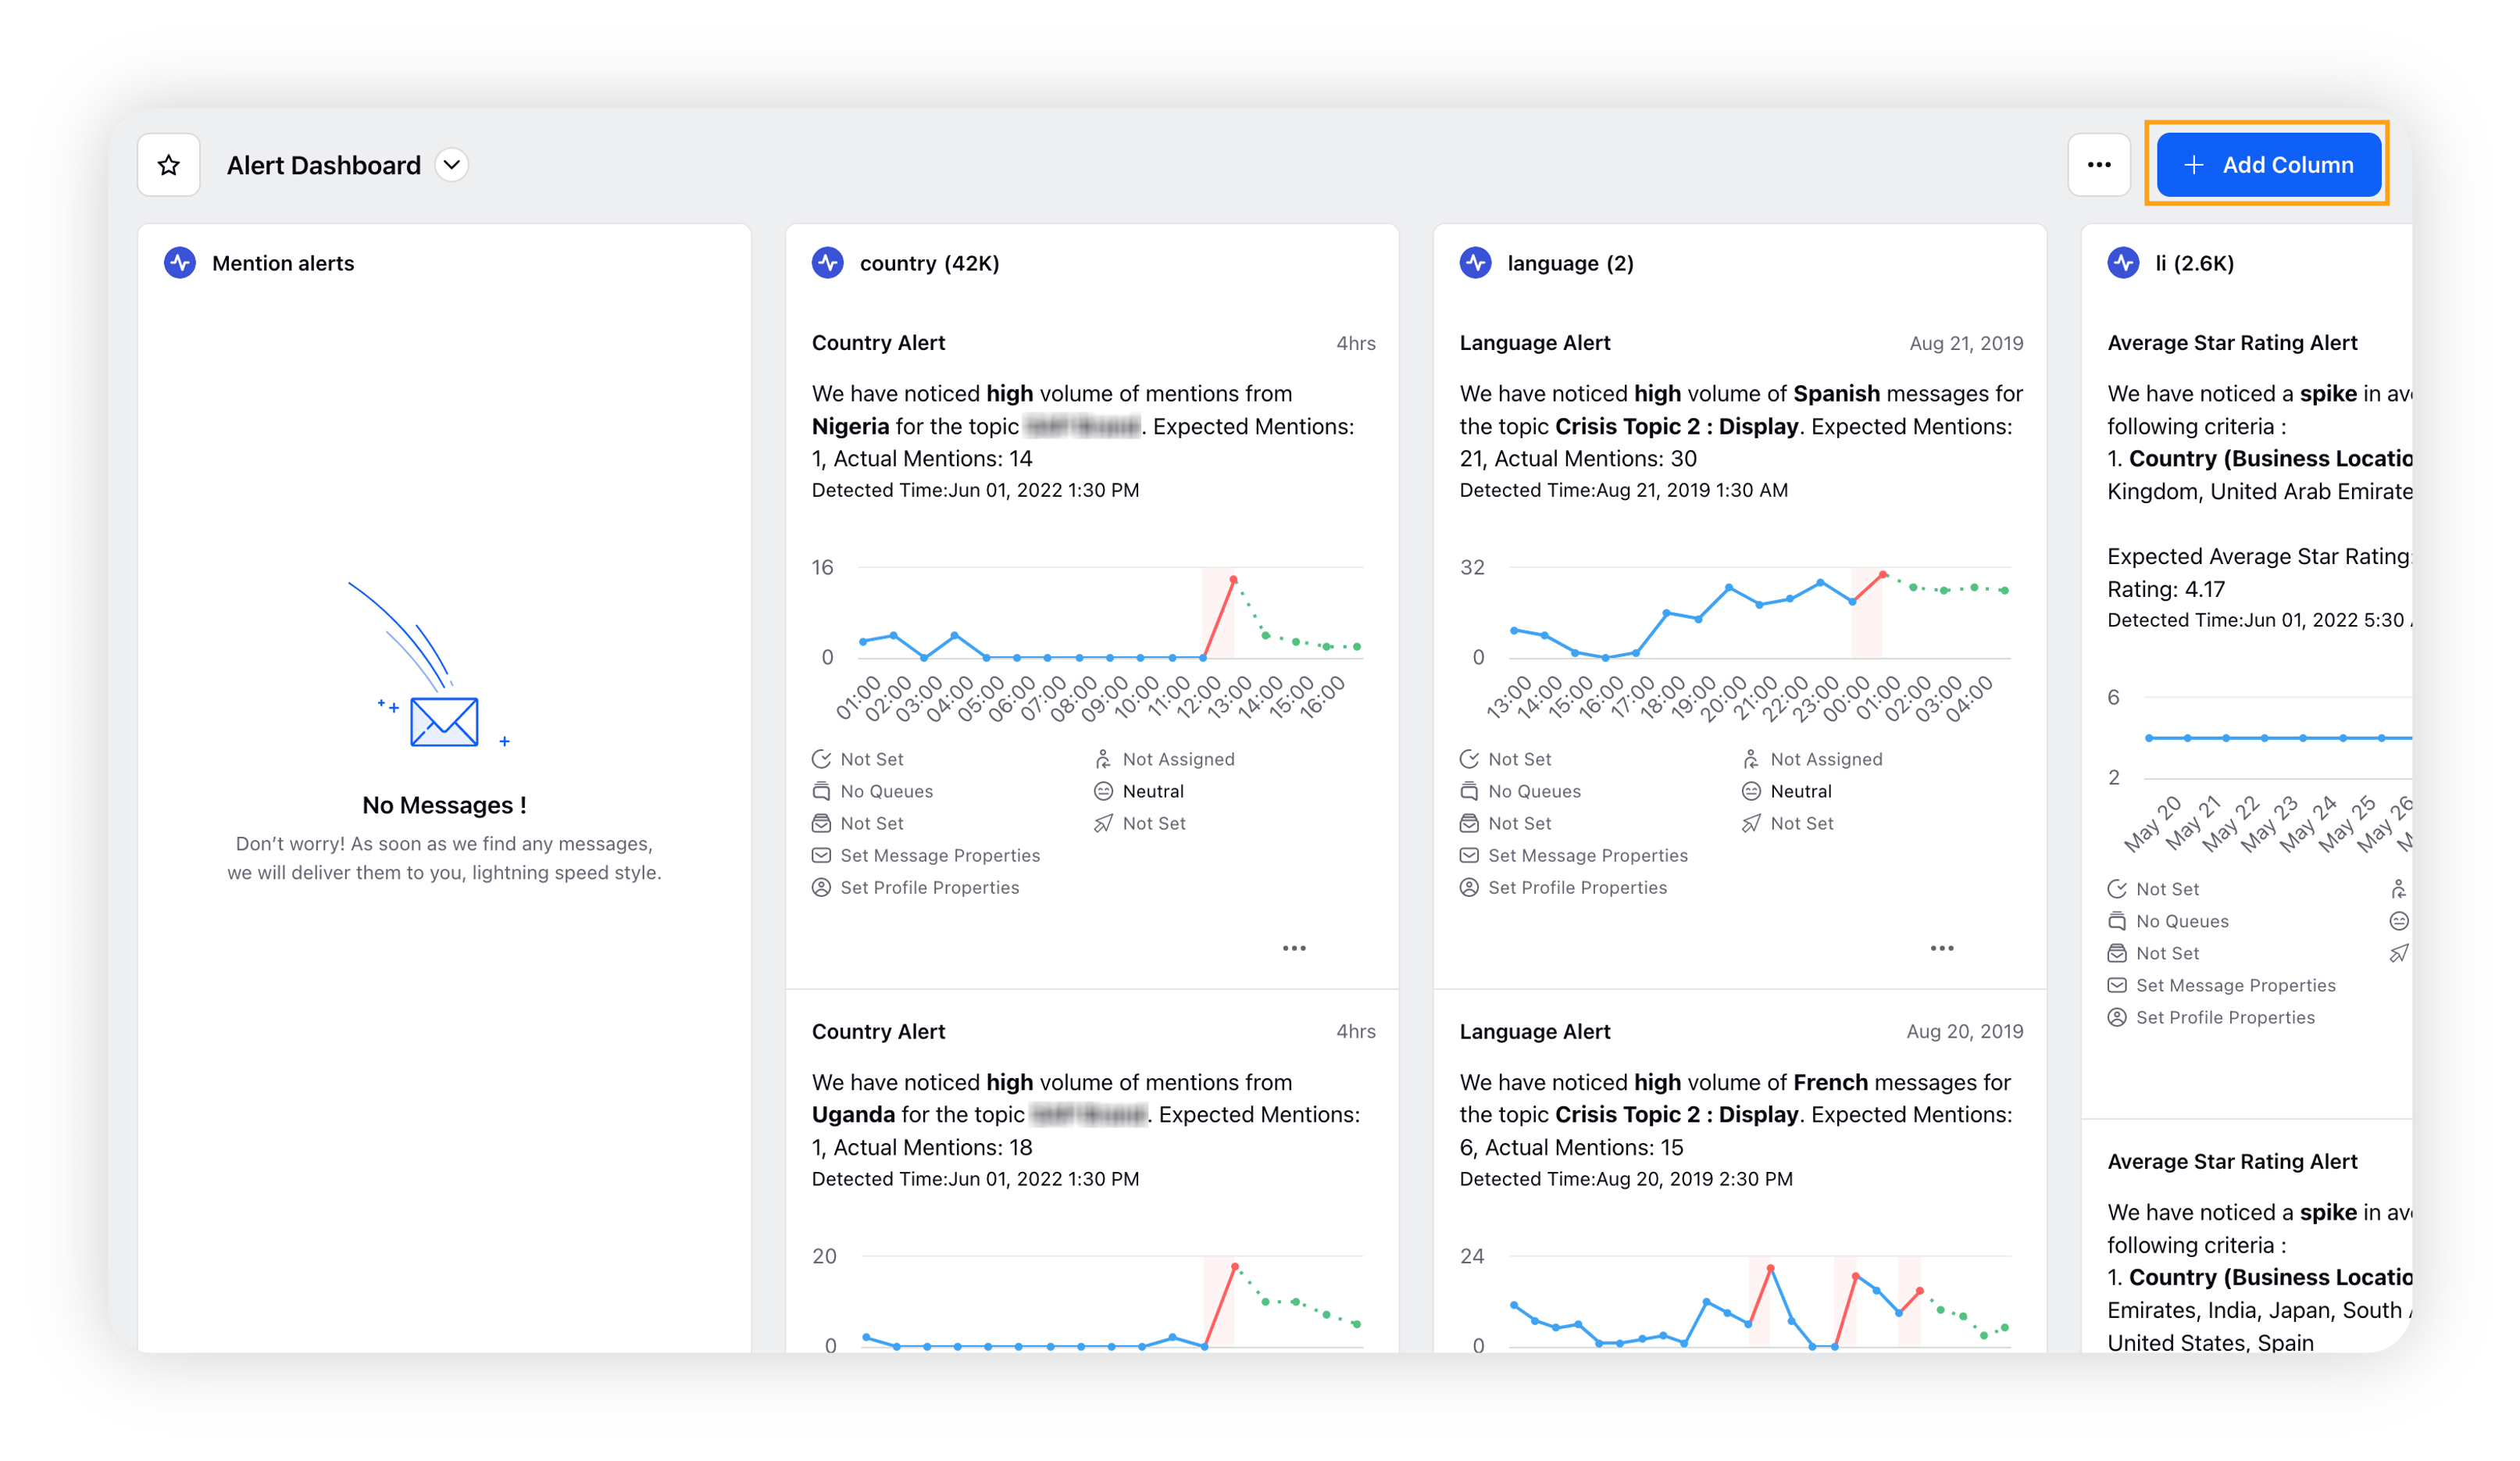
On Engagement Home, open the Engagement dashboard on which you want to add the column.
On the Engagement dashboard, click Add Column in the top right corner.
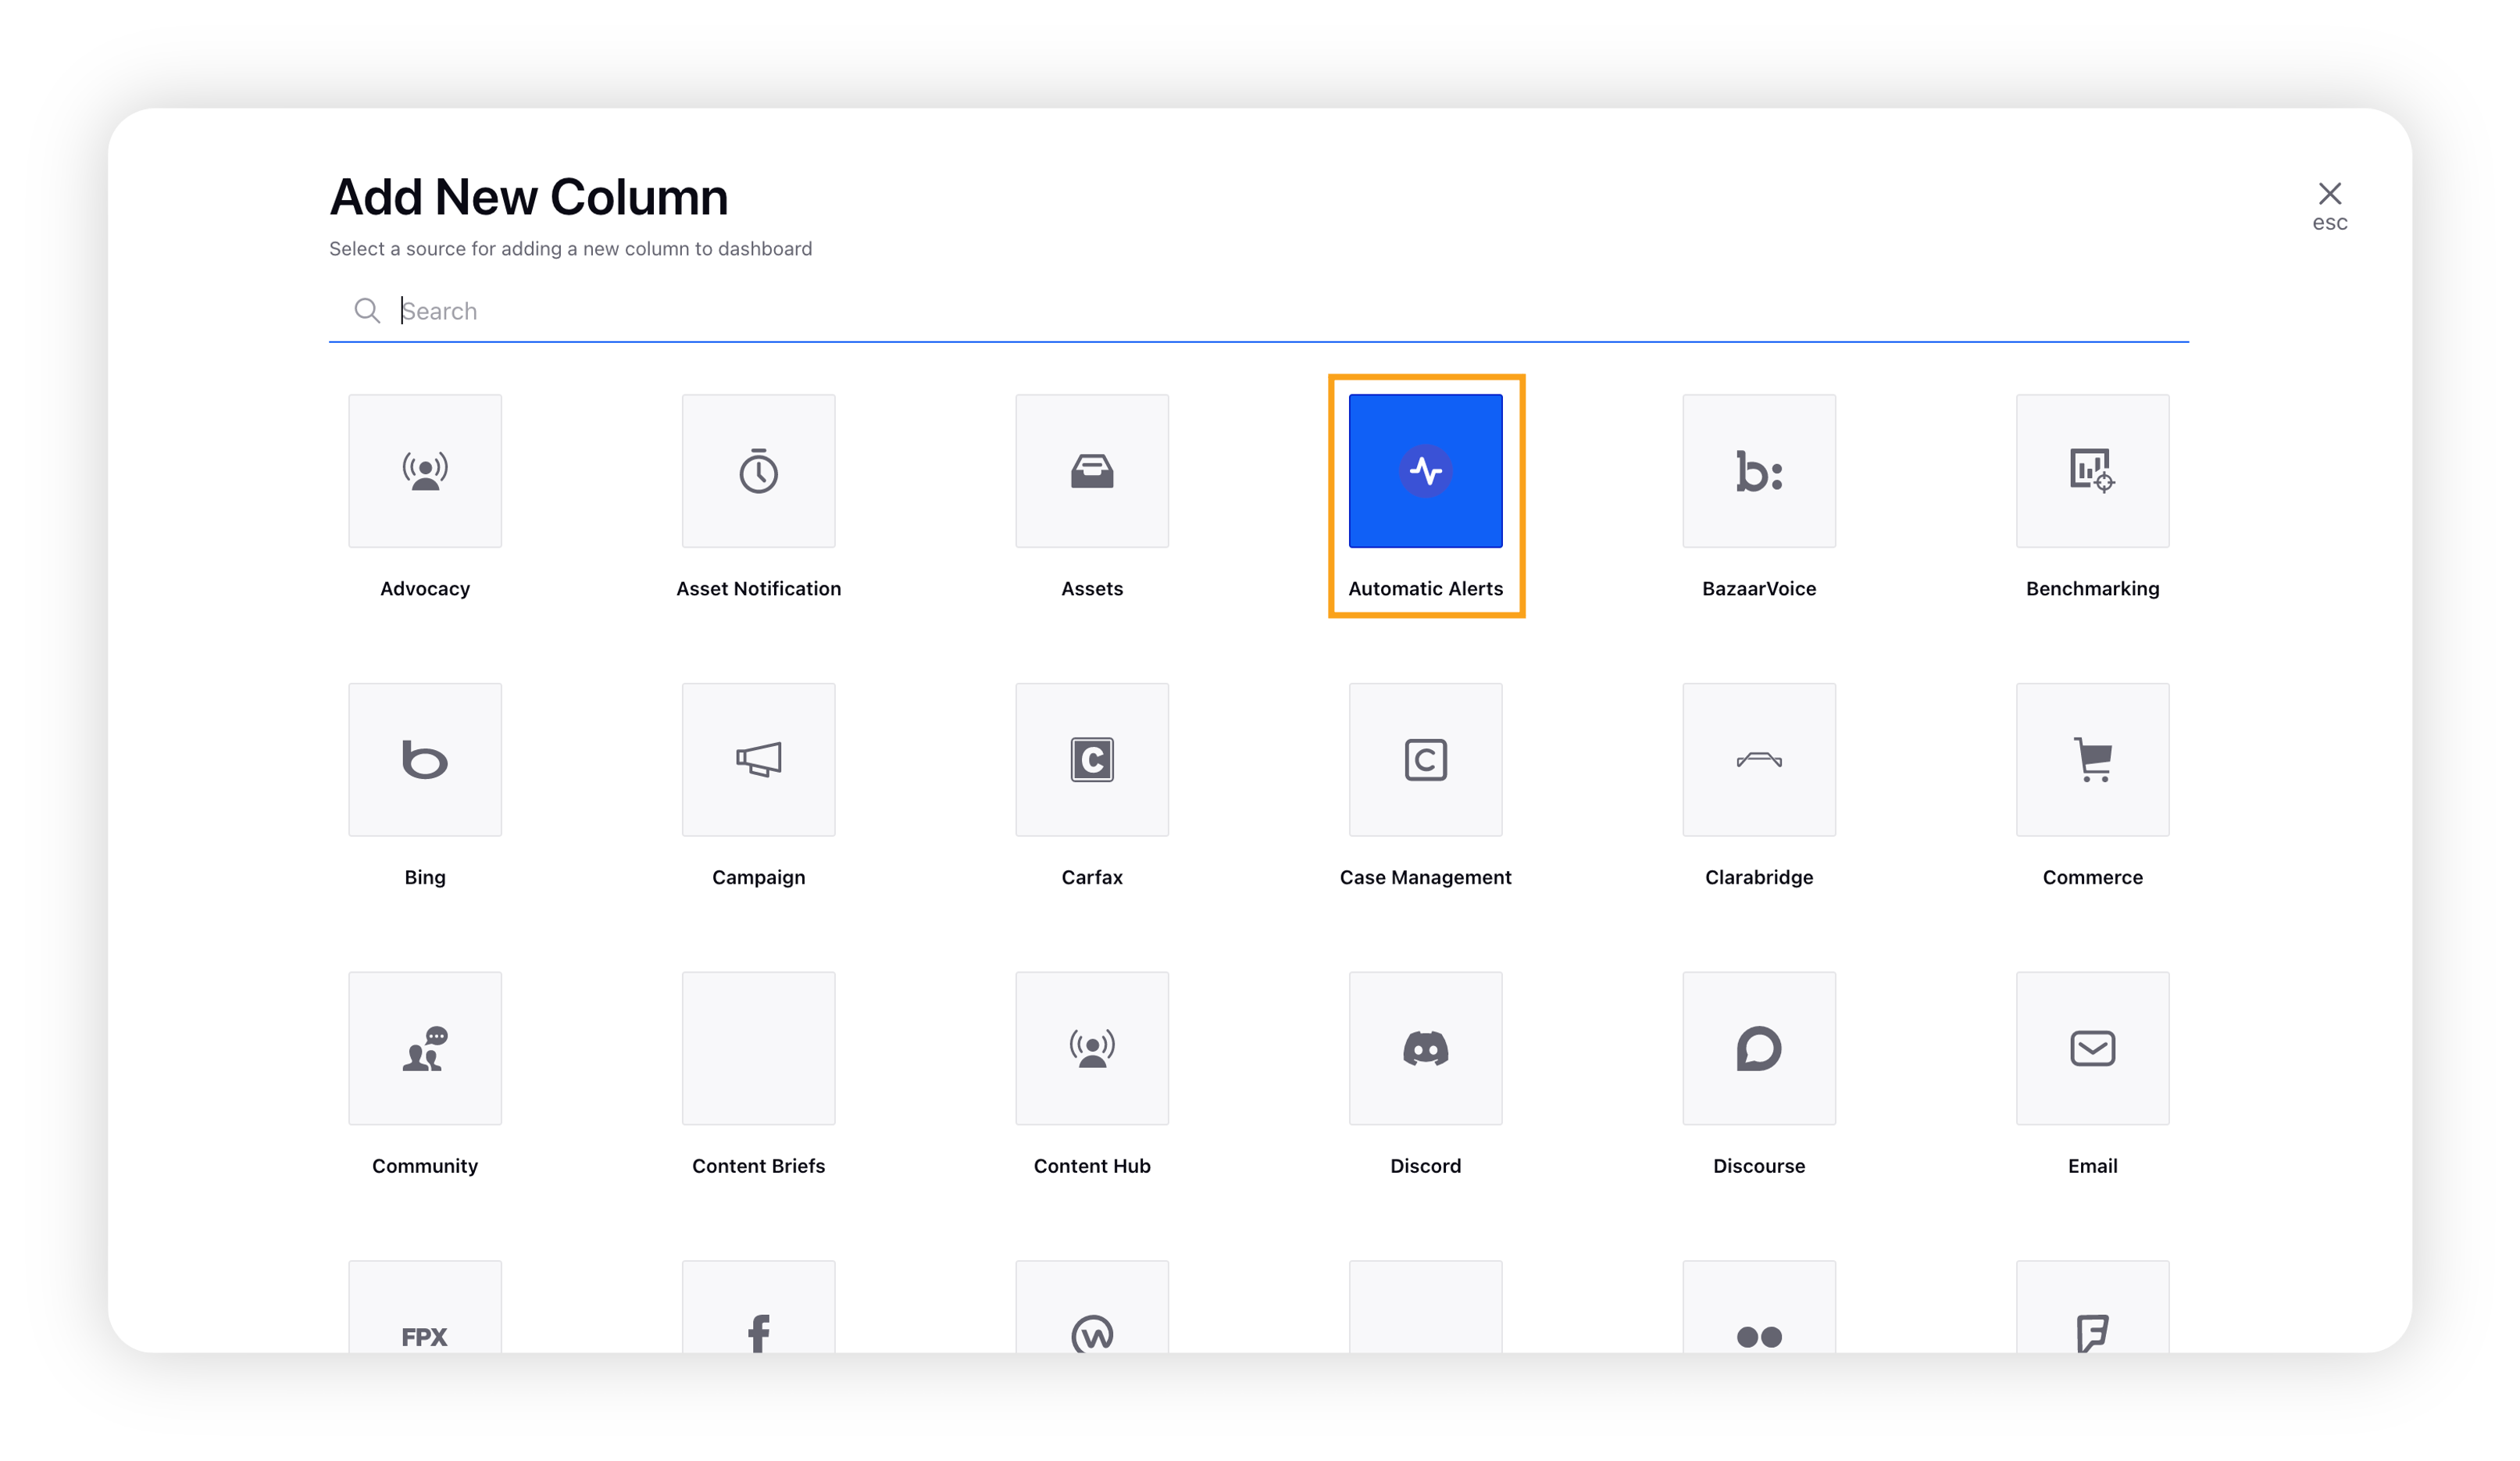
On the Add New Column window, click Automatic Alerts in the list.
On the Add New Automatic Alerts Column window, click Automatic Alerts to expand the form. Provide the basic details for your column.
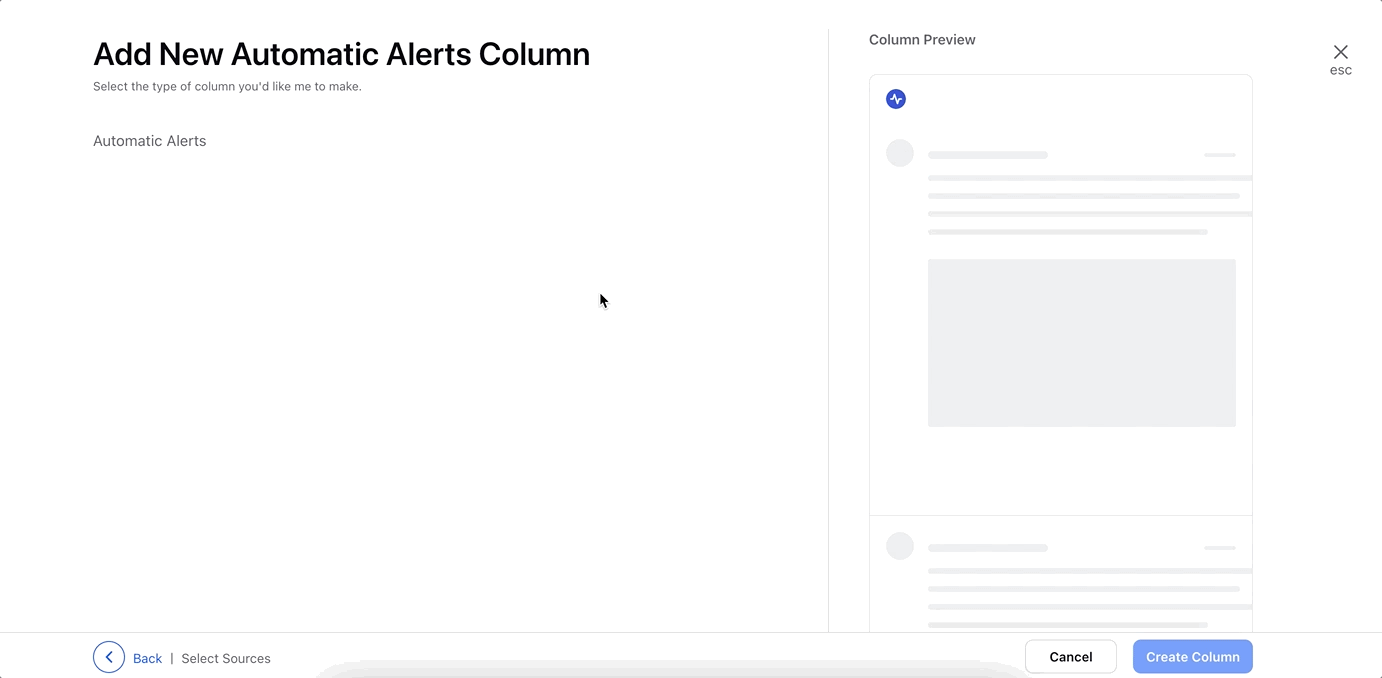 Note: These details will vary according to the column category and type and will determine the content that appears in your column. Note that the preview of the column will render on the right side of the window.
Enter the Workflow Property configurations as desired.
Note: Workflow properties refer to the properties applied in Sprinklr, either automatically or manually, that determine the alert's workflow status, user assignment, priority, spam designation, and sentiment.Provide the custom properties and channel custom properties as desired.
Note: Additional properties refer to the Custom Fields of alert. Configuring Additional Properties in an Engagement Dashboard column, you can specify alert to include or exclude based on the properties that have been applied to the alert.After entering all the details for your column, click Create Column to create the new column. Upon creation, your column will be available in the current dashboard.