Create an Authentication message template
Updated
This template is created to support the capability to authenticate your customer through Apple Messages for Business account. This will help you in verifying customer's identity. You can create an Authentication Message template and send it to customers to go through the authentication process.
Before you begin
Before the agent or bot sends an authentication request to a consumer, they need to know if the consumer device is compatible (that is, using iOS 12 or newer) with Apple Auth.
In an Apple Messages for Business conversation, the messaging channel will automatically send an authenticated "role" engagement attribute to LiveEngage:
If the consumer's Apple device supports authentication, this attribute's value will be "Apple Authentication supported".
If the consumer's Apple device does not support authentication, this attribute's value will be "Apple Authentication not supported".
The agent or bot should read the consumer engagement attributes to check for this engagement attribute before sending the Apple Authentication request to the consumer.
To create an Authentication Message template
Follow steps 1-3 of Date/Time Picker template.
Under Asset Specific, select Authentication from the Template Type dropdown and Apple Messages for Business from the Channel dropdown.
Under Received Message, click the Upload Image icon and add the desired image. Enter Title, Subtitle and preferred Style in the respective fields. Style is the size of the icon inside the template. You can select the desired size from the dropdown.
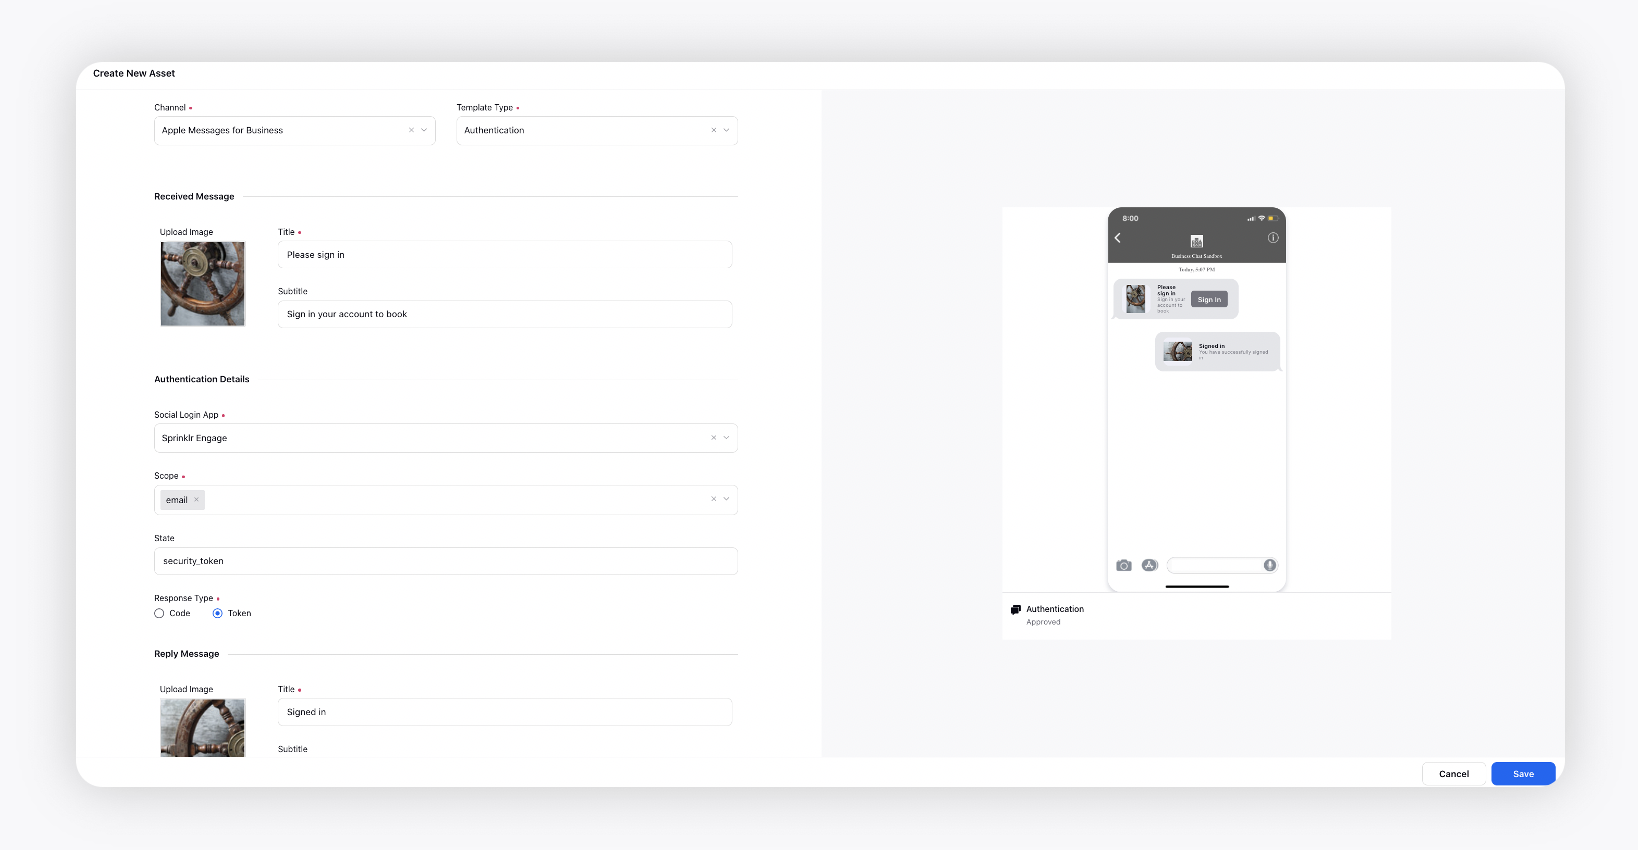
Under Authentication Details, select the Social Login App from the dropdown.
Select Scope from the dropdown and Response Type as either Code or Token, per the requirement.
Code: An authorization code is a short-lived token representing the user's access grant, created by the authoriSation server and passed to the client application via the browser. The client application sends the authoriSation code to the authoriSation server to obtain an access token and, optionally, a refresh token.
Token: The access token is used by the client to make authenticated requests on behalf of the end-user. It has a longer lifetime than the authorization code. When the access token expires, an attempt to use it will fail, and a new access token must be obtained via a refresh token.
Under Reply Message, click the Upload Image icon and add the desired image. Enter Title, Subtitle and preferred Style in the respective fields.
Under Asset Details, enter the asset details like Campaigns, Status, Available From, Visible From, Expires on, etc.
Under Asset Sharing, select the Workspaces and Users/Users Groups you want to share your asset with. Check the Visible in all workspaces box to make it visible in all workspaces.
Next, apply the desired Properties to the asset.
Click Save in the bottom right corner to create the template.