Configure where and when prompt will trigger
Updated
While a creative contains the content you want to display, an Intercept defines when and where to display said creative.
One intercept can be linked to one or multiple creatives. To create an intercept, open your proactive prompt folder, Select "Intercepts" from the drop down on the top right, and then click on create New.
Intercept Structure
An Intercept structure looks something like this:
Common conditions to be applied to all creatives linked with the intercept
Define creatives to be linked. (We put this in a field called variants)
Extra conditions to be applied to specific creatives. (We put this in a field called variants)
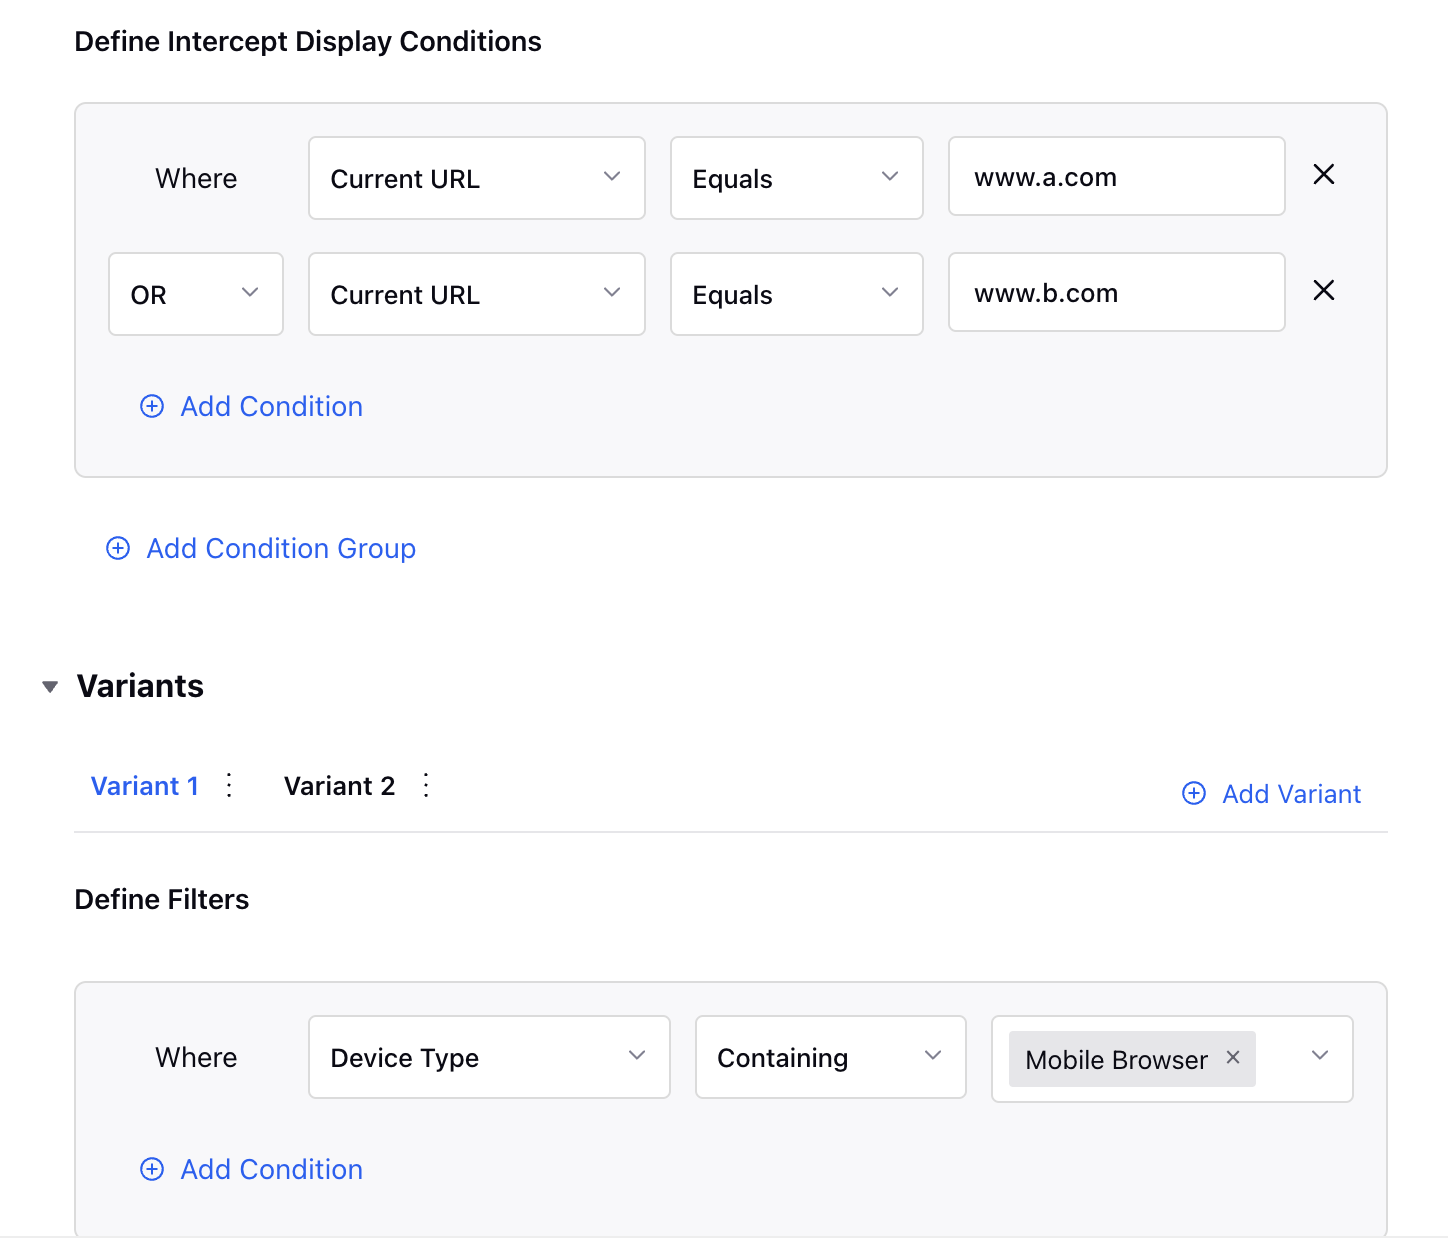
For example, if you have made two creatives, one for mobile browser and one for desktop browser and you want them to come up on specific URLs A, B and C.
Then your intercept conditions will look something like this. We have created two variant tabs, in each variant tab we have added the creative name and the extra conditions.
Configure an Intercept
To configure an Intercept, follow these steps:
1. Click the New Tab (+) icon to open the Launchpad.
2. Under Sprinklr Service > Listen, click Proactive Prompts.

3. Locate the desired proactive prompt.
4. Click the three‑dot icon and select Manage.

5. From the left drop‑down, select Intercepts.

6. Locate the desired intercept.
7. Click the three‑dot icon and select Edit.

8. In the Edit Intercept screen, configure the required settings.
Field | Description | |
Basic Information | ||
Name for the Intercept | Enter a name for the intercept. It will not be visible to the customers. | |
Intercept Status | Select as Active. Select Deactivated if you do not want to use it further. | |
Description | Enter a description for the intercept. | |
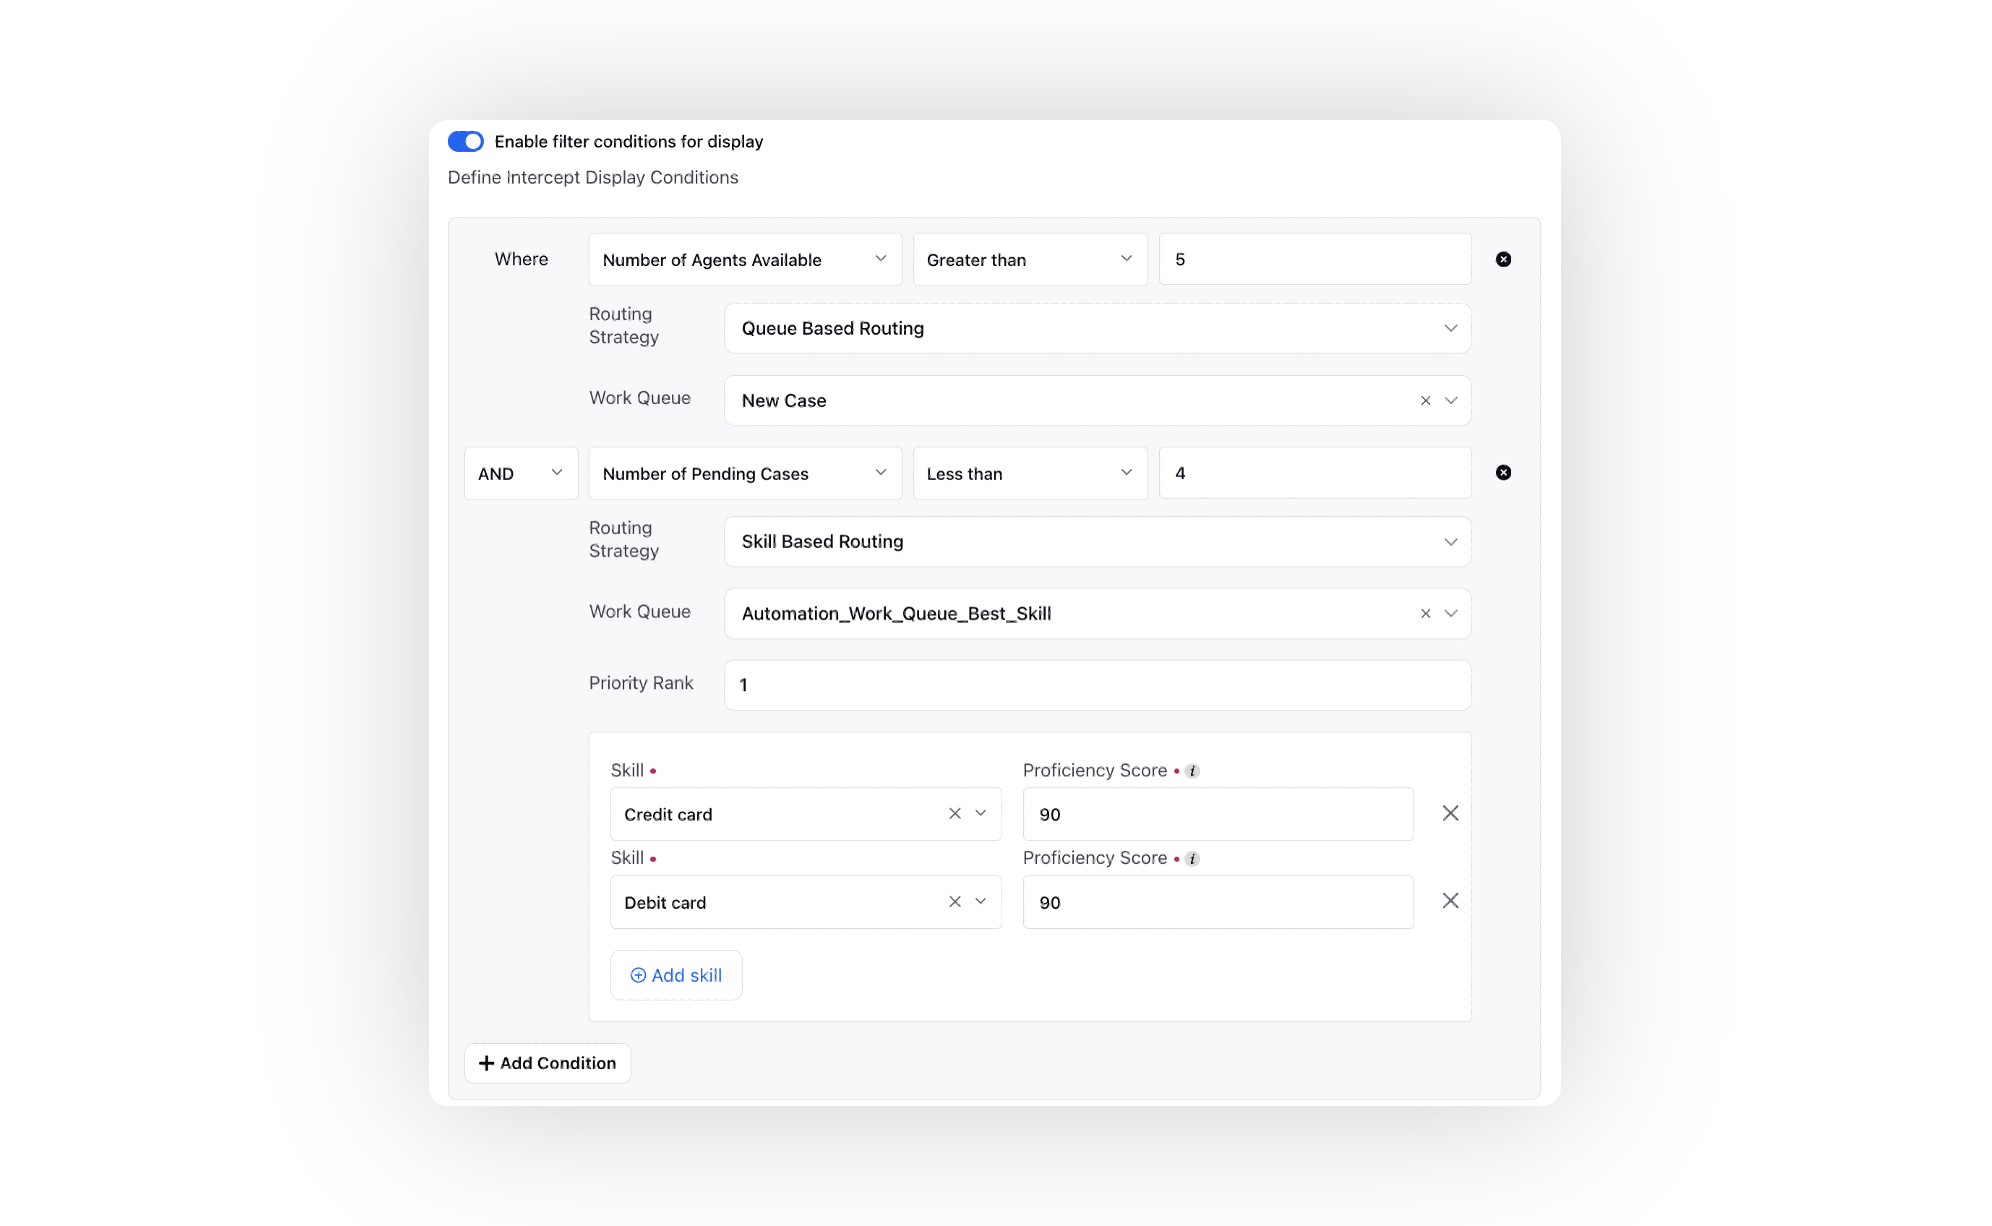
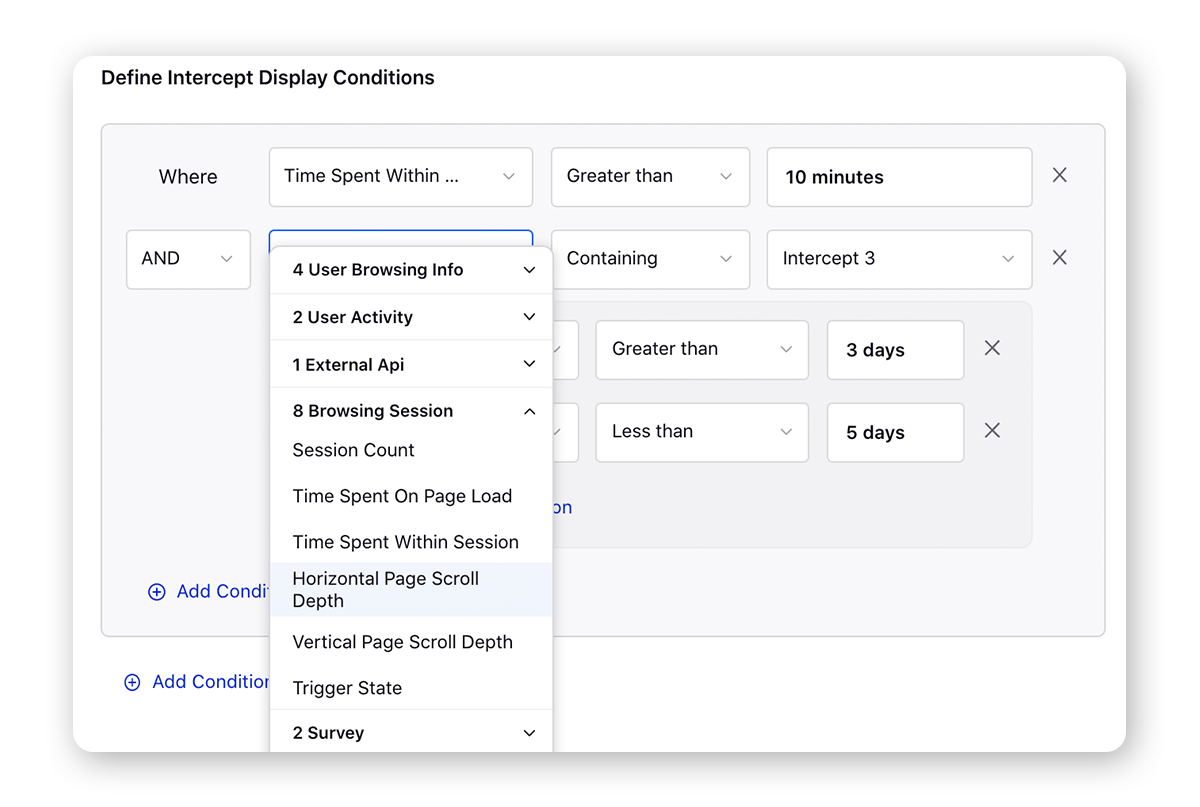
Define Intercept Display Conditions | Select the conditions from the dropdown based on which you want your customers to receive the pop-up. You can add as many conditions as you want using AND/OR. For example, a prompt can be triggered based on the visitor information and behavior metrics such as browser, device type, country, city, region, current URL, time spent on the website, visit times, number of agents available, number of pending cases, max snooze reached, page view in the current session and across sessions, and more.
You can also configure them to appear based on the previous intercepts, surveys triggered/closed and % page scrolled by the website visitor. Additionally, you can trigger prompts based on profile custom fields, for example, trigger different prompts for existing and new customers. You can also retrigger a prompt based on the time spent on the page by a user after s/he has already seen the prompt, for example, a customer may close a prompt and stay on the page for x minutes/hours, then you can show the prompt again. To do this, select 1. Intercept Engaged in Session - If the user has done any activity on the prompt like filling the survey. 2. Intercept Closed in Session - If the user has not done any activity and closed it. Next, select the Last Event Time post which you want to retrigger the prompt. You can also reduce cart abandonment using proactive prompts and website integration. Based on the cart activity of the user (which may include the number of products in the cart, product category, time since the cart has been modified, etc.), you can target them with predefined contextual prompts. To enable this, you need to put JS SDK on your website which will pass the information to the Live Chat widget and further can be consumed in proactive prompts as intercepts. Please work with your Success Manager to enable this capability. | |
Variants | ||
Define Filters | Here, you can create different variants to show different creatives based on different conditions. Add the desired conditions. | |
Prompt Creative | Select the desired Prompt Creative that you have created under the Creatives section. | |
Prompt Target | Set the actions for the target buttons. The number of target buttons will depend on the creative that you have selected.
Selecting Survey Inline will open the survey as an overlay on the webpage. If you select Survey then under the Target Value field, select the survey that you have created in the Survey Builder. Selecting Open Chat (Chat with Agent) can be used to trigger a bot flow or chat with an agent directly. More on this in this section. Note: Contact support team to get the Conversational AI bot app id added in the following DP to use the route to bot action. DP: INLINE_PUBLISH_ENABLED_APPLICATION | |
Additional Settings |
| |
Prompt Schedule | Under Set Days and Time this Prompt can be Sent, select the business hours that you can create and save in the platform settings. While creating business hours, you can set the business days and hours you want to send the prompt on. | |
Intercept Details | ||
Percentage of People to show the Intercept | Select the percentage of people you want to show the prompt to. For example, if you set the percentage to 50% and 4 incognito browsers are opened then the prompt will be displayed in 2 browsers. | |