Setting Up a Voicebot
Updated
Setting up a voicebot involves several steps, which are explained below.
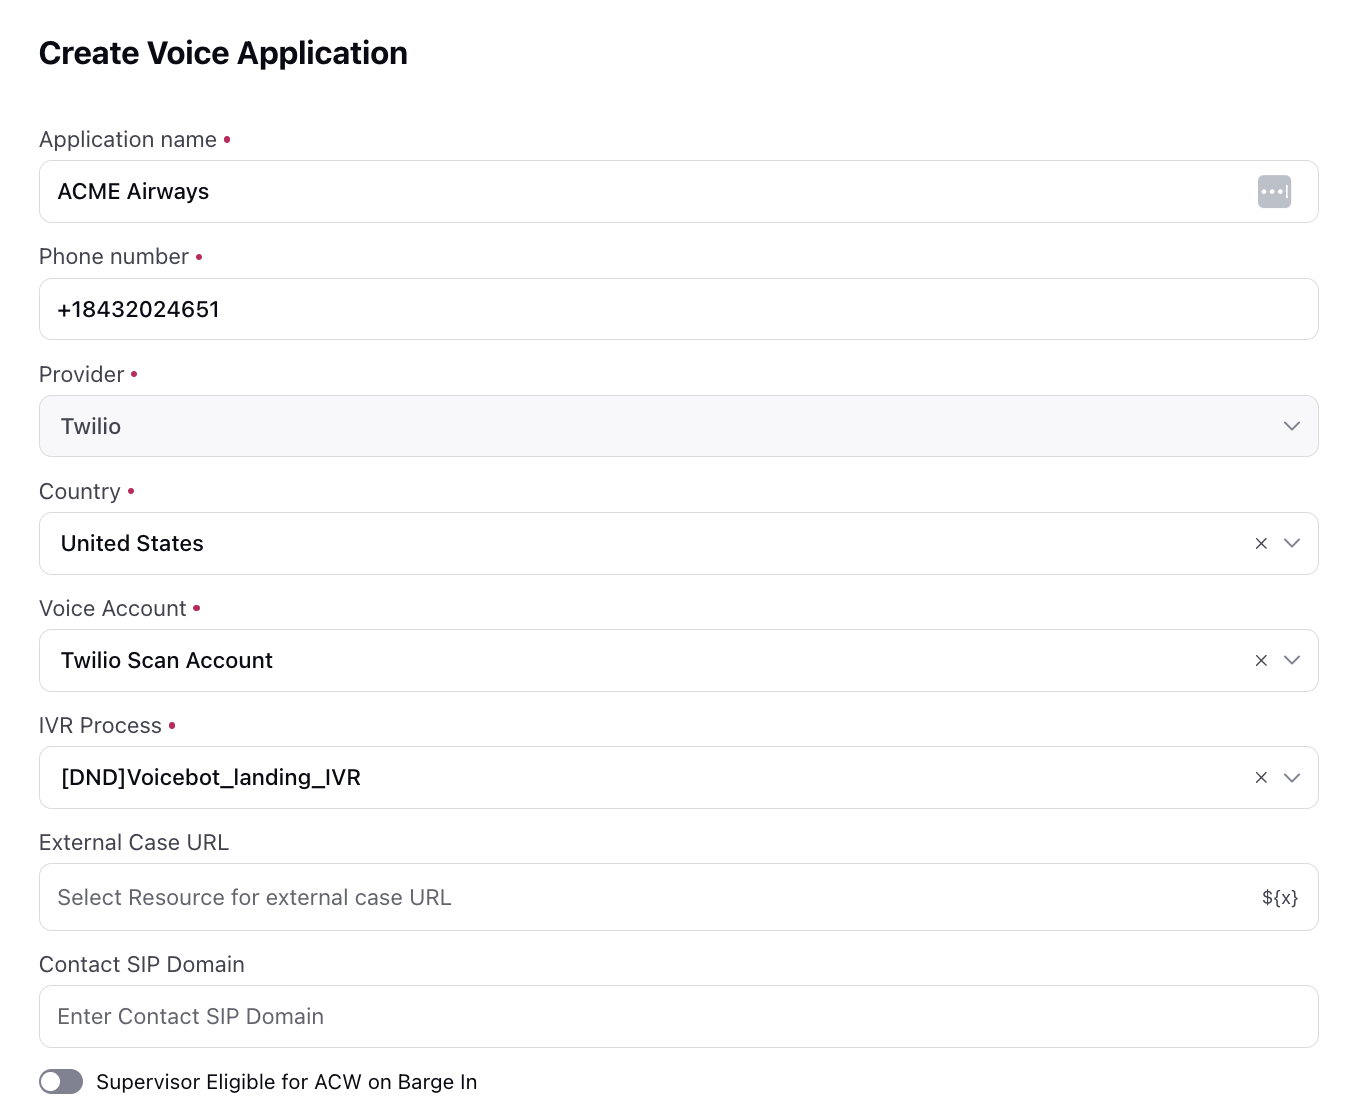
Create a Voice Application
Create a new voice application and select the provider, phone number, and IVR to connect the voice application.
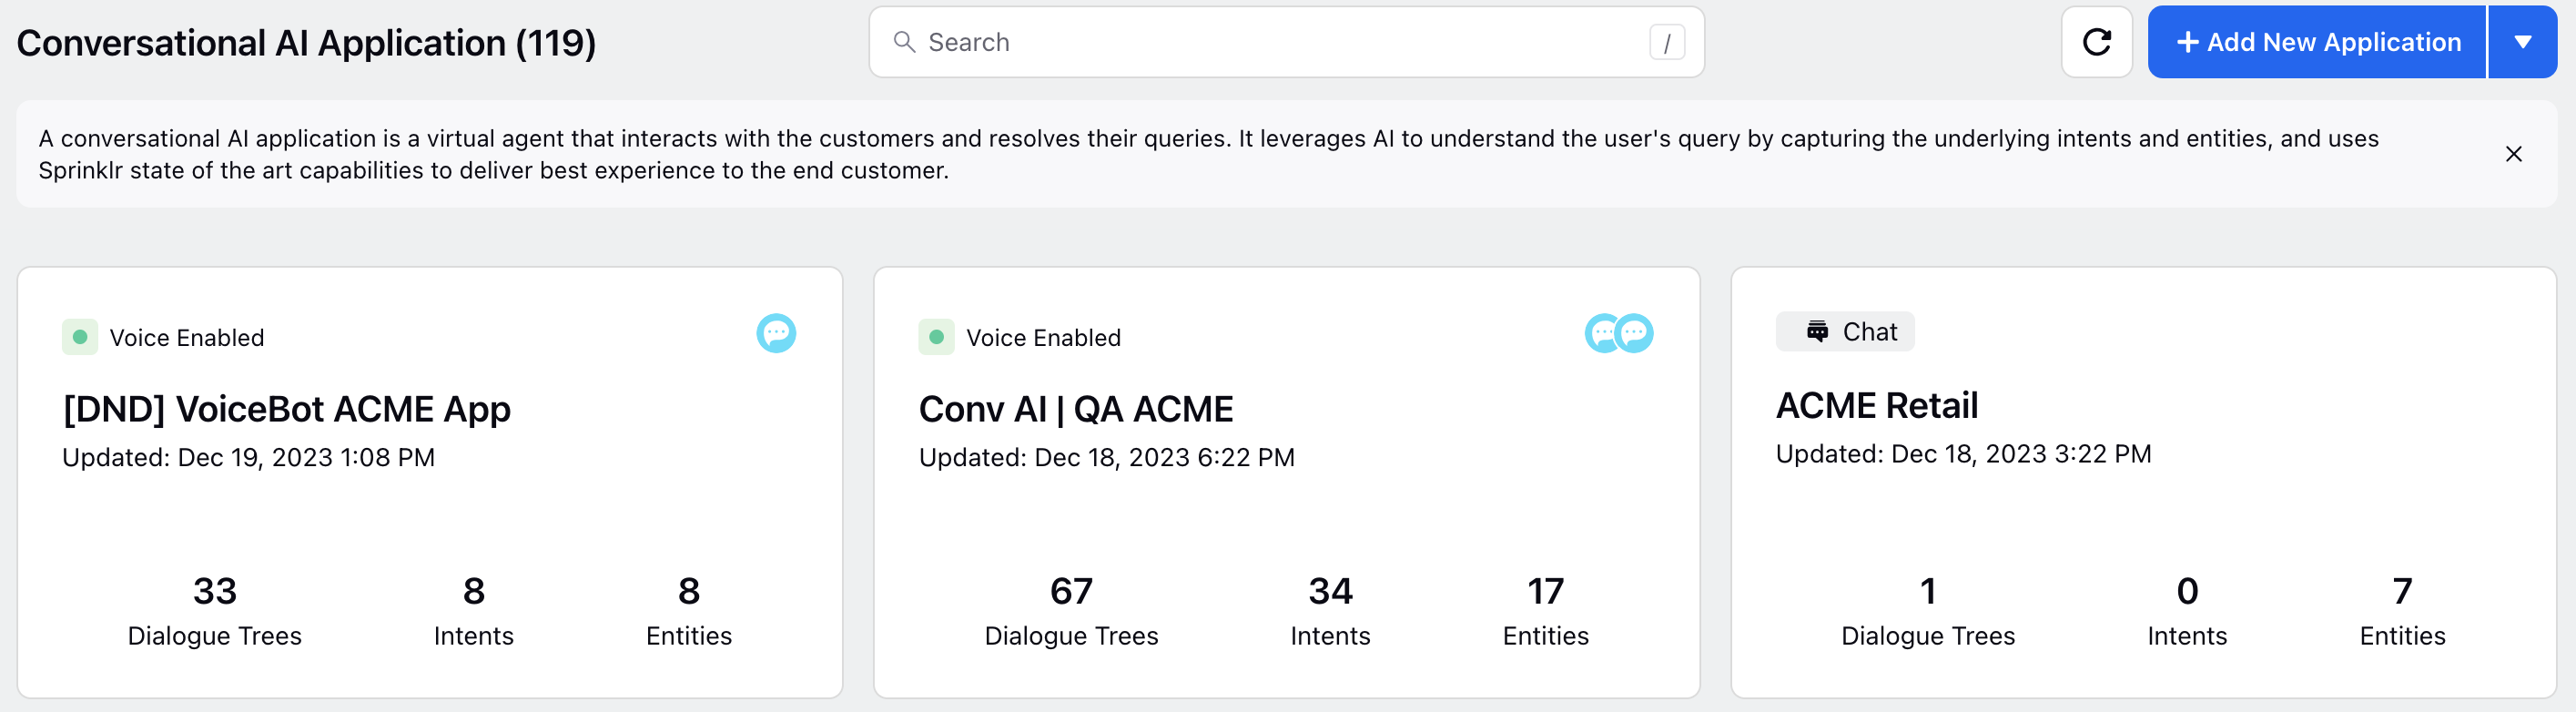
Create a Conversational AI Voicebot Application
Create a voicebot application and configure settings for it.
Sprinklr Voice bots can be effortlessly created or modified using Sprinklr's user-friendly dialogue tree builder.
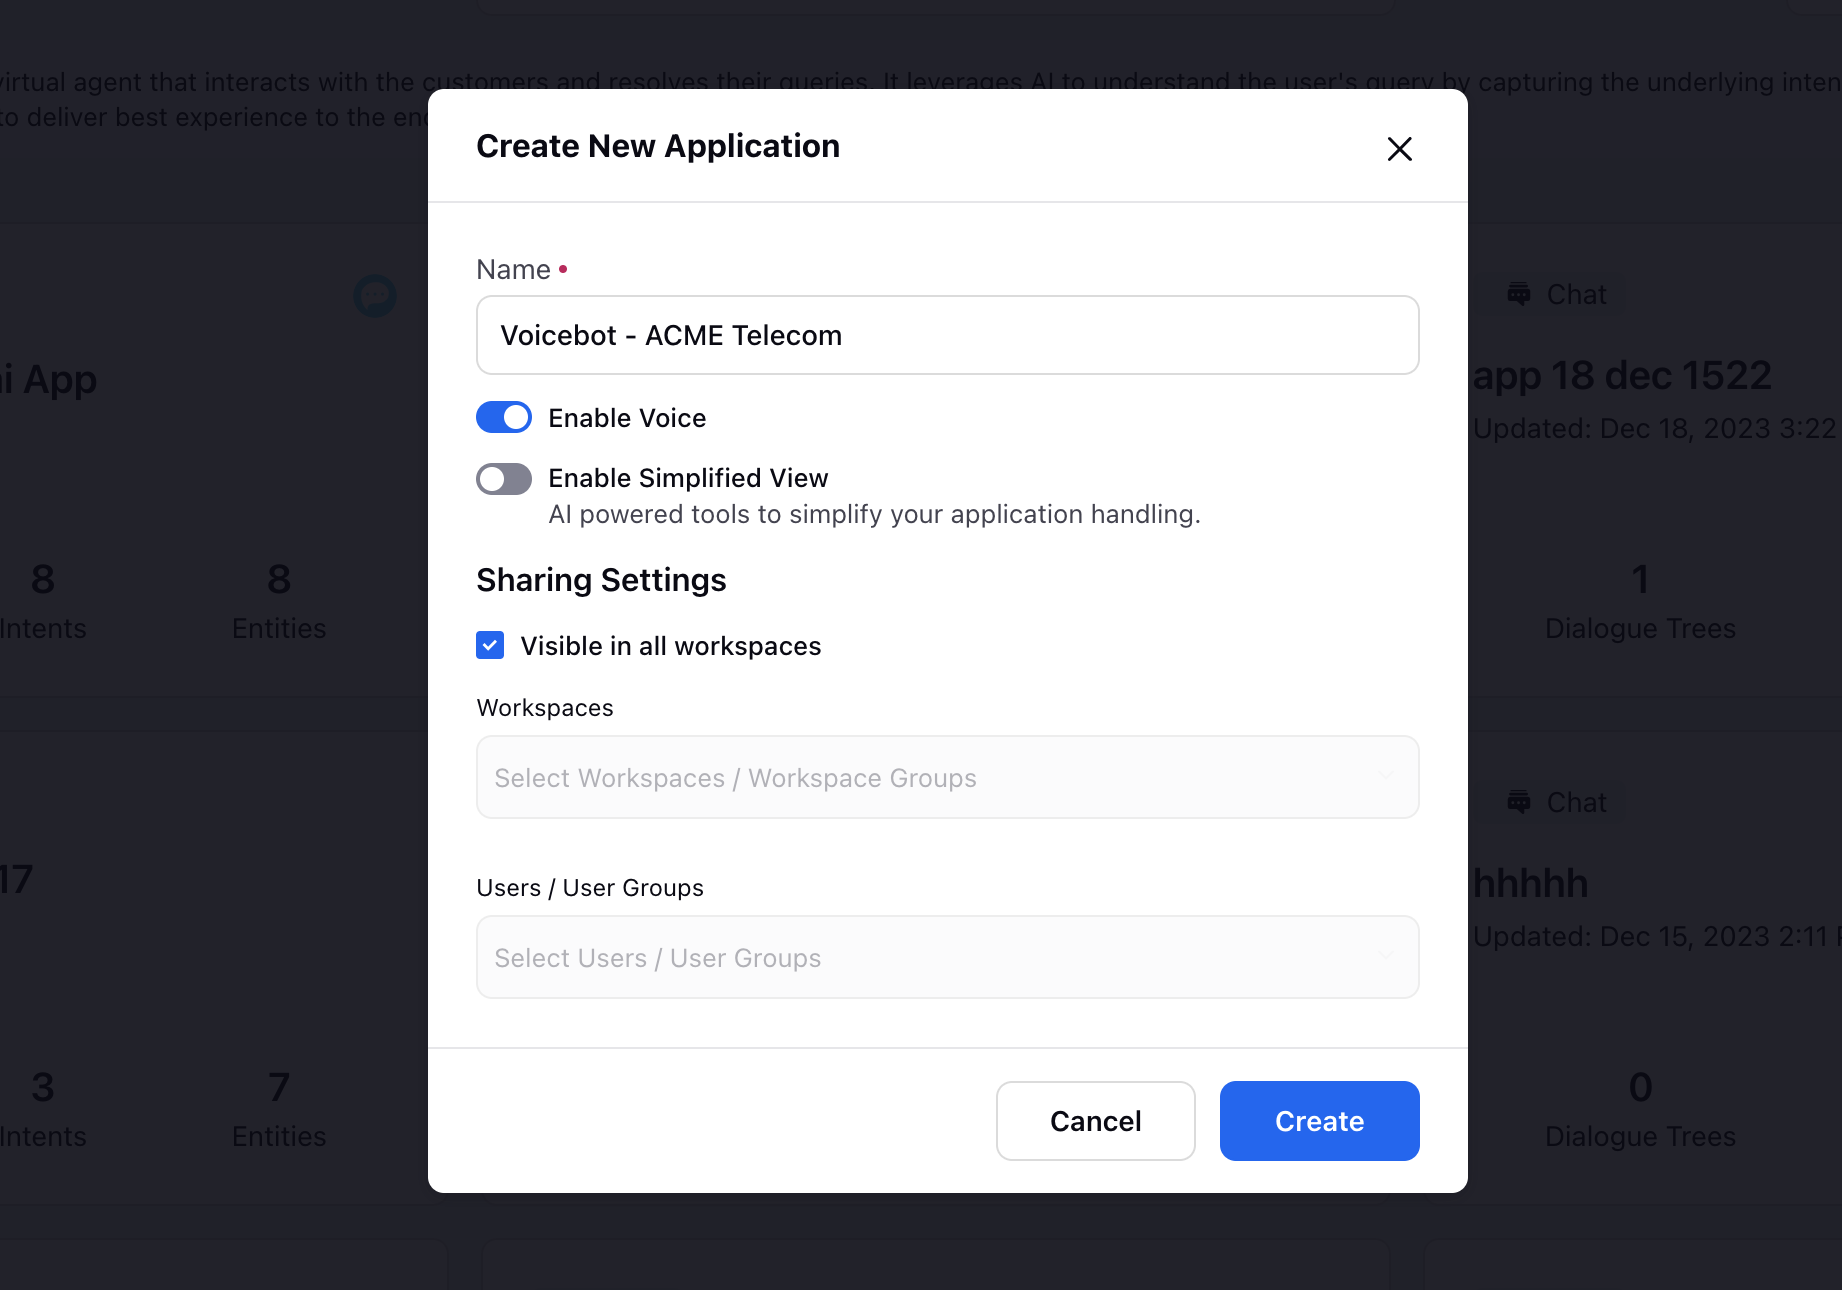
1. Creating a Voice-enabled Conversational AI Application
Once the end-to-end voicebot workflow is finalized, the configuration of the voicebot begins. The first step involves creating a voice-enabled conversational AI application.
Switch to Conversational AI Persona and create a new Conversational AI Application.
Add a name and switch the toggle on for Enable Voice.
2. Creating and Deploying a Dialogue Tree
Within a Conversational AI Application, you can create multiple dialogue trees to address various issues or dialogue flows.
Select Dialogue Trees under Build to create or edit dialogue trees.

Add various nodes as needed to customize the dialogue flow.
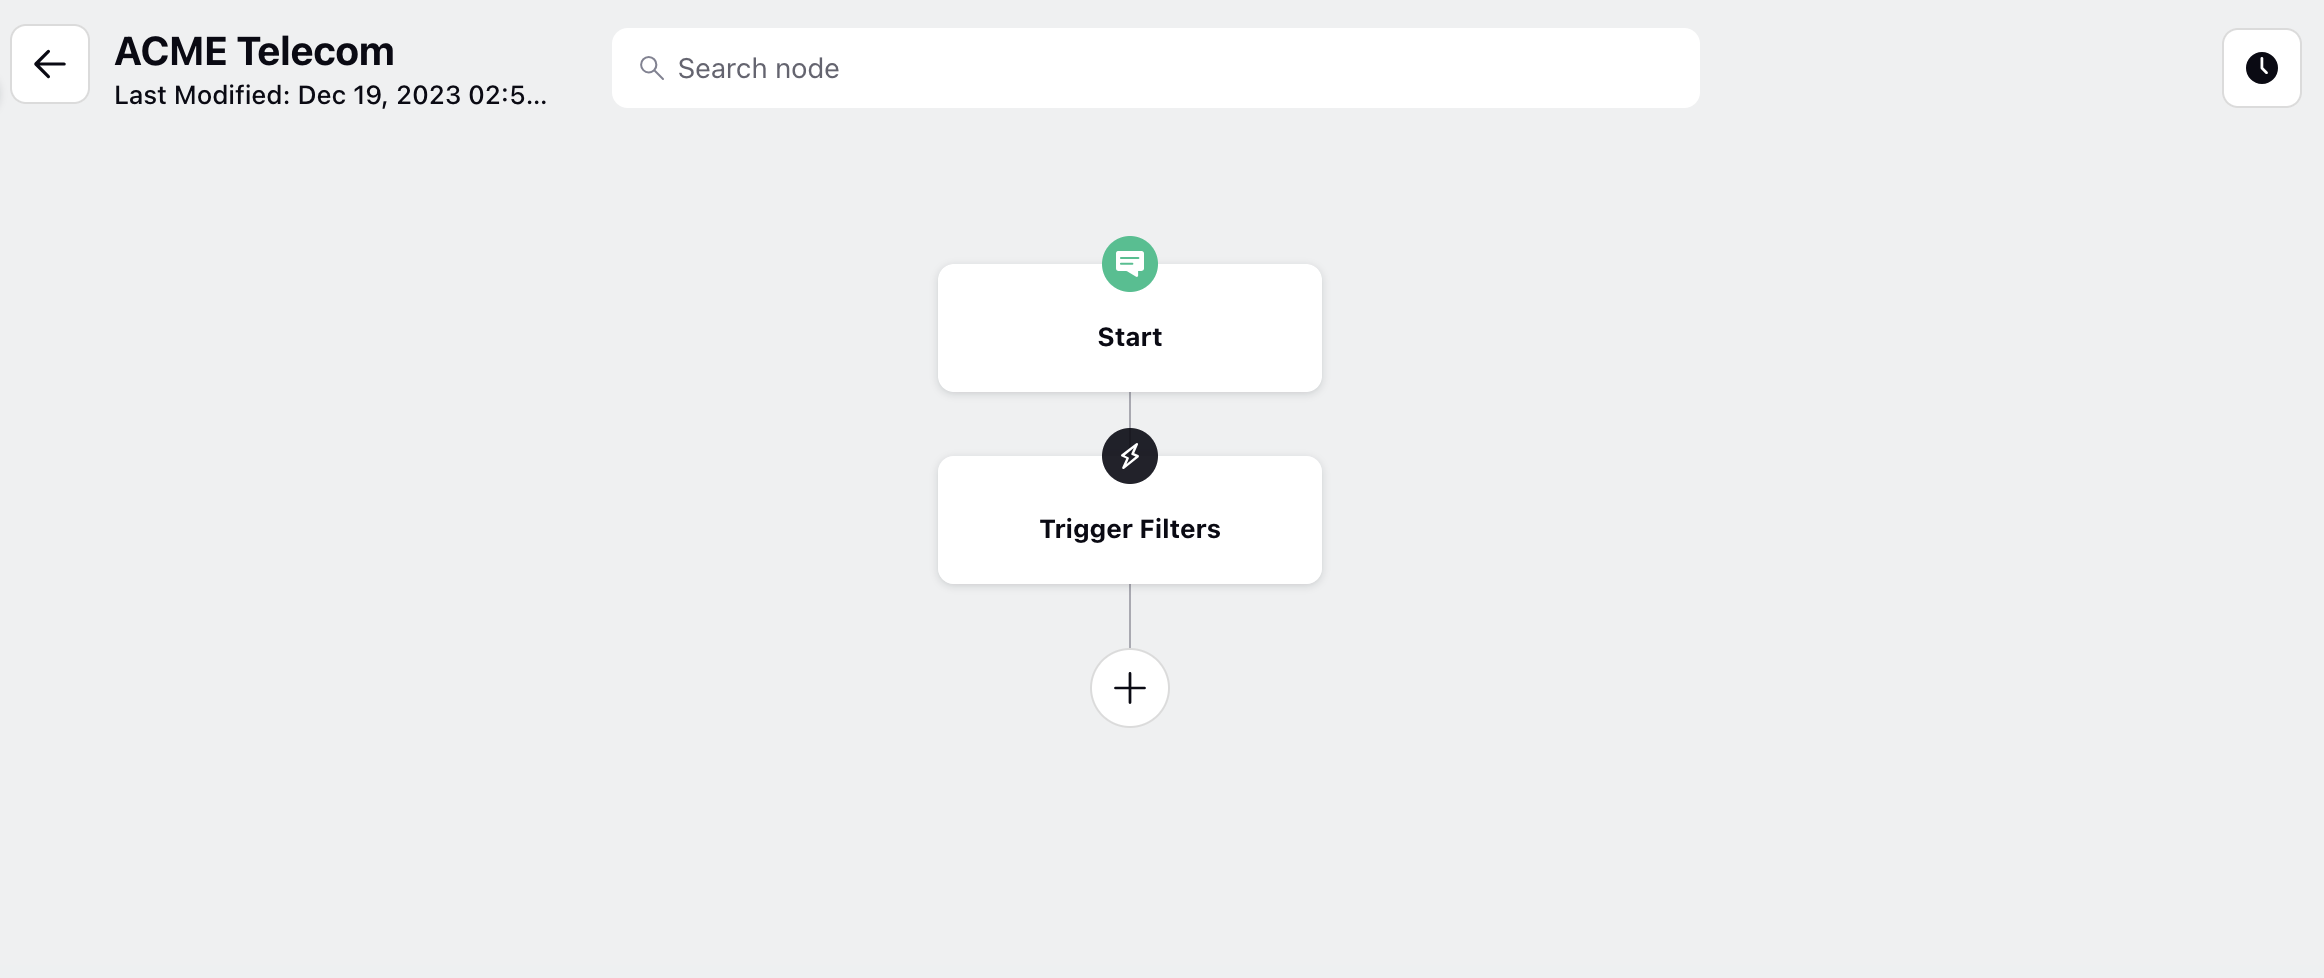
Click on 'Save as draft' to continue your work in the next session or 'Save & Deploy' once you've completed the configuration.
3. Adding a Speech Profile
Within a Conversational AI Application, you can create multiple dialogue trees to address various issues or dialogue flows.
Select Dialogue Trees under Build to create or edit dialogue trees.
On the Conversational AI window, click the Settings icon at the bottom of the left side pane.
Select Speech Profile on the Governance window.

Create a Speech Profile by assigning a name to it. Choose the language in which you want the voicebot to operate. Next, select the preferred Text-to-Speech (TTS) models from the available options. Similarly, choose the desired STT (Speech-to-Text) model, also known as Automatic Speech Recognition (ASR). This ensures that your voicebot is equipped with the language and models necessary for effective communication.
If TTS/ASR options are not available in the dropdown menu, please raise a request for TTS/ASR deployment by contacting tickets@sprinklr.com .

Finally, in Miscellaneous Settings of your voicebot application, select the created Speech Profile.
.png "MicrosoftTeams-image (117).png")
Add 'Redirect to Voicebot' Node in IVR
Edit the same IVR used in the voice application and add the Redirect to Voicebot node. This node transfers the call to a voicebot, allowing callers to navigate the workflow using their voice instead of keypad inputs. It returns the call to the IVR once the voicebot interaction is completed.
Enter the following details:
Name: Provide a name for the redirection node. This is for identification purposes within the IVR configuration.
Voicebot: Choose the voicebot that you want to integrate into this particular IVR node to redirect the users to.
Enable Speech to Speech Model: When enabled, user speech streams directly to the model, and responses arrive as speech tokens. This reduces latency and makes conversations feel more natural.

After you've set up the 'Redirect to Voicebot' node in your IVR, it allows for four potential paths based on user interactions. Here's an explanation of each path:
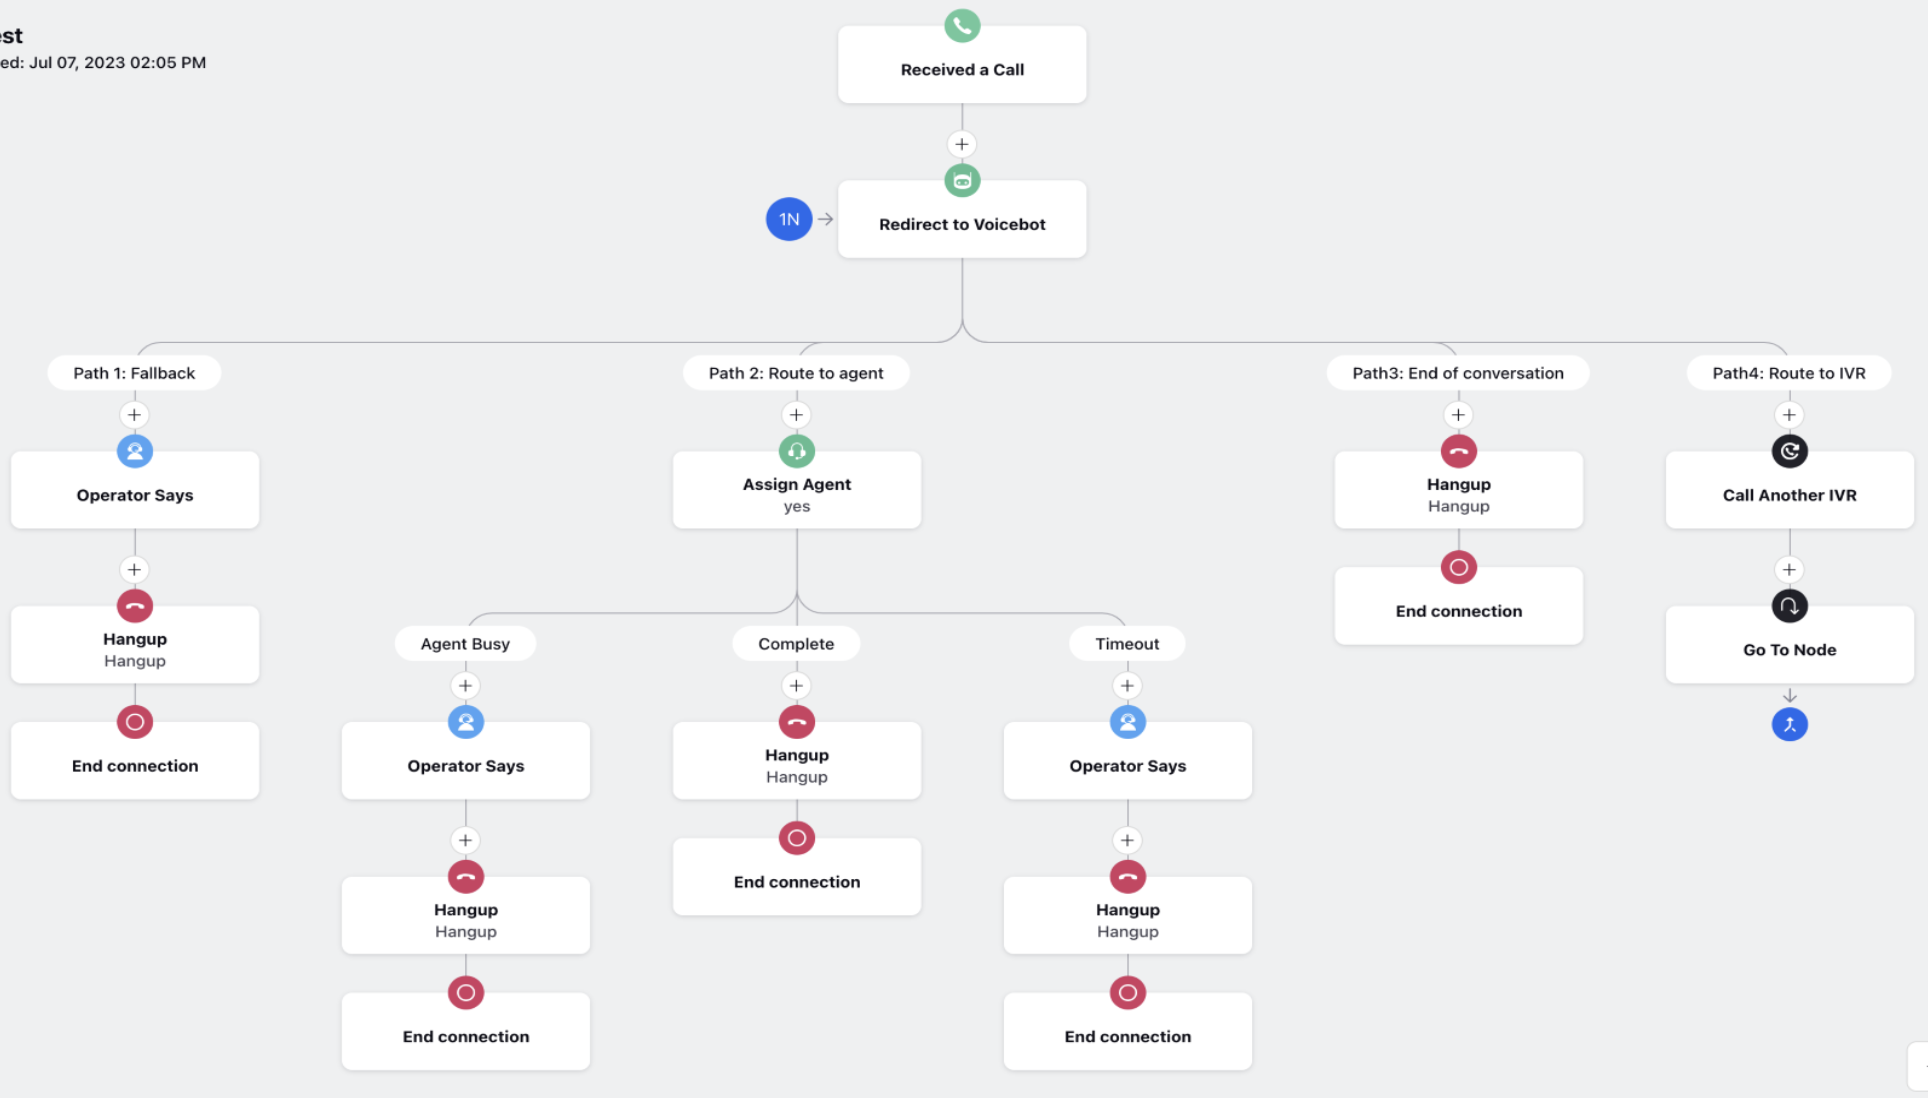
Path 1: Fallback
This path is likely designed as a fallback or default option. If the user's input or interaction doesn't match any predefined conditions or if there's an error in processing, the system may follow the fallback path. It could lead to a general support menu, automated assistance, or further instructions.
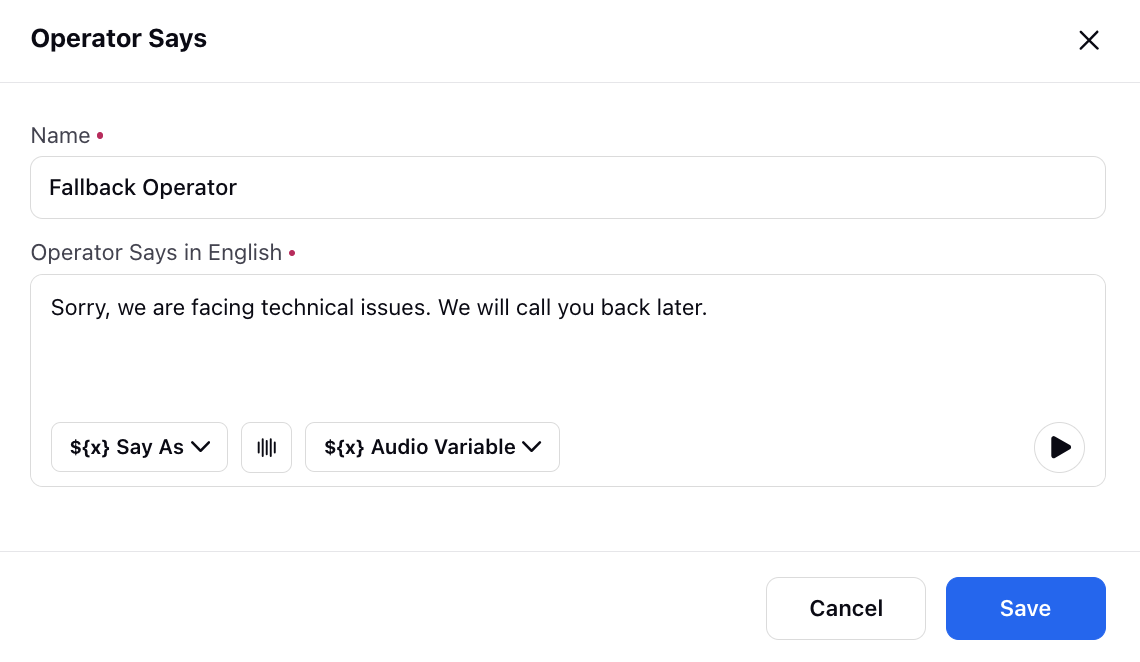
You can incorporate an 'Operator Says' node with a message like "Sorry, we are facing technical issues. We will call you back later" in the fallback path. This provides a friendly and informative response to the user in case there's an unexpected situation or if the voicebot encounters difficulties in processing the user's input.
Path 2: Route to Agent
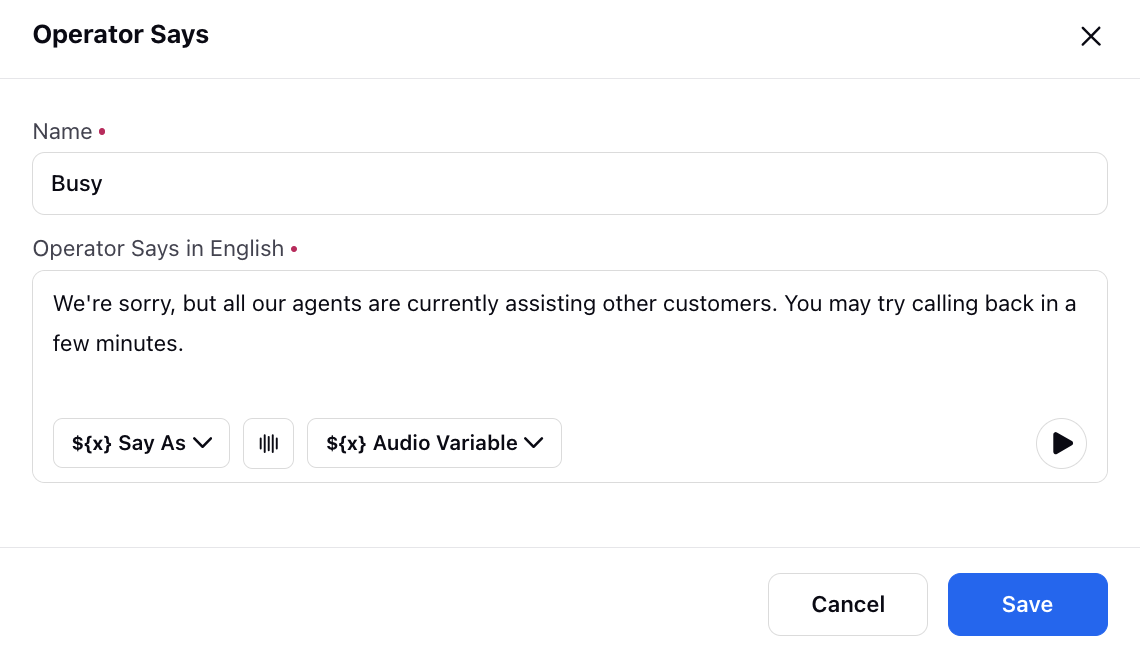
This path is likely configured to route the call to a live agent or customer support representative. If the user requests assistance that the voicebot cannot handle or if they choose to speak to a human, the call is directed to a customer service agent for personalized assistance. To implement this, add the 'Assign Agent' node for directing the call to an available agent. Additionally, within this path, you may include 'Operator Says' nodes tailored for scenarios where agents are busy or when there's a timeout.

Agent Busy - Convey messages such as "All agents are currently busy assisting other customers; please call back later." for the busy scenario.
Timeout - Convey messages such as "Apologies, but there seems to be a timeout. Please try your request again." for the timeout situation.

Path 3: End of Conversation
This path leads to the conclusion of the conversation. It's likely triggered when the user indicates that they have completed their interaction, received the necessary information, or if there's a natural endpoint in the conversation flow.
Path 4: Route to IVR
This path may involve redirecting the user to another Interactive Voice Response (IVR) menu using the 'Call Another IVR' node. It could be used for additional menu options or to guide the user through a different set of choices within the IVR system.
It's recommended to redirect the user back to the 'Redirect to Voicebot' node, using the 'Go To Node.'

These paths provide a structured and flexible way to handle various scenarios post a voicebot interaction. The design allows for smooth handling of user inputs, including fallback options, routing to live agents, concluding the conversation, and redirecting users to the IVR system.