Custom Field - Best Practices
Updated
In this article, we will cover the best practices on how to utilize custom fields.
Overview
Knowing best practices for organizing and grouping custom properties can assist you in optimizing both end-user experience and the efficiency of your data storage.
These principles apply to the following:
Outbound Message Properties
Inbound Message Properties
Media Properties
Profile Properties
User Properties
Account Properties
Use cases for Custom Fields
Allows your client to organize content production, gain a holistic view of their customer, and maximize the ability to scale.
Objectives:
Users see only relevant fields
Reduce end user decisions
Options should be limited
Optimize for end user not admin
Structure for ease of mapping
Custom Properties serve to create dynamic workflow experience and message level reporting. Clients need to group messages in many categories and sub categories. The intuitive solution is to give each grouping of values their own custom field. This would mean having one drop down for “Events”, another for “Products”, another for “Promotions”, and yet another for “Corporate Marketing”. This approach creates challenges for the end user by surfacing fields that may not be valuable. Too many Custom Fields can be confusing for the end user, and reduce the incentive to use them.
Note:
|
Here is an example case study -
A global technology company has several divisions, products, services, partnerships, and events. Some of these teams overlap in terms of the products, events, etc. that they cover all users are only interested in a small portion of the available options. Creating an optimized end user environment requires effective and optimized value storage limiting drop down selection to the smallest number possible.
Design Approach
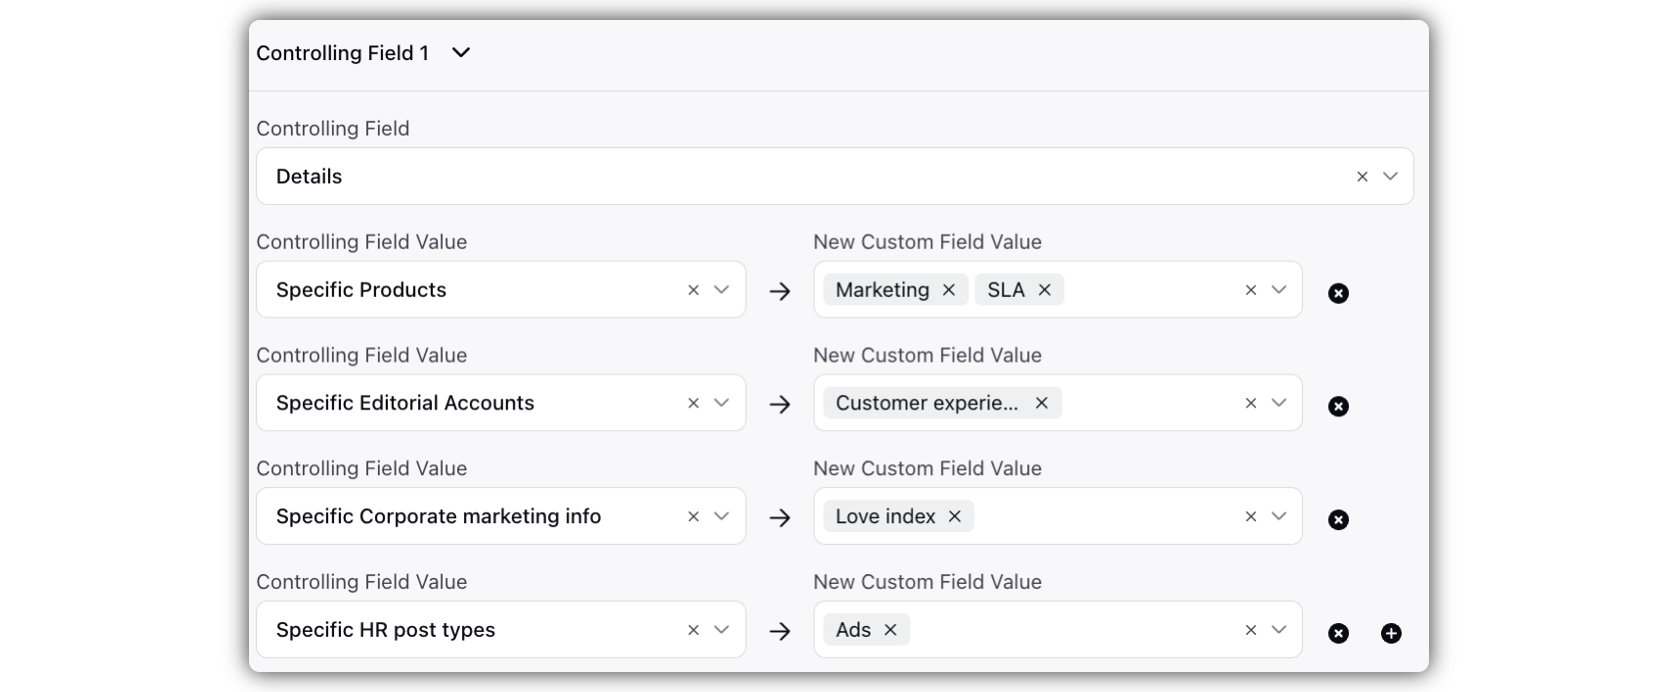
Limit the number of drop downs through the use of controlling fields rolling down from broad easily suggested categories to specific lists for each division. Platforms are configured for the end user not the administrator. While this configuration supplies extra work for the administrator it simplifies decision making so only relevant fields are considered by each end user.

The tech company in the example uses the following structure:
Category
Editorial Content
Product Marketing
Events
Corporate Marketing
HR

Detail
Specific Editorial Accounts
Specific Products
Specific Events
Specific Corporate marketing info
Specific HR post types
Topic
Customized based on Detail and Category
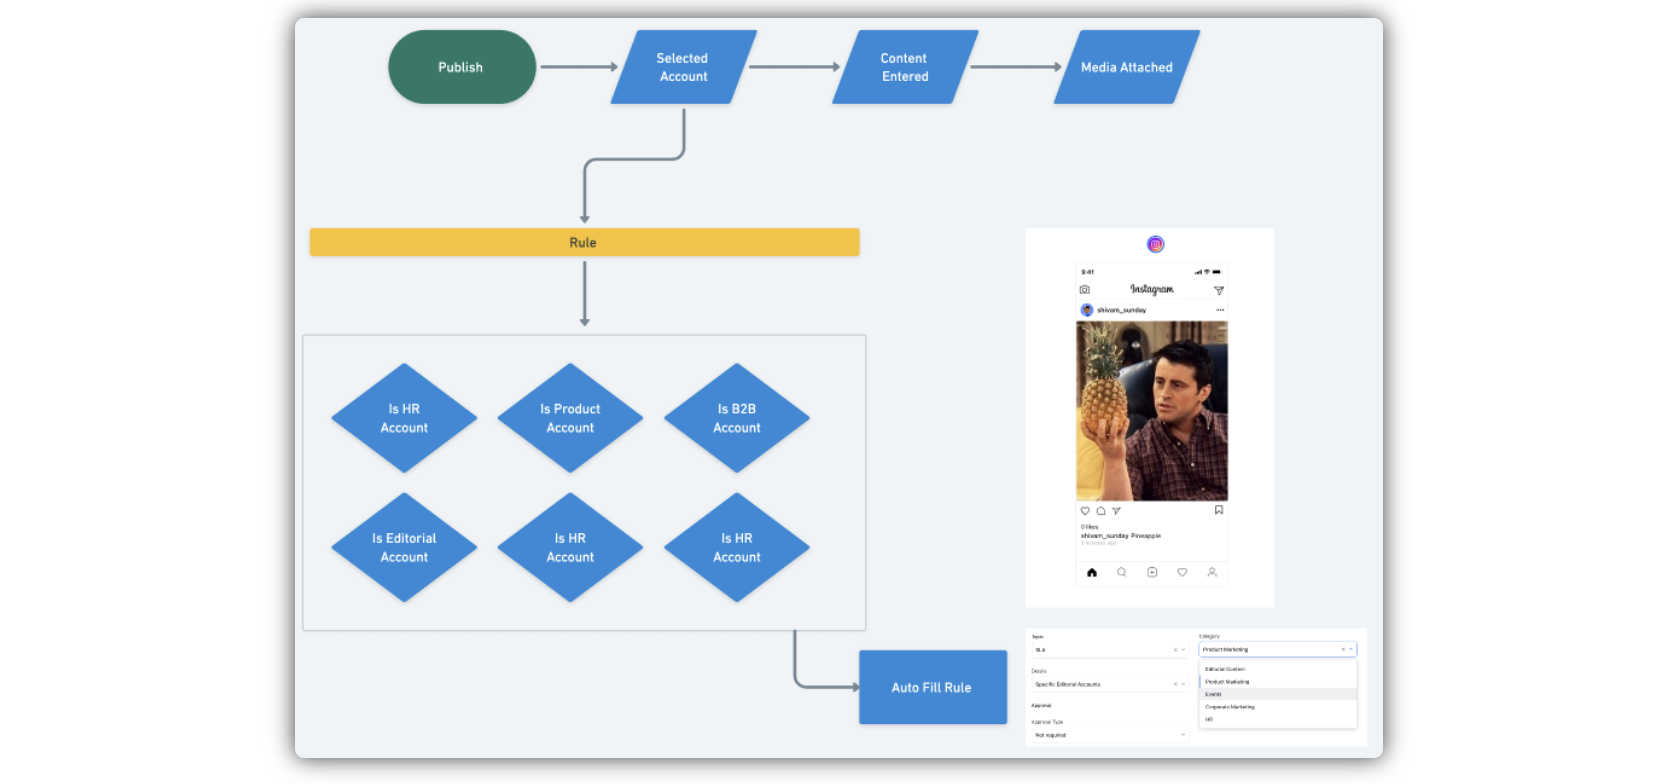
High order values should be auto suggested using Auto-Publishing fill rules, based on user, account selected, and content in post.
See Diagram Below for example:

Configuration
Plan Your Structure
To configure an effective message organization structure you’ll first need to identify the highest level in the tagging structure.
(These can be campaigns or a secondary field as shown in the example).Next you’ll want to map the highest order of organization to the next level down.
(Category A Controls Detail field so when selected only Detail 1,2,3,4 are visible)Do the same for the mid level to the lowest level field.
(Detail 1 controls topic field so only Topic “X,Y,Z” are visible)Once this is complete you’ll want to document in an Excel file (Template coming soon).
Build Your Structure
Each Value should be entered one time even if shared by multiple controlling fields. The same Value should not be entered in two custom fields or twice within the same custom property.
Build Custom Properties
To build custom properties in the system follow the click path: Administration >> Custom Properties
Add Custom Fields
Select Add Custom Field.
Select Relevant Asset
Repeat for Each field mapped in Step 1
Repeat these steps for other asset classes
Name the field
When building for other assets name field exactly the same when they map. “Content_Category” on the inbound asset = “Content_Category” on the outbound asset
Field Labels can be customised
Configure values and custom property
Add values from Step 1
Configure Custom property
Global
Required
Enabled
Set Controlling Fields
Use map from Step 1
Only one type of controlling field can be used per custom field.
Additional Tips and Tricks
Simplify decisions for end users, whenever possible.
Add a value ‘N/A’ to be auto-filled for any value that has no dependent property.
Use auto-suggest rules to limit decisions/ clicks an end user must make.
Document steps to manage system for client admin and success manager.