Improvement in filters
Updated
Navigate an intuitive UI to seamlessly add dashboard filters, enhancing your data journey.
Introducing improved filtering allowing you to control what data you see on your dashboards with an improved filter UI. With this update, we're providing users with an array of new capabilities that will significantly enhance their filtering experience, making data management and analysis more streamlined and intuitive than ever before.
With the Filter Improvement, we've elevated the filtering experience within the Sprinklr reporting. This feature will enable you to unearth deeper insights, make more informed decisions, and extract maximum value from your data.
What are the key highlights for the feature?
Improved Filter UI & Select All
A major update for this feature is improved filter UI. When users access the "Add Filter" option at the Dashboard level, they will now notice an improved UI with enhanced searching capabilities. User can now access Select All option for Dashboard, Section & widget filters when all the values are loaded. We have also improved the Filter Summary wherein user will notice segregated filter summary for Dashboard, Section & Widget Filters. These improvements will allow users to fine-tune their data selection to meet even the most intricate requirements.
Use Case-Based Groupings
With the introduction of use case-based groupings for filters you can now navigate through your filters with ease, as filters are organized into categories based on their intended use cases. This not only reduces scroll and simplifies navigation but also clarifies the objective of a specific filter, ensuring that you find the information you need without any confusion.
Enhanced Filter Conditions
We've reimagined the process of adding filters to offer users a more intuitive flow. Gone are the days of using symbols like '+' and '-' for inclusion and exclusion. Instead, users will now encounter a user-friendly dropdown menu that presents a range of equivalent conditions applicable to the filter. Whether it's "containing," "not containing," or other conditions, users can seamlessly choose the one that best fits their needs. This redesign ensures a smoother and more straightforward filter setup process.
Streamlined Filter Controls
In this new update, we've also introduced enhanced filter controls that are more accessible and user-friendly. Users can now easily interact with filters by simply hovering over them. Two key controls are at their fingertips – the "Pin" and "Lock" icons. With the Pin icon, users can keep specific filters at the forefront of their analysis, making it easier to monitor crucial data points. The filter controls for "Restricting" and "Hiding" come into play once filter values are selected at the Dashboard Level, providing a comprehensive set of tools to manage data visibility.
Section & Widget Filters
We understand that granular data analysis is often essential, which is why we've also enhanced filtering capabilities at the section and widget levels. Users can now apply filter controls at section & widget level (User Level Filtering) to have more control over the filters. This feature offers users a deeper level of data customization, allowing them to extract insights that are relevant to specific contexts.
Availability
Enablement note: This capability will be available in 18.11.1 (January'24). To get this capability enabled in your environment, please reach out to your success manager.
How does filtering work?
Dashboard Filters
Navigate to any Dashboard & click on “Add Filter” at Dashboard level
You will notice grouping for filters (Applicable only for Listening), along with filter & its values
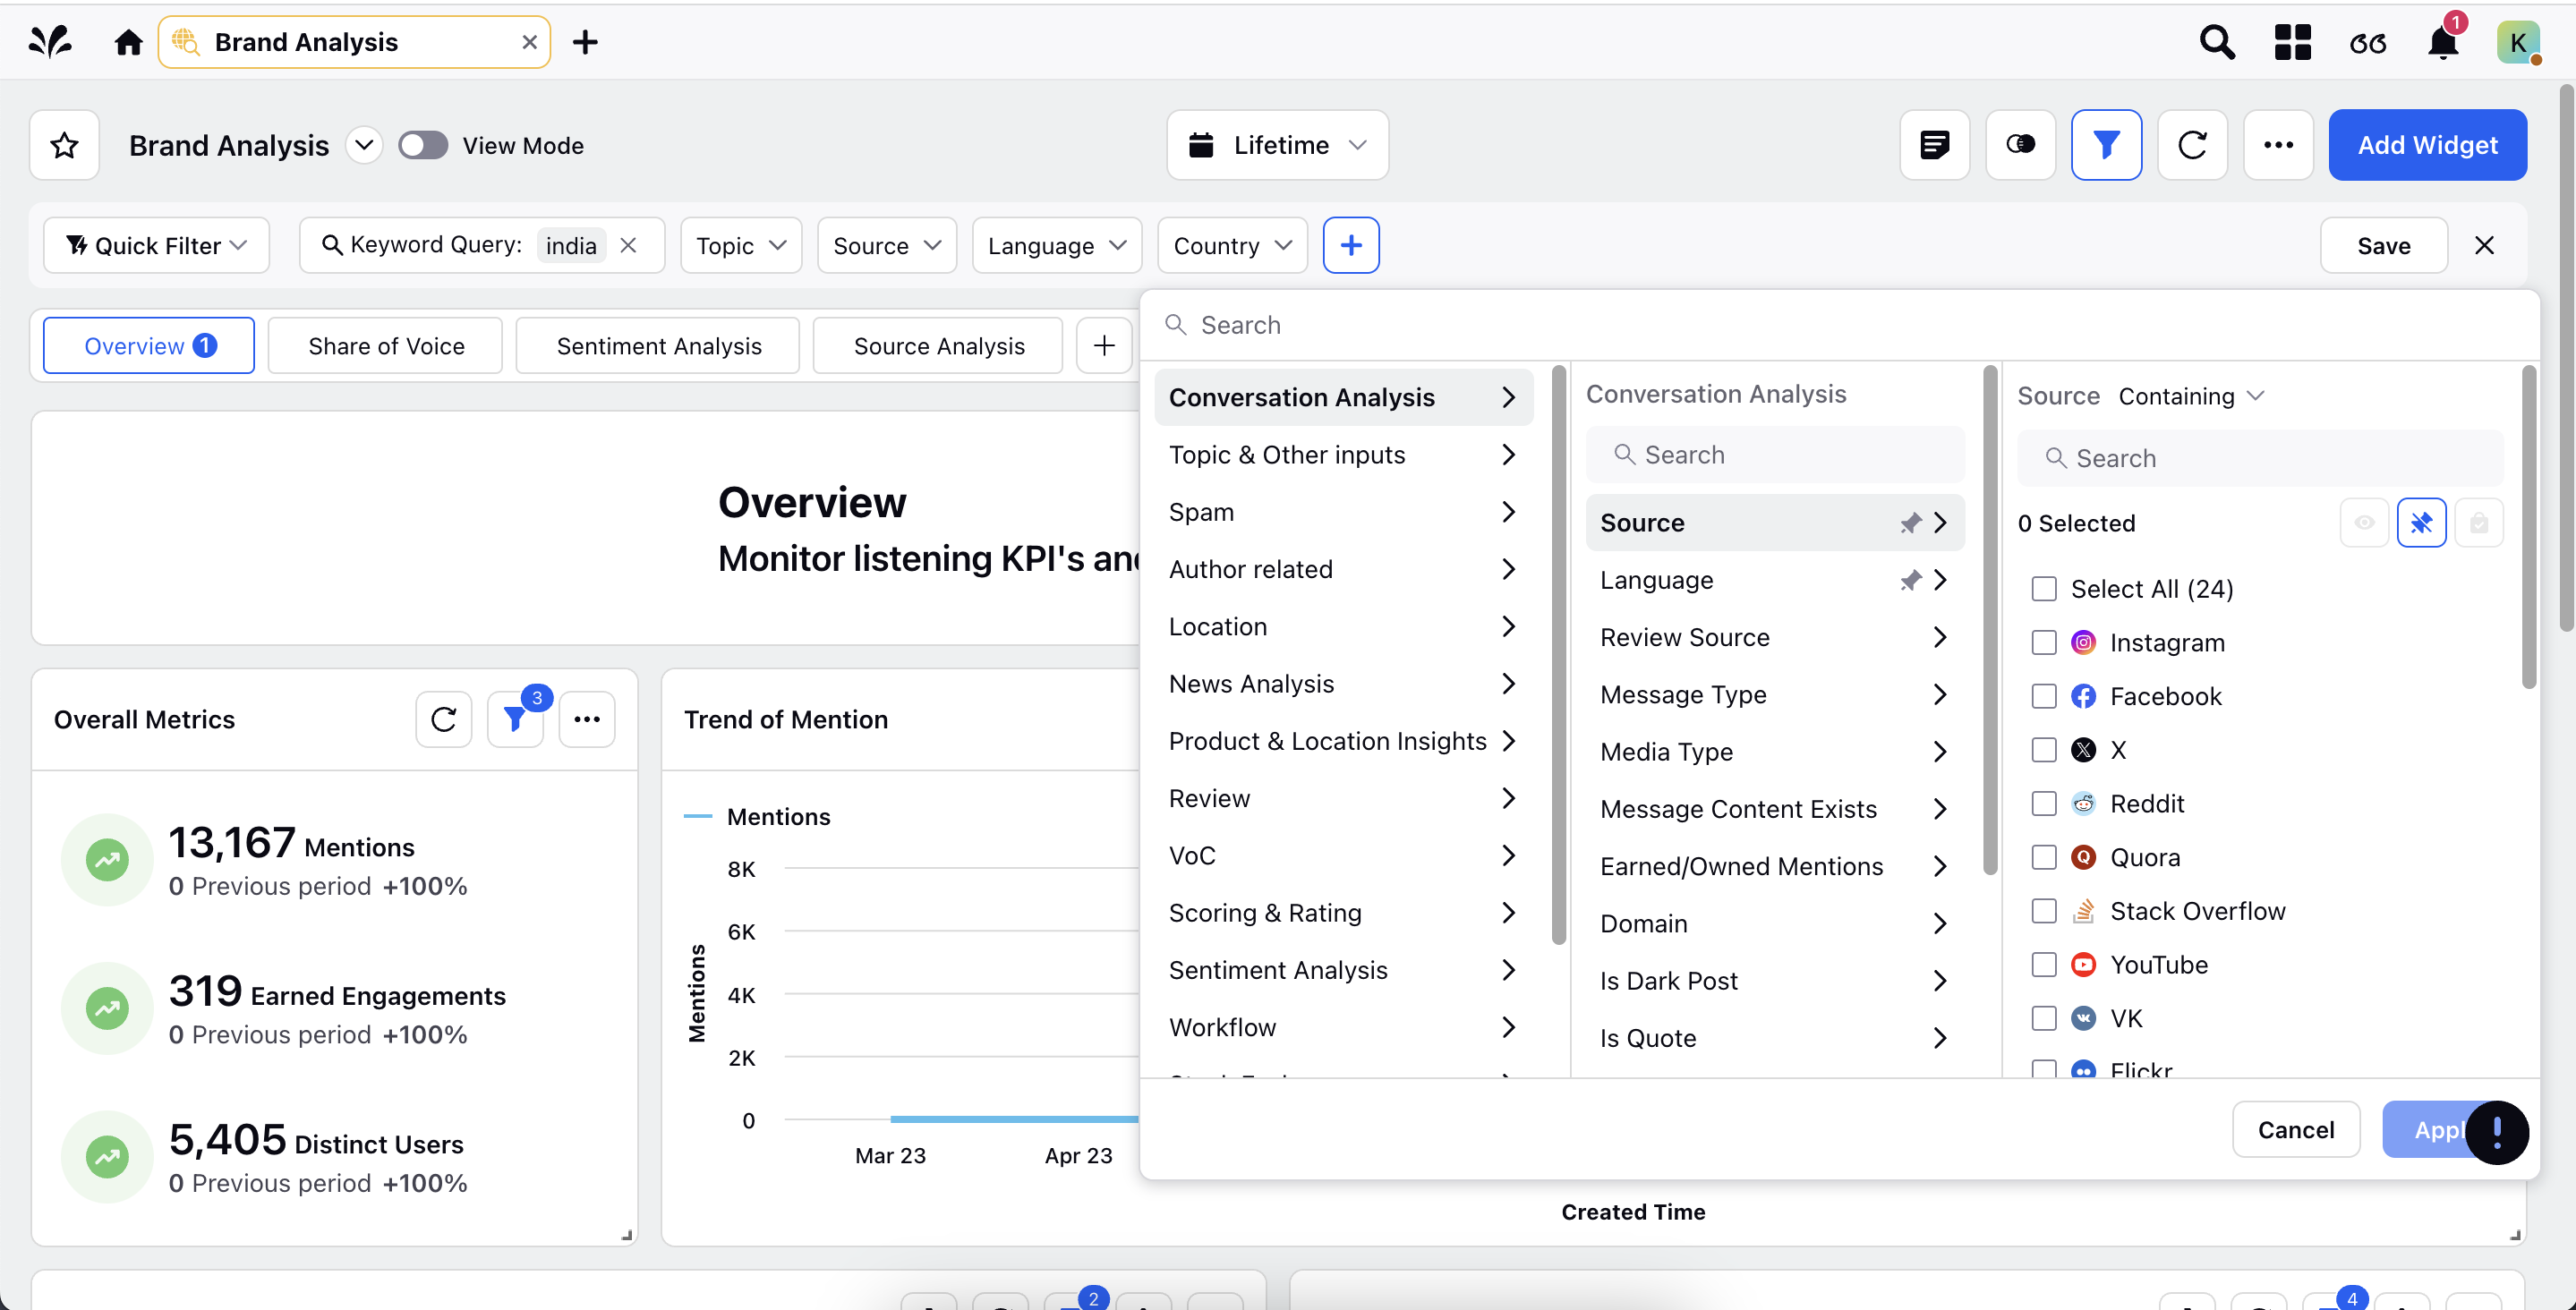
Search the filter that you want to apply for & select the filter.
You can also search the values directly which will show you result corresponding to your search with bucket , filter & matching value.
Select the condition containing/ not containing as per your use case & search/select the values for refined data
You can also select all the values matching your search criteria when all the values are loaded.
Filter Controls: Filter controls allows owners & users to define how users in end state would be able to leverage filtering.
Pin: “Pin” certain filters for easy visibility. These filters will be visible by default on the dashboard filter header. You can access this option by hovering over the filter after clicking Add filter or while selecting values.
Restrict values: Restrict the values of a filter that would be visible while filtering. End users with View only access can only choose to select between these values. You can access this option once you have selected the values that you want to select.
Lock : Lock the filter for restricted use. The filter would be visible with its values, but values can’t be updated. You can access this option by hovering over the filter after clicking Add filter or while selecting values.
Hide: Hide the filter summary. The selected filter is applied but hidden & not visible within filter header. End user can although search the filter and see the values selected.
Section Filters
Navigate to three dots menu on the section & click on Section Filters
Improved Filter view will open where you can add the filters with grouping
You can click on cross to clear out the filter row that you have added or Click on clear in the filter to clear all the filters applied in the section
The number of filters applied will be reflected on the section & upon clicking the number you can edit the filters.
For User Level filtering (wherever enabled), you will also see the options of Filter controls at section level filters
After selecting the values within a filter, navigate to three dots for individual filter row, you will see filter controls i.e. Pin, Lock, Restrict, Hide option
Apply the filter control as per the use case
User with view access will be able to edit the filter in user context as per the filter control set
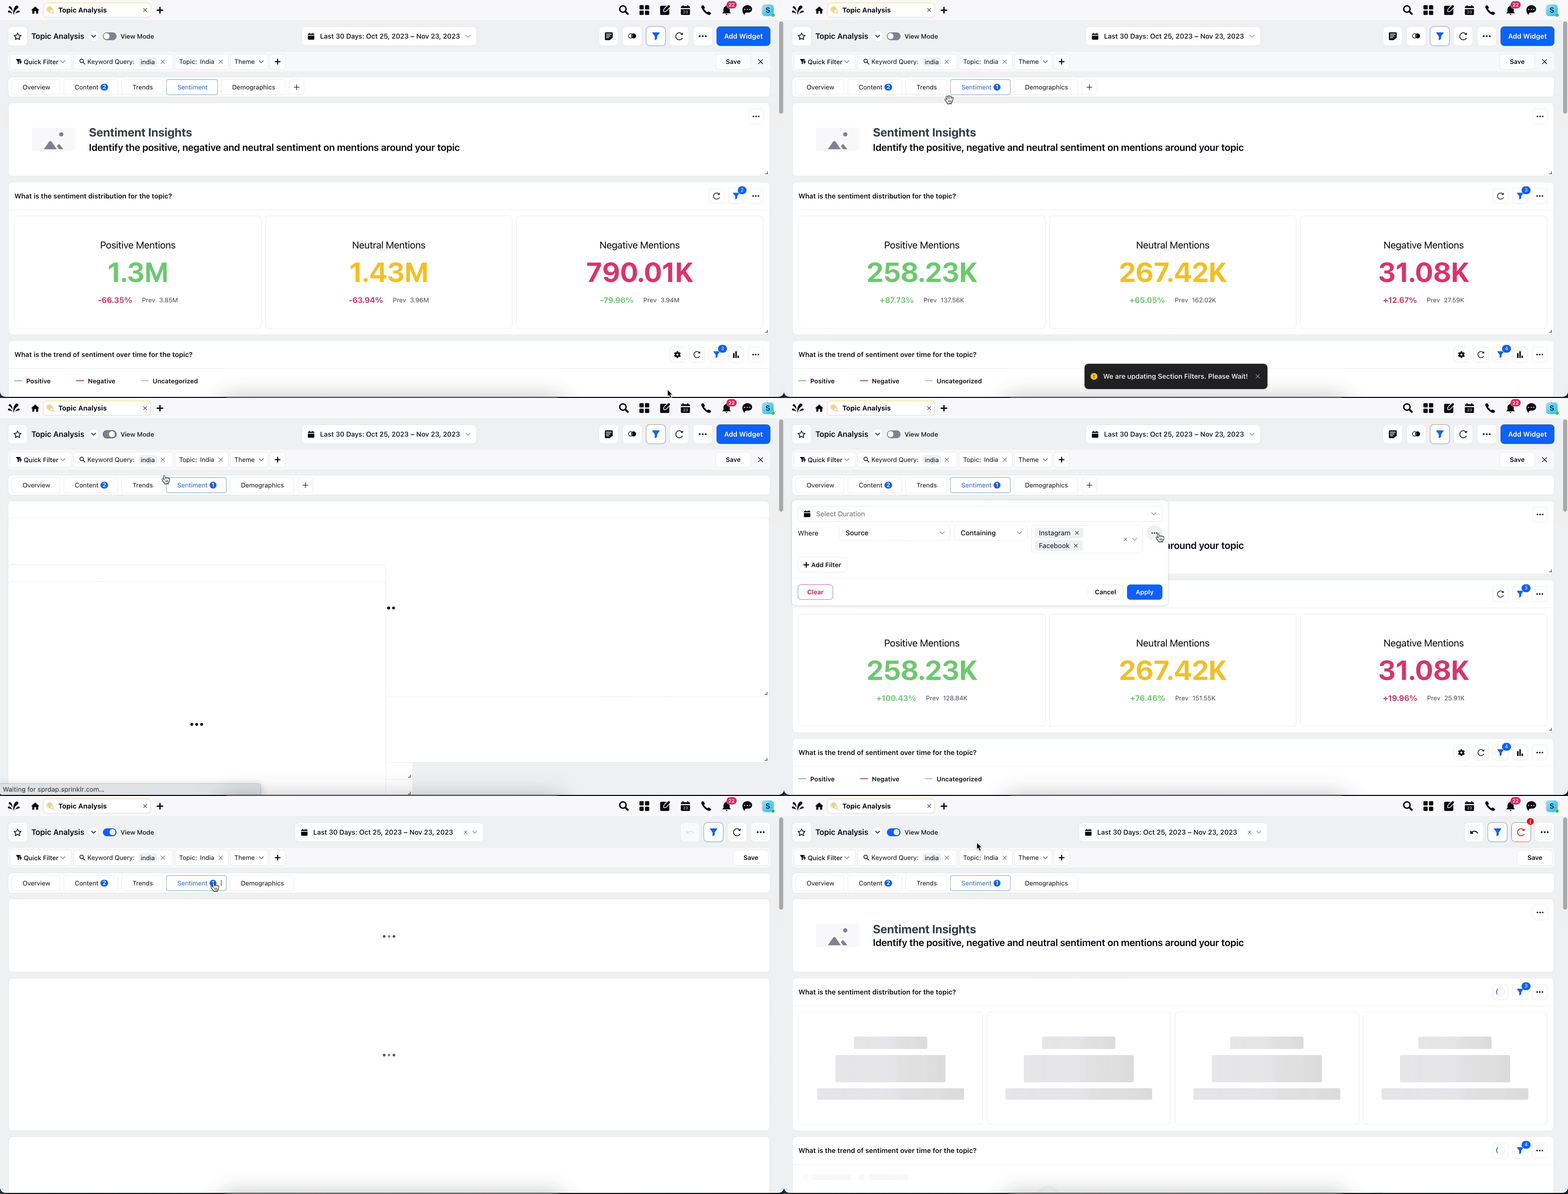
Date Range Filter: Date Range Filter UX is also updated at Section level as per below:

Widget Filters
Access Widget Filters by directly clicking on the Filter icon on the widget.
You can also access the widget filter by navigation to three dots & clicking on Edit Widget
Improved Filter view will be available for widgets with Grouping & Select All functionality
For User Level filtering (wherever enabled), you will also see the options of Filter controls at widget level filters
After selecting the values within a filter, navigate to three dots for individual filter row, you will see filter controls i.e. Pin, Lock, Restrict, Hide option
Apply the filter control as per the use case
User with view access will be able to edit the filter in user context as per the filter control set
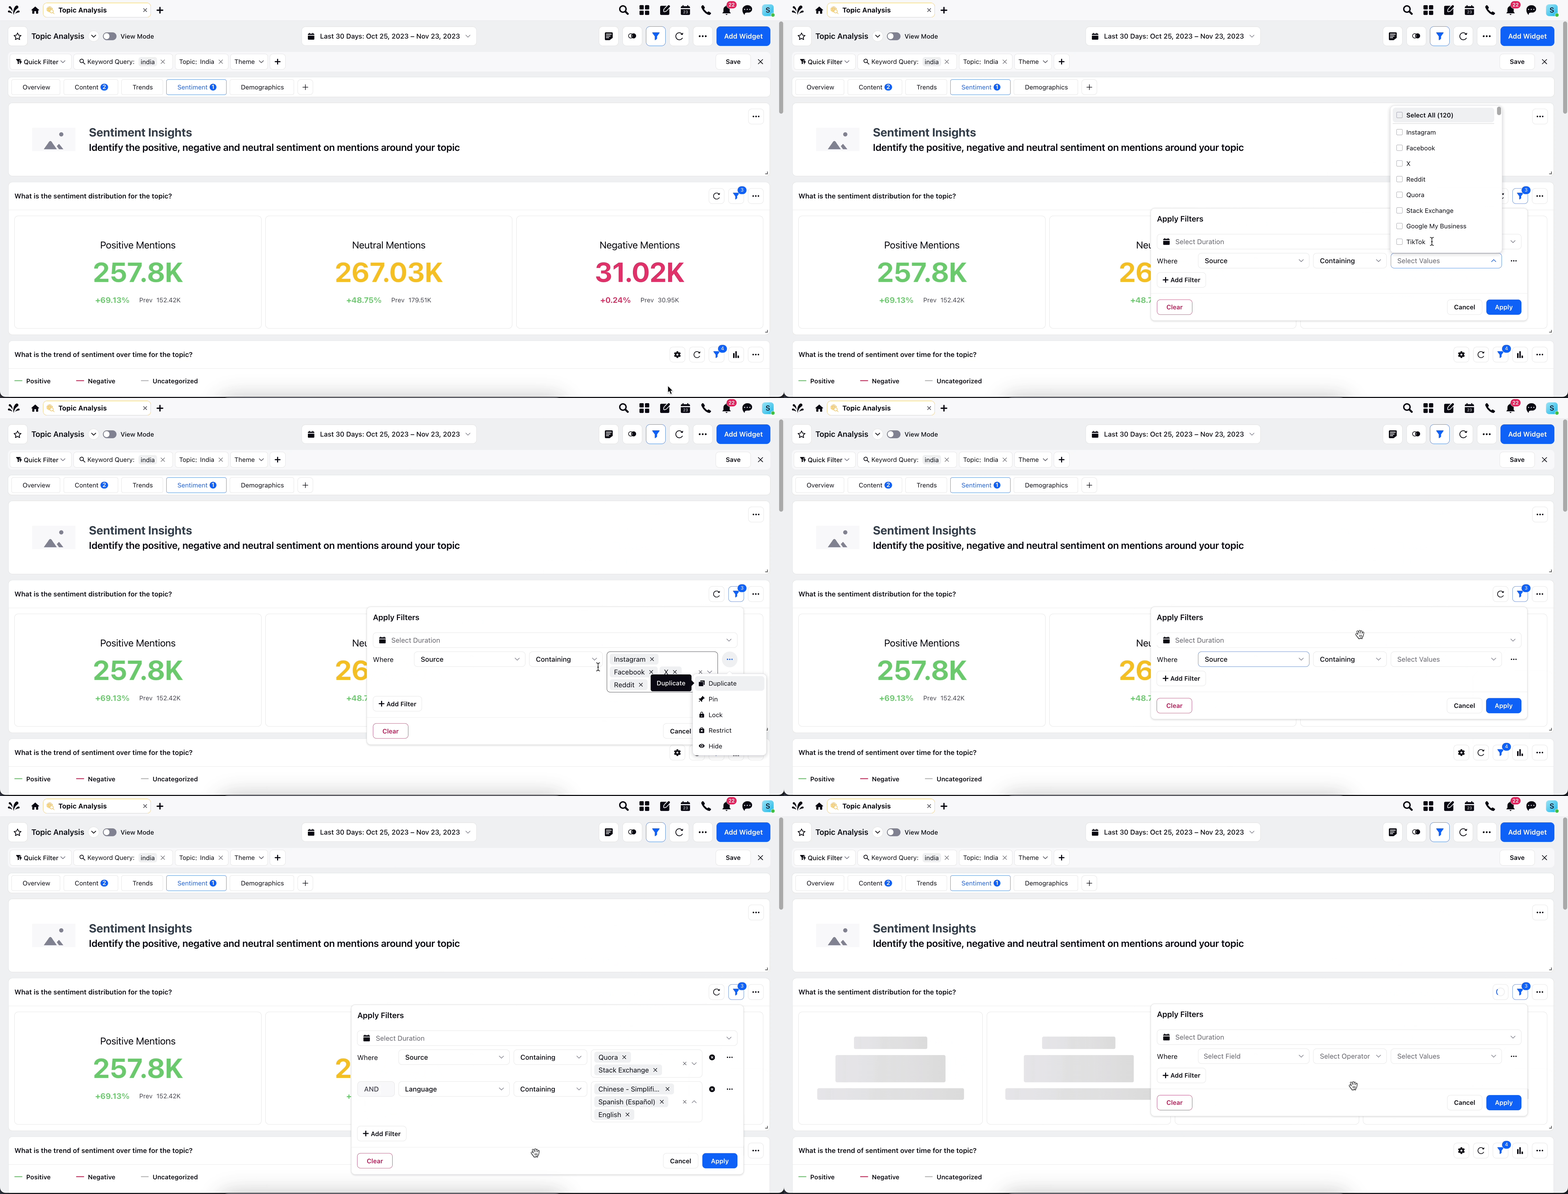
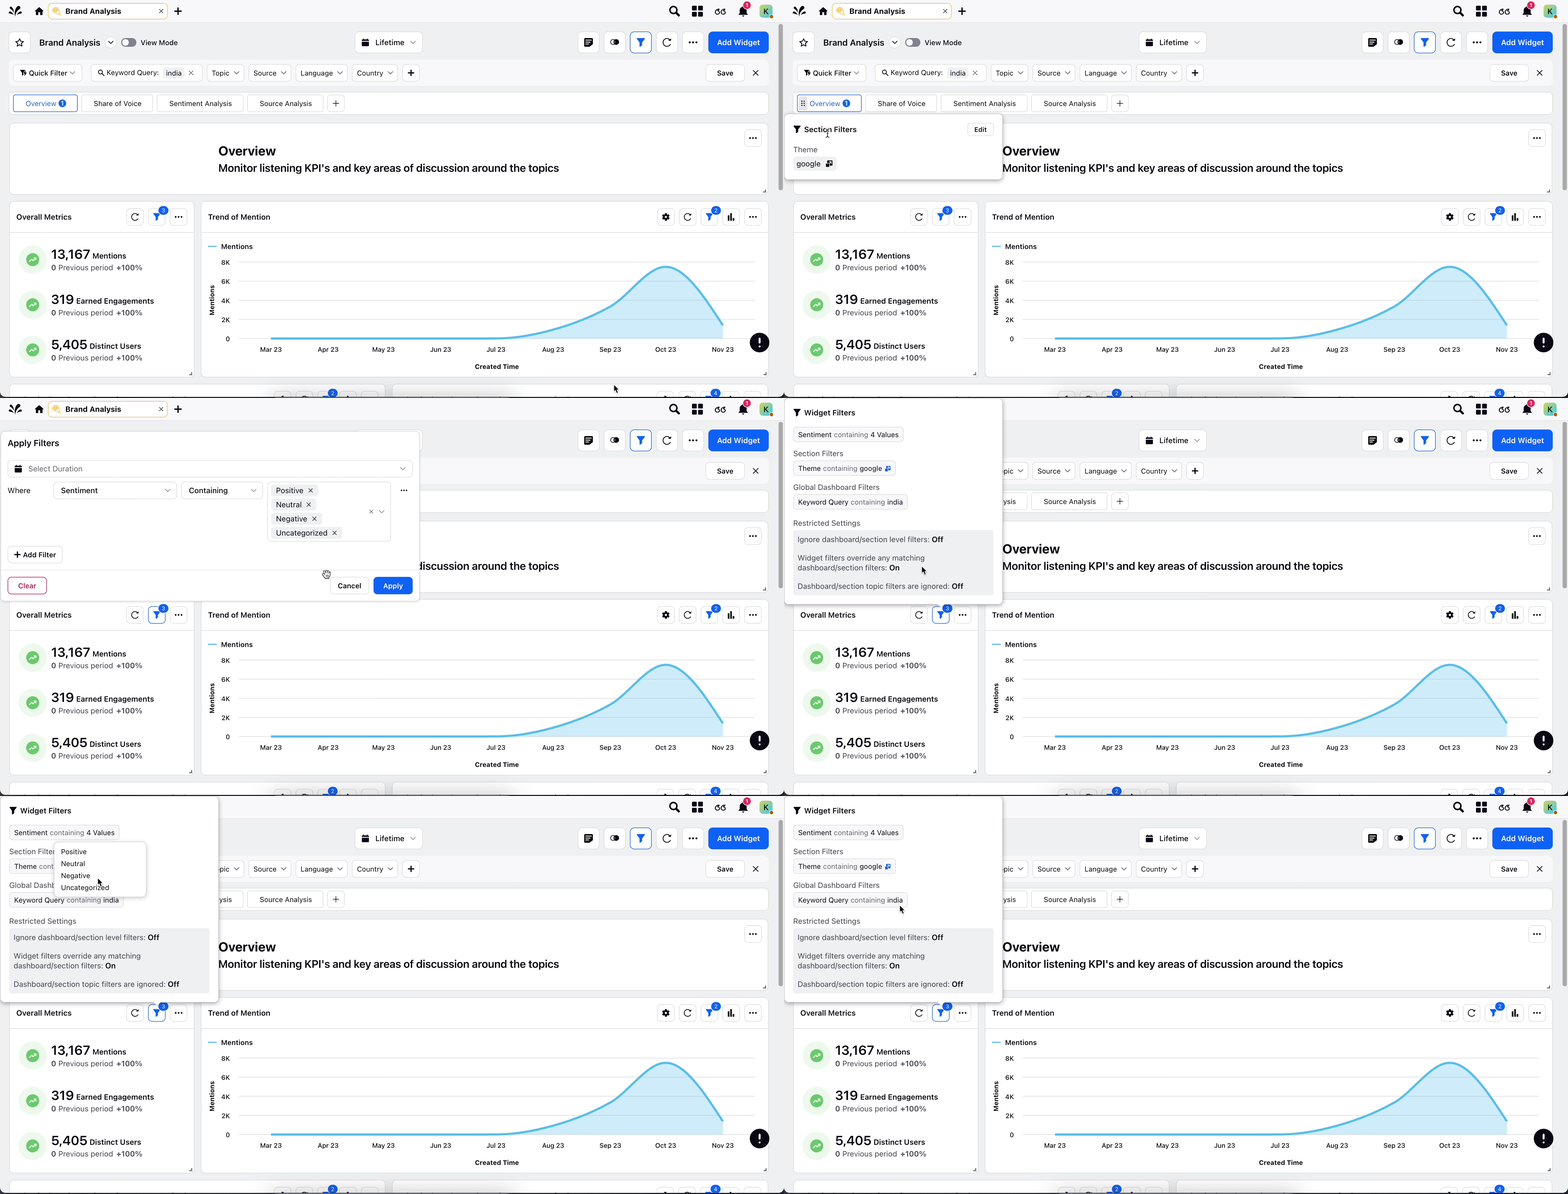
Widget Filter Summary:
When you hover over the widget filter icon representing the number of filters applied
Upon hovering, a pop up will open up with segregated filters clearly depicting widget filters, section filters & dashboard filters as applicable for that widget
- Date Range Filter: Date Range Filter UX is also updated at Widget level as per below:
