Date Range filter on the Reporting dashboard
Updated
Learn how you can limit the results on a dashboard by using the Date Range filter.
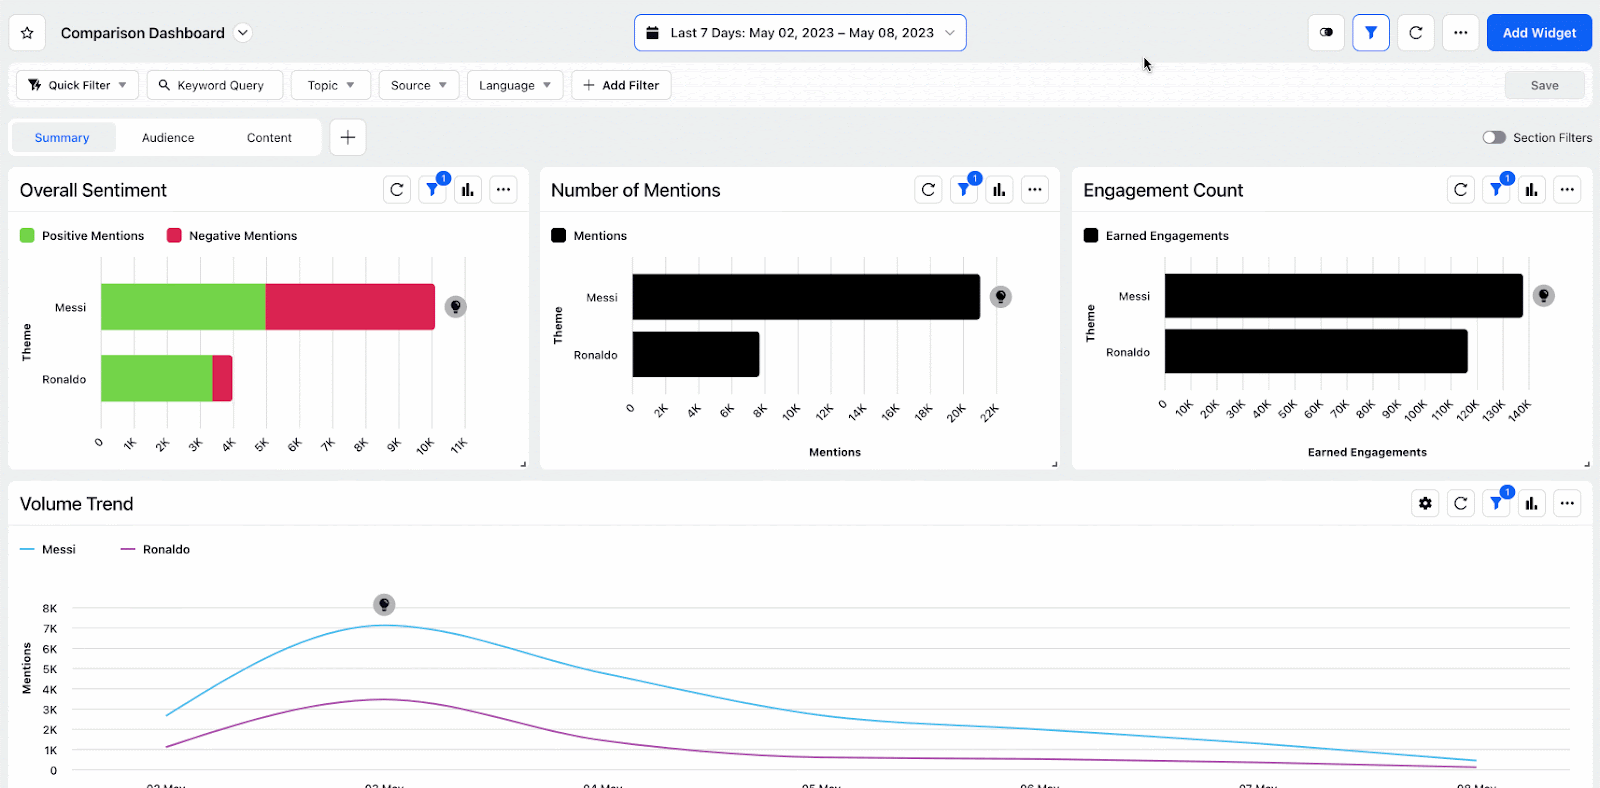
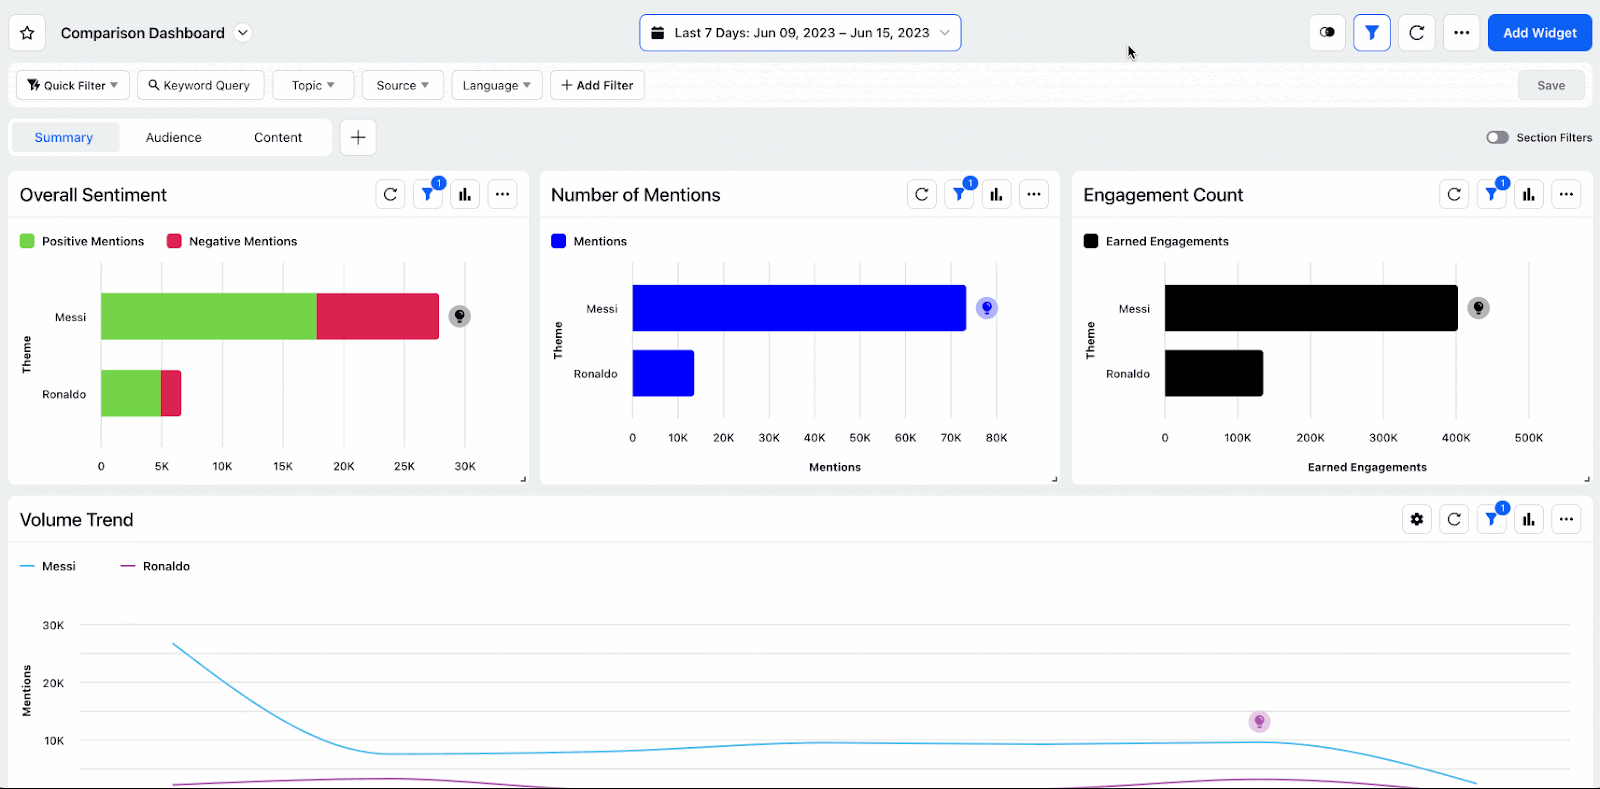
In Listening, Benchmarking, and other reporting dashboards, you have the ability to define the date range or duration to filter the results on the dashboard to the data that falls in a specific date range. For example, on a Listening dashboard, you want to check how many mentions you have received in the last month or during any specific time period. In such a situation, you can use the date range options to fetch mentions only from a specific date range.
The date range options are available at the dashboard, section, and widget levels. Setting a date range at the widget level will only be applied to that particular widget. On the other hand, setting a date range at the dashboard level will be applied to the entire dashboard, including all the widgets added to it. However, if the widgets have the date range defined, the widget-level date range will be considered, irrespective of the date range defined at the dashboard level.
Date Range options
|
|
|
|
The Custom Range allows you to define a custom date range, i.e. start date and end date, between which you want to fetch results.
![]() Note: To change the date in the date range, you can simply press the arrow keys (← ↑ ↓ →) on the keyboard, and the month and year will auto-complete as you type.
Note: To change the date in the date range, you can simply press the arrow keys (← ↑ ↓ →) on the keyboard, and the month and year will auto-complete as you type.
To apply timezone filter
On the Date Range popup window, click the Timezone in the top right corner. Select the desired timezone from the drop-down to set a standardized time zone for the desired reporting dashboard.
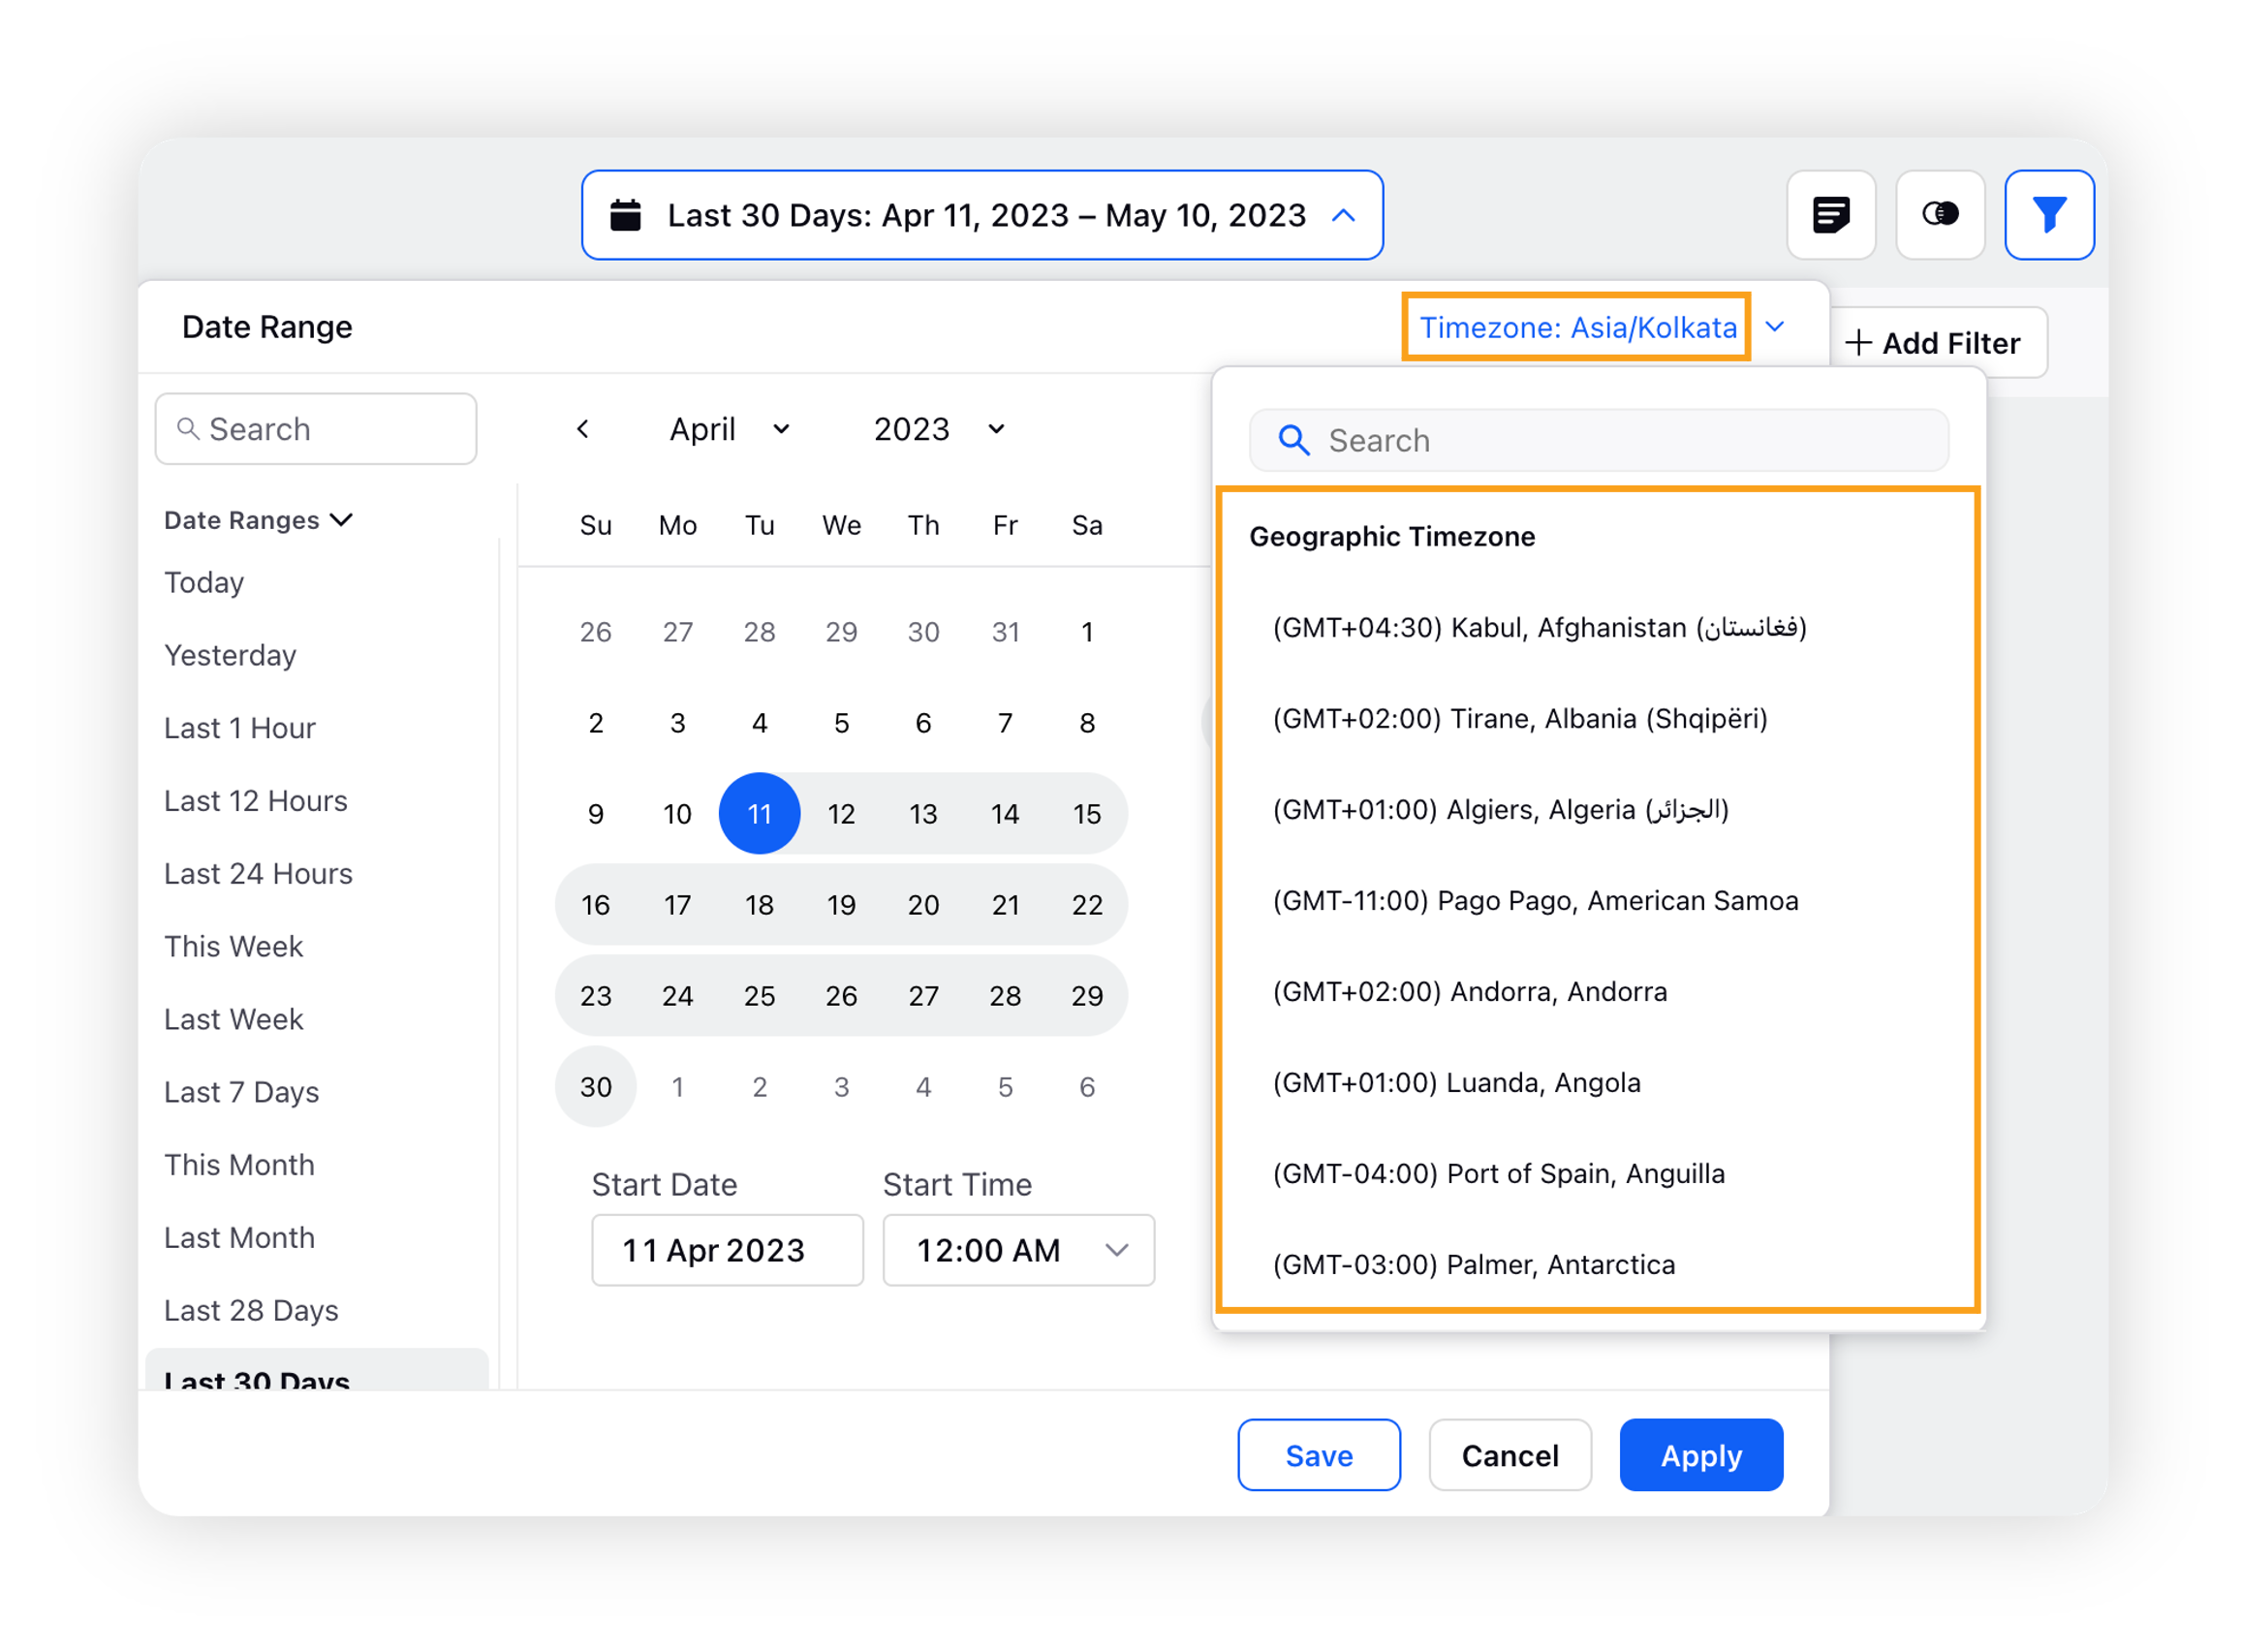
You can select any Geographic timezone for your dashboard. This will depict the reporting data based on the timezone of a particular geographic region.
Rolling time period with a custom range
Custom Range provides you with the rolling time period functionality to create a dynamic time range for tracking campaigns or events where the start date and end date are updated on a rolling basis.
Rolling start date: Start date will automatically move by 1 day every day
Rolling end date: End date will automatically move by 1 day every day

For example, suppose you define the 6th of April to the 5th of May as your custom date range and enable the rolling time period functionality. In that case, this will update your custom date range by 1 day when the next day starts, and it will keep updating the date range for the coming days.
Expected behavior
Toggle for Rolling Start Date will be disabled/grayed out by default. You must enable Rolling End Date to select a rolling start date.
This Rolling functionality within Date Range is available at the dashboard and widget levels.
Besides, it is also available in Advanced Scheduled Exports' Date Range options.
Saved date range capability
You can save date ranges for product launches, campaign launches, or other key events, making it simpler to keep track of important dates and timelines. You can select Start Date and End Date and save them with an appropriate name for your event. This ability to save a time range extends only to the following modules.
Listening dashboards
Listening Explorer
Benchmarking dashboards
Saved date ranges can be created and selected at the dashboard, section, and widget levels.
To save a date range
Click the New Tab icon. Under Sprinklr Insights, click the Listening Dashboard within Learn.
Search and select your dashboard and click the duration filter on top of the dashboard window.
On the Date Range window, select the start and end date for your event by clicking the dates. You can also input the start time and end time to have an accurate date range saved.

Click Save at the bottom of the Date Range window, and enter a name. You can change the start and end dates or the timezone as desired in the following popup before saving.
.gif)
You can search your saved date range by entering the name of your saved date range in the search bar of the date range window, as shown in the GIF above.
In the above example, we save our date range with the name – Brand Launch, and then search for it in the date range window.
Alternatively, you can click Saved Date Ranges in the bottom left of the Date Range window and scroll amongst the saved date ranges.
Expected behavior
The Saved Date Ranges created in a workspace will be visible and selectable to all users in that workspace.
The users who have permission to create a Saved Date Range must keep in mind the workspace-level visibility of all date ranges and avoid extraneous date ranges.
Saved Date Ranges are module-specific, i.e. a date range saved in a Listening dashboard will not be visible in Benchmarking dashboards and vice versa.
Dynamic date range capability
The dynamic time range feature in the Reporting Dashboard provides enhanced flexibility for specifying particular durations based on varying dates. It is particularly valuable when you require reporting for a specific timeframe that may differ each time.
This feature allows you to define custom time periods such as the second last week, second last month, last 3 weeks to last 1 week, or last 3 days, catering to specific business requirements. With the dynamic time range option, you can generate insightful reports based on the desired duration, enhancing your analytical capabilities.
For example –
You can retrieve a post's reporting for the 2nd or 3rd week after its publication or analyze video performance for one week starting from the 4th day after its release.
You can analyze the performance of a social media post during the second week after it was published. Simply specify the duration as "2 weeks ago" and select the appropriate options for the duration and end (weeks ago). This generates a report focused on the post's engagement, reach, and other metrics specifically for that second week after publication, providing valuable insights.
To set up a dynamic time range
Click the New Tab icon. Under Sprinklr Insights, click the Listening Dashboards within Custom.
Search and select your dashboard and click the duration filter on top of the dashboard window.
On the Date Range window, scroll the sidebar on the left and click Dynamic range.
To utilize the dynamic time range feature, input the desired value in the field – Duration of. Then, choose the appropriate duration & its unit (Hours, Days, Week, Months, and Years) from the provided dropdown menu. Indicate the end of the duration by selecting the corresponding option (Hours ago, Days ago, Weeks ago, Months ago, or Years ago).
 Note: Duration of and Ending will have the same units, i.e., if you select days in Duration of, the ending will be set as Days ago only.
 Once the duration is applied, you can preview the set range and review how it aligns with your requirements.
Click Apply at the bottom of the Date Range window.

Ability to filter data by time range at the widget-level
You can now filter the data of a particular widget within a Listening dashboard at the widget level. Setting a date range at the widget level will only be applied to that particular widget. If the widgets have the date range defined, the widget-level date range will be considered, irrespective of the date range defined at the dashboard level.
.gif)