Data Connector - Configuration and Use Case
Updated
Before you Begin
1. Before proceeding, ensure that you have already created a custom entity using the Custom Entity Manager.
2. Ensure that you have the Data Connector visible and accessible in the Persona through this article.
Overview
The Data Connector serves as a tool for uploading or changing data in a custom entity. Data can be inserted using Excel or SQL, and mapping for the data can be defined after the data upload.
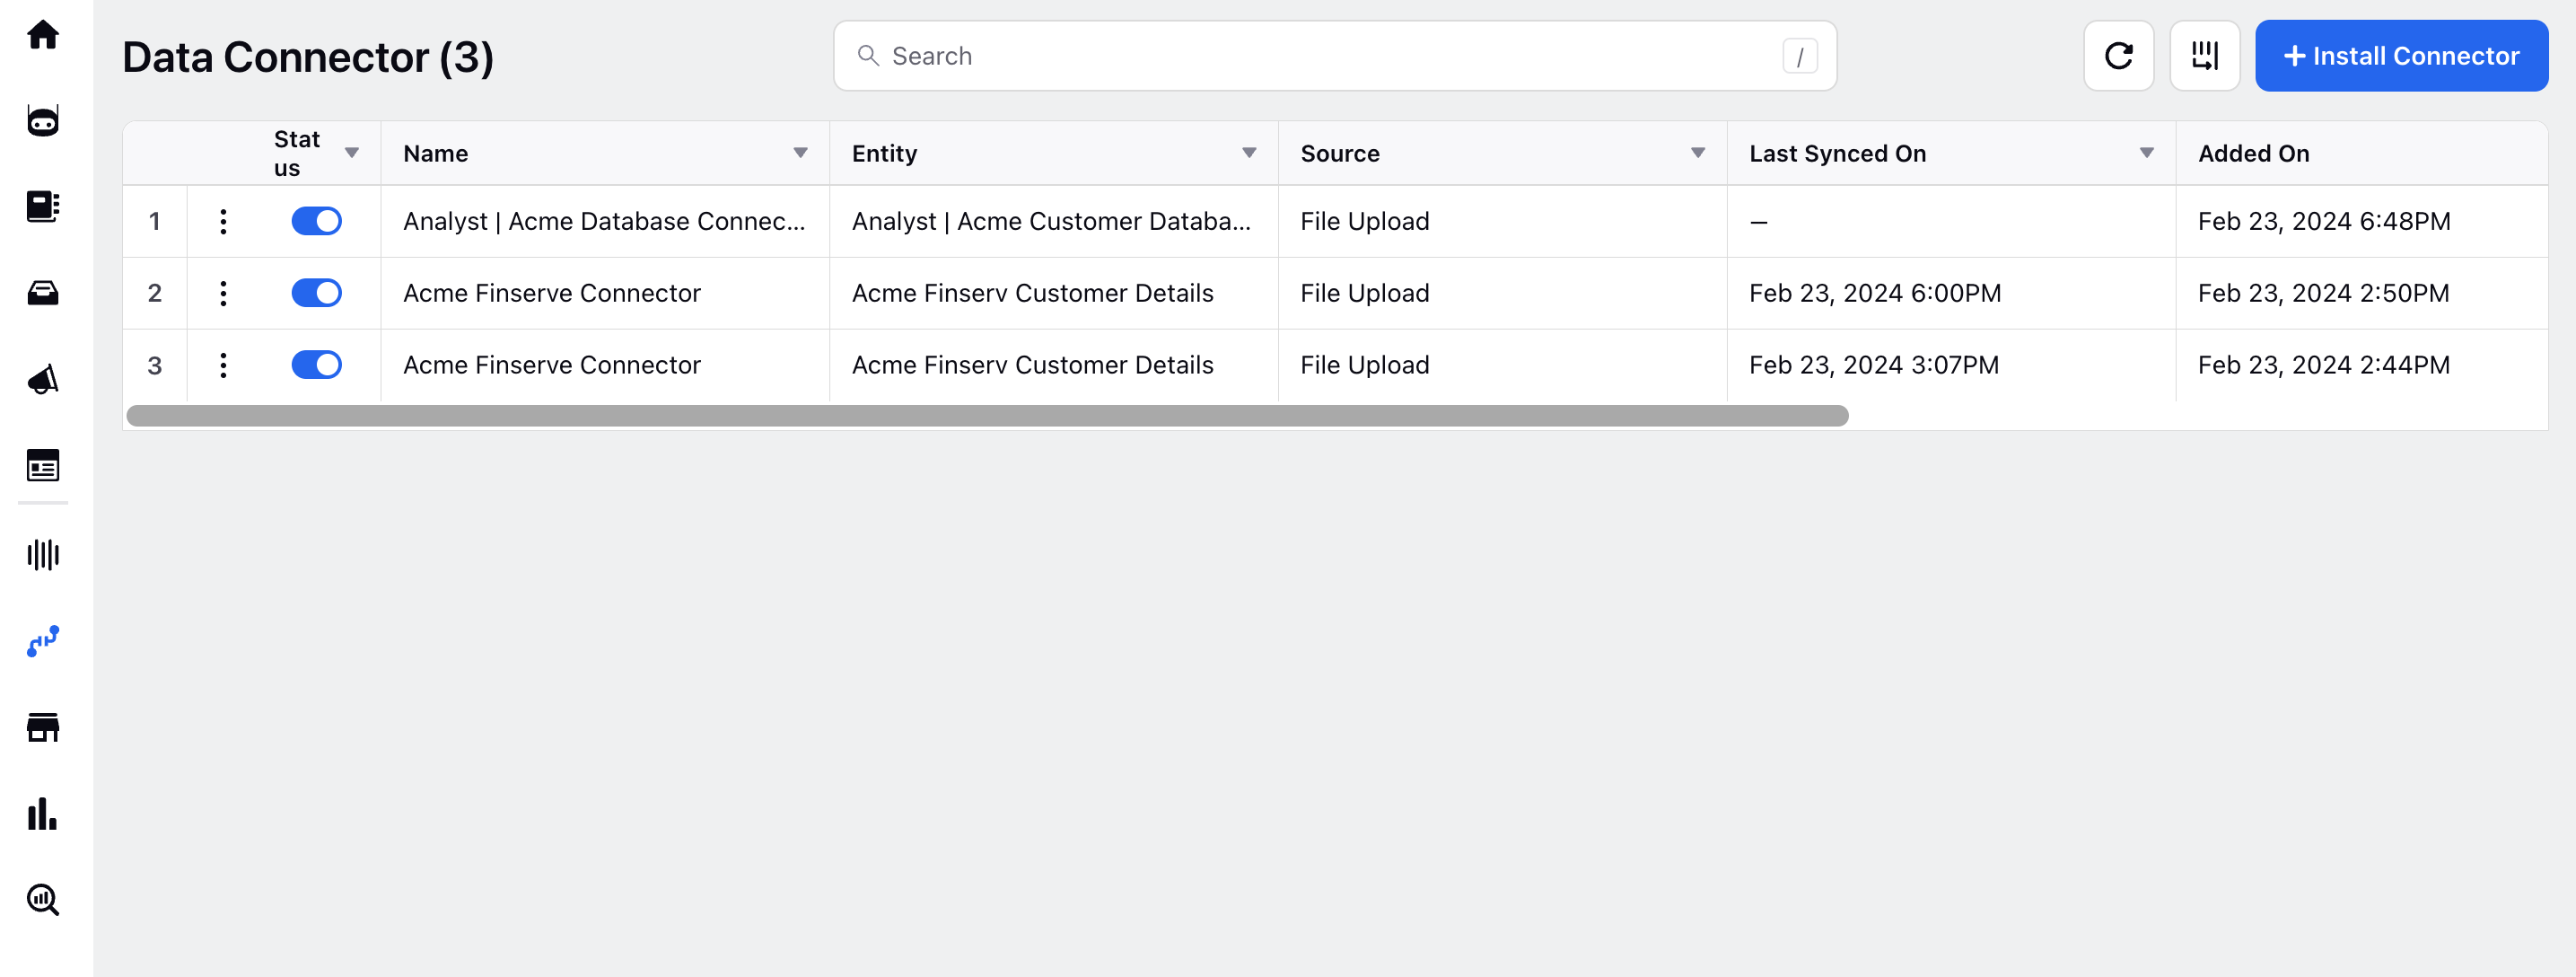
To Create a Data Connector
Navigate to the Data Connector window.
Click Install Connector located in the top right corner to begin creating a new connector.
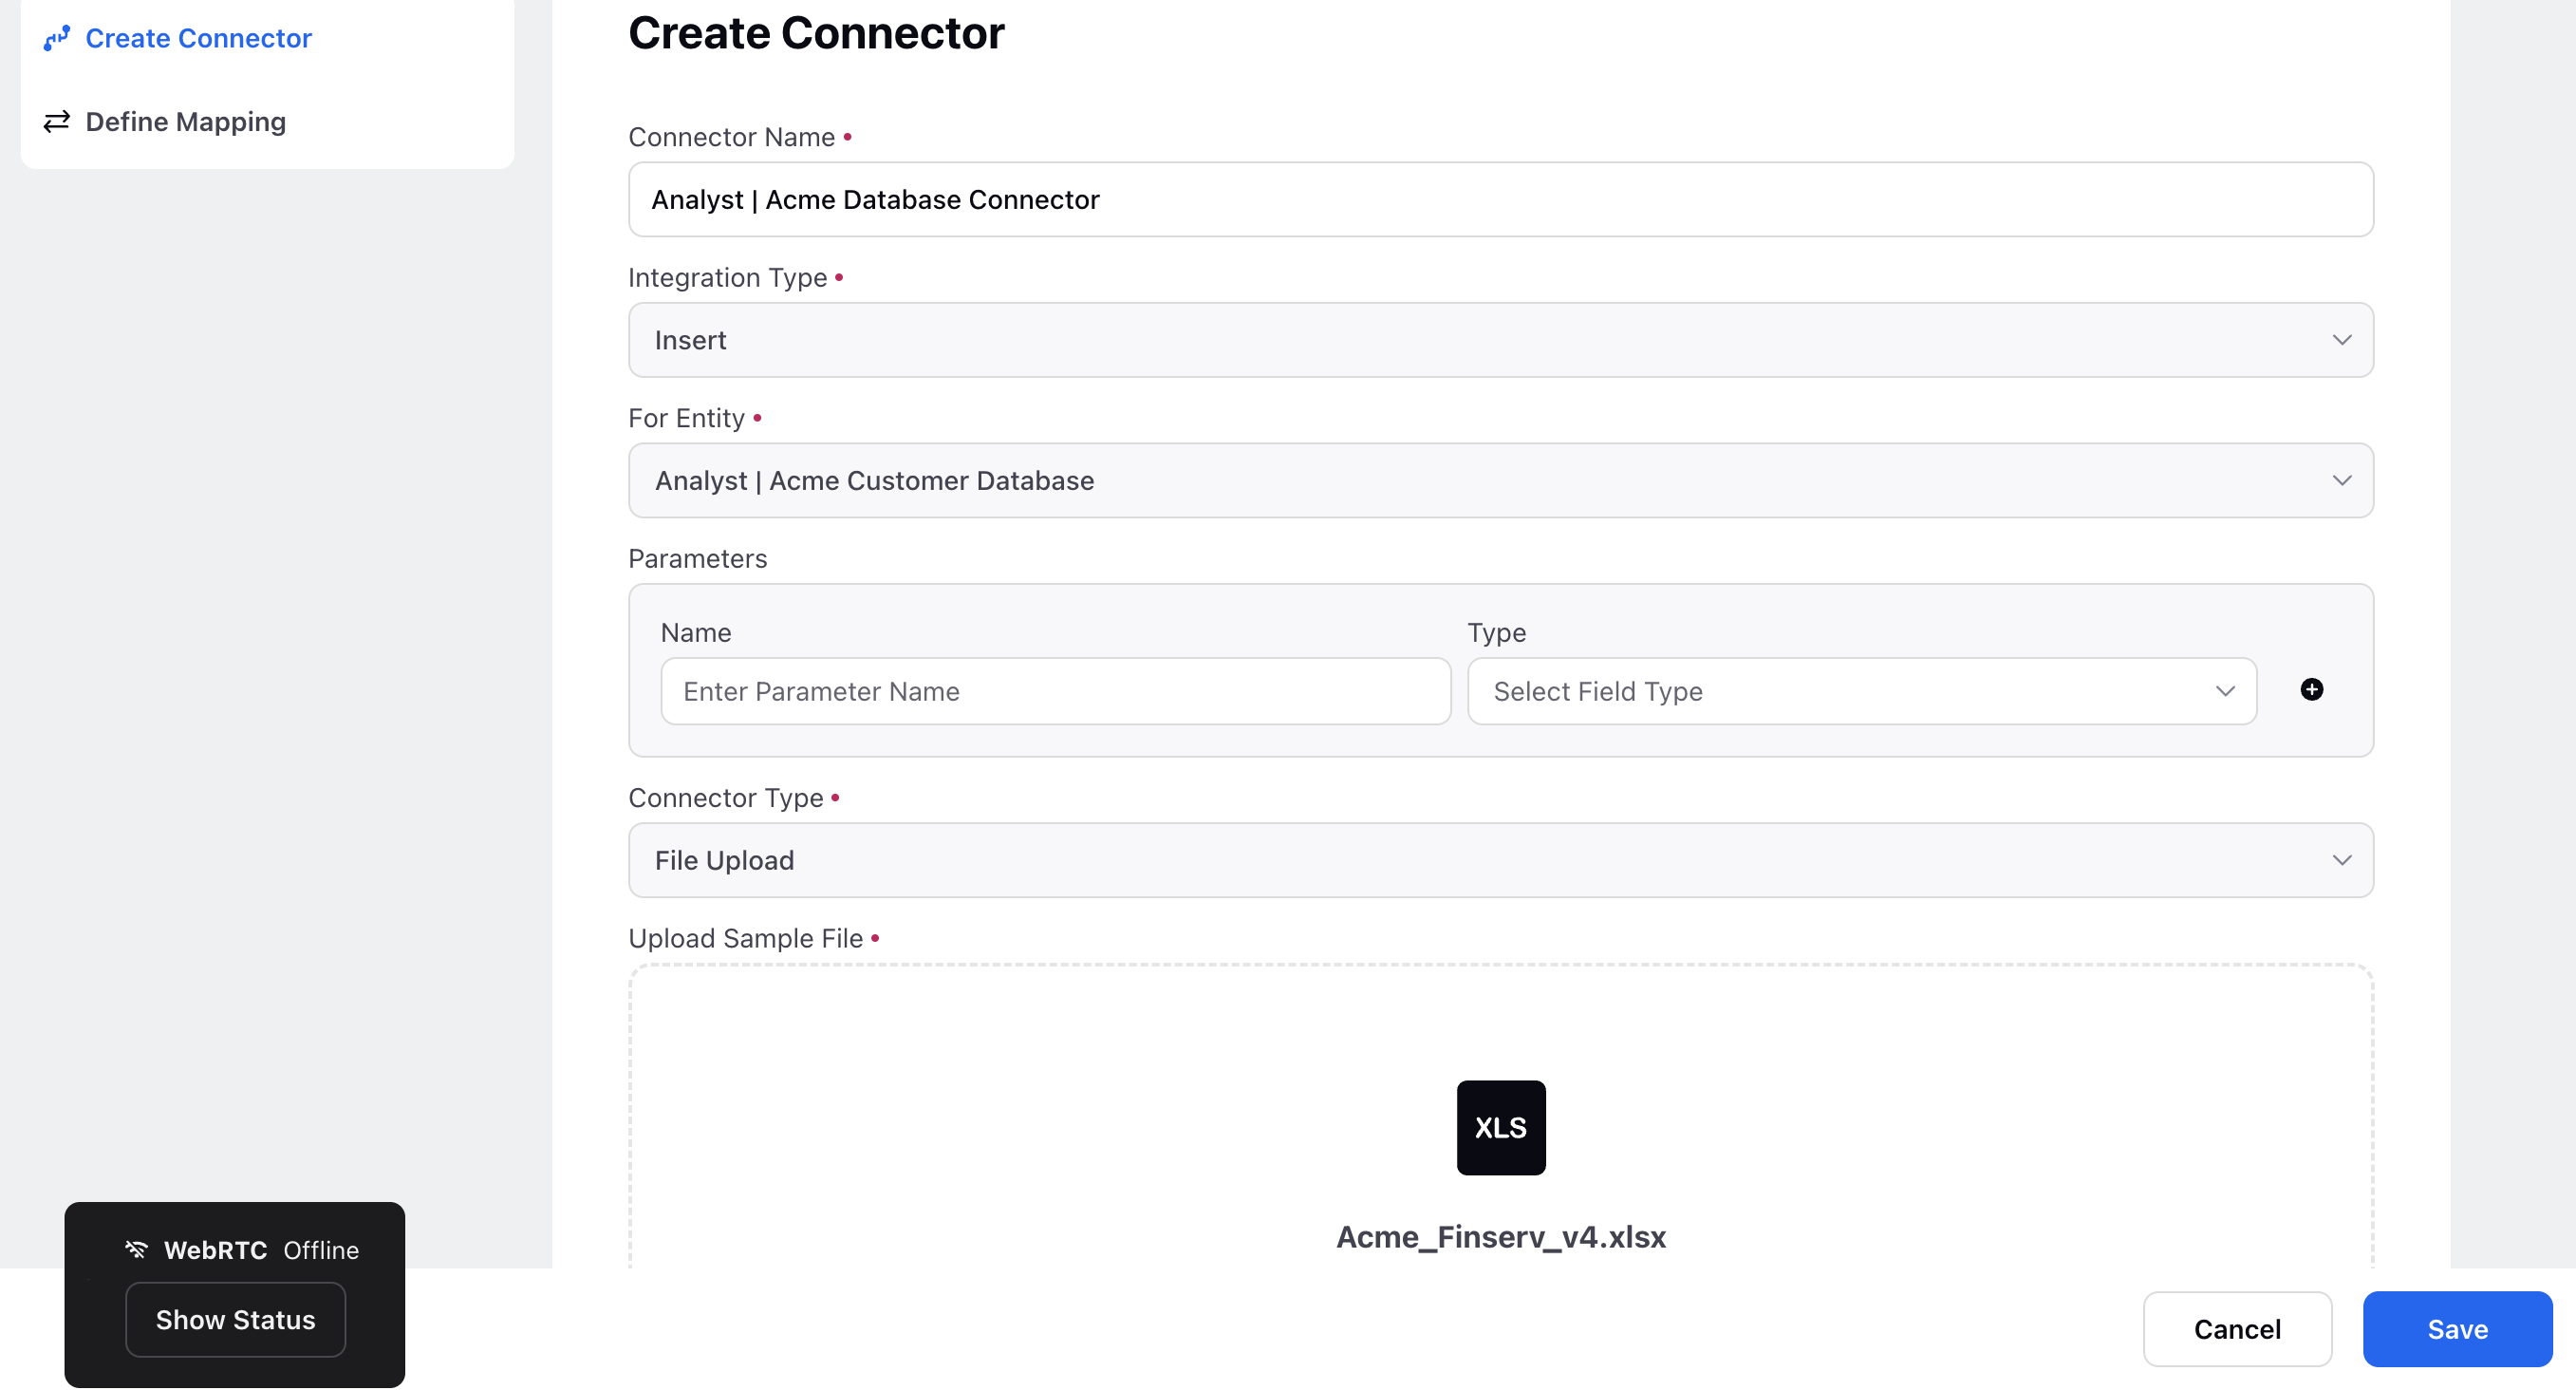
On the Create Connector window, you'll need to provide the following details:
Connector Name: Assign a name to the connector.
Integration Type: Choose "Insert" to indicate that data will be inserted into the entity.
For Entity: Select the desired entity for which you're creating the connector.
Connector Type: Choose "File Upload" as the connector type.
Upload Sample File: Upload a sample file from which the values will be copied.
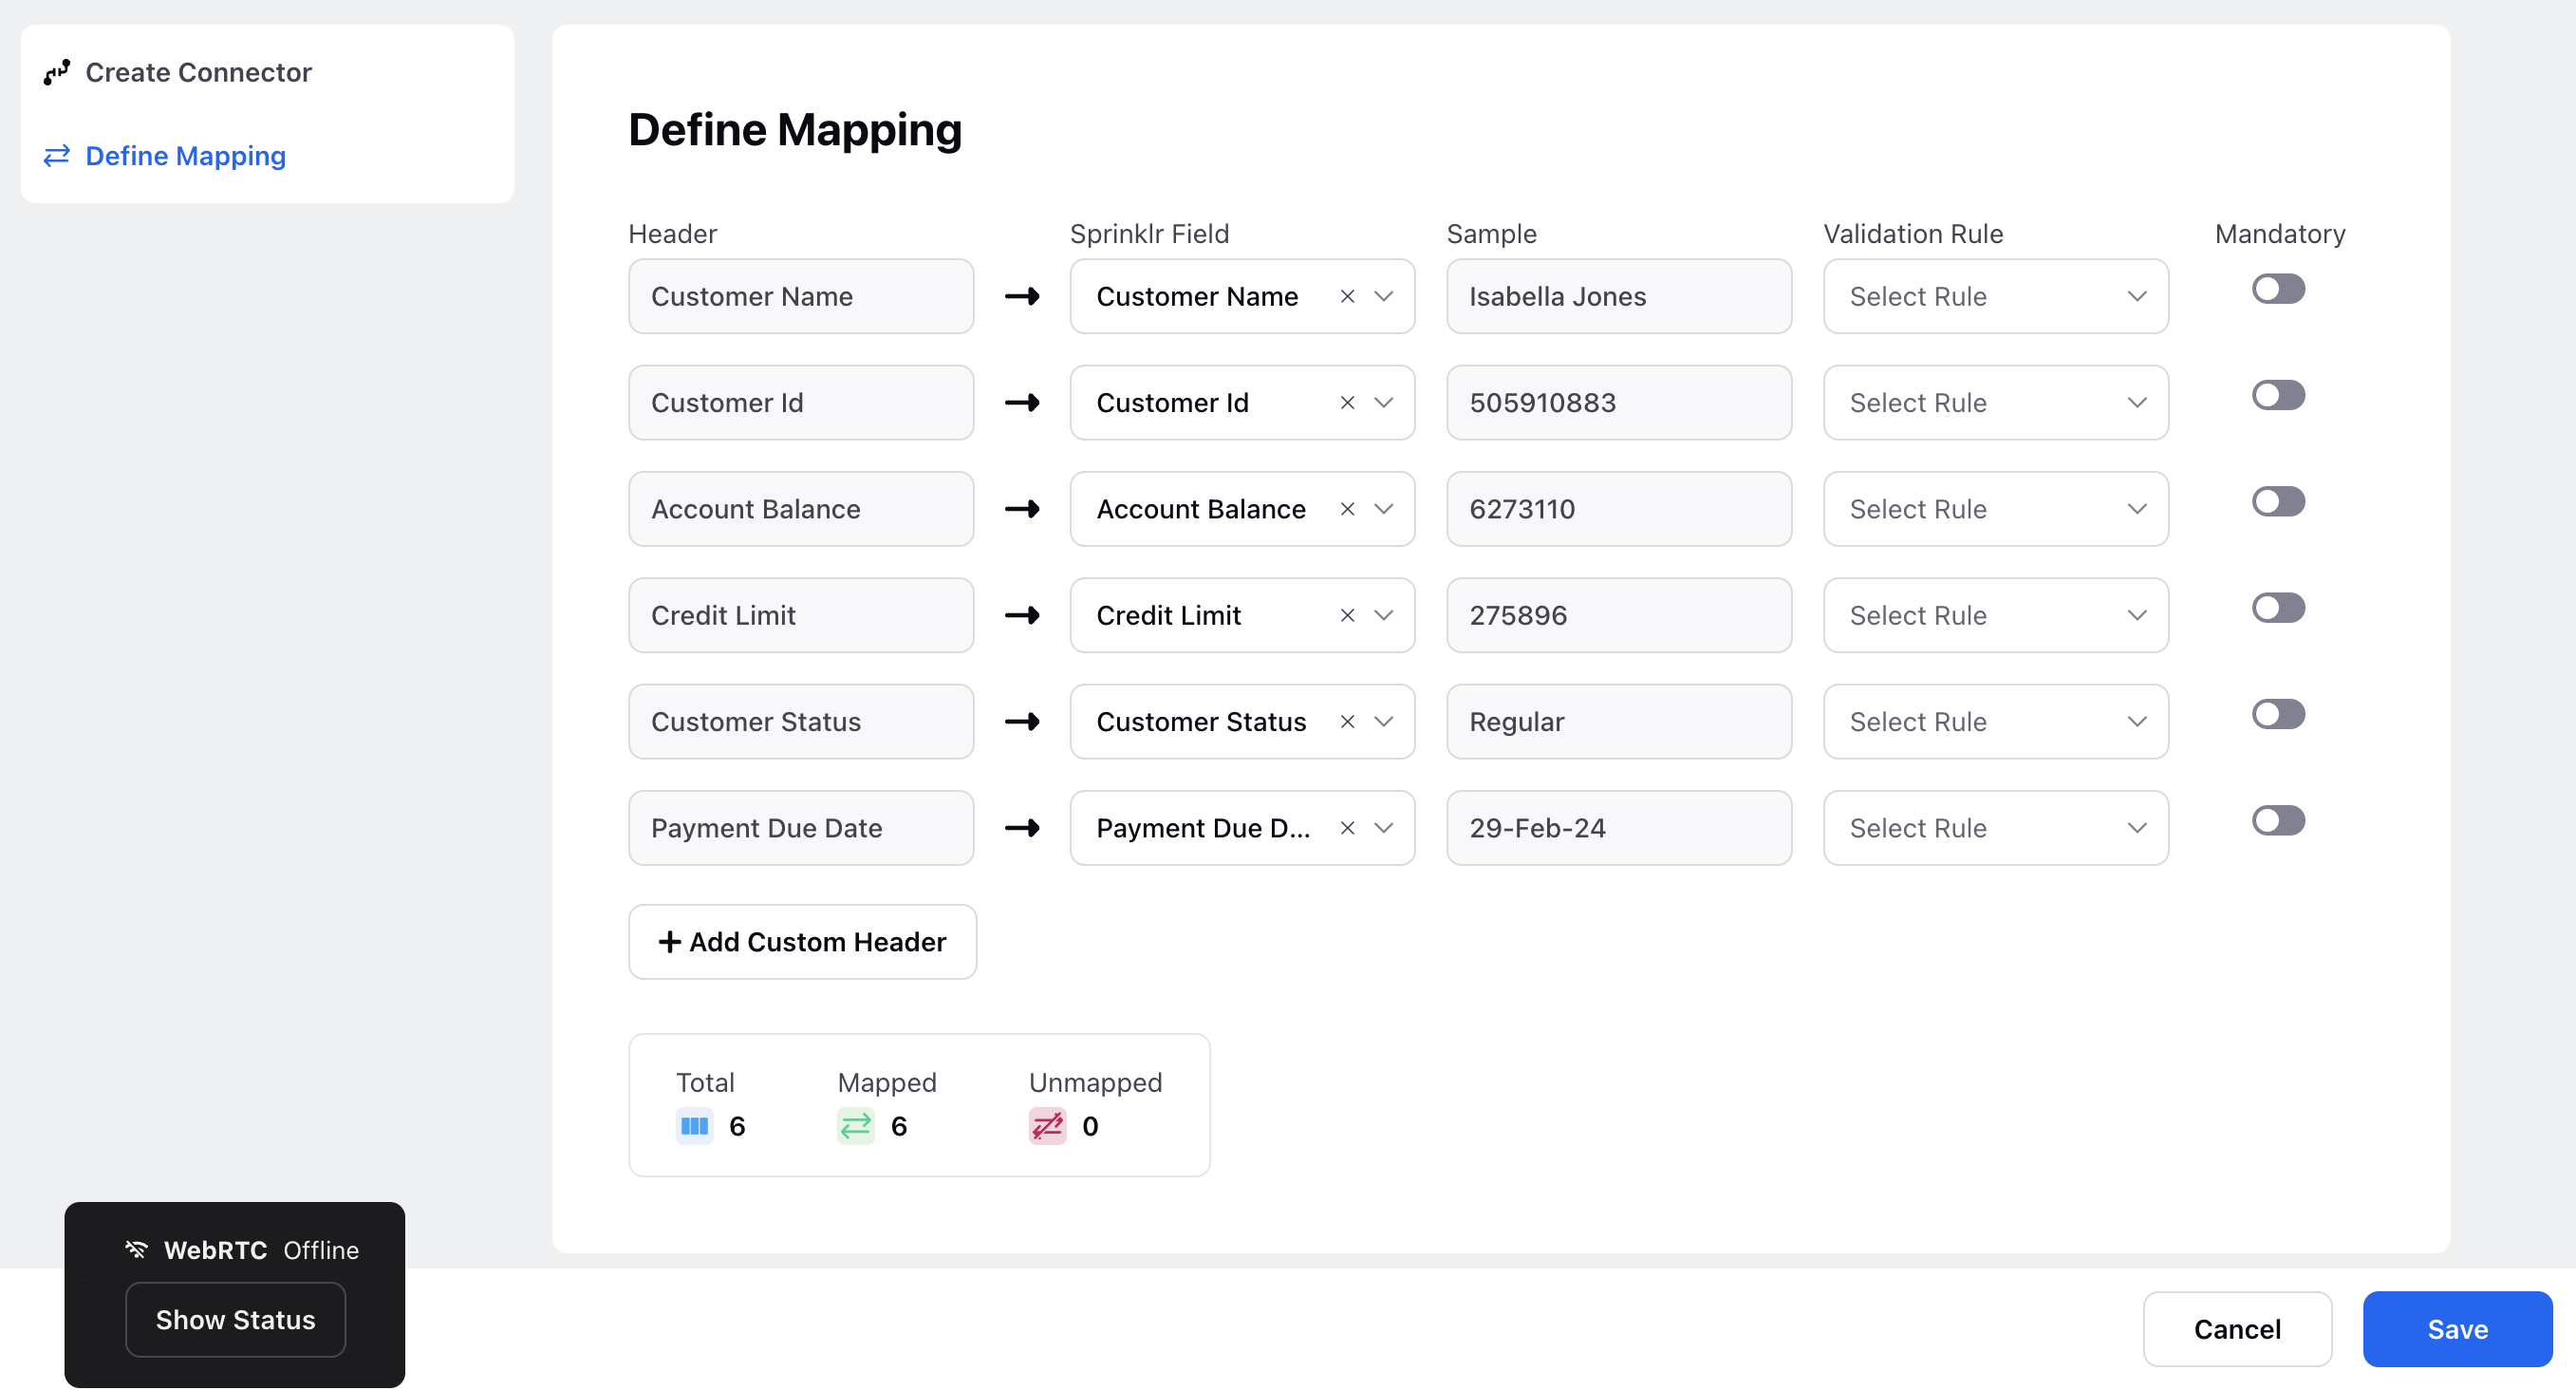
After providing these details, switch to the Define Mapping tab to map the columns from the uploaded Excel file to the corresponding columns in the entity. Once you've completed the mapping, click Save at the bottom to finalize the setup.
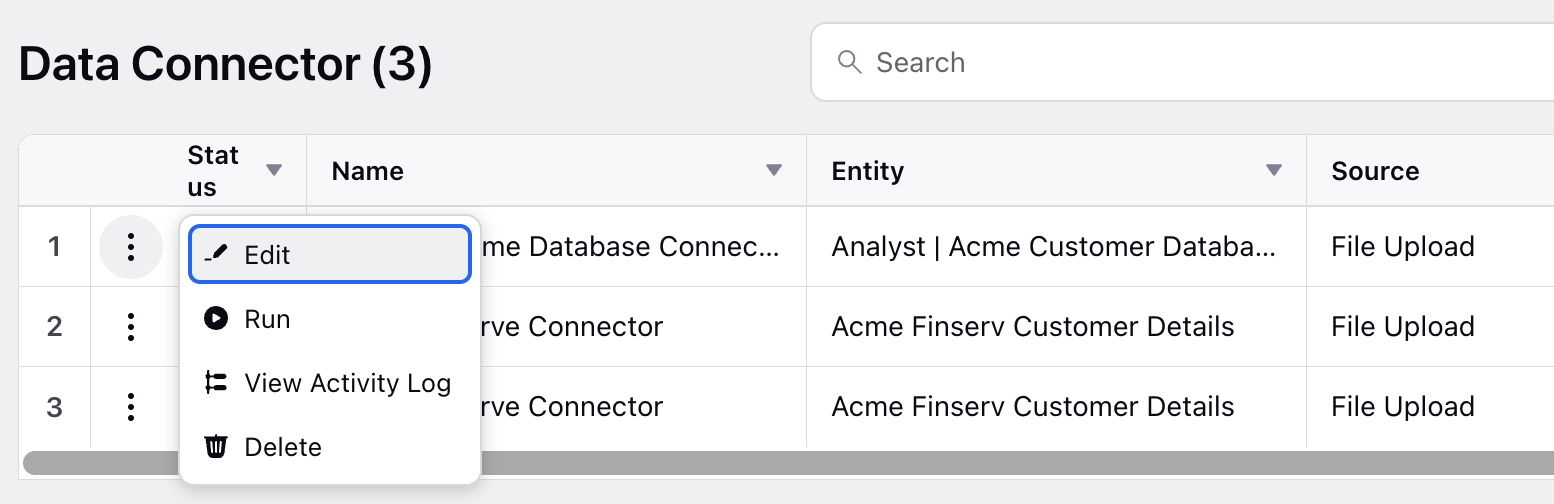
Once the connector is created, you can perform various actions by hovering over the Options icon alongside:
Edit: Modify the configuration settings of the connector.
Run: Execute the connector to initiate the data upload or modification process.
View Activity Log: Access the activity log in the third pane to monitor the status and details of the connector's executions.
Delete: Remove the connector if it's no longer needed.
Please Note:
1. Only the fields whose mapping are populated will be filled and the rest of the fields will be blank.
2. The new data will be populated above the exisiting data in the custom field
Next Steps:
1. You can view and manage the populated data using the Dynamic Record Manager.