Dynamic Record Manager - Configuration and Use
Updated
Before you Begin
Ensure that a record for a custom entity is created in the Custom Entity Manager, with at least one entry, to display records. Additionally, you will have to configure a record in the Entity Manager and enable its view in the Persona App Manager.
Overview
The Record Manager serves as the dashboard to view the desired custom entities. You can define the fields to display and customize the color, titles and filters for the same.
To Create Record Manager
Record Managers serve as the creation managers of the entity, assisting in capturing the appropriate information related to the entity. You have the flexibility to customize the entity creation manager for each role within your organization.
Navigate to the Record Manager tab in the Entity Manager. Click Create Record Manager in the top right corner.

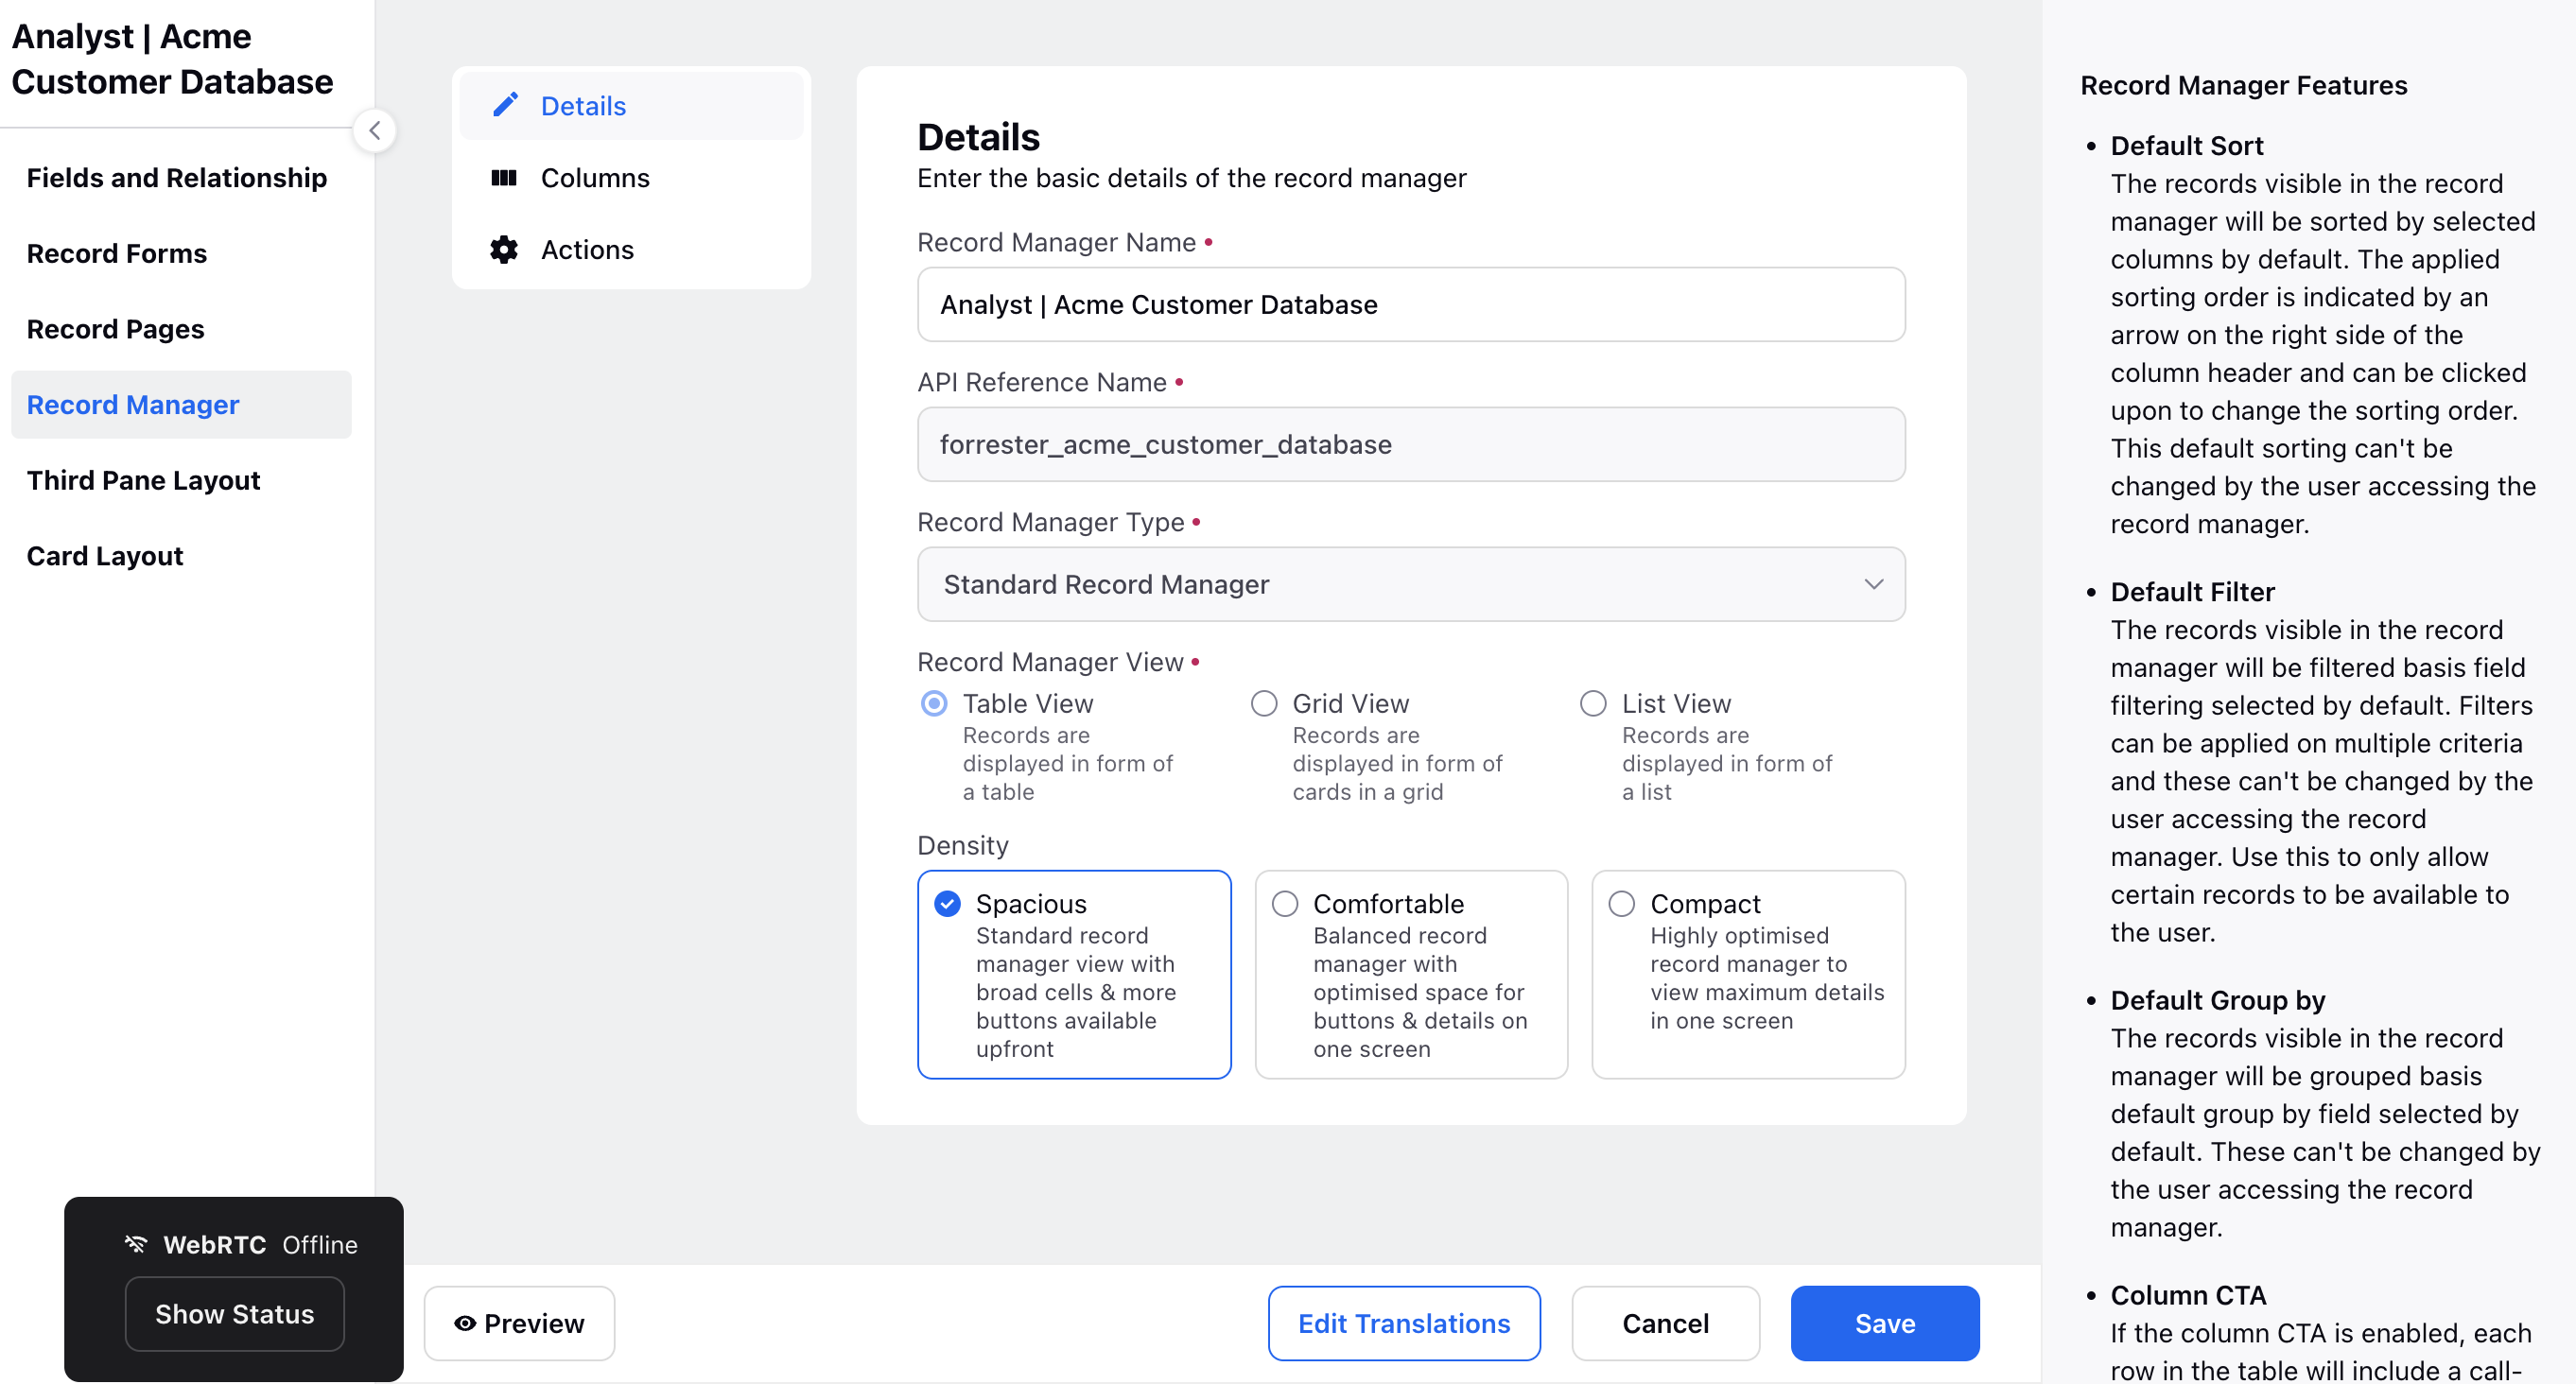
Within the Details tab, provide the following information:
Record Manager Name: Name your Record Manager.
API Reference Name: Assign an API reference name to the Record Manager.
Record Manager Type: Select the type of Record Manager from options like Table View, Grid View, or List View.
Density: Choose the density of the view, such as compact, spacious, or comfortable.

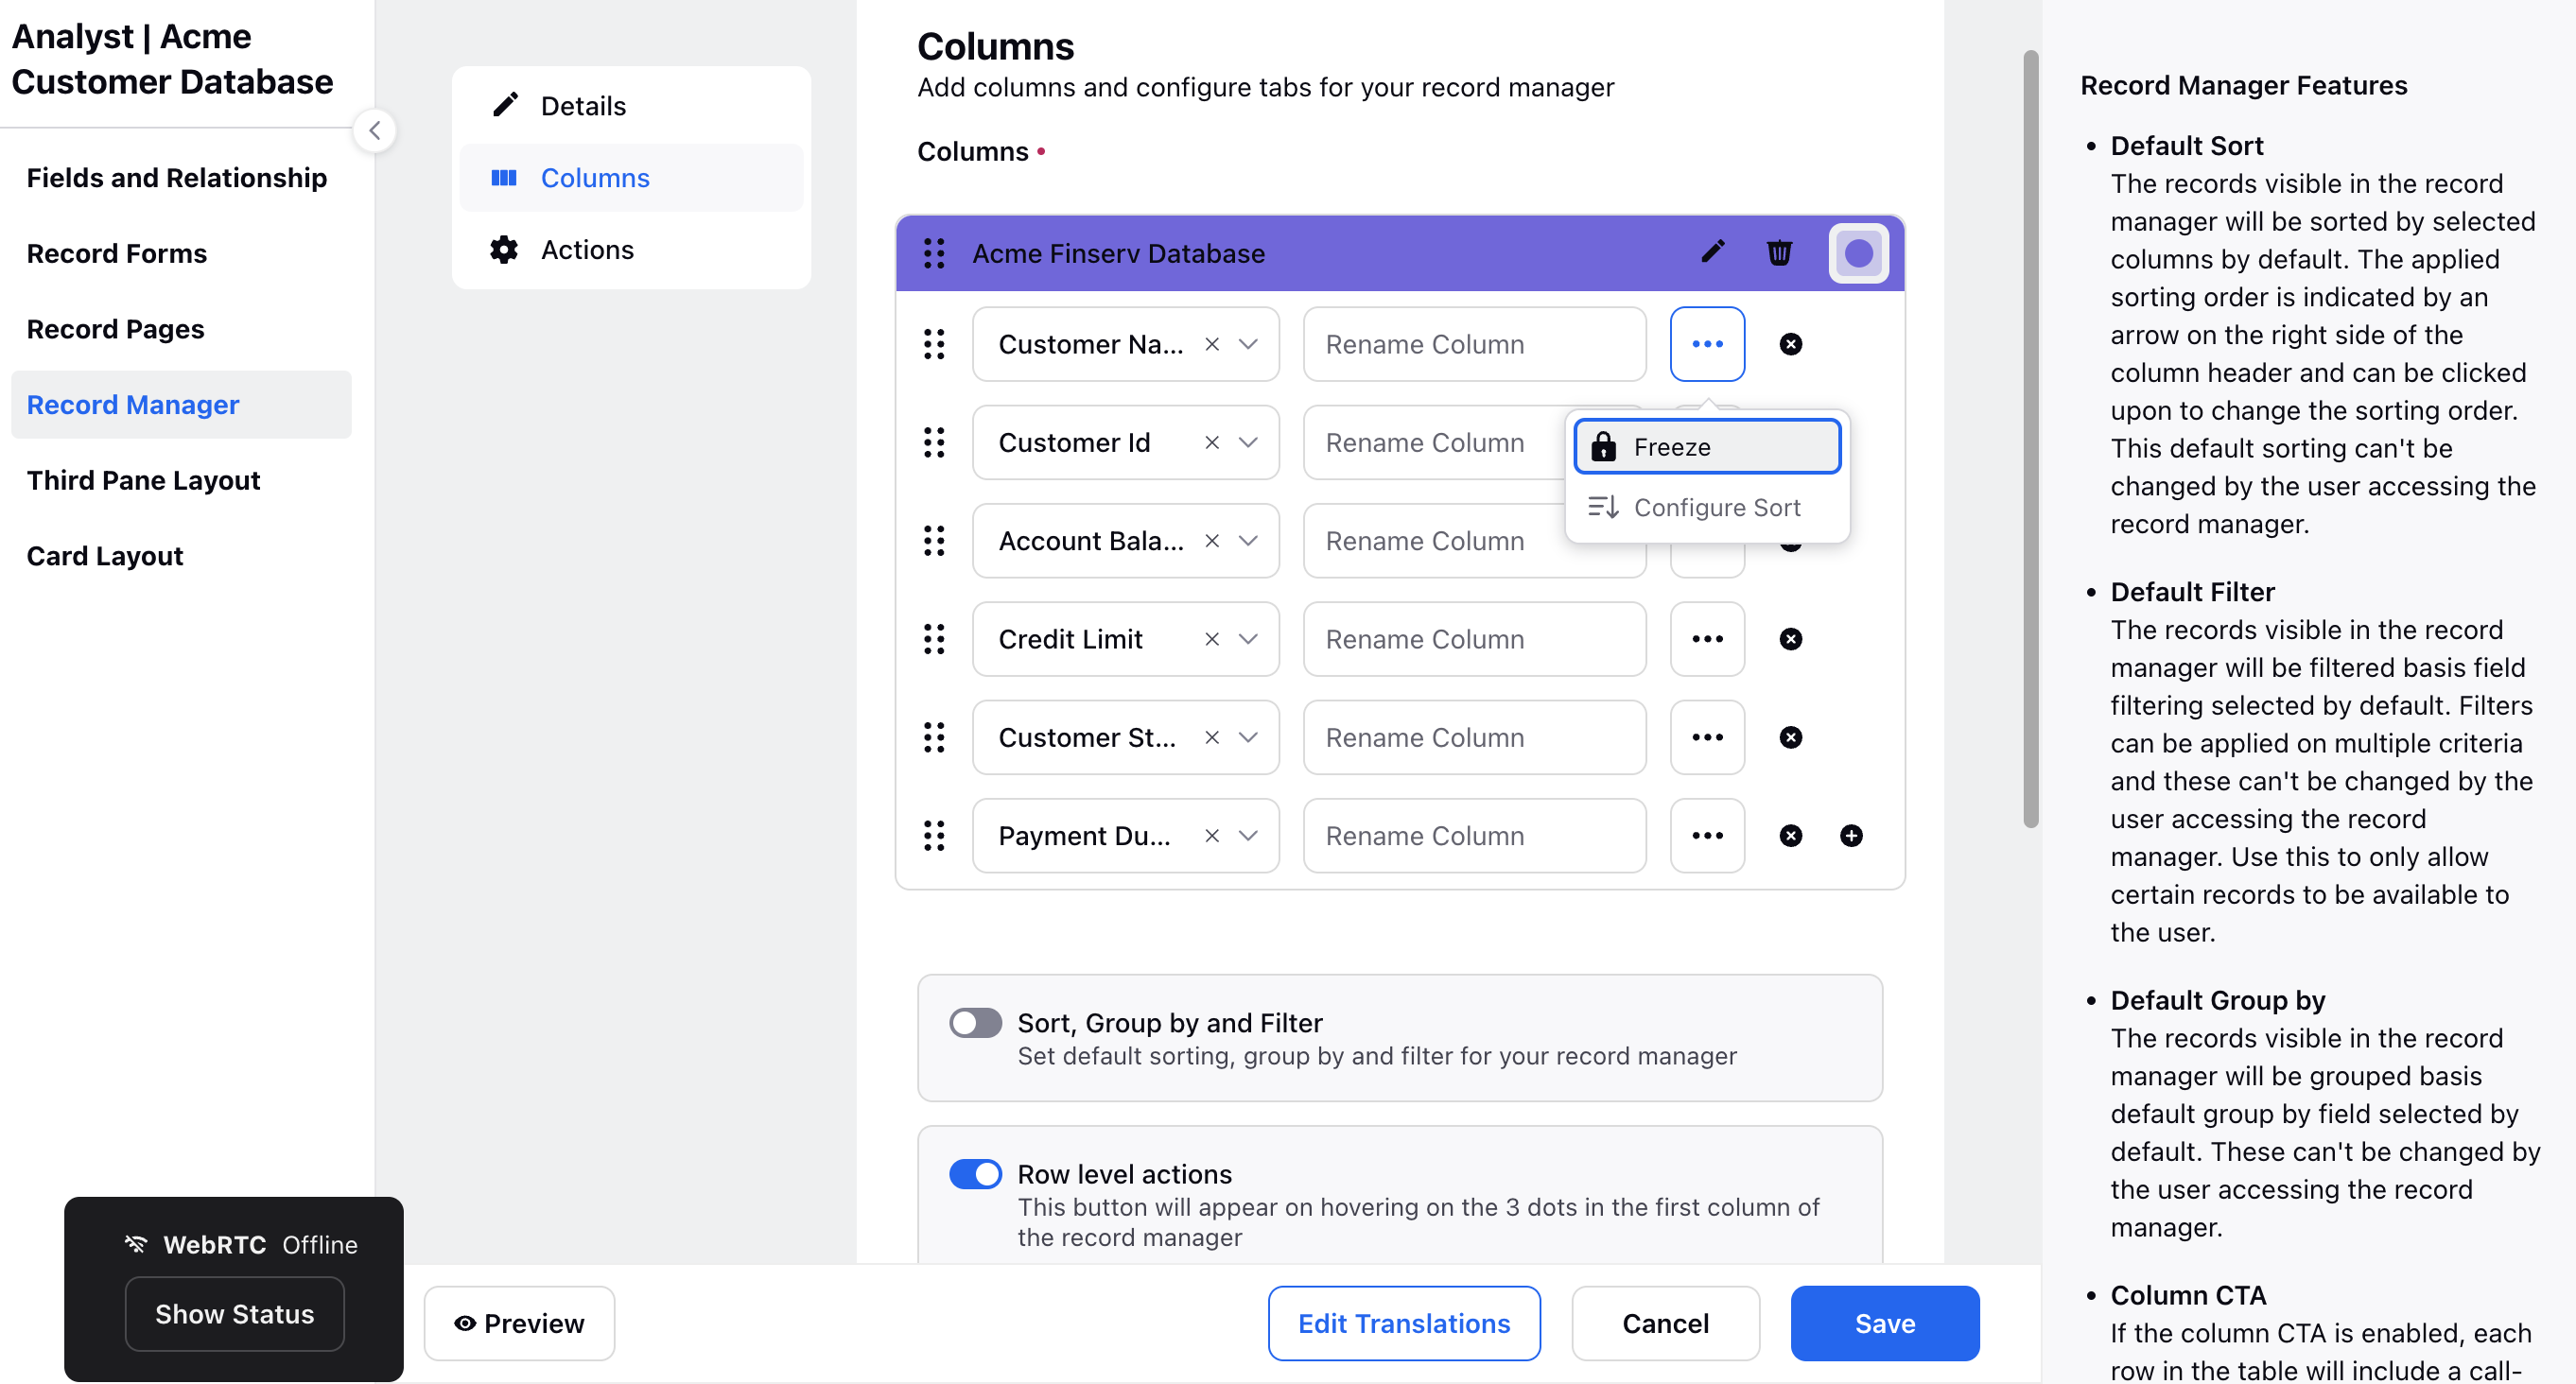
Within the Columns tab of the Record Manager setup:
Include entities as columns to display relevant information in your Record Manager.
Customize column names or freeze columns as needed for better organization.
Set the header color as desired.
Define default sorting, grouping, and filtering options for efficient data management.
Also, select columns that can be edited directly within the Record Manager interface for quick updates.
Display a rolled-up summary of columns at the bottom of your Record Manager for easy reference and analysis.

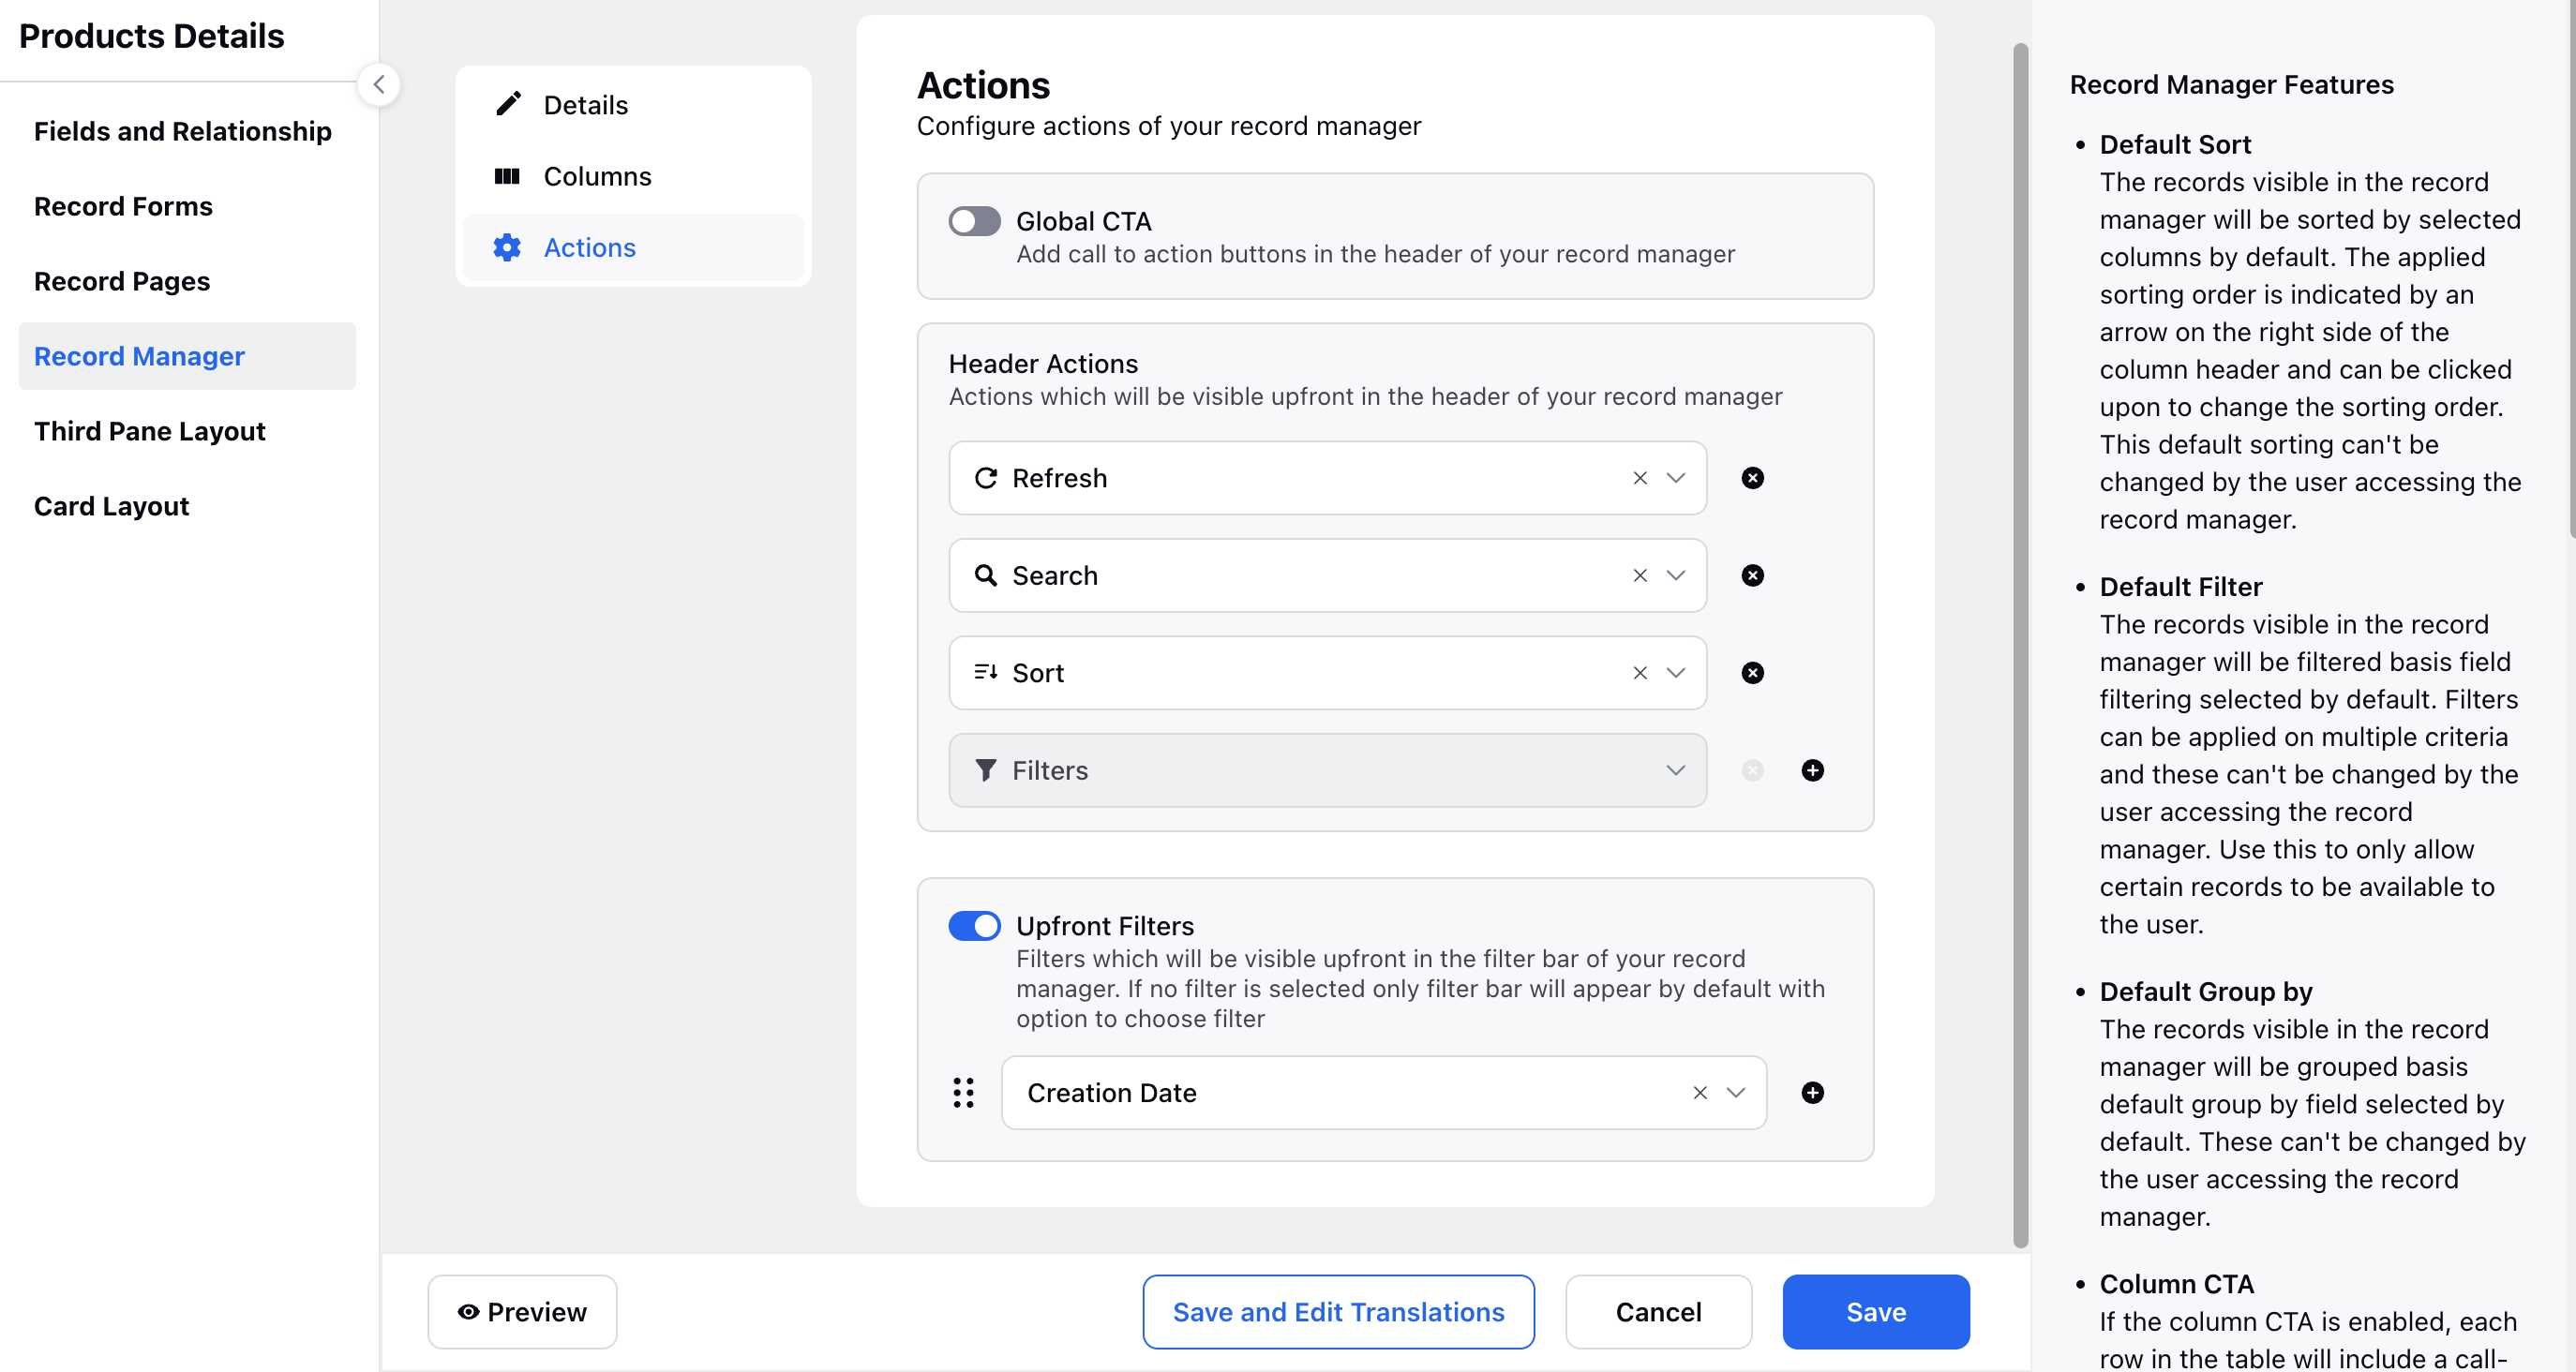
In the Actions tab of the Record Manager setup:
Customize actions for your Record Manager.
Global CTA: Add call-to-action buttons to the header of your Record Manager for easy access to key functionalities.
Header Actions: Specify actions such as Refresh, Search, Export that will be prominently displayed in the header of your Record Manager.
Upfront Filters: Define filters that will be visible upfront in the filter bar of your Record Manager. If no filters are selected, the filter bar will appear by default with the option to choose filters as needed.

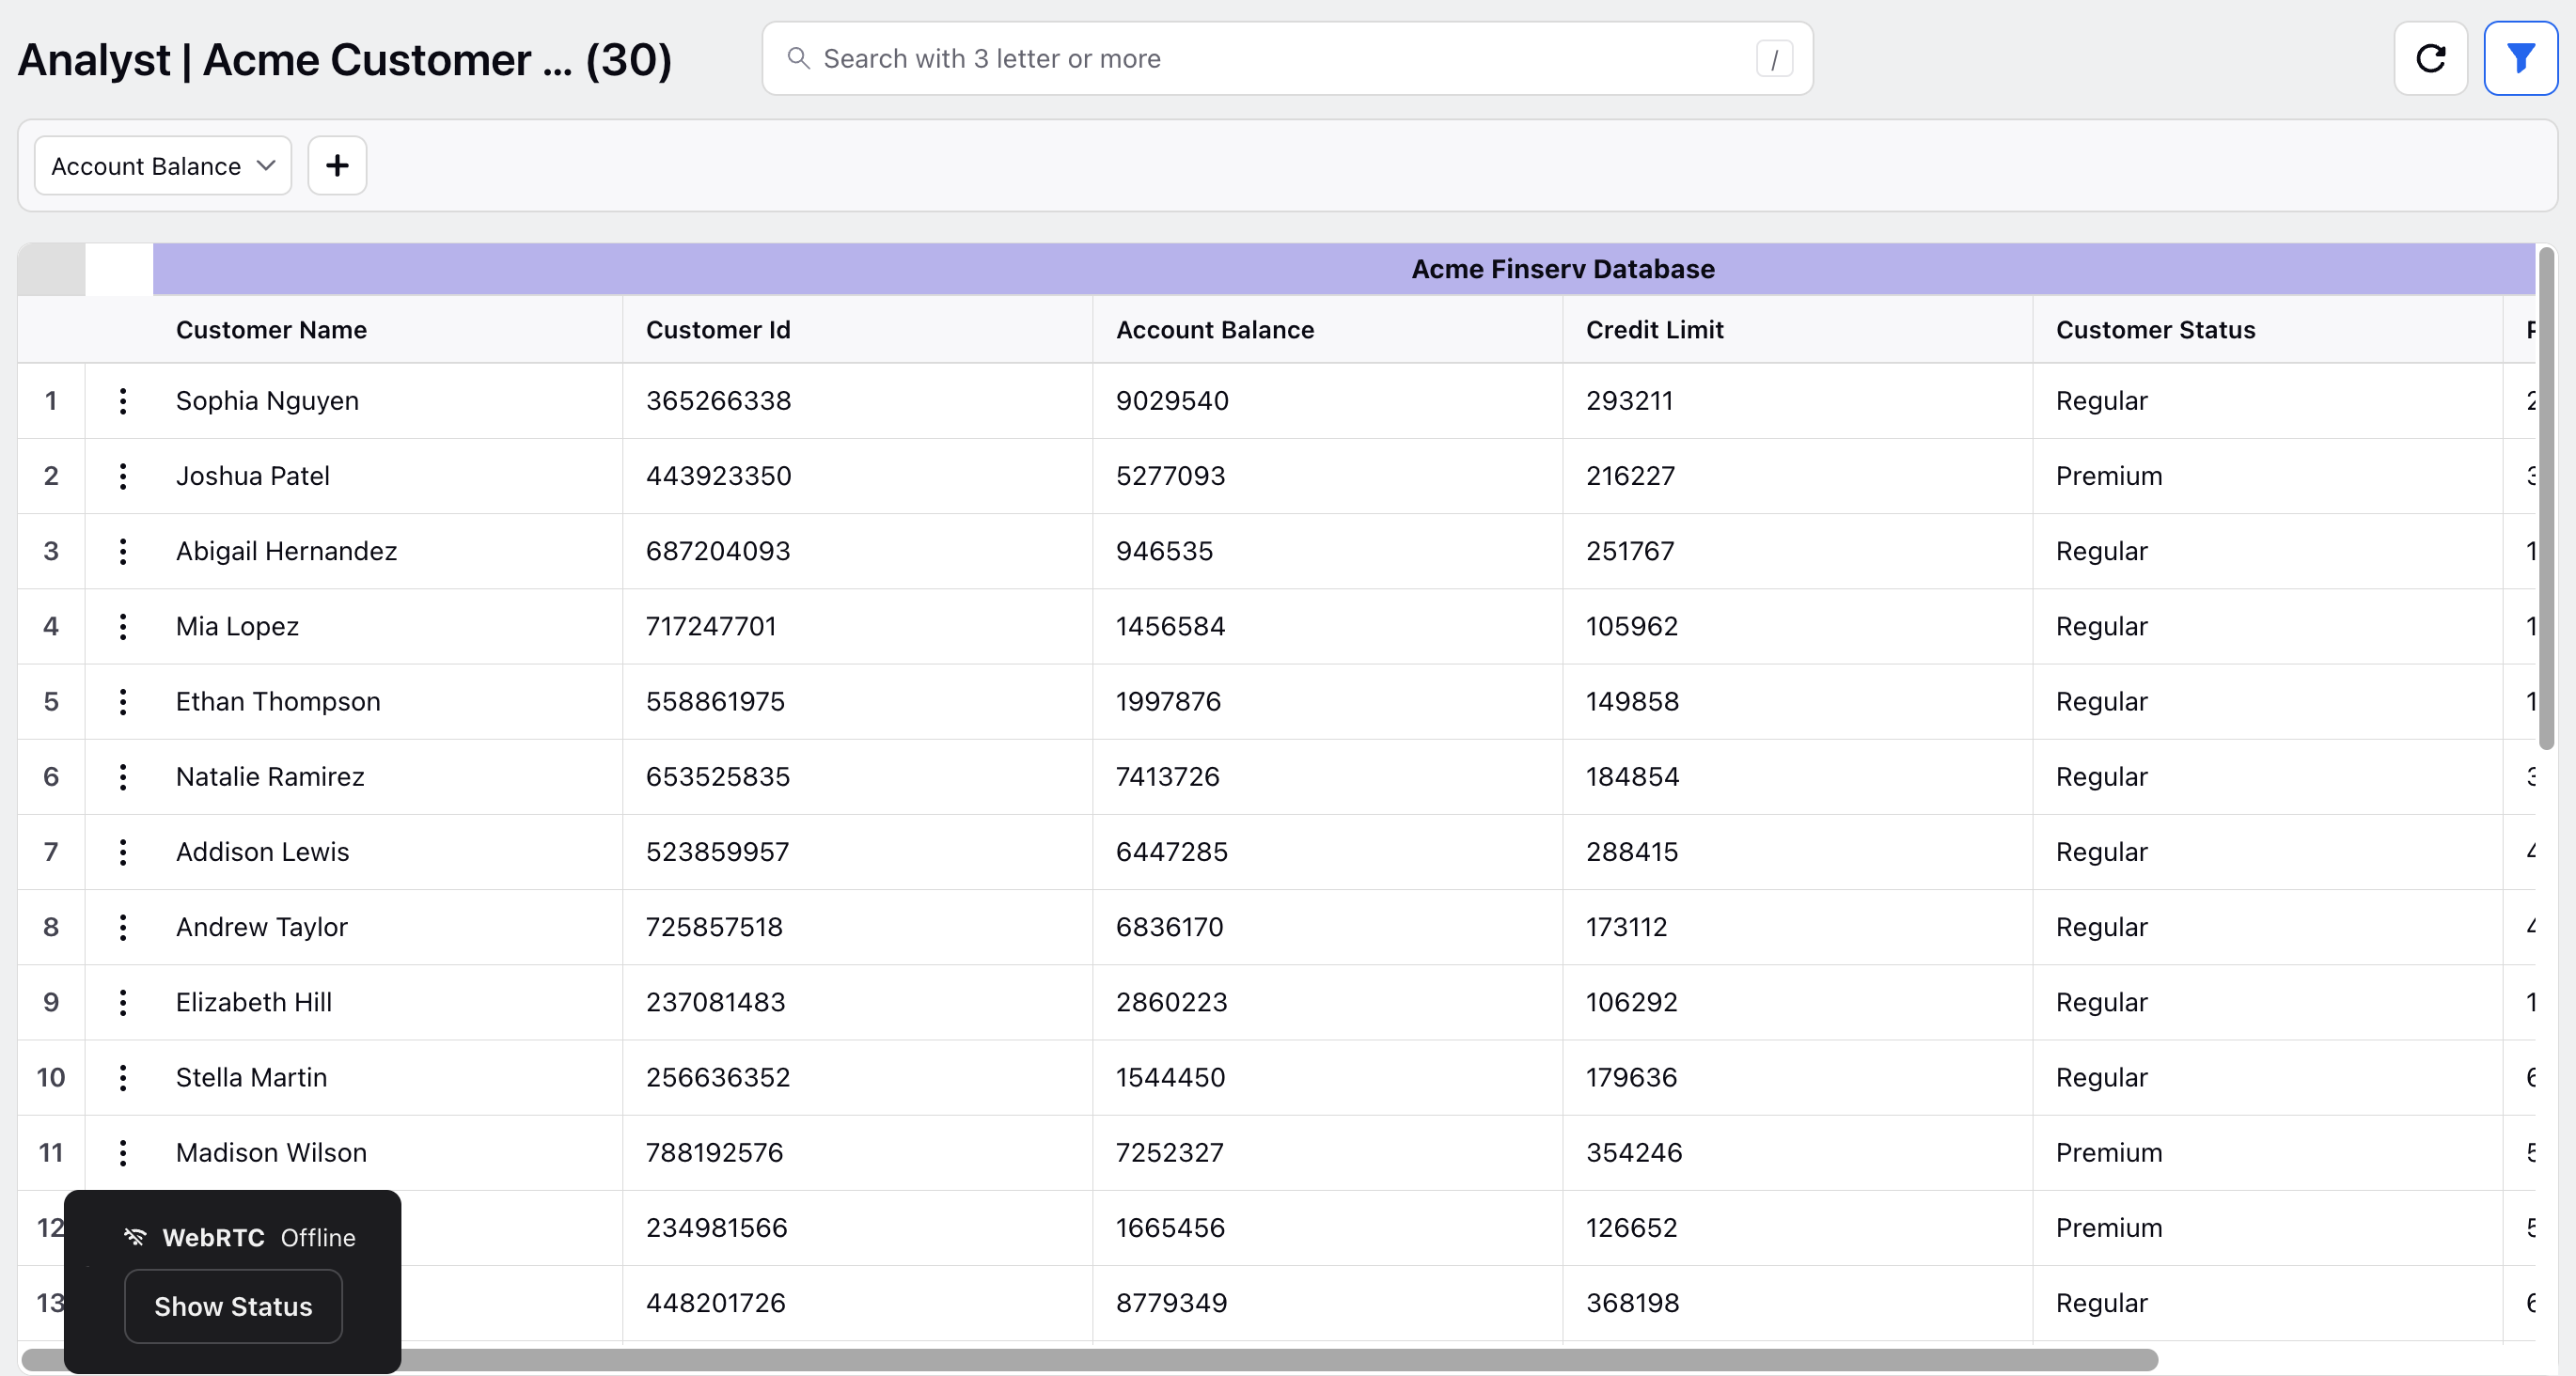
To preview the columns with populated data, simply click Preview at the bottom left corner of the interface. This action will display a preview of the Record Manager, showcasing how the columns appear with actual data populated within them.
Click Save at the bottom the save your Record Manager.
To View the Record Manager
Add the Relevant Record Manager thrught the Persona App (Point 6).
Navigate to the Record Manager window, where you'll find the record of custom entities.
Here, in accordance with the configured header actions, you'll find the Refresh, Search, Sort, Export, etc. options located at the top of the interface. By utilizing the Export function, you can conveniently export the records into an Excel format.
