Entity Manager - Creating Custom Entities in Sprinklr
Updated
Before you Begin
Ensure the custom Entity Manager is visible by configuring it using the Persona App Manager. You will find a list of standard/ custom entities. Ensure you make a new Custom Entity, since the standard entities might be in use.
Permissions
Ensure you have enabled the permissions for Entity Studio through a Global/ Workspace role.

![]() Note: To ensure this feature is enabled, please contact tickets@sprinklr.com and provide the Partner ID and Name. If you are unsure of your Partner ID and Name, please work with your Success Manager.
Note: To ensure this feature is enabled, please contact tickets@sprinklr.com and provide the Partner ID and Name. If you are unsure of your Partner ID and Name, please work with your Success Manager.
Overview
Entity Manager is utilized to manage and create custom entities. These entities serve as a centralized database accessible across all applications within the Sprinklr environment. Additionally, you have the capability to manage pre-created entities.
Creating a Custom Entity
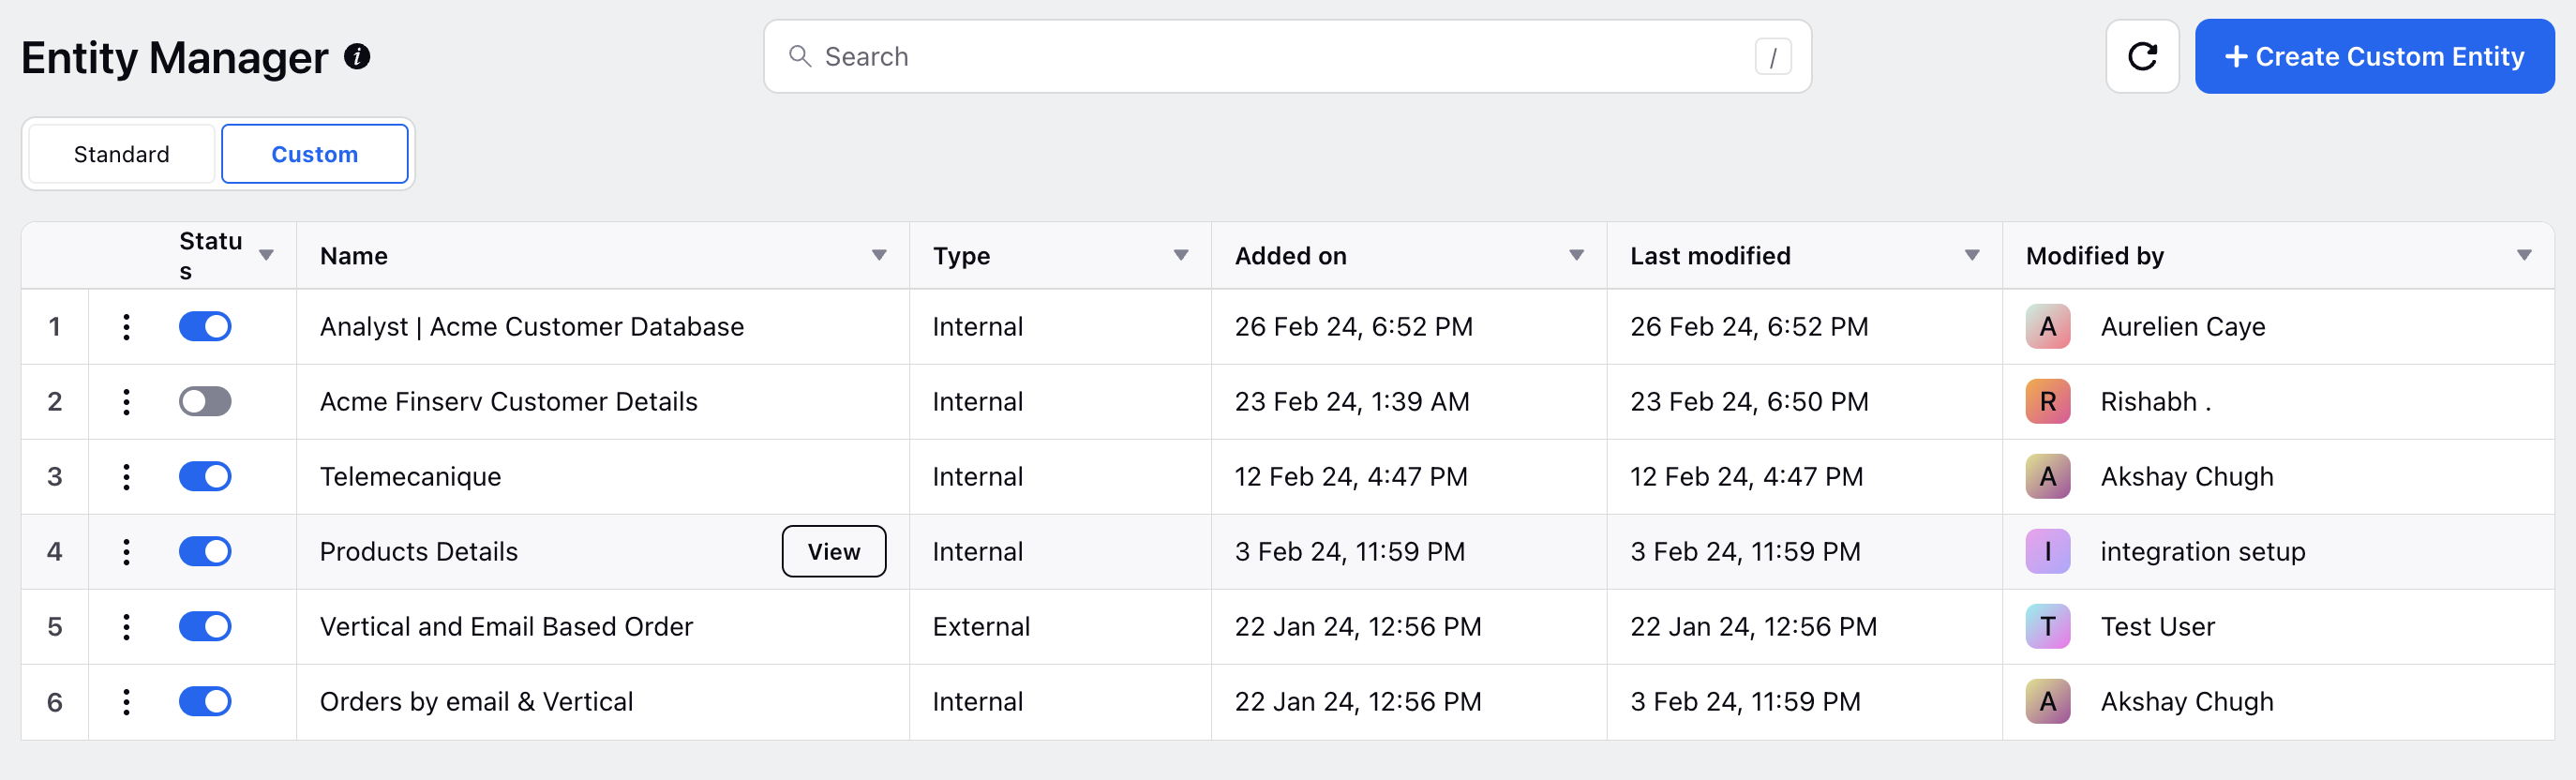
Navigate to the Entity Manager window, where you'll find the standard custom entities already created.
Switch to the Custom tab and click Create Custom Entity located in the top right corner to initiate the creation of new entities.

On the Create Custom Entity window, provide the following details:
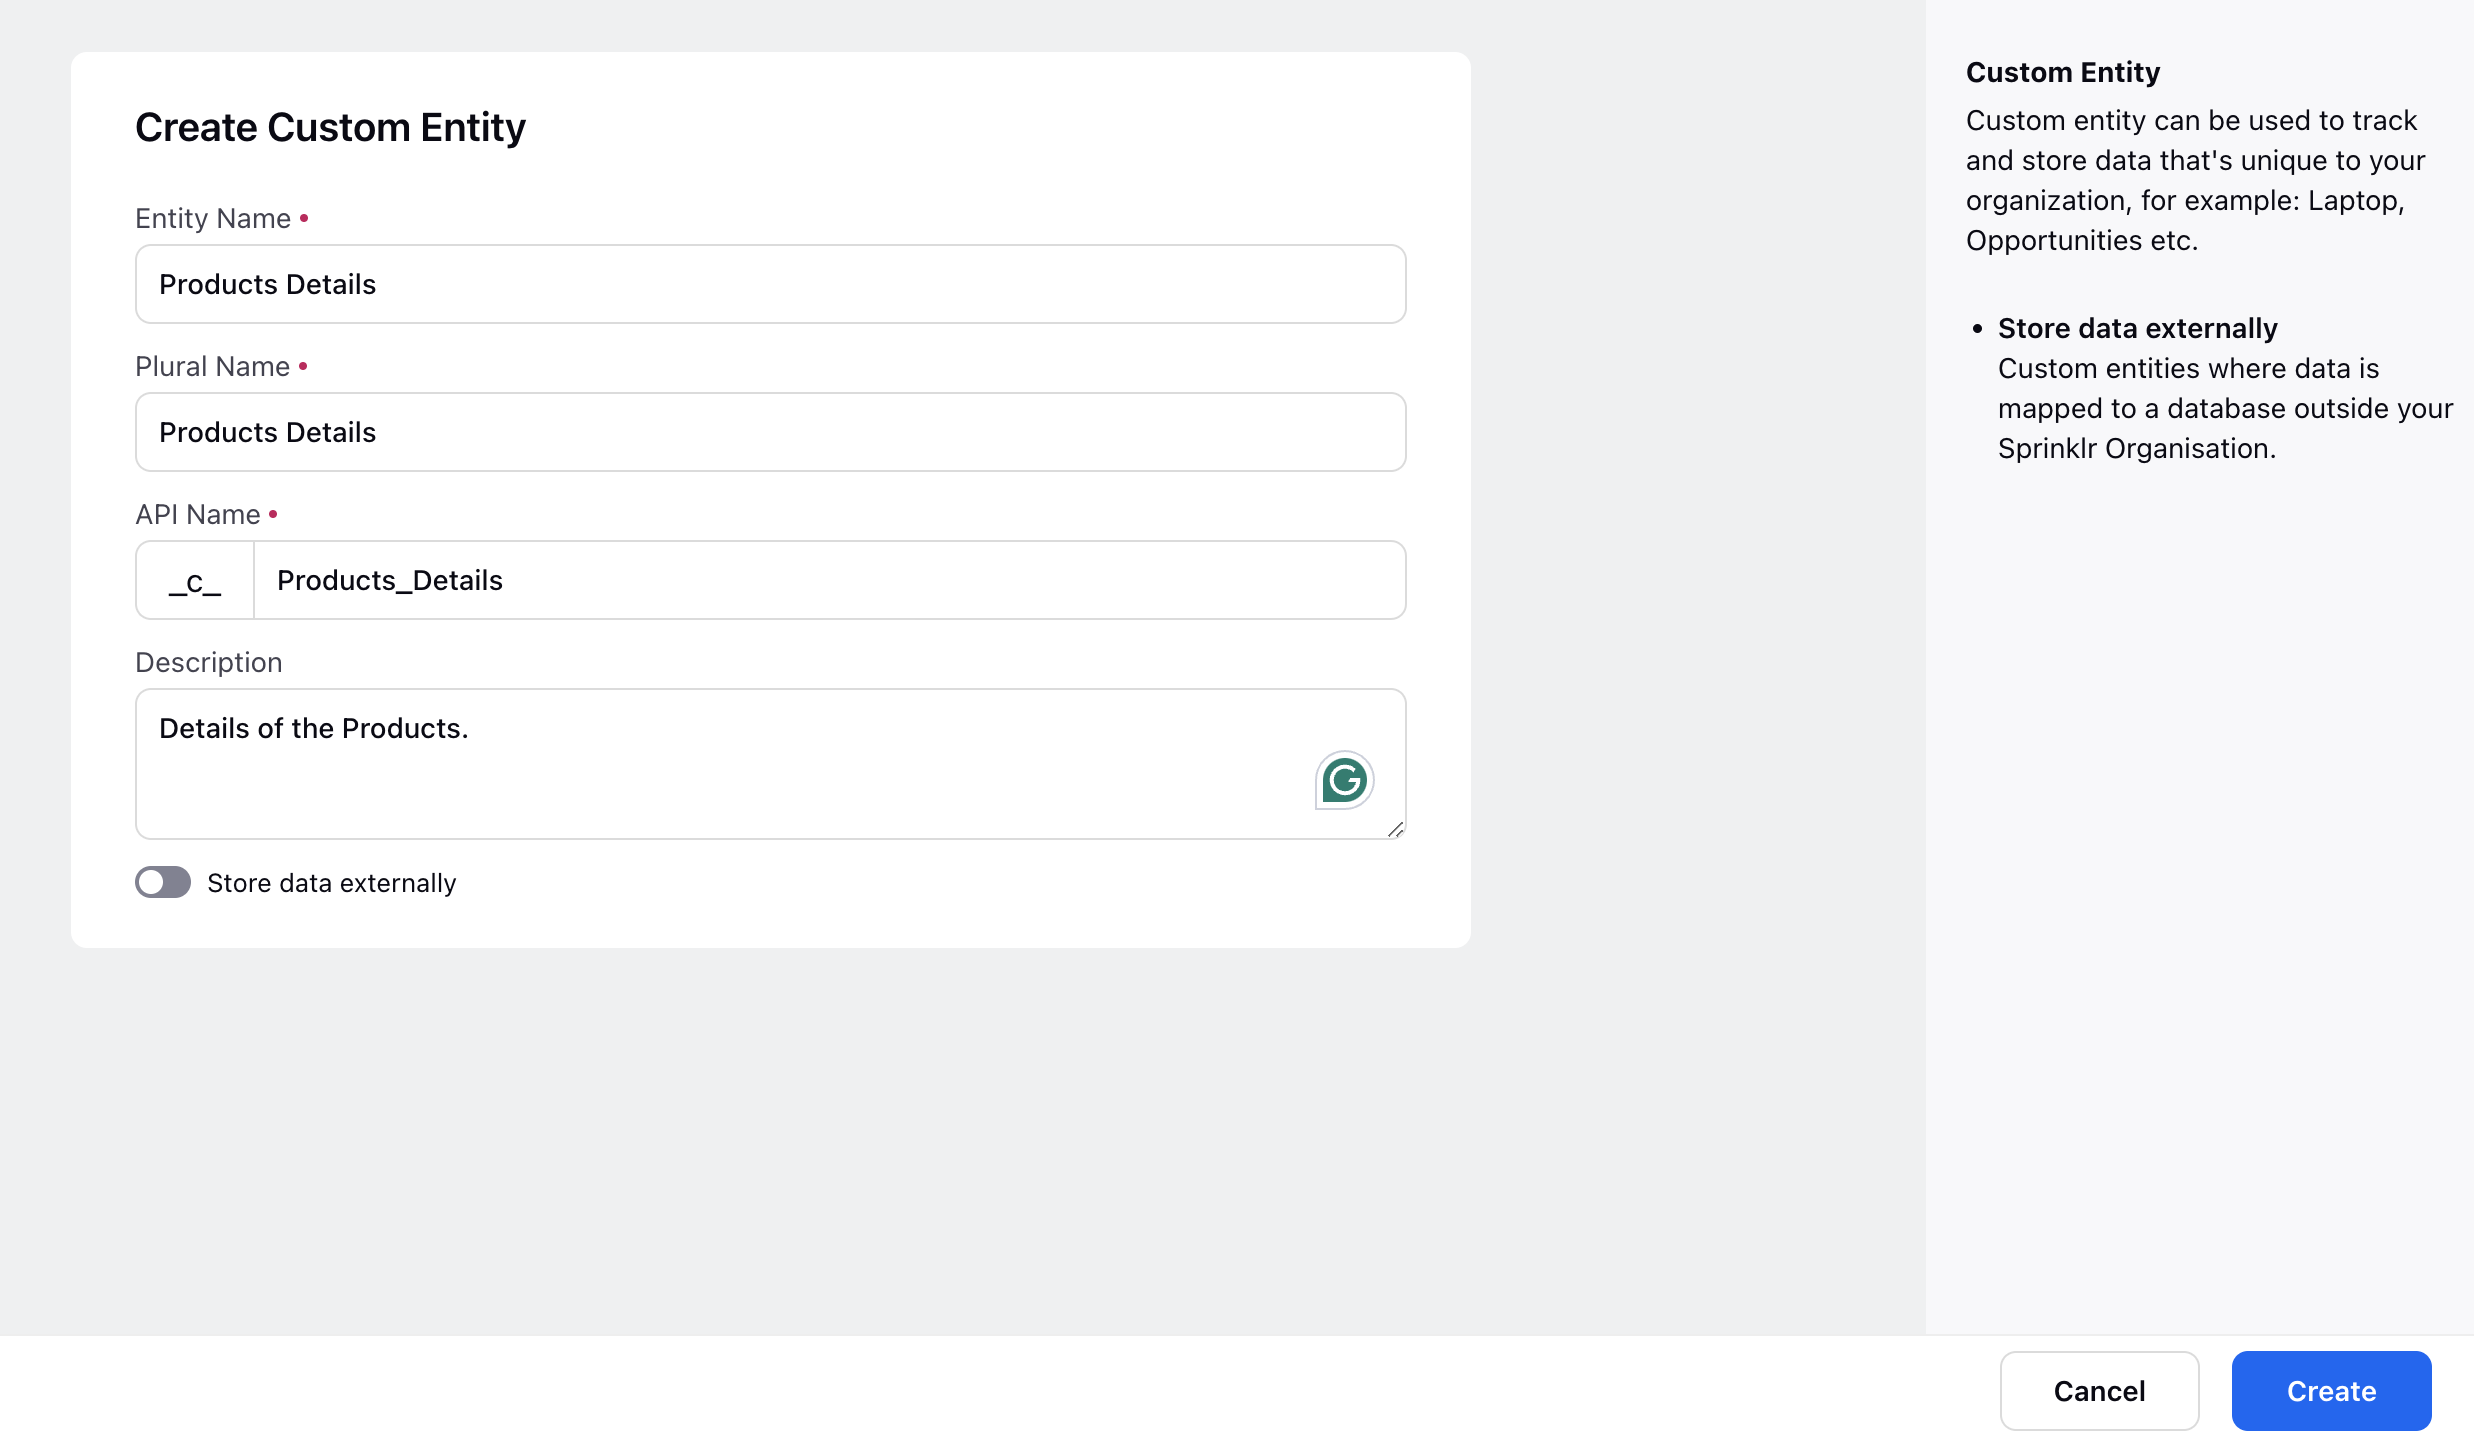
Entity Name: Enter the desired name for the entity.
Plural Entity Name: Specify the plural form of the entity name.
API Name: Use underscores in the API name for consistency.
Description: Optionally, provide a brief description of the entity.
Click Create at the bottom.
To Add Entity Fields
After creating a custom entity, click View alongside it. This action will navigate you to the Fields and Relationships window.
On the Fields and Relationships window, you'll find standard entity fields common to all custom entities.
To add new fields, click Create Field in the top right corner. These entity fields/columns allow you to capture relevant information related to the entity in a format of your choice.

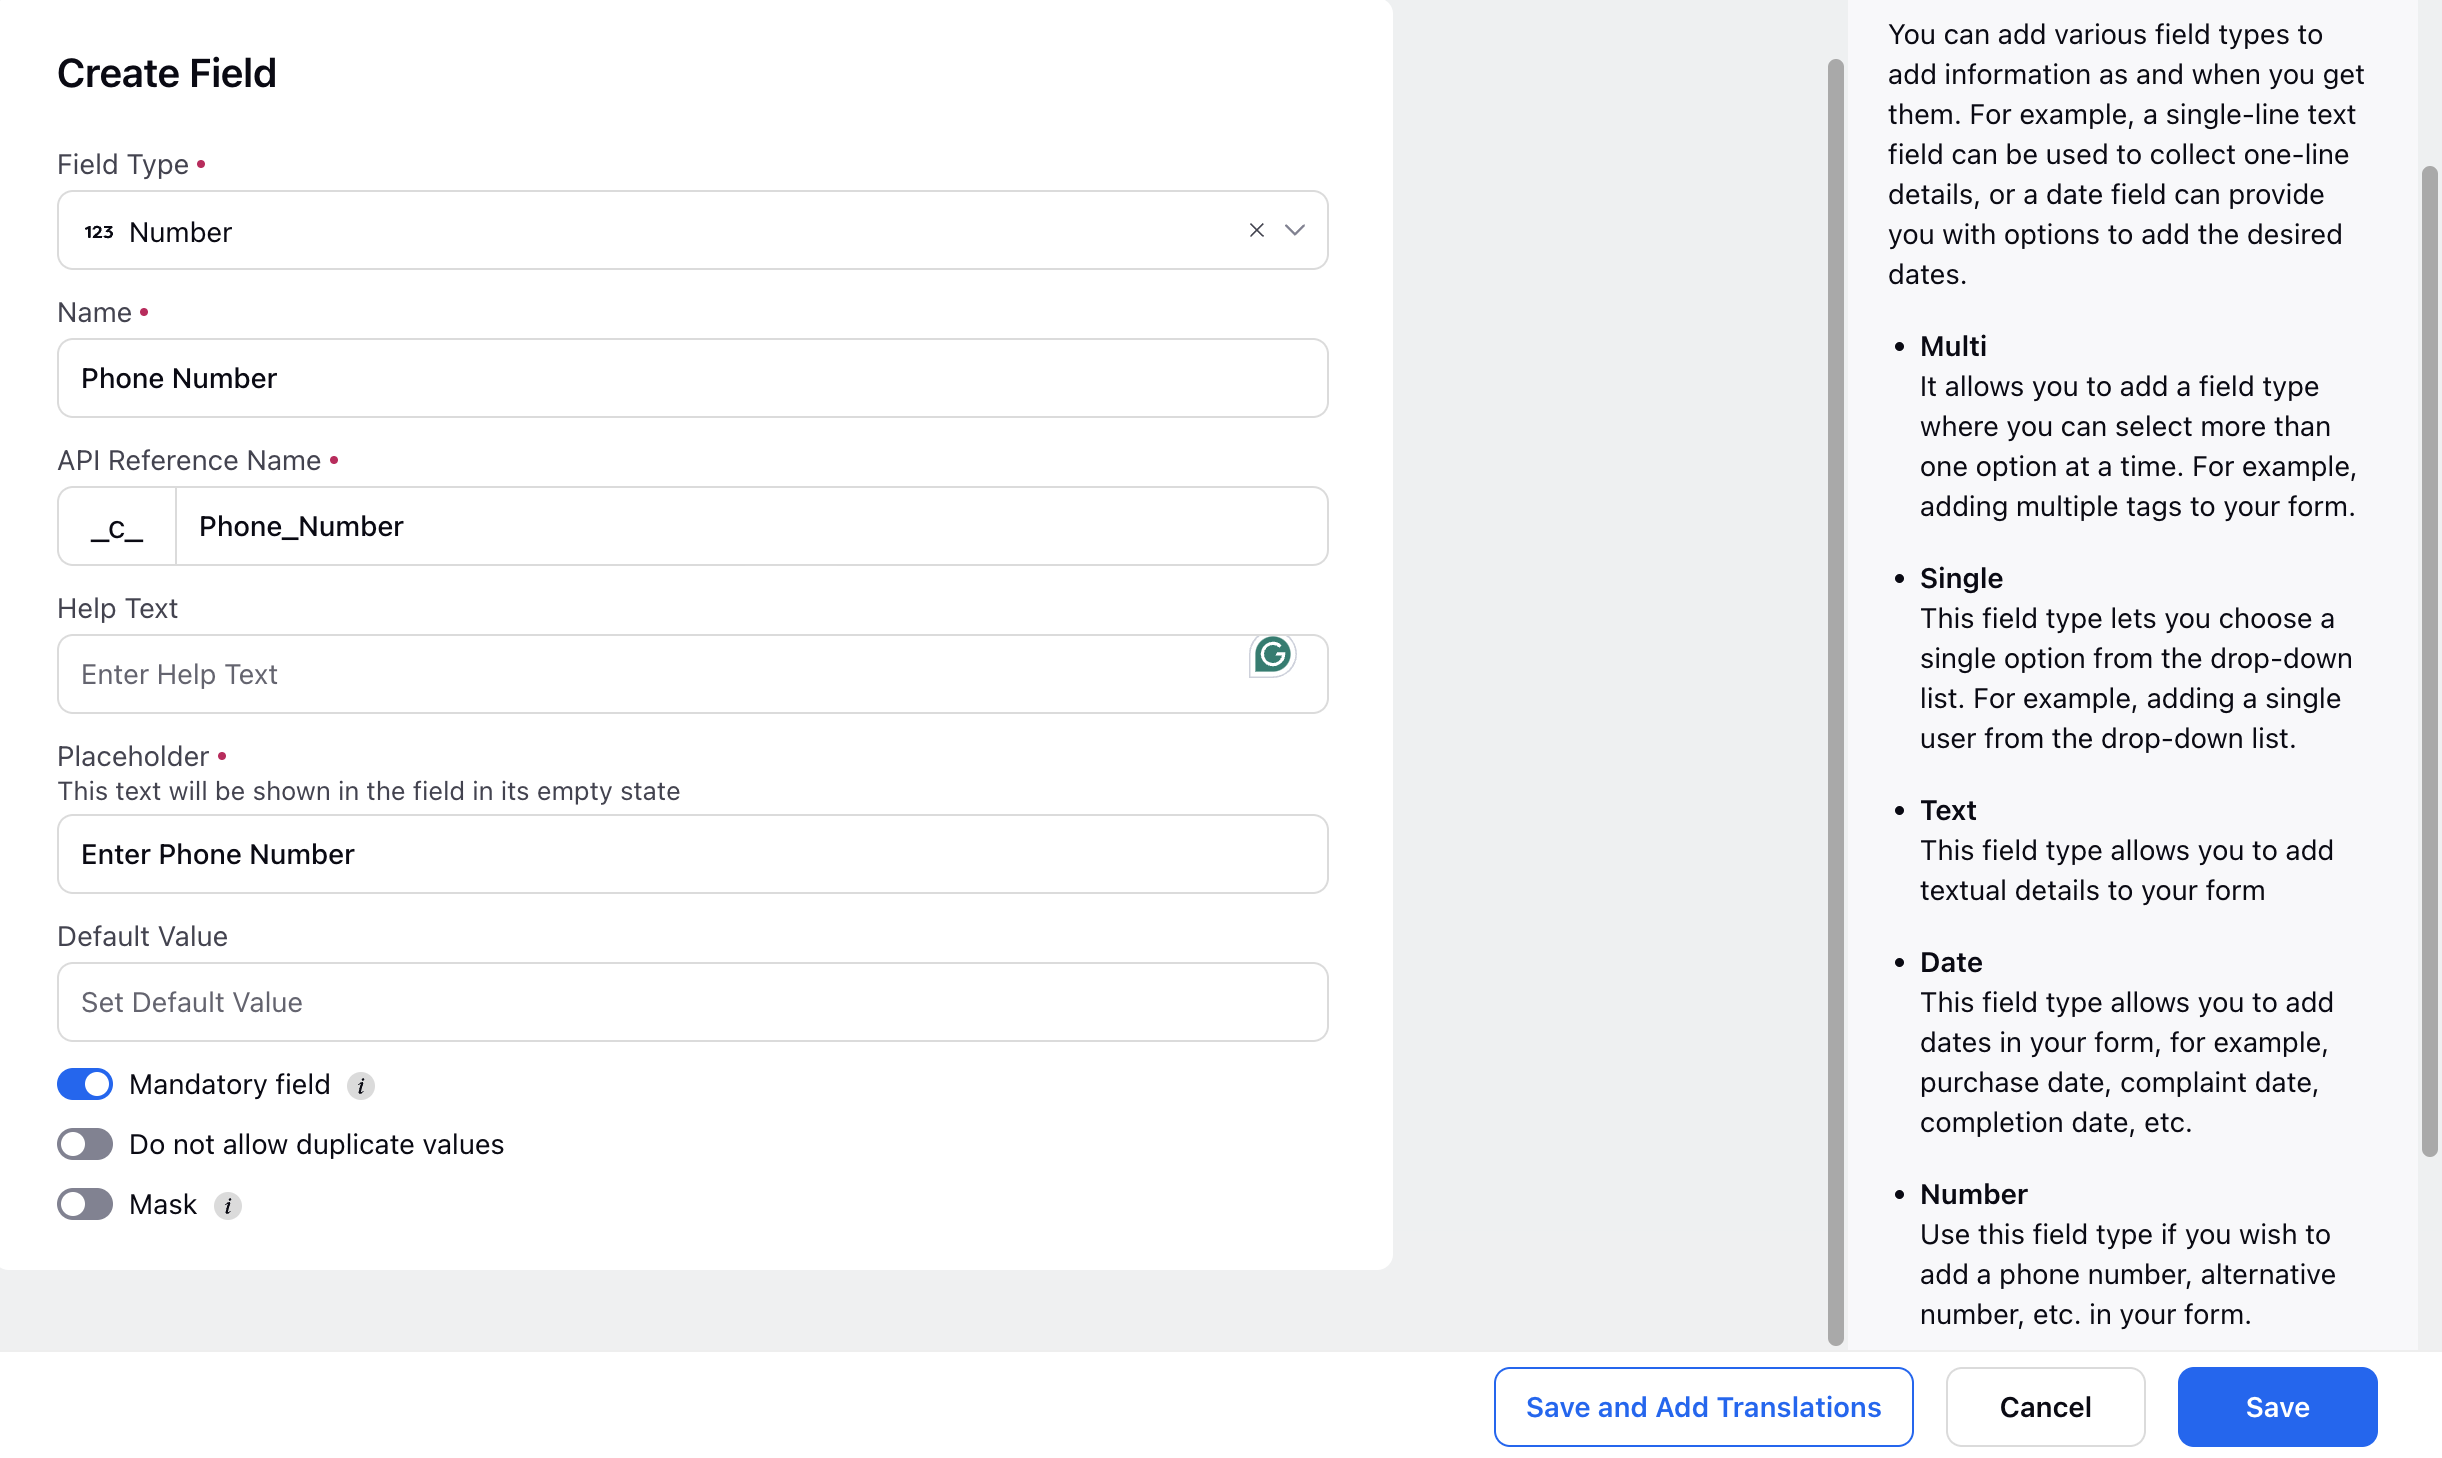
On the Create Field window, select the desired Field Type, such as Text, Number, Date, Single Select, and so on.
 Note: Support of Case Queue is now present while creating fields in Custom Entity. When the Field Type is set to Lookup, you have the option to select Case Queue as the lookup entity. Choosing this option enables the field to reference available Case Queues.

Specify the Name and API Reference Name for the field.
Add Help Text and a Placeholder for the field. The placeholder text will be displayed when the field is empty.
Mark the field as Mandatory if you need the field to be captured while capturing all other fields
Click Save at the bottom to create the field.
If you need to make any changes later on, simply click Edit alongside the respective field.

Some entitiy fields are created by default. These fields will not have "_c_" preceding their name in the API Reference Name column.
Create the fields you would like to use instead of overwriting the pre-exisiting standard fields.
Next Steps
You can now use these Custom Entities in a Dialogue Tree node. Please note, you will have to add records throught the Dialogue Tree node or through a file using the Data Connector to start populating data in the fields
You can view any records added to fields using the record manager. It can be created from the Entity Manager, and the view can be set using a persona app. To learn how visit the article on Dynamic Record Manager.