Create an Address Template for WhatsApp Business
Updated
Businesses based in Singapore, catering to Singapore customers, and those based in India, serving Indian customers, can leverage the address message templates on WhatsApp. The template contains a call-to-action (CTA) button that prompts the users to interact with the message, providing a convenient and streamlined way for them to share their shipping addresses.
Sample Singapore Address Message
|
|
|


Supported Address Fields by Country
The below table outlines which fields are supported in which country specifically.
Display Label | Input Type | Supported Countries | Limitations |
Name | text | India, Singapore | None |
Phone Number | tel | India, Singapore | Valid phone numbers only |
Pin Code | text | India | Max length: 6 |
Post Code | number | Singapore | Max length: 6 |
Flat/House Number | text | India | None |
Floor Number | text | India | None |
Tower Number | text | India | None |
Building/Apartment Name | text | India | None |
Address | text | India, Singapore | None |
Landmark/Area | text | India | None |
Unit number | text | Singapore | None |
City | text | India, Singapore | None |
State | text | India | None |
To Create an Address Template in Digital Asset Manager
Click the New Tab icon. Under the Sprinklr Social tab, click Assets within Engage.
In the top right corner of the All Assets window, click Create Asset and select Omni Chat Templates from the dropdown.
On the Create New Asset window, enter a Name and optional Description for your asset under the Basic Details section.
Under the Asset Specific section, select WhatsApp Business from the Channel dropdown and Address from the Template Type dropdown.
Under the Message Details section, you can input the Header, Message, and Footer for your template. This allows you to customize the content of your message to suit your specific needs.
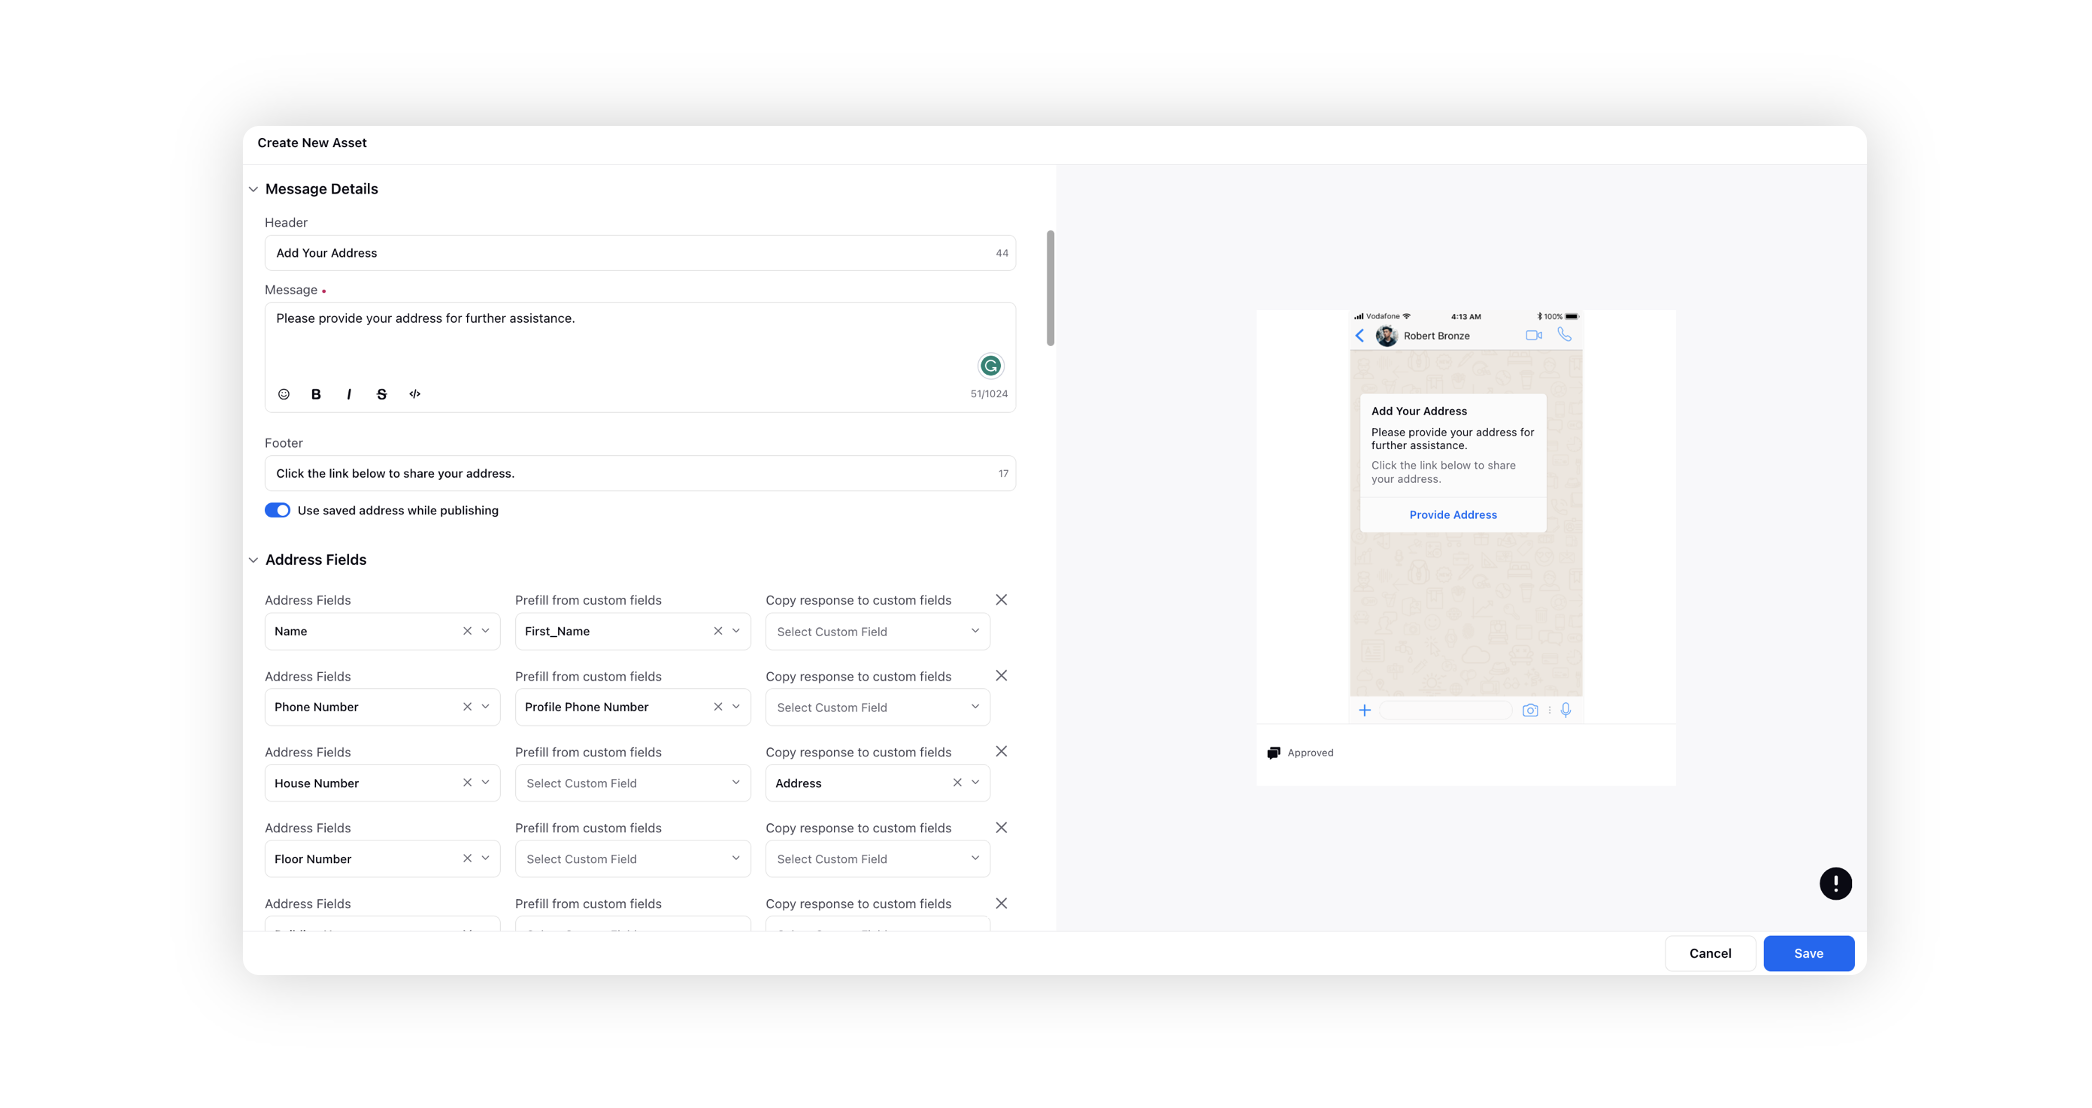
Enable the toggle for Use saved address while publishing to include saved addresses linked to the user's profile. These addresses are stored at the profile level for each user. Users can conveniently choose from their saved addresses instead of manually entering the information.

Under Address Fields, include the relevant fields like building name, house number, pin code, city, etc. Keep in mind that the supported address fields may vary depending on the country code. See Supported Address Fields by Country.
You can prefill certain address fields from custom fields to make it easier for users to complete the form. Additionally, you have the option to copy address fields received through customer replies to different custom fields in Sprinklr.
In the Asset Details section, choose the relevant details for the asset, including Campaigns, Sub Campaigns, Status, Expires on, Tags, Restricted settings, and the Folder in which the asset should be categorized. This information helps organize and manage assets effectively within the system.
Next, enter the Properties per your needs.
Under Asset Sharing, select Workspace(s) and Users/Users Group(s) you want to share this asset with. You can also check the box alongside Visible in all workspaces to share the asset with all workspaces.
Click Save in the bottom right corner.
Once the user submits the address message form, Sprinklr receives a webhook notification which contains the details of the address submitted by the user.
![]() Note: Please refer here for more details on the address template.
Note: Please refer here for more details on the address template.