Create a post using the Quick Publisher
Updated
Leverage your social account in the best possible way using Sprinklr's social publishing tool which provides you with key publishing functionalities to enhance the content you publish. In this article, we will go through the key features of Quick Publisher.
Steps to create a post using the Quick Publisher
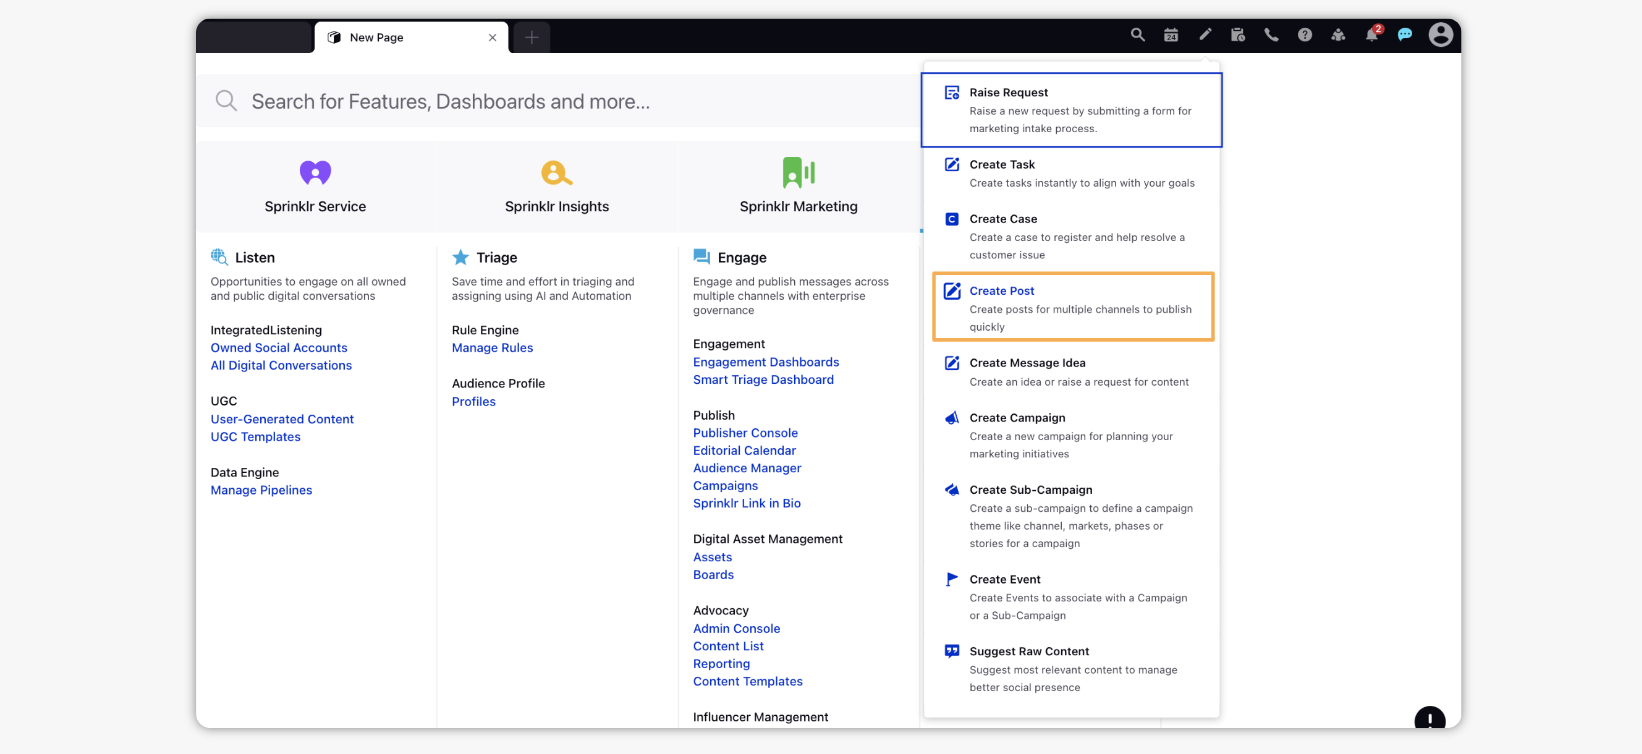
Click the New Tab icon
. Click the Publishing Options icon in the top right corner of the Navigation Bar. Select the Create Post option from the available dropdown.
By default, the scale down version of the Publisher will open for quick access. To open the maximized view of the Quick Publisher, in the Create Post window, select the Maximize icon in the top right corner to open the expanded Create Post window.
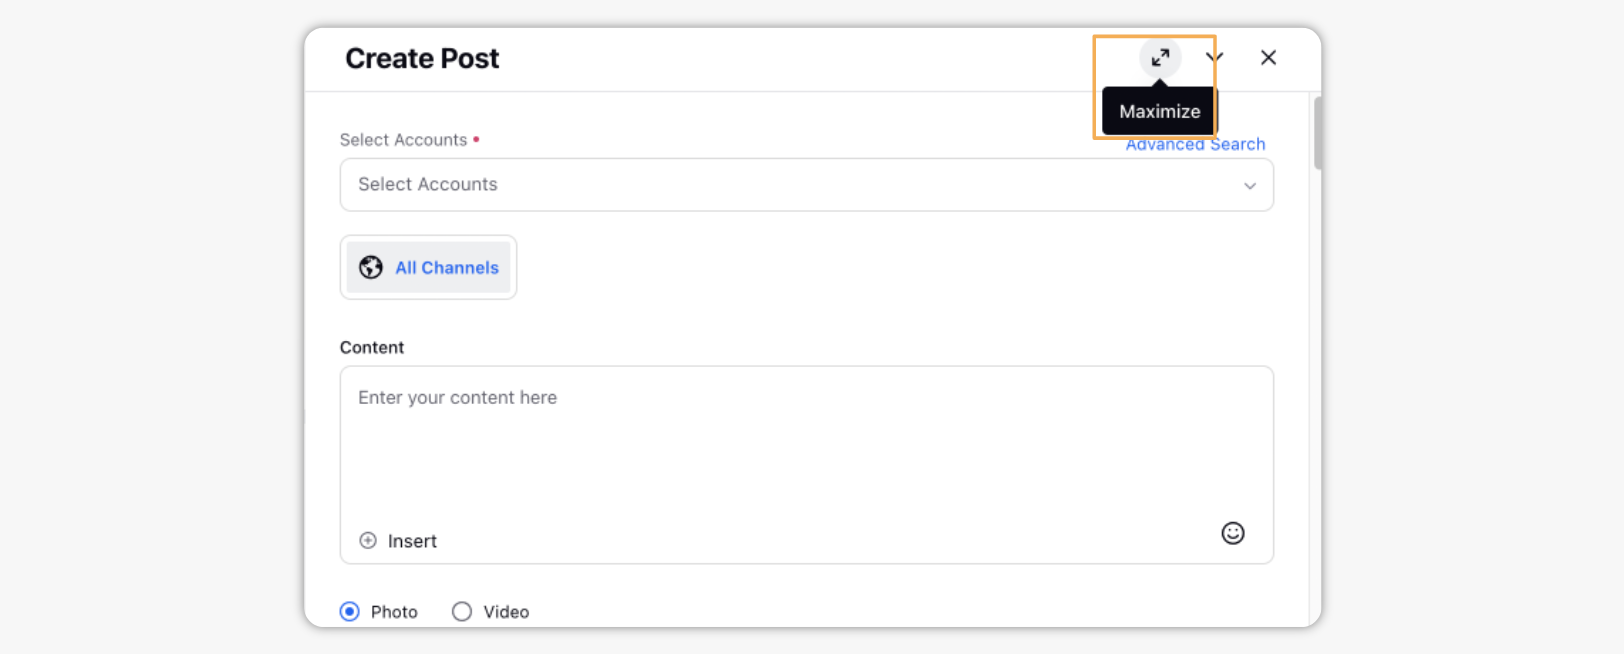
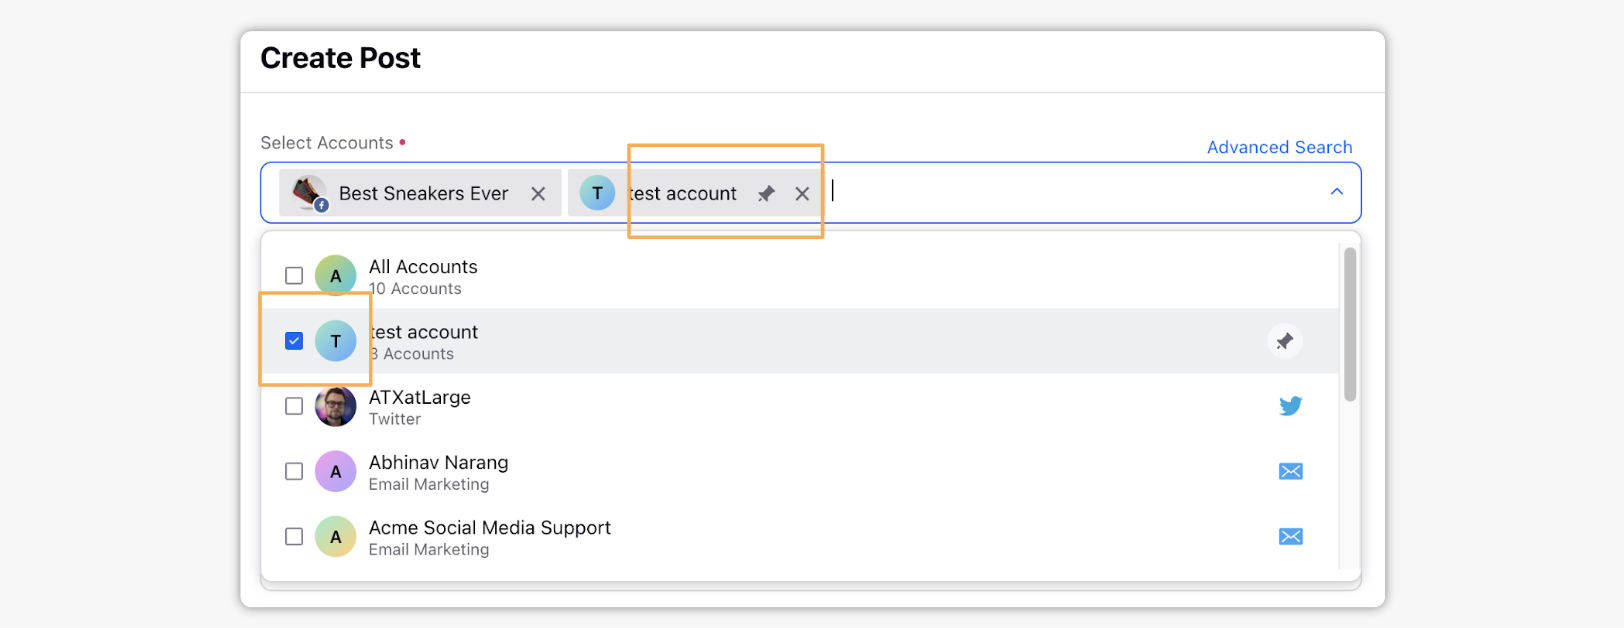
In the Create Post window, search and select the required Account from the Select Accounts field.
 Note:
Note: Active and Inactive accounts are displayed separately in Select Accounts dropdown, allowing users to easily distinguish between them in the publisher. Active accounts are shown first ensuring that users can quickly access the most relevant and currently used accounts, with inactive accounts listed afterward for reference.
However, this capability needs specific setup. Get in touch with your Success Manager to get this capability enabed in your environment.
Note: Use DP: PUBLISHING_DEACTIVATED_ACCOUNTS_VISIBILITY_ENABLED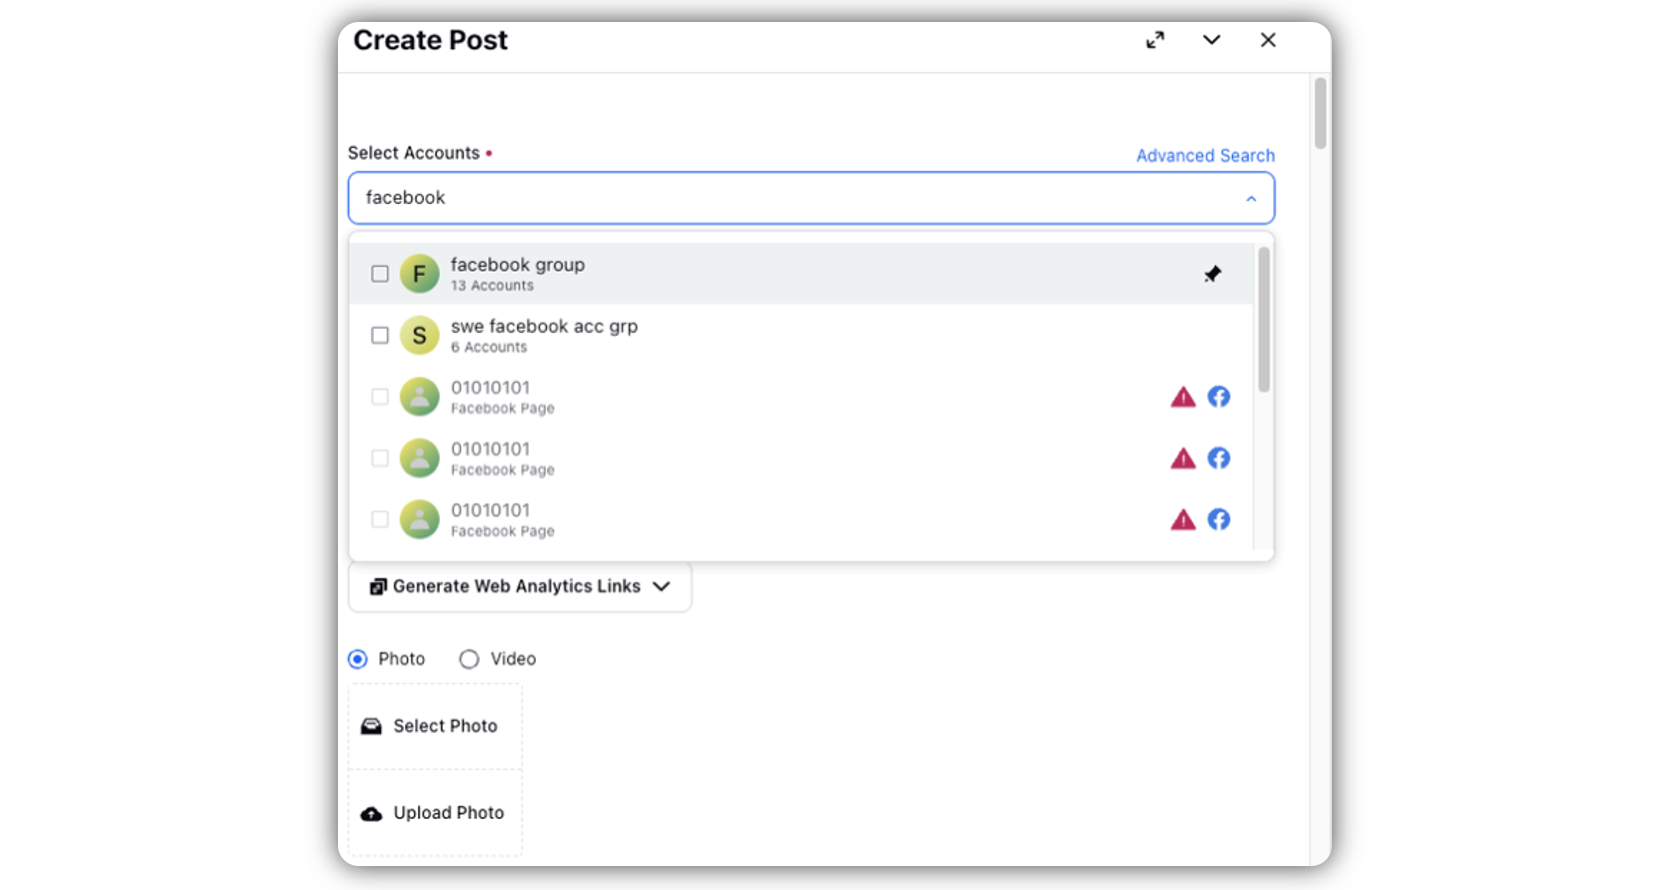
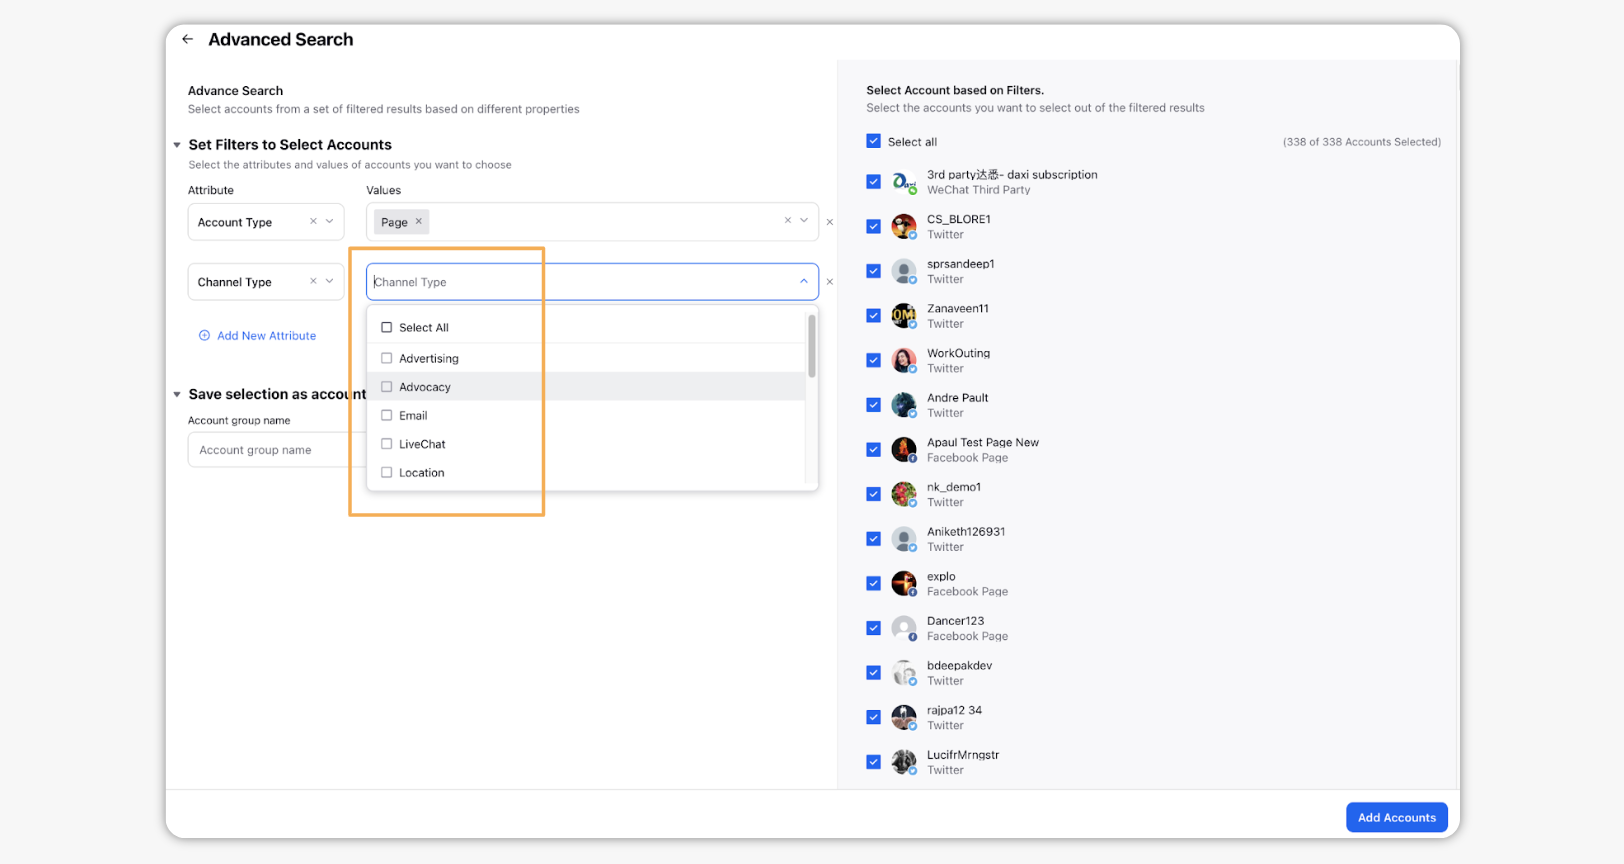
You can also use Advanced Search to narrow your searches by a series of various filters.
If you want an account(s) to show up in the Publisher, you can Pin your favorite account(s).
To Pin an account(s), select the checkbox alongside the account(s).
To remove the Pin from the account(s), unselect the checkbox alongside the account(s).
Once you have selected the Account you would like to publish to, enter the content for the post. You can also add Custom Links, Content Placeholders, previously created Text Templates, or YouTube Videos to the post by clicking the Insert icon
in the bottom left corner of the Message box.
Click the Emoji Picker icon from the Message box to open the emoji menu. Use the icons at the top to browse categories, or search the emoji. Click your chosen emoji, and it'll be added to your message.
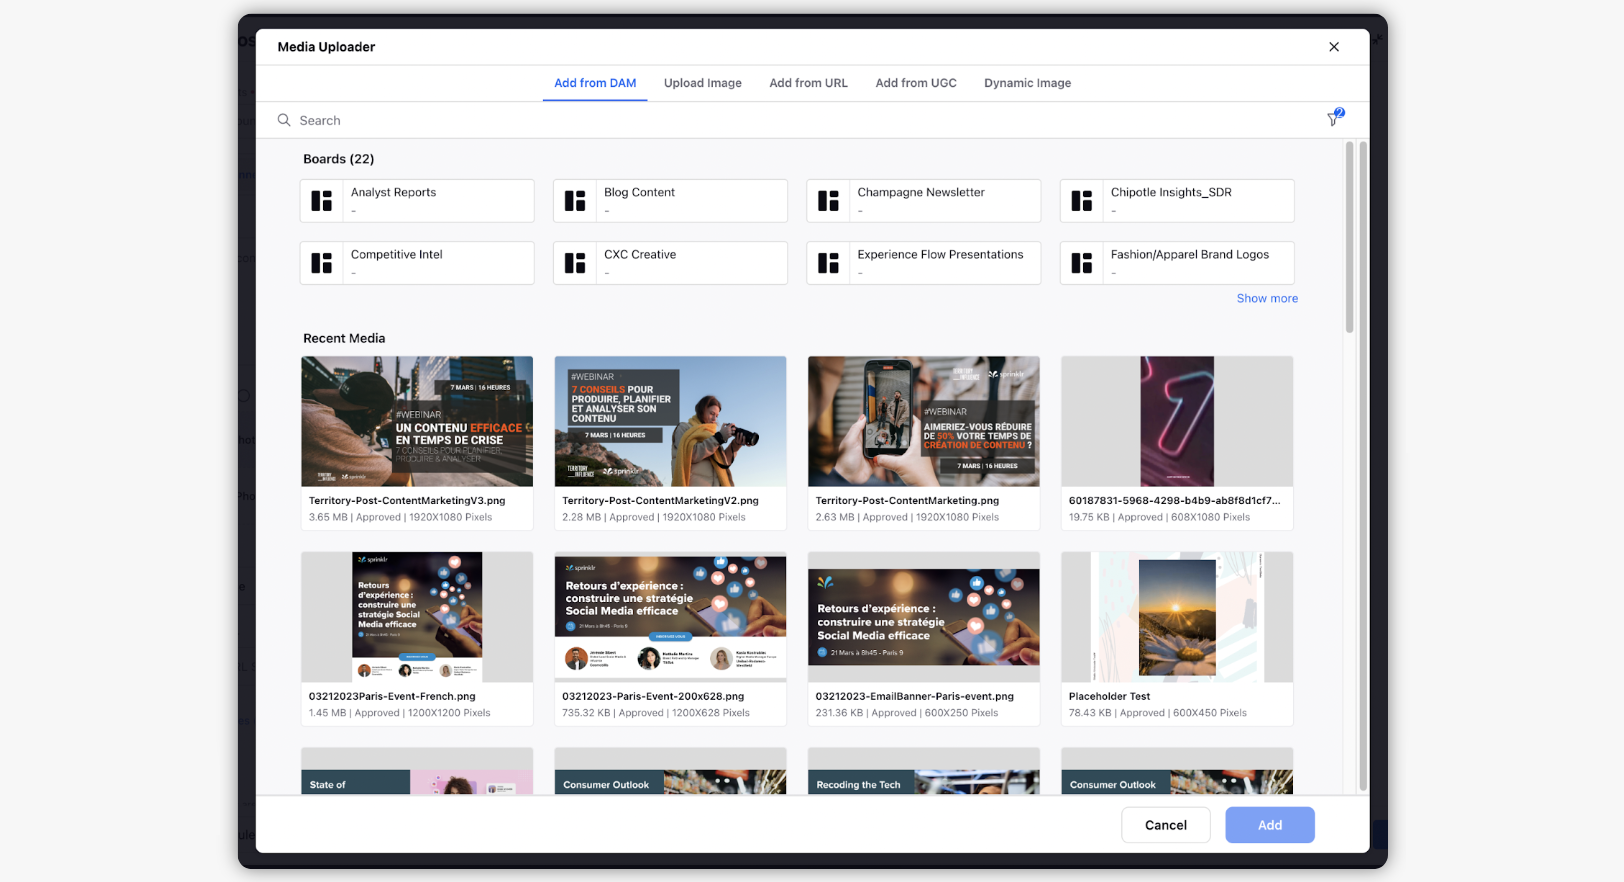
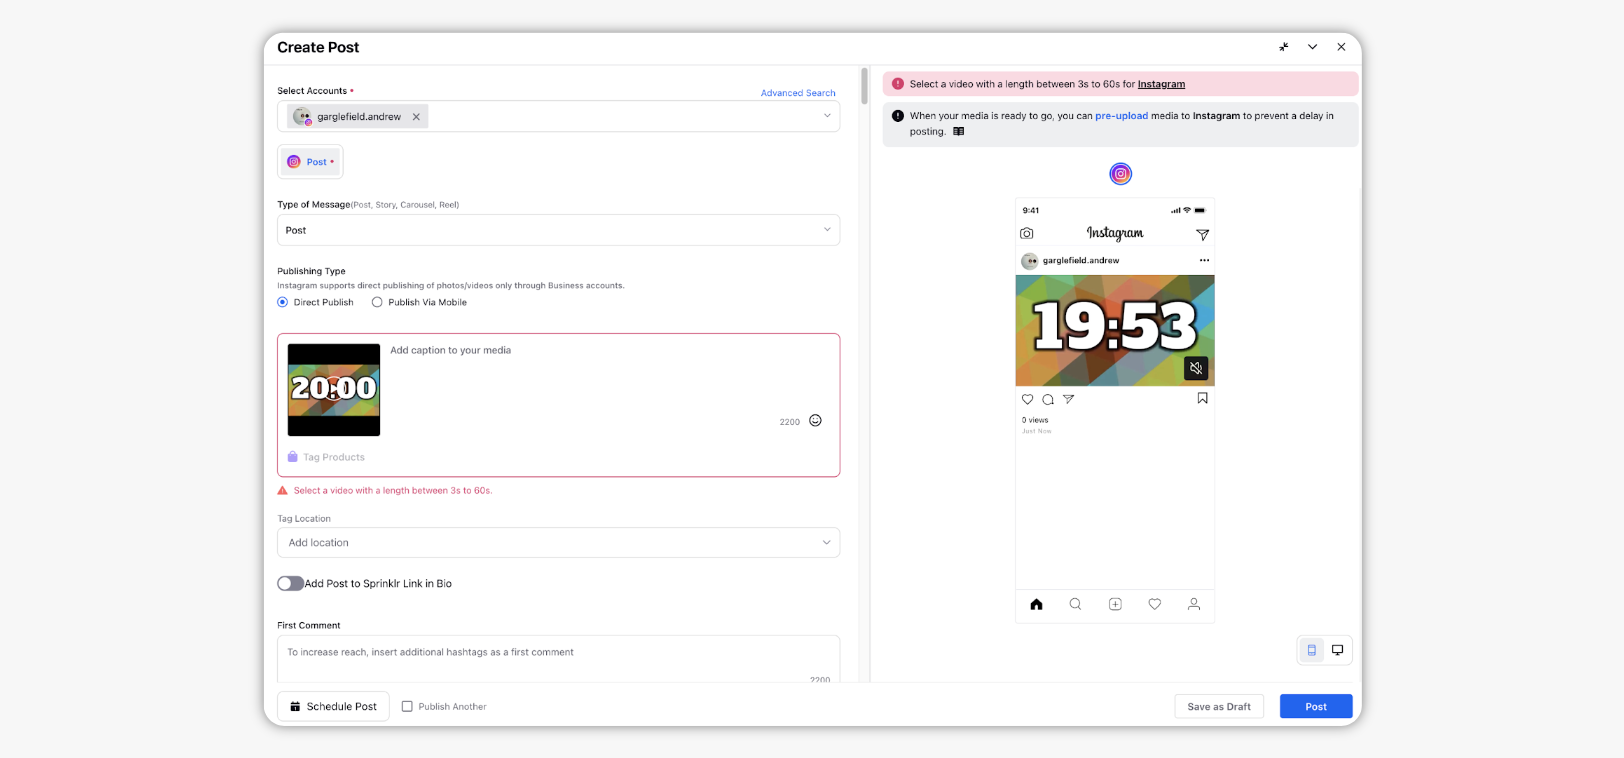
Either select Photo to add an image/GIF or select Video to add a video. Next, click the Select Photo icon to open the Media Uploader window. To directly upload an Image/Video, click Upload Photo/Video and select a file from your device (alternatively drag and drop from your device).
In case you are uploading multiple images, you can easily re-arrange the media, once uploaded in Quick Publisher, to publish the content as per the desired order, without removing the selected media.
Note: Media rearrange capability needs special setup. Get in touch with your Success Manger to get this capability enabled in your environment.

The preview of the post will render on the right pane.
For the scaled-down version, you can click the Preview icon in the top right corner of the Create Post window.
In the maximized Create Post window, select your desired Account(s) and the preview of the post will be enabled in the right pane. This allows a preview of how your post will appear on the social channels before publishing.
To enable the desktop preview, click the Desktop icon in the bottom right corner of the Preview pane.
Click Post in the bottom right corner to publish the content on the selected account immediately. If you are not ready to publish and want to save your post as a draft, click Save as Draft.
You can also schedule your post for a future date and time by clicking the Schedule Post icon in the bottom right corner. Select the desired Time Zone from the drop-down menu in the top of the Scheduler box. Select the month, date, and time of publishing. Click Apply to save your changes.
To continue publishing the post, check the given Publish Another box at the bottom.
To know more on how to publish on a specific Social channel please check out the following -
Create a post on LinkedIn

Additional Capabilities in Quick Publisher
Schedule Recurring Drafts
To schedule recurring drafts, please follow these steps while creating a post from Quick Publisher -
Click the Schedule Post icon in the bottom left corner to schedule your post for a future date and time. Select a date for scheduling from the given calendar.
From the Repeat Post field dropdown, select an option as when to repeat your post from these options:
Does Not Repeat
Repeat Daily for a Week
Repeat Weekly for a Month
Repeat Fortnightly for a Month
Repeat Monthly for a Year
Custom Repetition
The Does Not Repeat option will be set as default.
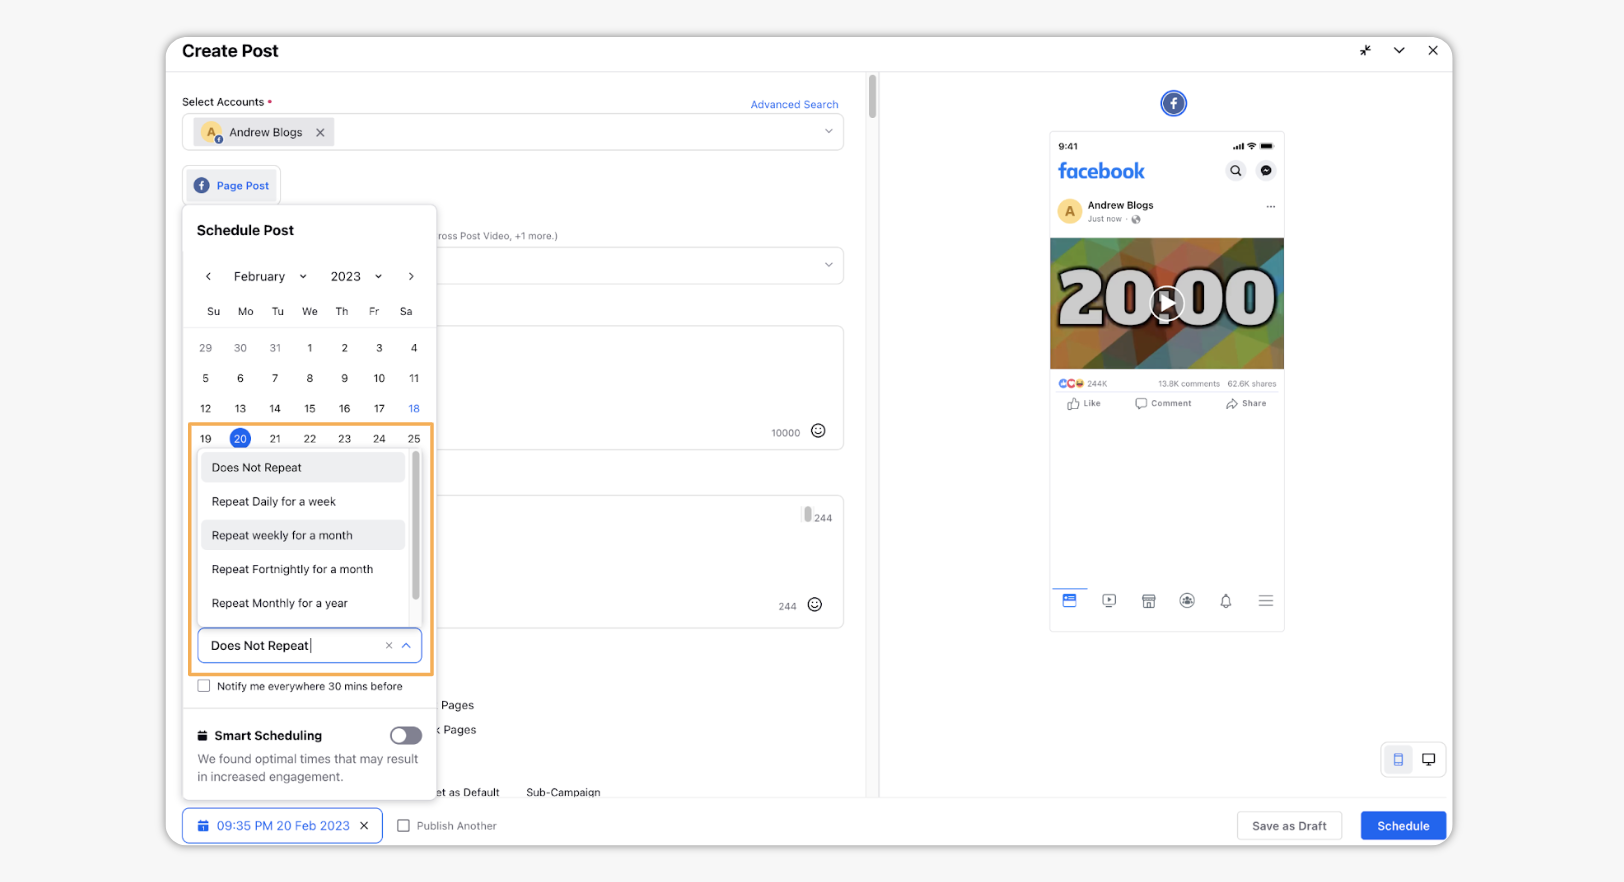
Check the Notify me everywhere 30 minutes before checkbox to set reminders for the scheduled post.
Additionally, you can set the customize repetitions and notifications by selecting Custom Repetition from the Repeat Post field dropdown.
Click Apply to save your changes.
Smart Scheduling
Smart Scheduling intelligently picks out the best time to publish based on the time of the day and selected account. Using Smart Scheduler you can select a date and get multiple recommended time slots on that date. You can also take into consideration your already scheduled posts to ensure gaps between posts. To know more about Smart Scheduling, please check out Find best time to publish using Smart scheduling.

Enhanced Error and Warning Systems
Errors to posts such as image size, custom property field missing, miss-matched campaign are surfaced and hyper-linked for easy identification of errors directly within your draft message. This capability improves the publishing experience, reduces errors, and saves your time across multiple channels and accounts.
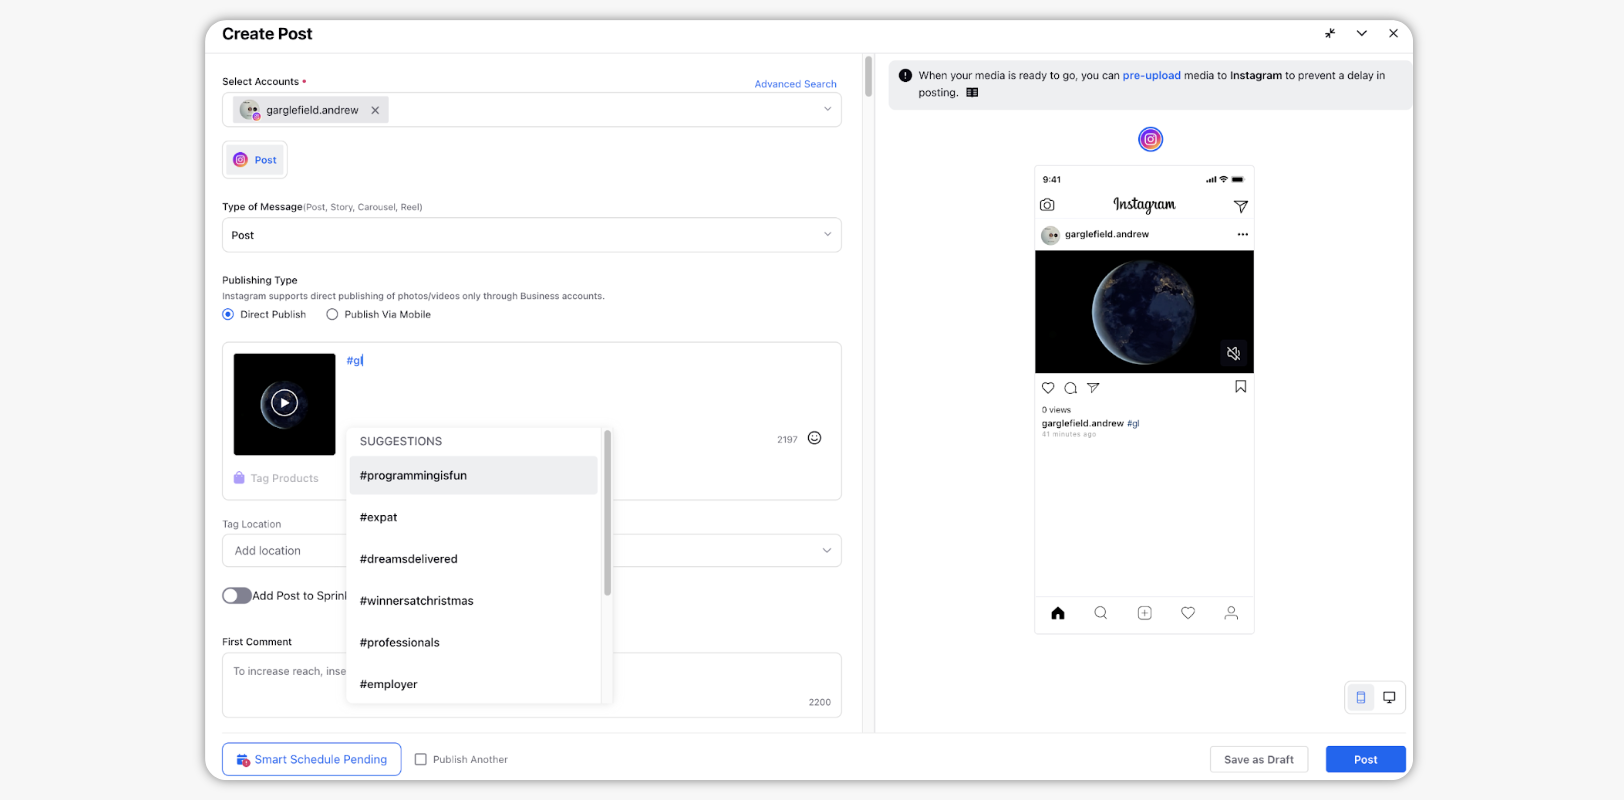
Recommended Hashtags
On publishing to Instagram Account in the Sprinklr platform, you will be suggested with Recommended Hashtags based on the hashtag that you entered. Additionally, you can enter the content or hashtags under the First Comment box.
Post and Boost Posts simultaneously
Boost posts immediately after publishing in a single click from the Quick Publisher. This will allow you to publish and boost your content efficiently so that you do not have to take numerous steps to complete your daily regime.
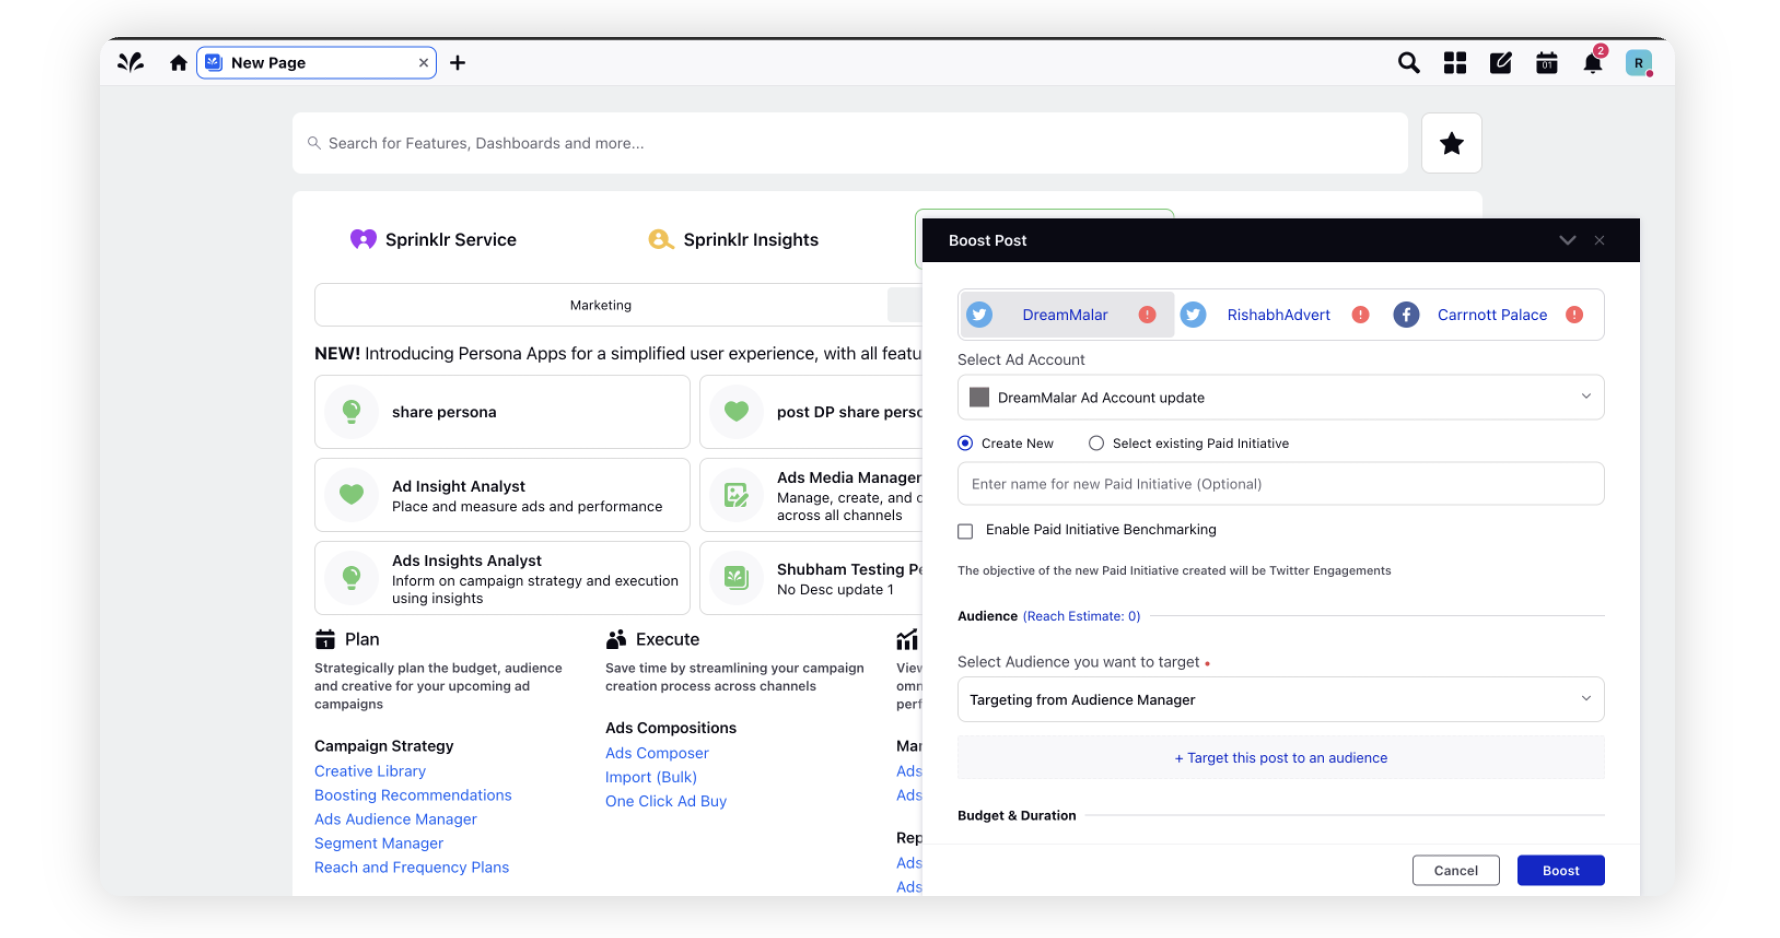
1. Click Post and Boost.

Enablement note: To learn more about getting this capability enabled in your environemnt, work with your Success Manager.
2. On the Boost Post pop-up window, enter the required details for all posts. You can see the different posts under a group by clicking on the post tab at the top of the boost post window. Once finished, click on Boost All Posts.