Add Facebook Brand Page with only Advertiser Access in Sprinklr
Updated
With Admin access, users are granted a wide range of permissions including Page Deletion, Permissions Management, Content, Messages, Community Activity, Ads, and Insights. On the other hand, Advertiser access is more restricted.
The user who has full access to the Page can provide advertiser permissions only to the user profile. The user with limited access will need to add the Facebook pages into the platform with limited native advertiser-only access to the Facebook page(s).
Steps to Get the Advertiser Permission on a Facebook Page Natively
Open the Facebook page Settings.
Click the Profile icon in the top right corner, and click Settings & Privacy.
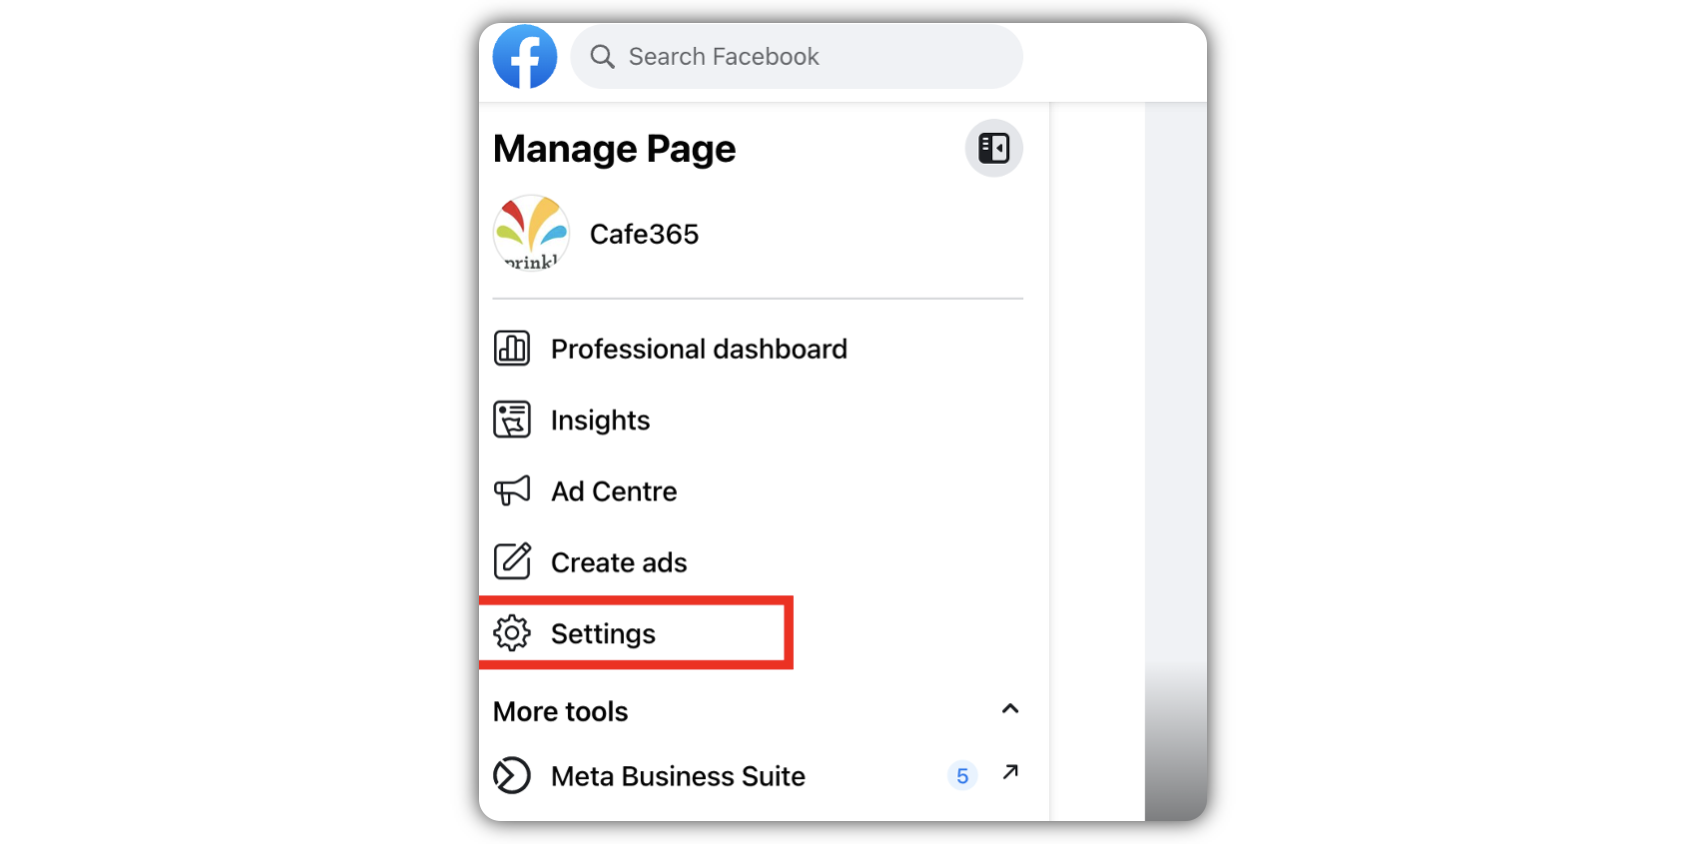
In the Manage Page window, click the Settings icon.
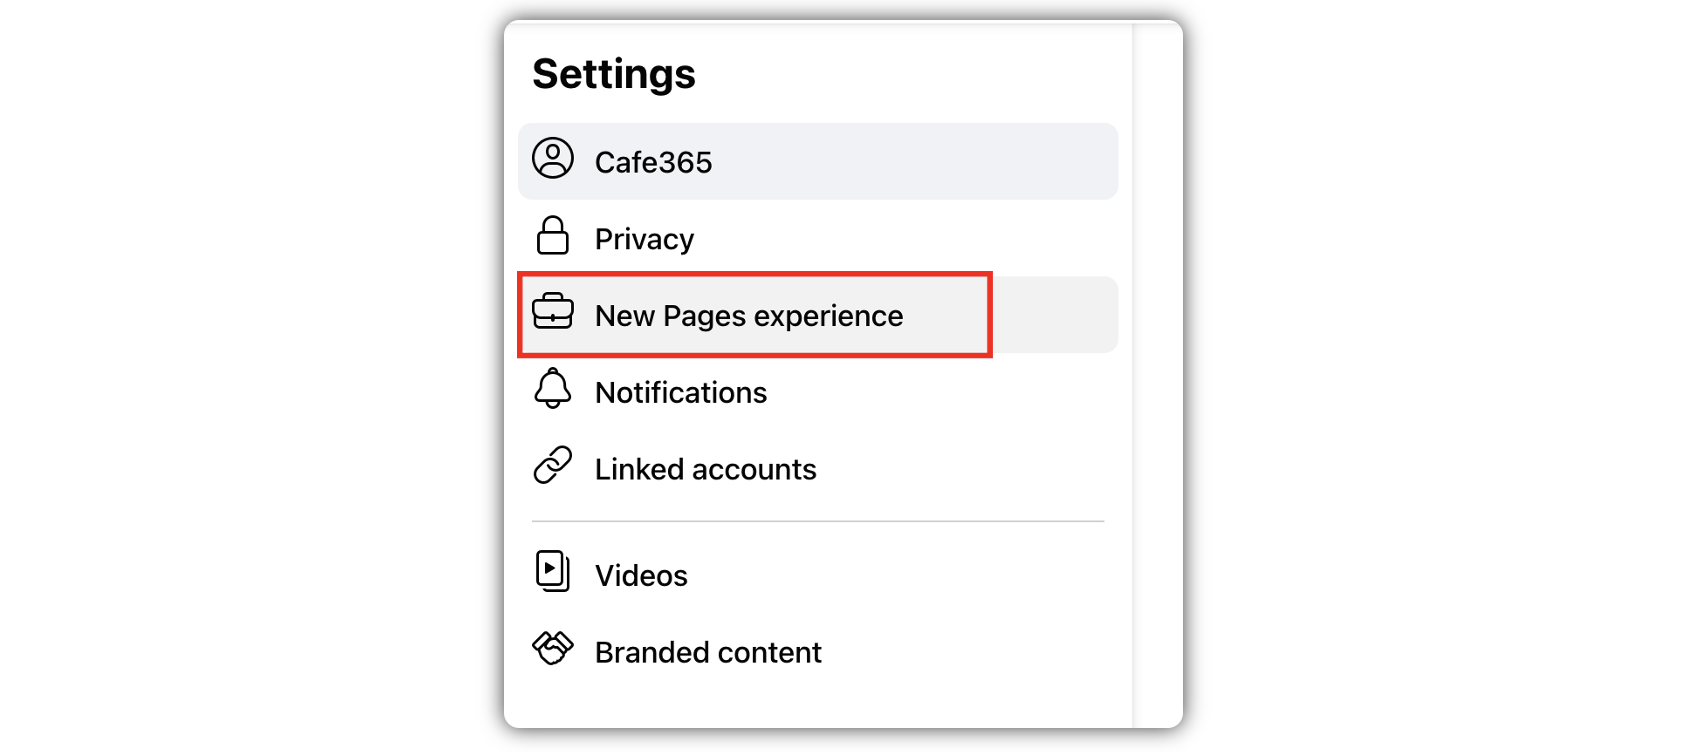
Click New Pages experience in the pop up window.
Click Page access.
Under the People with task access section, click Add New.

Search and select the Facebook profile account for which you want to give the advertiser access to this Facebook page.
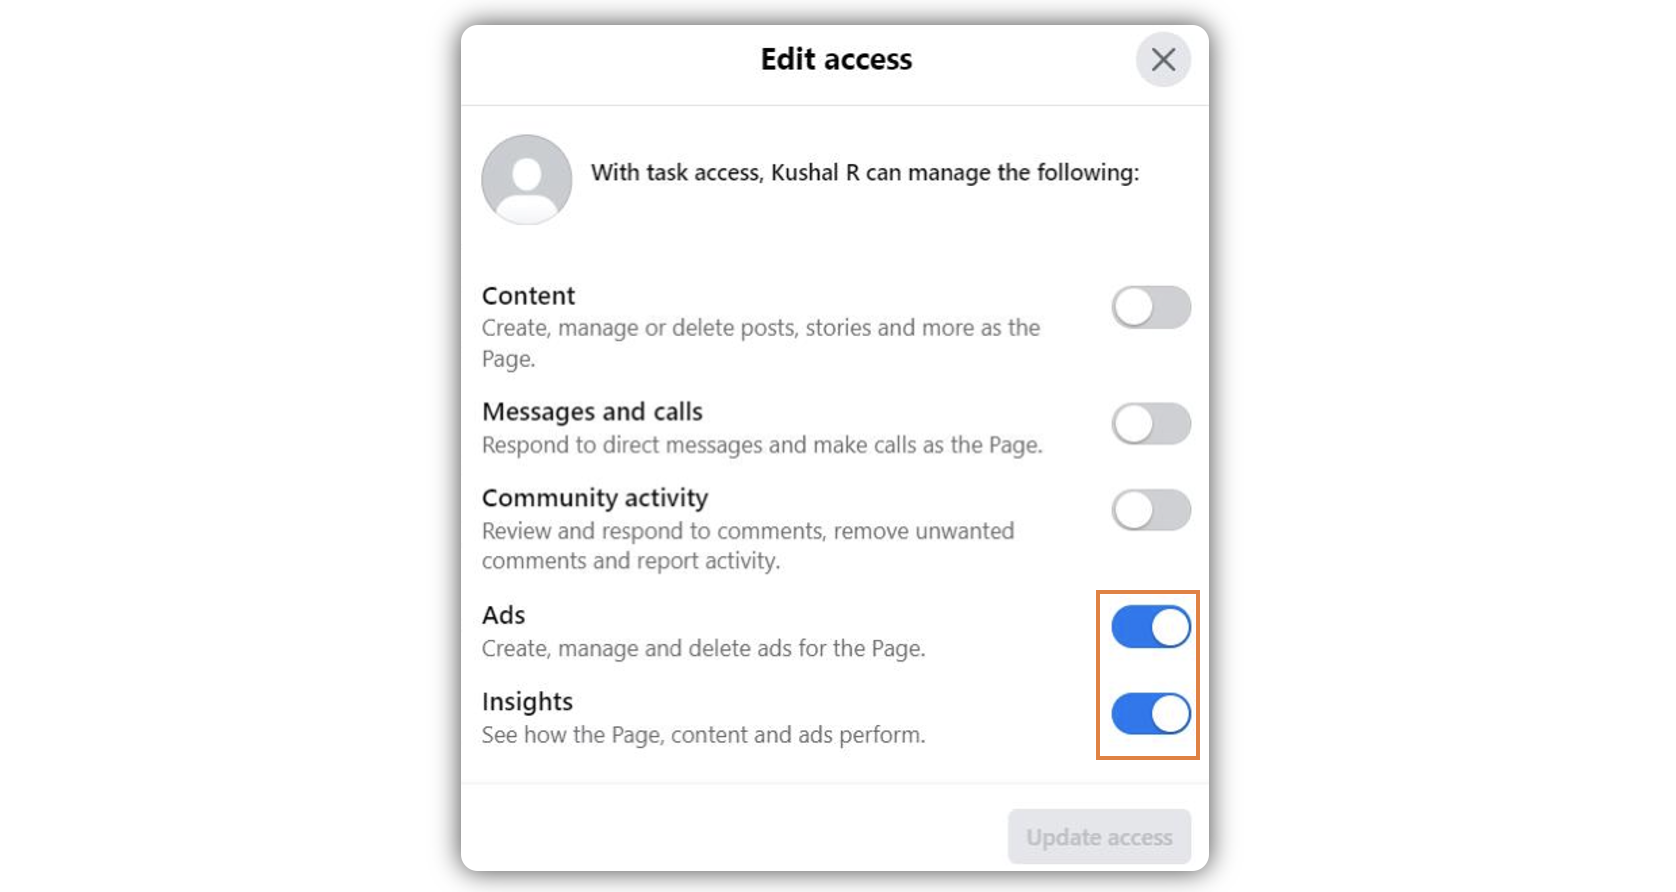
Select all 2 options – Ads, and Insights. Click Give Access.
The User needs to accept the invitation via their Facebook profile account.

Once accepted, under People with task access the Facebook profile will be visible.

Steps to Get the Advertiser Permission on a Facebook Page on Sprinklr
Click the New Tab icon
. Under the Sprinklr Social tab, click Owned Social Accounts within Listen.
In the Accounts window, click Add Account in the top right corner.
In the Add Account window, select Facebook Page.
In the Facebook log-in window, enter the Email and Password for the FB profile that your Page is linked with.
In the authentication window, follow the prompts to give Sprinklr permission to access your account. Please do not Edit Permissions since we have already provided only advertiser access natively.
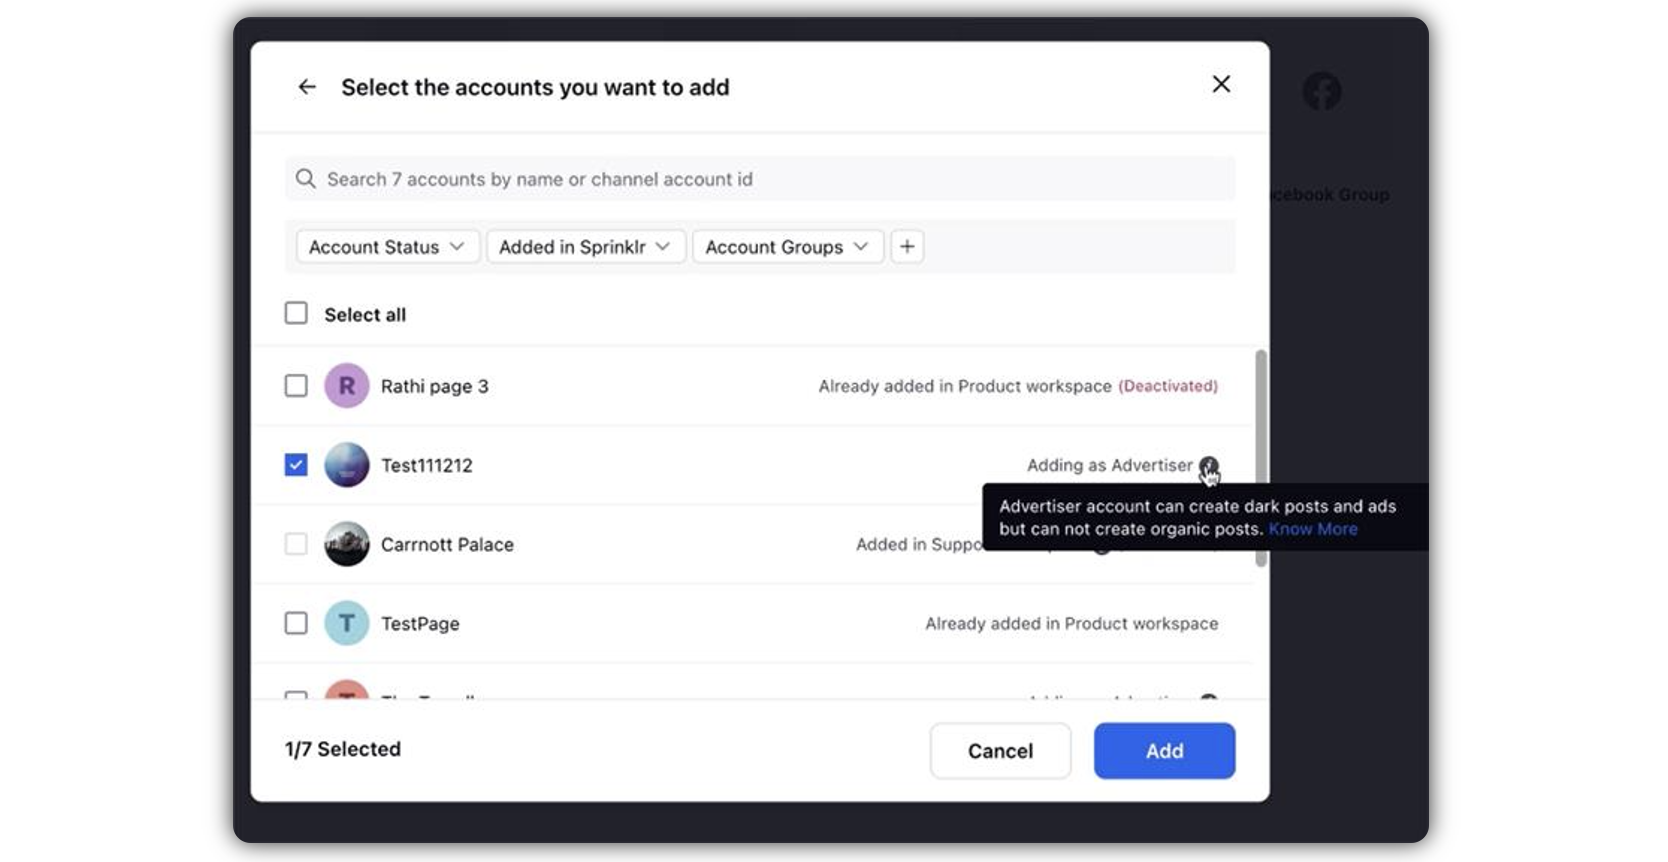
In the pop-up window, select the Page(s) you wish to add.
You would see Adding as Advertizer label for the pages where the profile has the Advertiser Access.
Click Add in the bottom right corner.
Now, you can set up your Account Details and Permission.
Edit basic details of your account in Account Details, including changing the name of the account as it appears in Sprinklr, if needed.
Under Permissions, permission channel actions to Users and User Groups who should have access to the account.
Under Share this Account Across Spaces, choose the Workspaces that you would like the account to be visible in or share across all Workspaces to make the account visible globally within your customer environment.
Click Save in the bottom right corner.
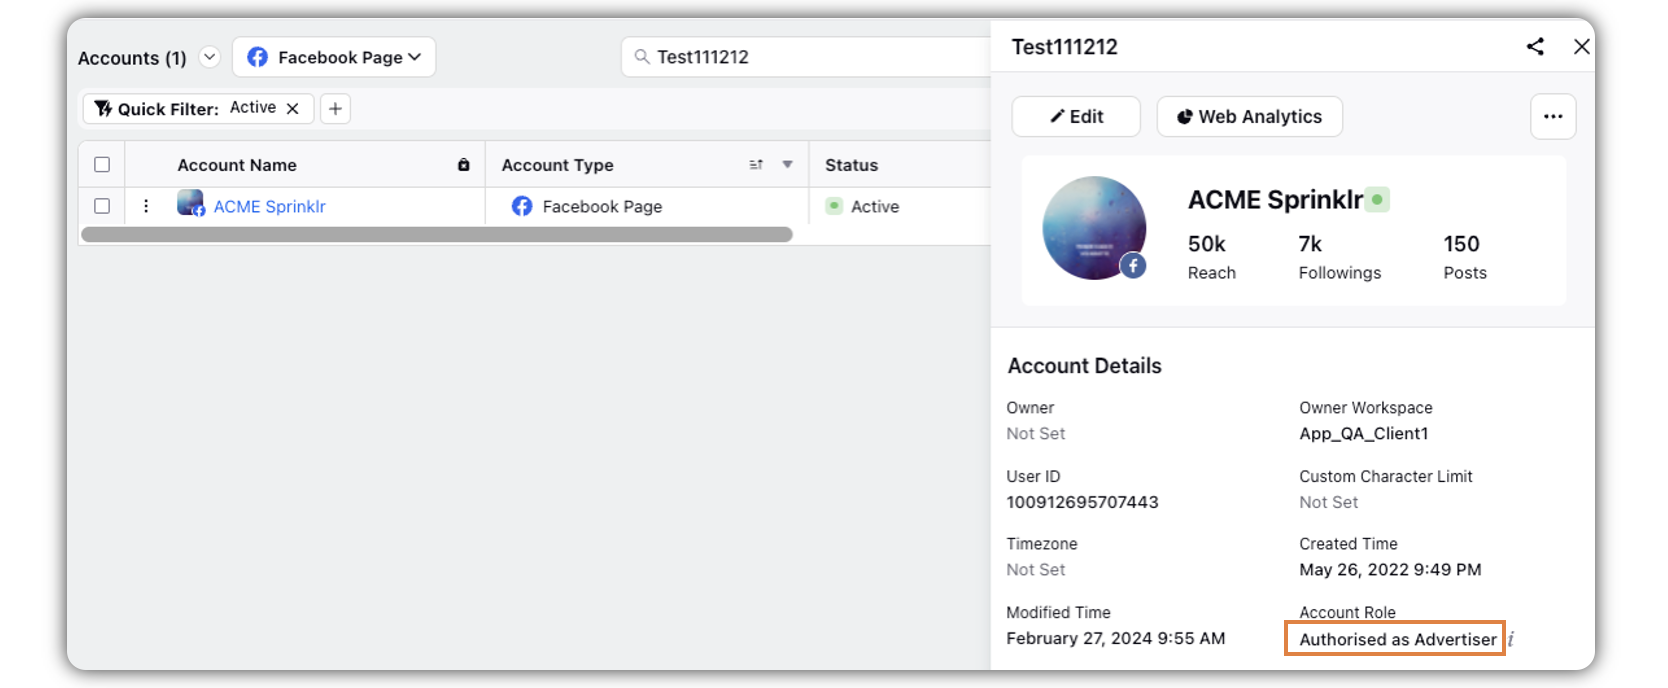
You can verify the access by going to the Account details screen, the Account Role will be displayed as Authorized as Advertiser.
This account can be used for Advertising via Sprinklr.
