Profile List Based Journey Trigger
Updated
Overview
In this article, we’ll walk through the mechanism of triggering a journey based on profile lists. Profile lists are tags that can be placed on a profile. Journey configuration contains an option to choose the desired profile list. It supports the triggering of both global and workspace profilelist. The steps to be followed for triggering a profile list journey are as follows:
Create a profile list
Add a profile list to a profile using:
Manually
Via Audience upload
Creating a journey with Profilelist as the trigger
Enablement
This feature is enabled by default.
Note:
Global Profile List and Partner Profile List are the same, and the nomenclature can be used interchangeably within Sprinklr.
Client Profile List and Workspace Profile List are the same, and the nomenclature can be used interchangeably within Sprinklr.
Steps to Trigger a Profile List Journey
1. Create a Profile List
To create a Global Profile List:
Click the New Tab icon. Under the Platform Modules, select All Settings within Listen.
Within Manage Customer, search for Global Profile Lists. Once it appears, click on it.
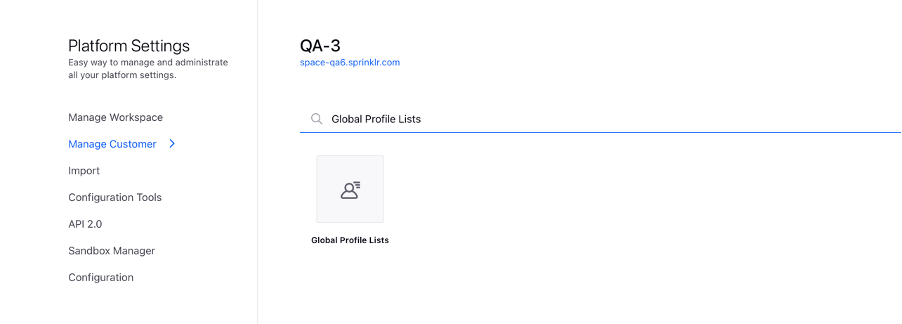
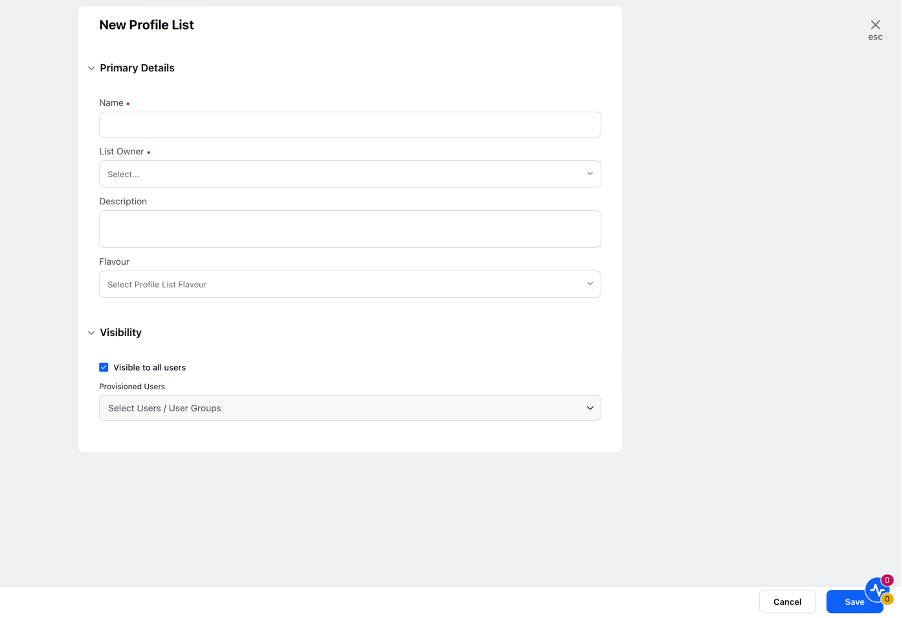
On the Global Profile Lists window, click Add Profile List in the top right corner to create a new profile list. Fill in the required details - Name and Owner of the profile list. Once filled, click Save. The profile list will be created.
To create a Workspace Profile List:
Click the New Tab icon. Under the Platform Modules, select All Settings within Listen.
Within Manage Workspace, search for Workspace Profile Lists. Once it appears, click on it.
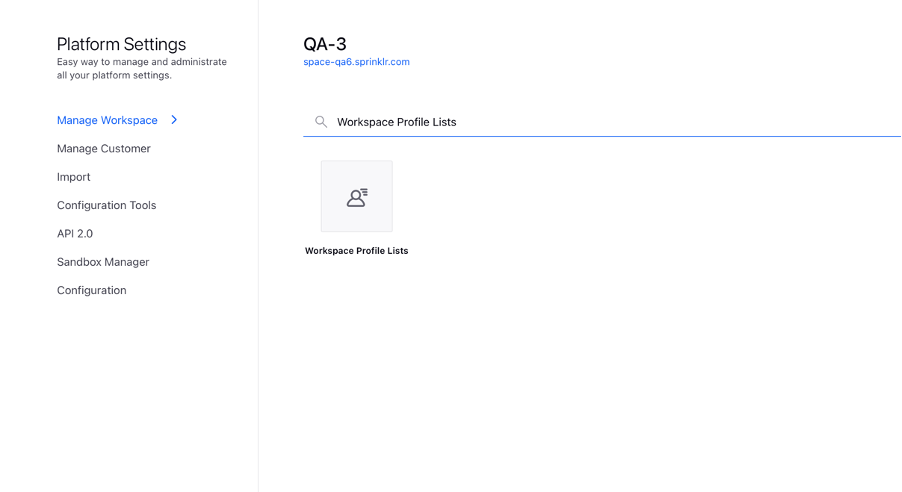
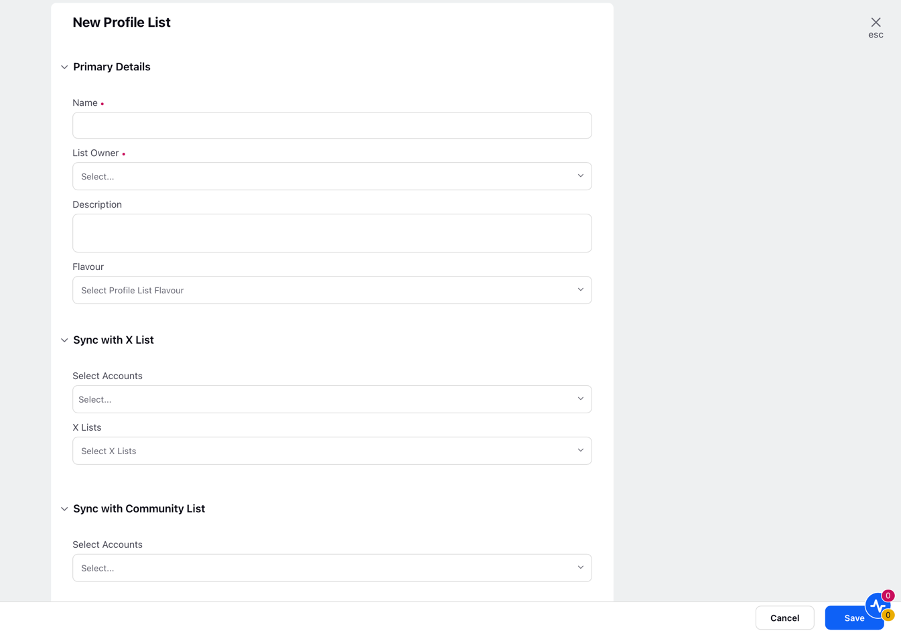
On the Workspace Profile Lists window, click Add Profile List in the top right corner to create a new profile list. Fill in the required details - Name and Owner of the profile list. Once filled, click Save. The profile list will be created.
2. Adding Profile List to Profiles
Manually Adding Profile List to Profiles
Click the New Tab icon. Under the Sprinklr Marketing tab, select Audience Profiles within Publish.
On the Audience Profiles window, search for the profile which needs to be tagged using the Search Bar.
Hover over the Options icon on the left side of the profile name. Click View Profile.

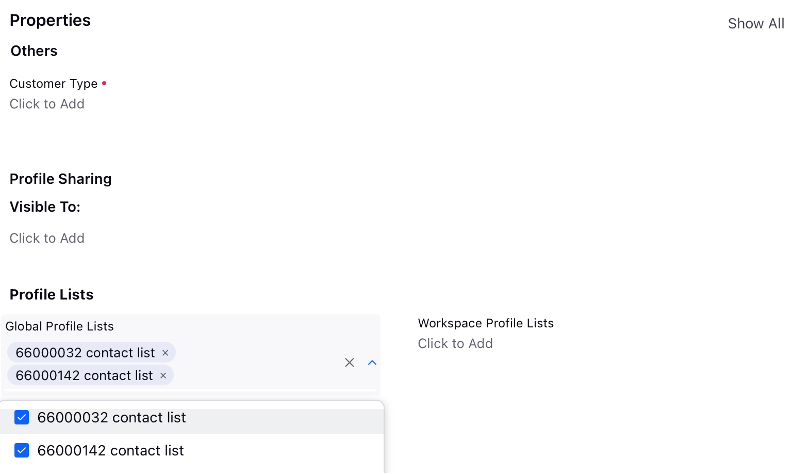
Under the Profile Lists section, choose the desired Global Profile List or Workspace Profile List from the dropdown.
Adding Profile List Through Audience Upload
Click the New Tab icon. Under the Sprinklr Marketing tab, select Audience Profiles within Publish.
On the Audience Profiles window, click the Options icon in the top right corner of the window.
Select Import option from the menu.

Click Download Template appearing on the Import Audience Profiles window.
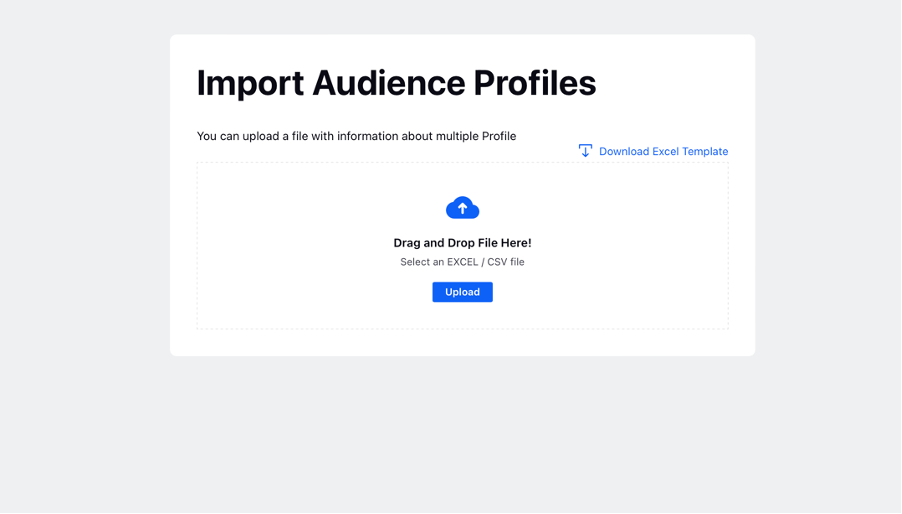
Open the Excel template downloaded on your device and fill in the name of the profile to be added either in the Partner Profile List column or Client Profile List column.

Note: ·You can add one profile list or multiple profile lists (separated by a comma). Both Partner Profile Lists and Client Profile Lists can be added, and the addition can also be done in the
same file.Save the file changes. Go back to the Import Audience Profiles window. Click Upload to upload the updated Excel.
The profile lists will be added to the profile or a group of profiles once the sheet is successfully uploaded.
3.Creating a Journey Based on Profile List
Click the New Tab icon. Under the Sprinklr Service tab, select Journey Facilitator within Resolve.
In the top right corner of the Journey Facilitator window, click Add Journey.

Fill in the required details while configuring Journey Settings. Choose the desired profile list from the dropdown. Ensure to select the right profile list between Partner Profile List and Workspace Profile List based on your requirements.
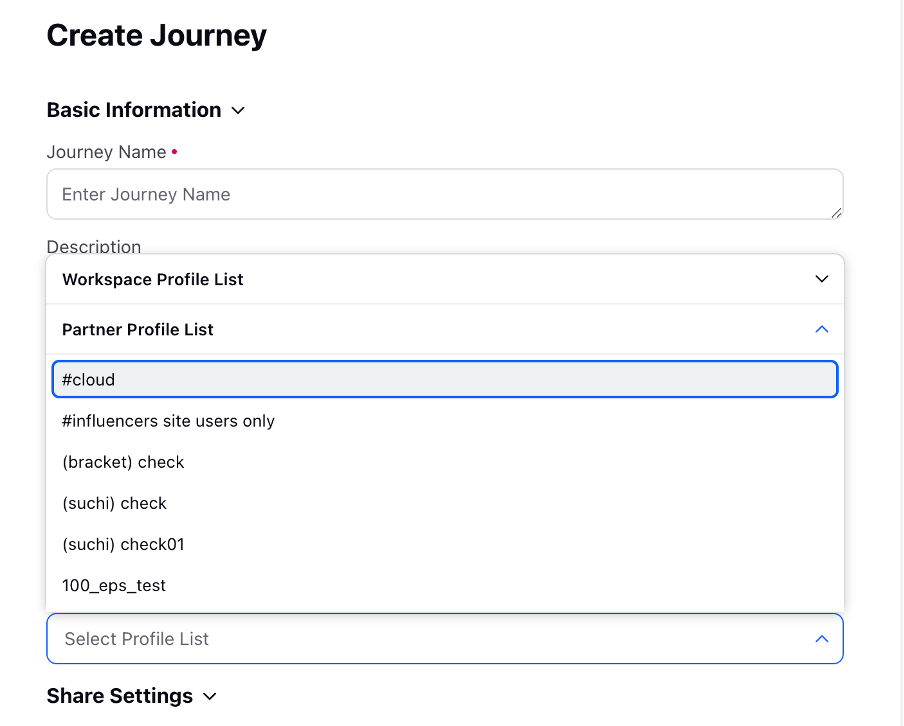
Click Save and build the journey as required.
Once done, deploy the journey. The journey will be sent only for all those audience profiles that will have the selected profile list tagged.