Apply Macros to take multiple actions on an entity
Updated
Execute multiple actions via saved configurations with a single click on various entities and bring efficiencies to your workflows.
Macros allow you to execute complex actions with a single click. In Sprinklr, a macro is a saved configuration of multiple actions that allows you to apply more than one change to a message, a SAM asset, or other entities in Sprinklr, all at once.
Below, we will explore how macros can be applied to various assets in Sprinklr based on the type of macro you would like to apply.
Apply message macros
The most frequently used type of macro, message macros can be applied to inbound messages in Sprinklr in the Monitoring Dashboards or in the message Third Pane. Message macros can be used to move a message along in a workflow.
For example, a message macro "Assign to Legal" might be configured to remove a message from a Customer Service queue and assign it to a Legal queue. A macro "Close - Customer Responded to" might be applied to remove a message from a Customer Service queue and change the message status to Closed. Macros can be configured by admins. You can learn more about creating macros in Create Macros. 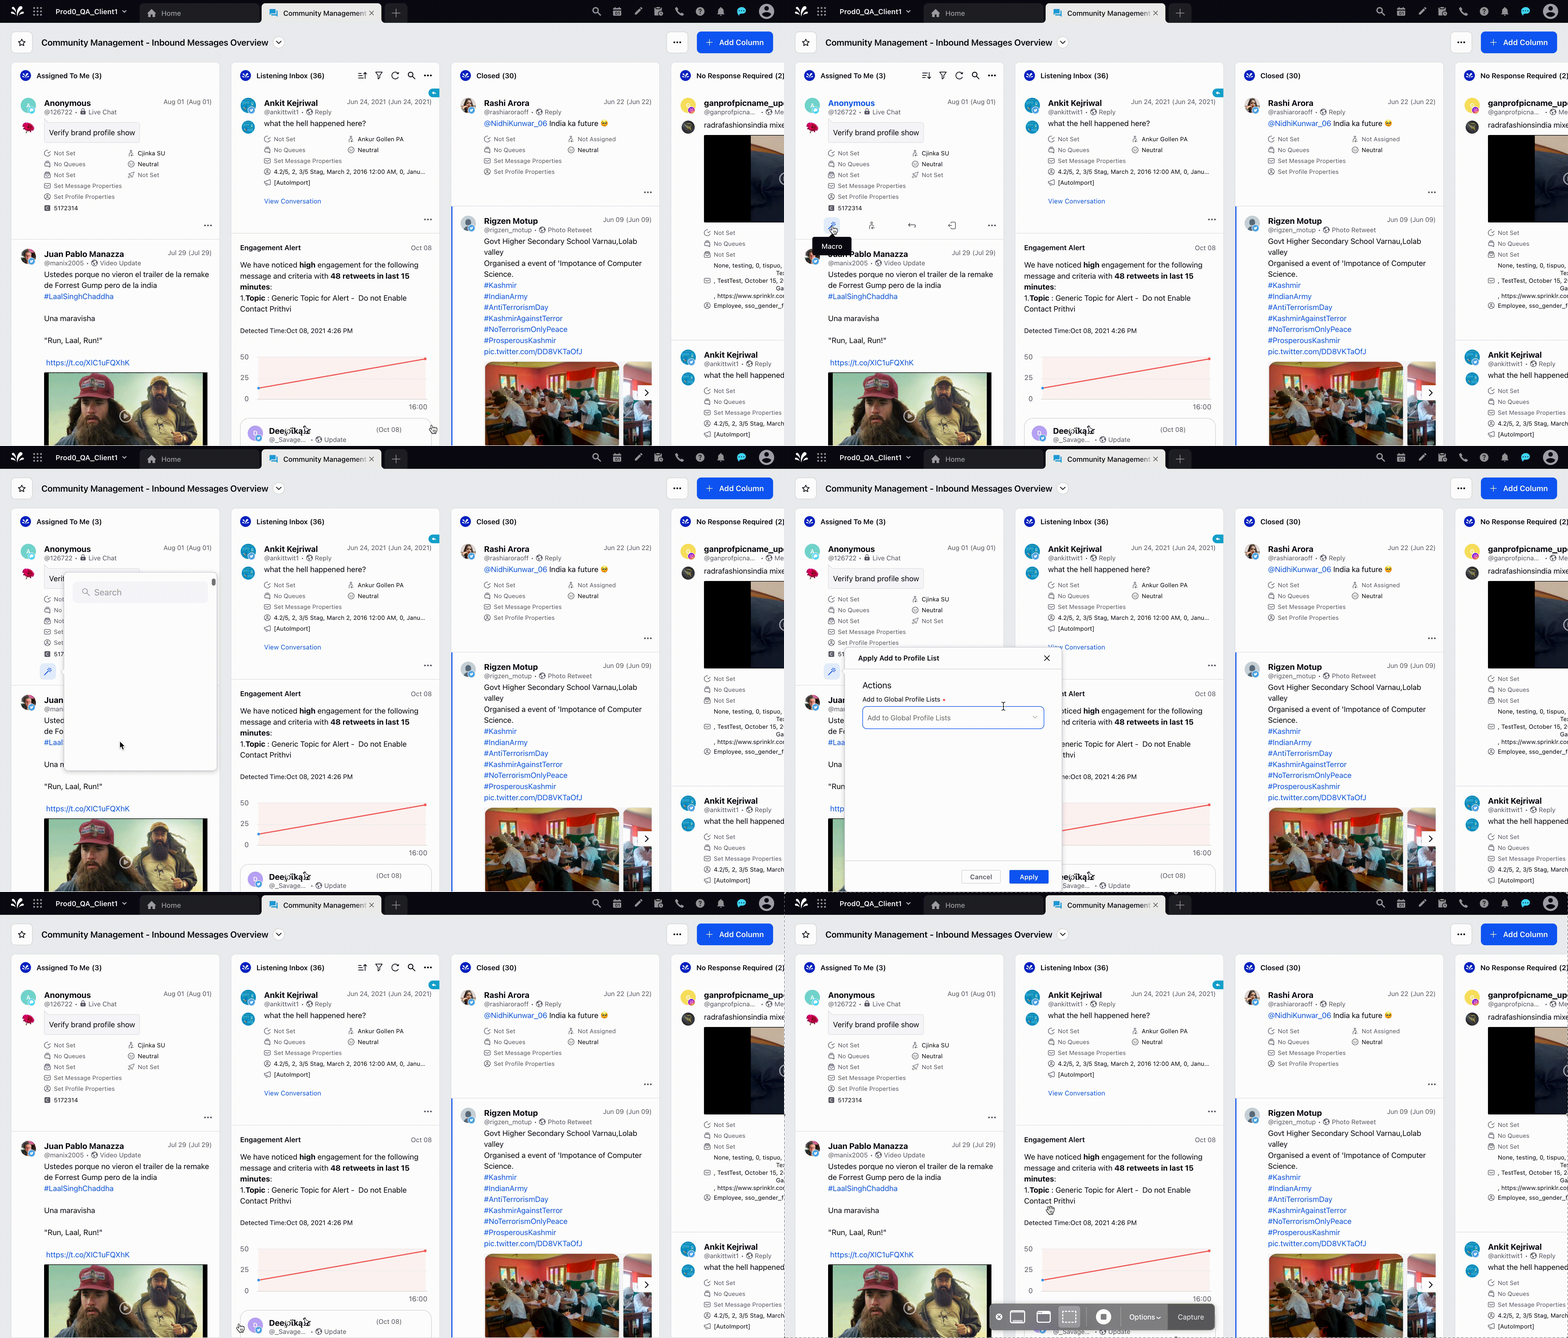
Click the New Tab icon. Under the Sprinklr Social tab, click Engagement Dashboards within Engage.
Search and navigate to the desired Inbound messages dashboard.
Hover over an inbound message in the given columns and click the Macro icon. A list of available macros will appear.
Search and select the desired macro from the dropdown. On clcking, the macro will be applied. Any action associated with the macro will be executed on the inbound message.
Note:
|
Apply macros from the Third Pane
You can also apply message macros from the Third Pane of a message.
Navigate to the Inbound Messages column in Engagement Dashboards.
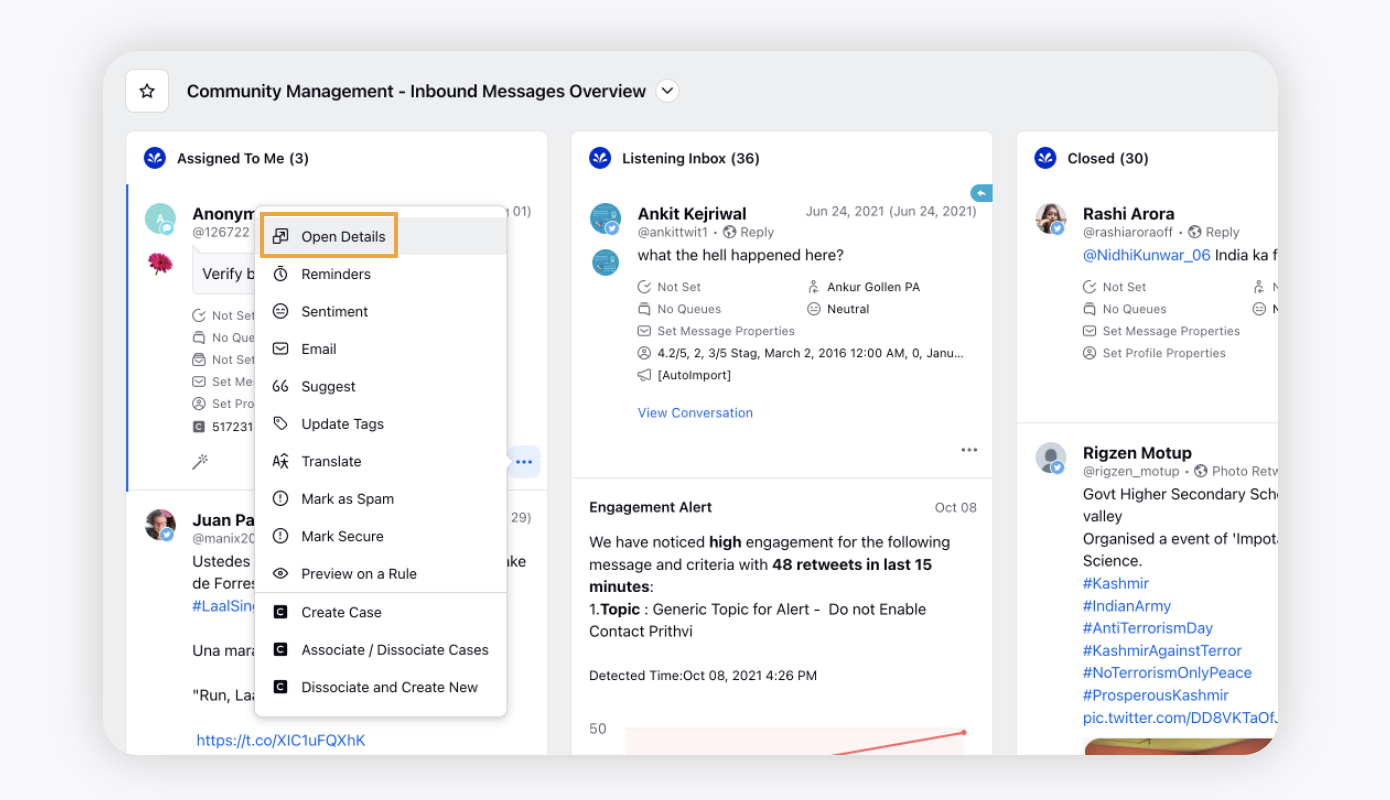
Click the Options icon of the desired inbound message and select Open Details. The inbound message will open in the third pane.
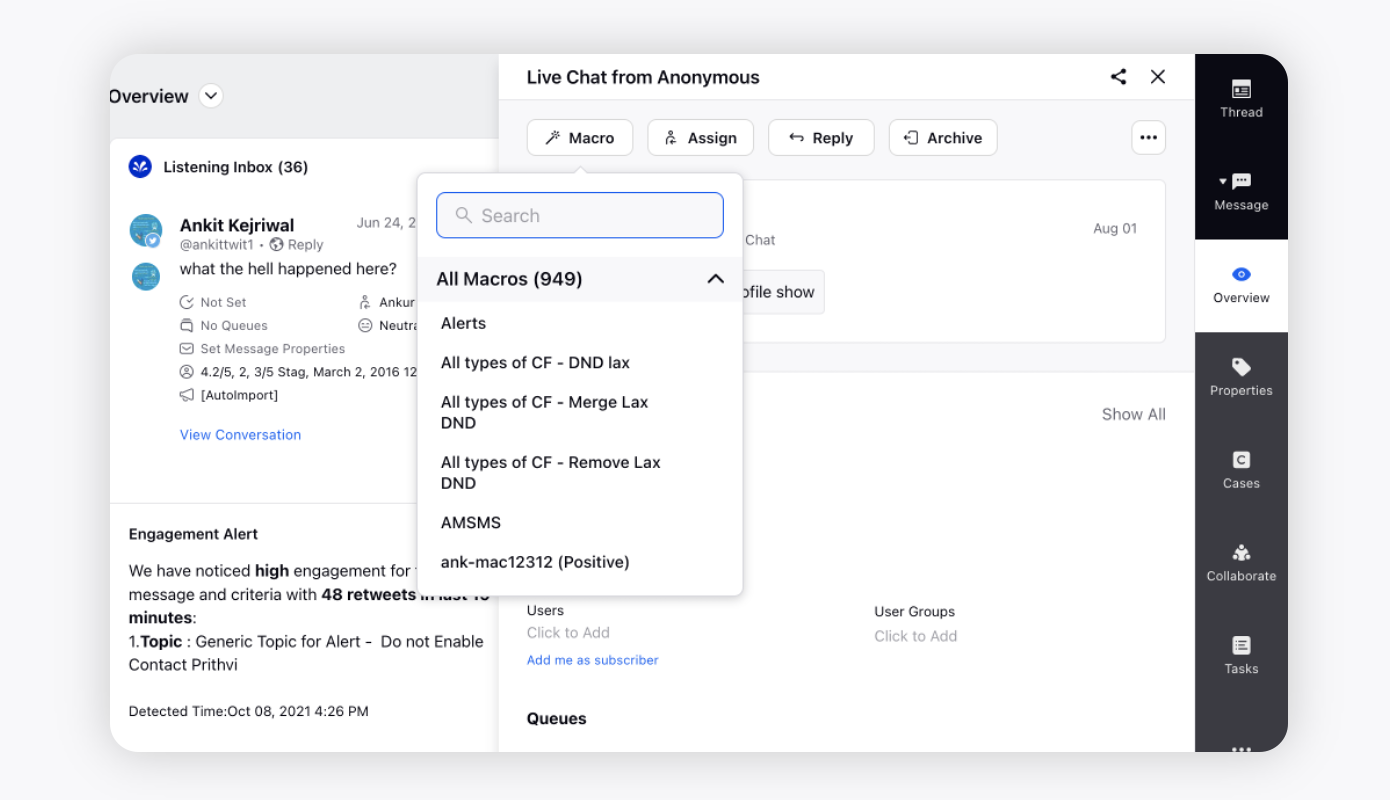
In the Third Pane, click Macro.
Search and select the desired macro from the dropdown. On clcking, the macro will be applied. Any action associated with the macro will be executed on the inbound message.
Apply outbound message macros
Outbound Message macros can be applied to messages that you have published. You can apply Outbound Macros from the Editorial Calendar, Message Third Pane, Monitoring Dashboards, or if Content Marketing is enabled in your environment then from the Production Dashboards as well.
Apply macros from the Editorial Calendar
Click the New Tab iocn. Under the Sprinklr Marketing tab, click Editorial Calendar within Plan.
Hover over the Options icon of the desired message and click Macros icon.
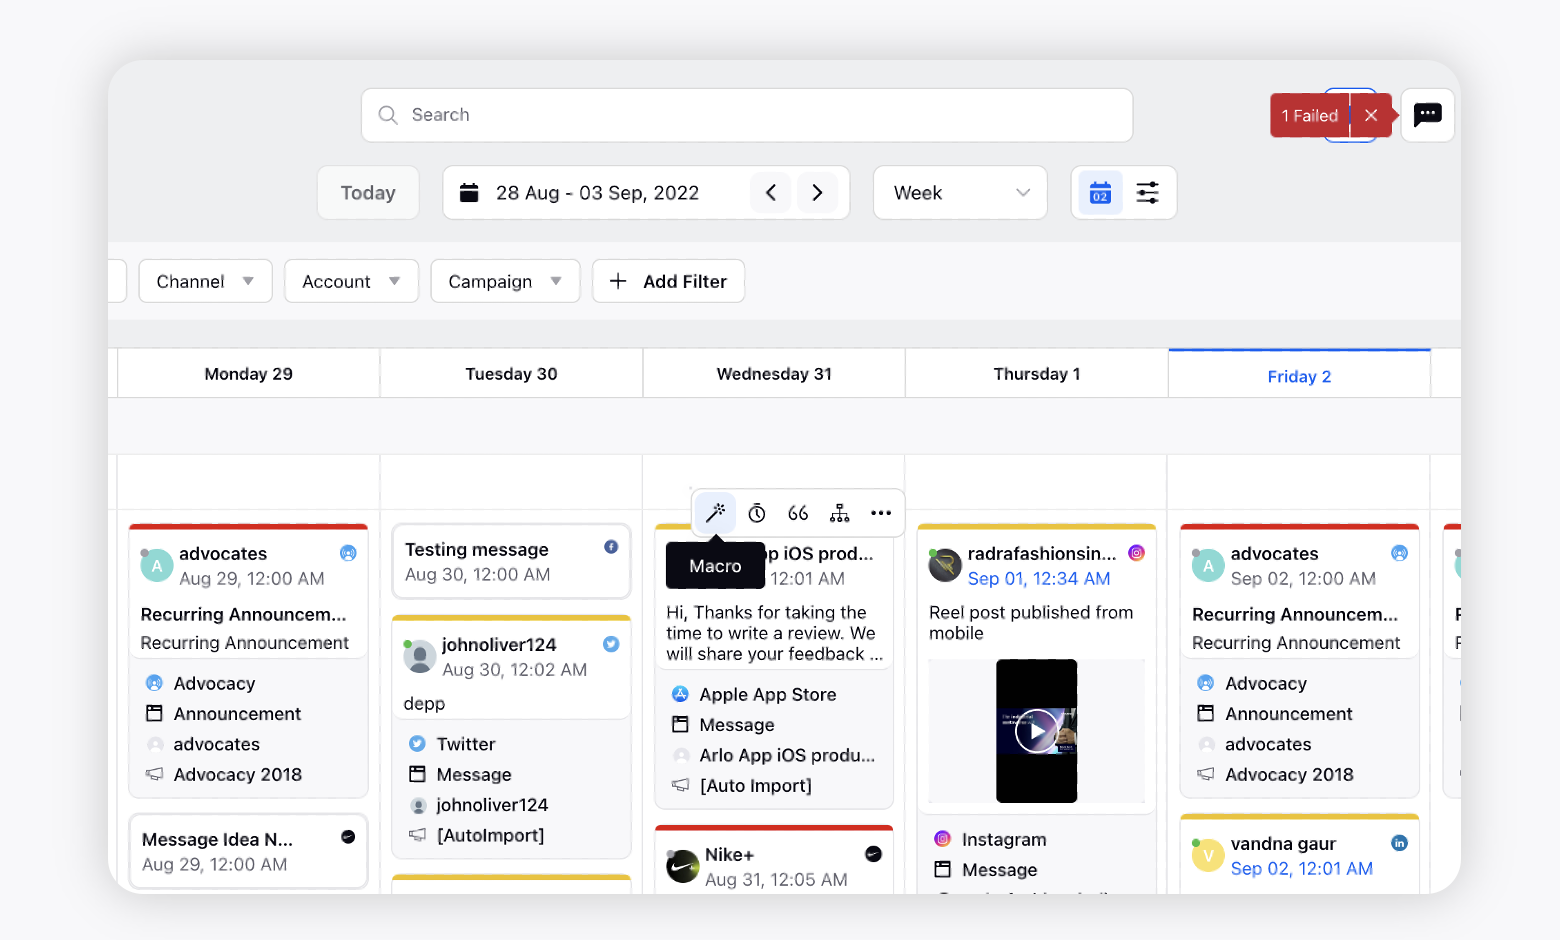
Search and select the desired macro from the dropdown. On clicking, the macro will be applied. Any action associated with the macro will be executed on the inbound message.
Note: Using the select all box, or by individually selecting multiple messages, you can apply macros to multiple messages at a time from the List View. |
Apply macros from Monitoring Dashboards
Click the New Tab icon. Under the Sprinklr Social tab, click Engagement Dashboards within Engage.
Search and navigate to the desired Monitoring Dashboard.
Hover over a message in the given column and click the Macro icon. A list of available macros will appear.
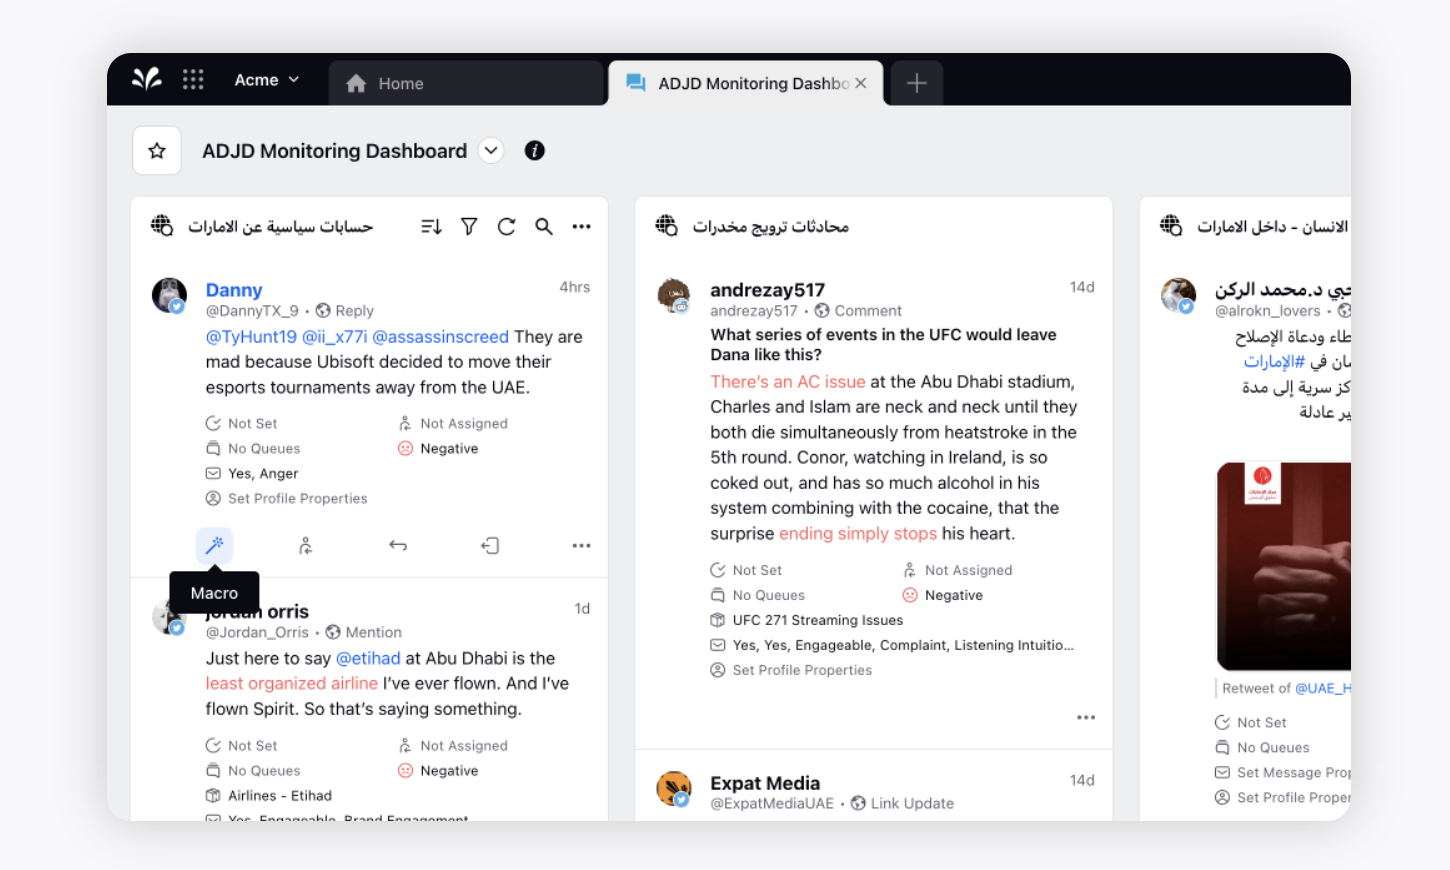
Search and select the desired macro from the dropdown. On clcking, the macro will be applied. Any action associated with the macro will be executed on the message.
Apply macros from the Production Dashboards
Click the New Tab icon. Under the Sprinklr Marketing tab, click Production Dashboards withn Produce.
Hover over the Options icon of the desired message and click Macro.
Search and select the desired macro from the dropdown. On clcking, the macro will be applied. Any action associated with the macro will be executed on the message.
Note: Use of the Production Dashboards requires that Content Marketing be enabled in your environment. To learn more about Content Marketing, please contact your Success Manager. |
Apply DAM macros
DAM (digital asset management) Macros can be applied to social assets in Asset Management to apply properties in bulk, or to remove outdated assets from the Social Asset Manager.
Click the New Tab icon. Under the Sprinklr Marketing tab, click Digital Asset Manager within Plan.
Click an asset to select it. Various asset actions will appear at the bottom of the window.
Select the Macro option and select the desired macro. The macro will be applied to the asset.
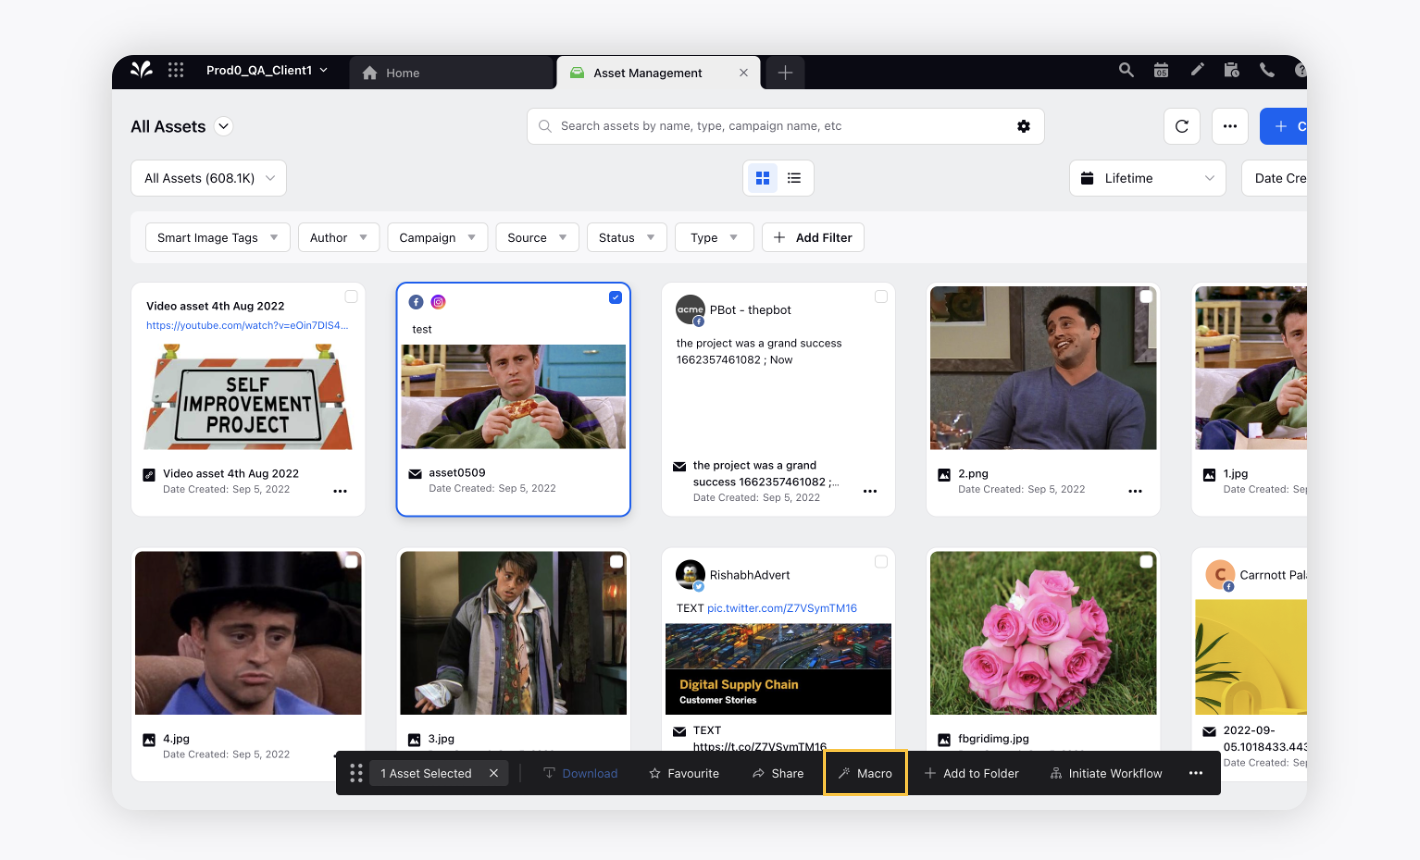
Note: To select multiple assets at once, you can control-click if using a PC or command-click if using a Mac. |
Apply case macros
Apply Case Macros to Cases in Sprinklr and multiple actions the same way you can with other message types. Case Macros allow you to create efficient Case Management workflows, taking multiple actions on an entire Case at once.
Note: Use of this feature requires that Case Management be enabled in your environment. To learn more about Case Management, please contact your Success Manager. |
Case Management macros are applied through the Third Pane, meaning that the option to apply a Case Management macro will not be present at the top of the screen when a case is selected as it is for message-level macros. Instead, apply a macro by selecting a case in a case column and hovering over the icon and selecting Workflow or by double clicking the case to open the Third Pane.
Click the New Tab icon. Under the Sprinklr Service tab, click Care Console within Resolve.
On the Care Console window, click on the case you wish to apply macro to.
In the top right corner, click Macro.
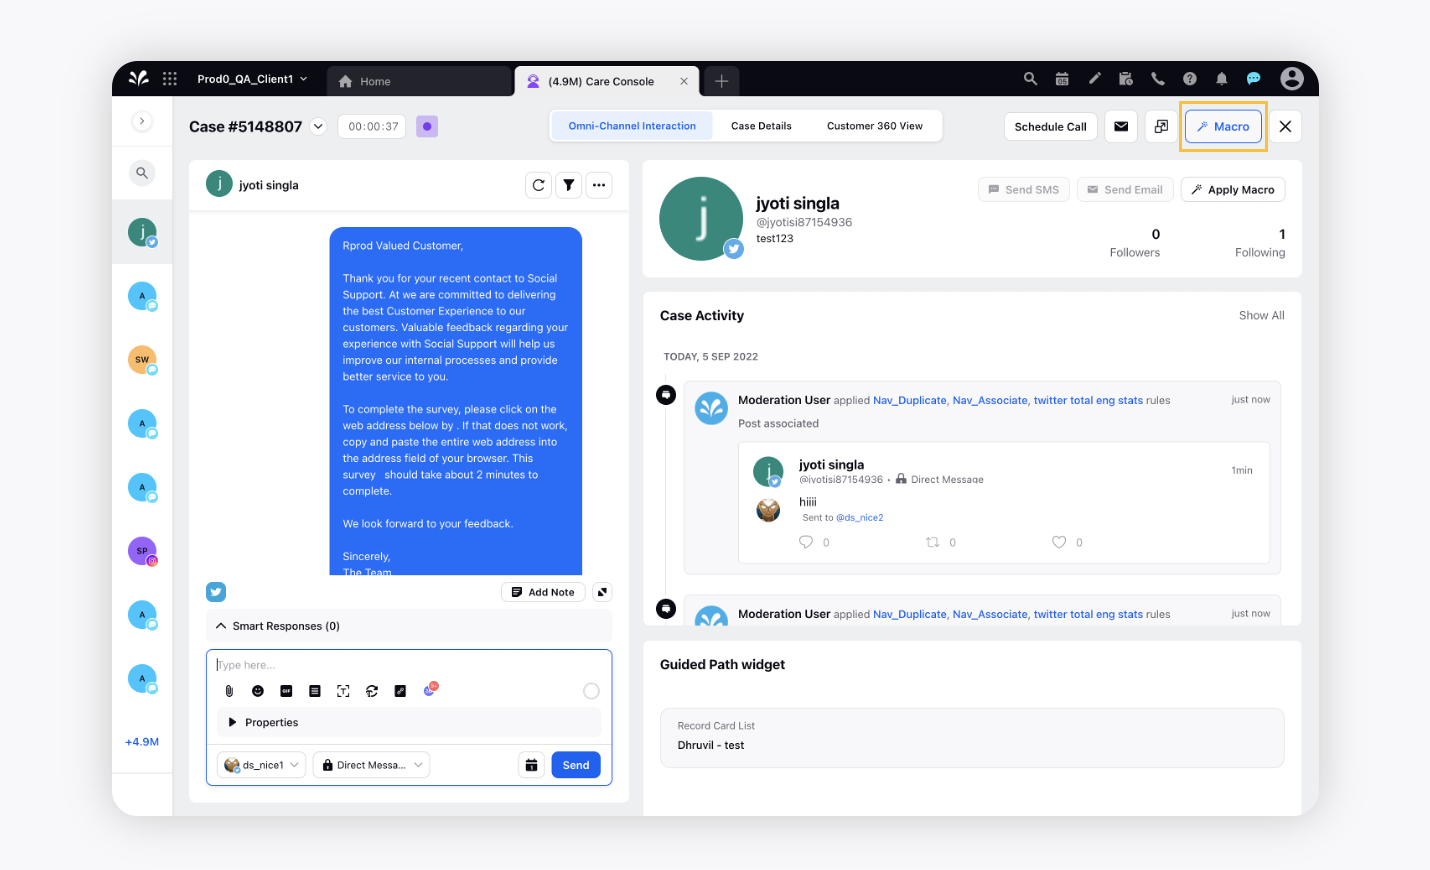
Search and select the desired macro. On clicking, the macro will be applied. Any action associated with the macro will be executed on the inbound message.
Apply UGC macros
UGC macros can be applied to User Generated Content, letting you take multiple actions on UGC assets at once. You can approve, add or remove tags, or split UGC assets into text-only or image-only assets using macros.
Note: Use of UGC Macros requires that Content Marketing be enabled in your environment. To learn more about Content Marketing, please contact your Success Manager. |
Click the New Tab icon. Under the Sprinklr Marketing tab, click User-Generated Content within Produce.
On the User Generated Content window, click the Dashboards icon and switch to any Standard Board.
Hover over the Options icon of the desired asset and select Macro.
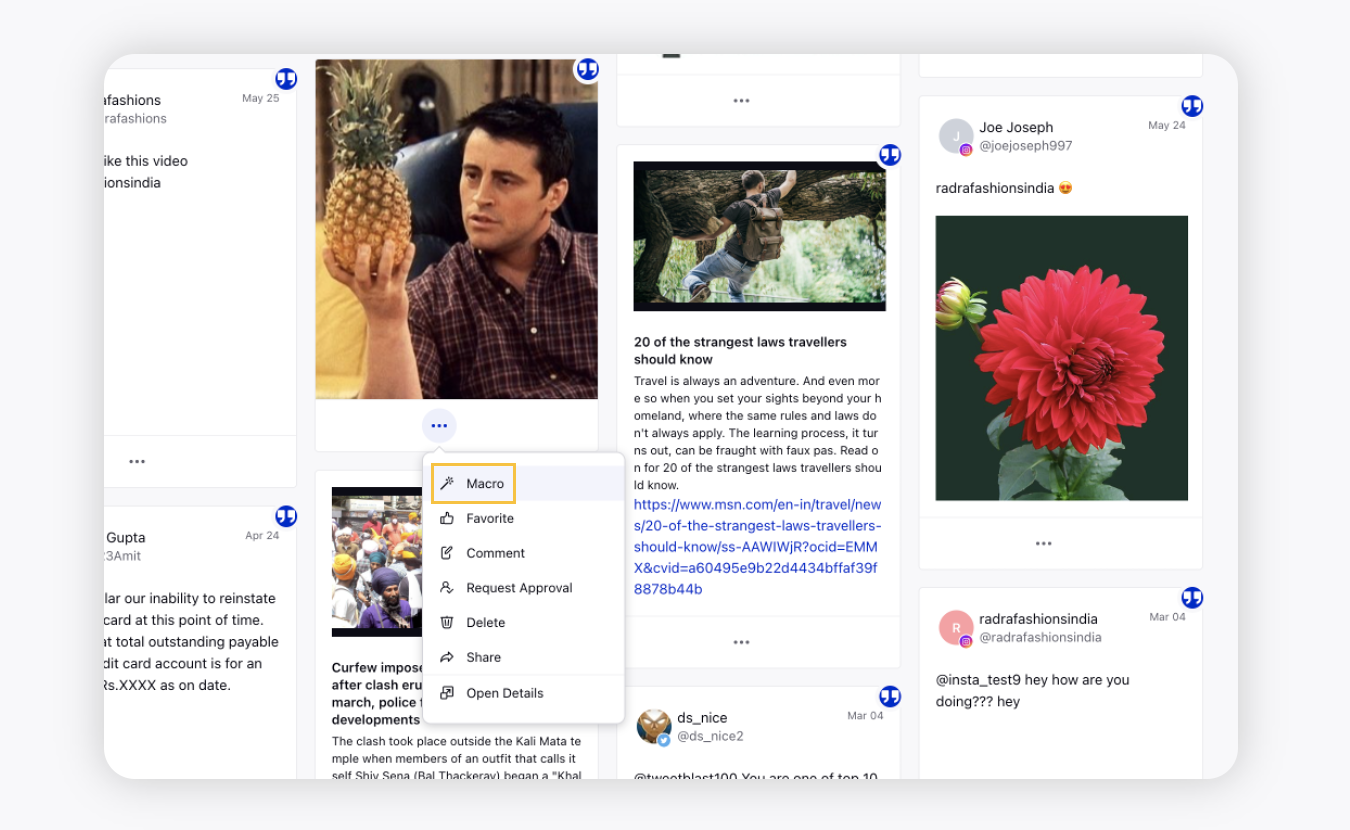
Search and select the desired macro. On clicking, the macro will be applied. Any action associated with the macro will be executed on the inbound asset.
Apply profile macros
Profile Macros are applied to user profiles in Sprinklr and can be used to apply tags or add custom properties to profiles or to add a profile to a Profile List. Profile Macros can be added by opening a message in the Third Pane, then selecting the profile tab to apply a Profile Macro.
Navigate to the Engagement Dashboard.
Hover over the desired Profile and select Macro.
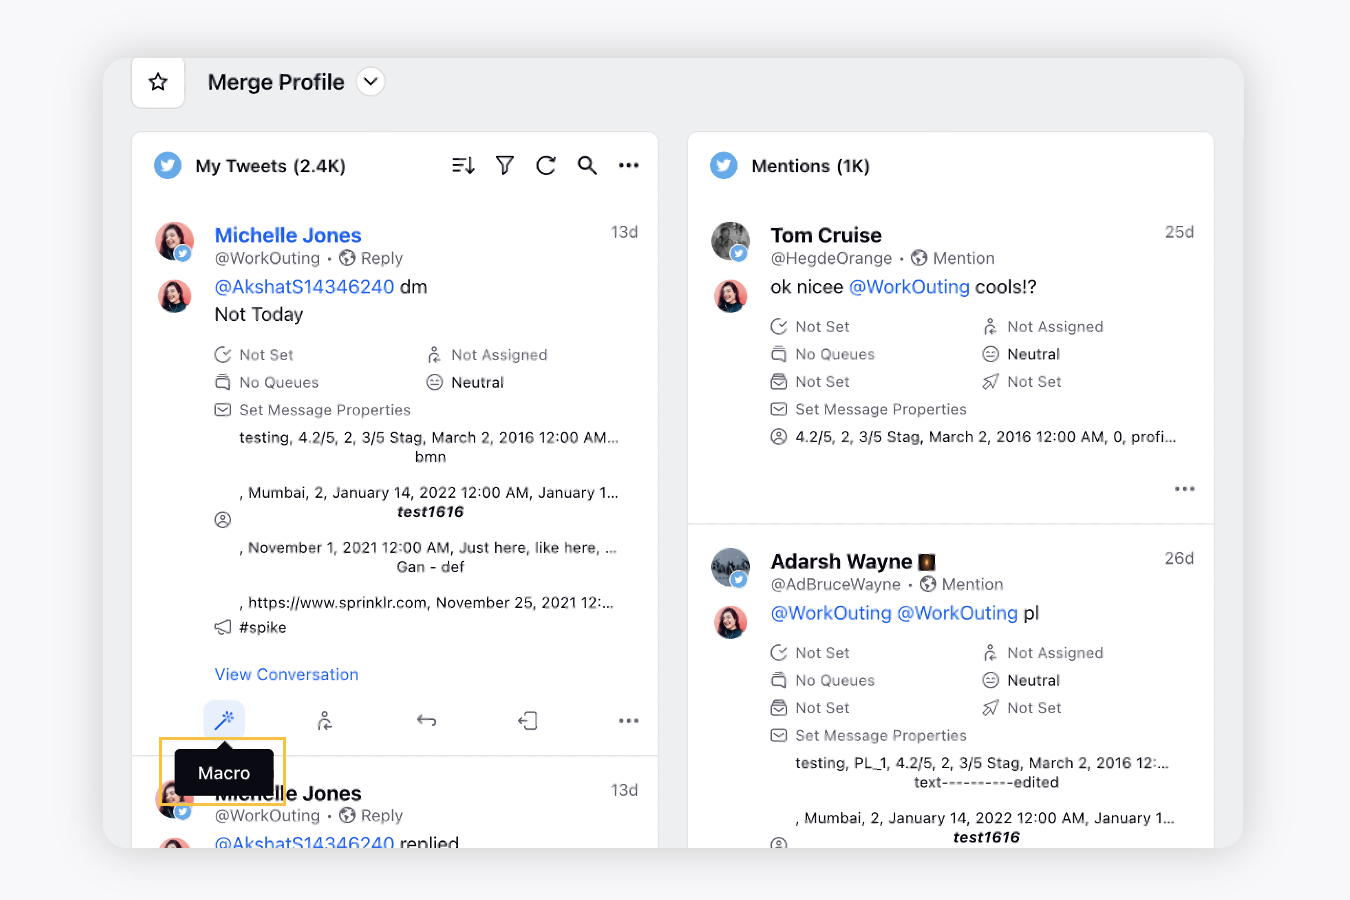
Search and select the desired macro. On clicking, the macro will be applied. Any action associated with the macro will be executed on the inbound asset. For more information, see Profile Macros.