Omni Channel Survey Distribution
Updated
This feature provides users with the ability to gather solicited customer feedback via Email and WhatsApp enabling brands to capture insights at every customer touchpoint. It helps to improve the rate of response and the quality of feedback.
User Benefits: This sets the base for expanding our distribution to other channels like social, improving customer feedback volume and quality by sending surveys on the right channels.
There are two ways in which you can design the Omni Channel distribution survey:
Whatsapp
Email Messages
We can customise the workflow to schedule optimum distribution to suit the needs to get impactful feedback. We can collect both active and passive feedbacks from the customers.
Steps to Create Omni Channel Survey Distribution
There are 2 additional ways in which you can design surveys.
Steps for Omni Channel Survey Distribution | Email Messages
Click New Page(+) and under Sprinklr Insights select Surveys.
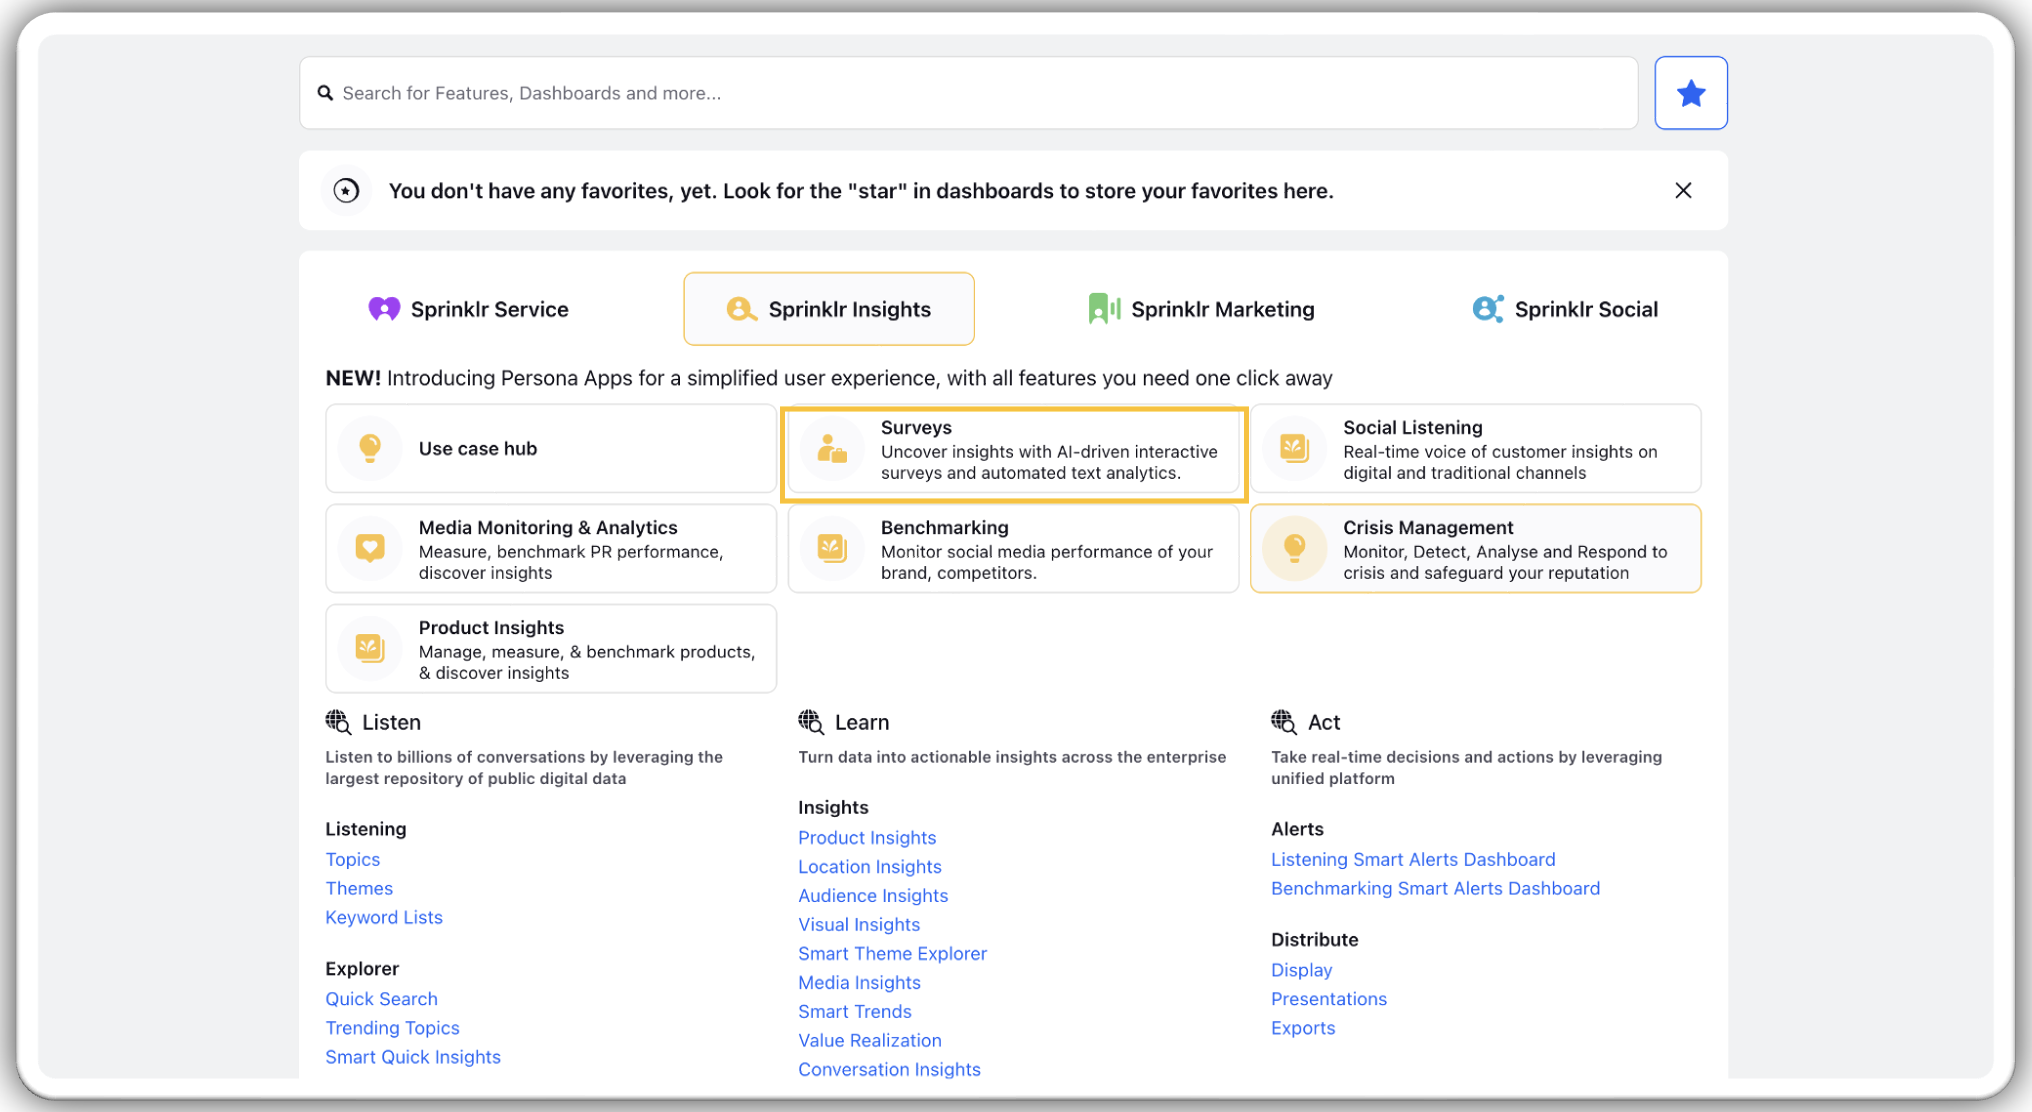
Click Create Program on the right side top corner and fill in the program details.
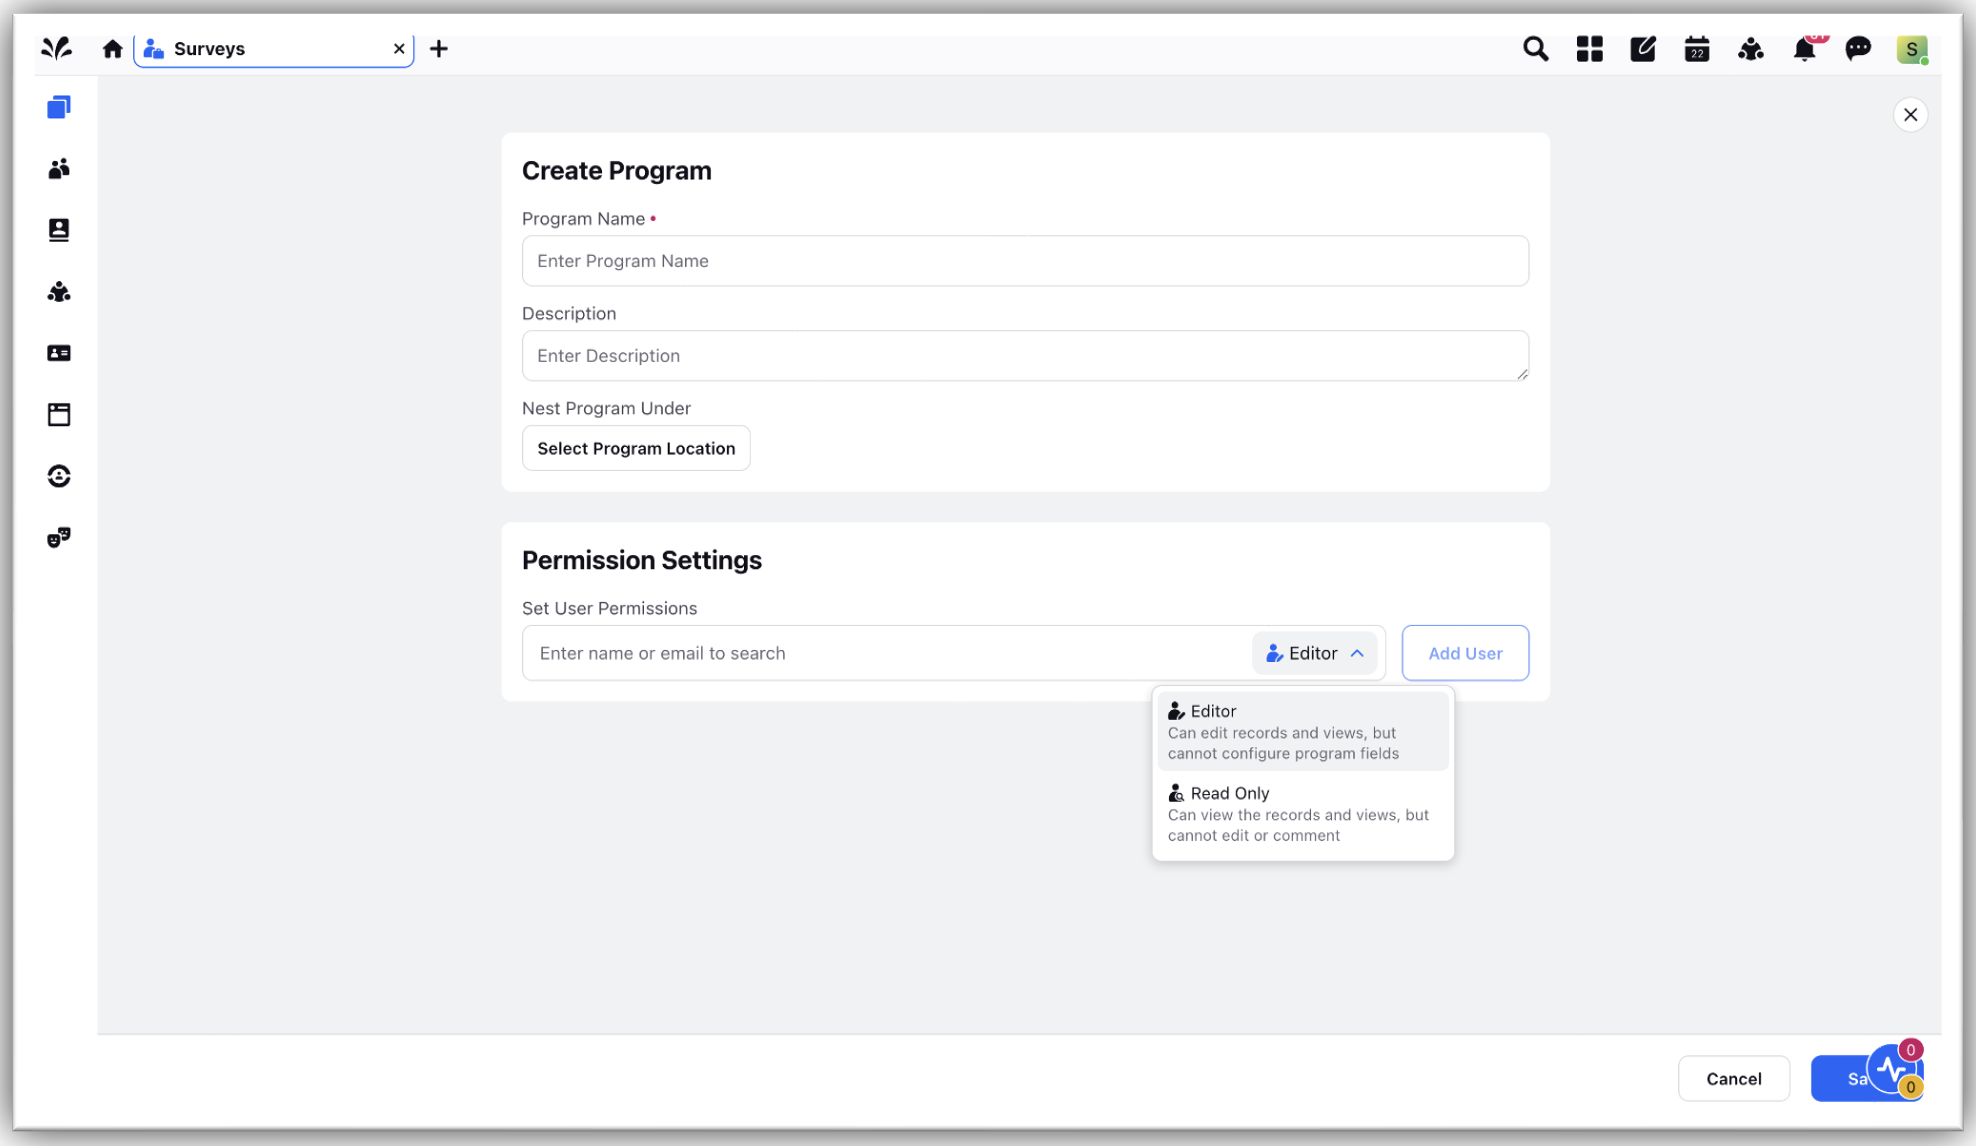
Program Name: Enter name of the program
Description: Optionally, add description
Nest Program Under: Select location for hosting the program
Permission Settings: Select users for Edit/Read Only permissions and click Create Now pop up.
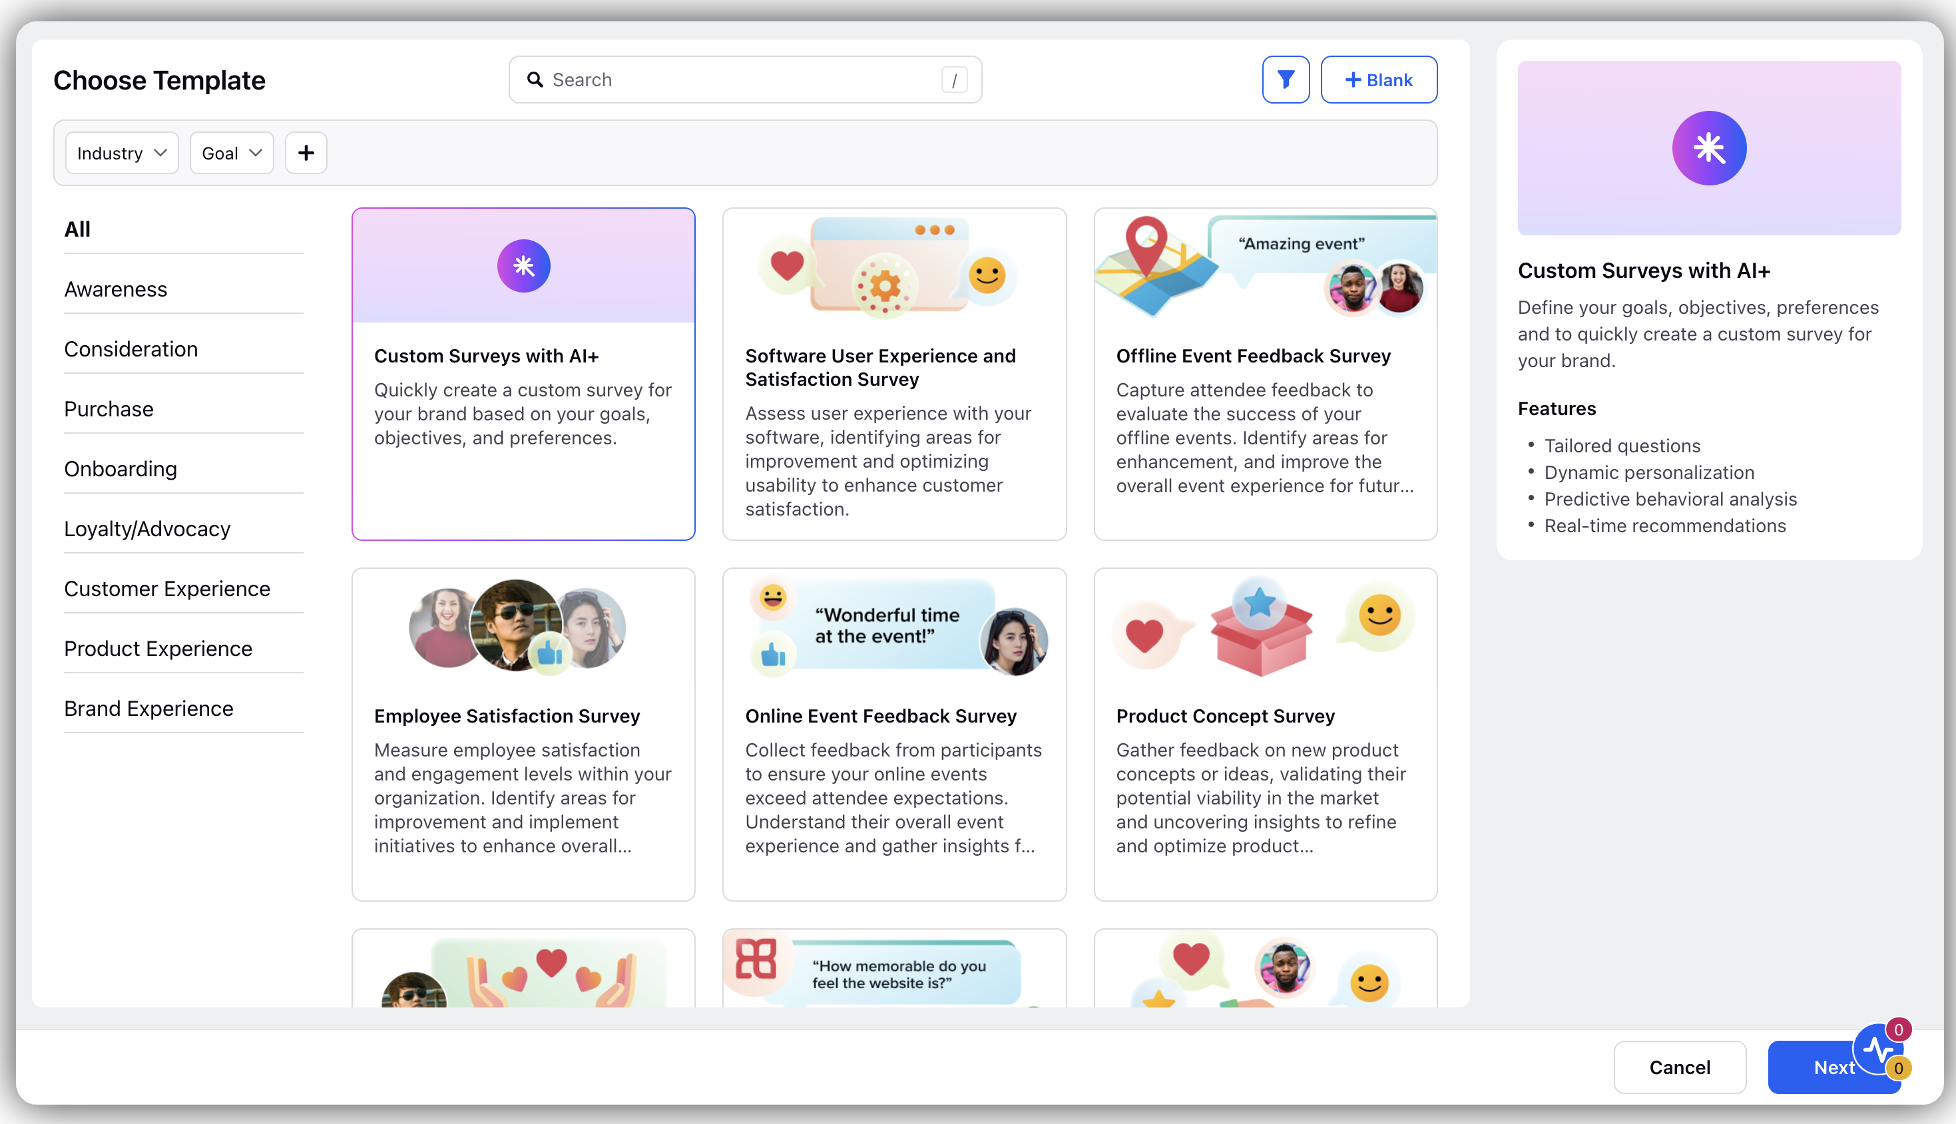
Select relevant template under Choose Template window and click Next.
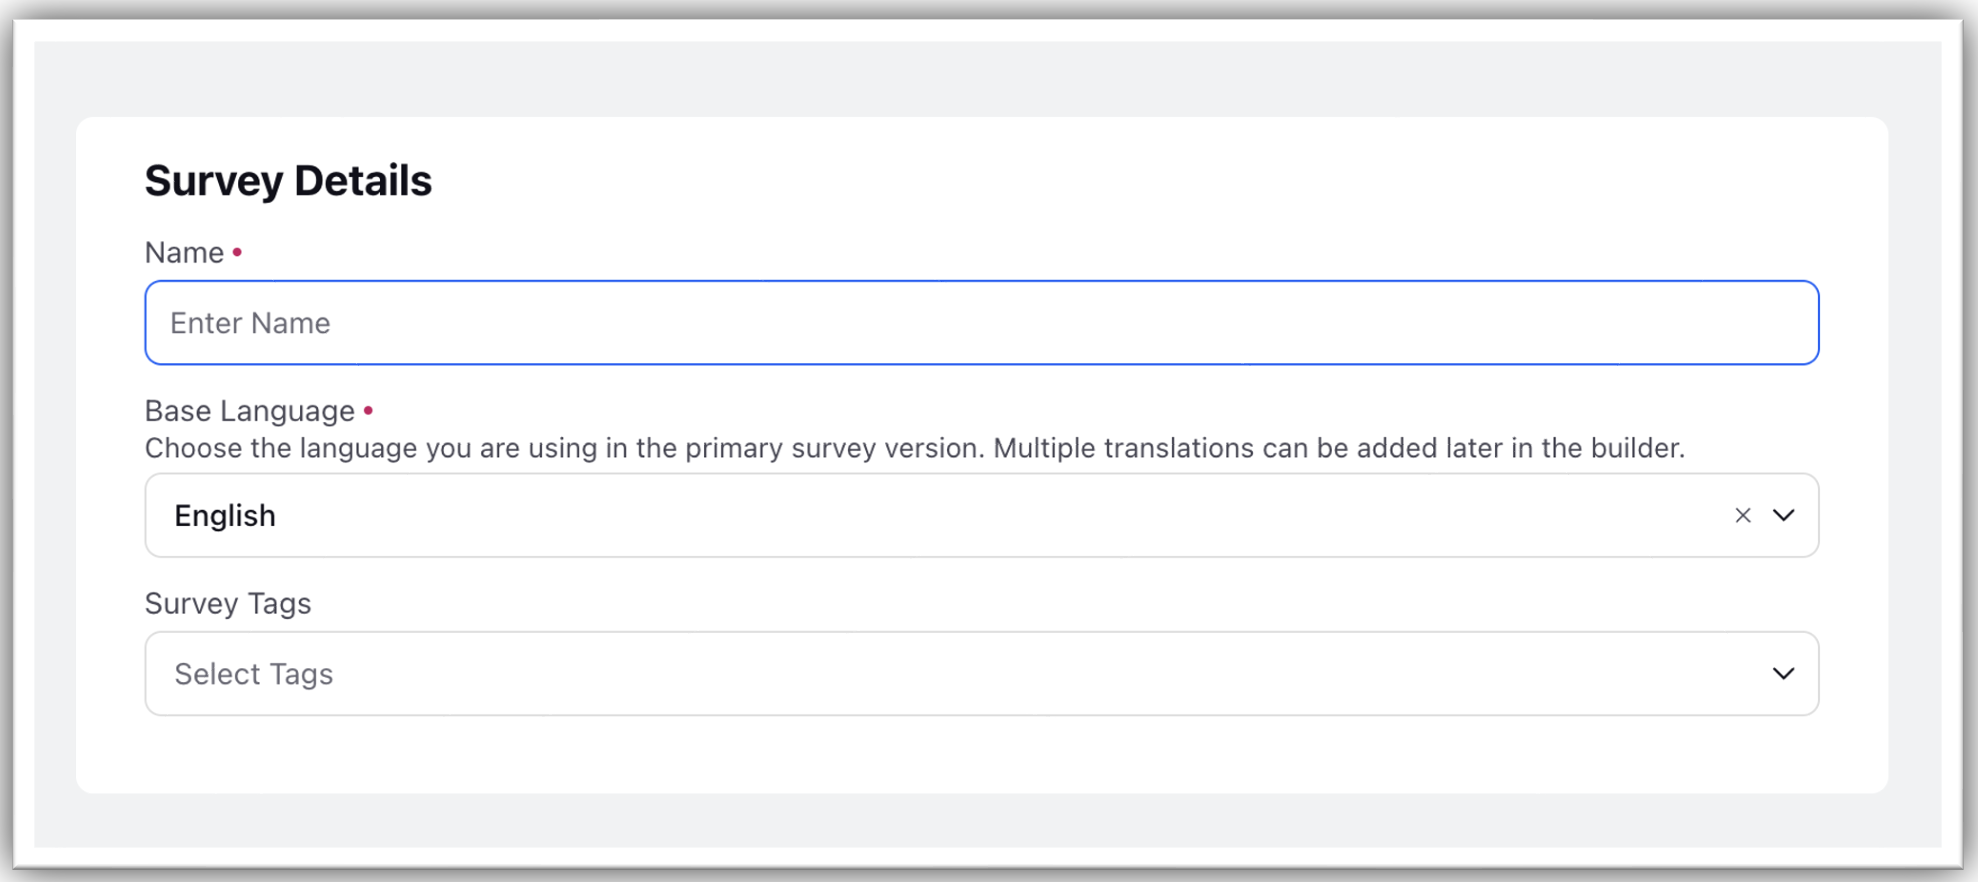
Fill Survey Details and click Create
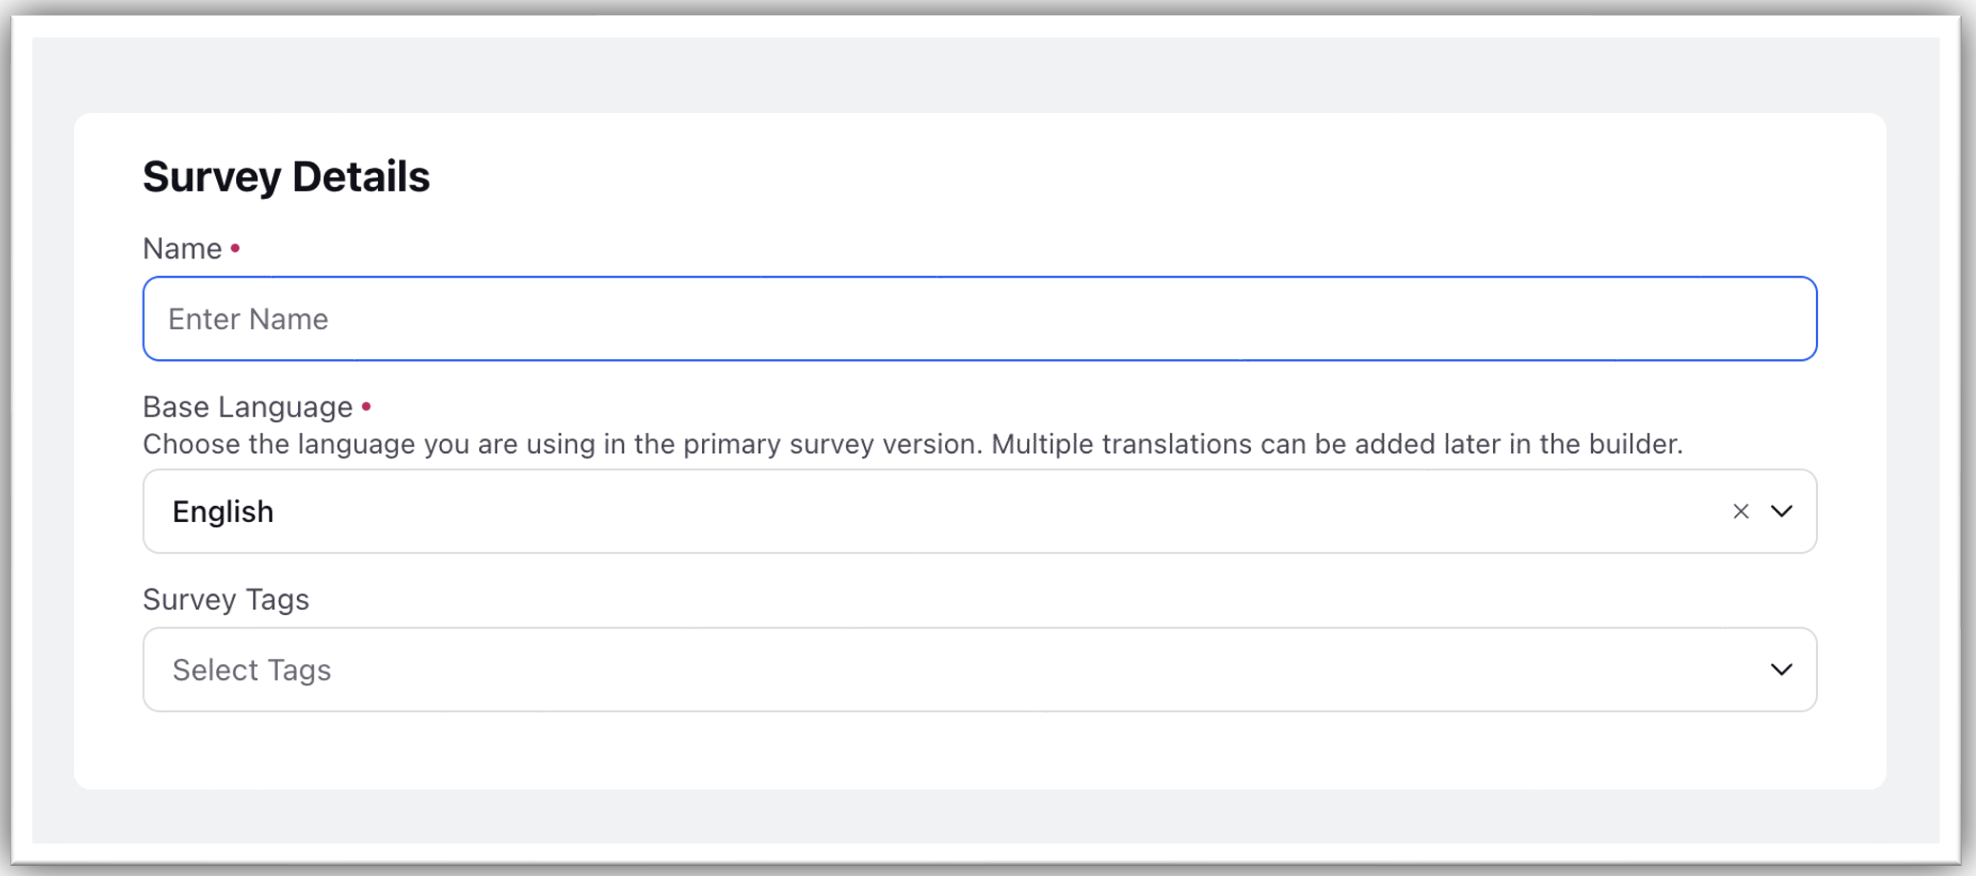
Name: Enter a name of the Survey
Base Language: Select the language of survey
Survey Tag: Optionally, add a tag to the survey
Click +Question (Choose from Library). Drag questions from library or add below and click Submit (You can select various types of surveys from the library).
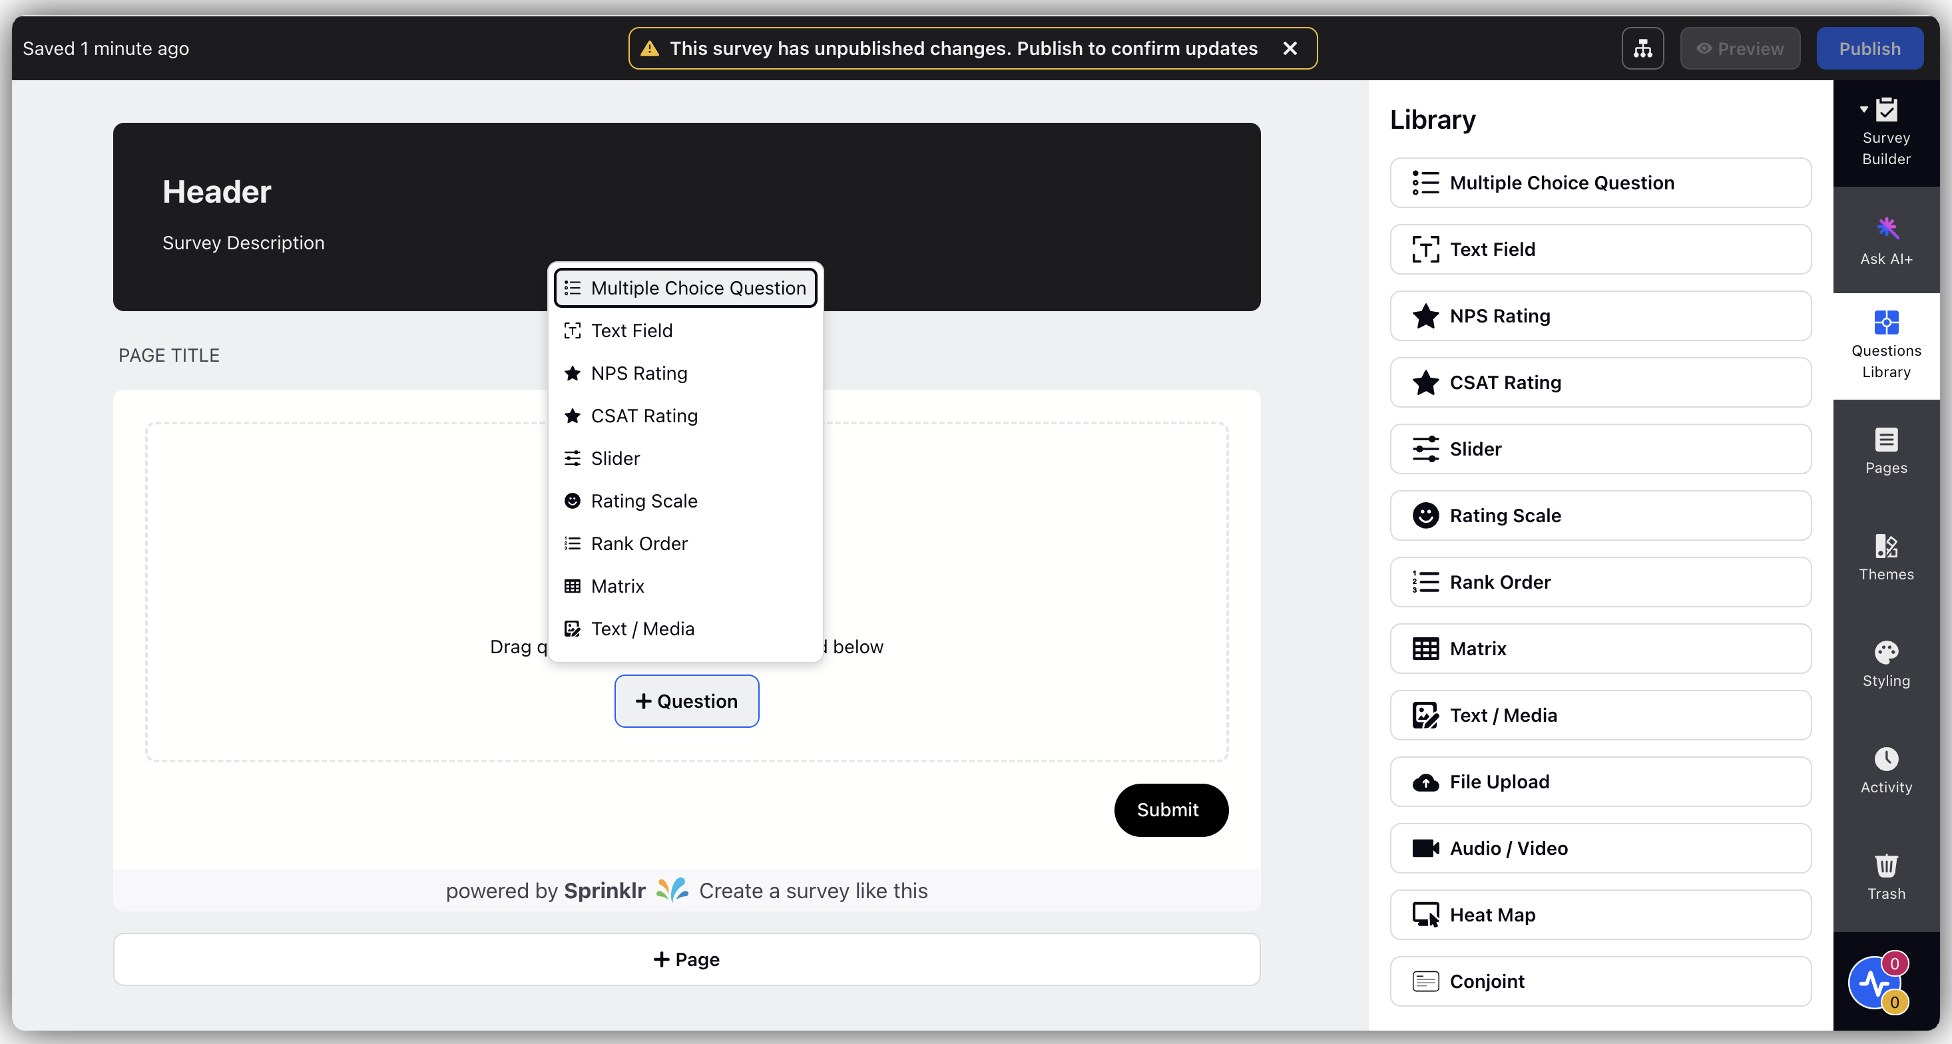
Click Distribution from the menu bar.
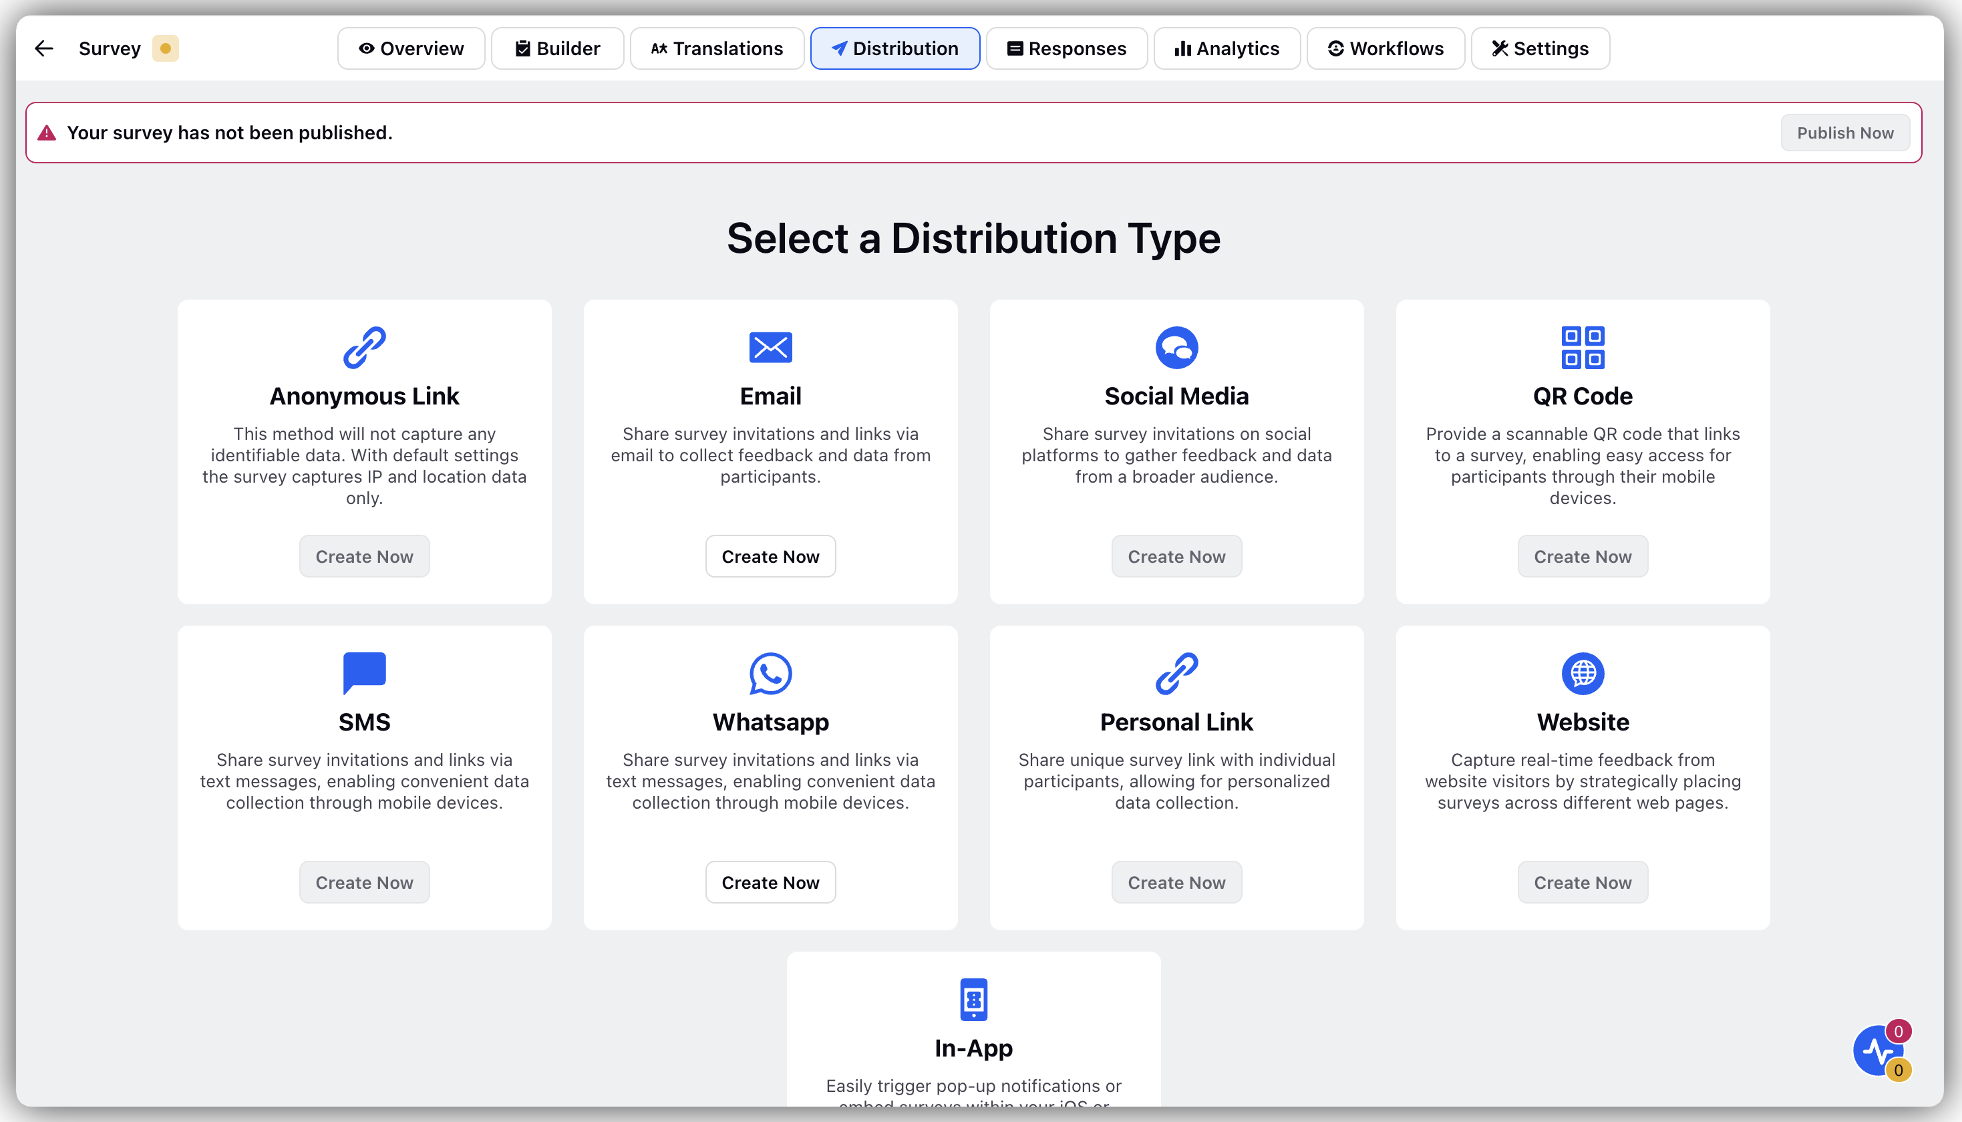
Select Email and click Create Now (from email distribution survey).
Add Distribution Details:
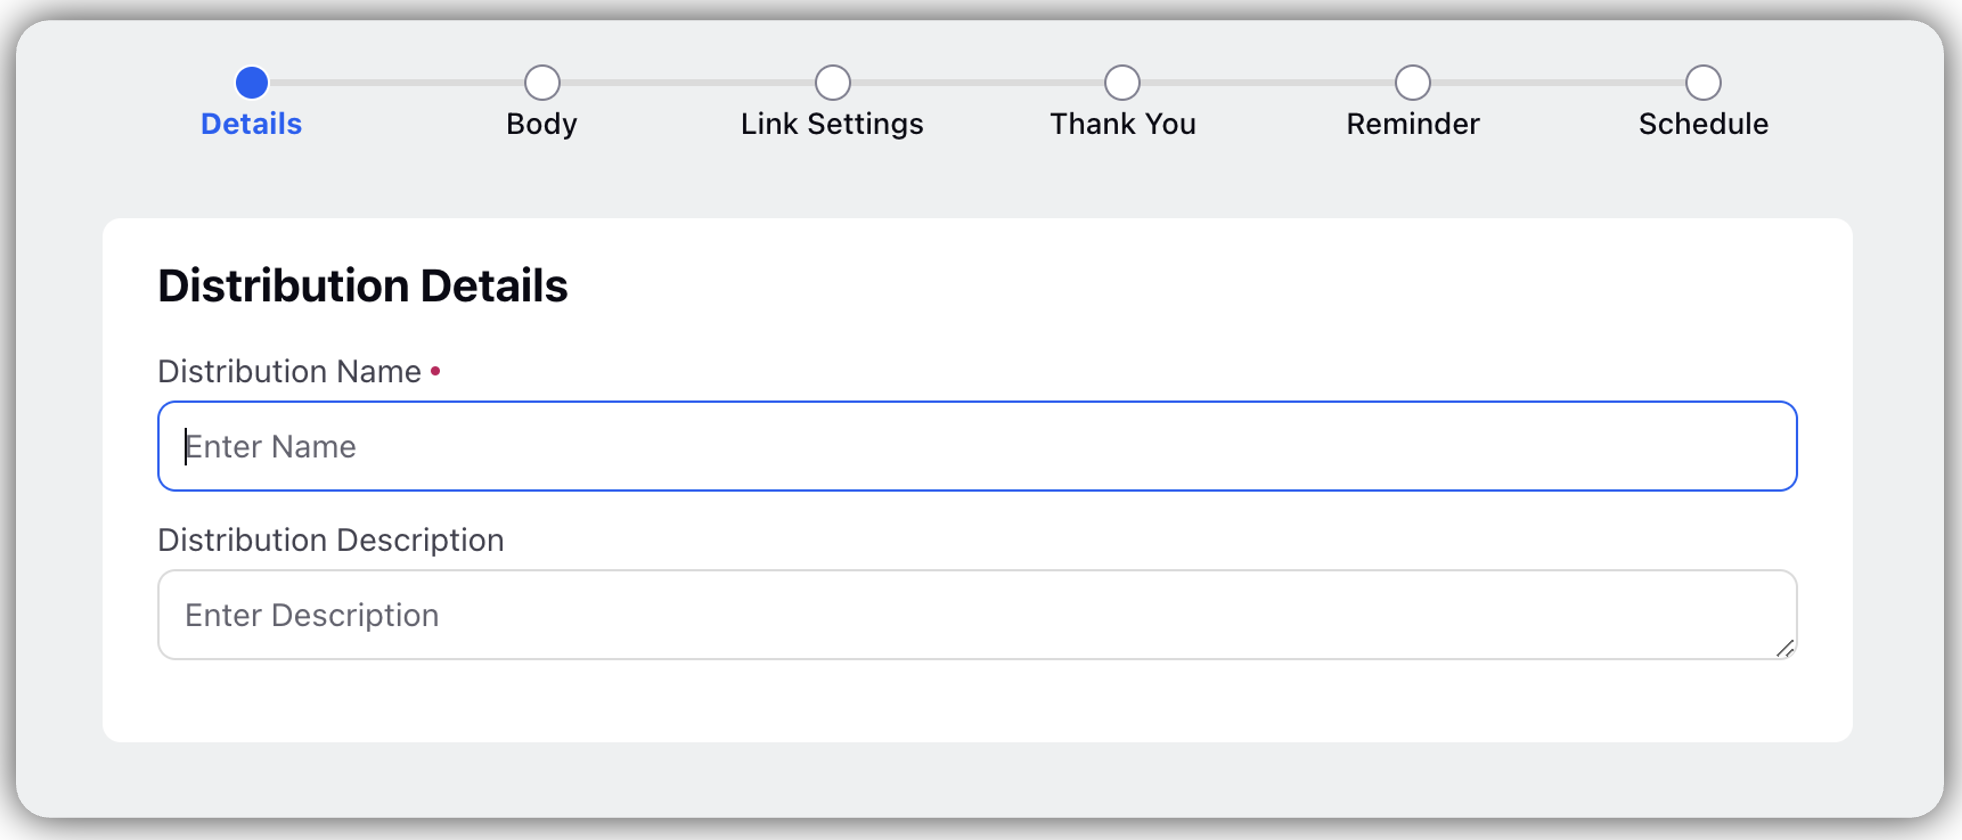
Distribution Name: Enter the name of email distribution
Distribution Description: Optionally, enter a description
Click Next
Click Body and on Create Template tab add template details:
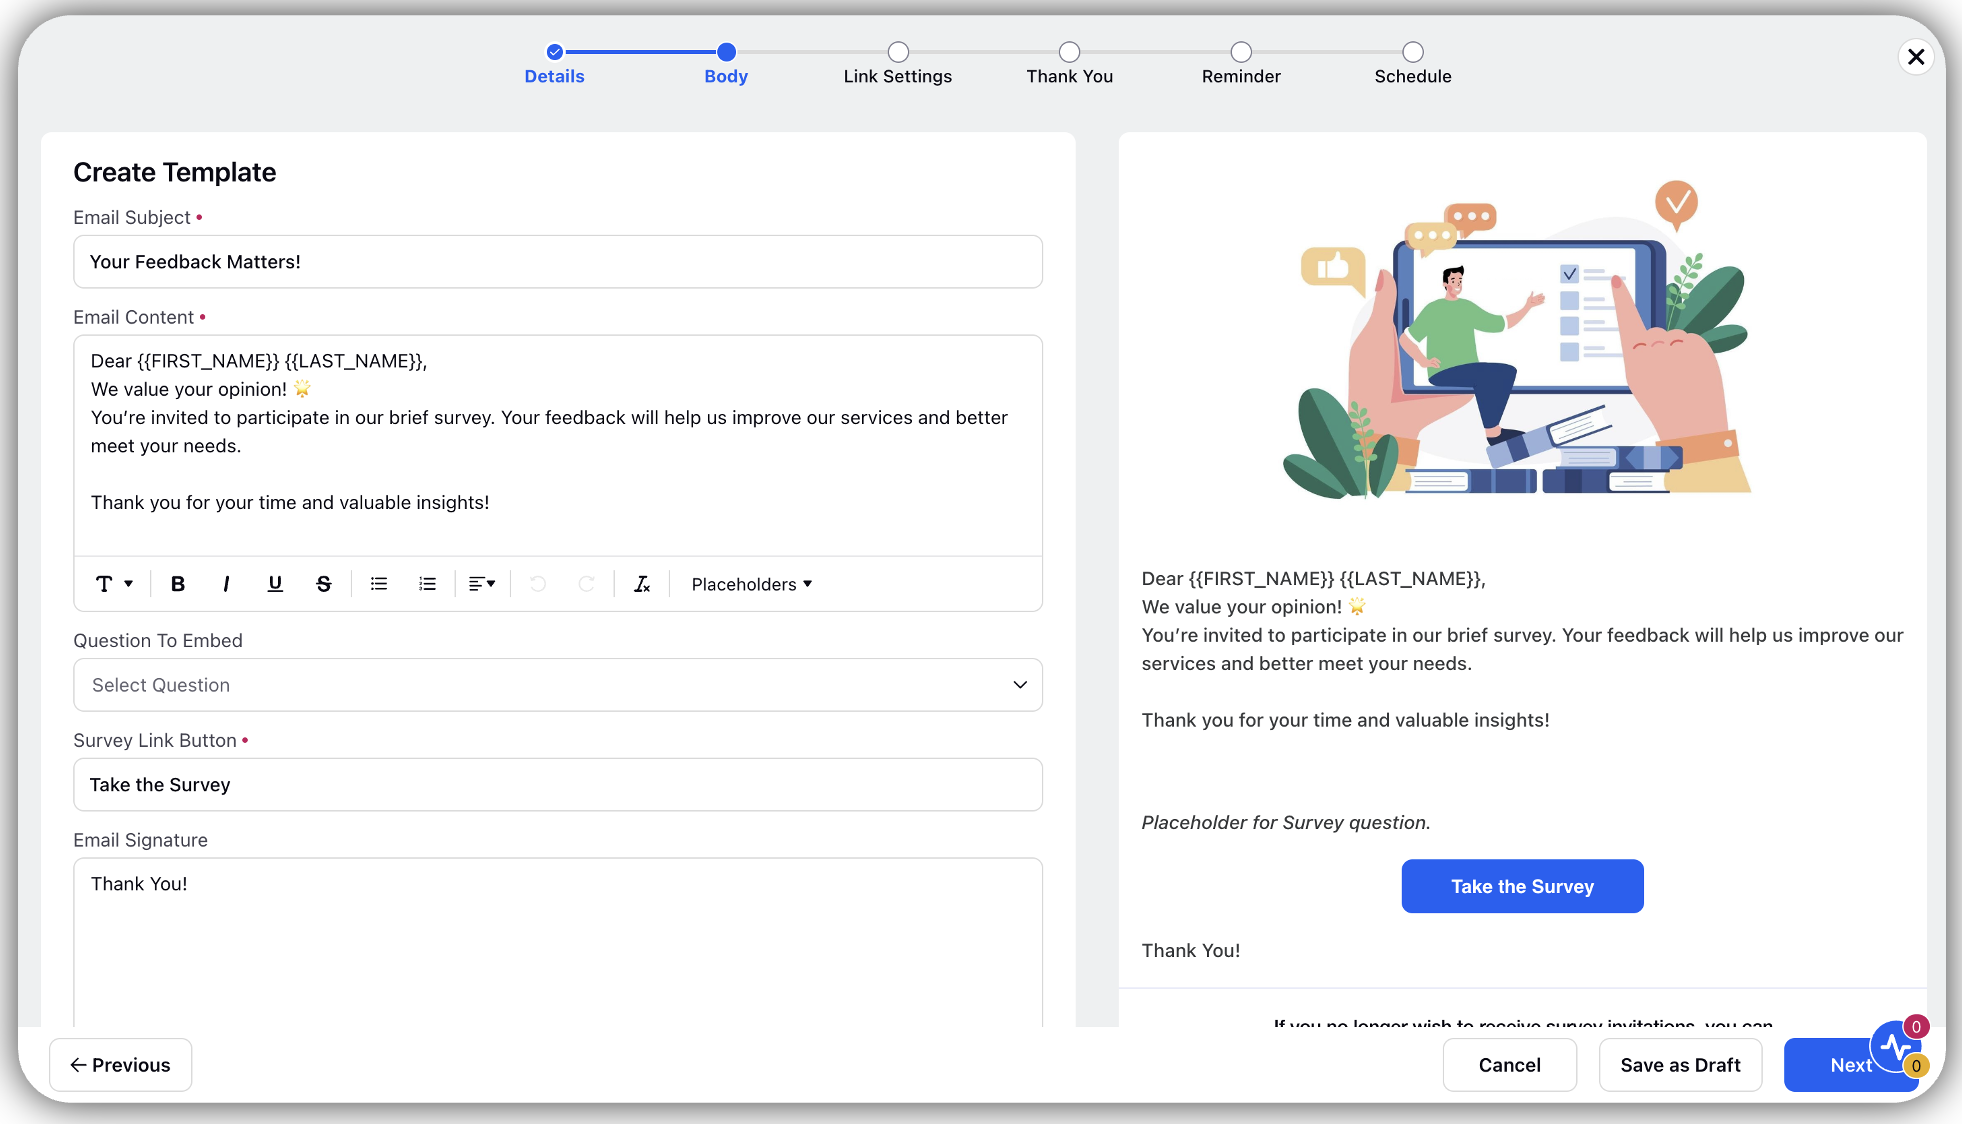
Email Subject: Add Subject line to the Email
Email Content: Draft Email content
Question to Embed: Embed Questions
Survey Link Button: Write a name to the survey button
Email Signature: Optionally, add signature
Email Footer: Optionally, add email footer
Click Next (Preview of the Survey appears in the right pane)
Click Link Settings and on Link Expiry Details tab fill details:
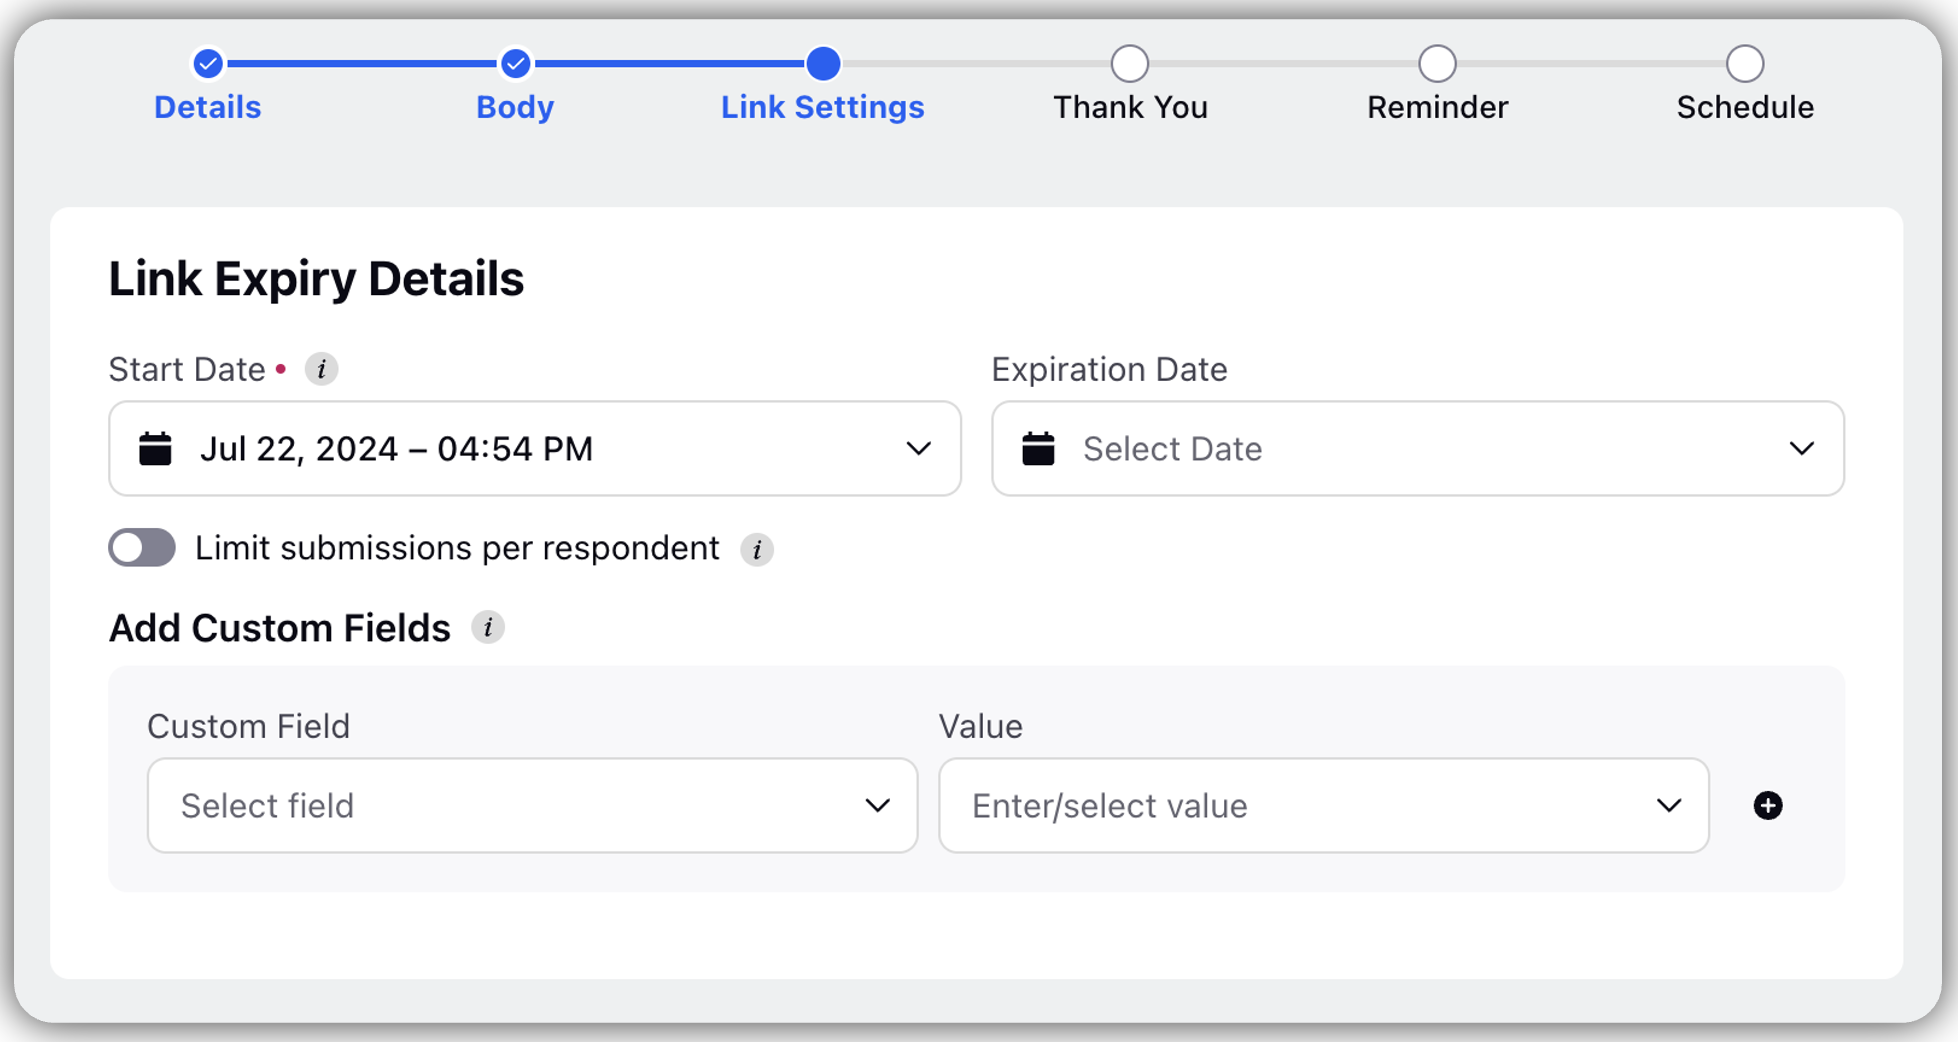
Start Date: Add a start date to begin
Expiration Date: Optionally, add expiry date
Limit Submissions per respondent: by sliding to the right, you can limit the number of responses, after which the survey will stop
Add Custom Fields: Select Custom Field and Value
Click Next
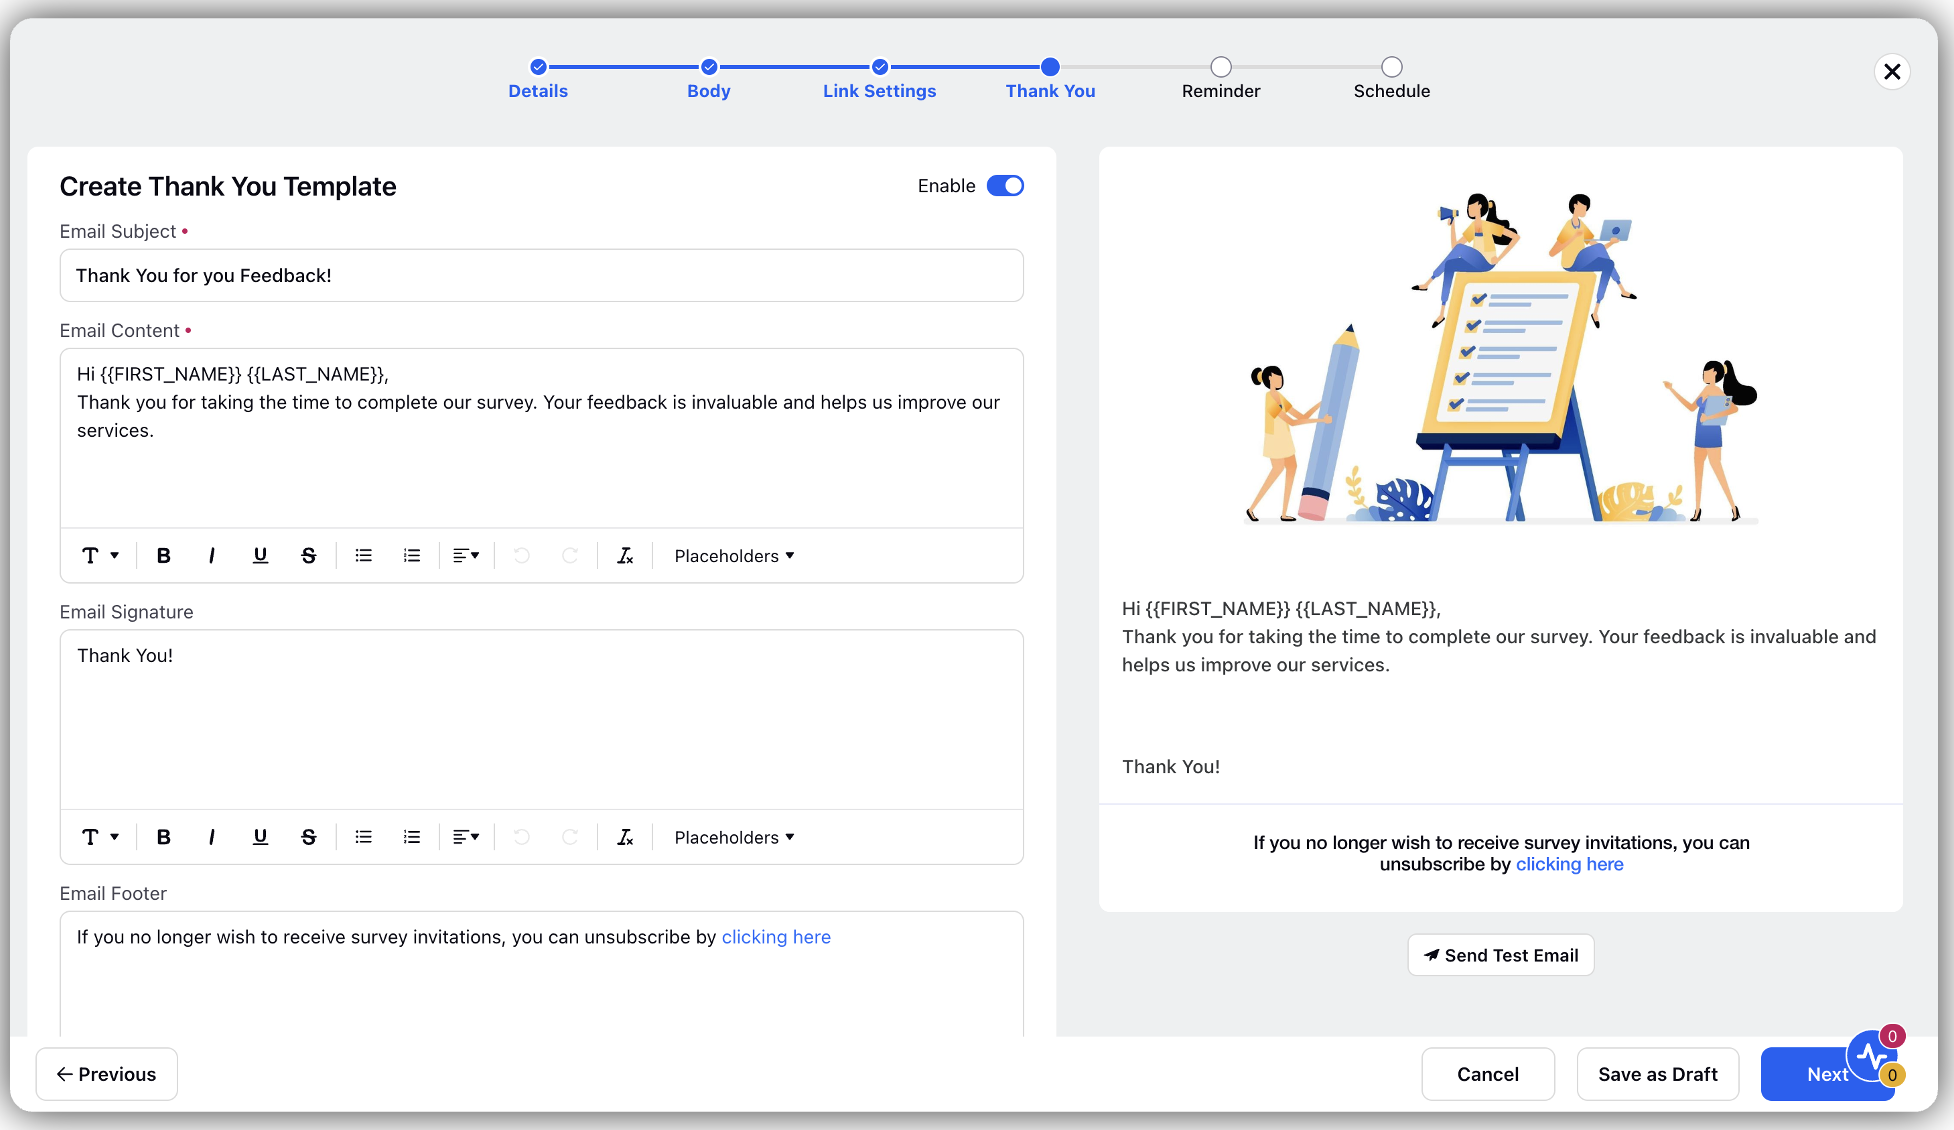
Click Thank You and add details to Create Thank You Template tab and click Next.
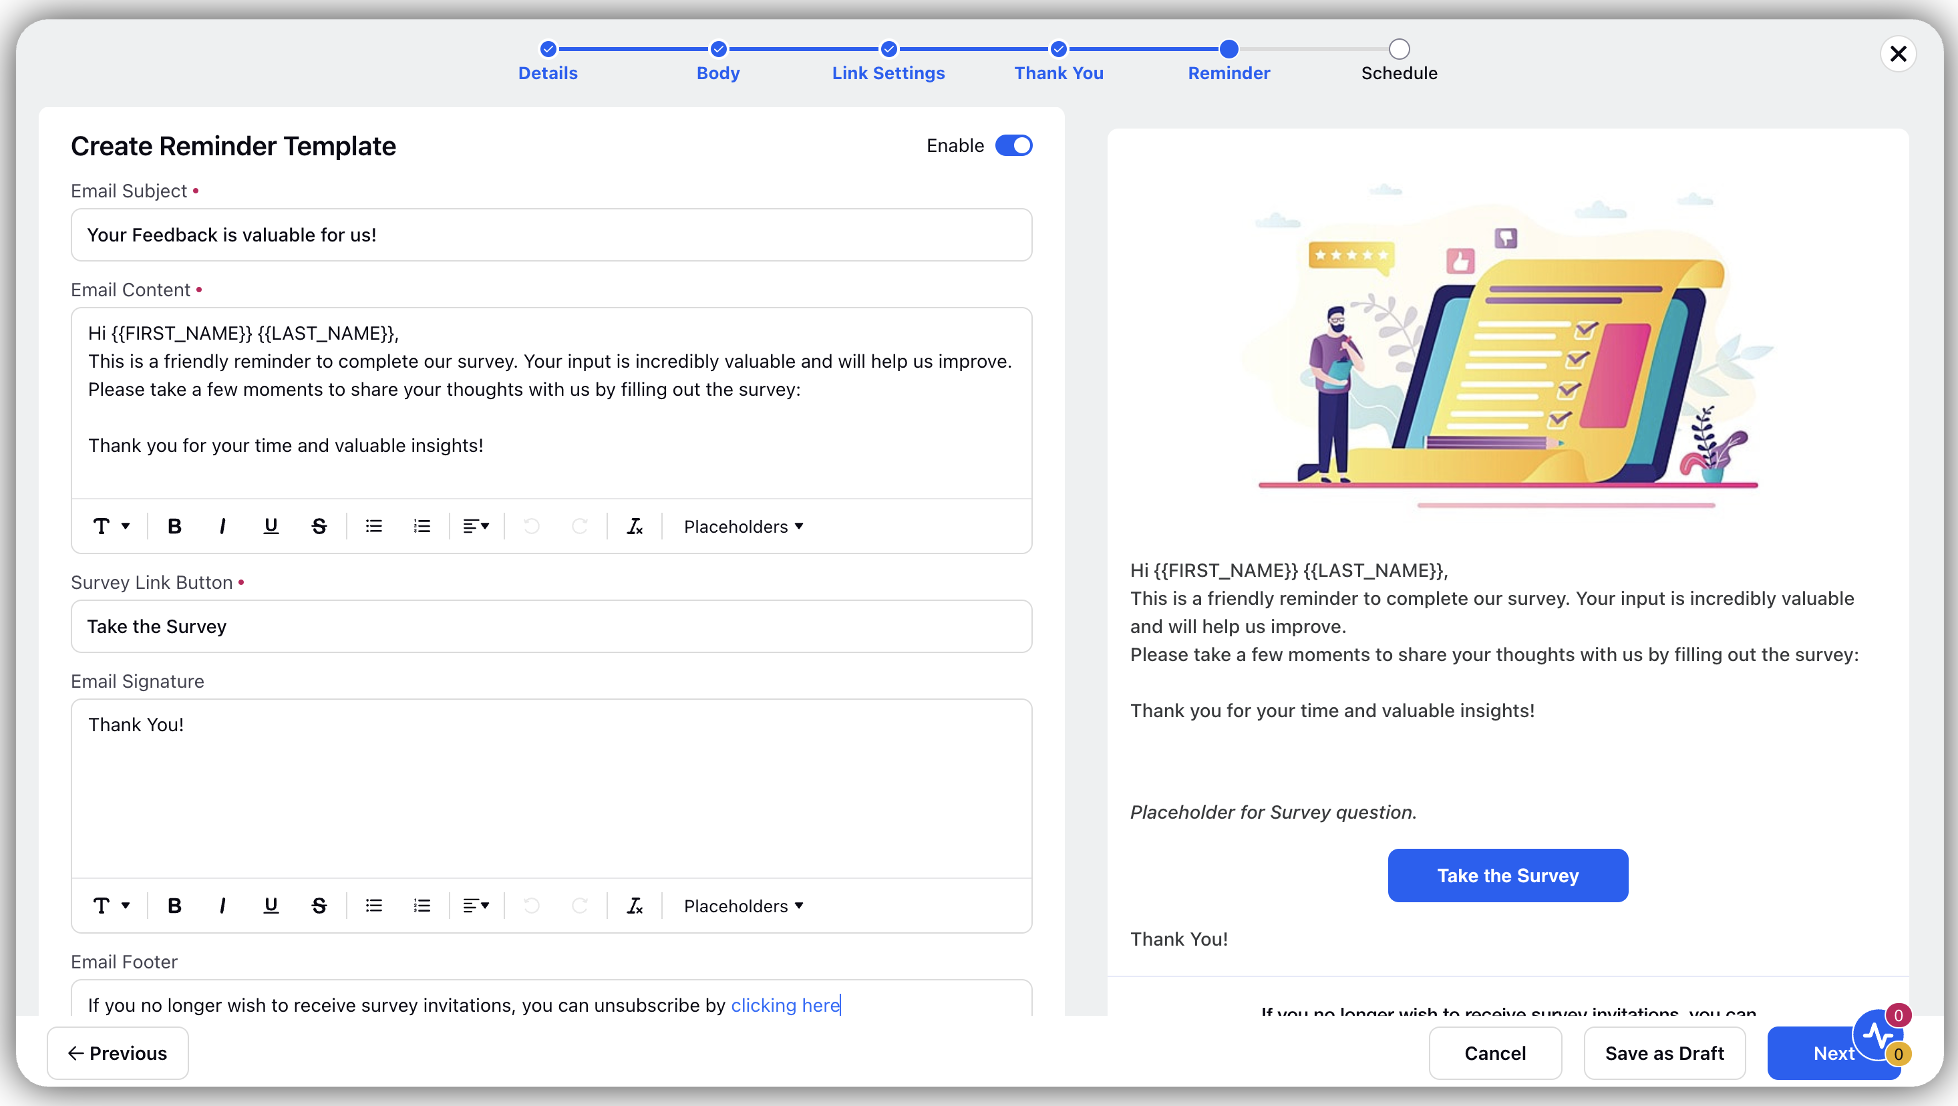
Click Reminder and add details to Create Reminder Template tab and click Next.
Click Schedule and on Schedule Distribution tab select scheduling options:
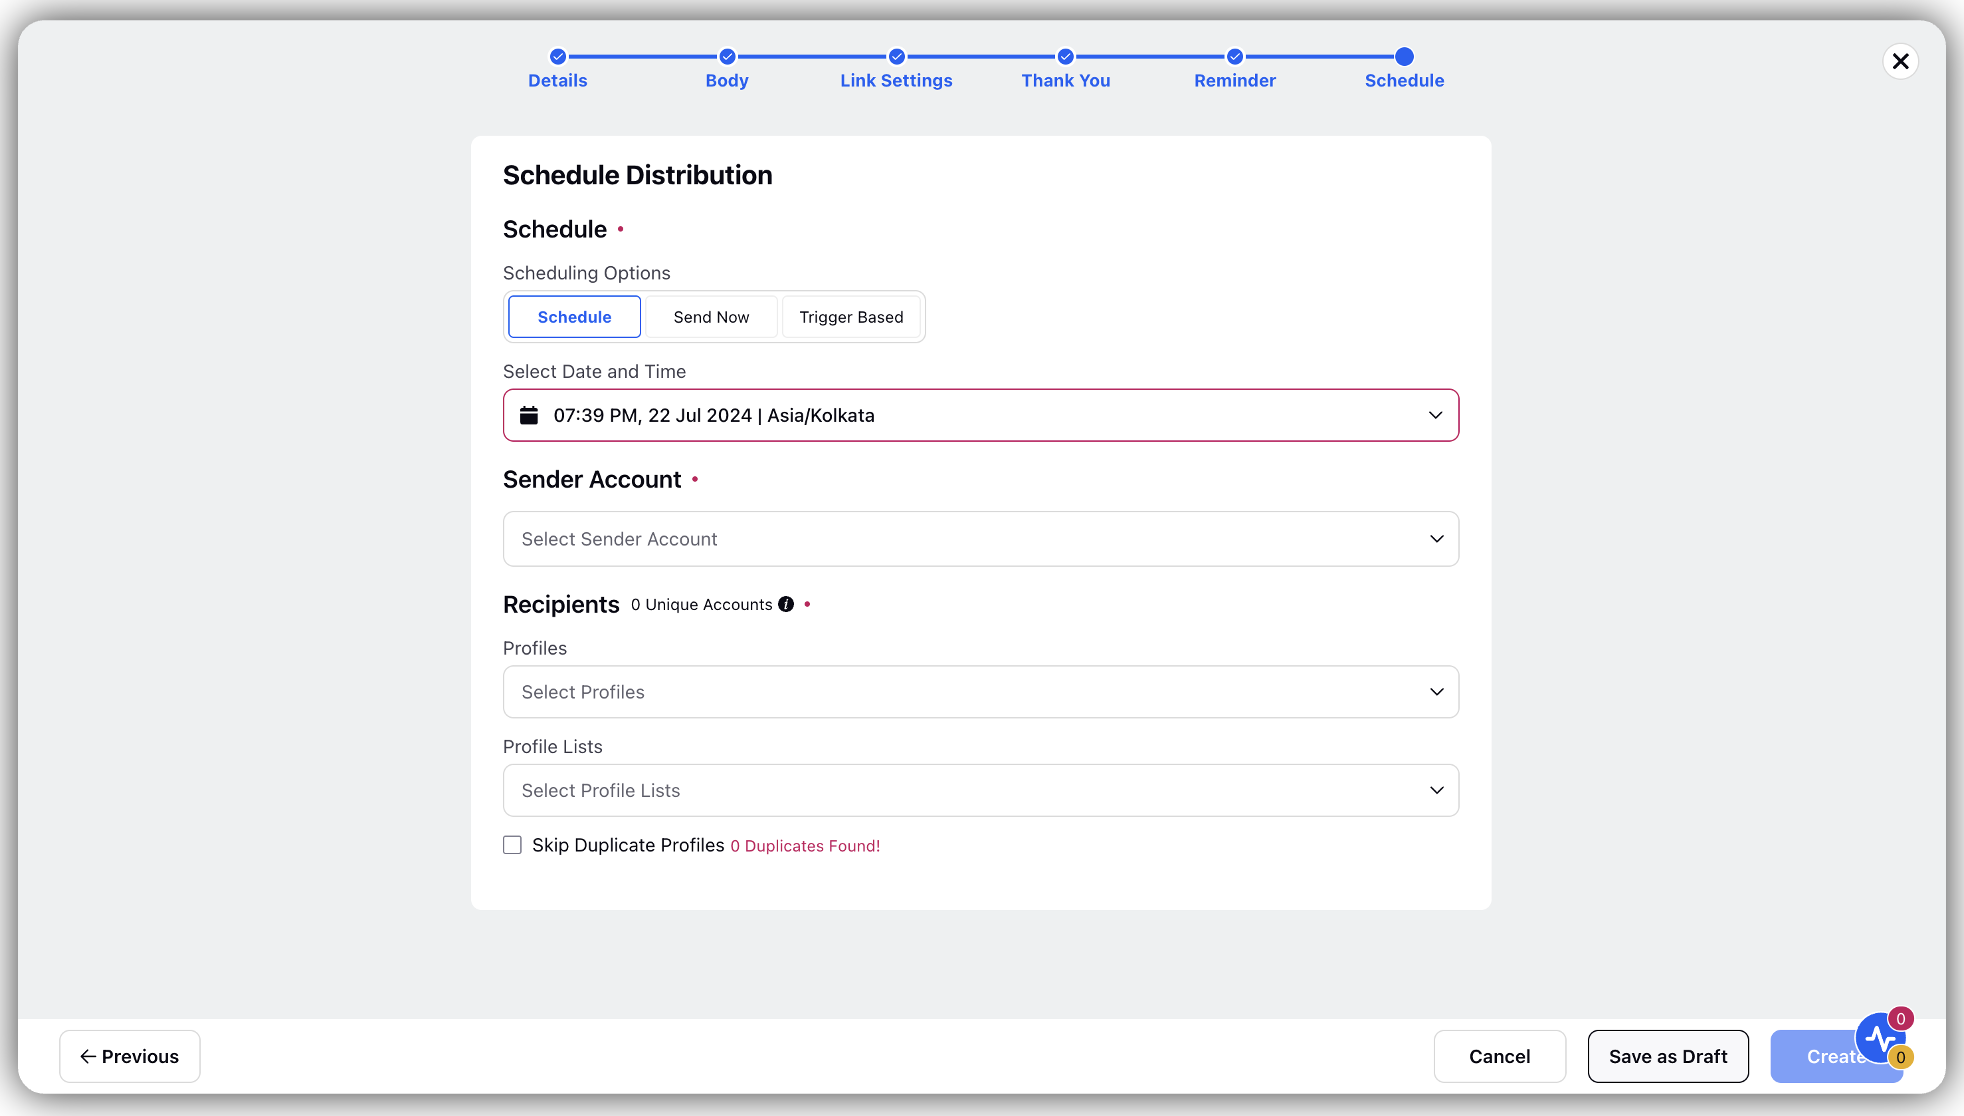
Schedule
Select Date and Time: Select date and time of schedule
Sender Account: Select Account details
Recipient: Select profile and profile list of receivers
Skip Duplicate Profiles: Select to skip duplication
Send Now
Sender Account: Select Account details
Recipient: Select profile and profile list of receivers
Skip Duplicate Profiles: Select to skip duplication
Trigger Based
Sender Account: Select Account details
Click Create
Steps for Omni Channel Survey Distribution | Whatsapp
Click Distribution from the menu bar and select Whatsapp in distribution type and fill details:

Distribution Name: Enter name of the distribution
Distribution Description: Optionally, enter a description

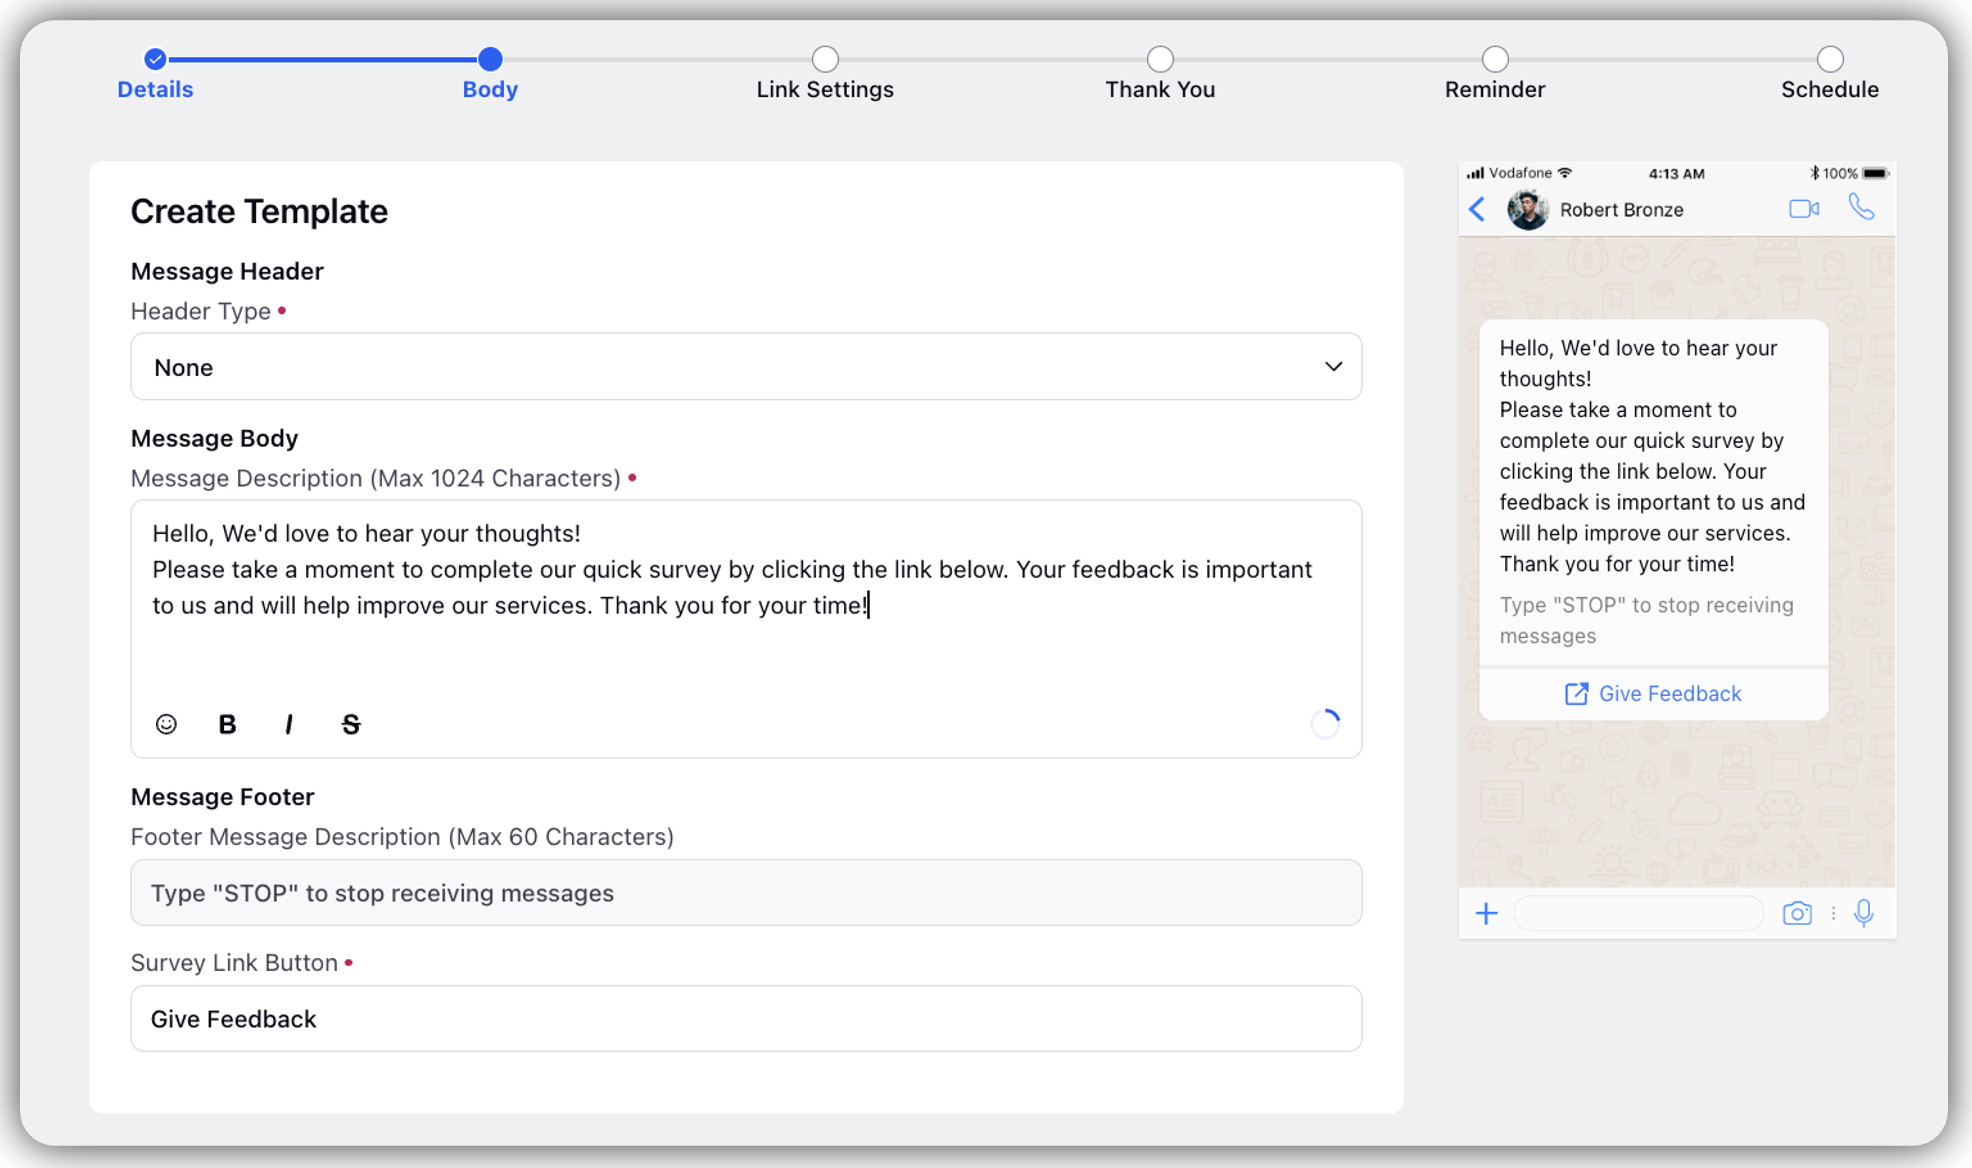
Click Body and on Create Template tab add template details:
Message Header: Add header to the message
Message Body: Draft the body of the message
Message Footer: Add footer to the message
Survey link button: Add Survey link button
Click Next
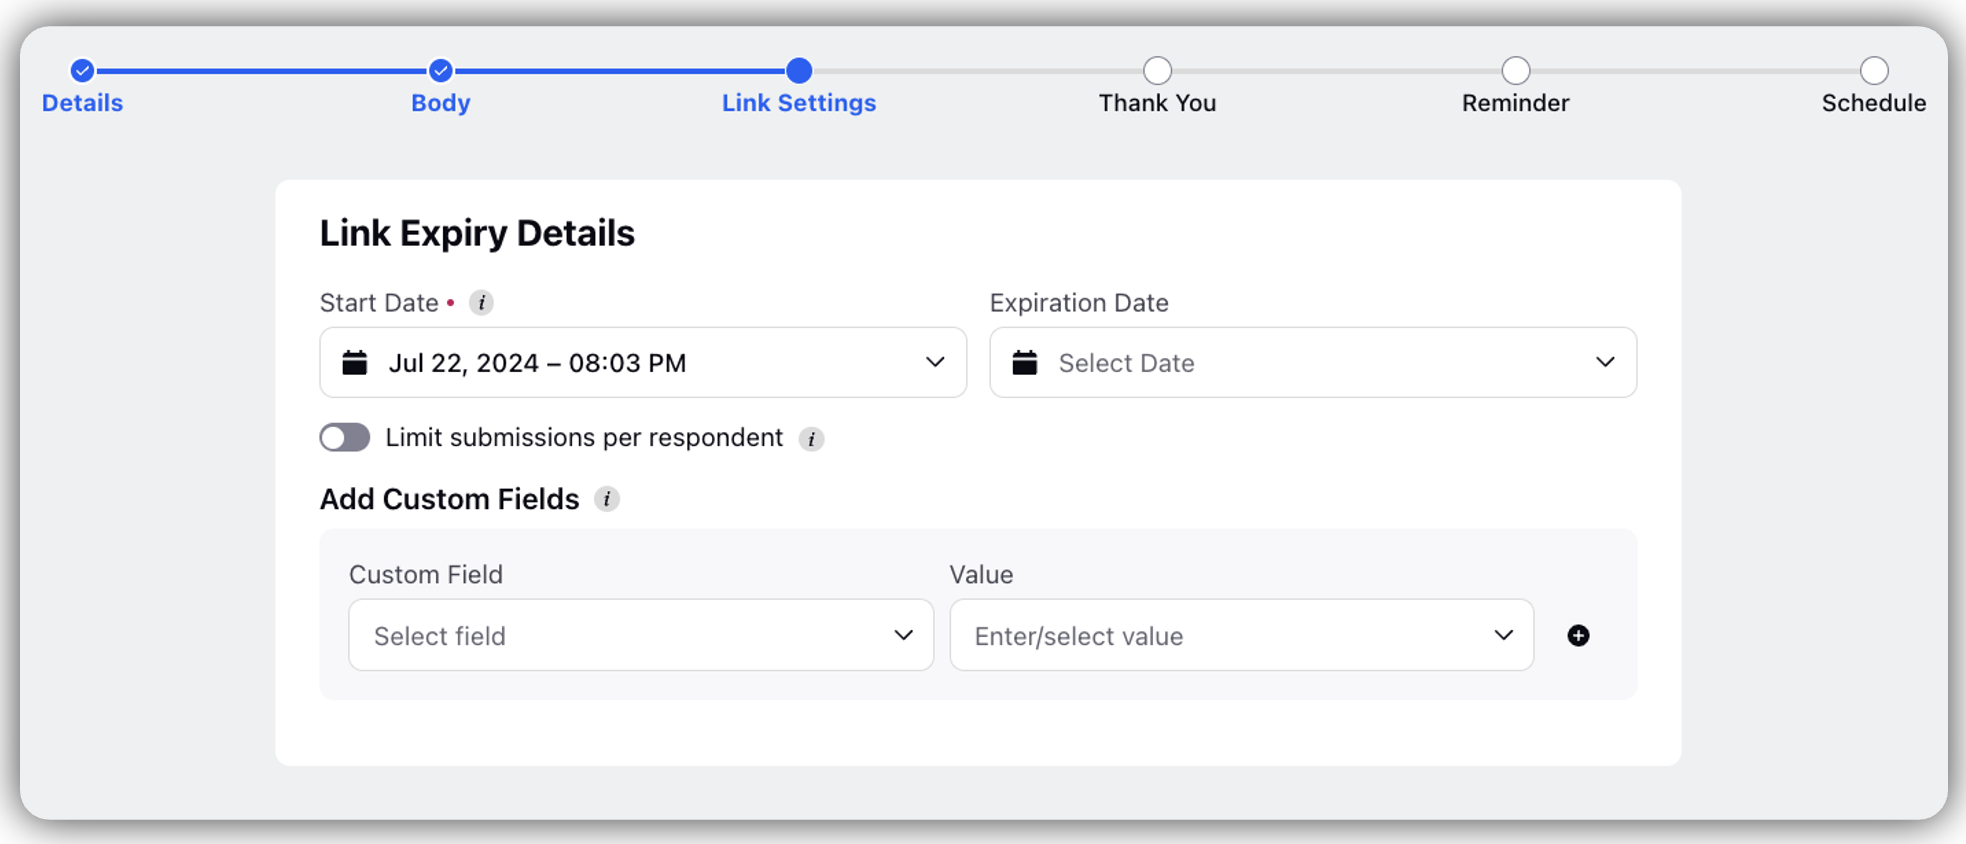
Click Link Setting and in Link Expiry Details window fill the details:
Start Date: Add start date
Expiration Date: Optionally, add expiry date
Limit Submissions per respondent: By sliding to the right, you can limit the number of responses, after which the survey will stop.
Add Custom Field: Select custom field and its value
Click Next
Click Thank You and in the Create Thank You Template fill details.
Click Reminder and fill in the Create Reminder Template details.
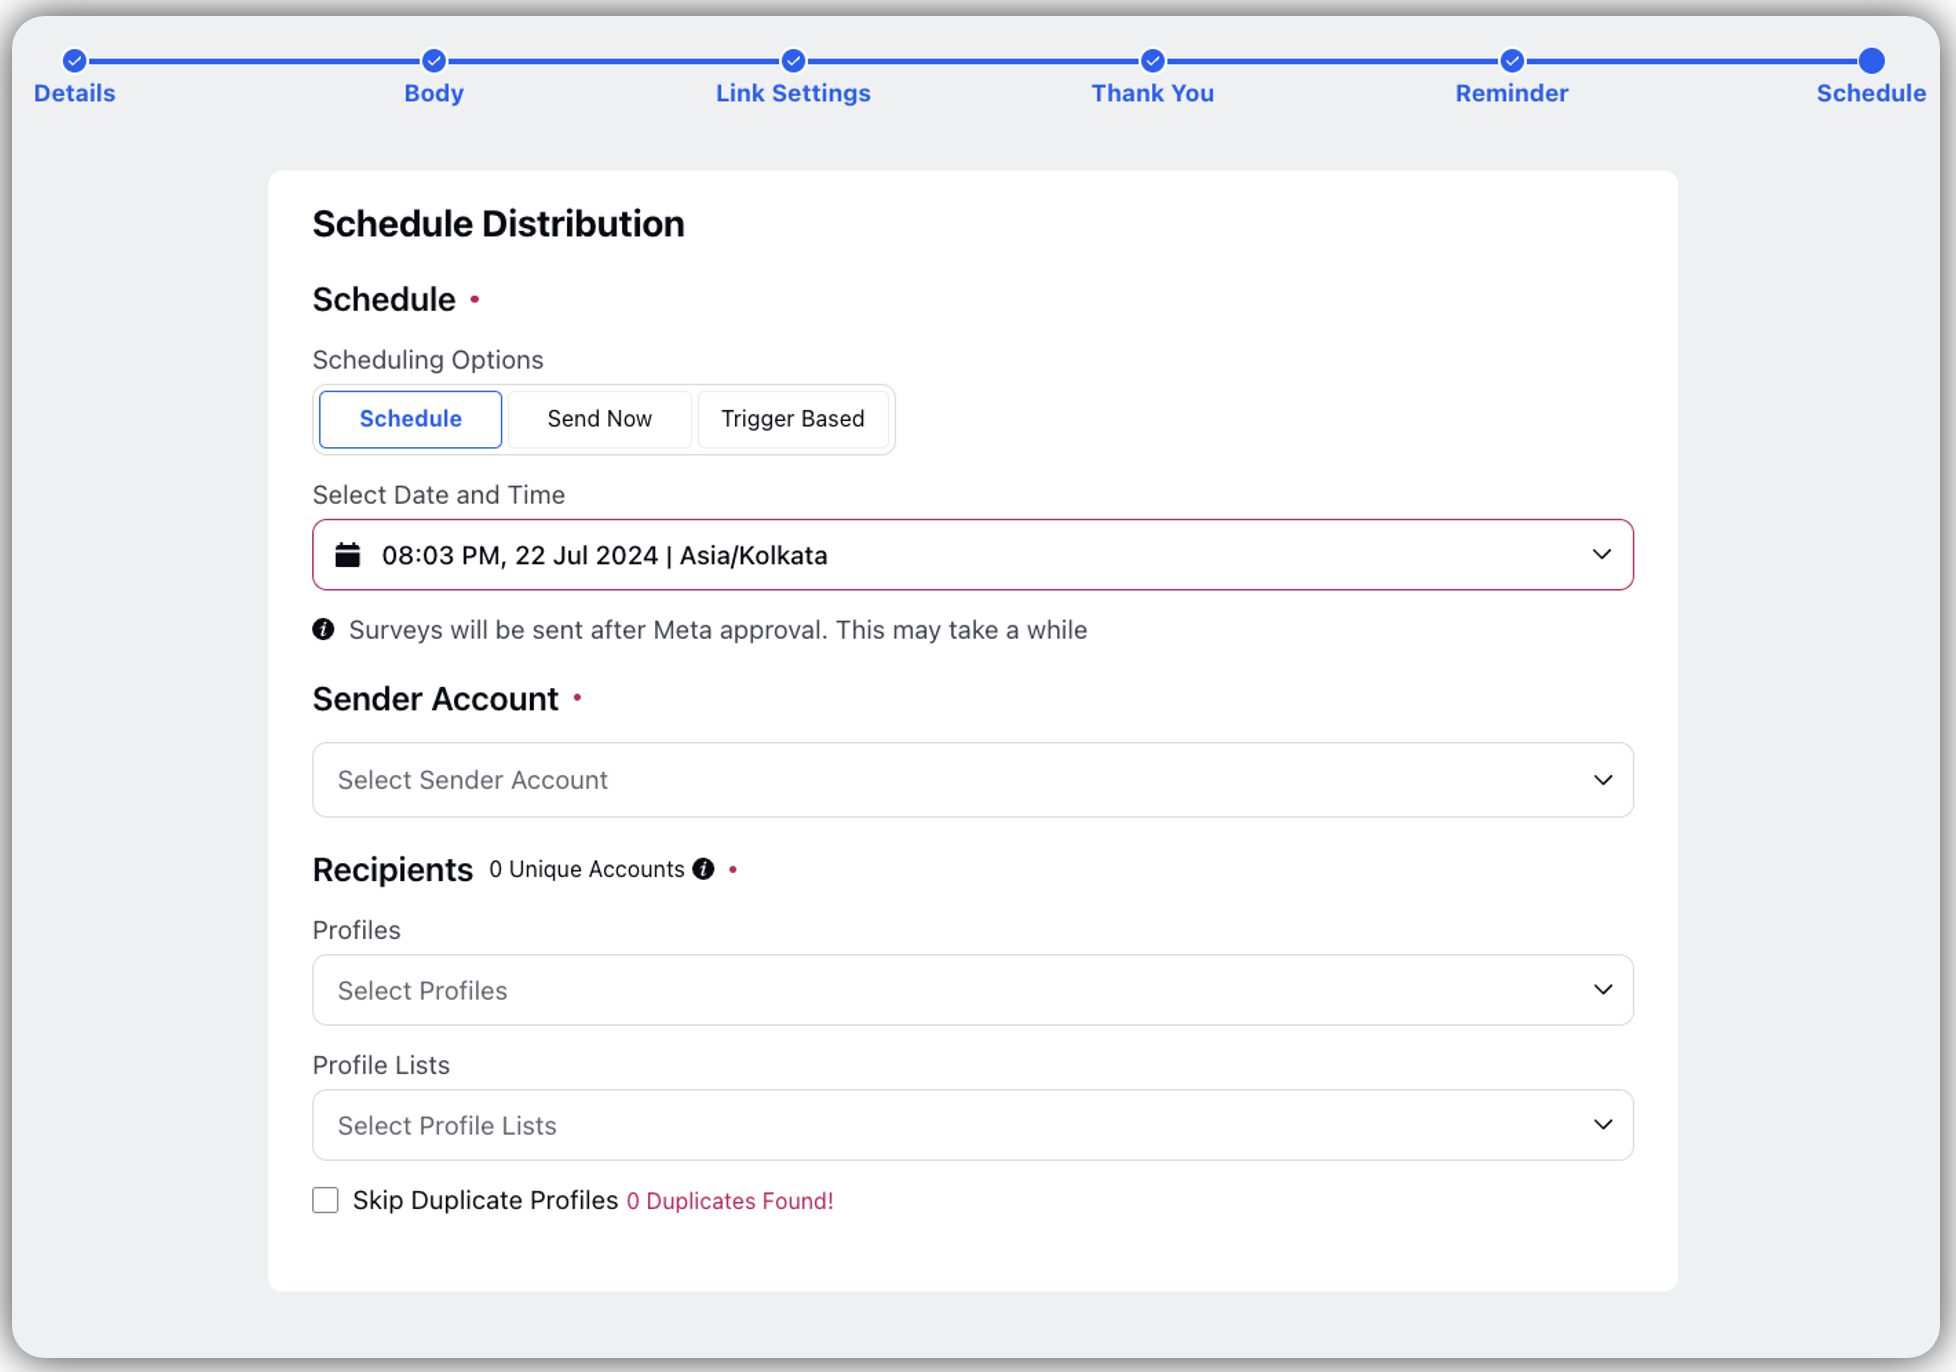
Click Schedule and on Schedule Distribution tab select scheduling options:
Schedule
Select Date and Time: Select date and time of schedule
Select Date and Time: Select date and time of schedule
Recipient: Select profile and profile list of receivers
Skip Duplicate Profiles: Select to skip duplication
Send Now
Sender Account: Select Account details
Recipient: Select profile and profile list of receivers
Skip Duplicate Profiles: Select to skip duplication
Trigger Based
Sender Account: Select Account details
Click Create